When you click on links to various merchants on this site and make a purchase, this can result in this site earning a commission. Affiliate programs and affiliations include, but are not limited to, the eBay Partner Network.
For my second trany flush at 155K on the wife’s ES350, I decided to change out the ATF filter but I couldn’t find a how-to on any Lexus thread. A Camry thread provided some guidance. The ATF filter was quite dirty even though the car is garaged at home and at work and the wife drives it as if it was the last car on earth. The filter element is paper based, which may lead to the capture of more particulate matter than mesh filters. I will replace the filter again at 200k. The one hiccup is a single trany bolt that is very difficult to remove without raising the engine an inch or so. It turned out not to be such a difficult task.
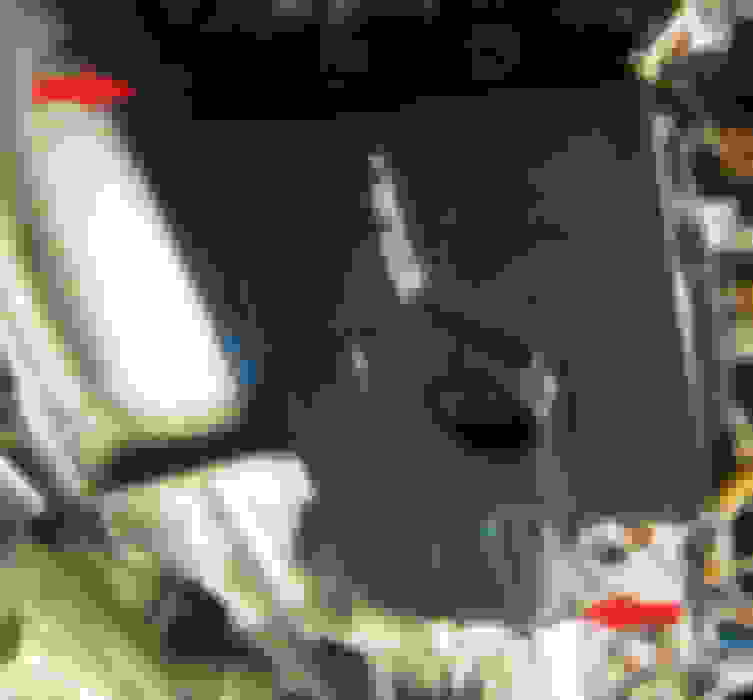
Dirty filter
Tools:
6mm allen hex socket
1/4 drive sockets: 10mm
3/8 drive sockets: 10mm; 12mm; 19mm
1/2 inch sockets: 14mm deep (or 3/8 drive)
Ratchets to drive above sockets
4 to 6 inch 3/8 or 1/4 drive extensions (wobble preferred)
Inch/lb and foot/lb torque wrenches
Materials:
ATF filter -
Beck/Arnley 044-0356 (made in Taiwan; $20)
Power Torque FK424 (Oreilly brand; does not include o-ring; made in China; $17)
Toyota trany filter 35330-48020 (Japan?; $70); gasket 35168-08010 ($10)
Note: WIX Part # 58010 does not fit the U660E Transmission.
Drain plug gasket - Toyota 90430-12008 ($1.25); or equivalent M12 gasket.
Filler plug gasket - 90430-18008 ($1.25); or Dorman 095-149 ($11 for pack of ten); or M18 equivalent
Filler level tube – Toyota 35125-07020 ($2; in case you damage it; it’s plastic and fragile)
Thread Sealant - Three Bond 1344 (Loctite/Permatex/JB Weld blue should suffice)
WS or compatible ATF Fluid. 3+ qts for drain/refill or 12 qts for full flush. (I flushed through 13 qts of Valvoline Max Life.)
Lots of paper towels and rags
Procedure:
1. Put the vehicle on stands. Put a level on the frame to level the car. Turn steering wheel to far left.
2. Remove plastic covers below engine and the splash guard inside driver side wheel well (covers the trany ATF filler plug.)
3. Drain ATF fluid. Drain plug takes 6mm allen wrench. If engine is cold, very little, if any fluid should come out. Insert allen wrench again to remove the plastic level tube; as you remove it ATF will start to drain, up to 3 qts. Wear rubber gloves; it’s going to get messy.
4. Loosen motor mounts. While ATF is draining, loosen the driver-side and front motor mounts. Don't forget to loosen dog-bone shaped mount on top, pass. side.
.
Driver-side: remove top 19mm nut through wheel well. It’s a tight fit; only my 3/8 drive 19mm socket would fit.
Front mount: loosen but do not remove three 14mm nuts from the bottom; one is hidden in the subframe requiring removal of a 2-inch plastic cover. Use 14mm deep socket on these three nuts.
5. Raise engine to remove PIA bolt. Re-install the pan drain bolt. Lift engine from area just aft of the trany pan. Raise just enough to be able to reach in and remove that one trany pan bolt – an inch or so should do it. Remove the bolt using 10mm � drive socket and 4-inch long wobble extension. Alternatively, you can reach in from the side using an offset wrench.
6. Lower engine back down and remove the remaining pan bolts. Be careful removing the last bolts as pan may fall down. Pan will have about half a quart of ATF; pour it into the drain pan.
7. Trany pan cleanup. Clean the pan and two magnests with paper towels. I would avoid using chemical agents. Replace the magnets in the pan at the marked settings. Remove drain plug and reinstall the orange filler tube; hand-tight it (torque spec is 15 in/lb; my torque wrench starts at 20). Install drain plug, using a new washer if it needs one. You can torque it down now if you want, but will be easier once the pan is bolted in.
8. Replace ATF filter. Remove ATF filter; it is held in place with two bolts. An o-ring adds tension; wiggle and pull downward on filter to remove it. Be careful as some more ATF will pour out. (Be sure to remove the o-ring; it may stick to the valve body.) Lube the new o-ring with ATF and slide over snout of new filter. Gently wiggle filter back into place and re-install the filter bolts. Torque to 8 ft/lbs (or 96 in/lbs).
9. Optional step: It will make life easier if you replace two or three trany bolts with stud bolts. They will serve as guide pins when installing the pan and gasket. I used 25mm studs and inserted ten threads into the trany using high strength thread locker. The bolts are M6-1.0.
10. Install trany pan/filter. Wipe dry and clean the gasket and gasket mounting surfaces. Install the trany pan and bolts, with threadlocker sealant, but leave loose enough to move pan. Raise engine to install PIA bolt. Be careful not to cross-thread the bolt. (That’s why I replaced this bolt with a stud bolt.) Once the PIA bolt is in, snug all the bolts and tighten to spec using a criss-cross pattern. Torque spec is 66 in/lb.; however, that’s with the .65mm thick OEM pan gasket. In my opinion, this is too high for a rubber/cork gasket. The oil pan and trany spec for my other Toyota products with a rubber gasket is 35 in/lb. That’s what I used and have had no leaks after two years (as of 7/11/17).
11. Torque the drain plug to 15 ft/lb. and lower the engine.
12. Re-tighten engine mounts’ nuts. Torque for nut on driver-side motor mount is 70 ft/lb. I could not find torque specks on the three nuts on the front engine mount - 35 ft/lb felt good. Don't forget the dog-bone strut on top.
13. Complete the drain/refill procedure, or proceed with the trany flush procedure. I would wait a week or two to check for leaks before re-installing the plastic covers.
How funny, Never found that one. I looked for "filter' in the title. Looks like our procedures differ a bit in the motor mount bolt removal, but both get the job done.
I have a 2011 ES350 with 39,000 miles. at what mileage do you suggest performing the first transmission service ?
Lexus Master Technician here, the fluid in the vehicle is designed to last the lifetime of the transmission. Especially since you have a later model ES from that generation. I have seen that gen ES with 250,000 miles on the original transmission and fluid. The 2007, and some 2008 models had many transmission issues, but i've never seen one from your model year needing a transmission replacement.
I would do a drain/refill now and at 80K with WS fluid. Then, a full flush at 120K with WS or compatible ATF (I started using MaxLife). Others would do a full flush every 50K. I think it's risky not doing anything as the Master Tech suggests.
LjeksesES, i appreciate what you're sayin'. Most ' standard shops ' probably only use a machine to exchange/replace the fluid with new.
Paying/taking the time to drop/clean the pan and replace the filter (with a new OEM filter ) -for sure.
No one knows of a good Lexus indy shop in the Inland Empire, of southern california ? ...near ontario, chino, upland, claremont ..i'll have to start looking.
Thank you for the instruction. Just replaced my 2007 ES350, 110,000 miles, transmission filter with 3+ liter of the Max Life ATF.
Just want to reiterate that the WIX Part # 58010 filter, that what I got from Amazon, will not fit. I called Oreilly, at first they also told me the same WIX Part # 58010 transmission filter, I have to ask them to look for a different filter and they came up with the mentioned "Power Torque FK424" which matches my original filter came off from the car.
The fluid came off looked dart (black), it sorta smells normal transmission fluid to me, the pan was a bit dirty with light film of deposit. The two magnets had some fine metallic deposit but not that bad for 110,000 miles (assuming that the transmission had not been serviced since new, I am the third owner) compare to other cars I have. The old filter visually looks not that bad.
Quote from Chuyrobles
"
Power Torque FK424 (Oreilly brand; does not include o-ring; made in China; $17)
Toyota trany filter 35330-48020 (Japan?; $70); gasket 35168-08010 ($10)
Note: WIX Part # 58010 does not fit the U660E Transmission.
"
Lexus Master Technician here, the fluid in the vehicle is designed to last the lifetime of the transmission. Especially since you have a later model ES from that generation. I have seen that gen ES with 250,000 miles on the original transmission and fluid. The 2007, and some 2008 models had many transmission issues, but i've never seen one from your model year needing a transmission replacement.
For my 07 Tacoma, that also requires WS ATF, Toyota recommends a full flush at 60K for severe service usage.
Regardless of the recommended change intervals, you want to look at the color and smell of the ATF. If ATF ever smells burnt, flush it. If the trany has over 100K miles and it has never had a flush, it is recommended to do a couple drain/refills before doing a flush because the cleaning agents in ATF may dislodge accumulated crud.
Trick to Removing 2 Tough Bolts WITHOUT Raising Transmission
I ran into the same issue for the corner bolt and one along the subframe. Trick? 10mm driver bit that is shallow and thin-walled. The shallow part lets you get to just the screw but not hit the frame.
 03-01-15, 09:46 PM