DIY: Door Welcome Lexus Logo Light Installation
 09-28-15, 07:00 PM
#1
Lexus Champion
Thread Starter
Here’s how to remove the door panels to install welcome logo lights on a 4th Gen Lexus ES300/ ES330.
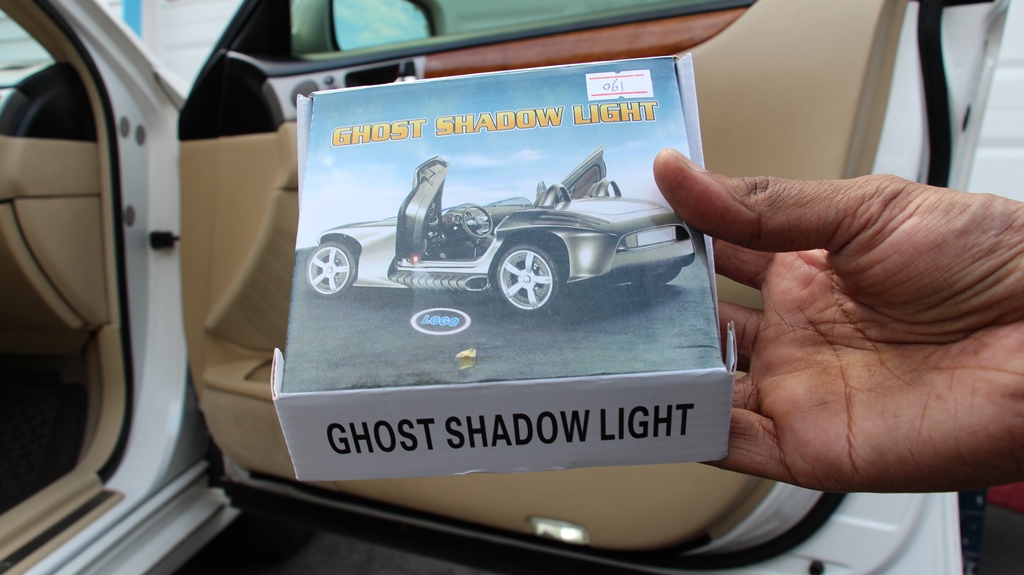
Here’s the kit I purchased from eBay. Approximately $10 for a pair.
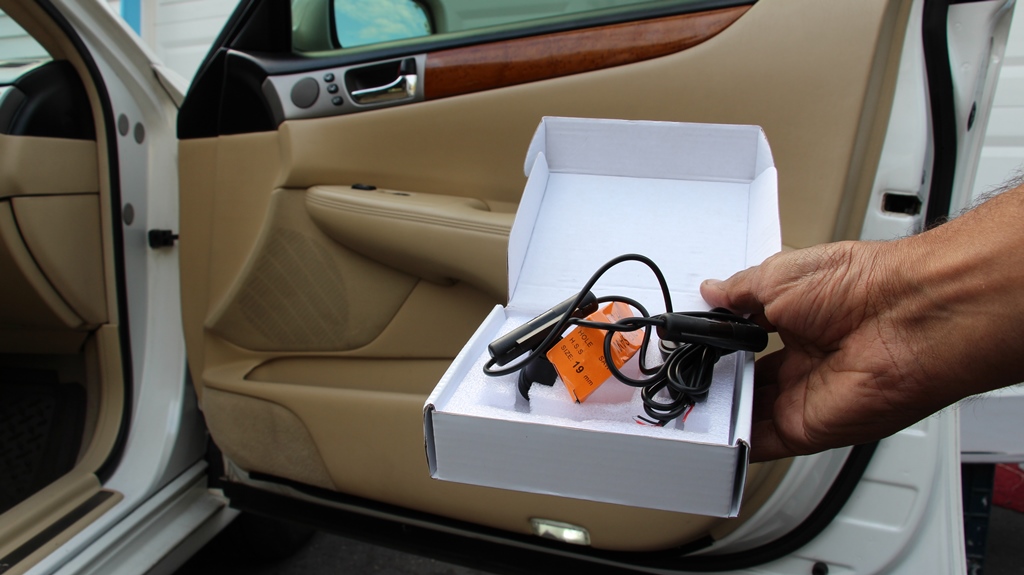
The kit comes with two projectors and a drill bit. You’ll need to remove the door panels and drill the bottom of them to install the logo light. It will be wired to the puddle light.
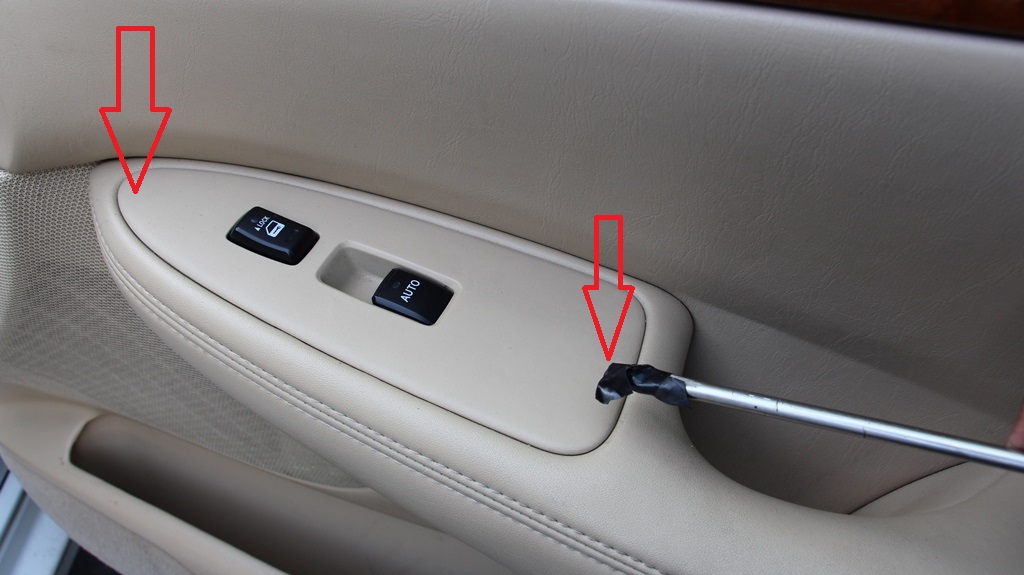
To remove the door panel, first start with a protected flat blade screwdriver and pry up on the window switch panel:
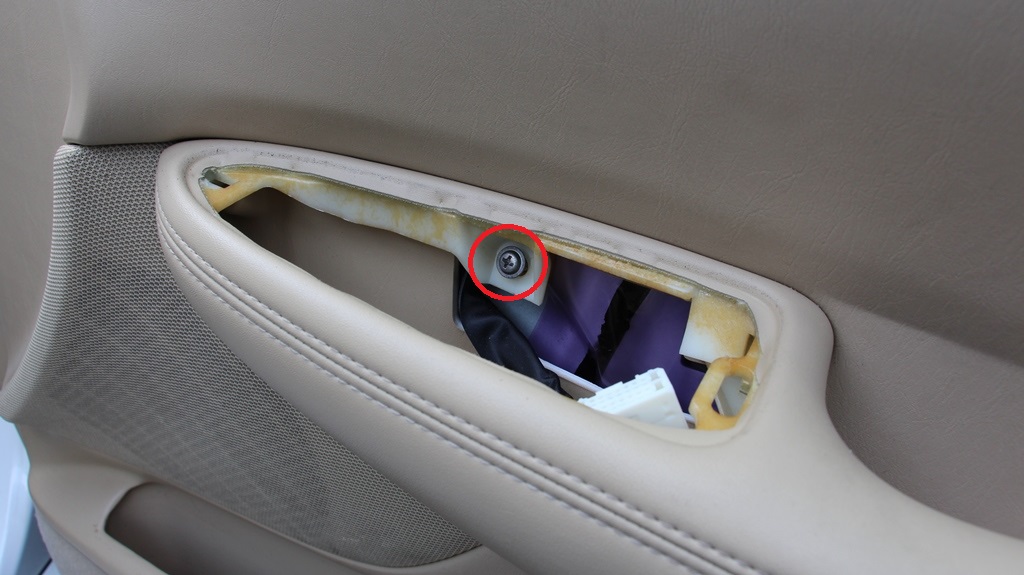
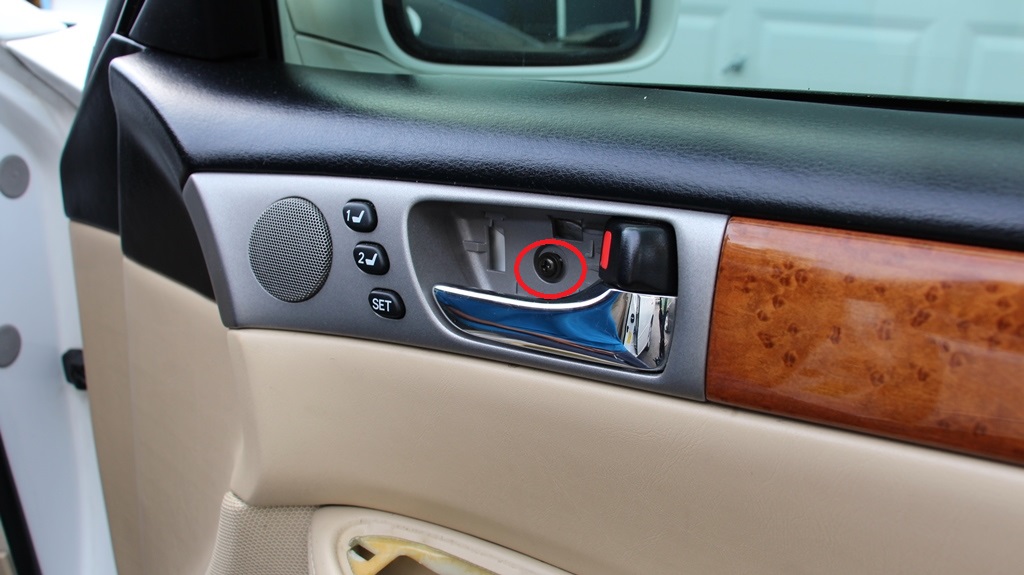
Once the electrical is disconnected, remove the Philips screw:
Then remove the black plastic piece from behind the interior door handle, and then the Philips screw:
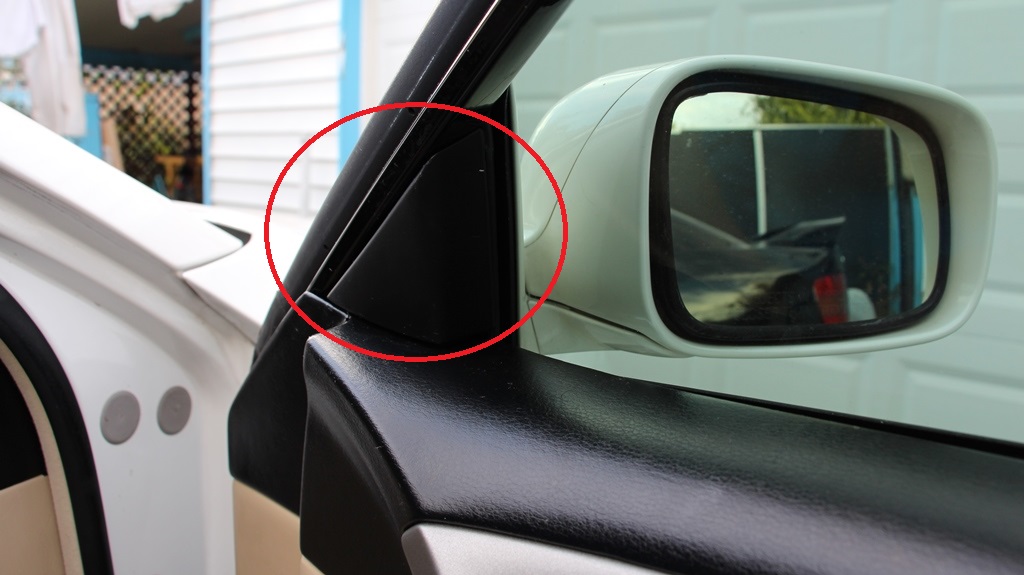
Next, pop off the black plastic triangle near the mirror:
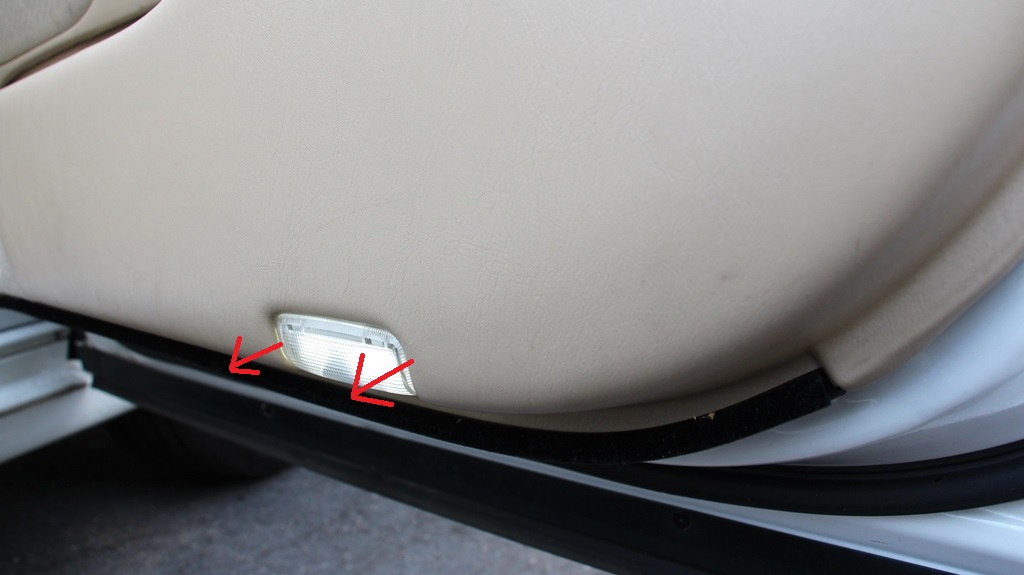
And use a flat blade screw driver to remove the puddle light, one clip on either side:
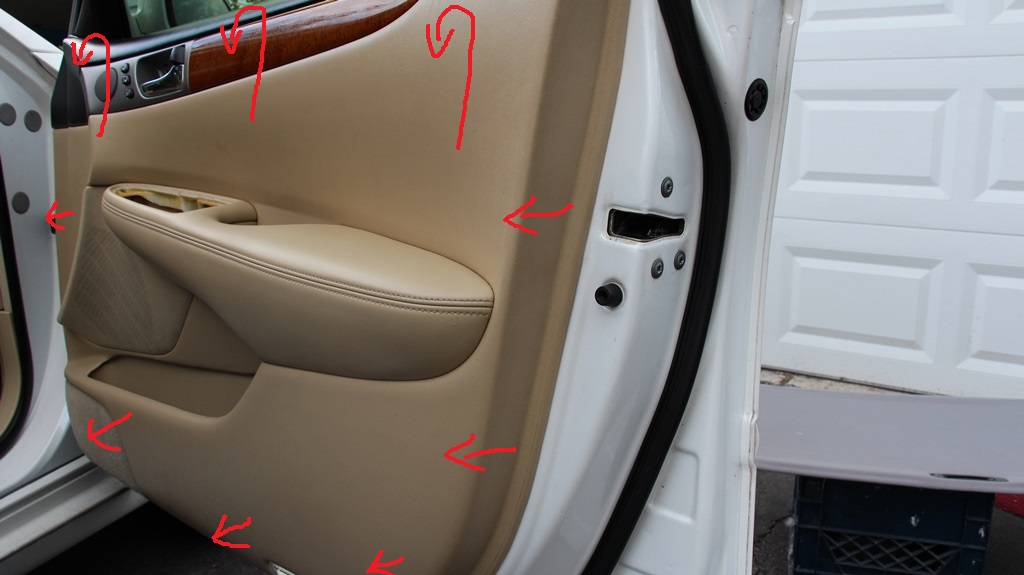
The rest of the door panel is held on by upholstery clips. First time removal will be tough. Pull the panel bottom out away from the door, then lift it over the sill.
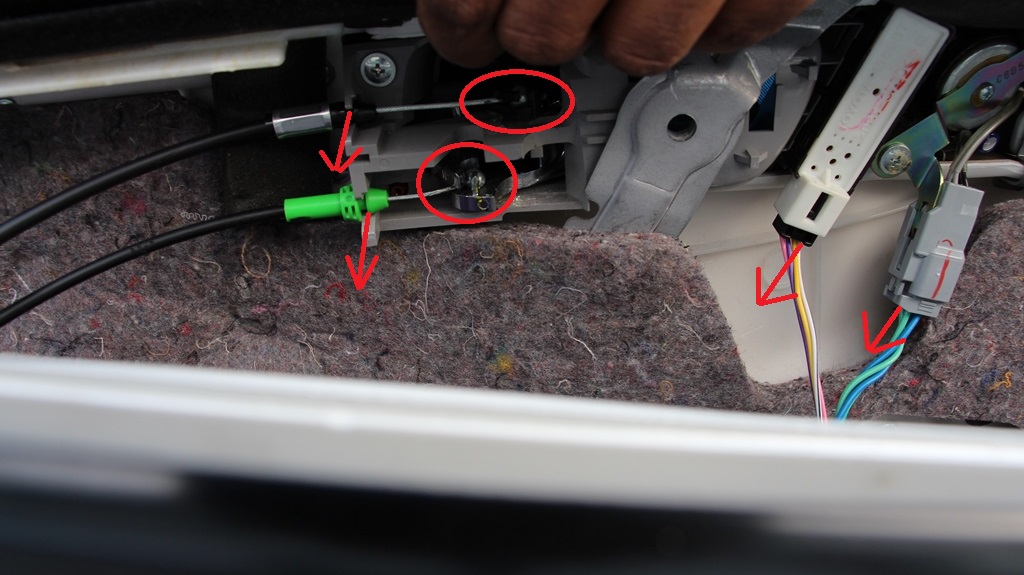
Remove the cables for the door lock and handle, and wires to the memory seat and tweater:
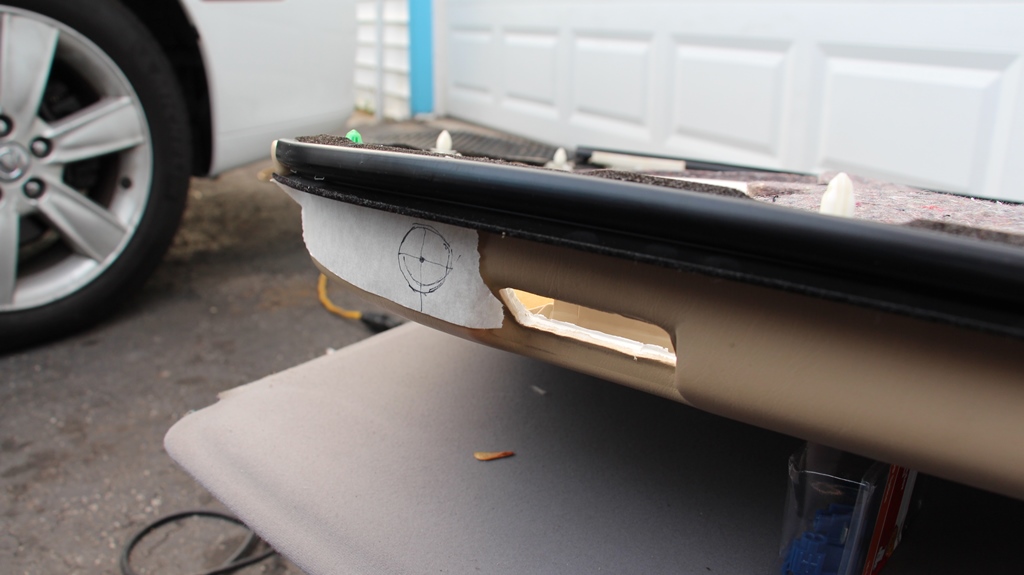
With the door panel out of the car, align the door welcome light in a position where nothing within the door panel can interfere with it.

Use tape to mark your hole and drill it using the supplied 19mm hole saw.
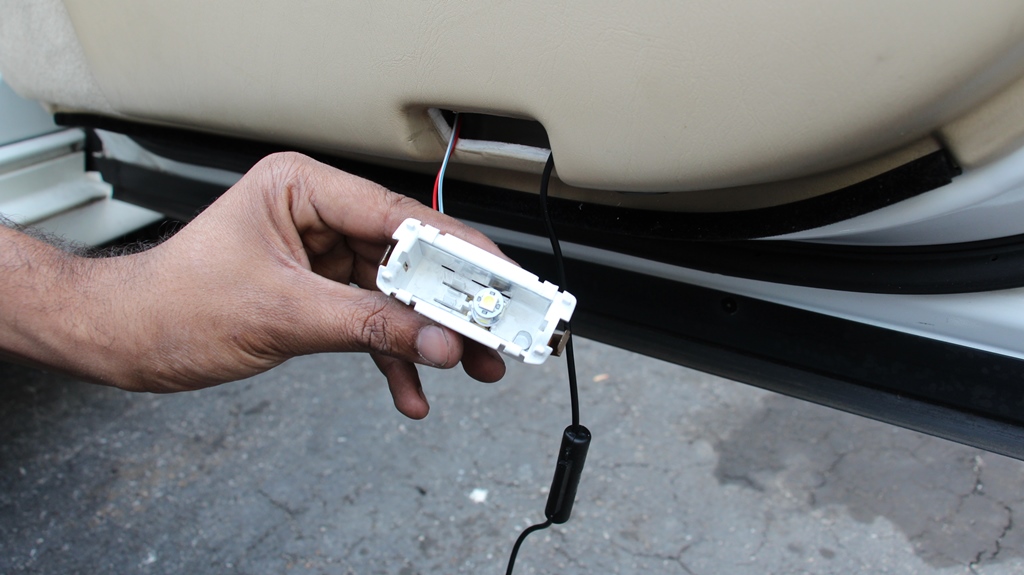
Then slide the logo light in and tighten it with the nut:

Reinstall the door panel. You can use T-taps or solder the logo lights directly to the puddle lights. I chose to wrap the wires around my LED bulb base then install it backward so the puddle light doesn’t over come the logo light:
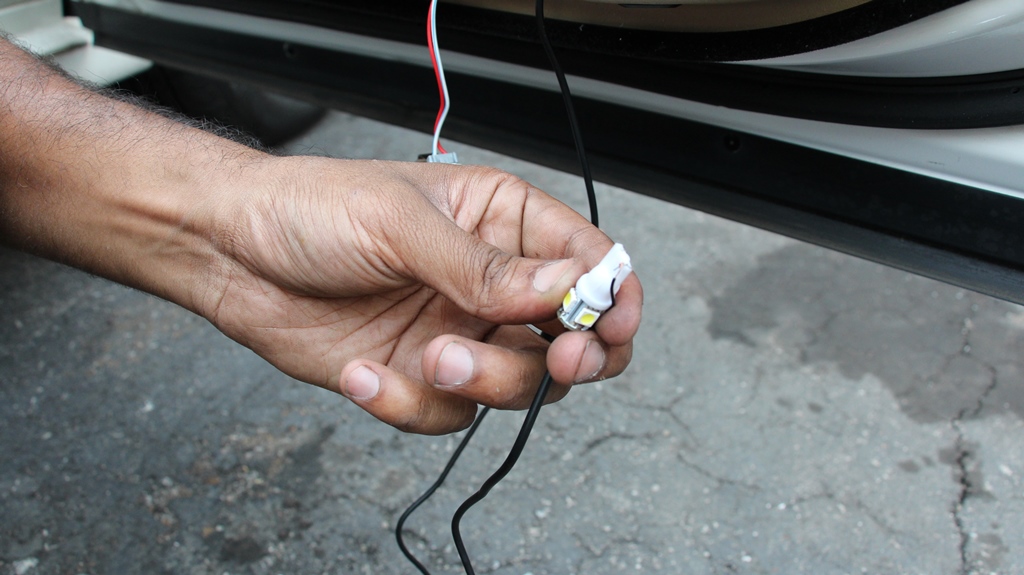
Then wedge the bulb back in for a solid contact.
Once you pop the puddle light back in, double check the Lexus logo is rotated properly relative to the car when you open the door:

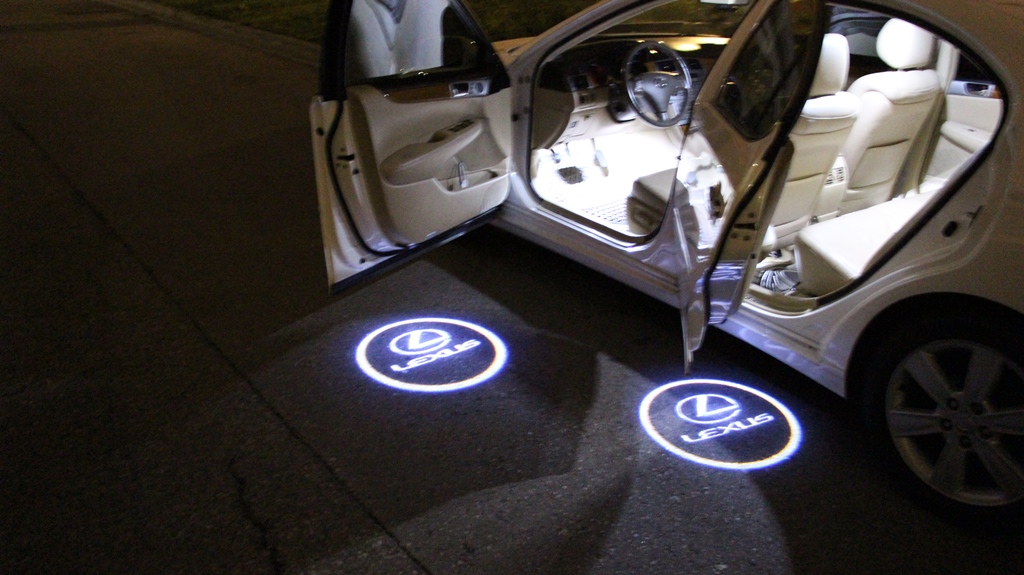
Here’s what it looks like at night:


Here’s the kit I purchased from eBay. Approximately $10 for a pair.

The kit comes with two projectors and a drill bit. You’ll need to remove the door panels and drill the bottom of them to install the logo light. It will be wired to the puddle light.

To remove the door panel, first start with a protected flat blade screwdriver and pry up on the window switch panel:

Once the electrical is disconnected, remove the Philips screw:

Then remove the black plastic piece from behind the interior door handle, and then the Philips screw:

Next, pop off the black plastic triangle near the mirror:

And use a flat blade screw driver to remove the puddle light, one clip on either side:

The rest of the door panel is held on by upholstery clips. First time removal will be tough. Pull the panel bottom out away from the door, then lift it over the sill.

Remove the cables for the door lock and handle, and wires to the memory seat and tweater:

With the door panel out of the car, align the door welcome light in a position where nothing within the door panel can interfere with it.

Use tape to mark your hole and drill it using the supplied 19mm hole saw.

Then slide the logo light in and tighten it with the nut:

Reinstall the door panel. You can use T-taps or solder the logo lights directly to the puddle lights. I chose to wrap the wires around my LED bulb base then install it backward so the puddle light doesn’t over come the logo light:

Then wedge the bulb back in for a solid contact.

Once you pop the puddle light back in, double check the Lexus logo is rotated properly relative to the car when you open the door:

Here’s what it looks like at night:


Thread
Thread Starter
Forum
Replies
Last Post