DIY: 1MZFE ES300/RX300 Timing Belt
 02-13-13, 08:27 PM
#1
Aside from one youtube video, I've never seen a good guide on how to replace the 1MZFE V6 timing belt. I just came across this website, so I thought I'd share it with everyone on here. The important thing is that it has pictures for every step. Enjoy!
http://diyservice-en.blogspot.com/20...on-1mz-fe.html
http://diyservice-en.blogspot.com/20...on-1mz-fe.html
Last edited by Hayk; 02-16-13 at 08:49 PM.

The following users liked this post:
DavidES300 (11-16-20)
02-13-13, 11:12 PM
#2

Wow, you truly stumbled upon a gold mine here. That is incredibly detailed and would come in handy for anyone who is planning on doing their timing belt. Thank you for sharing this!
Will definitely come in handy when I get around to changing my timing belt.
Will definitely come in handy when I get around to changing my timing belt.
02-14-13, 07:28 AM
#4
Good info Mrbooby. Well done write up. I especially appreciate the use of tie straps and torque specs for bolts. I will use this procedure this weekend on my 96' ES. I will also fabricate the Camshaft removal device he shows.
02-14-13, 10:08 AM
#5
Lexus Test Driver

I have replaced the timing belt on my 97 ES300 a few times. The last time took me 2 hours with just the basic hand tools.
Trending Topics
06-29-14, 09:14 AM
#8
Lexus Champion
I did my timing belt last month on my 1MZ-FE and just wanted to add to this thread my DIY video:
There's a DIY writeup of the procedure for the 6 cylinder Camry here:
http://www.toyotanation.com/forum/10...ls-part-i.html
So instead of making a full writeup repeating whats already posted, I wanted to add to it by highlighting the most challenging parts of my DIY timing belt job.
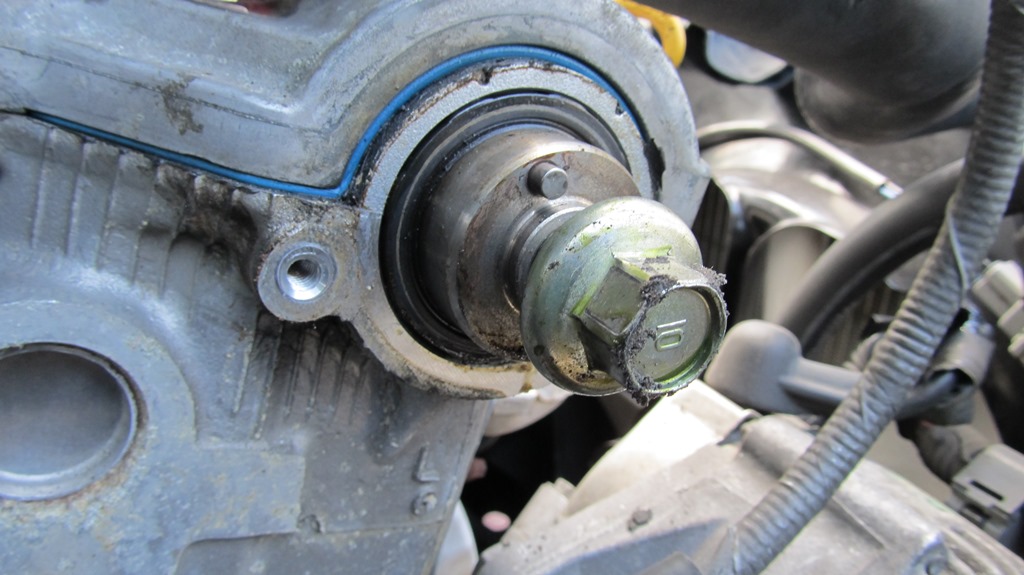
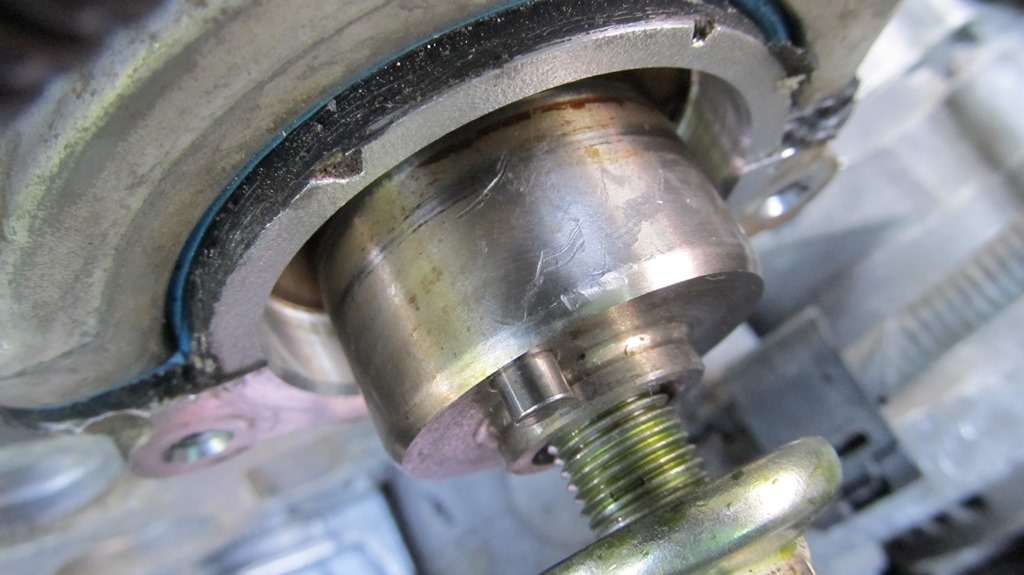
The first milestone was the crank bolt. I used the bump starter method to break it loose and my 1/2" impact gun at 120PSI to drive it in and out.
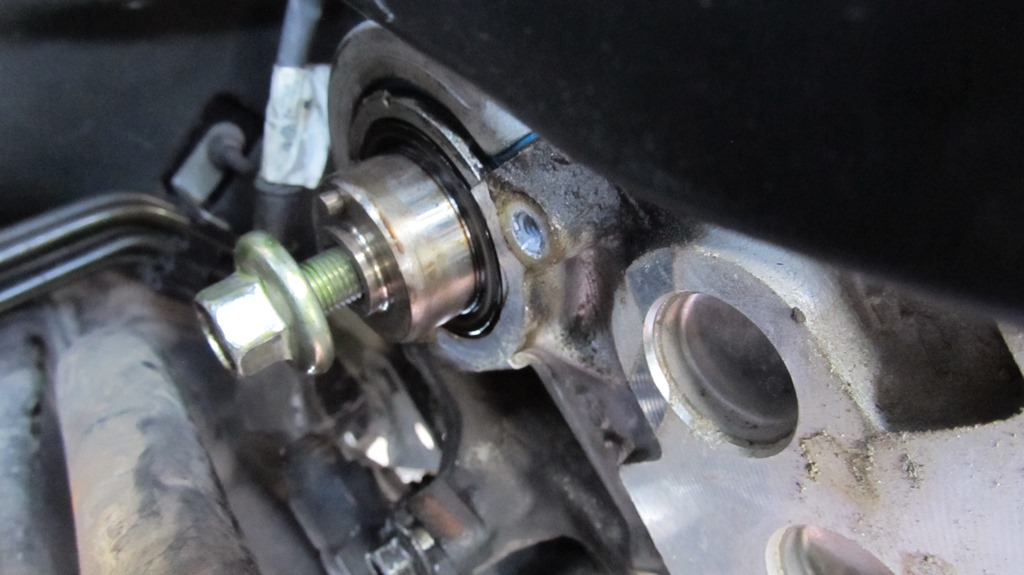
The engine mount bracket cleared the inner fender fine, I had no issue removing it with the studs in place. (I also recall this not being an issue on my 3MZ-FE Lexus ES330). I did not have to jack up the engine, however I did have the right front of the car jacked up to remove the wheel, so I wonder if the angle the car was tilted at shifted the engine to give me enough clearance along the fender. The waterpump cleared the studs fine also.
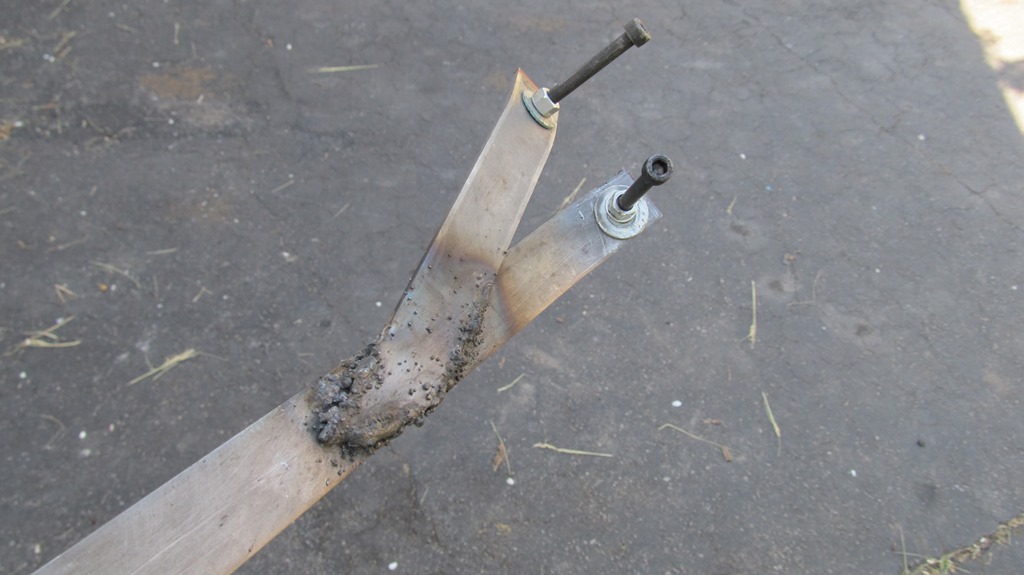
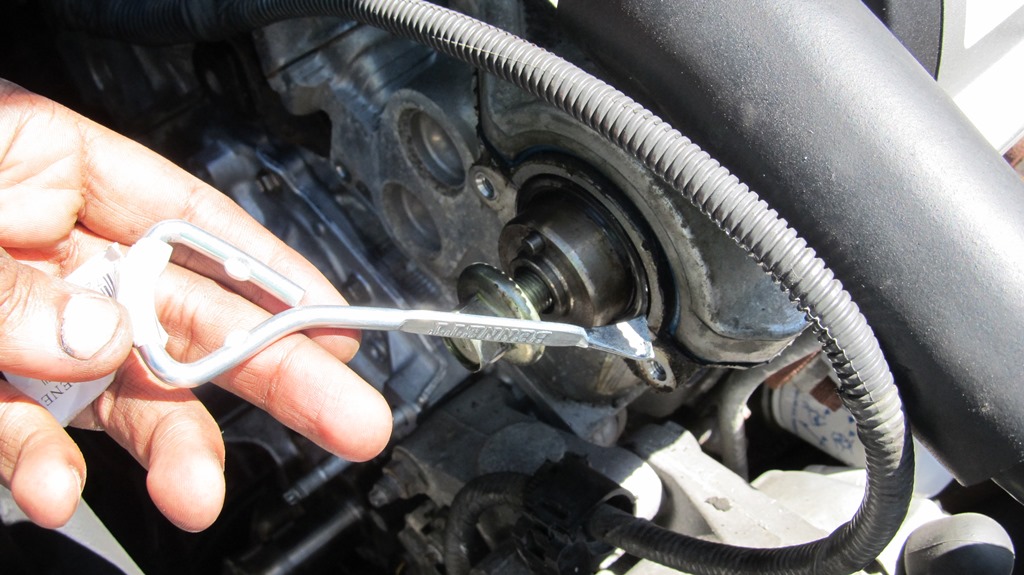
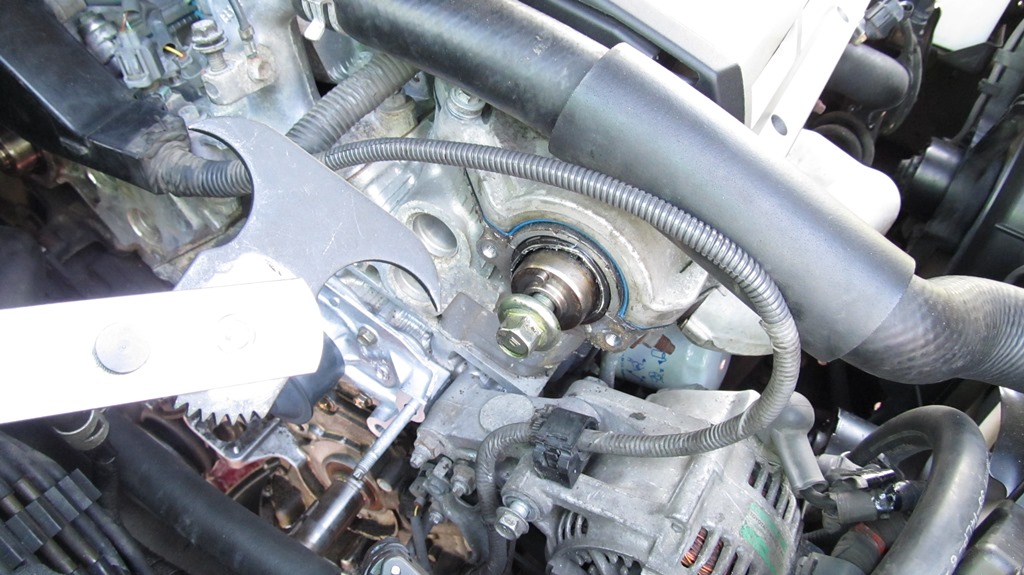
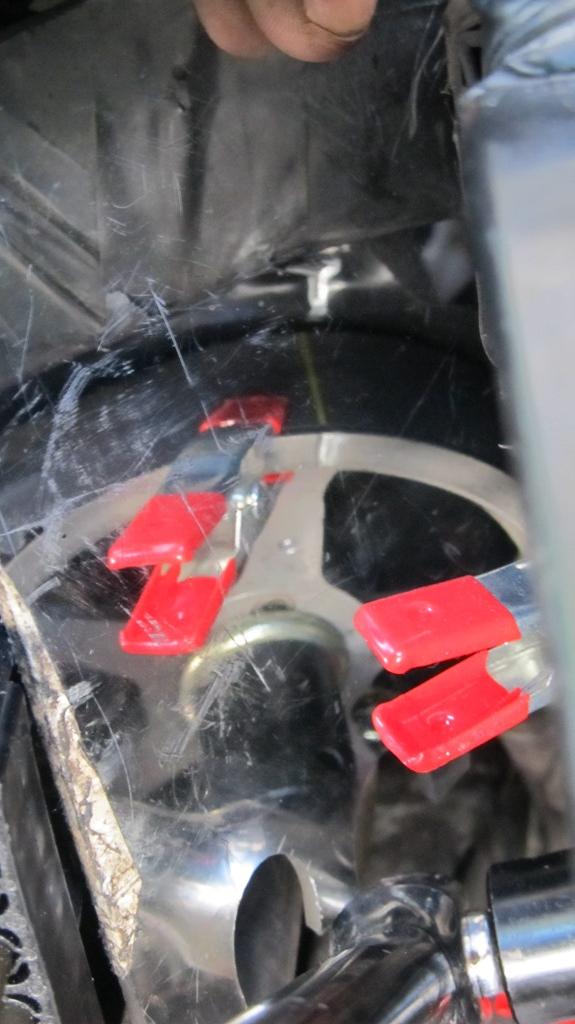
The camshafts were the next hurdle. I made a tool to hold the camshaft from turning while breaking its bolt loose (excuse the noob welding job - its not mine!). Its made of 1/8" steel and two bolts.
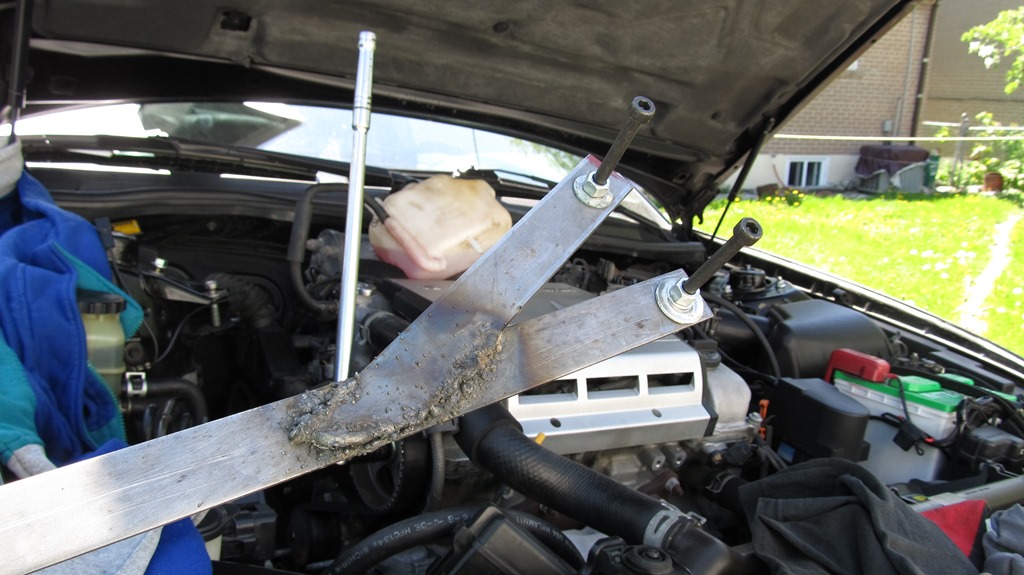
Of course the steel wasn't strong enough and bent with all the torque from the breaker bar. :disappoin
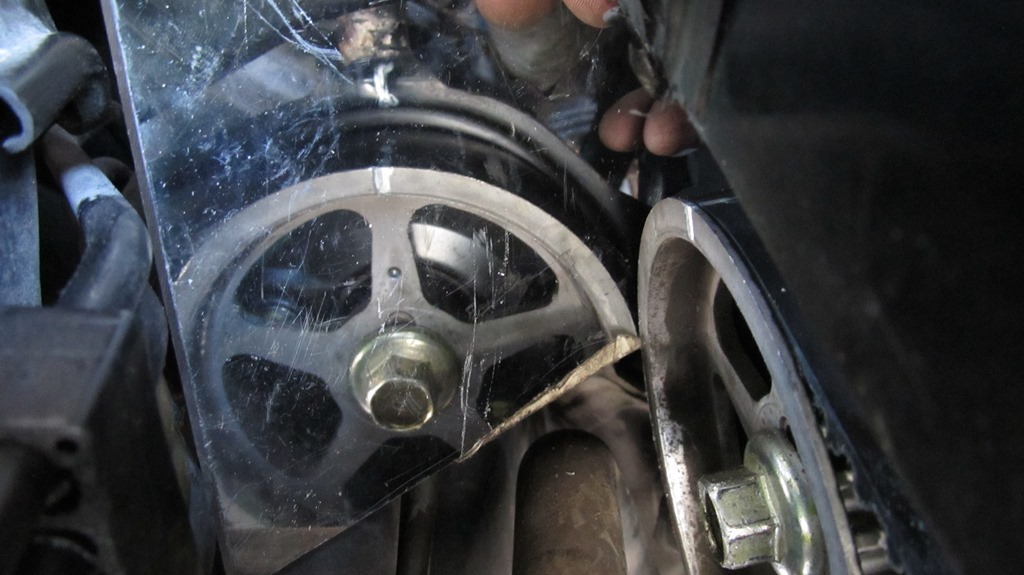
I ended up using the timing belt tension to loosen the rear bolt, with one ratchet / bar on the front camshaft, and one on the rear, turning them in opposite directions.
I purchased a camshaft holding tool to loosen and tighten the cam bolts.


Next I marked the timing belt at the crank and cams. Accessing the rear cam making sure the marks were on time was pretty difficult with the wiring harness in the way. I used a mirror to get a better view.
The timing covers were a little bit oily. I thought the crank seal would be leaking, but it turns out it was dry, I changed it anyway. The front cam-seal was also dry:
The rear cam-seal was slightly oily, but I'm not sure if that was residue left from a leaking rear valve cover that I fixed last year.
The timing belt was changed in 2006 according to a sticker on the car, but apparently the water-pump was original for this car. It lasted 15+ years, it was stamped 1/99 as the manufacture date. There was some black burnt crap on the pulley probably from the timing belt rubbing away.
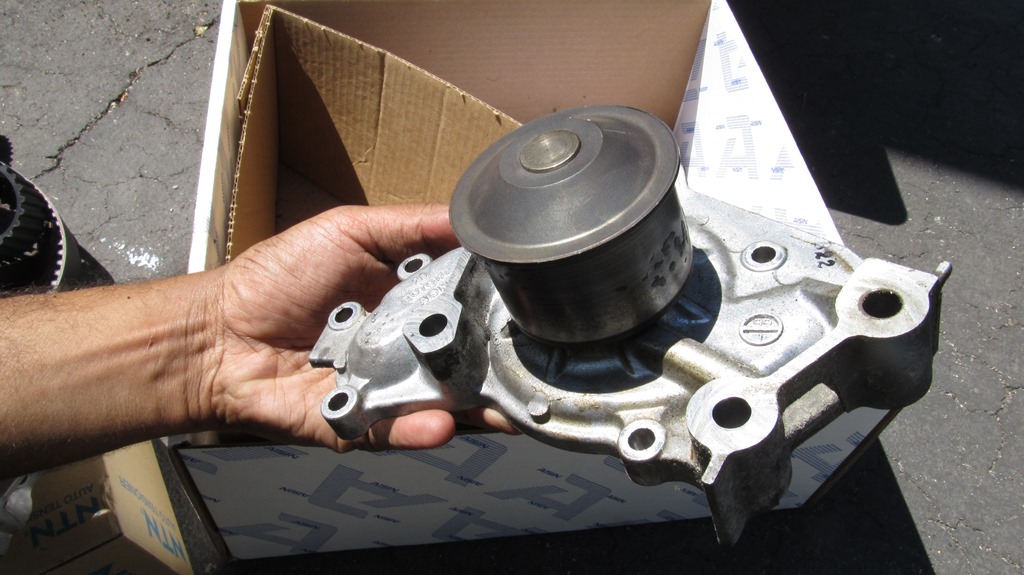
I used the Aisin timing belt from RockAuto to replace all the parts, along with FelPro cam and crank seals.
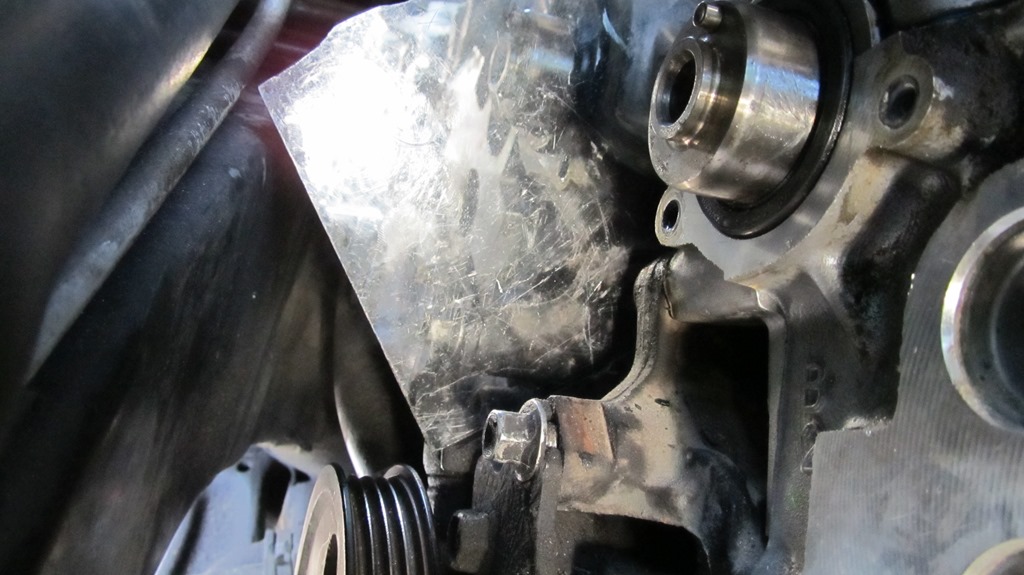
Getting the seals out was the hardest part of this job. I used a paint can opener and a seal remover tool to dig at it.
Ended up scratching up the camshaft really bad. There has to be an easier way to get these seals out!
The rear cam seal was by far the hardest, with very little access along the inside of the fender well. The seal came out in pieces after digging at it with the seal remover tool.
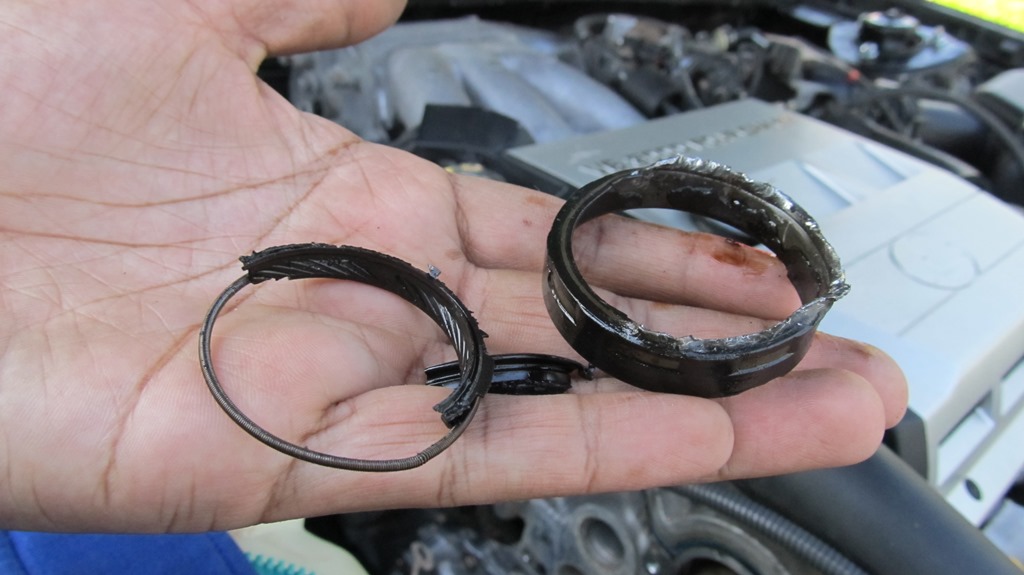
I used a 1 1/2" PVC pipe and a hammer to tap in the new seals. Again the rear seal was hard to tap in as there's no space to swing a hammer. Removing the power steering line helped a little. I didn't get it in all the way flush, I just hope it doesn't leak.
Putting everything back together was straight forward, again pay attention to the rear camshaft timing belt marks to make sure they align with the mark on the cover. It took a bit of fidgeting to get it correctly timed. I started putting on the timing belt at the rear cam, then idler, front cam, water-pump, crank and then tensioner.
Overall this job was much easier than I thought it was going to be. I had all my tools prepared, and could probably do this job in 4 hours had it not been for stopping to take pictures and make the video. The rear valve cover job was much more challenging than this!
There's a DIY writeup of the procedure for the 6 cylinder Camry here:
http://www.toyotanation.com/forum/10...ls-part-i.html
So instead of making a full writeup repeating whats already posted, I wanted to add to it by highlighting the most challenging parts of my DIY timing belt job.
The first milestone was the crank bolt. I used the bump starter method to break it loose and my 1/2" impact gun at 120PSI to drive it in and out.
The engine mount bracket cleared the inner fender fine, I had no issue removing it with the studs in place. (I also recall this not being an issue on my 3MZ-FE Lexus ES330). I did not have to jack up the engine, however I did have the right front of the car jacked up to remove the wheel, so I wonder if the angle the car was tilted at shifted the engine to give me enough clearance along the fender. The waterpump cleared the studs fine also.
The camshafts were the next hurdle. I made a tool to hold the camshaft from turning while breaking its bolt loose (excuse the noob welding job - its not mine!). Its made of 1/8" steel and two bolts.

Of course the steel wasn't strong enough and bent with all the torque from the breaker bar. :disappoin

I ended up using the timing belt tension to loosen the rear bolt, with one ratchet / bar on the front camshaft, and one on the rear, turning them in opposite directions.

I purchased a camshaft holding tool to loosen and tighten the cam bolts.

Next I marked the timing belt at the crank and cams. Accessing the rear cam making sure the marks were on time was pretty difficult with the wiring harness in the way. I used a mirror to get a better view.

The timing covers were a little bit oily. I thought the crank seal would be leaking, but it turns out it was dry, I changed it anyway. The front cam-seal was also dry:

The rear cam-seal was slightly oily, but I'm not sure if that was residue left from a leaking rear valve cover that I fixed last year.

The timing belt was changed in 2006 according to a sticker on the car, but apparently the water-pump was original for this car. It lasted 15+ years, it was stamped 1/99 as the manufacture date. There was some black burnt crap on the pulley probably from the timing belt rubbing away.

I used the Aisin timing belt from RockAuto to replace all the parts, along with FelPro cam and crank seals.
Getting the seals out was the hardest part of this job. I used a paint can opener and a seal remover tool to dig at it.


Ended up scratching up the camshaft really bad. There has to be an easier way to get these seals out!

The rear cam seal was by far the hardest, with very little access along the inside of the fender well. The seal came out in pieces after digging at it with the seal remover tool.

I used a 1 1/2" PVC pipe and a hammer to tap in the new seals. Again the rear seal was hard to tap in as there's no space to swing a hammer. Removing the power steering line helped a little. I didn't get it in all the way flush, I just hope it doesn't leak.

Putting everything back together was straight forward, again pay attention to the rear camshaft timing belt marks to make sure they align with the mark on the cover. It took a bit of fidgeting to get it correctly timed. I started putting on the timing belt at the rear cam, then idler, front cam, water-pump, crank and then tensioner.

Overall this job was much easier than I thought it was going to be. I had all my tools prepared, and could probably do this job in 4 hours had it not been for stopping to take pictures and make the video. The rear valve cover job was much more challenging than this!
 06-29-14, 02:18 PM
#11
Getting the seals out was the hardest part of this job. I used a paint can opener and a seal remover tool to dig at it.
Ended up scratching up the camshaft really bad. There has to be an easier way to get these seals out!
The rear cam seal was by far the hardest, with very little access along the inside of the fender well. The seal came out in pieces after digging at it with the seal remover tool.
06-30-14, 04:46 AM
#12
Lexus Champion
In my research before diving into the TB/WP/seals job I found those videos on the Lisle seal puller. But for the life of me I was not able to find a place selling it in Canada....and I wasn't going to be robbed to have them ship it to me up here.
Regardless I don't know if the Lisle seal puller would have worked for that rear cam-seal, as the clearance between the camshaft and inner fender is really tight.
04-24-15, 10:39 AM
#13
Thanks OP and posters, Well my freakin wrench appeared to have cut corners by not replacing my CrankShaft and CamShaft Seals.
I will be using these tutorials to replace those, Oh the joy :-(
So since I am only replacing the seals what would you fellas think the ETA would be?
TIA,
Jim
I will be using these tutorials to replace those, Oh the joy :-(
So since I am only replacing the seals what would you fellas think the ETA would be?
TIA,
Jim
04-24-15, 12:35 PM
#14
Lexus Champion
Replacing the seals is the same job as replacing the timing belt and the seals you go through the same steps sans replacing the timing belt/water pump components.