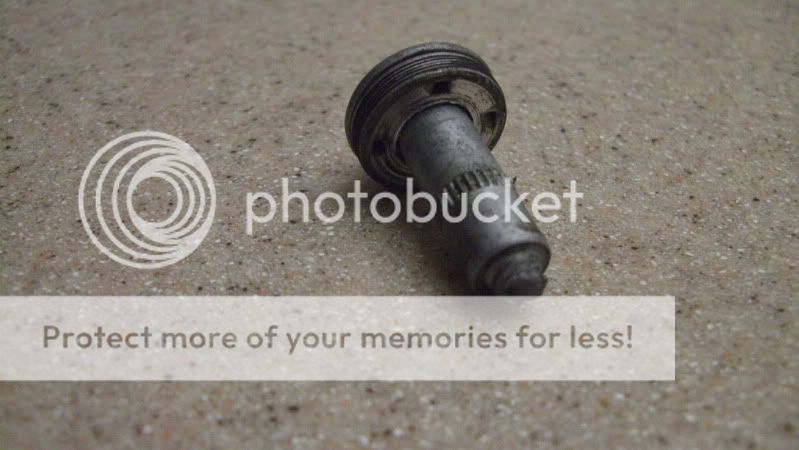
broken valve cover screw when torque..


 12-15-10, 09:54 PM
#2
Driver School Candidate

Join Date: Nov 2010
Location: il
Posts: 3
Likes: 0
Received 0 Likes
on
0 Posts
Oh no....I am very sad to see this happen to you. I'm in the same trouble you are sadly. I have tried a few things but with no success.
I went to Lowes and got the ProGrabit easy out set. I set some newspaper over the open valve because you do not want metal shavings in there, and then proceeded to use the reverse bit. I ended up boring my block out a little bit because it walked on me when it stated it would not. Case in point, tap a hole first and then try to use it i guess. I have 2 bolts that broke off on me, my torque wrench was shot apparently, i got it to 17 pounds and it still wouldnt click. Sucks.
The only other way that I know of is to get a Tap and Die set and bore out a new hole with new grooves and get some bolts that will fit it. This is a labor intensive job but there are some videos on youtube that explain how to do it fairly well.
I hope I have helped you out some, good luck to you!
12-18-10, 06:34 AM
#3
Driver School Candidate

Join Date: Oct 2010
Location: NC
Posts: 4
Likes: 0
Received 0 Likes
on
0 Posts
Ya, had this happen -- twice. Seems the shoulder bolts are made out of butter, not designed to be torqued more than about 15 lbs per my guess. I had real probs w/ the first one, w/ the reverse drill walking a bit, but finally got thru and tapped a 5x8 mm thread a bit off line (original thread 6x10). Doesn't look good, but holds it down alright. The second one (I got really mad at myself...), wasn't torqued that hard and still broke, I was able to back out the broken end with the reverse drill, but took about an hour.
06-27-20, 09:45 PM
#4
Driver School Candidate
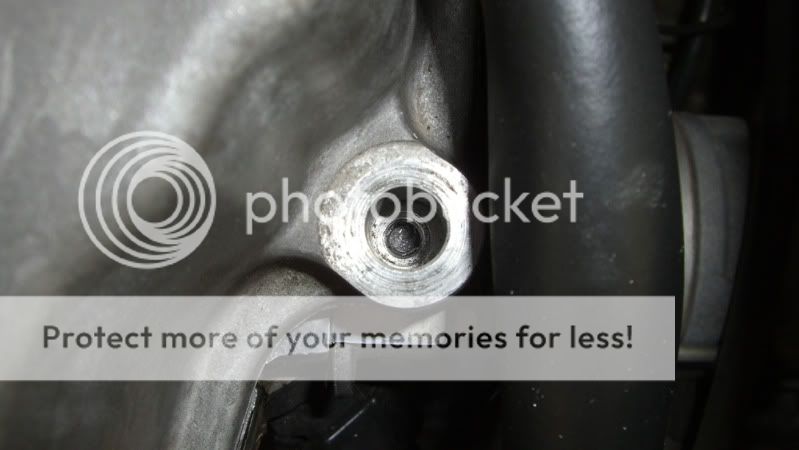
Snap. I bolted my valve cover down to 69 in/lbs, per a video's suggestion. (One said 59, another said 69, and this forum says 75; my mechanic friend always did his by feel.) The next morning I noticed one bolt had snapped. Yikes. Rather than take the valve cover off, I examined the area from above and went to the hardware store for a Dremel bit that might work. My plan was to use my Dremel to cut a slot, so as to make this into a slotted screw. (I tried #569, for grout removal; 106, engraving cutter; 7134, diamond point). Finding a center point, I used the 7134 and slowly cut a path. When I had a little groove, I used a small bladed craftsman screwdriver and tried to ease it out. Sadly, my screwdriver blade twisted (bad quality stuff!). I went back to the hardware store for a screwdriver made of tempered steel but came away with a straight screw exactor from Hanson (ST-1; Irwin tool #53601). The extractor was square--and I was dubious. But I tapped it down into the aluminum groove and turned the bit with a vise grip. It yielded and soon I was holding the remnant of the bolt in my hand.
Last edited by ELZ; 06-27-20 at 09:52 PM.
06-28-20, 11:01 AM
#5
Pole Position

Hello,
There is a pretty easy fix to almost any broken bolt like that - you just need to get a drill bit that is a little smaller than the Torx bit you have on hand, drill the fastener a little, and then knock the Torx bit into the hole that you created, that will create a Torx pattern in the hole. If done right, that setup should hold quite a bit of torque. Just be careful, and start with smaller bit in case if it will get stripped, so that you will have space for maneuver.
About breaking valve cover bolts - those bolts and washers under them should technically be replaced after each use, so I would suggest inspecting them before re-using. All of them have shoulders for a reason - to prevent you from crushing the rubber gasket too far. All you need is to hit the point at which the bolt stops, and give it a little bit of a turn, that should be more than enough, you don't need to go crazy on them.
Hope this helps and best of luck!
Last edited by Arsenii; 06-28-20 at 11:28 AM.

The following users liked this post:
ELZ (06-28-20)
06-28-20, 05:58 PM
#6
Driver School Candidate
Arsenii, Wow... I will have to tuck that one away for the future. What a great hack.
In a couple of videos the recommendation was to add two 5/16" washers to keep the shoulder from bottoming out and to secure a true pressure on the valve cover. I sense that you would say that the design speaks for itself, namely, that the shoulder is a dummy-proof way to supply the exact pressure needed and to keep the bolt from breaking. Am I right? I am half-way through the process, having to stop until I have a replacement bolt for the back valve cover. So, maybe when I do the back valve cover, I should just skip adding the washers.
In other words, with a new gasket and the application of rtv for the cams and bends, the washers are overkill and present a greater possibility of snapping. Correct?
ALSO, I'm having trouble finding a replacement for that broken bolt. Does anyone have a link or suggestion as to where I can find the right / appropriate bolt?
AND... now you've gotten me thinking about the gasket that I put in. How would I know if the gasket has been over-compressed? If I undid the bolts and put in brand new ones, without the extra washers, would I have to replace the gasket? Or should I just move forward and hope for the best?
Thanks,
Eric
Last edited by ELZ; 06-28-20 at 07:21 PM. Reason: clarification
06-28-20, 08:37 PM
#7
Pole Position
Arsenii, Wow... I will have to tuck that one away for the future. What a great hack.
In a couple of videos the recommendation was to add two 5/16" washers to keep the shoulder from bottoming out and to secure a true pressure on the valve cover. I sense that you would say that the design speaks for itself, namely, that the shoulder is a dummy-proof way to supply the exact pressure needed and to keep the bolt from breaking. Am I right? I am half-way through the process, having to stop until I have a replacement bolt for the back valve cover. So, maybe when I do the back valve cover, I should just skip adding the washers.
In other words, with a new gasket and the application of rtv for the cams and bends, the washers are overkill and present a greater possibility of snapping. Correct?
ALSO, I'm having trouble finding a replacement for that broken bolt. Does anyone have a link or suggestion as to where I can find the right / appropriate bolt?
AND... now you've gotten me thinking about the gasket that I put in. How would I know if the gasket has been over-compressed? If I undid the bolts and put in brand new ones, without the extra washers, would I have to replace the gasket? Or should I just move forward and hope for the best?
Thanks,
Eric
In a couple of videos the recommendation was to add two 5/16" washers to keep the shoulder from bottoming out and to secure a true pressure on the valve cover. I sense that you would say that the design speaks for itself, namely, that the shoulder is a dummy-proof way to supply the exact pressure needed and to keep the bolt from breaking. Am I right? I am half-way through the process, having to stop until I have a replacement bolt for the back valve cover. So, maybe when I do the back valve cover, I should just skip adding the washers.
In other words, with a new gasket and the application of rtv for the cams and bends, the washers are overkill and present a greater possibility of snapping. Correct?
ALSO, I'm having trouble finding a replacement for that broken bolt. Does anyone have a link or suggestion as to where I can find the right / appropriate bolt?
AND... now you've gotten me thinking about the gasket that I put in. How would I know if the gasket has been over-compressed? If I undid the bolts and put in brand new ones, without the extra washers, would I have to replace the gasket? Or should I just move forward and hope for the best?
Thanks,
Eric
I did a valve cover gasket job a while ago, I didn't use any washers, and the gasket is now perfectly spread out across the surface. I would say it's not necessarily about snapping bolts, the issue is that washers will create a bigger risk of tightening the gasket unevenly, since there will be no way to be sure about the depth at which the bolt was screwed it. I think that is the main reason why those bolts are designed like that.
As a bottom line, I didn't use any washers and it worked just fine for me.
About valve cover bolts - Part Number for them is 90901-19026. You can call-up any Toyota/Lexus dealer and they should be able to ship it to the dealer location in a few days.
Hope this helps and best of luck!

Thread
Thread Starter
Forum
Replies
Last Post