DIY: 2009 Lexus IS 250 RWD - Caliper Painting **Warning: Lots of Pictures**
 05-06-09, 02:57 PM
#1
Pole Position
Thread Starter

***USE AT YOUR OWN RISK***
"I'm not a Mechanic or Auto Body Specialist. I sit in-front of my computer all day at work. That being said; If I can do this Step-By-Step DIY, so can you!"
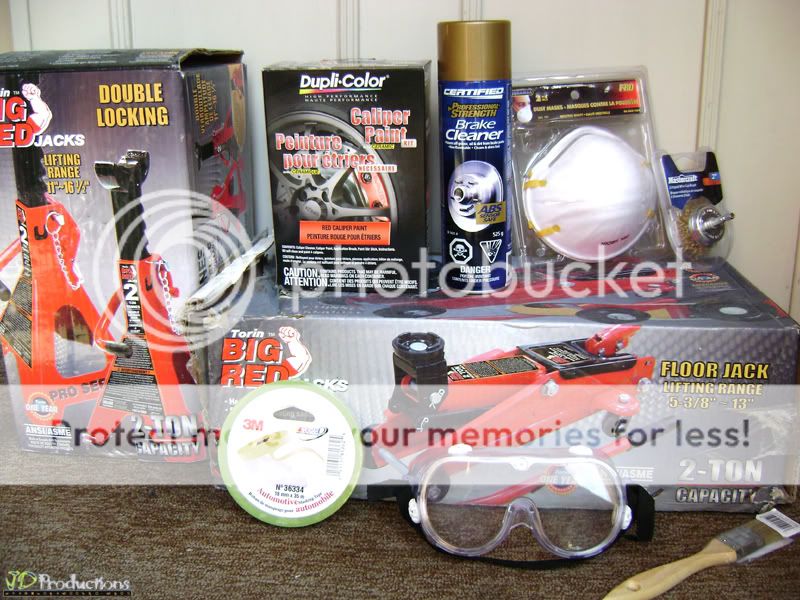
MATERIALS REQUIRED:
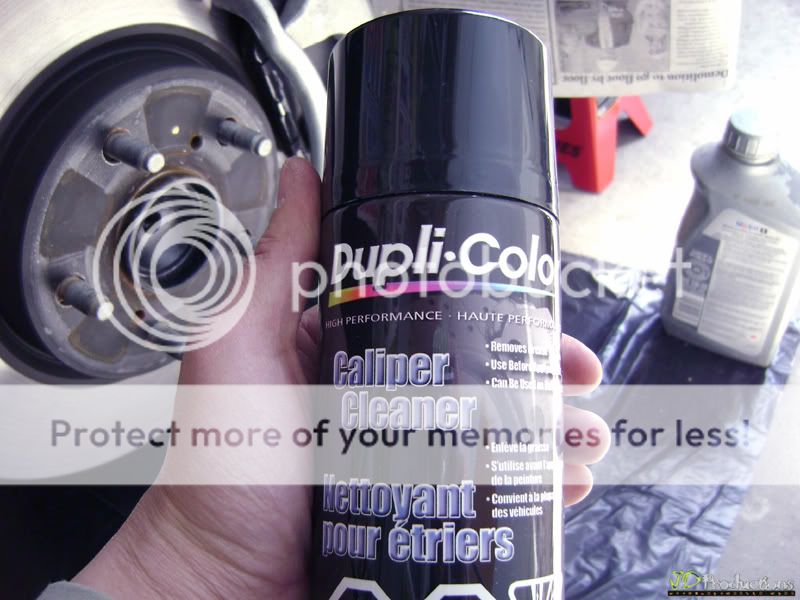
*DupliColor Caliper Paint Kit
(Includes: Caliper Cleaner, stir stick, paint brush, masking tape, and complete instruction book) - Canadian Tire
*1 Extra Caliper Brake Cleaner - Canadian Tire
*3M Automotive Tape - Canadian Tire
*1" Paint Brush (the Brush from the Kit is not good quality; broken after 1st coat) - Canadian Tire
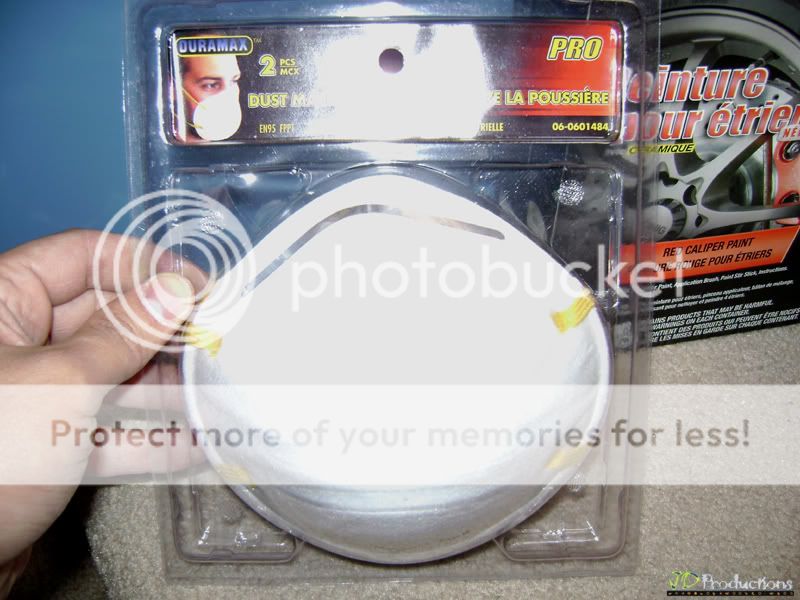
*Respirator Mask - Dollarama
*3" Wire Brush - Canadian Tire
*3M Automotive Sandpaper - Canadian Tire
*Old Newpapers & Garbage Bags
*Caliper Decal - Seche Media
TOOLS NEEDED:
*2-Ton Floor Jack
*2x 2-Ton Jack Stand
*2x In-Car Floor Jack (Optional-applies Lowered Cars)
*Lug Wrench
*Cordless Power Drill
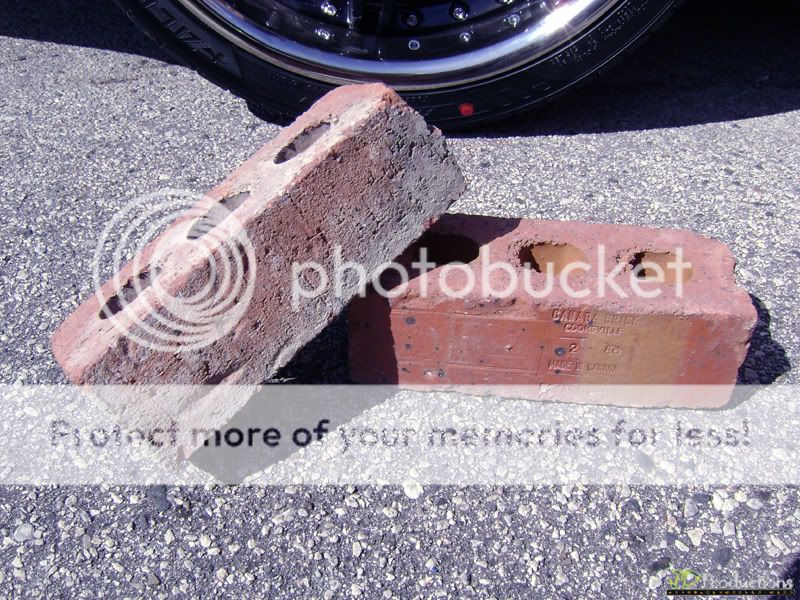
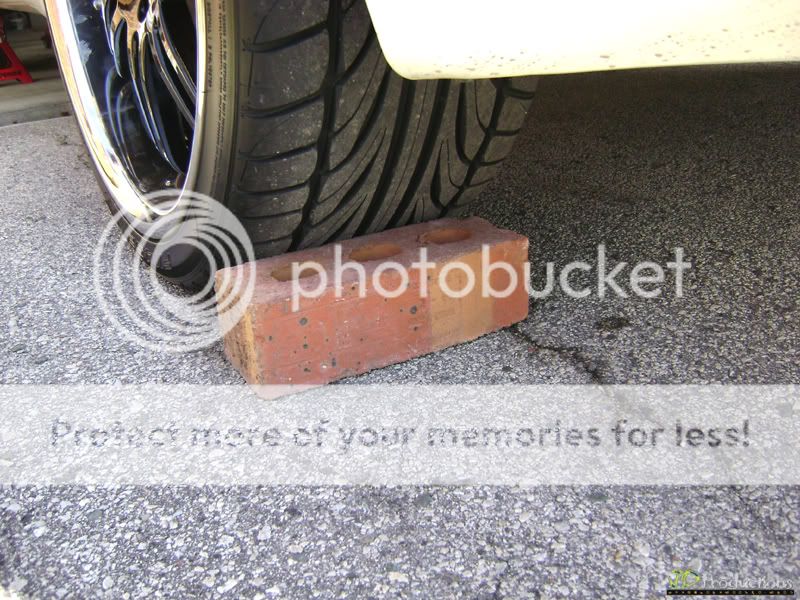
*2 Bricks (Prevent the car from rolling back)
*Work Safety Goggles
*Old Toothbrush
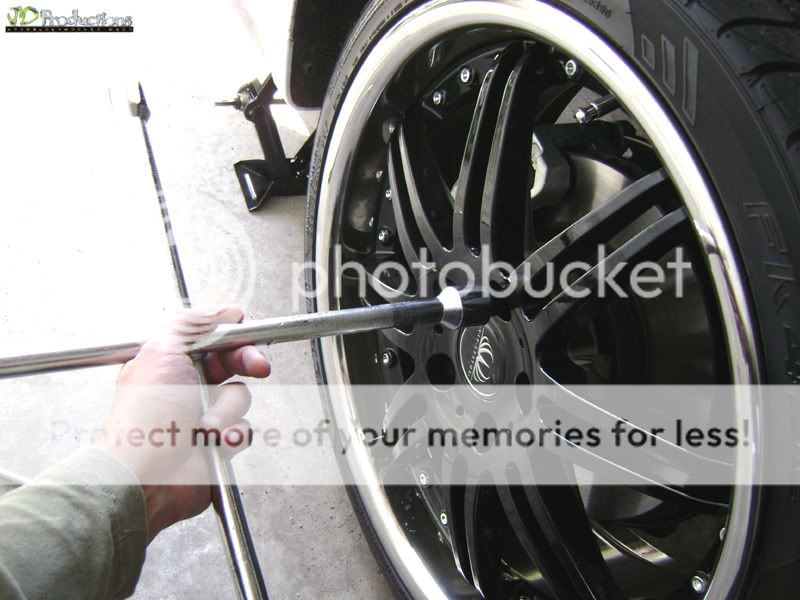
STEP 1: Loosen Bolt
Get the Lug Wrench and start loosening the Lug Nuts, Use an adaptor if necessary.
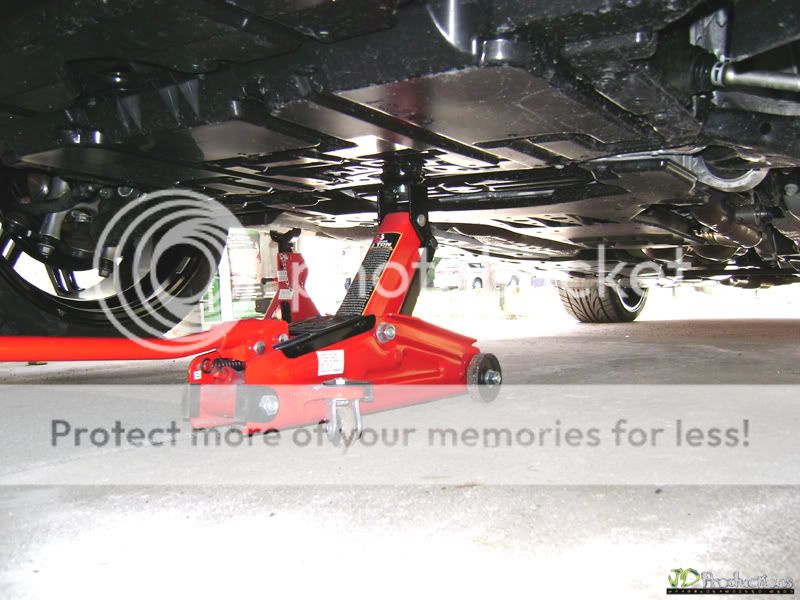
STEP 2: Floor Jack
I used the In-car Floor Jack due to my car is lowered.
"I'm not a Mechanic or Auto Body Specialist. I sit in-front of my computer all day at work. That being said; If I can do this Step-By-Step DIY, so can you!"
MATERIALS REQUIRED:
*DupliColor Caliper Paint Kit
(Includes: Caliper Cleaner, stir stick, paint brush, masking tape, and complete instruction book) - Canadian Tire
*1 Extra Caliper Brake Cleaner - Canadian Tire
*3M Automotive Tape - Canadian Tire
*1" Paint Brush (the Brush from the Kit is not good quality; broken after 1st coat) - Canadian Tire
*Respirator Mask - Dollarama
*3" Wire Brush - Canadian Tire
*3M Automotive Sandpaper - Canadian Tire
*Old Newpapers & Garbage Bags
*Caliper Decal - Seche Media
TOOLS NEEDED:
*2-Ton Floor Jack
*2x 2-Ton Jack Stand
*2x In-Car Floor Jack (Optional-applies Lowered Cars)
*Lug Wrench
*Cordless Power Drill
*2 Bricks (Prevent the car from rolling back)
*Work Safety Goggles
*Old Toothbrush
STEP 1: Loosen Bolt
Get the Lug Wrench and start loosening the Lug Nuts, Use an adaptor if necessary.
STEP 2: Floor Jack
I used the In-car Floor Jack due to my car is lowered.
Last edited by cyberscorp; 05-20-09 at 07:21 AM.


Trending Topics
05-18-09, 11:05 PM
#9
Lead Lap

Join Date: Nov 2008
Location: Vancouver, BC
Posts: 504
Likes: 0
Received 0 Likes
on
0 Posts
Someone had some copy/paste issues (his own post)
http://my.is/forums/f122/diy-2009-le...ctures-388610/
http://my.is/forums/f122/diy-2009-le...ctures-388610/
05-19-09, 12:15 PM
#10
executive matchup
Someone had some copy/paste issues (his own post)
http://my.is/forums/f122/diy-2009-le...ctures-388610/
http://my.is/forums/f122/diy-2009-le...ctures-388610/
cyberscorp:
pics are clear and instructions are good. well done! my only recommendation for this diy caliper painting is that i would actually take out the caliper to be painted (instead of leaving it on and using masking tape). other than that, looks good!
 05-19-09, 12:39 PM
#11
Pole Position
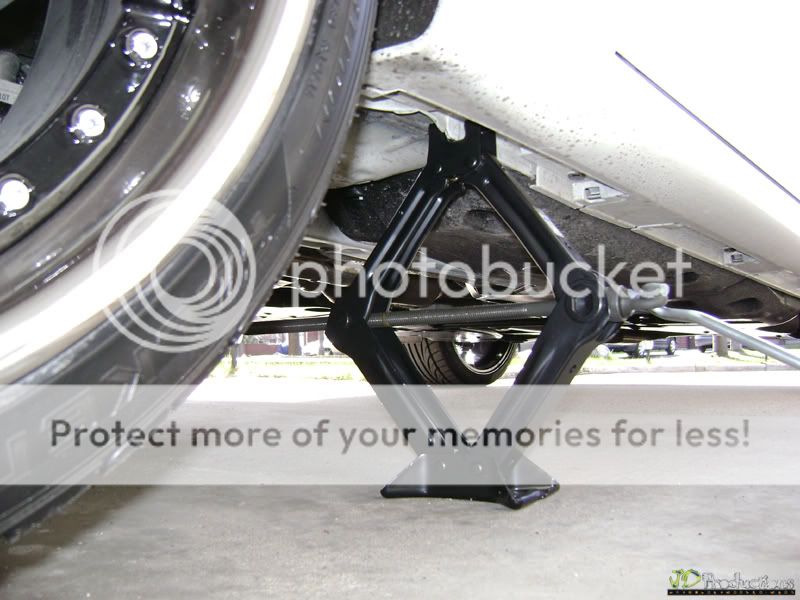
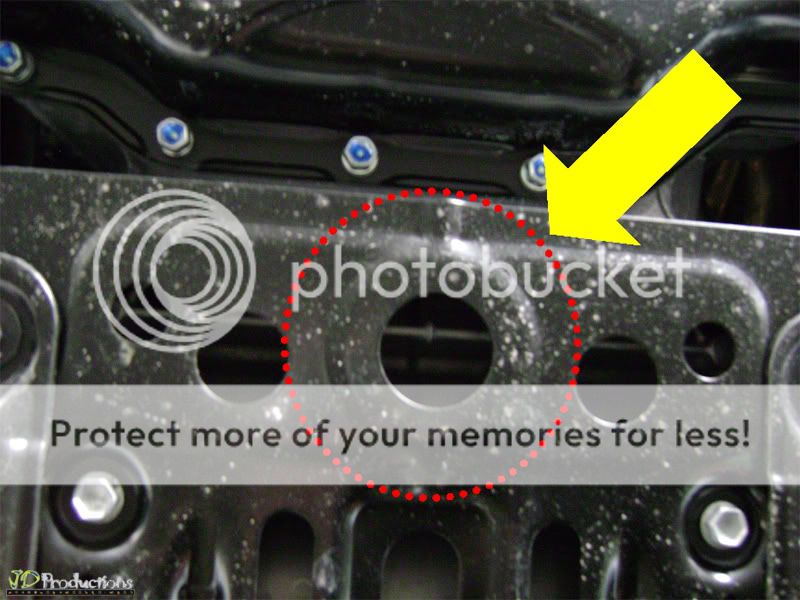
The location he is using is for the factory OEM jack, so if the car is lowered accidentally or not, the "re-inforced" sheet metal tab will bend damaging the jack point. Manufacturers provide this tab as a lateral lock for the supplied jack at the four hard points, to prevent side way movement, and also act as a guide for correct jack positioning. The thin edge should never be allowed to carry the weight of the car at any of these four locations or they will bend. Even service shops make that mistake and don't always repair the damage that results.
Btw, I can see it's already been bent once before...
I've even seen them bent completely flat by the dealer of all places.")
Btw, I can see it's already been bent once before...
I've even seen them bent completely flat by the dealer of all places.
Last edited by Johnny; 05-19-09 at 08:56 PM. Reason: Clarification
 05-20-09, 07:16 AM
#13
Pole Position
Thread Starter
Sorry about the original post. It was held up when I posted it. Here's the continuation'
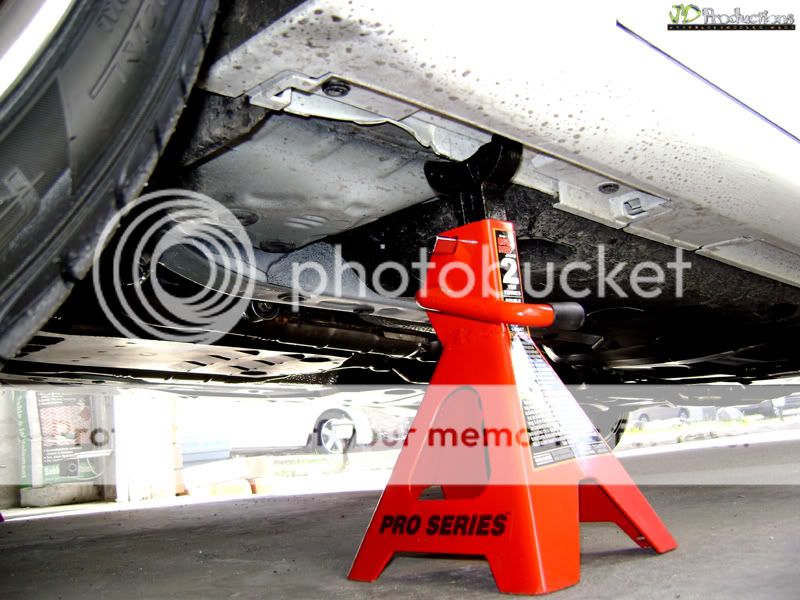
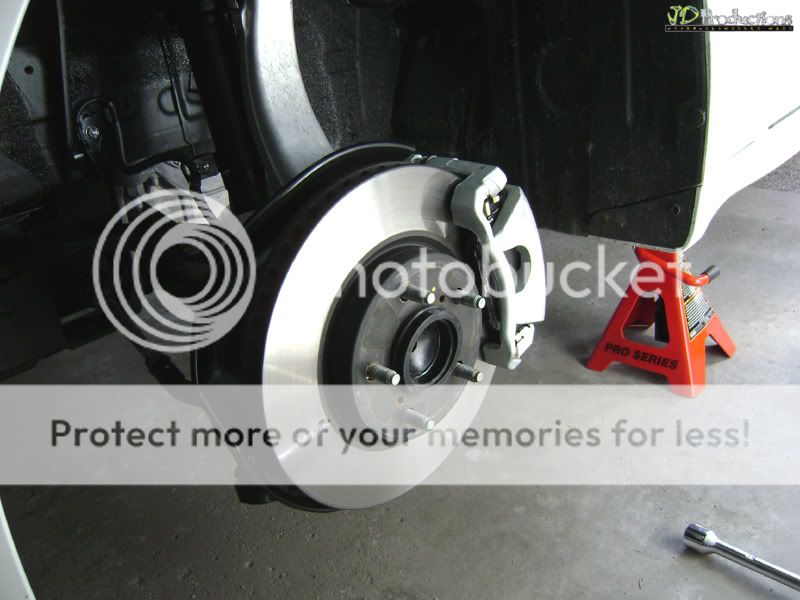
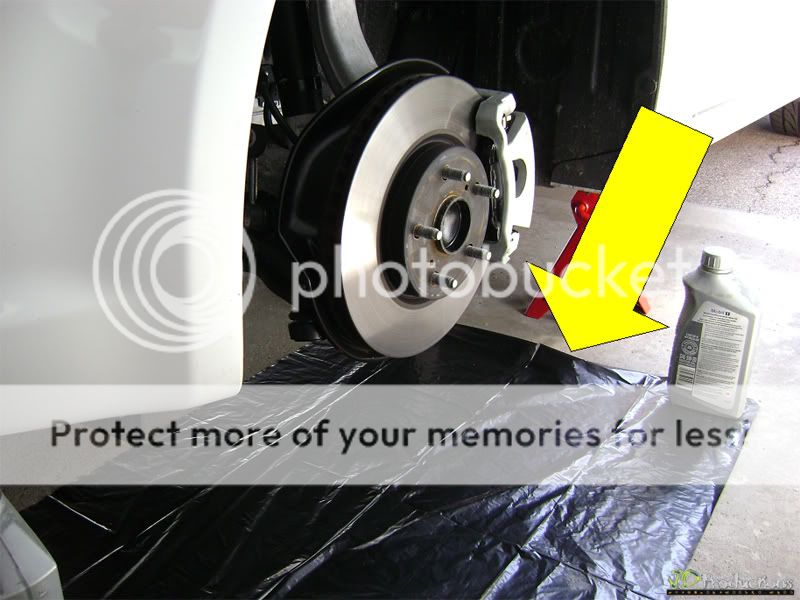
STEP 3: 2-Ton Floor Jack
Go underneath the car and look for the Front Center Jack Point
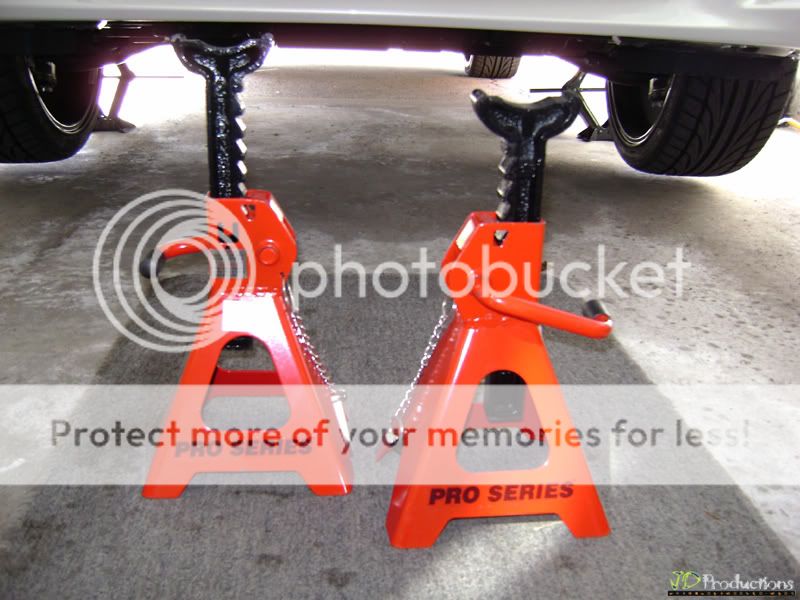
STEP 4: 2-Ton Jack Stand
Once the Floor Jack is in place; it's time to swap the In-car Jack with the Jack Stand.

STEP 5: Bricks
Locate the Bricks and place them in the Rear Tires/Wheels (considering you're working on the Front Caliper Brakes). This will prevent the car from accidentally rolling.
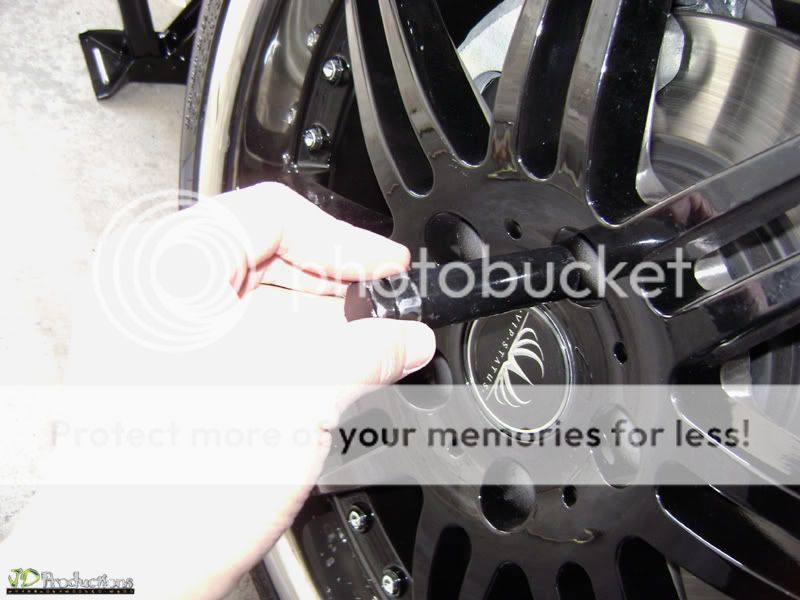
STEP 6: Wheels
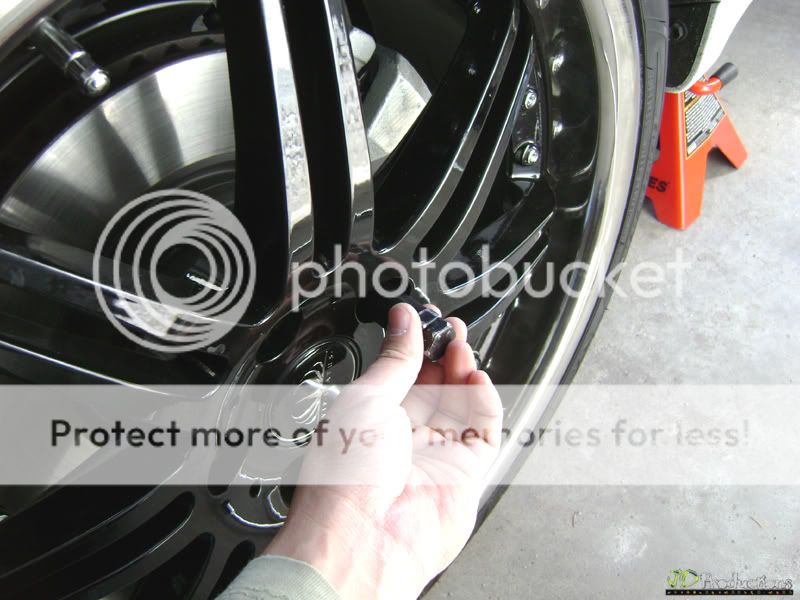
Now fully remove the Lug Nuts from the bolts and remove the Wheels
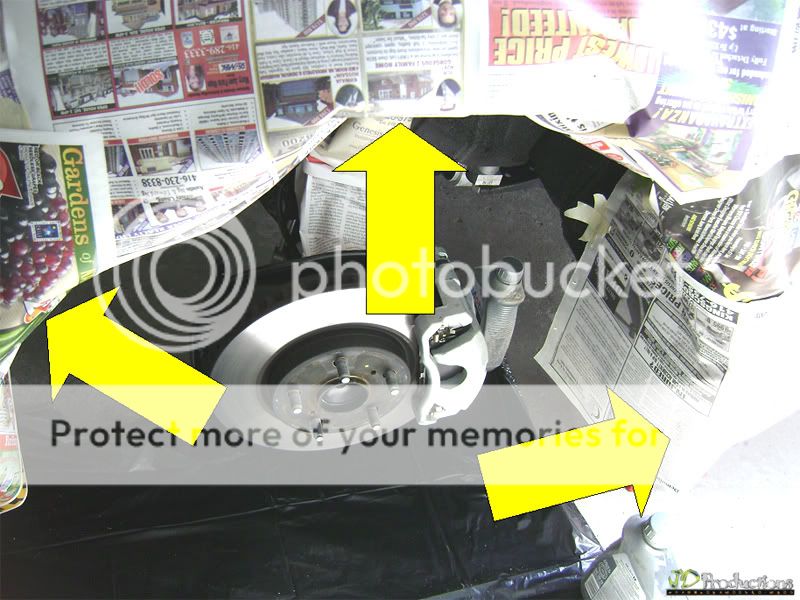
STEP 7: Newspapers & Plastic Bags
Place Newspaper & or Garbage bag on the floor and cover the fender with Newspaper as well (I highly recommend doing this part)
STEP 3: 2-Ton Floor Jack
Go underneath the car and look for the Front Center Jack Point
STEP 4: 2-Ton Jack Stand
Once the Floor Jack is in place; it's time to swap the In-car Jack with the Jack Stand.
STEP 5: Bricks
Locate the Bricks and place them in the Rear Tires/Wheels (considering you're working on the Front Caliper Brakes). This will prevent the car from accidentally rolling.
STEP 6: Wheels
Now fully remove the Lug Nuts from the bolts and remove the Wheels
STEP 7: Newspapers & Plastic Bags
Place Newspaper & or Garbage bag on the floor and cover the fender with Newspaper as well (I highly recommend doing this part)
05-20-09, 07:17 AM
#14
Pole Position
Thread Starter
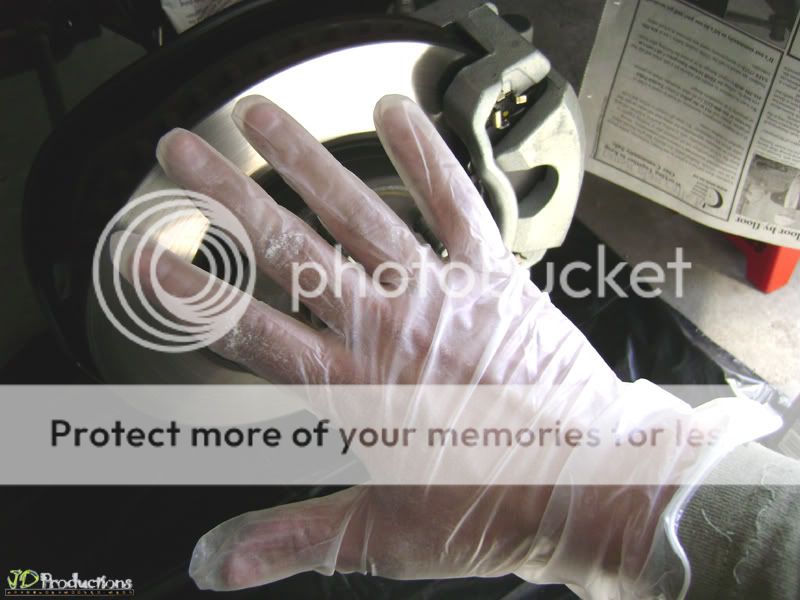
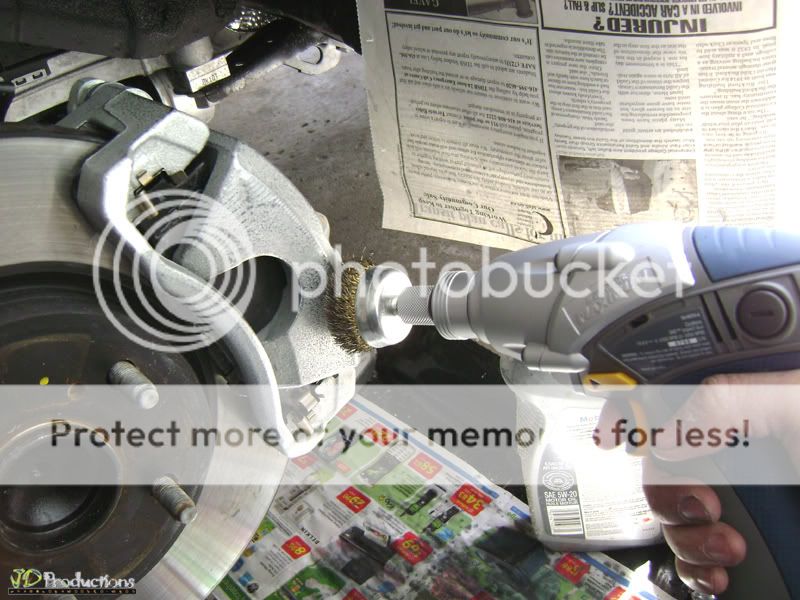
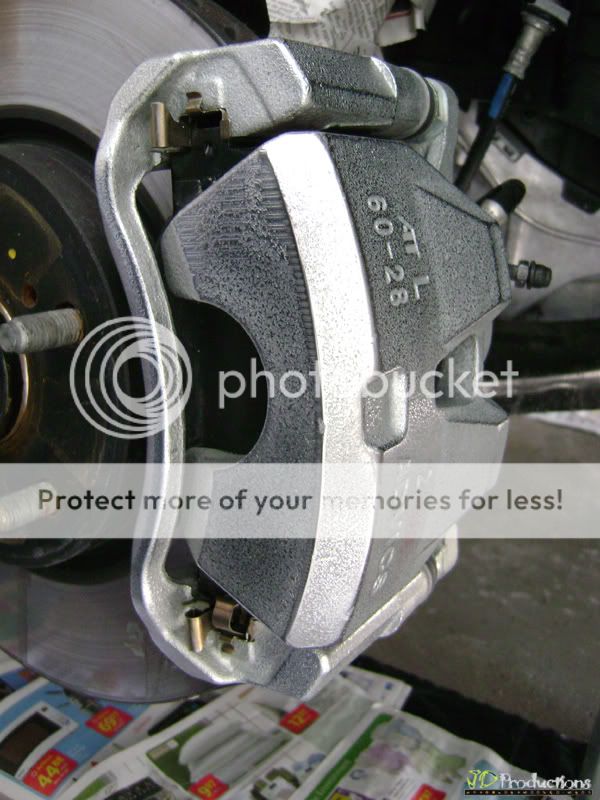
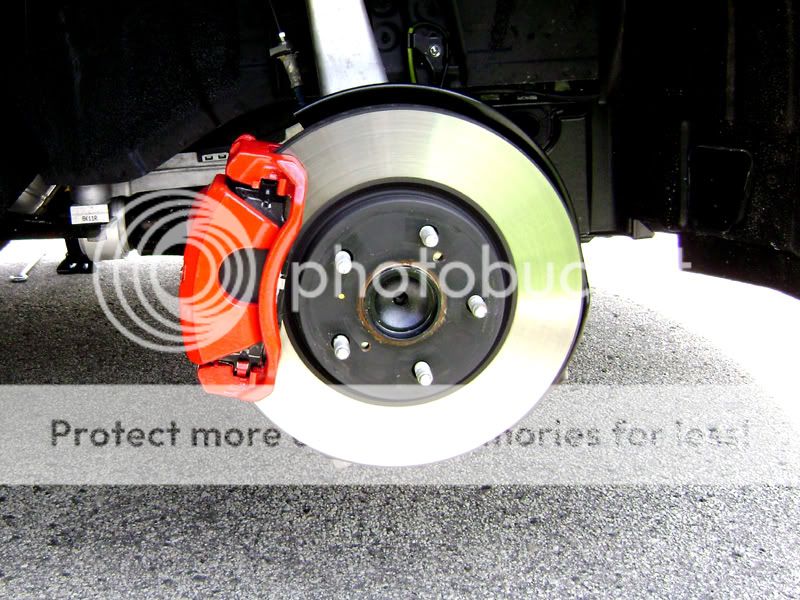
STEP 8: Gloves, Mask & Goggles
Put your Gloves, Work Safety Goggles & Respiratory Mask. Let's start Grinding & Sanding!
I use Mastercraft Cordless Power Drill, 3" Wire Brush & 400 Grit Sandpaper
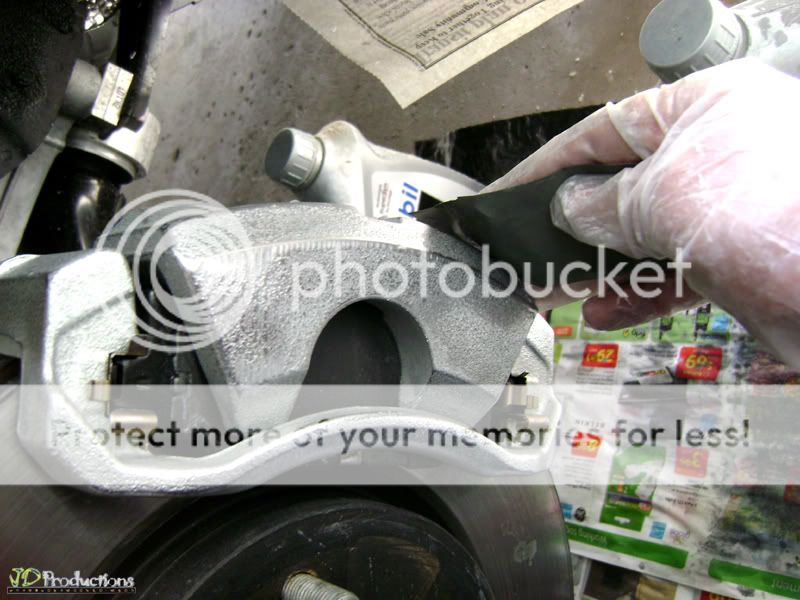
STEP 9: Caliper Brake Cleaner
Once satisfied with the surface from final sanding, spray Caliper Brake Cleaner. Use Old Toothbrush to scrape dirt and wipe with cloth.

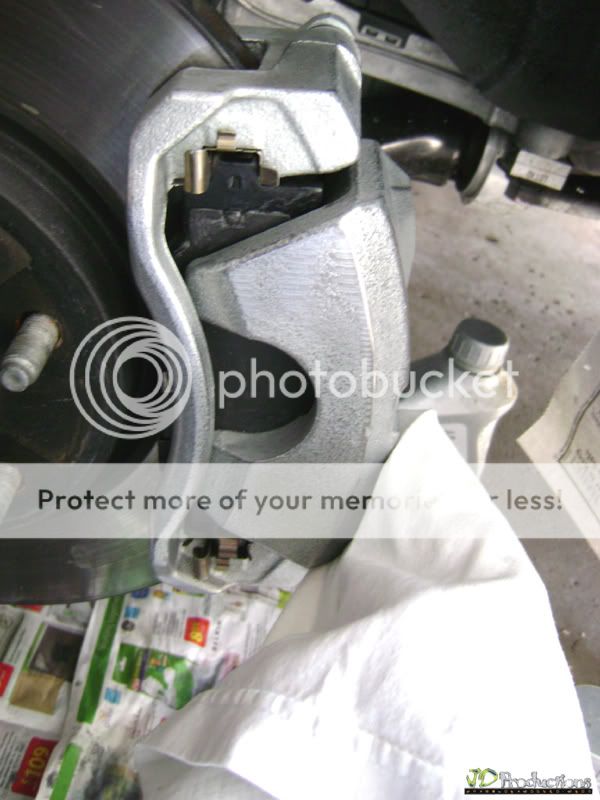
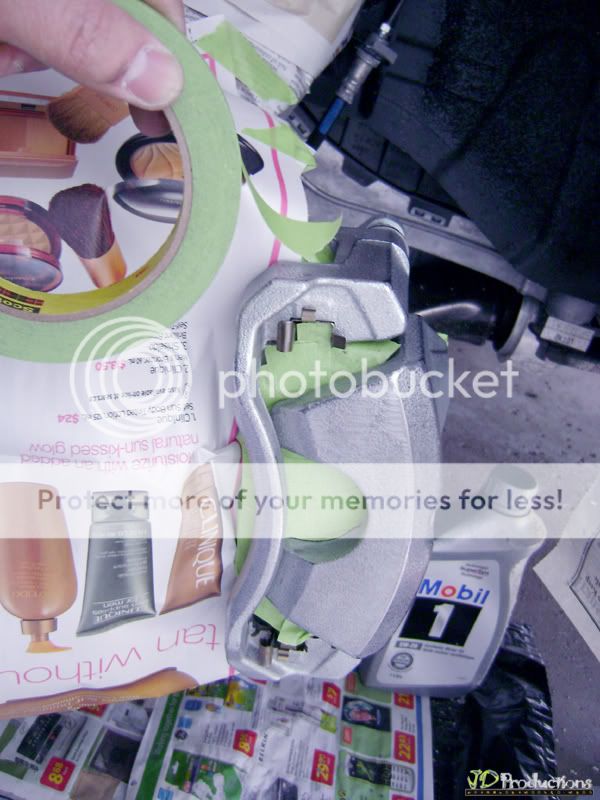
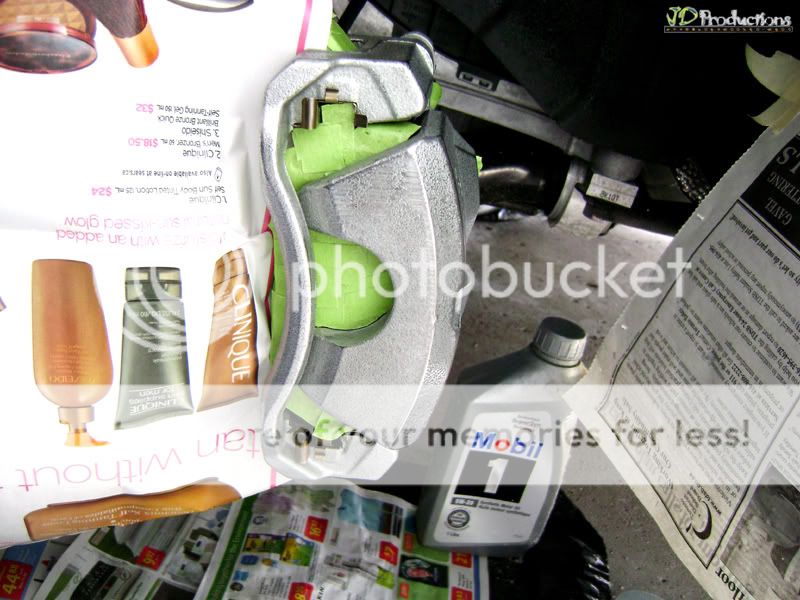
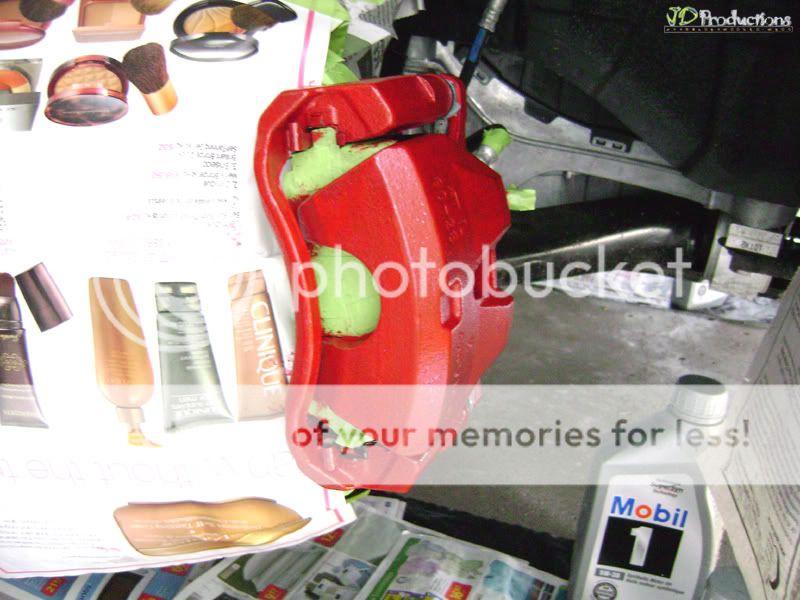
STEP 10: Taping
Now the fun part begins. Tape any parts that you don't want painted or accidentally painted.
Put your Gloves, Work Safety Goggles & Respiratory Mask. Let's start Grinding & Sanding!
I use Mastercraft Cordless Power Drill, 3" Wire Brush & 400 Grit Sandpaper
STEP 9: Caliper Brake Cleaner
Once satisfied with the surface from final sanding, spray Caliper Brake Cleaner. Use Old Toothbrush to scrape dirt and wipe with cloth.
STEP 10: Taping
Now the fun part begins. Tape any parts that you don't want painted or accidentally painted.
05-20-09, 07:18 AM
#15
Pole Position
Thread Starter
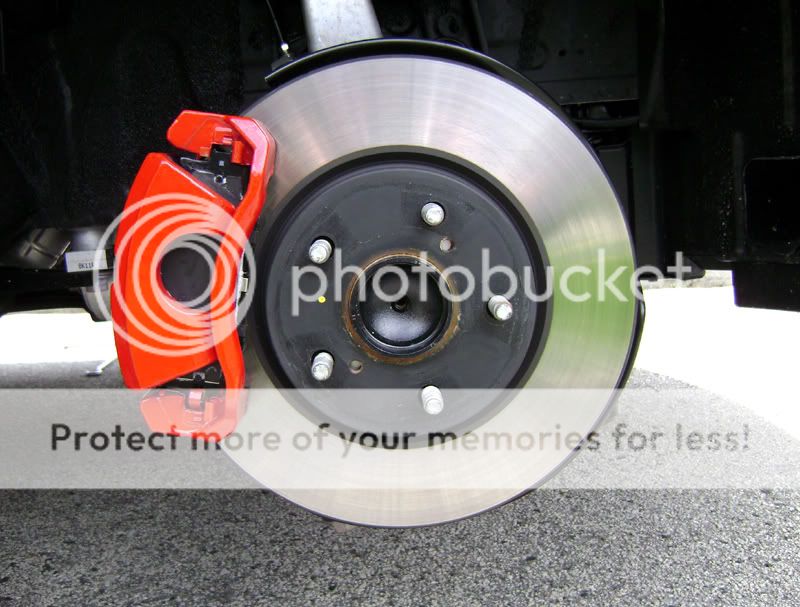
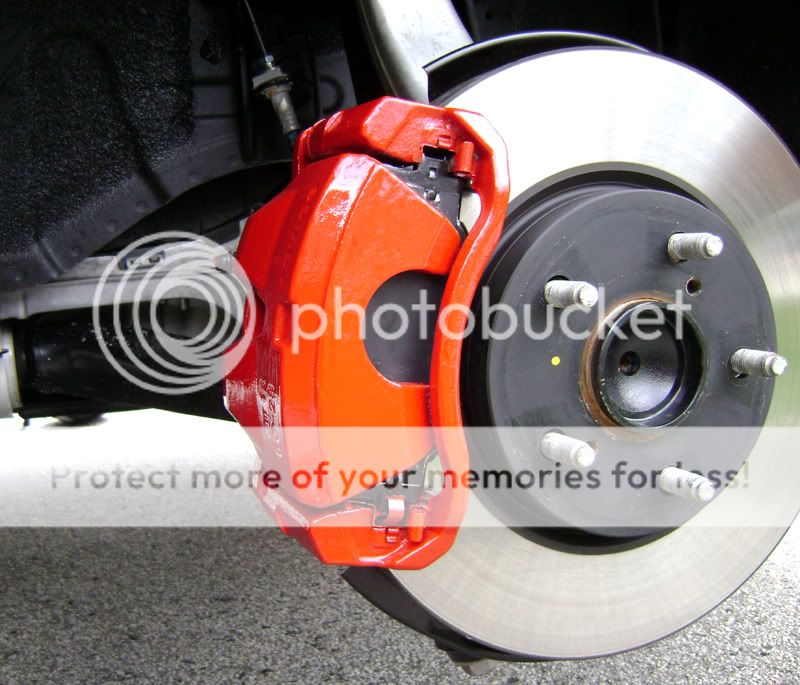
STEP 11: Mixing
Open the can of paint
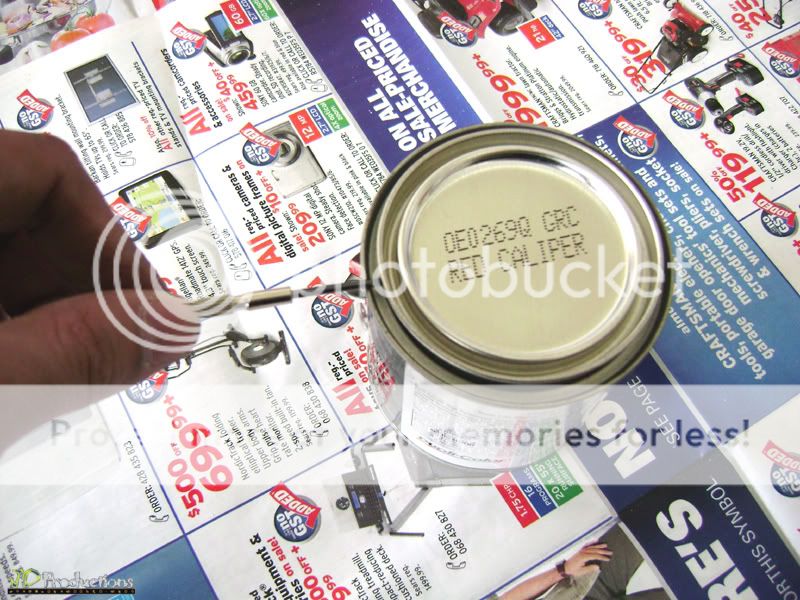
Use the Stir Stick from the Kit. Mix for 1 - 2 minutes. Mix every time you apply coat.
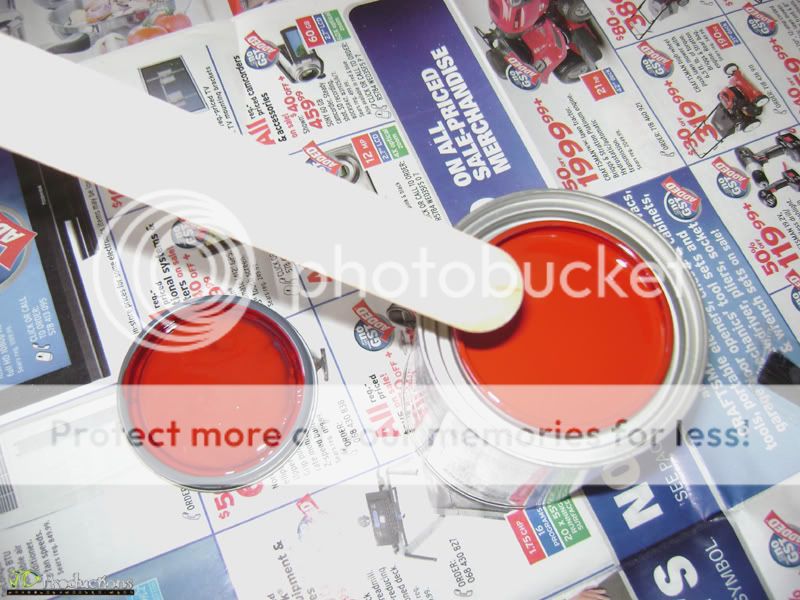
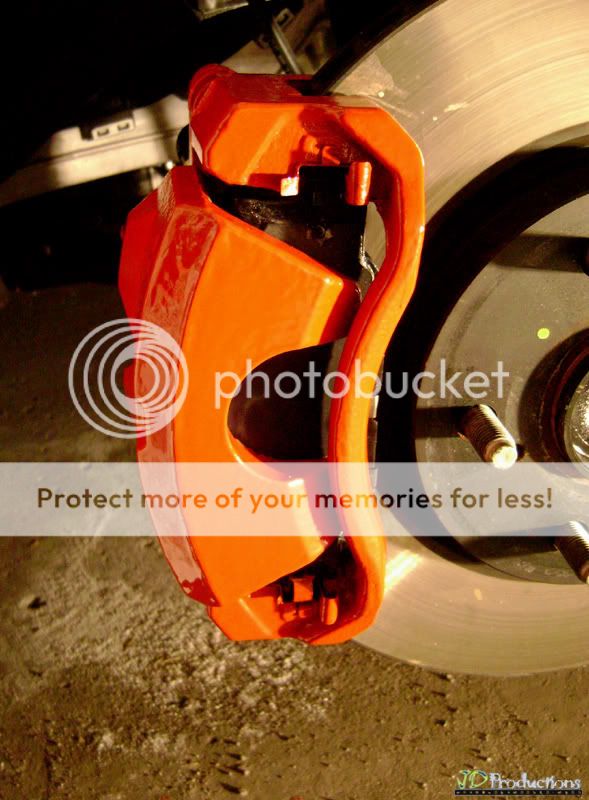
STEP 12: Painting
Apply 1st coat (lightly)
2nd Coat (after 45 minutes)
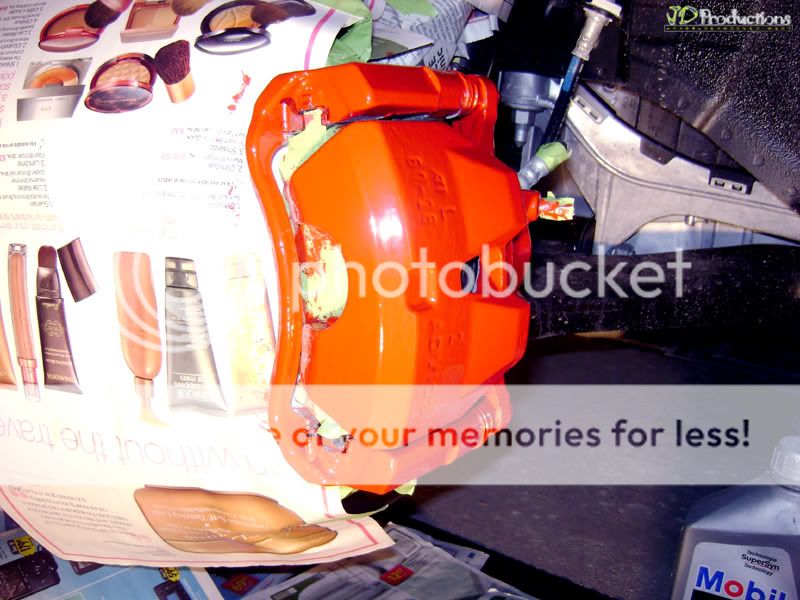
3rd Coat (after 1 hour). I use a total of 4 coats.
Open the can of paint
Use the Stir Stick from the Kit. Mix for 1 - 2 minutes. Mix every time you apply coat.
STEP 12: Painting
Apply 1st coat (lightly)
2nd Coat (after 45 minutes)
3rd Coat (after 1 hour). I use a total of 4 coats.