My indecisive 98 SC300 build

 12-04-16, 09:47 AM
#47
Awesome updates! If I ever get my cars exterior to where I want it and painted again, definitely going to do a paint coating. A previous customer of mine had Modesta done, the car looked perfect all the time and water rolled right off. Great pics of the shock shaft disassembly, cool to see that broken down. Id love to see the car sometime, I just got transferred to HB for work drive on Beach daily.
We can meet up once the car is mobile again. I'm always down to check out other modified SCs. If you ever see my car on Beach Blvd, then I'm probably heading to a car dealership to pick up parts. lol
There is a seal inside of the shock that goes around the shaft that usually goes bad. I wish I had the right tools to take the shocks a part to explain it, but these pictures I found online will have to do. The seals that go bad is yellow in both of these pictures.

There is a collar that goes above the holes in the shaft and moves freely up and down to create a seal. There is an external seal that touches the inside of the shock body, and an internal seal that touches the shaft. The internal seal is used to keep the shaft clean and performing optimally. If there is any pitting on the shaft it'll wear out this seal faster. Part of the rebuild process involves inspecting and measuring the shaft for any damage. If there is damage, then it has to be polished until the shaft is perfectly smooth. In my case, I'm replacing all the shafts with brand new ones.

The compression disks, piston, rebound disks, and nut go on the outside of parts 1-4 in my previous post. When revalving a shock the disk (washers) are changed. The valving is usually unique to each shock brand. If you're interested in revalving information Kene did a great write up here: https://www.clublexus.com/forums/gs-...rts-1-3-a.html
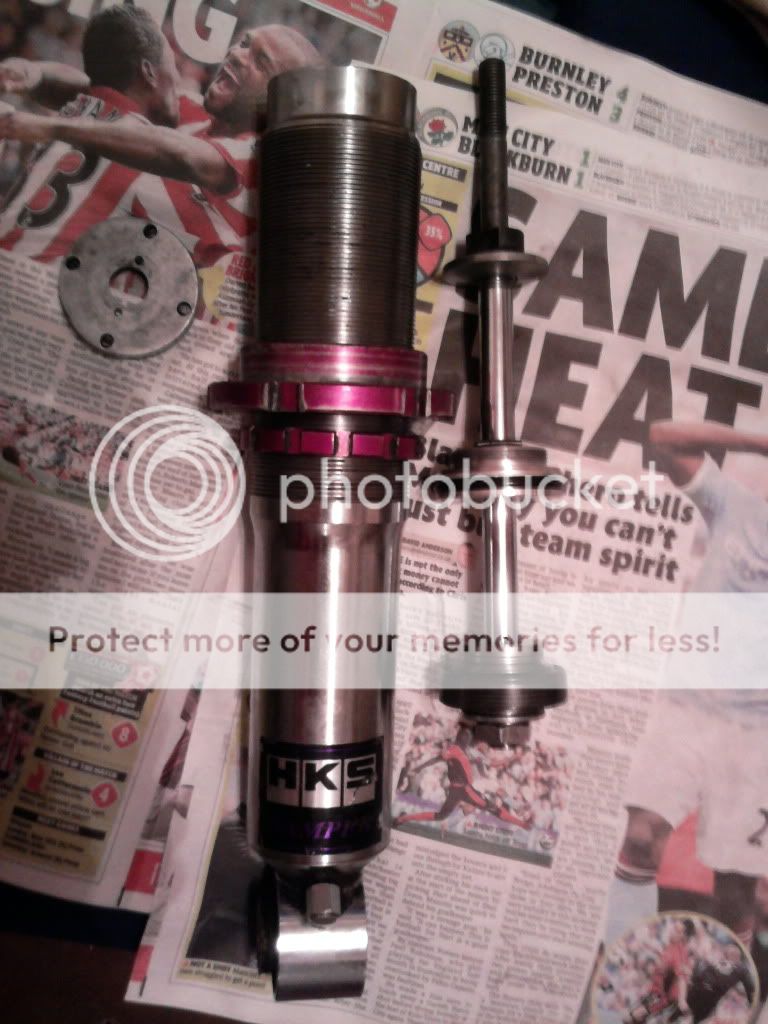
Here is a picture I found online of a HKS coil taken a part. The seals on the center piece are usually what have to be replaced.
12-04-16, 06:20 PM
#48
I finally got around to applying Gtechniq CSL and EXO. I regret not trying paint coatings even sooner.
My process is:
1. Wash with optimum no rinse (my car only had light dust on it)
2. Clay using riccardo yellow clay with gyeon clay lube
3. Polished the paint with meguiars M205 combined with lake country 4" foam pads or buff and shine 5.5" MF pads
4. clean off polish residue with carpro eraser
5. Applied Gtechniq CSL (this was a lot easier than i thought it would be)
6. Wiped off each panel about 4 minutes after applying
7. Applied Gtechniq EXO in the same order as CSL
I only took photos during polishing. The car has to stay indoors for 12 hours for the Gtechniq to fully cure. I won't be able to see the car outside for another week or two until my coils come back. I really hope I didn't miss a spot because that would really suck...

I never knew a car could be this smooth.
My process is:
1. Wash with optimum no rinse (my car only had light dust on it)
2. Clay using riccardo yellow clay with gyeon clay lube
3. Polished the paint with meguiars M205 combined with lake country 4" foam pads or buff and shine 5.5" MF pads
4. clean off polish residue with carpro eraser
5. Applied Gtechniq CSL (this was a lot easier than i thought it would be)
6. Wiped off each panel about 4 minutes after applying
7. Applied Gtechniq EXO in the same order as CSL
I only took photos during polishing. The car has to stay indoors for 12 hours for the Gtechniq to fully cure. I won't be able to see the car outside for another week or two until my coils come back. I really hope I didn't miss a spot because that would really suck...
I never knew a car could be this smooth.
Last edited by Blkexcoupe; 01-18-20 at 11:41 PM.
The following users liked this post:
TitanG545 (07-07-20)
12-07-16, 09:40 AM
#49
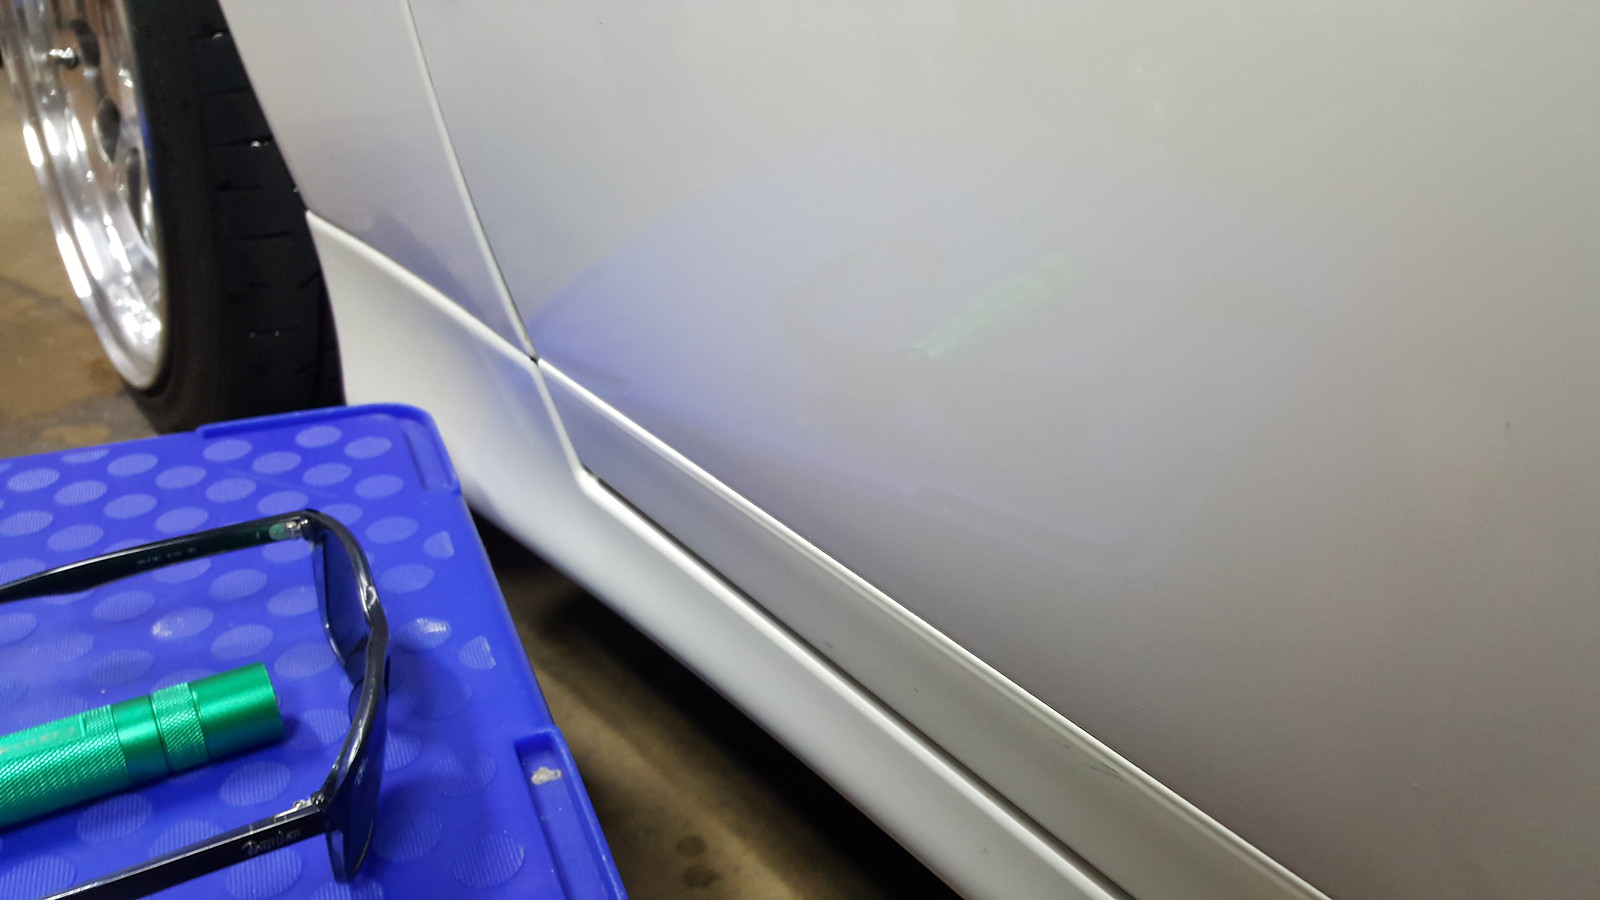
I took a spray bottle with distilled water and sprayed parts of my car to test the coating. If I were to spray more water than what was in the picture, then it just creates larger beads and drip off of the car.

I also coated my rim

I'm not sure if I needed to clean the rim more thoroughly, but its too late.


I also coated my rim
I'm not sure if I needed to clean the rim more thoroughly, but its too late.
Last edited by Blkexcoupe; 01-18-20 at 11:44 PM.
12-21-16, 03:05 PM
#51
Today is like christmas. I came home to a bunch of packages. My rear coilovers are finally back.
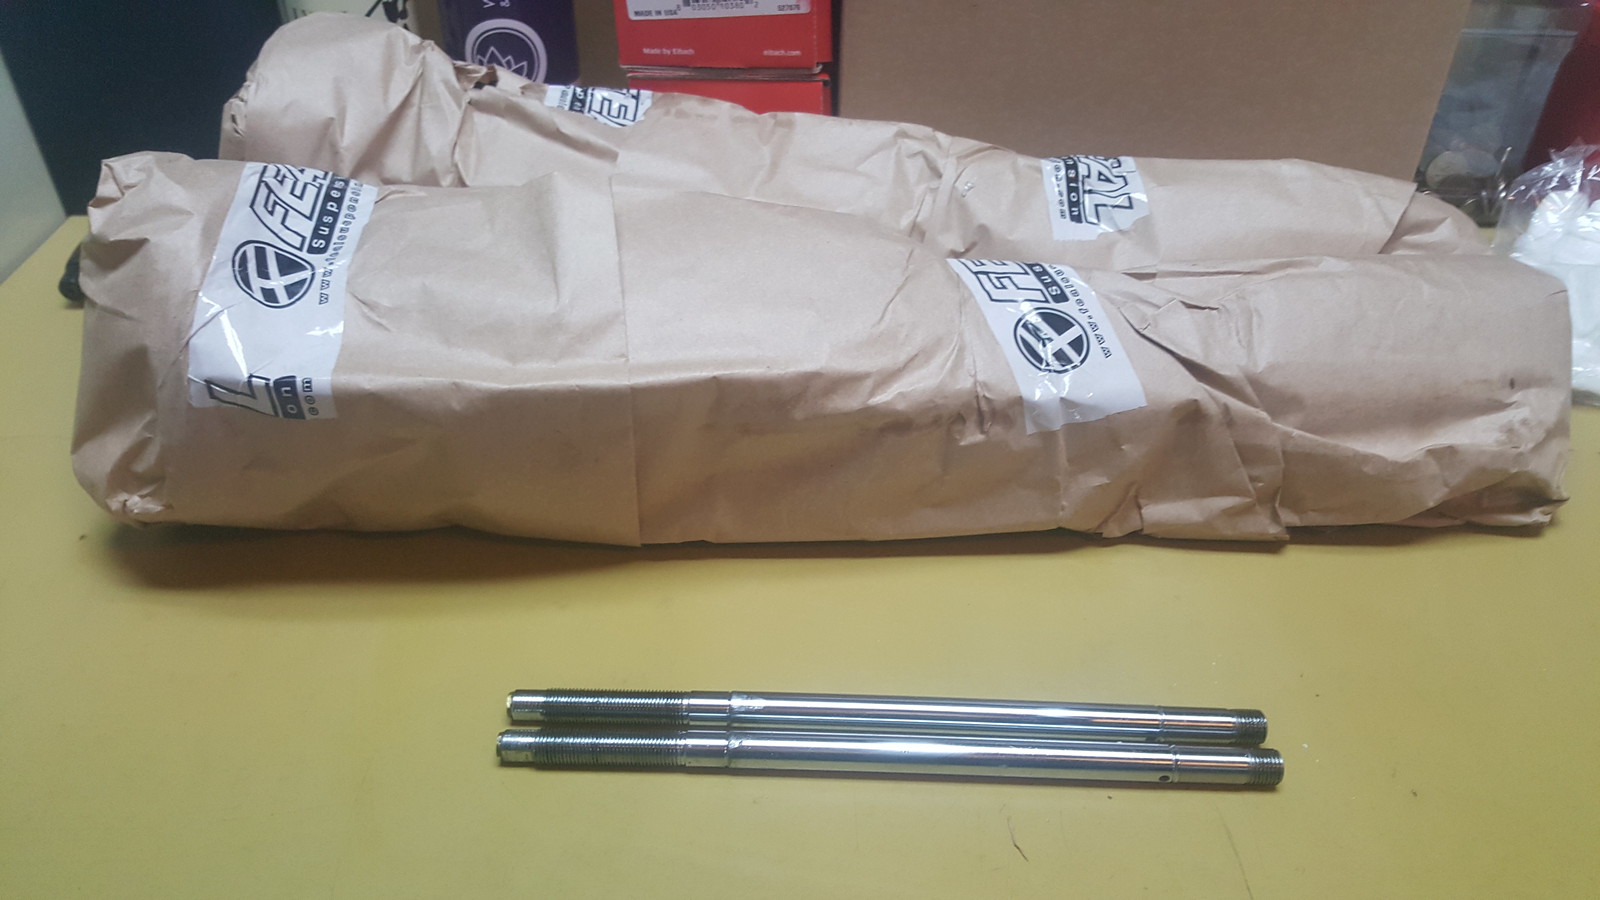

The rear shafts weren't scarred nearly as much, but the washers on them had slipped too.

I'm going to try to install them tonight. Hopefully get the ride height dialed in and take it in for an alignment this weekend once the rain stops.
Here is a video of me spraying the car with water and blow drying it.
The rear shafts weren't scarred nearly as much, but the washers on them had slipped too.
I'm going to try to install them tonight. Hopefully get the ride height dialed in and take it in for an alignment this weekend once the rain stops.
Here is a video of me spraying the car with water and blow drying it.
Last edited by Blkexcoupe; 01-18-20 at 11:45 PM.
01-06-17, 05:23 PM
#52
After installing the new shocks. I still have a knocking sound on the rear driver side. I suspected it was the rear LCA ball joint because I had accidentally stabbed it a few months prior and ripped the boot. I bought some used LCA from another member with the plans to refurbish them (stripped down, repaint, new bushings, and new boots. After working on the car today, I noticed the old ball joints don't have any play. My car has daizen rear bushings installed except for the knuckle and UCA. I didn't have access to the proper tools at the time to install them. From what I understand the UCA bushings have a directional sleeve that need to be pressed out, so that makes them harder to remove.
I went to go visit a friend to see what spare parts he had left over from his 5spd manual sc400. I was hoping he had some spare UCA, but he didn't. He doesn't post on here too often, but hopefully he will once the car sees more wrench time.


I washed my car to put it back into the garage until I can figure out what is broken.


I went to go visit a friend to see what spare parts he had left over from his 5spd manual sc400. I was hoping he had some spare UCA, but he didn't. He doesn't post on here too often, but hopefully he will once the car sees more wrench time.
I washed my car to put it back into the garage until I can figure out what is broken.
Last edited by Blkexcoupe; 03-28-20 at 09:48 AM.
The following users liked this post:
TitanG545 (07-07-20)
01-08-17, 09:06 PM
#53
The rear uppers do have a directional sleeve in them, referenced here: http://www.organizedgaragestatus.com...xus-SC300SC400
When I did my suspension install, my rear UCAs still looked ok and bushings intact. How many miles are on yours? Ideally Figs arms would be nice all around, but they are a pretty penny. http://shopfigs.com/v3/SUPSC-RUCE-V1
Thats 714 tires right? Ive seen that red car on instagram before...
When I did my suspension install, my rear UCAs still looked ok and bushings intact. How many miles are on yours? Ideally Figs arms would be nice all around, but they are a pretty penny. http://shopfigs.com/v3/SUPSC-RUCE-V1
Thats 714 tires right? Ive seen that red car on instagram before...
01-08-17, 10:43 PM
#54
The rear uppers do have a directional sleeve in them, referenced here: http://www.organizedgaragestatus.com...xus-SC300SC400
When I did my suspension install, my rear UCAs still looked ok and bushings intact. How many miles are on yours? Ideally Figs arms would be nice all around, but they are a pretty penny. http://shopfigs.com/v3/SUPSC-RUCE-V1
Thats 714 tires right? Ive seen that red car on instagram before...
When I did my suspension install, my rear UCAs still looked ok and bushings intact. How many miles are on yours? Ideally Figs arms would be nice all around, but they are a pretty penny. http://shopfigs.com/v3/SUPSC-RUCE-V1
Thats 714 tires right? Ive seen that red car on instagram before...
My car has about 187k miles. I think it would have been fine if my car wasn't bagged before. I was on air for 4 to 5k miles over a 1.5 to 2 year span. Constantly airing up and down puts a lot of strain on the bushings and ball joints. I knew it was a risk that I was taking when I bagged the car, so I'm not too surprised all of this happened. It just sucks for my bank account.
I've been debating for the past 2 months if I I had to replace all the arms on the car would I go figs engineering or all brand new OEM arms. The price difference between oem vs figs is $100 or $200, but the entire project would cost about $3-4k. I was talking with some of my friends, one has a SC sponsored by battle version and another who has a complete PBM 4GS. They both told me that I would hate having a completely adjustable rear end because it's super loud and sounds like a can of marbles when they drive on the street. The figs arms seem to be more thought out and built better than BV and PBM, but I don't have any first hand knowledge with the figs parts. I'm planning to convert the car to manual and go na-t in 2018 (after I smog the car), so I want to choose the suspension setup that would benefit me the most in the long run, but my friends have been trying to convince me to buy a new project and leave the SC as is to enjoy.
Yes, that picture was taken at 714 tires. My friend stores his car there. If you've been there in the last couple of months, then you've probably seen this SC or a liberty walk gtr parked outside of their shop during the day. The car belongs to my friend Minh of Royal Origin, so I'm not that surprised you've seen it on IG. He doesn't post on the forums as much as he uses other forms of social media. I'm very excited to see him finally giving this car the attention it deserves. It's basically the child of my white SC and that black vertex SC on the previous page. It'll have parts from both of those cars.
01-11-17, 09:14 AM
#55
I took delivery of this car exactly 9 years ago today. 
I picked up some lightly used Snap on bearing puller/drivers to press out the bushings. I'm still deciding if I want to have receiving cups cnc machined for future uses (Although I probably won't need them ever again... lol)

For anyone that is interested the diameter of the bushings are as follows:
Rear UCA x 4 = 1.78" or 45.212mm
Rear LCA (subframe) x 2 = 1.5" or 38.1mm
Shock mount x2 =
Toe link x 2 = 1.57" or 39.878mm
Traction/strut link x 2 = 1.82" or 34.29mm
Spindle/knuckle bushing x 2 = 1.35" or 34.29mm
Front UCA x4 = 1.72" or 43.69mm
I picked up some lightly used Snap on bearing puller/drivers to press out the bushings. I'm still deciding if I want to have receiving cups cnc machined for future uses (Although I probably won't need them ever again... lol)
For anyone that is interested the diameter of the bushings are as follows:
Rear UCA x 4 = 1.78" or 45.212mm
Rear LCA (subframe) x 2 = 1.5" or 38.1mm
Shock mount x2 =
Toe link x 2 = 1.57" or 39.878mm
Traction/strut link x 2 = 1.82" or 34.29mm
Spindle/knuckle bushing x 2 = 1.35" or 34.29mm
Front UCA x4 = 1.72" or 43.69mm
Last edited by Blkexcoupe; 03-28-20 at 09:54 AM.
02-10-17, 03:24 PM
#56
After being informed that the 97-00 tails are discontinued and out of stock for dealers, I rushed out to buy a set to keep as spares just in case my lights ever break.

 [/url]
Old on top and new on the bottom

[/url]Old on top and new on the bottom
Last edited by Blkexcoupe; 03-28-20 at 09:59 AM.
The following users liked this post:
TitanG545 (07-07-20)
02-10-17, 03:32 PM
#57
Moderator
Just read through the thread and I have to say... very nice work. I love how the car looks!
02-11-17, 09:21 AM
#58
My continued search for these mystery noises has led me to think its the spherical bearing inside of my top hats. It looks like I can only buy them from Japan or Europe, and they're quite pricey after the exchange rate and shipping. 
I've checked every bolt to make sure its tight, but I decided I'm going to torque every bolt to oem spec. I printed out the following diagrams, so I can mark it off as I torque the bolts. Hopefully it'll be useful for someone else.


Thank you!
I've checked every bolt to make sure its tight, but I decided I'm going to torque every bolt to oem spec. I printed out the following diagrams, so I can mark it off as I torque the bolts. Hopefully it'll be useful for someone else.
Thank you!
Last edited by Blkexcoupe; 07-31-17 at 03:45 PM.
02-26-17, 08:17 AM
#59
Cleaned up seats and the rest of the leather in the car. I need to find a new center console lid with good condition leather.

I bought a 3 spoke steering wheel from Jimmymac and an airbag adapter harness on ebay. I need to get quotes to see how much reupholstering the wheel will cost before I install it.

I bought a 3 spoke steering wheel from Jimmymac and an airbag adapter harness on ebay. I need to get quotes to see how much reupholstering the wheel will cost before I install it.
Last edited by Blkexcoupe; 03-28-20 at 10:00 AM.
03-13-17, 10:28 PM
#60
My search for a spherical bearing has taken way too long now. Just in case any Hipermax II owners come across this in the future, all of it is documented here: https://www.clublexus.com/forums/sus...placement.html
I bought some Tein Street Basis coilovers over the weekend. I got them for a price I couldn't say no to. The coilover uses a design similar to ground control or the more common gixxer drew setup. It has a shock + a sleeve with collars + a spring.

Out of curiosity I decided to pull my air suspension out of the boxes to see if it would fit. UAS air bags require a 2.14" (54mm) or smaller diameter to work.

The shock body (Green part) measured roughly 51mm while the threaded portion (black) measured 55 to 56mm which would normally make the UAS bags incompatible.
The basis shocks have a removable sleeve that can be cut down to fit, so that combined with the design of my airbag bracket allowed me to mount the bag like this. The setup seems like it'll work, but there are a few limitations.
1. Once aired up the car will always be stock height
2. The fact that the bag is mounted so high up the bag might not be able to reach an optimal PSI.
To get around the limitations the threaded portion could be cut shorter to allow the bag to sit lower or request short bags from UAS.
I bought some Tein Street Basis coilovers over the weekend. I got them for a price I couldn't say no to. The coilover uses a design similar to ground control or the more common gixxer drew setup. It has a shock + a sleeve with collars + a spring.
Out of curiosity I decided to pull my air suspension out of the boxes to see if it would fit. UAS air bags require a 2.14" (54mm) or smaller diameter to work.
The shock body (Green part) measured roughly 51mm while the threaded portion (black) measured 55 to 56mm which would normally make the UAS bags incompatible.
The basis shocks have a removable sleeve that can be cut down to fit, so that combined with the design of my airbag bracket allowed me to mount the bag like this. The setup seems like it'll work, but there are a few limitations.
1. Once aired up the car will always be stock height
2. The fact that the bag is mounted so high up the bag might not be able to reach an optimal PSI.
To get around the limitations the threaded portion could be cut shorter to allow the bag to sit lower or request short bags from UAS.
Last edited by Blkexcoupe; 03-28-20 at 10:04 AM.