My build thread from across the pond!
 07-09-15, 07:39 AM
#1
Hey Guys,
So finally decided it's about time I take the plunge and set up a build thread.
Been posting individual threads in the normal forum for a while now, but with no end to my mods in sight, I thought it was about time I did things properly!
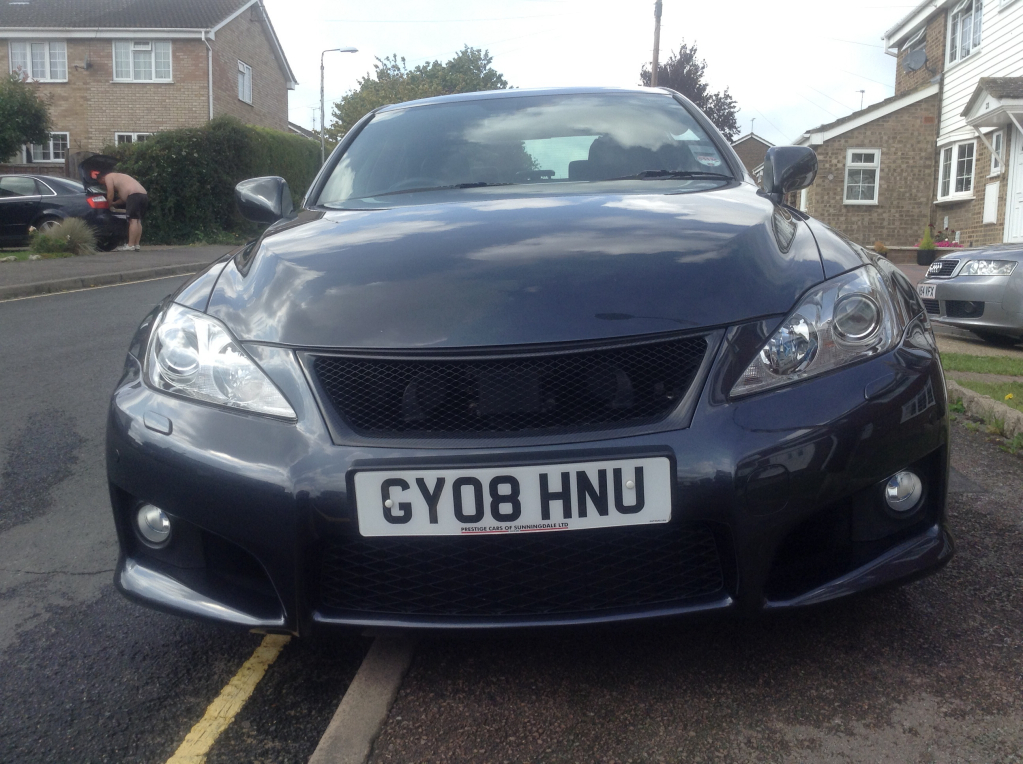
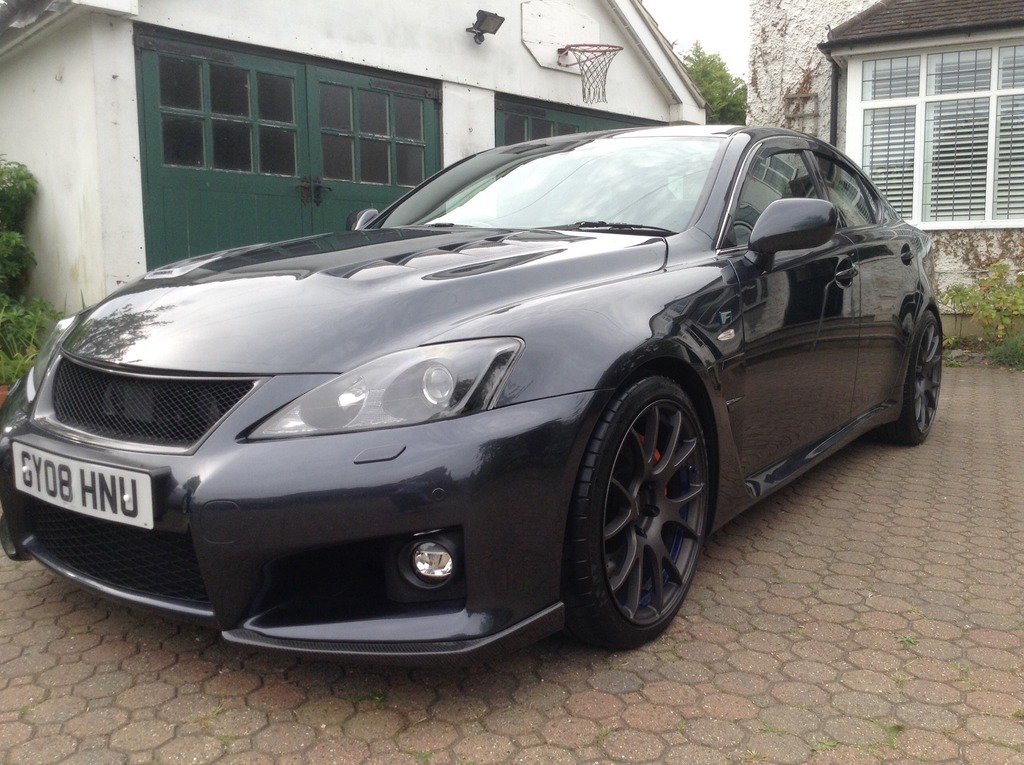
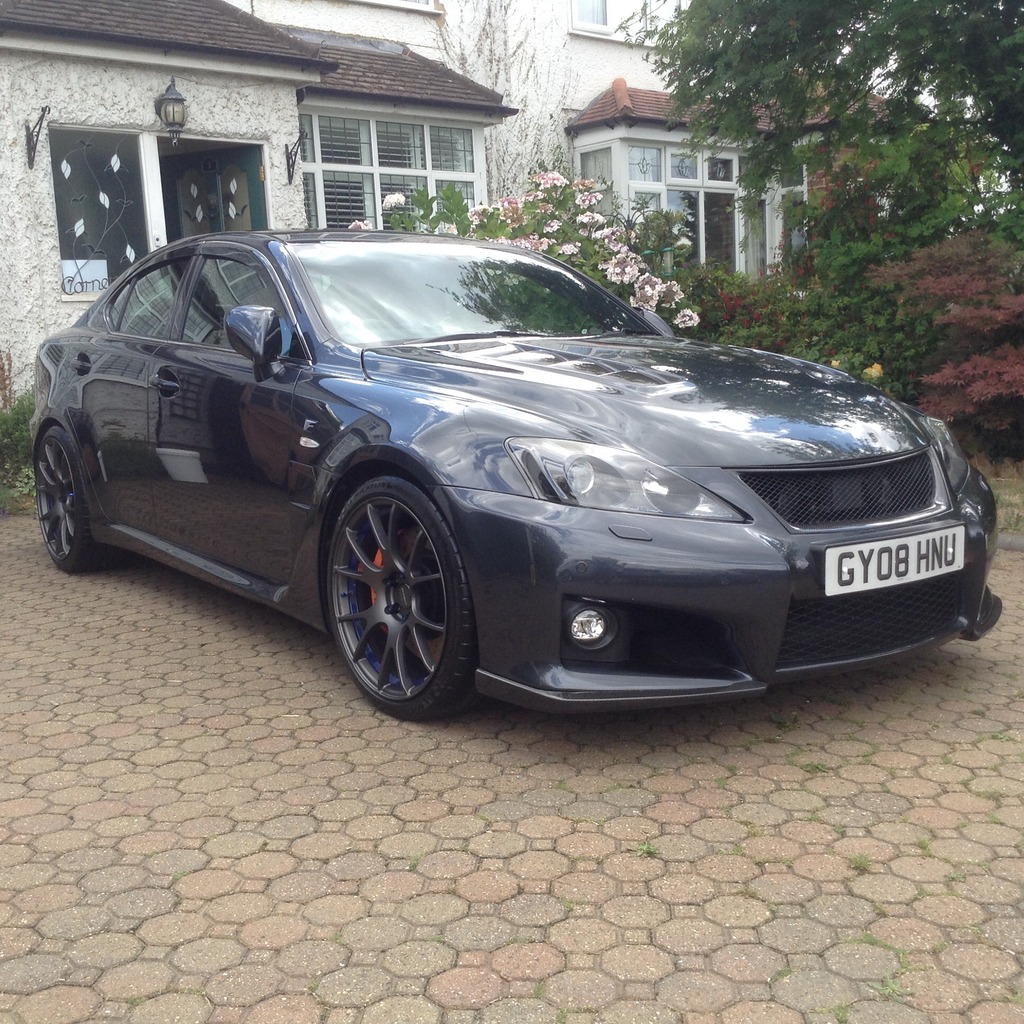
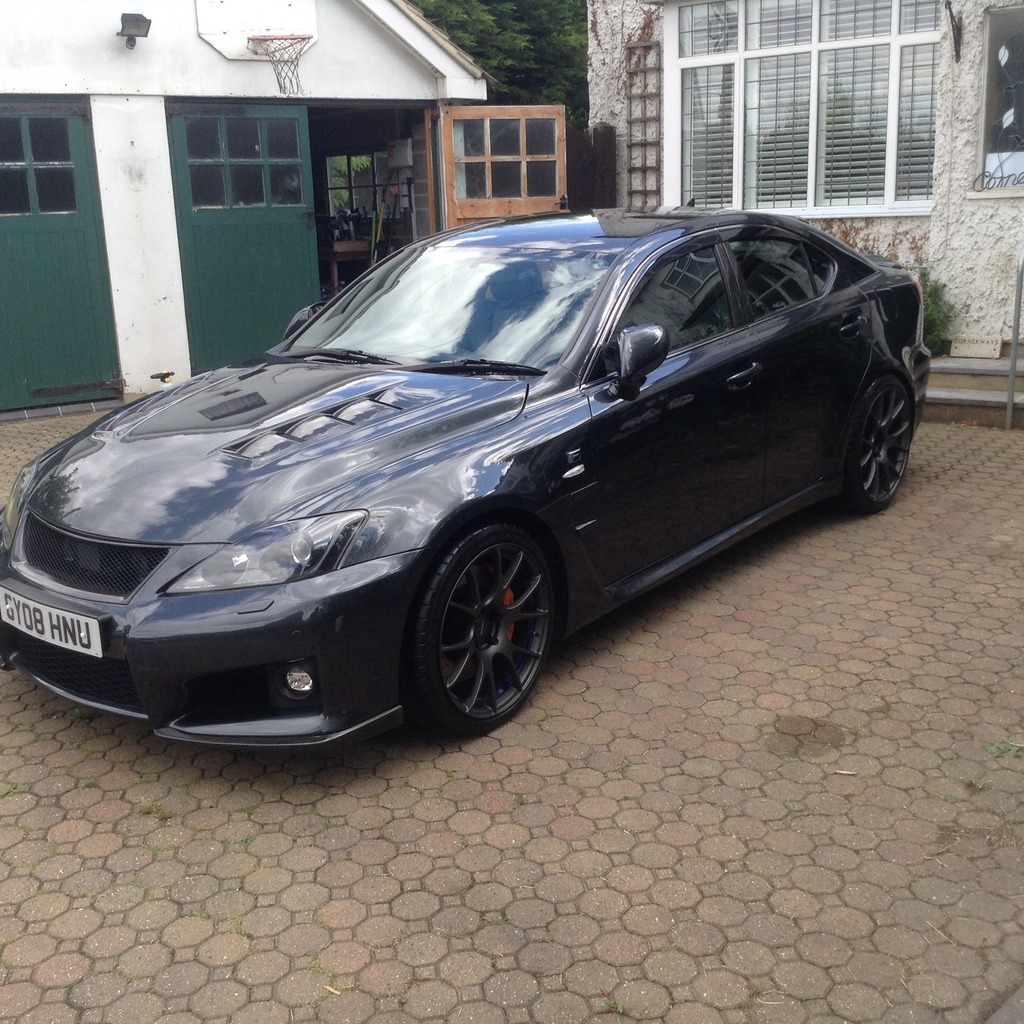
So, my car is a UK spec 08 model in SGM. Apart from the steering wheel being on the wrong side of the car (or so you guys like to think! Lol), there are a few subtle differences like the side indicators we get on our front wings/fenders.
There are only 200 or so IS-F's in the whole of the UK, so seeing another one on the road is even rarer here than it is over the pond.
Mine is probably the most modified F in the UK, if not Europe.
Still got plenty to do before I can run with some of you guys though!
So, enough talking, here's some photo's!
This was shortly after I got it home for the first time. Note the OEM wheels were on the wrong way around!
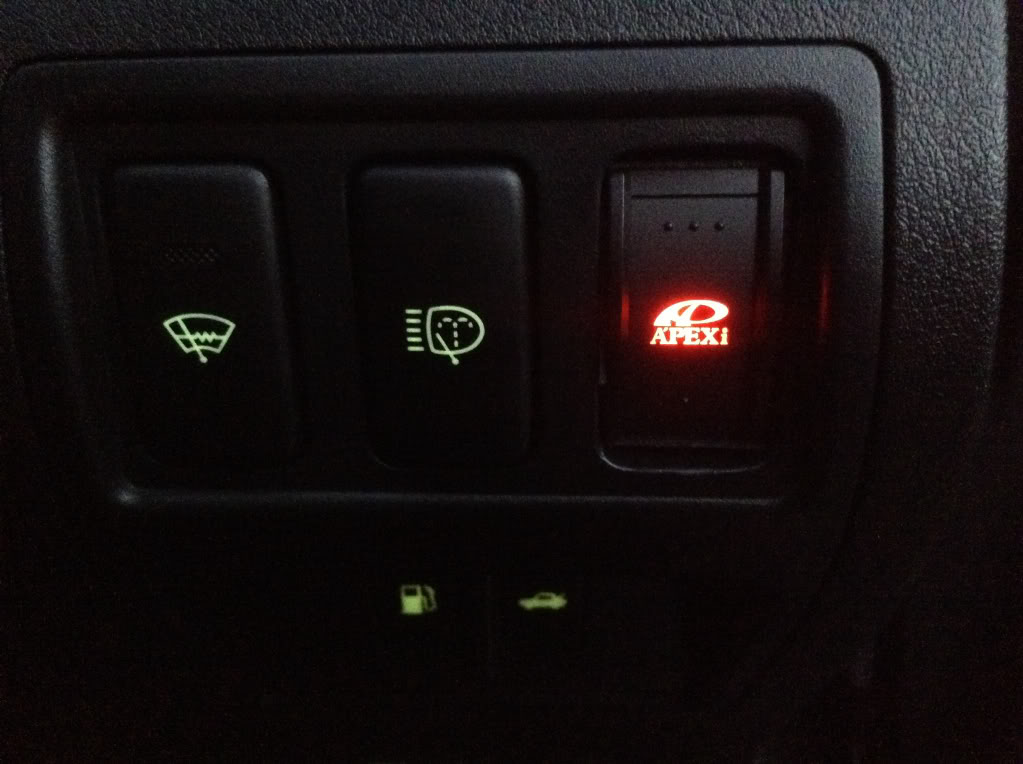
I had already bought my first mod before I even owned the car! Lol. A good price with Black Friday sales meant I bought the Apexi Throttle controller with the F specific harness (a must!).
It installs so neatly in one of the blank slots by the steering wheel as these photos show:
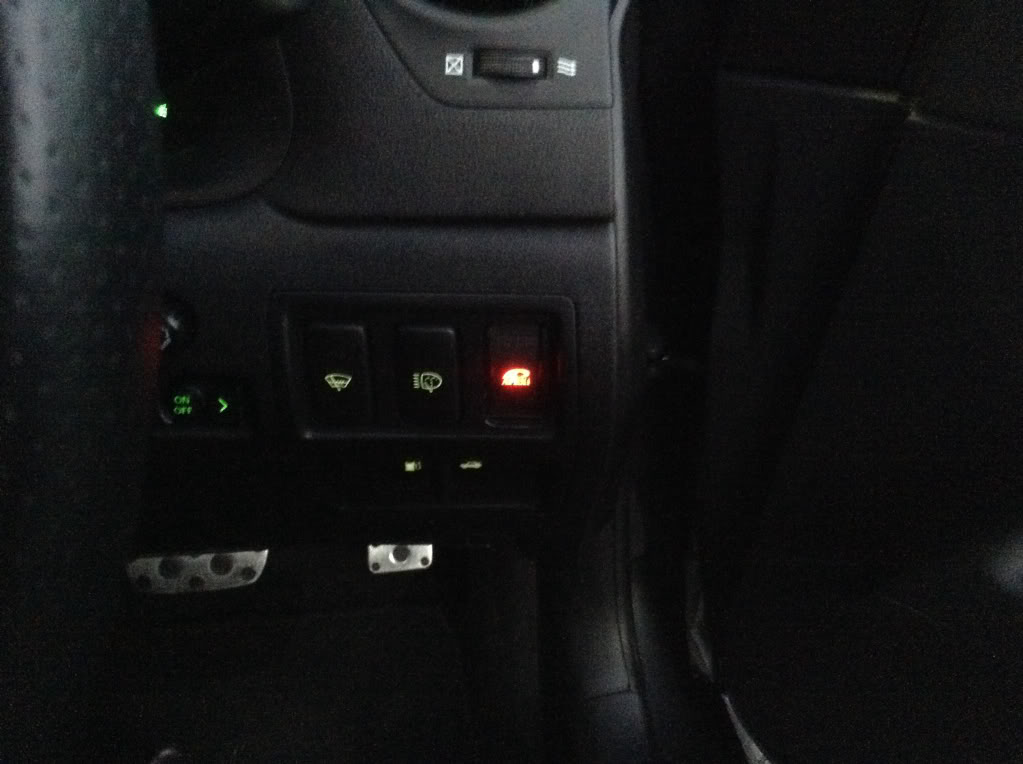
Next up was a full interior LED kit along with the uprated puddle lights for the wing mirrors (did I mention UK models have electrically folding mirrors as standard!):
(not the easiest thing to photograph! sorry for the poor quality!)
Next up I added the rear bumper LED's that replace the OEM reflectors. These work as additional brake lights, and are wired to be lit when the lights are on as well. Have to be one of my favourite mods for the money.
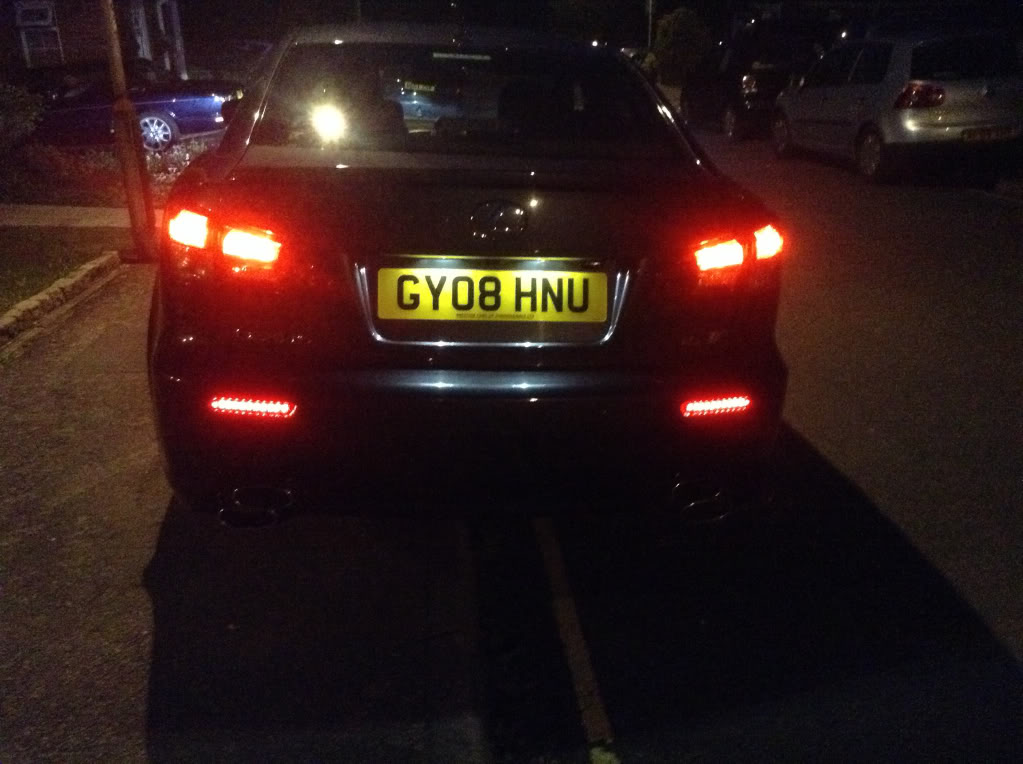
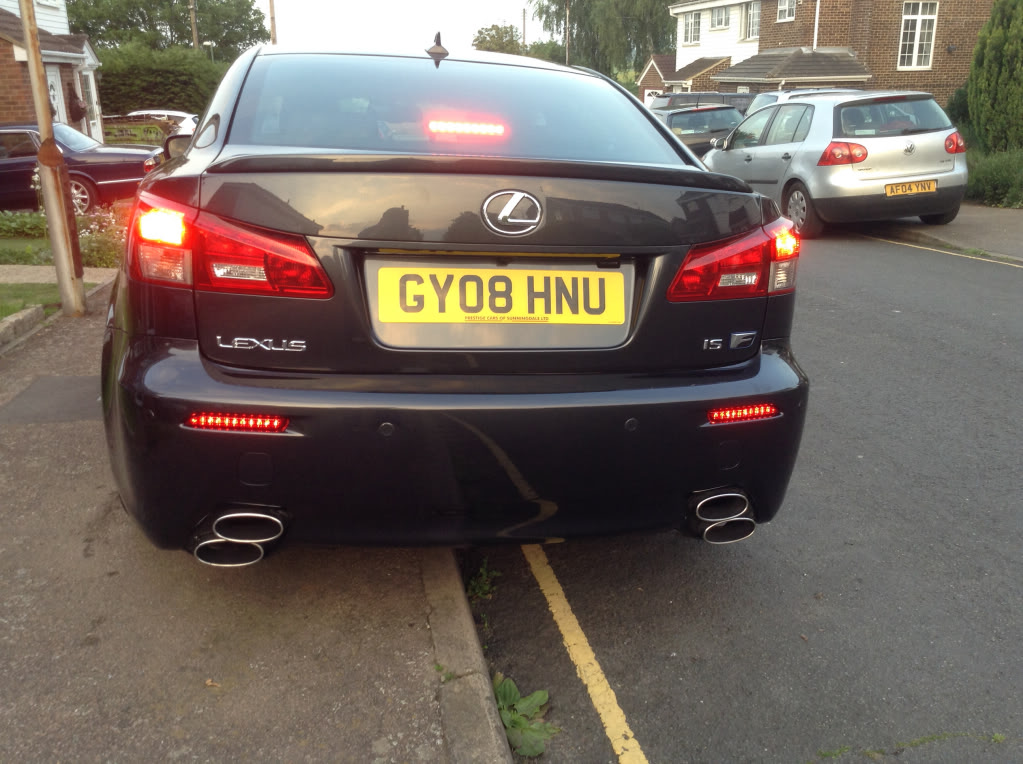
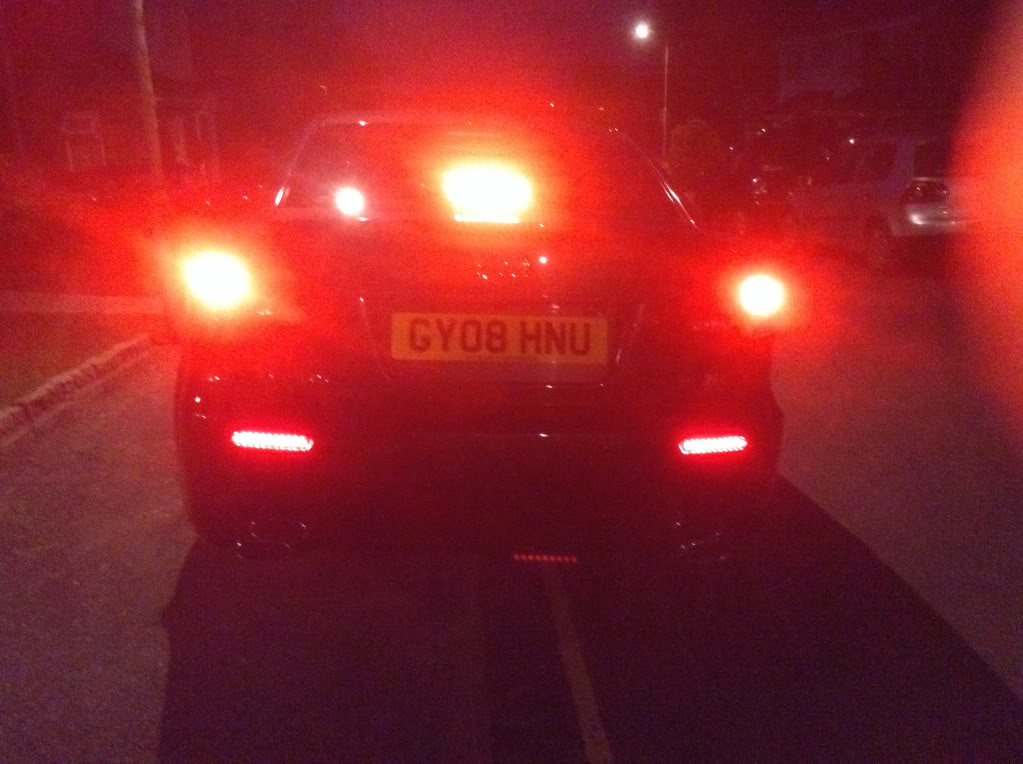
No excuses for not seeing when I brake at night! Lol.
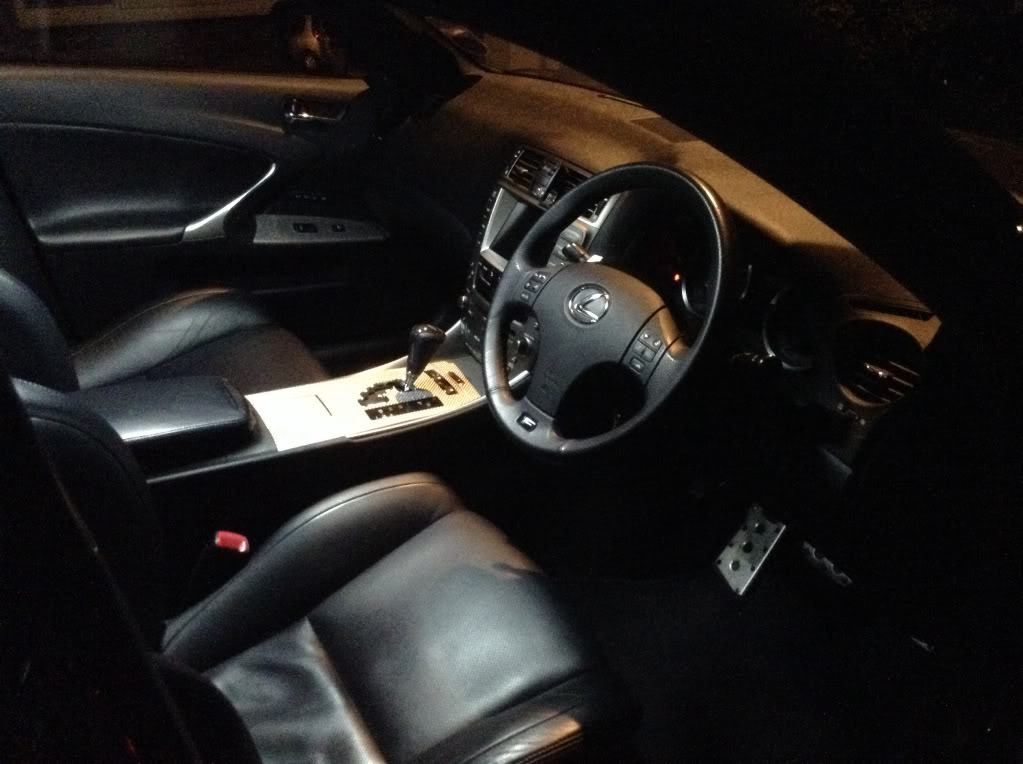
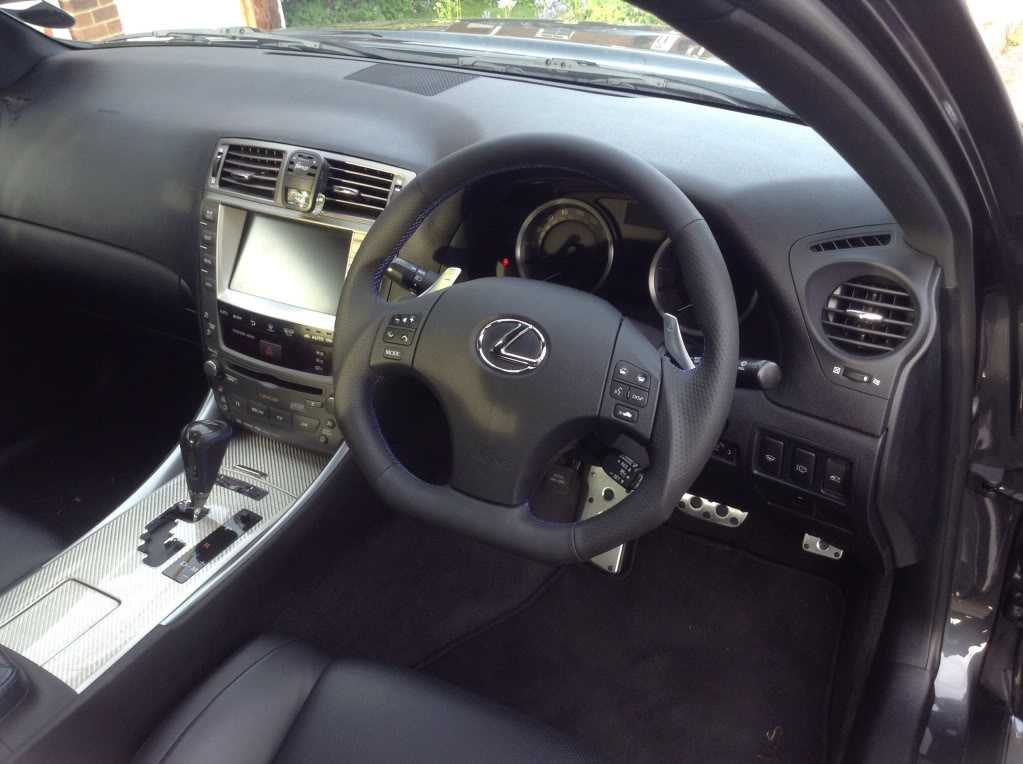
Next I decided to swap out my OEM steering wheel for a flat-bottom version:
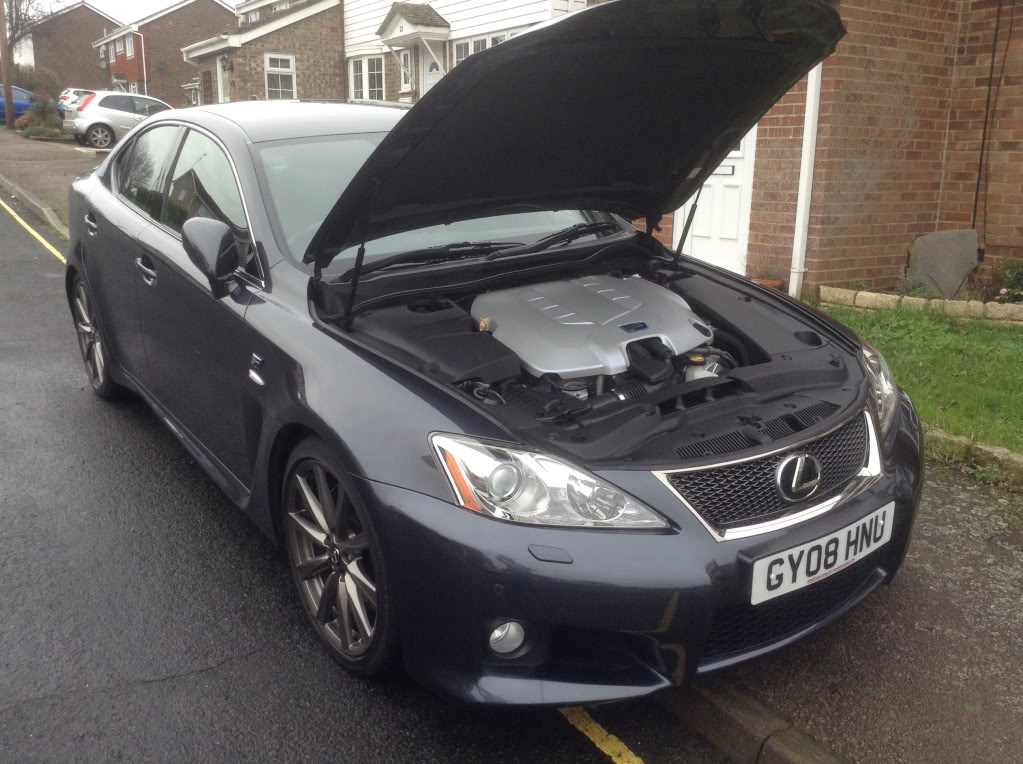
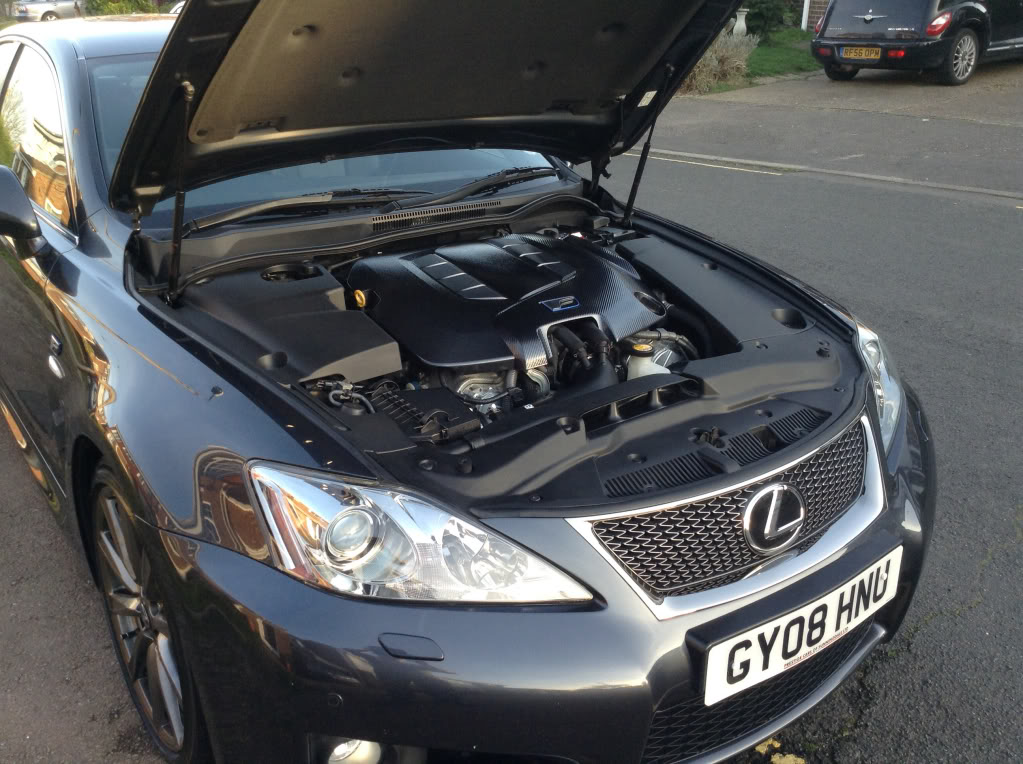
I also decided it was time to get rid of the silver touches both inside the car, and the engine cover. The door switches and rear centre armrest were sent off to a carbon skinning specialist. These are not the usual vinyl covered items, each piece has been coated in real carbon-fibre, and lacquered. This is the same process as most companies use for making carbon parts.
You will also notice I had a black version of the Takeda intake installed at this point. I've since changed that to the HPS silicone intake pipe with an AFe dry panel filter in the OEM airbox. I will explain a bit more about that later on!

So finally decided it's about time I take the plunge and set up a build thread.
Been posting individual threads in the normal forum for a while now, but with no end to my mods in sight, I thought it was about time I did things properly!
So, my car is a UK spec 08 model in SGM. Apart from the steering wheel being on the wrong side of the car (or so you guys like to think! Lol), there are a few subtle differences like the side indicators we get on our front wings/fenders.
There are only 200 or so IS-F's in the whole of the UK, so seeing another one on the road is even rarer here than it is over the pond.
Mine is probably the most modified F in the UK, if not Europe.
Still got plenty to do before I can run with some of you guys though!
So, enough talking, here's some photo's!


This was shortly after I got it home for the first time. Note the OEM wheels were on the wrong way around!
I had already bought my first mod before I even owned the car! Lol. A good price with Black Friday sales meant I bought the Apexi Throttle controller with the F specific harness (a must!).
It installs so neatly in one of the blank slots by the steering wheel as these photos show:


Next up was a full interior LED kit along with the uprated puddle lights for the wing mirrors (did I mention UK models have electrically folding mirrors as standard!
):

(not the easiest thing to photograph! sorry for the poor quality!)
Next up I added the rear bumper LED's that replace the OEM reflectors. These work as additional brake lights, and are wired to be lit when the lights are on as well.
Have to be one of my favourite mods for the money.


No excuses for not seeing when I brake at night! Lol.
Next I decided to swap out my OEM steering wheel for a flat-bottom version:

I also decided it was time to get rid of the silver touches both inside the car, and the engine cover. The door switches and rear centre armrest were sent off to a carbon skinning specialist. These are not the usual vinyl covered items, each piece has been coated in real carbon-fibre, and lacquered. This is the same process as most companies use for making carbon parts.
You will also notice I had a black version of the Takeda intake installed at this point. I've since changed that to the HPS silicone intake pipe with an AFe dry panel filter in the OEM airbox. I will explain a bit more about that later on!


Last edited by PDP180180; 07-09-15 at 07:58 AM. Reason: more photos added
 07-09-15, 07:40 AM
#2


You'll also spot the F Sport carbon shifter ****. Another nice mod for reasonable money I think.
Notice also the inner door handles and the two pieces either side of the front centre console have been painted SGM as well.
Just waiting on my skinning guy to give me the all clear to send him the centre console, ashtray, storage compartment. That will then complete the interior re-skinning.

Next up was the addition of a nice Cusco front strut brace. My bodyshop did a great job modifying the engine covers to fit over the brace as you can see. I also added some trim edging to the area just to clean up the edges.


I also added an aftermarket oil filler cap in a nice grey colour. This has also been changed again on the current spec! Now running the Blitz oil cap that has been discontinued. Photos to come of that later.
Next up we had the TRD red push button start.


Moving to the exterior of the car, I started off with a carbon fibre copy of the OEM trunk spoiler.


This has also changed to a Wald replica in the current spec!
photos to follow later on!
Last edited by PDP180180; 07-10-15 at 01:35 AM.
07-09-15, 07:41 AM
#3
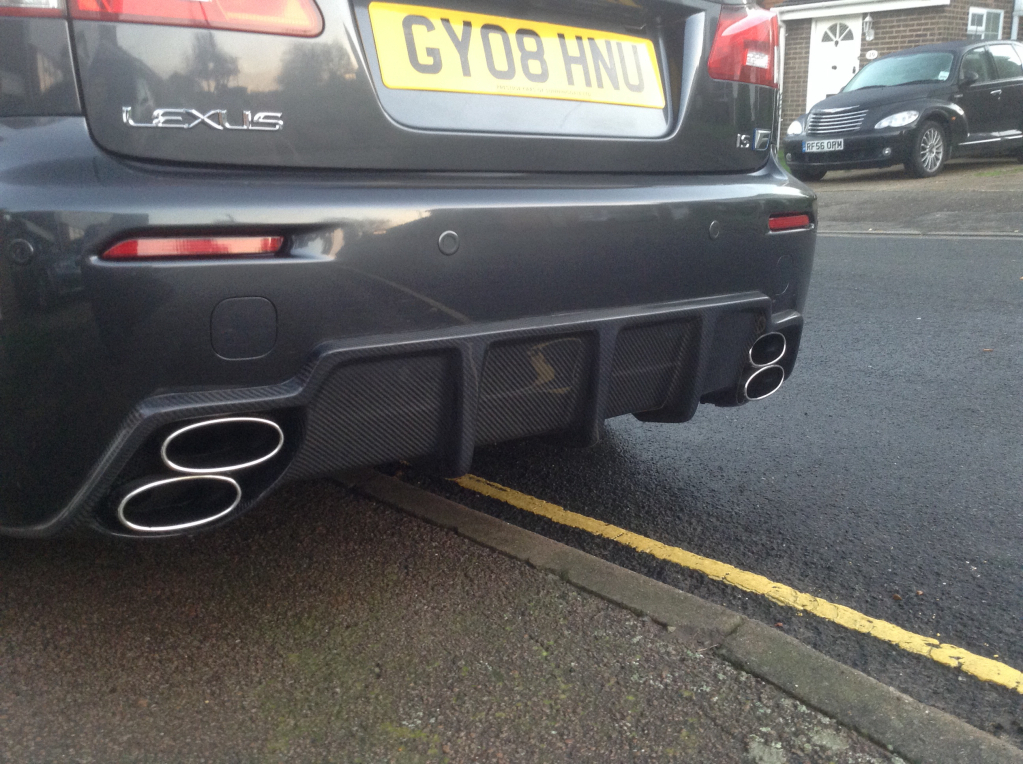
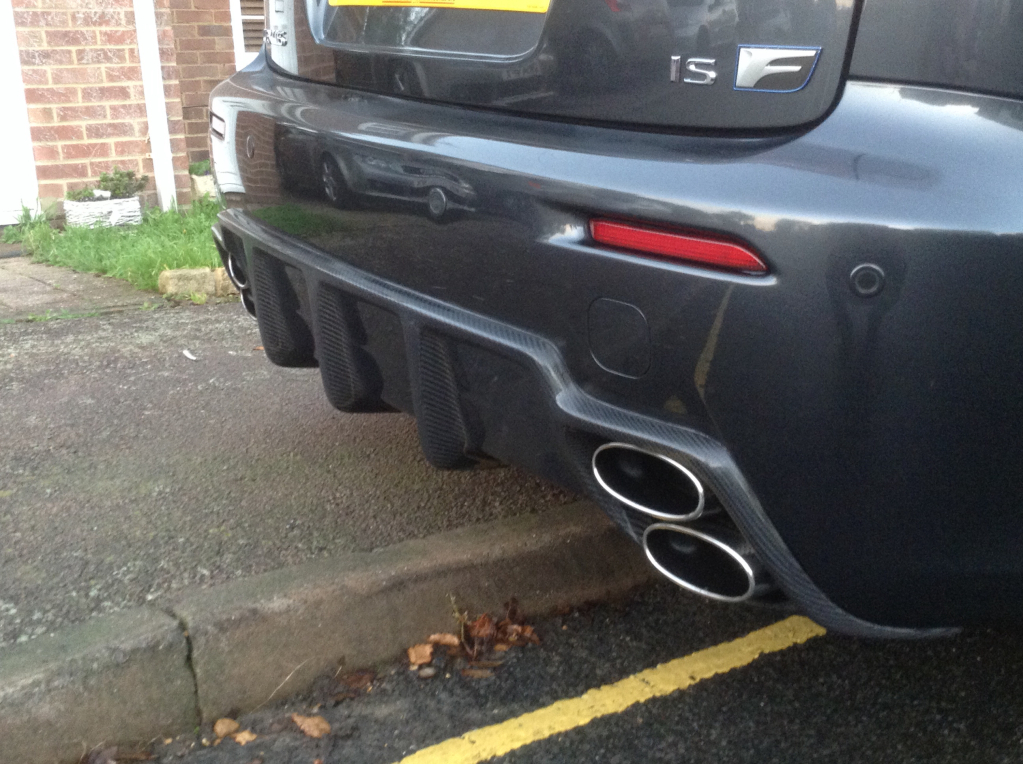
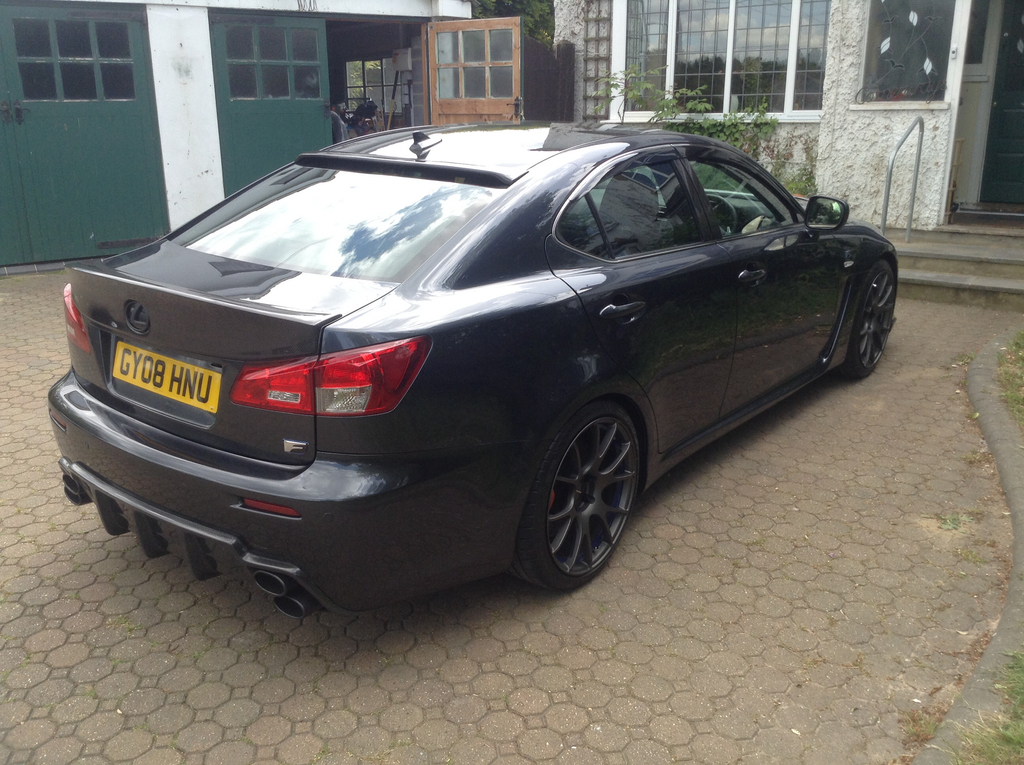
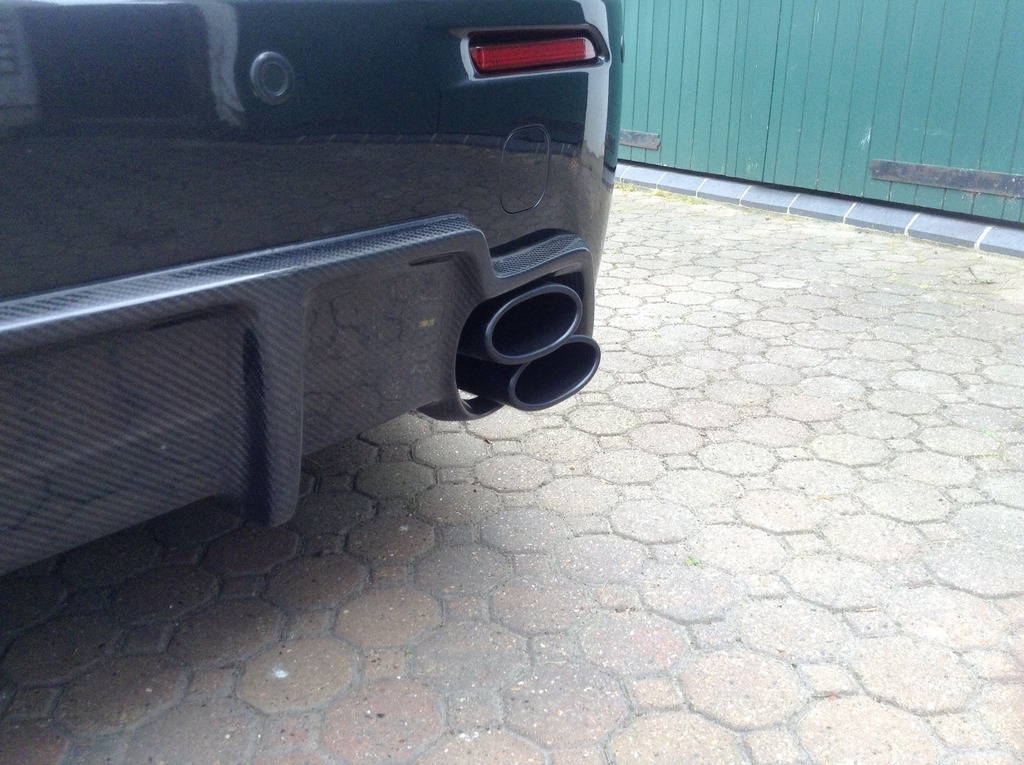
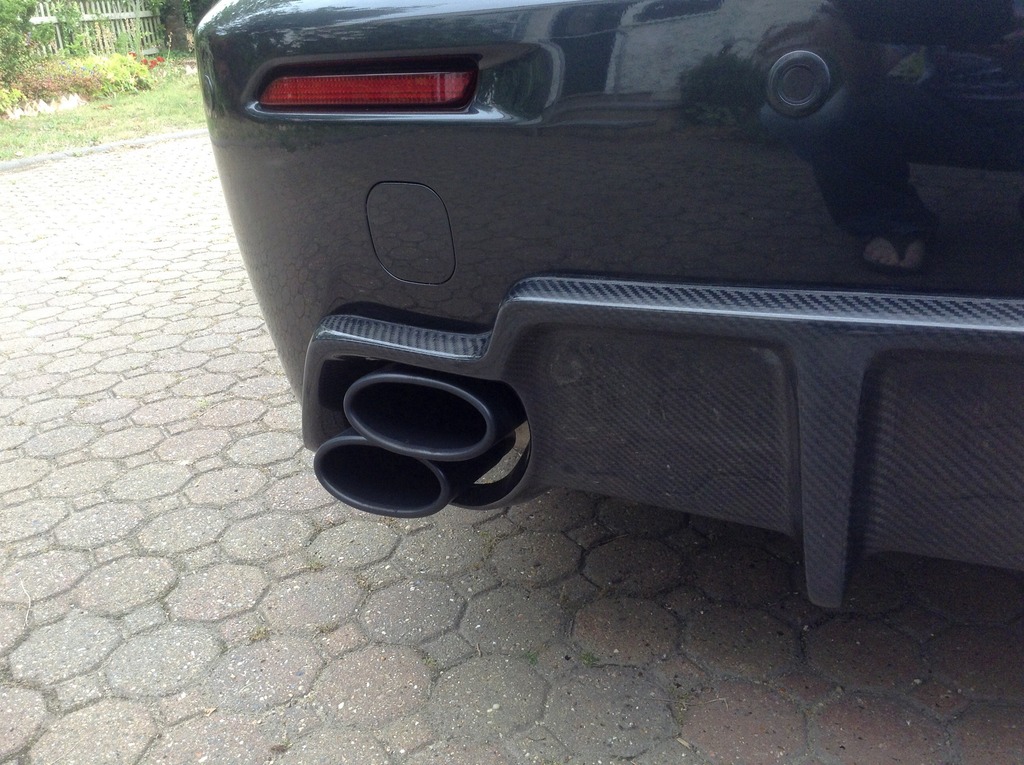
Next up was the Arkym carbon rear diffuser. Bear in mind nearly all the parts you are seeing were sourced and bought in the US!
I and some close friends now known as my 'mules', brought this stuff over on planes! Lol.
The carbon theme bit hard, so I added some pillar trims as well. There are some photos of those dotted around (don't think I have any specific ones I took at the time I installed them!)
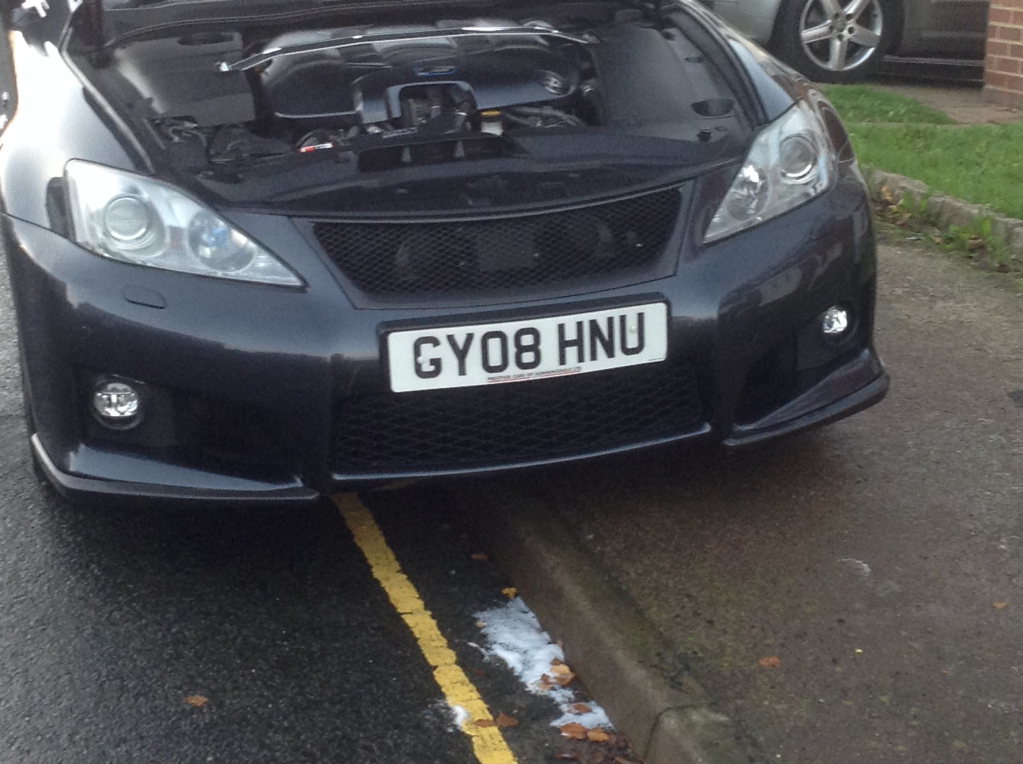
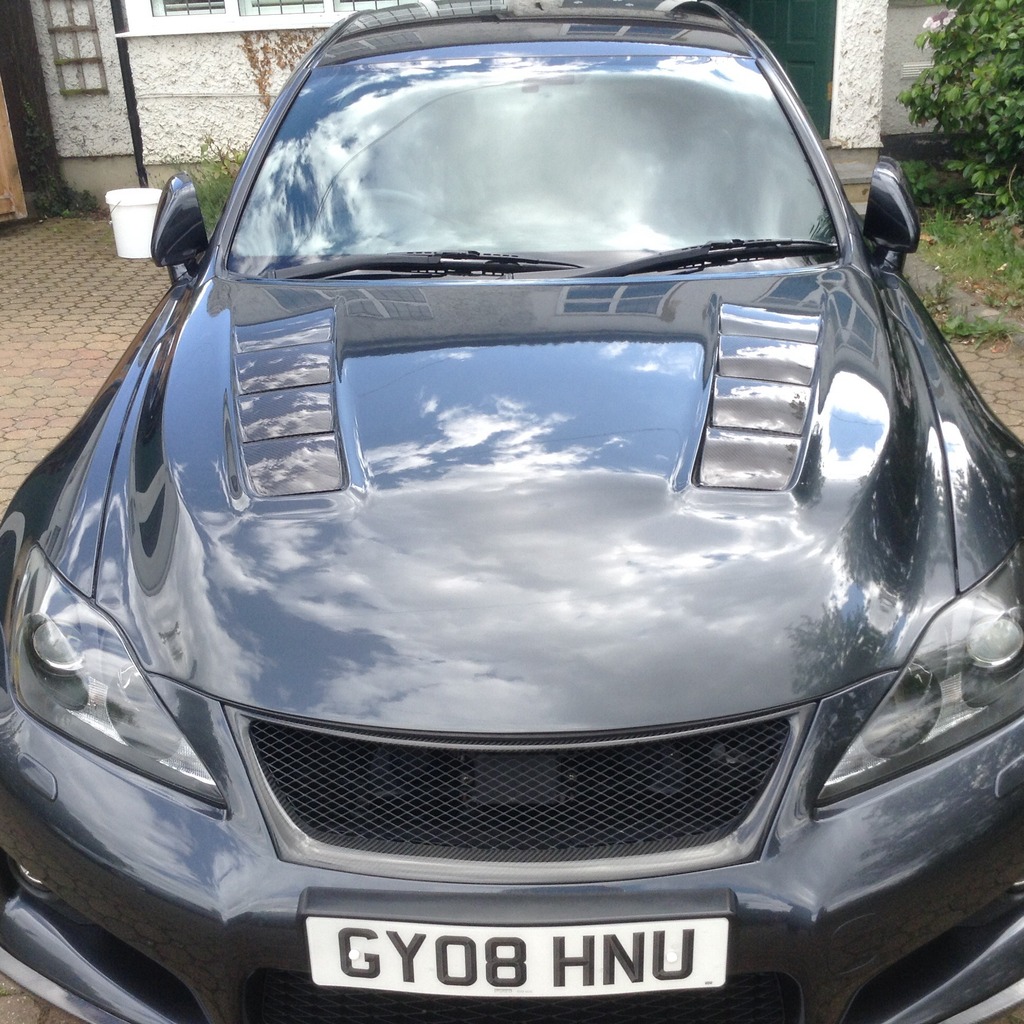
I also added a carbon badgeless front grill (doesn't affect the cruise control sensor - it's not attached to the Lexus badge as some people thought)
Excuse the guy in the background! Lol. Bet he wishes he'd worn a t-shirt! I've moved since these were taken thankfully! Have a nice driveway and double garage to work with.
Next up were the Aeroworx carbon front splitters. Whilst I do like the look of these, I will probably be doing a matching Arkym front splitter at some point.
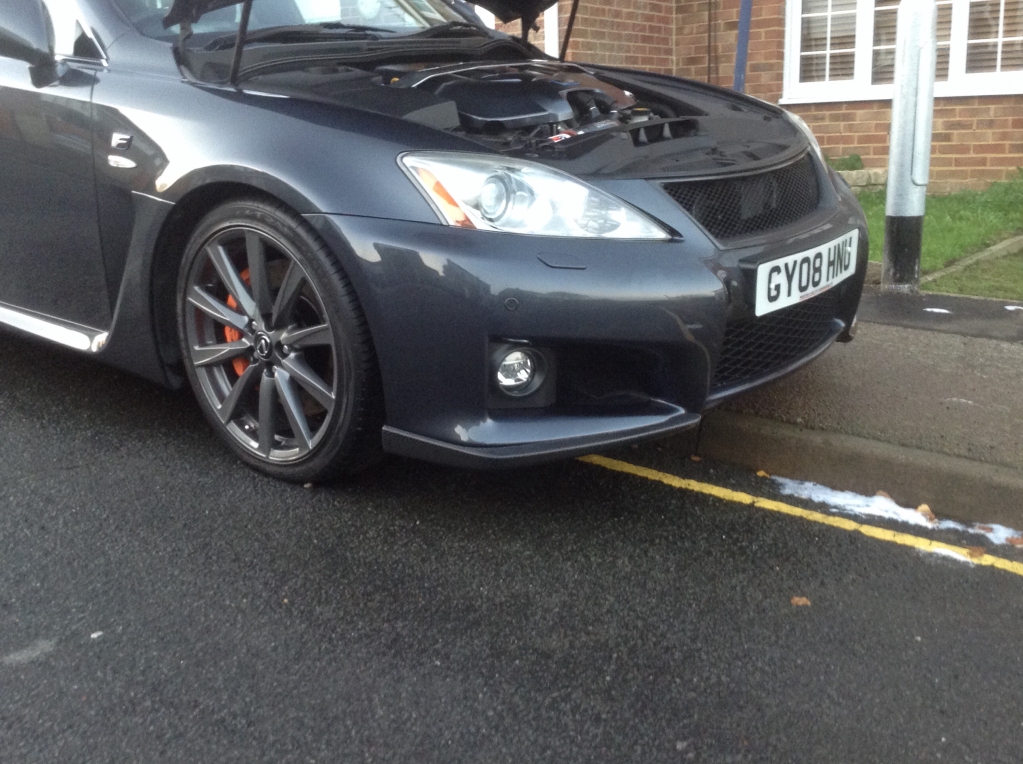
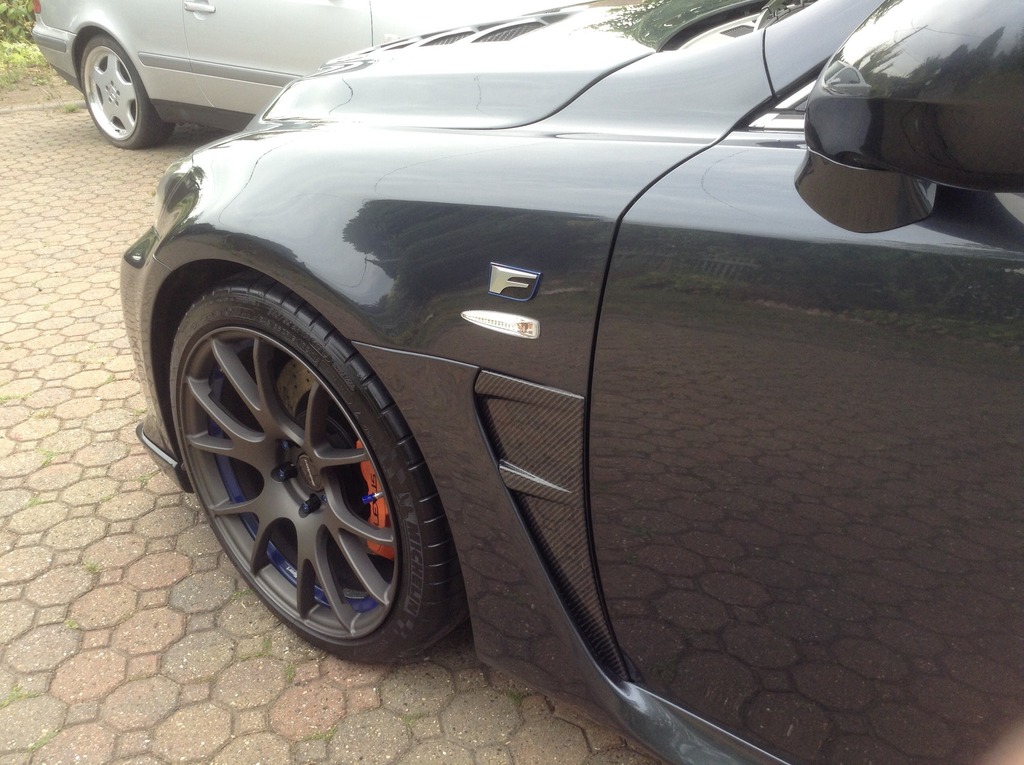
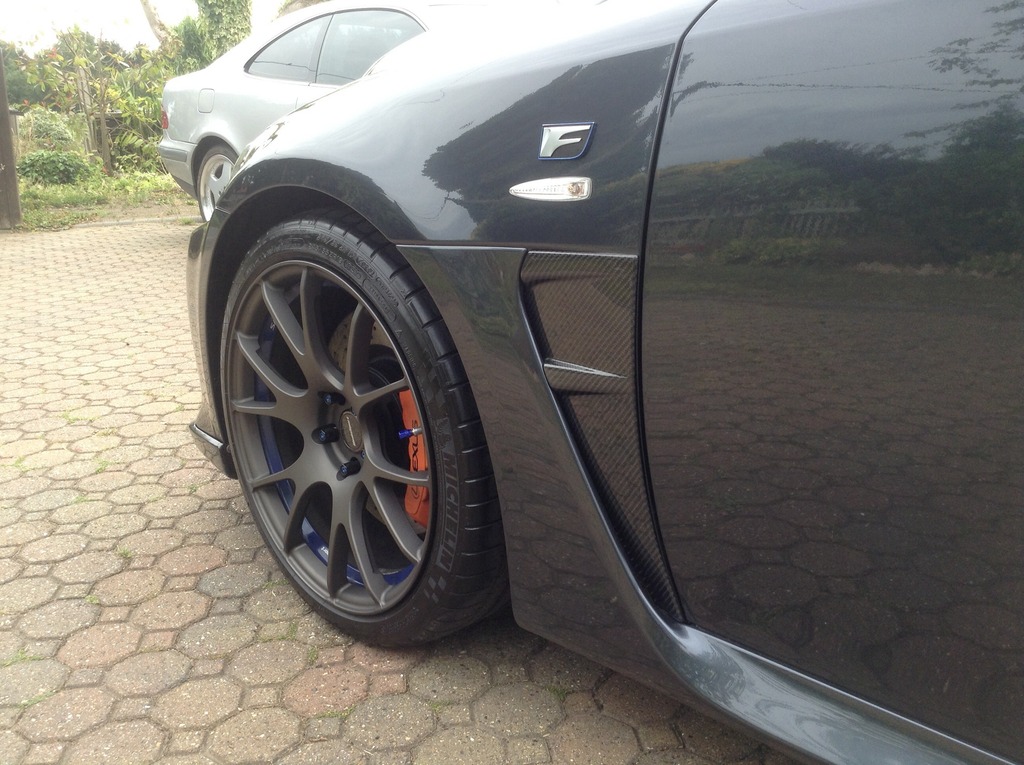
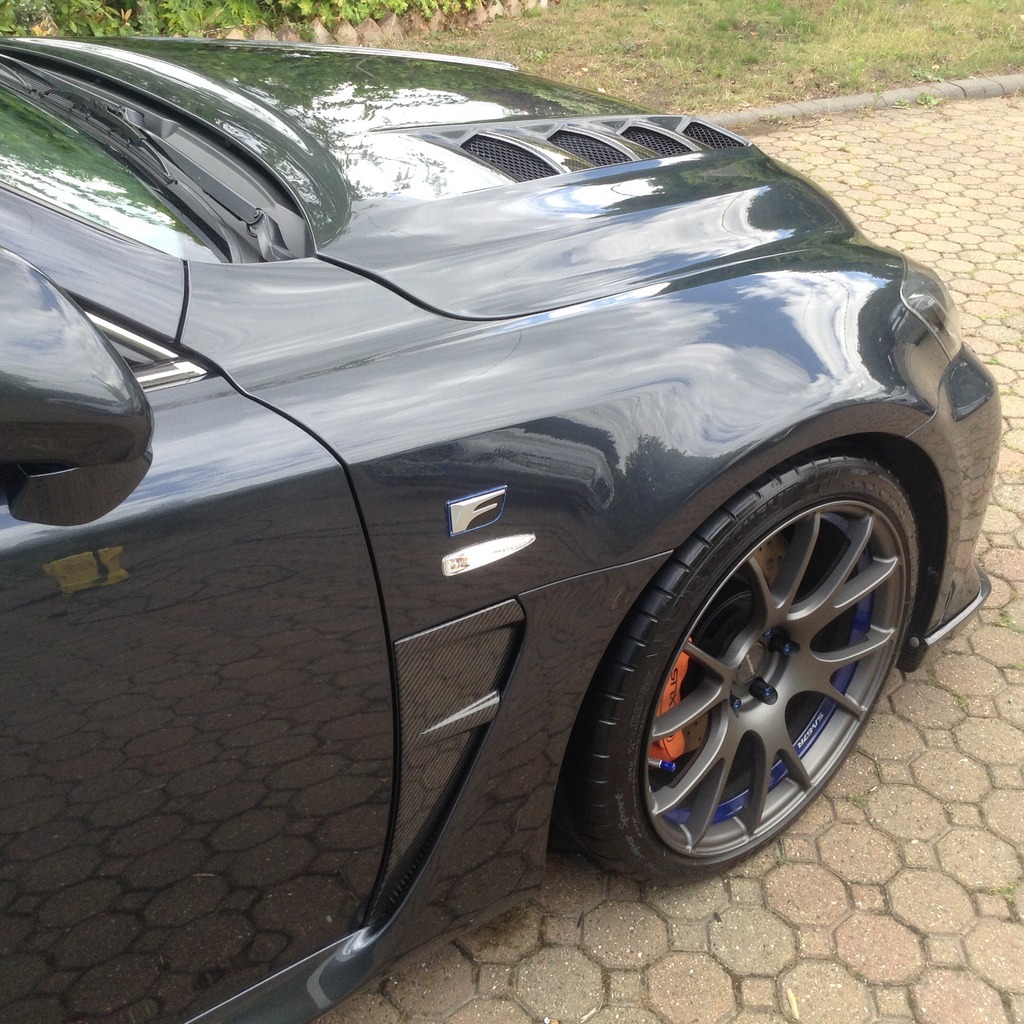
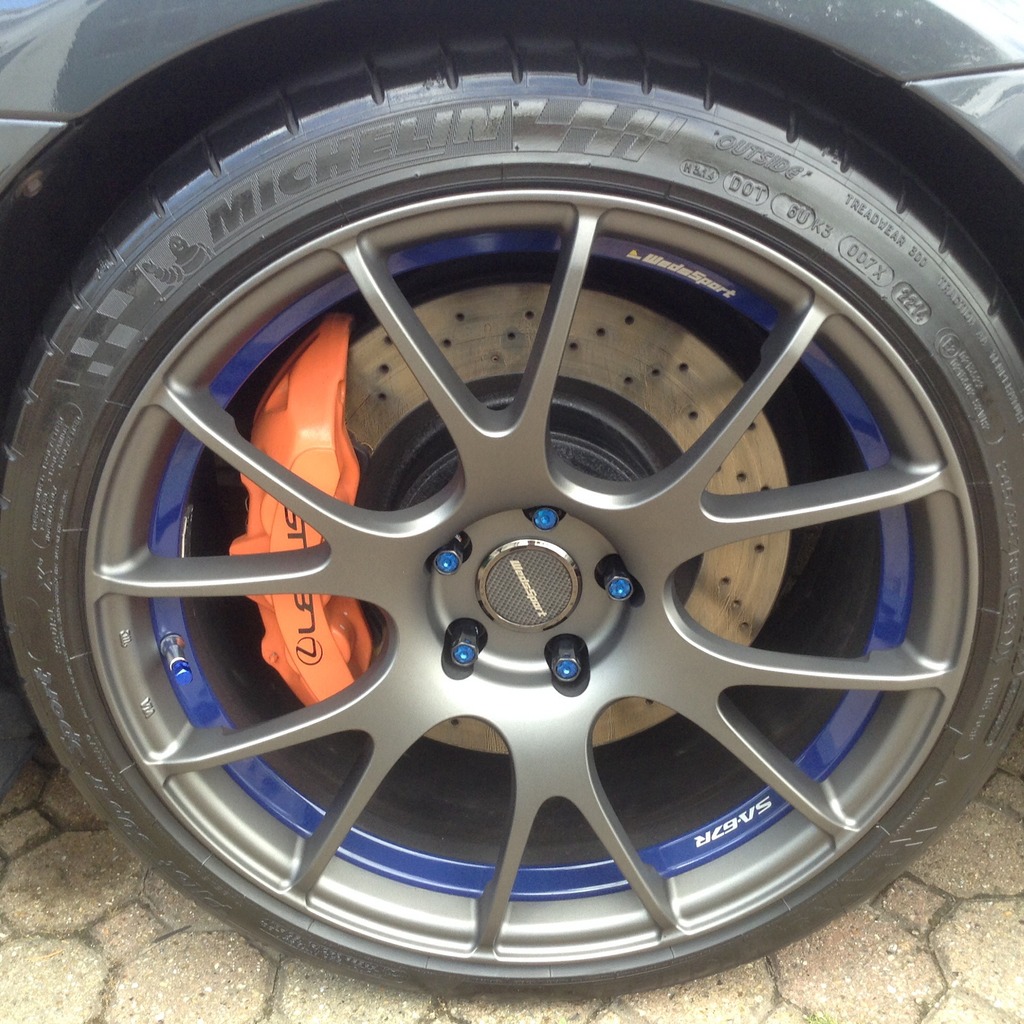
I missed a stage! You'll see in some of the photos I have had my calipers re-painted in orange with black Lexus vinyl's. Again, this was before I decided on different wheels etc. Now considering changing them again to blue to match up with the new rims!
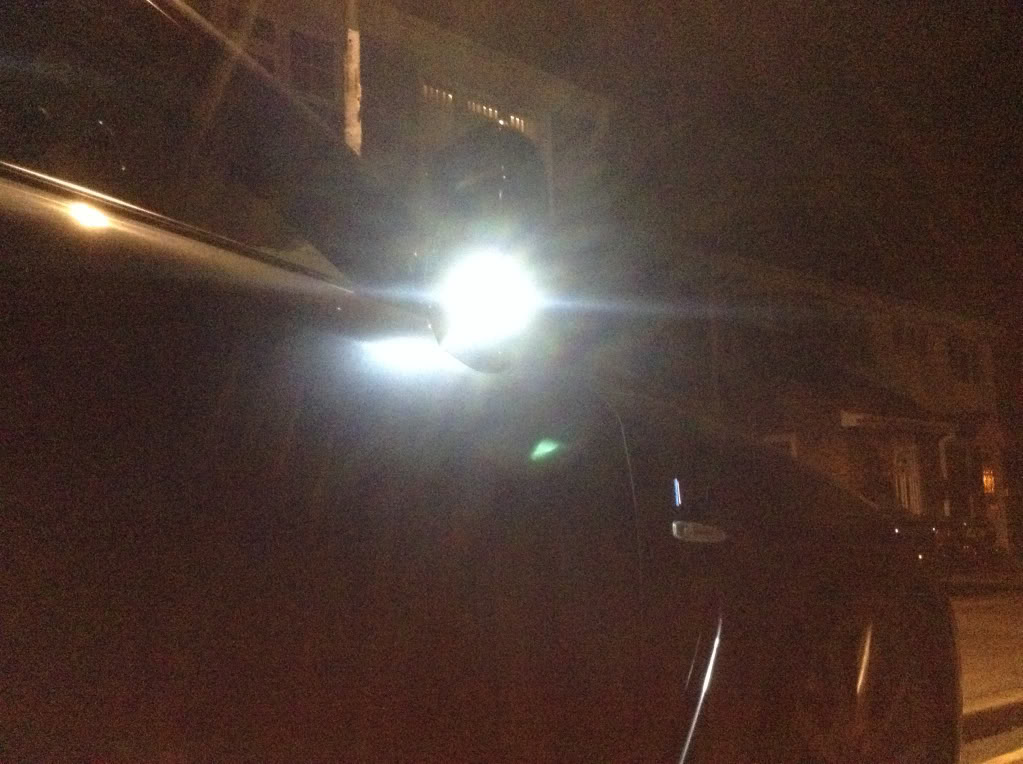
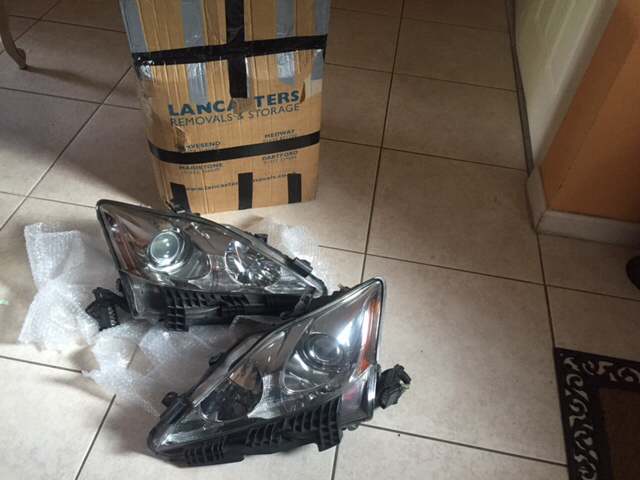
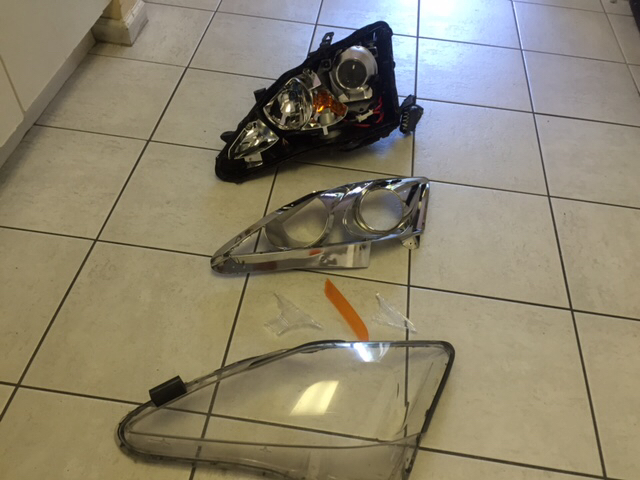
I then decided I wanted to blackout my OEM headlights. Unfortunately there are not many places here in the UK that will do this kind of work. Those that do offer this service on other models wouldn't touch my car with a barge pole! Lol. Apparently the risk of damaging them was too great, and they wouldn't want to fork out Lexus prices for a new set!")
I was very lucky to find another forum user in Miami that offered to do the work for a very fair price. Just the small issue of removing them from my car, and checking them in as luggage on one of my business flights! Lol.
This is how they looked when he received them:
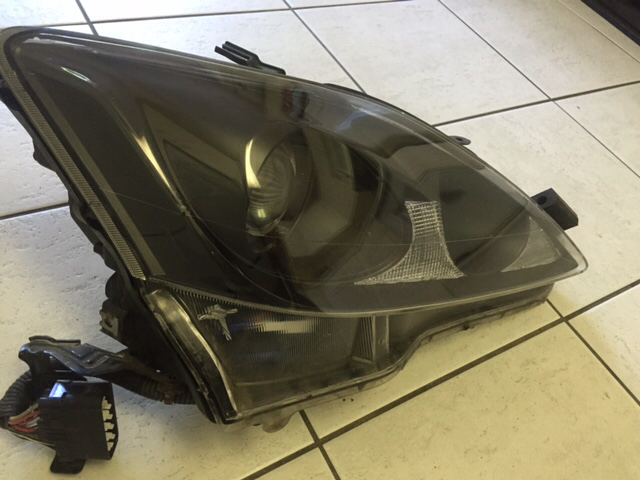
This was a mid-stage progress shot:
The finished article:
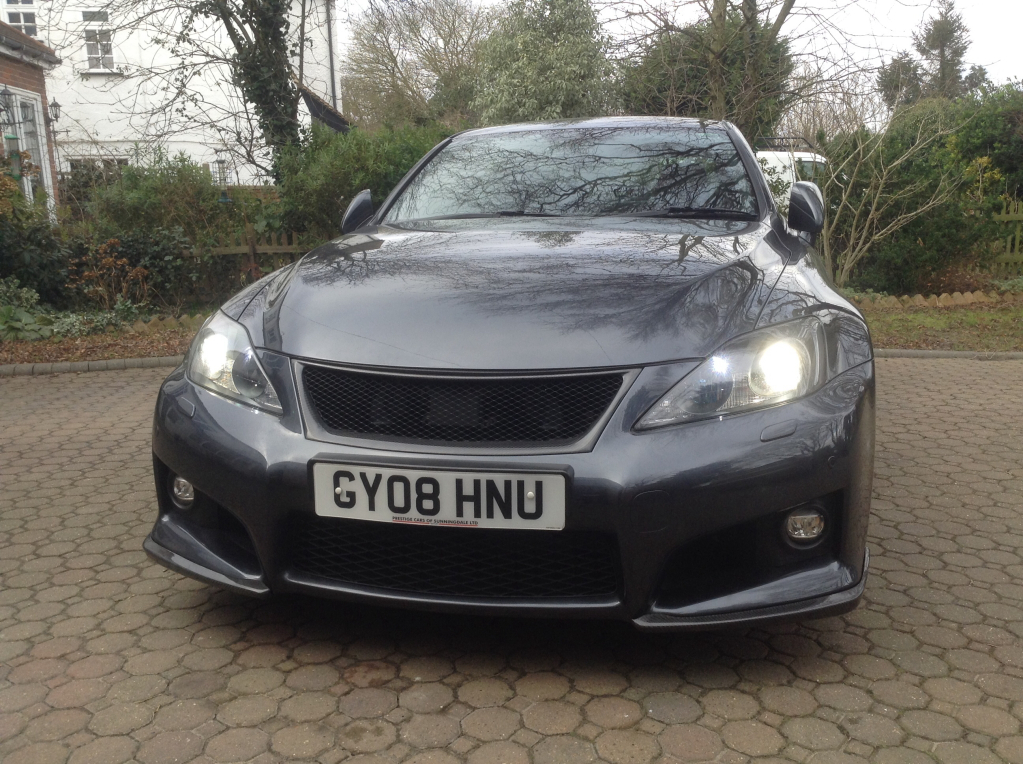
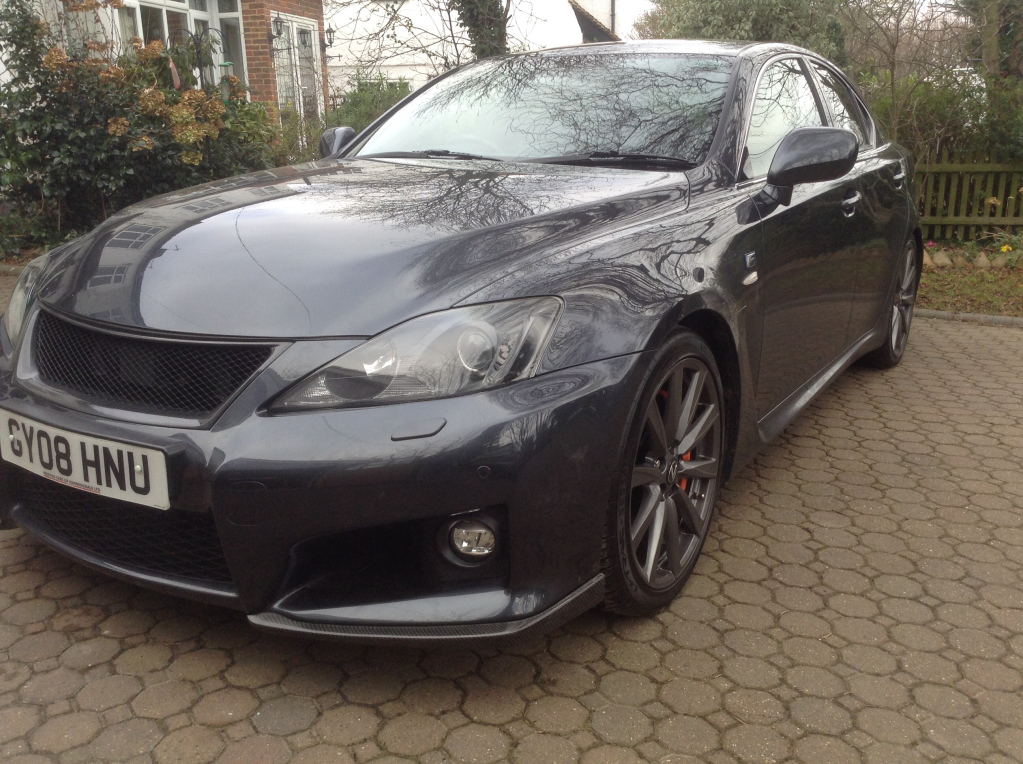
Here are a couple of shots of them re-installed on my car once I got them back in the UK.
I and some close friends now known as my 'mules', brought this stuff over on planes! Lol.


The carbon theme bit hard, so I added some pillar trims as well.
There are some photos of those dotted around (don't think I have any specific ones I took at the time I installed them!)I also added a carbon badgeless front grill (doesn't affect the cruise control sensor - it's not attached to the Lexus badge as some people thought)

Excuse the guy in the background! Lol.
Bet he wishes he'd worn a t-shirt! I've moved since these were taken thankfully! Have a nice driveway and double garage to work with. Next up were the Aeroworx carbon front splitters. Whilst I do like the look of these, I will probably be doing a matching Arkym front splitter at some point.


I missed a stage! You'll see in some of the photos I have had my calipers re-painted in orange with black Lexus vinyl's. Again, this was before I decided on different wheels etc. Now considering changing them again to blue to match up with the new rims!
I then decided I wanted to blackout my OEM headlights. Unfortunately there are not many places here in the UK that will do this kind of work. Those that do offer this service on other models wouldn't touch my car with a barge pole! Lol. Apparently the risk of damaging them was too great, and they wouldn't want to fork out Lexus prices for a new set!
I was very lucky to find another forum user in Miami that offered to do the work for a very fair price. Just the small issue of removing them from my car, and checking them in as luggage on one of my business flights! Lol.
This is how they looked when he received them:

This was a mid-stage progress shot:

The finished article:

Here are a couple of shots of them re-installed on my car once I got them back in the UK.


Last edited by PDP180180; 07-10-15 at 02:24 AM.
07-09-15, 07:42 AM
#4

This was my first dyno run with the car. You will note I was down on power. I also had a strange spike in my AFR readings.

I decided to change out the Takeda intake for the stock airbox with the HPS intake pipe and a K&N panel filter to see if that helped.
The results were surprisingly good in comparison.

The red line was the best run of the second visit. You will see it improved across the full range, and also corrected the strange spike I had with my AFR readings.

I will be hoping to do another dyno session soon to see how the new H&S exhaust and lighter alloys affects things. Print-out will be uploaded as and when I get it booked in.
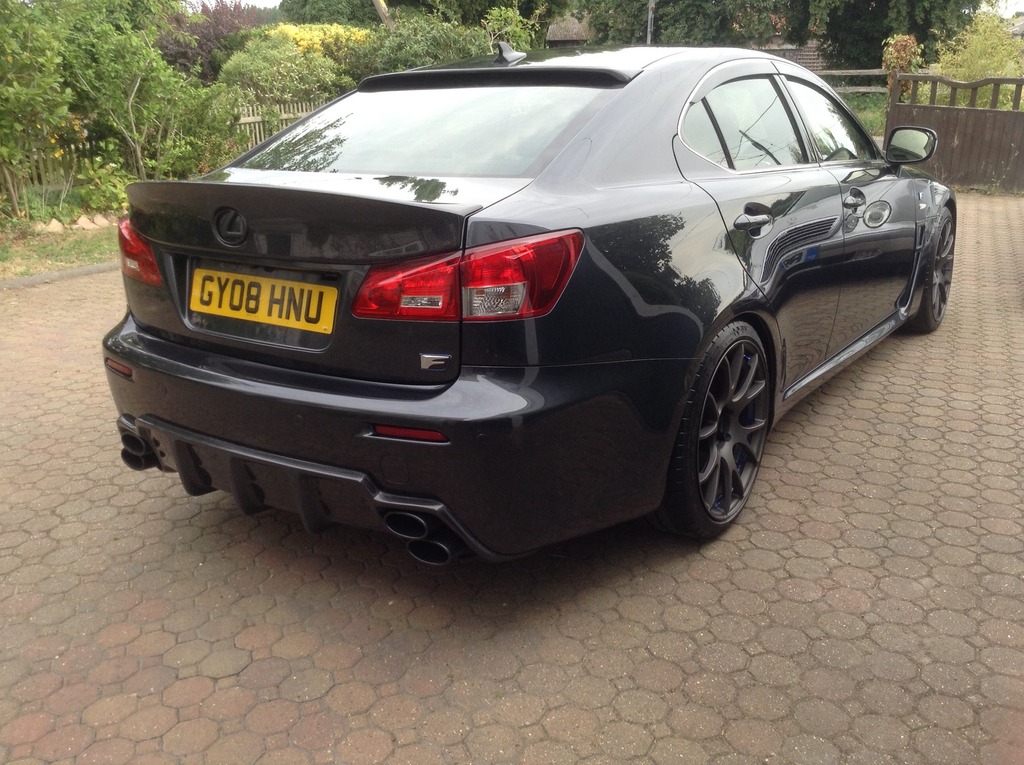
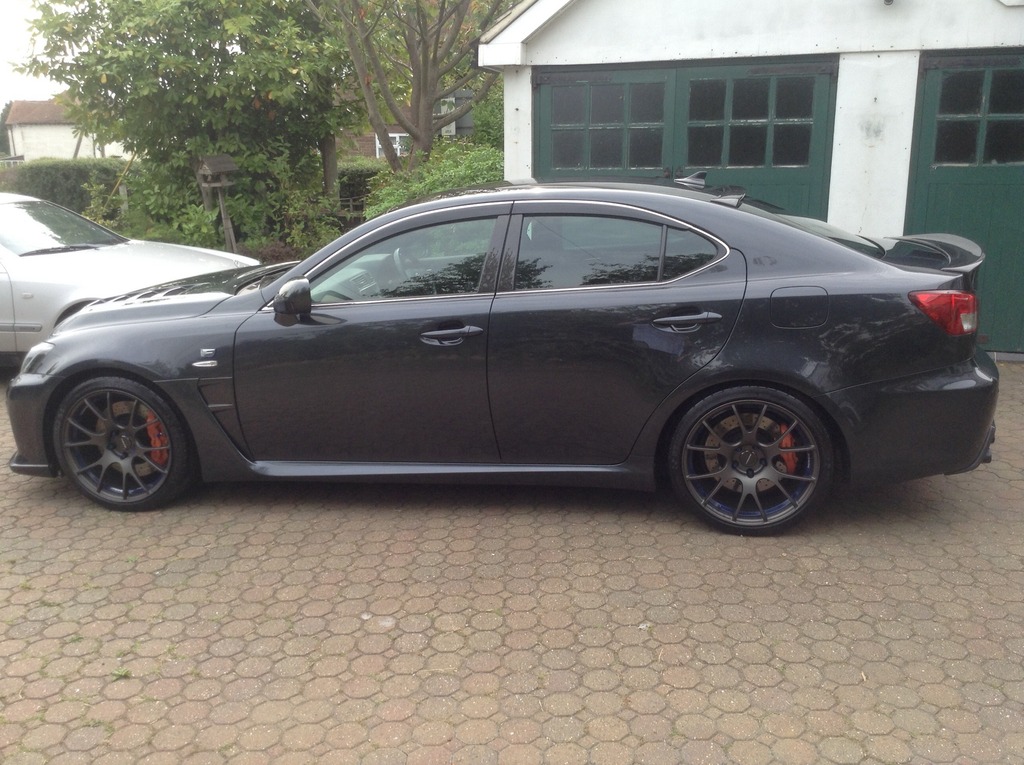
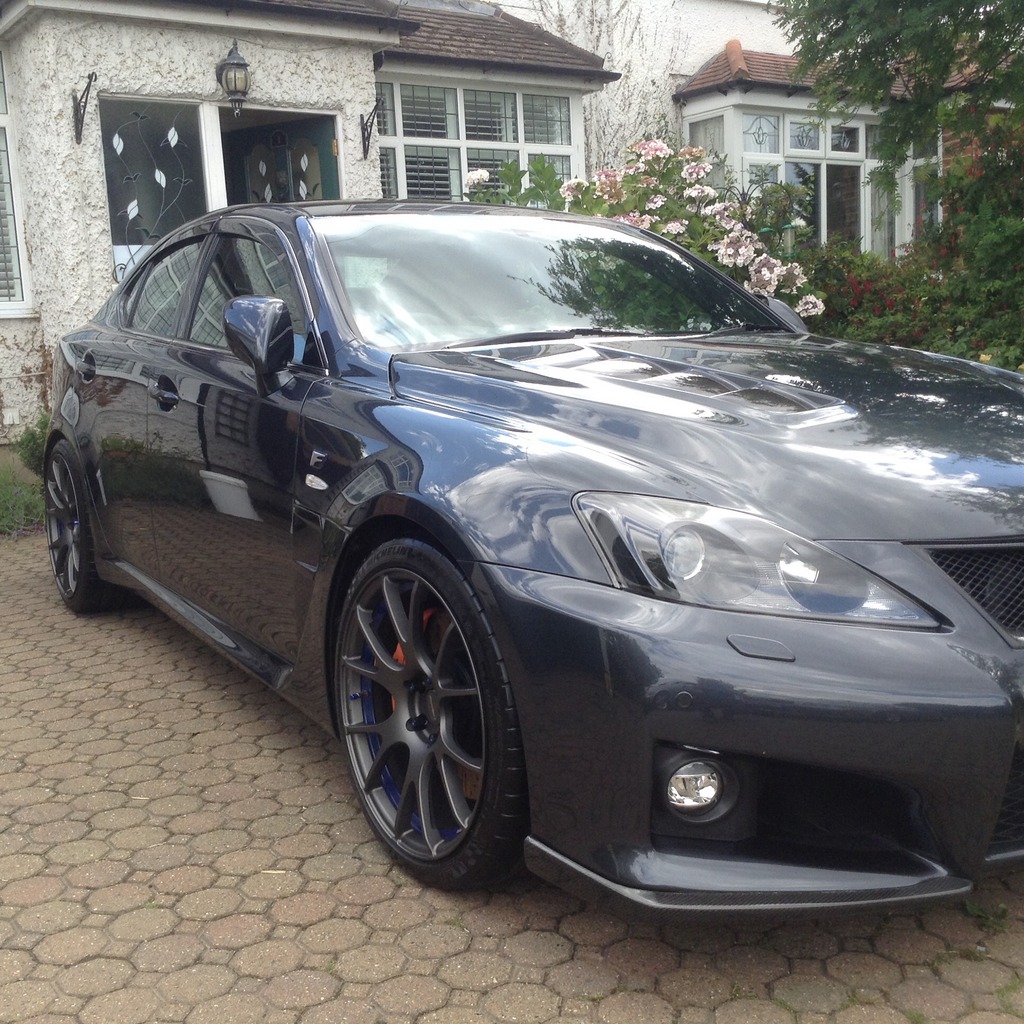
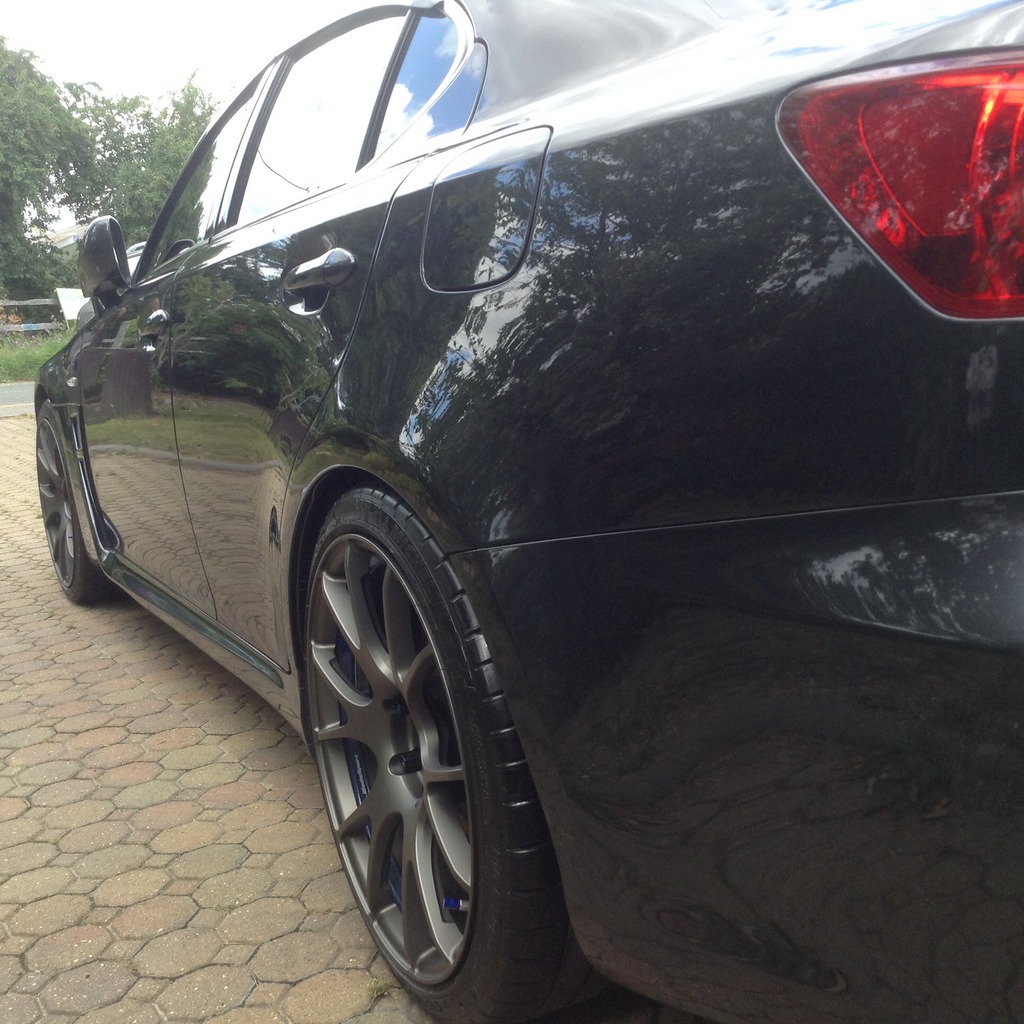
Next up were my new rims. These are the now dis-continued Wedsport SA67R's. I managed to get the larger MPSS tires for them as well.


I also ordered up the flat carbon fibre centre caps. These look soo much nicer that the ones the rims came with.

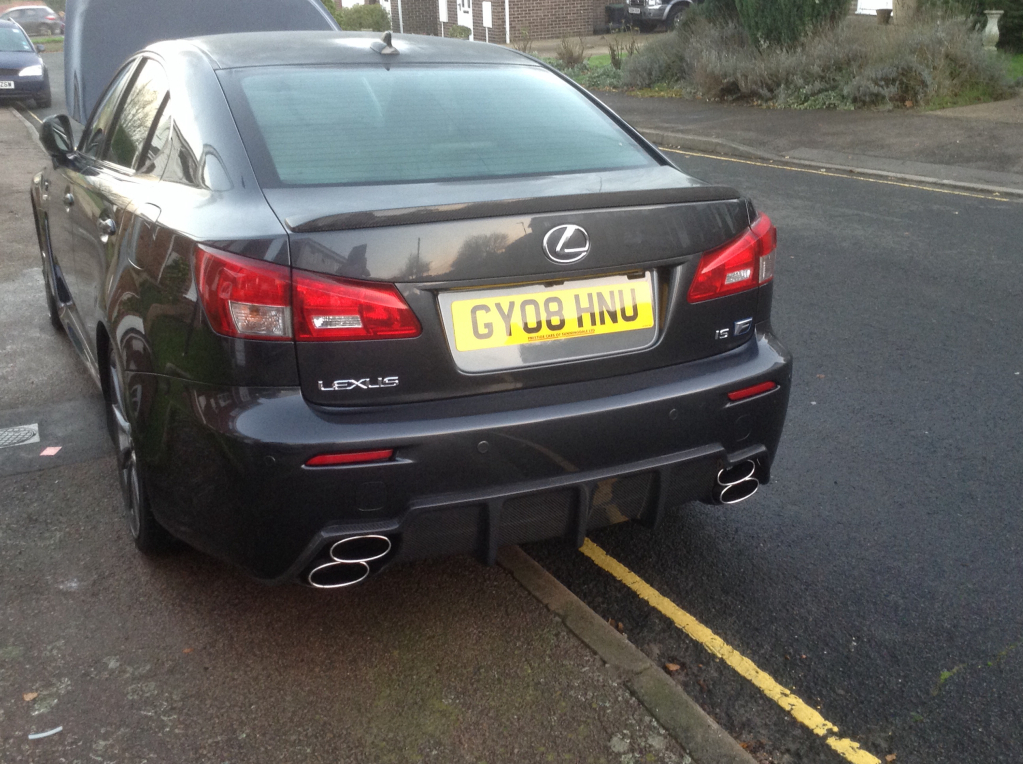
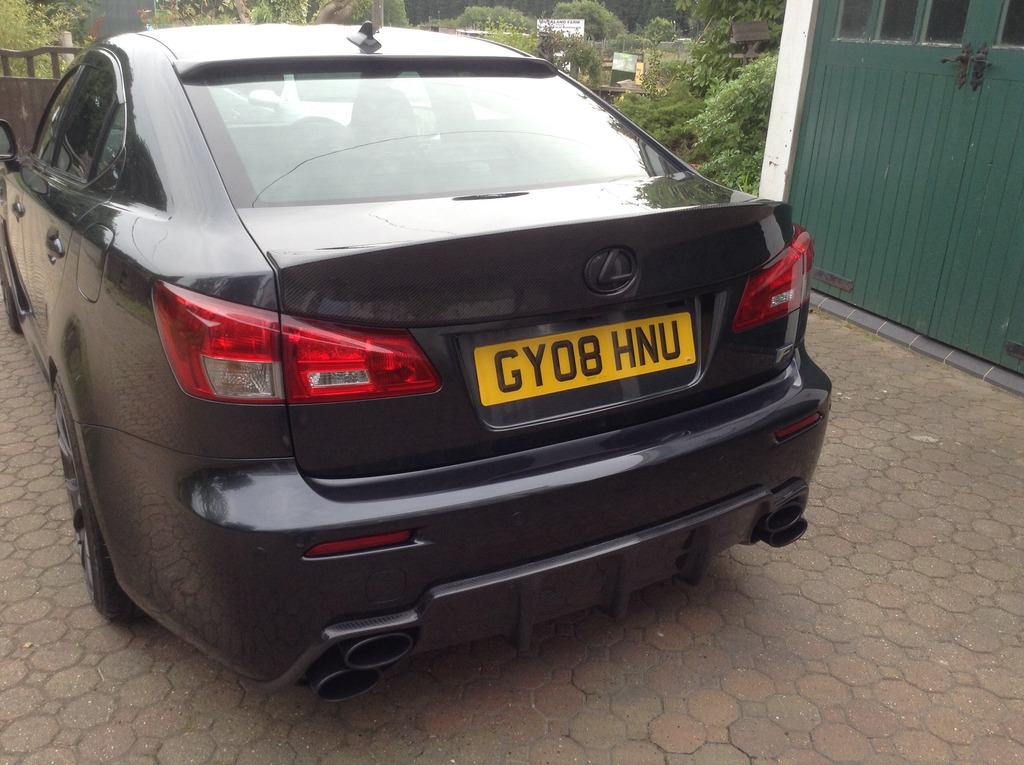
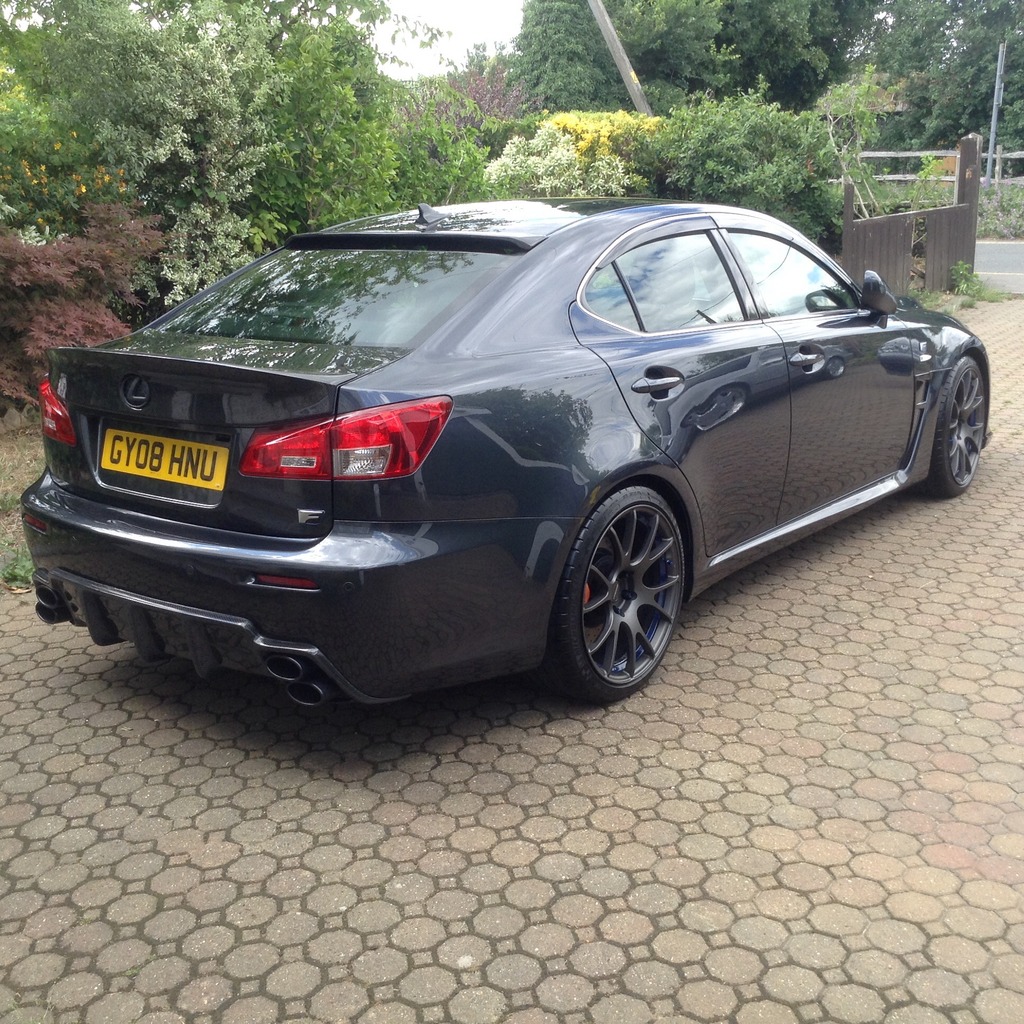
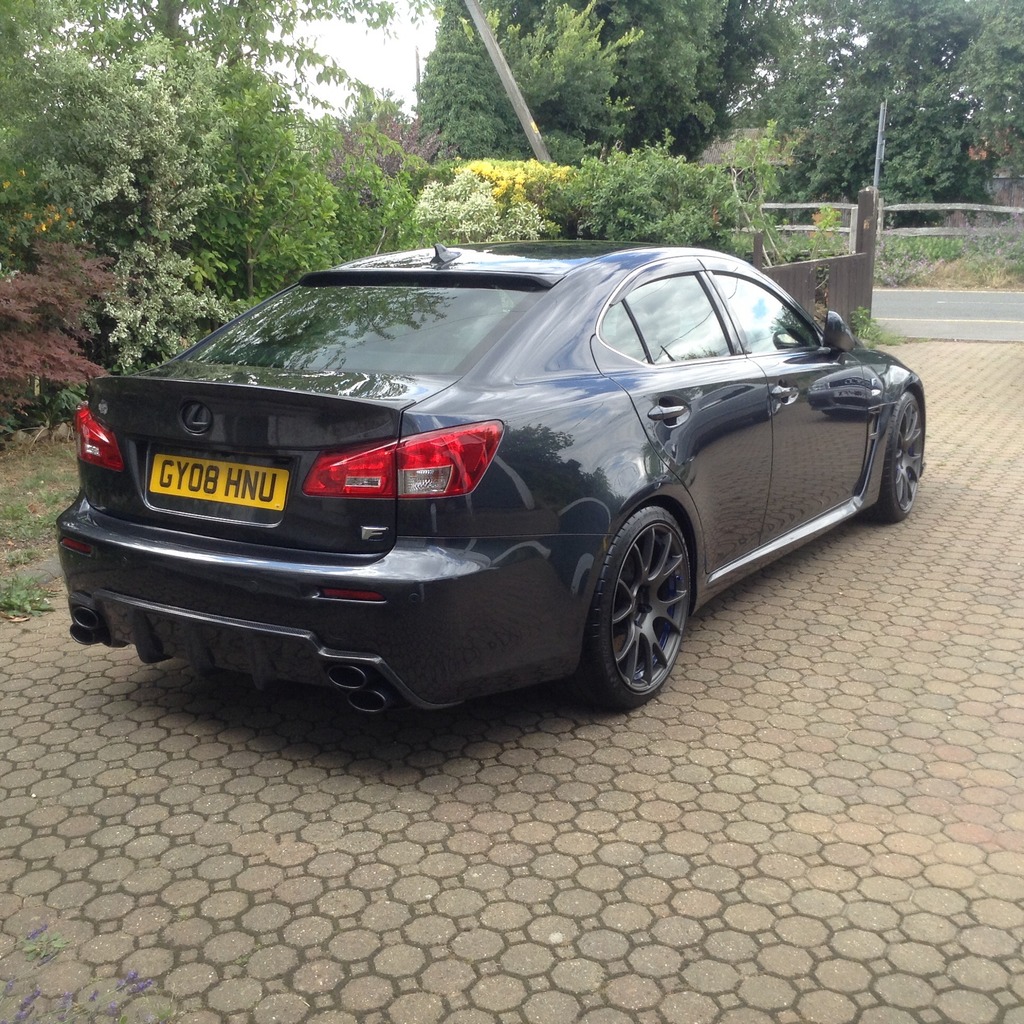
Next we have the Wald replica deck spoiler, carbon upper roof spoiler, plasti-dipped rear Lexus emblem, and OEM wind deflectors.


Next came the Seibon TS2 vented carbon bonnet/hood. This was one part I didn't try to bring back with me on a plane! Lol. Luckily my tuner offers 0% APR finance these days!


I then decided to tone down the carbon look for the bonnet, and had the majority painted in SGM. The vents were kept carbon, and were given an extra coat of lacquer to prevent any chipping etc.


Last edited by PDP180180; 07-10-15 at 04:16 AM.
07-09-15, 08:23 AM
#5
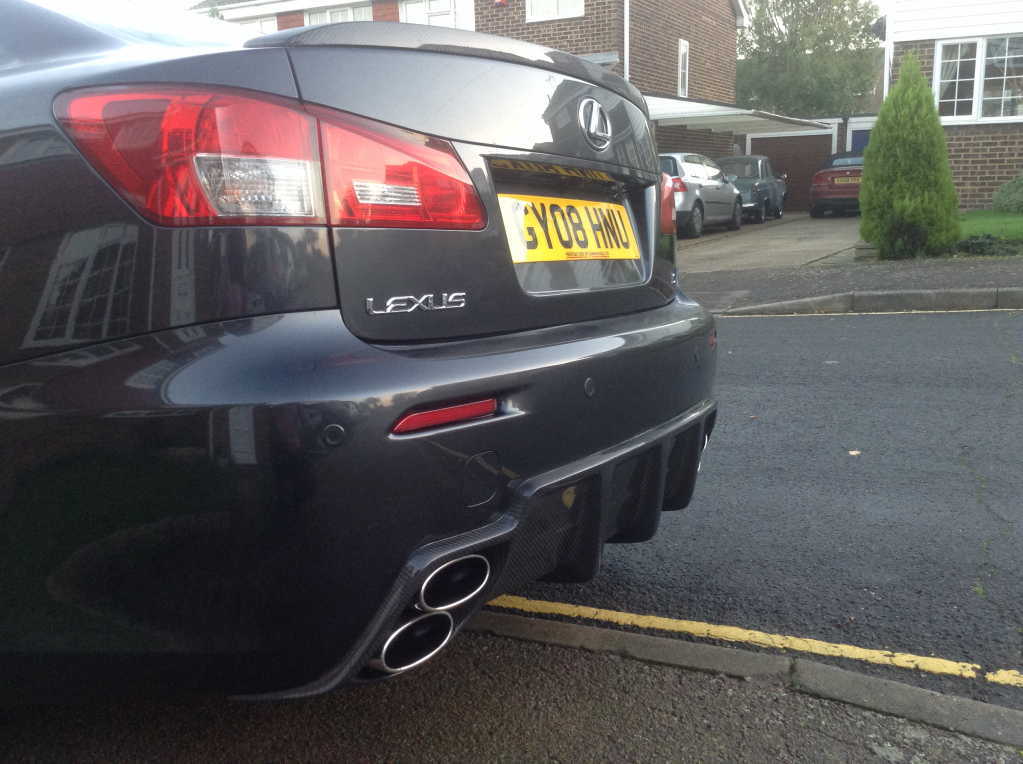
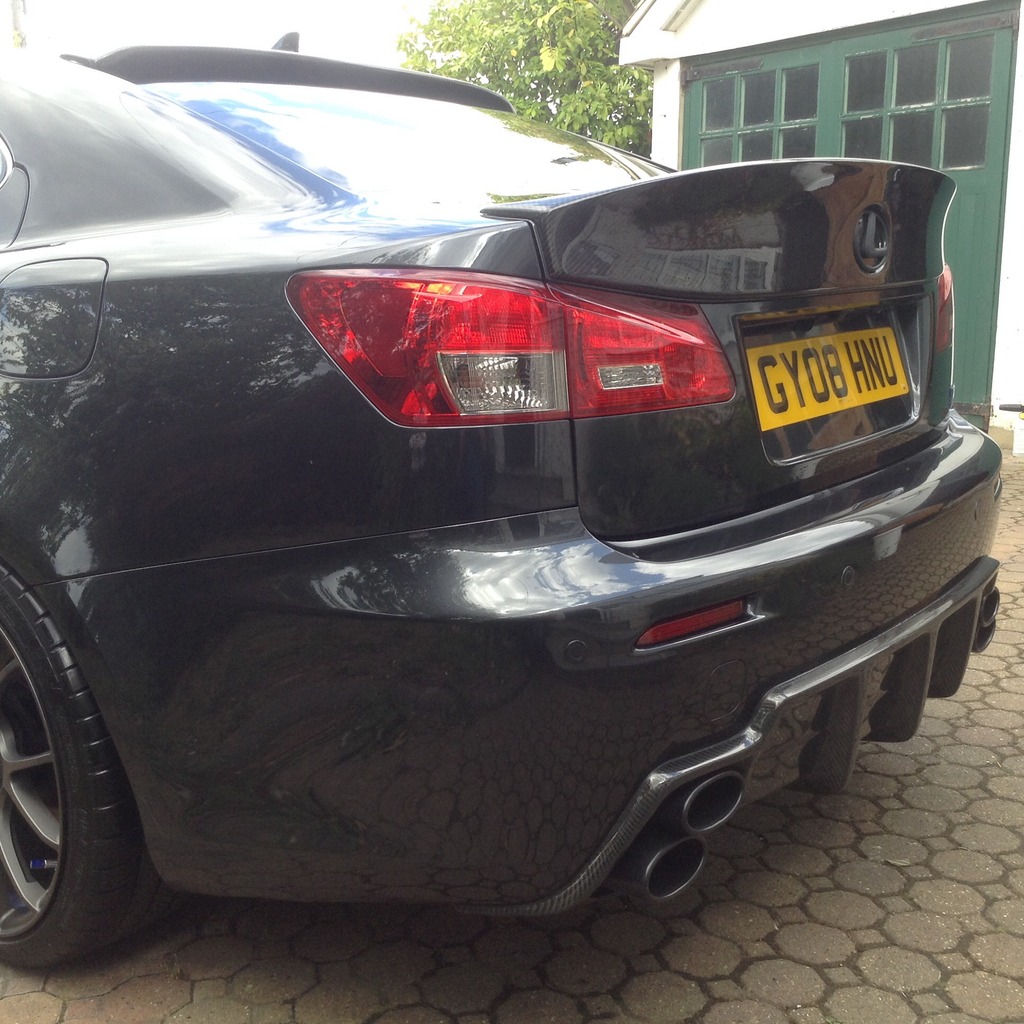
At the same time I had the bonnet painted, I also got them to partially de-badge the rear end of the car.
Off came the 'LEXUS' and 'IS' badges, leaving just the F badge and the Lexus logo on the Wald replica trunk spoiler.
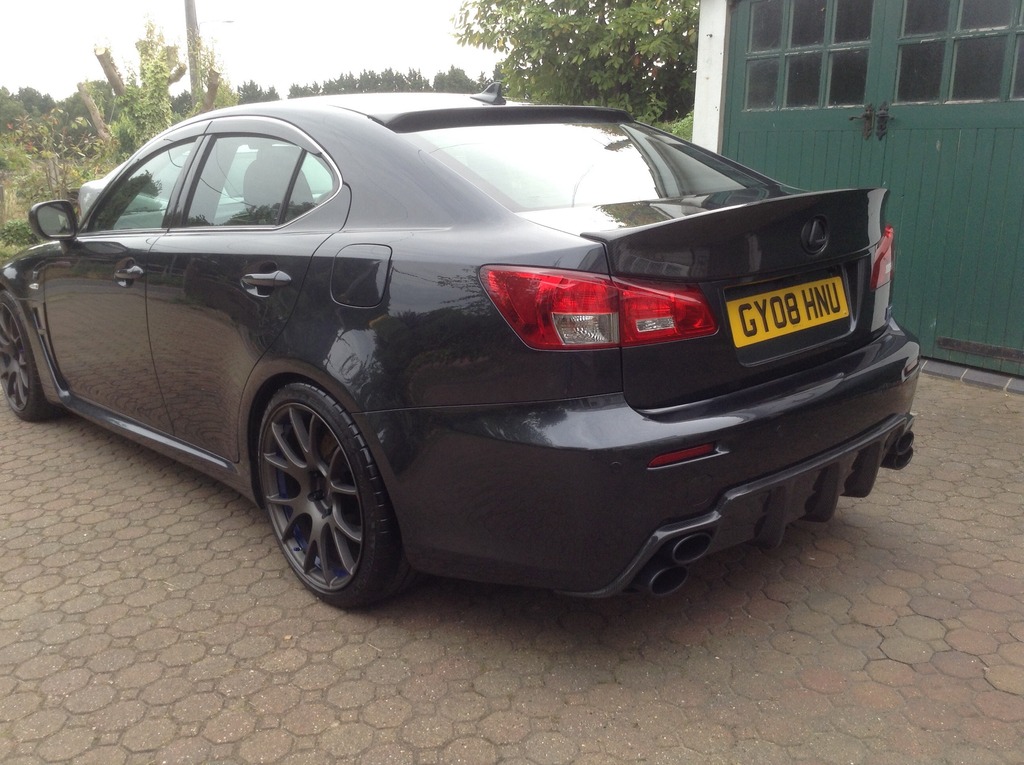
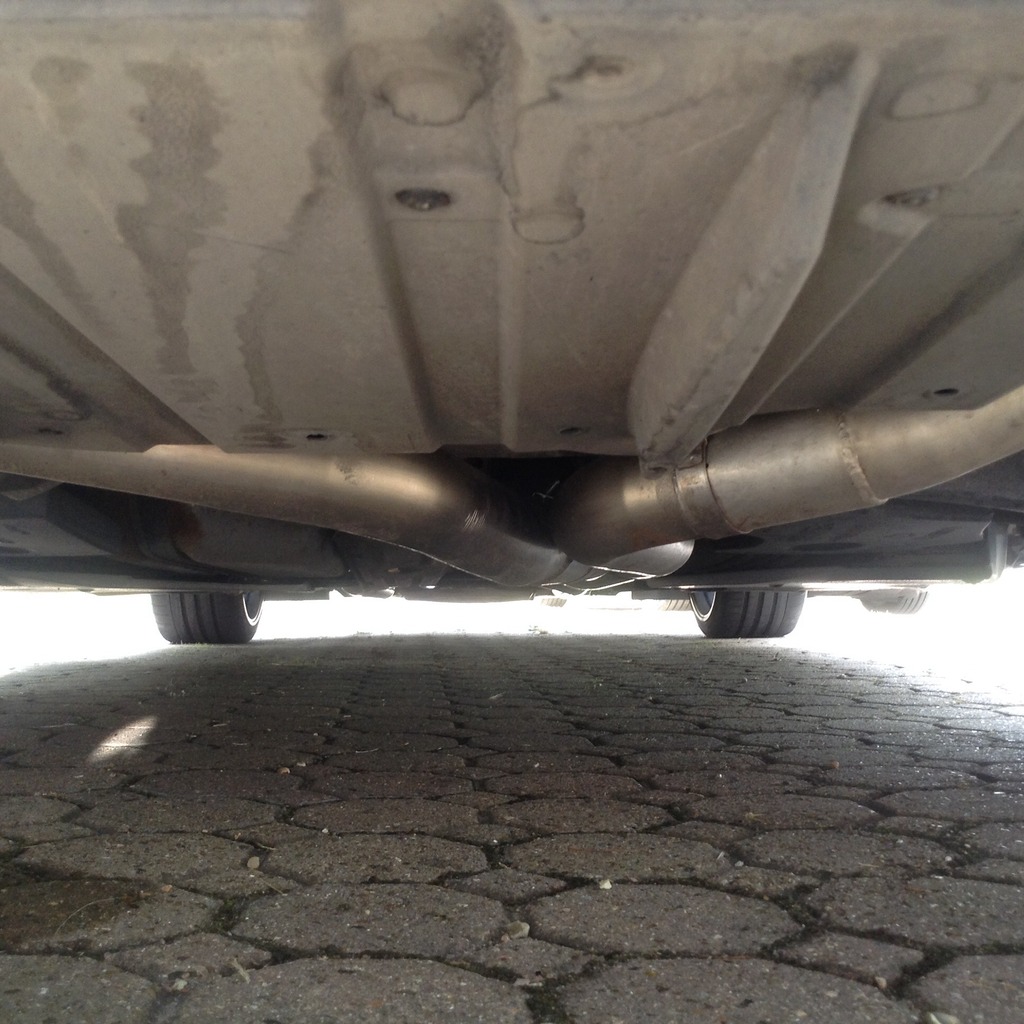
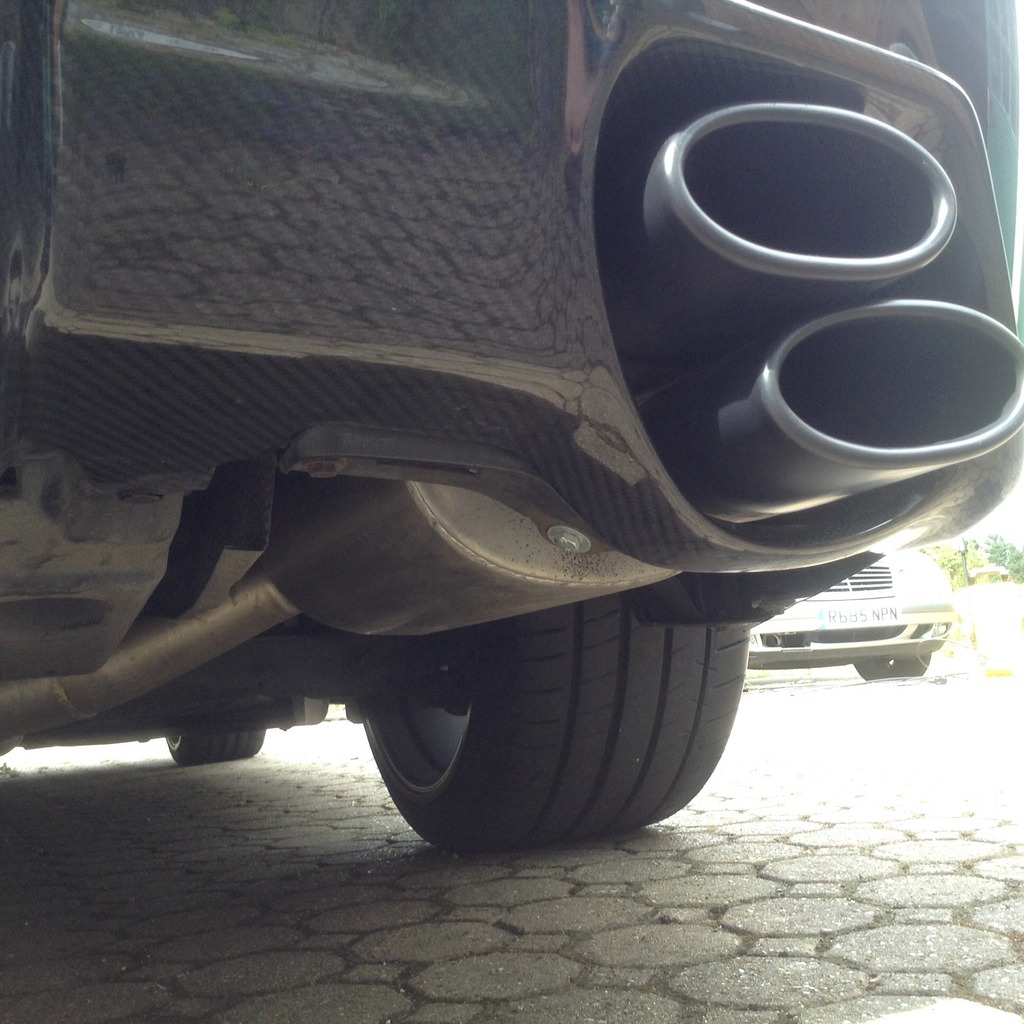
The sharper eyed amongst you will have noticed the black exhaust tips.
These are part of the newly installed Hayward & Scott header back system. Whilst there are a few of these in the UK now, this is the only one I know of with the secondary cat's removed.
It is also the only one with ceramic coated exhaust tips I believe.
I also upgraded the fogs to the newer LED type as can be seen in this photo.
The most recent addition was my secondhand set of Novel carbon fender ducts (thanks Pat!).
That brings things bang up to the present in terms of where the car is currently.
I'll list out some of the next steps in a further post in a bit.
Hope everyone enjoys my build thread.
Thanks.
Peter
Off came the 'LEXUS' and 'IS' badges, leaving just the F badge and the Lexus logo on the Wald replica trunk spoiler.


The sharper eyed amongst you will have noticed the black exhaust tips.
These are part of the newly installed Hayward & Scott header back system. Whilst there are a few of these in the UK now, this is the only one I know of with the secondary cat's removed.
It is also the only one with ceramic coated exhaust tips I believe.


I also upgraded the fogs to the newer LED type as can be seen in this photo.

The most recent addition was my secondhand set of Novel carbon fender ducts (thanks Pat!).


That brings things bang up to the present in terms of where the car is currently.
I'll list out some of the next steps in a further post in a bit.
Hope everyone enjoys my build thread.
Thanks.
Peter
Last edited by PDP180180; 07-10-15 at 06:22 AM.
 07-10-15, 06:33 AM
#8
So, now I have done my whirlwind build thread to bring things up to the present, I should probably go over what's going to be happening next!
I currently have a set of second-hand BC BR coilovers with Swift springs in my garage. These will be getting installed along with my second-hand FIGS mega rear suspension arms, RR-Racing USRS kit, and F Sport rear sway bar. The bar and bush kit are currently making there way to a buddy in Texas, he will then ship them to another buddy in LA for when I am due out there in a couple of weeks time (got a deposition to do in Phoenix!).
I'd have loved to grab a set of RHD PPE headers whilst I am going to be in Phoenix, but funds just can't stretch that far at the moment sadly!
I am also going with the RR-Racing air/oil separator as I would like to try and get the F out on some of our brilliant tracks over this side of the pond soon.
2-piece rotors are another upgrade I want to do when I can afford it, and I also want to grab the Arkym front carbon splitter to match up with the diffuser.
I have also been considering a re-trim for the interior in a dark red colour (think ox-blood), as I think it would look amazing against the SGM and carbon details.
The calipers may also be going blue to tie-in better with my rims, lug nut centre's, and valve caps.
After that I think it's time to do some more digging with the whole mapping side of things. Given my car is a UK model, it's closer to the JDM specification than the USDM ones. Should mean any solution from Novel or SARD or any other Japanese tuner will work on my car. That's the theory anyway!!
I'll be back with updates very soon.
Cheers.
Peter
 07-10-15, 06:58 AM
#10
Thank you!
Glad you like it.
Have to say the memorable part for me was trying to get some of the larger parts back on the plane!
My best effort so far was the 4 rims, my re-furbished headlights, a full sized suitcase, and my carry on case!
I guess travelling a lot for business has some perks! No excess luggage charges!!
Did need two trolleys when I landed to move it all! Lol.
Fun times!
07-27-15, 01:22 AM
#13
Hey Guys,
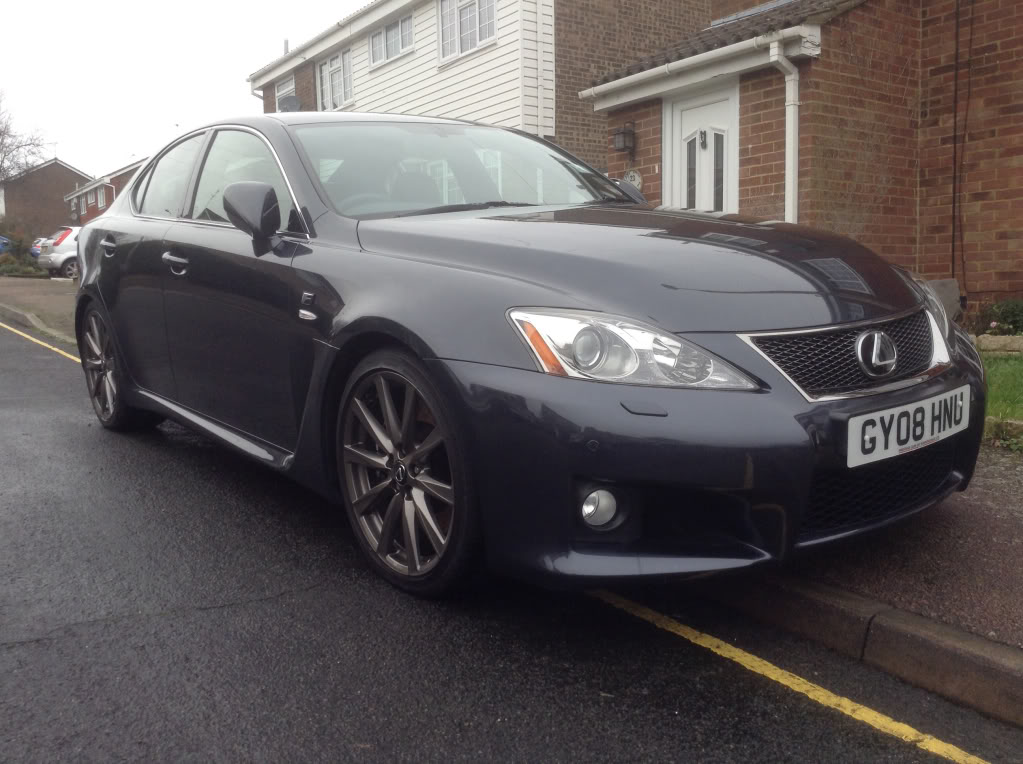
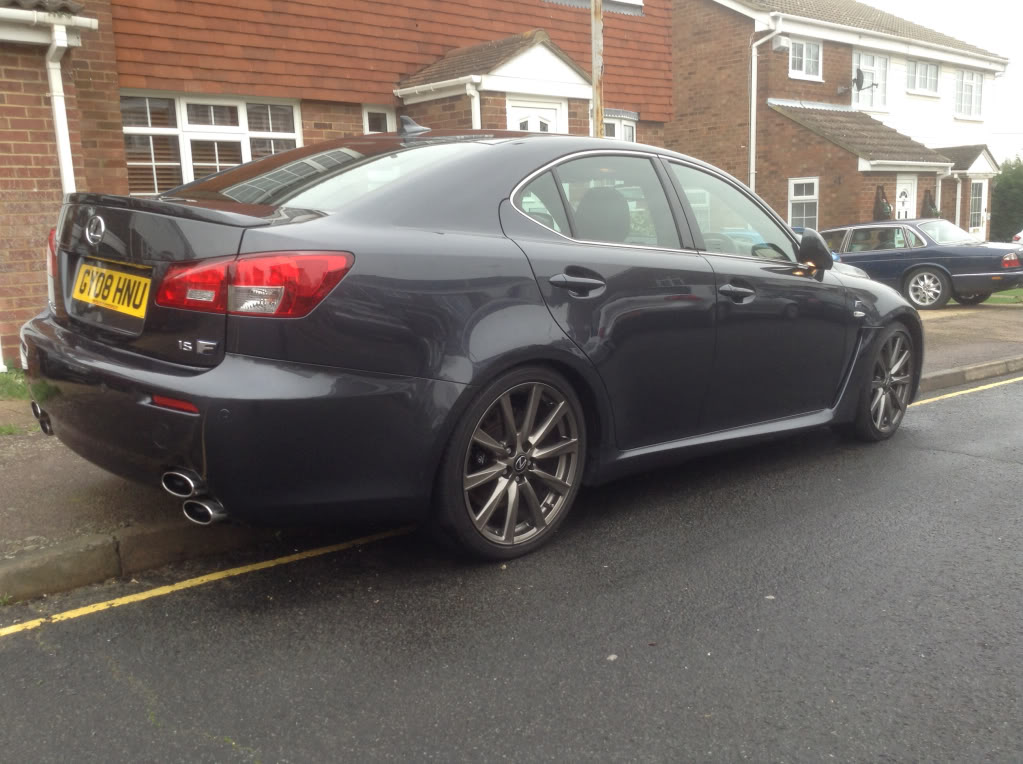
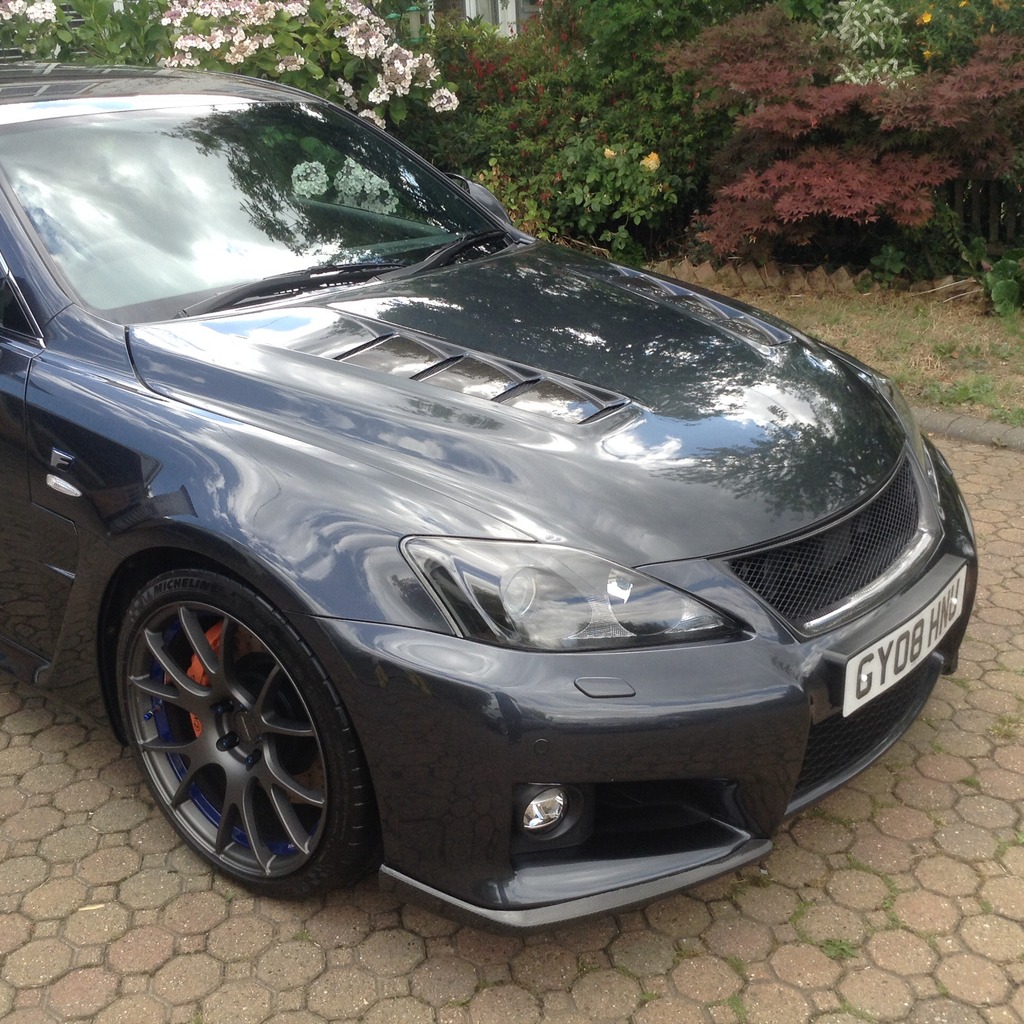
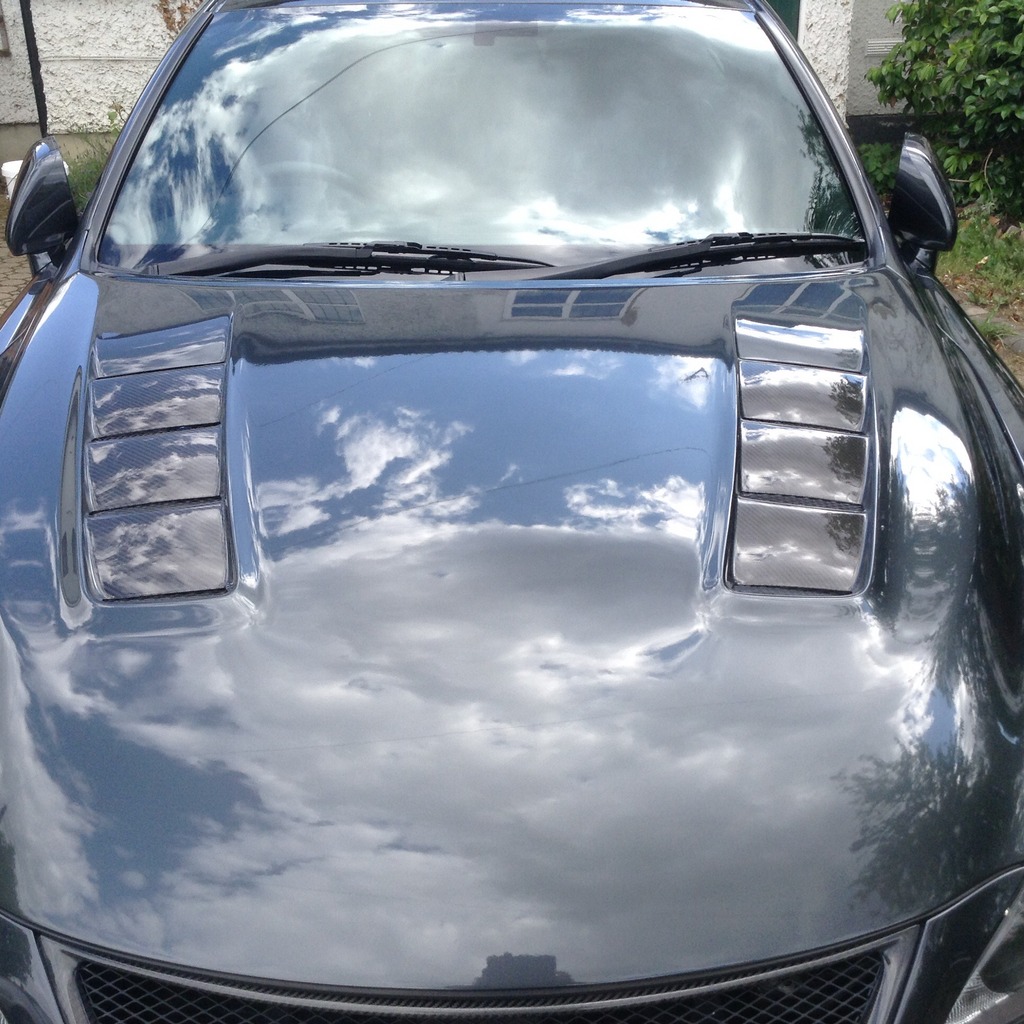
So I finally had a chance to give the F a proper clean and polish at over the weekend. Snow foam, two bucket method, a nice coat of polish, and the wheels sealed with Sonax nano-sealant.
Here are some photos when I was done. Hope you like them.


So I finally had a chance to give the F a proper clean and polish at over the weekend. Snow foam, two bucket method, a nice coat of polish, and the wheels sealed with Sonax nano-sealant.
Here are some photos when I was done. Hope you like them.


The following users liked this post:
DJosey (02-22-18)
07-27-15, 11:59 AM
#15
Racer
Looking great,
I remember AMD tuning, they do a lot of VAG cars don't they? I'd love having the ISF in the UK, must be great with the cold weather but then again traction must be a constant pain, I hope those Pilot SS hold it well in the rain.
I remember AMD tuning, they do a lot of VAG cars don't they? I'd love having the ISF in the UK, must be great with the cold weather but then again traction must be a constant pain, I hope those Pilot SS hold it well in the rain.