
2002 Lexus IS300 Sportcross Maintenance Log
 01-18-15, 10:05 PM
#31
Pit Crew
Thread Starter
M98 = Torsen LSD goodness
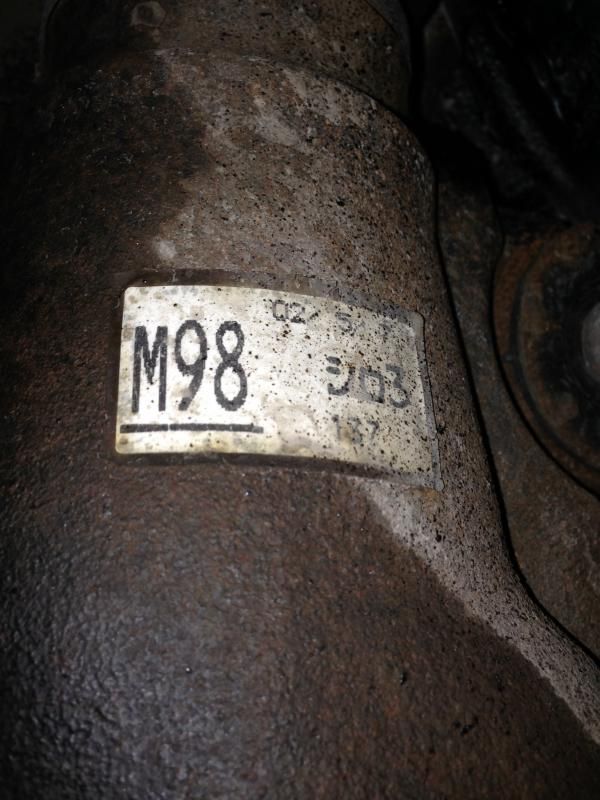
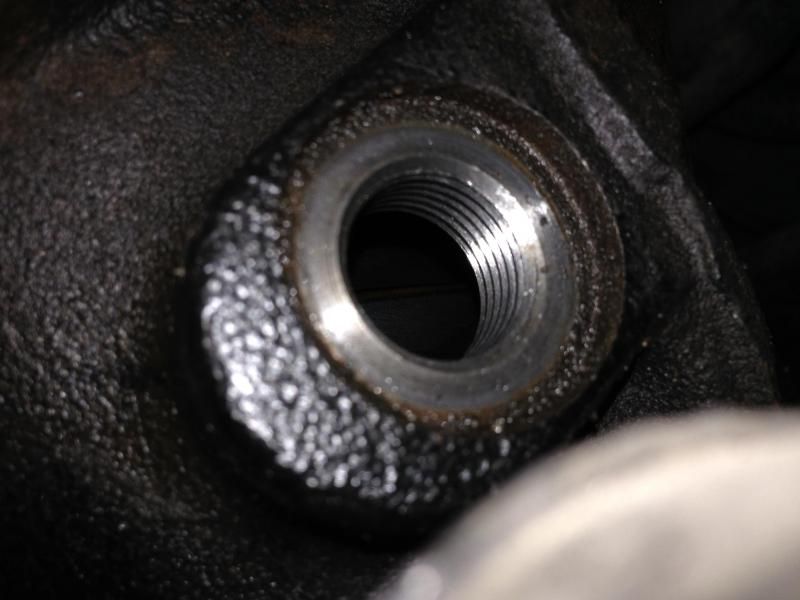
I wanted to see something cool inside but nothing really is there
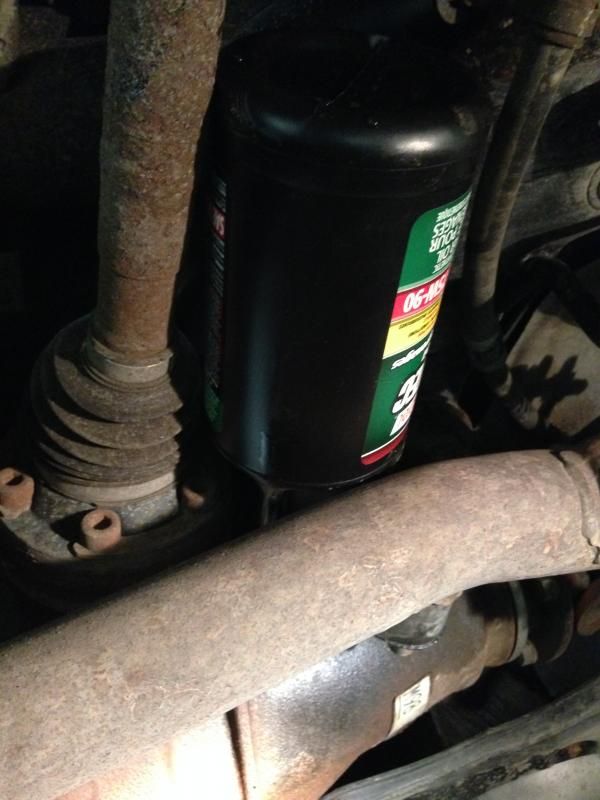
This is the CV axle protector I swung out of the way. You only really have to undo one bolt and loosen the other
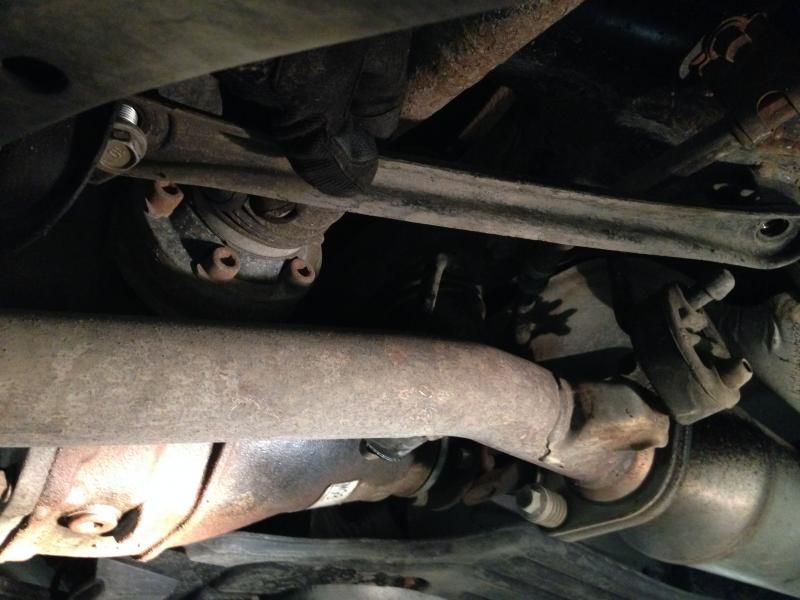
Nice and tight fit
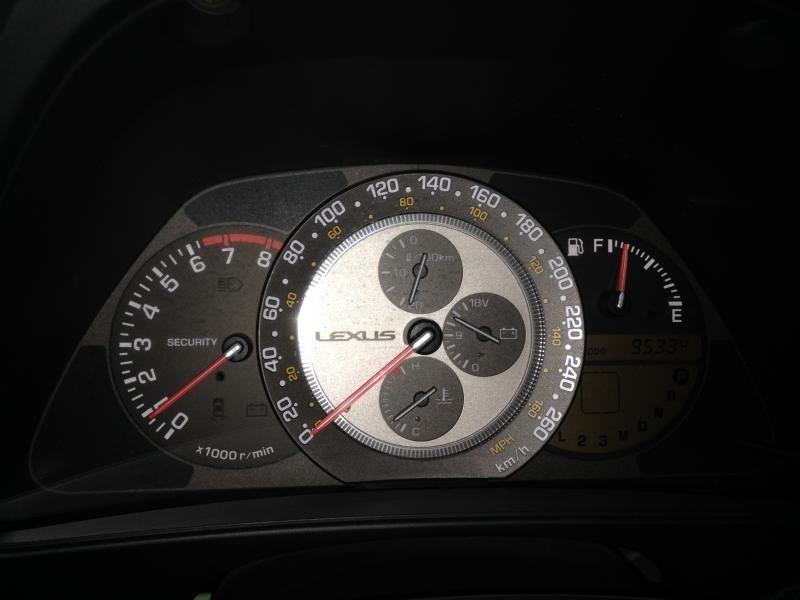
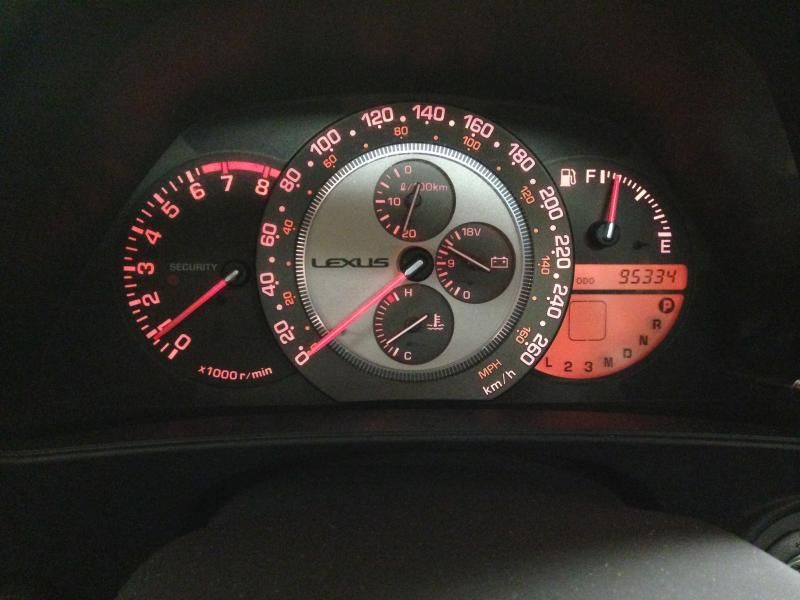
And gauge cluster just because

I wanted to see something cool inside but nothing really is there

This is the CV axle protector I swung out of the way. You only really have to undo one bolt and loosen the other

Nice and tight fit


And gauge cluster just because


 08-29-15, 06:43 PM
#32
Driver School Candidate

Join Date: Aug 2015
Location: CA
Posts: 1
Likes: 0
Received 0 Likes
on
0 Posts
man, that is a lot of work. And you definitely know what you are doing... I hope you still have the car.. Our sportcross became an Unintentional Exotic due to the low number of these cars sold..
11-20-15, 09:30 PM
#33
Pit Crew
Thread Starter
The previous owner paid a sack load of money to get the timing belt and water pump replaced at 90k kilometers. He took it to a shop in Calgary that he’s been going to for years. The pump started to leak and got progressively worse which prompted me to redo the whole timing belt service. Since the shop messed up the water pump I figured they probably screwed something else up as well……I was unfortunately right.
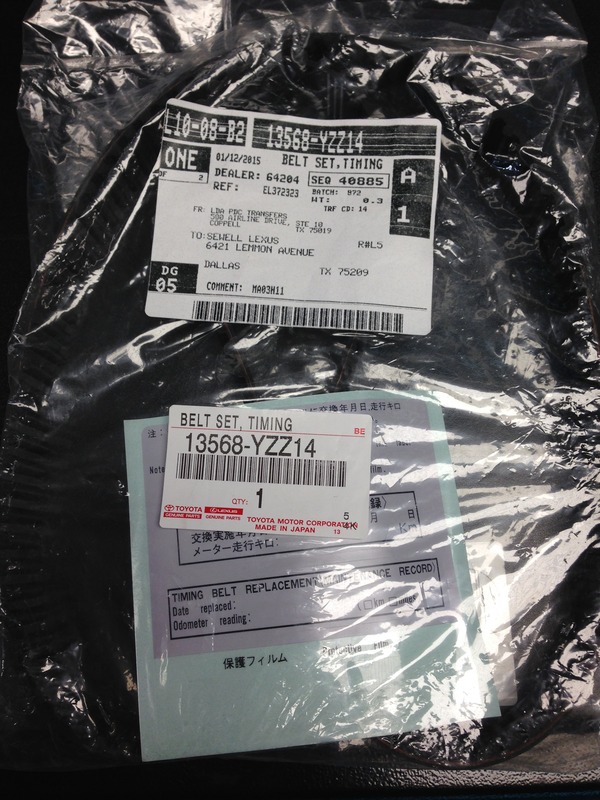
Start with placing a large order to your favorite online parts place
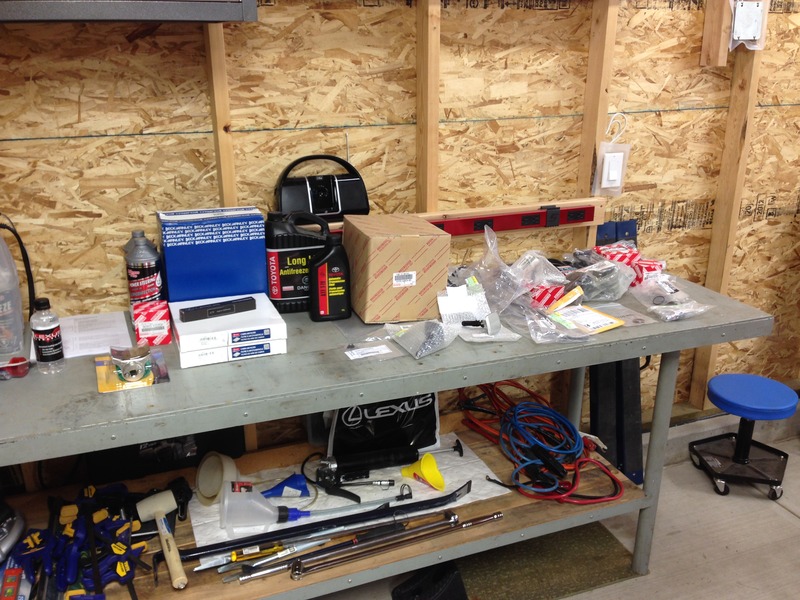

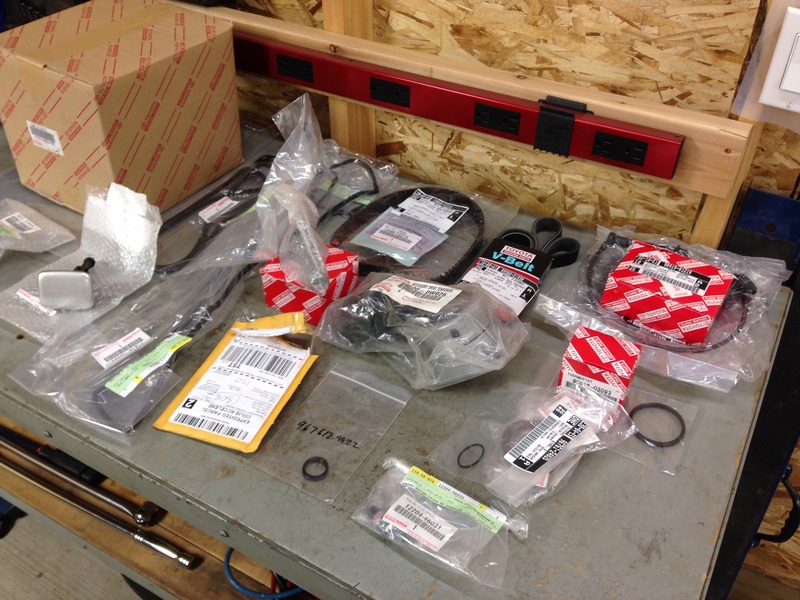
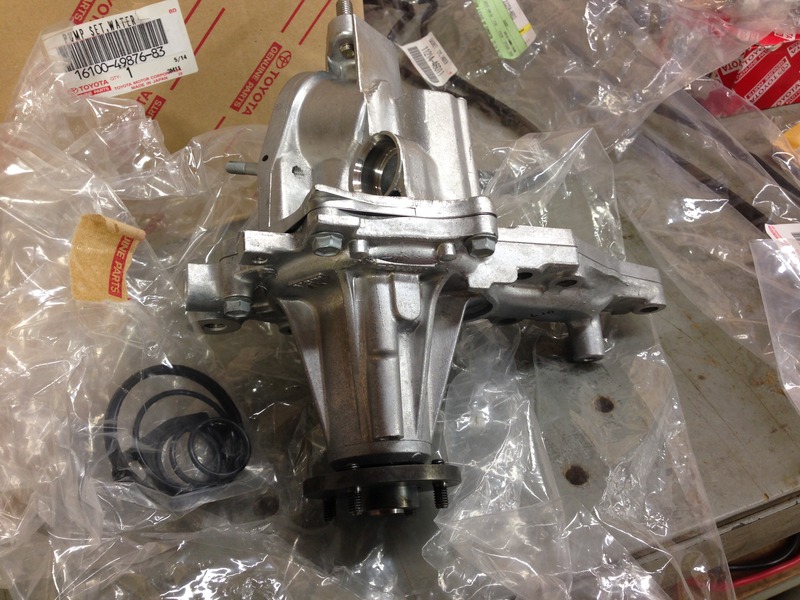
New water pump goodness with all seals
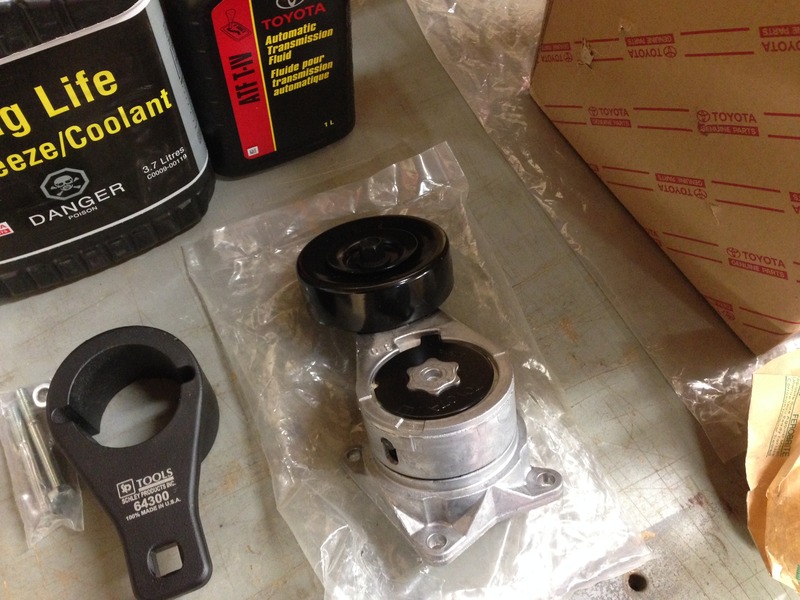
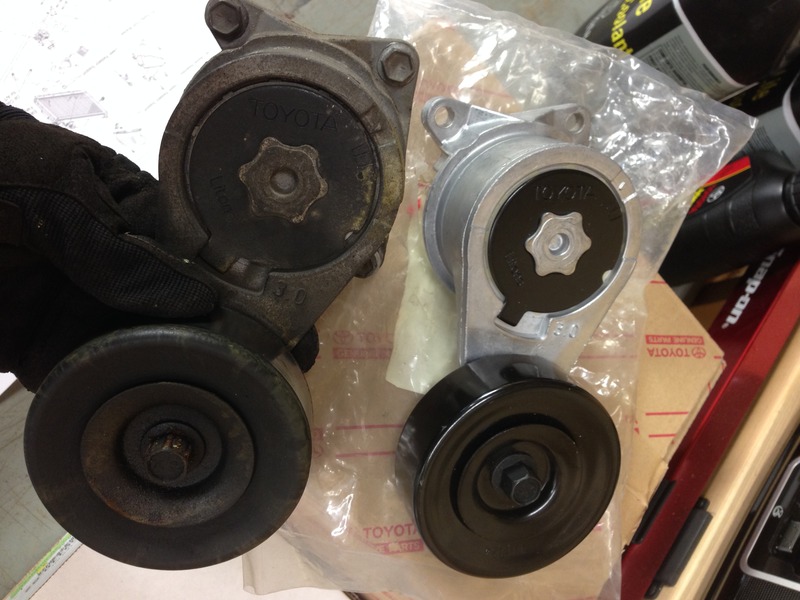
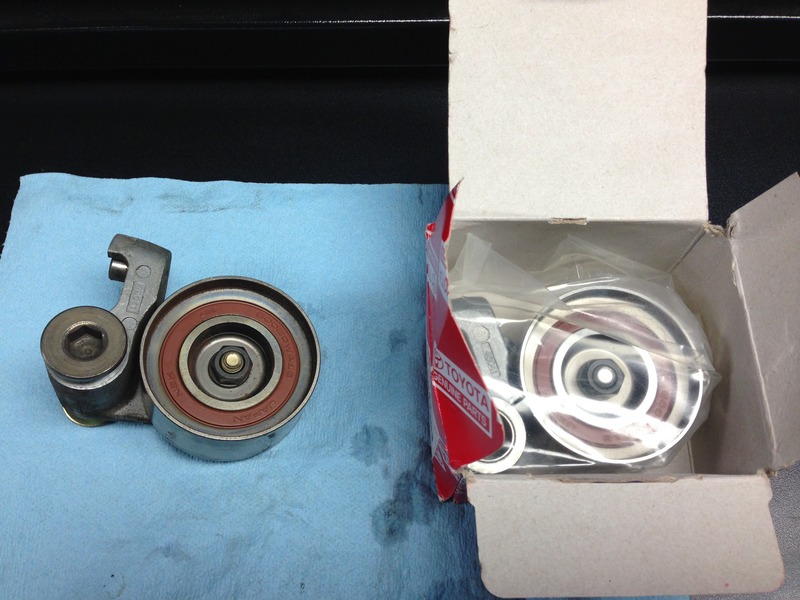
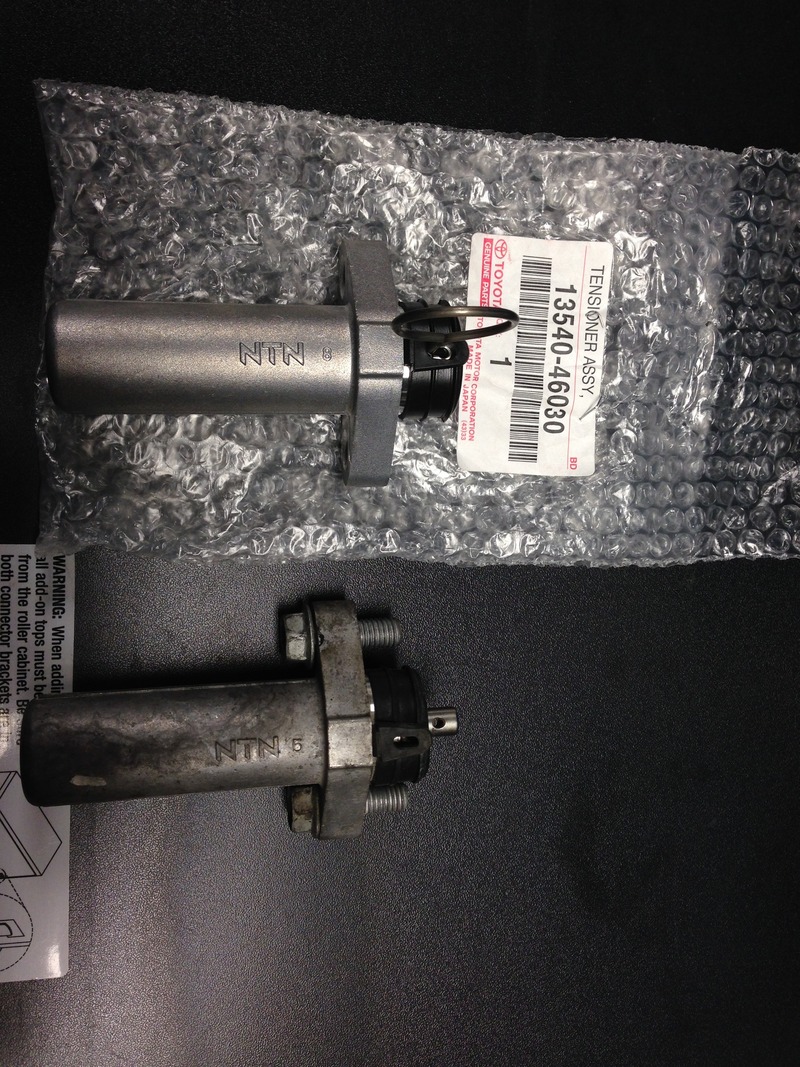
New tensioner since I had a squeaker
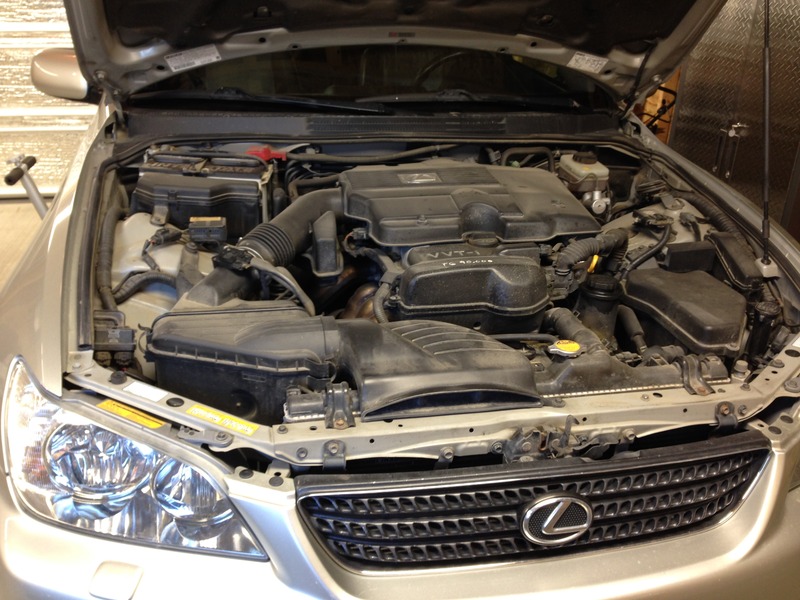
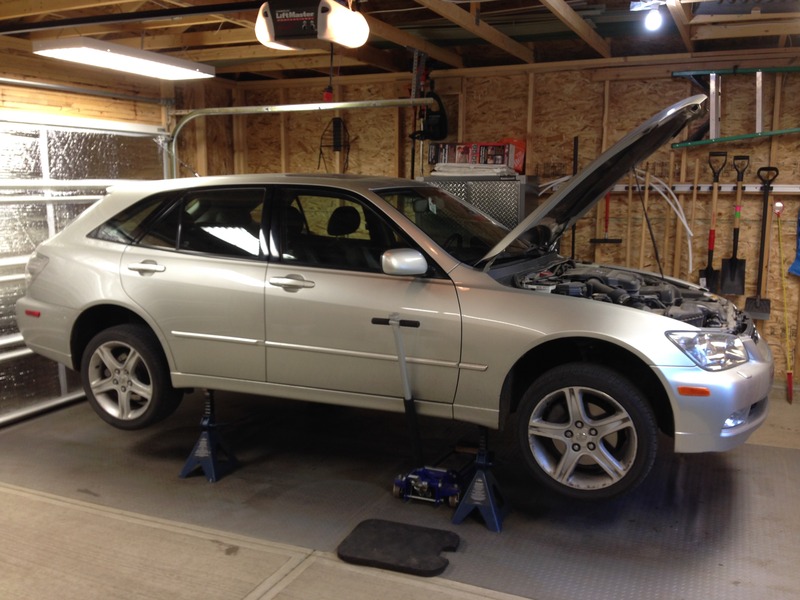
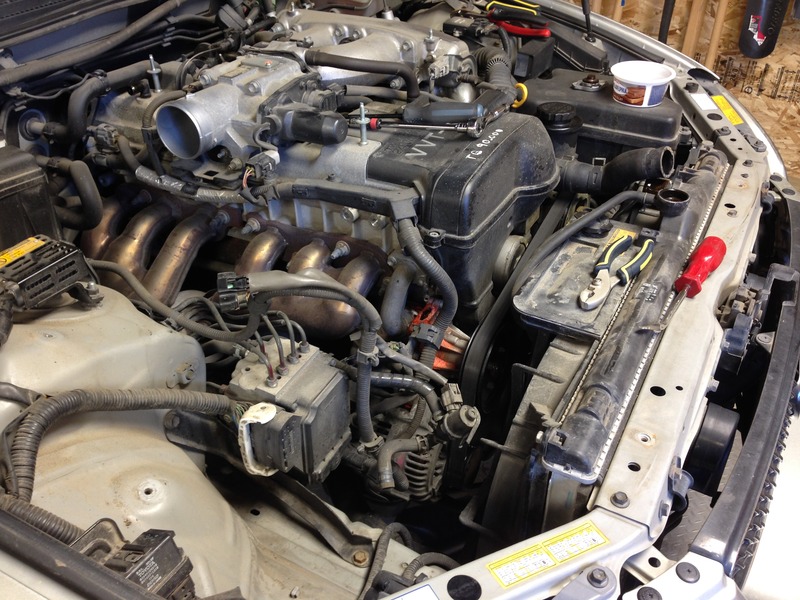
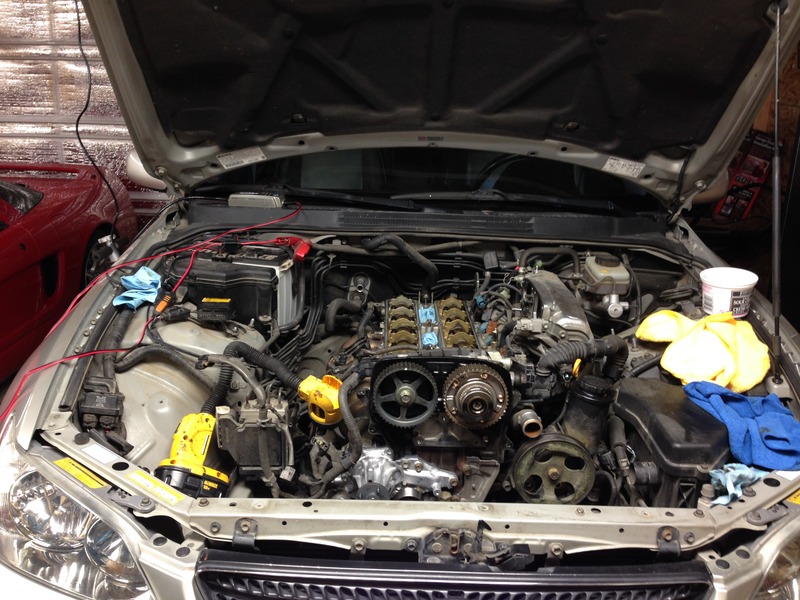
Here is how it sat before any work began
The leaking water pump.
Jack it up and start taking parts off the car
Start with placing a large order to your favorite online parts place


New water pump goodness with all seals

New tensioner since I had a squeaker

Here is how it sat before any work began

The leaking water pump.


Jack it up and start taking parts off the car

 11-20-15, 09:31 PM
#34
Pit Crew
Thread Starter
Remove airbox
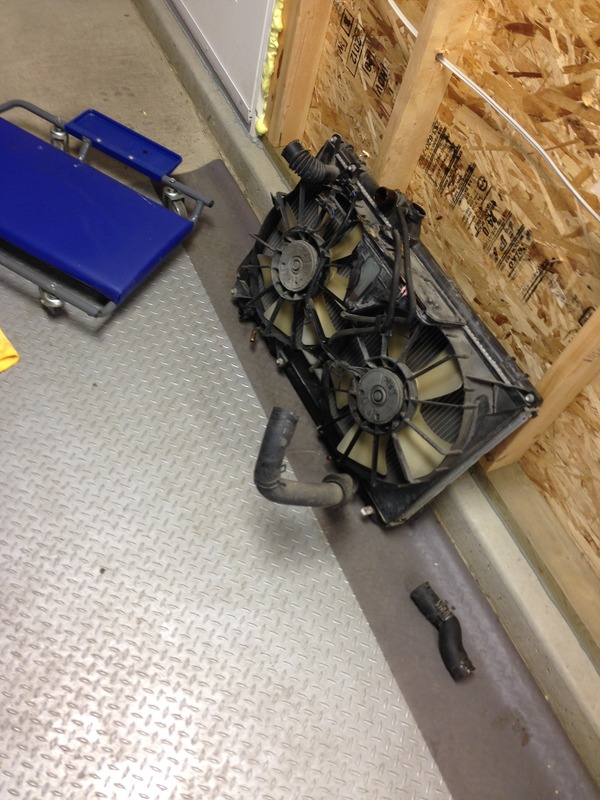
Remove radiator
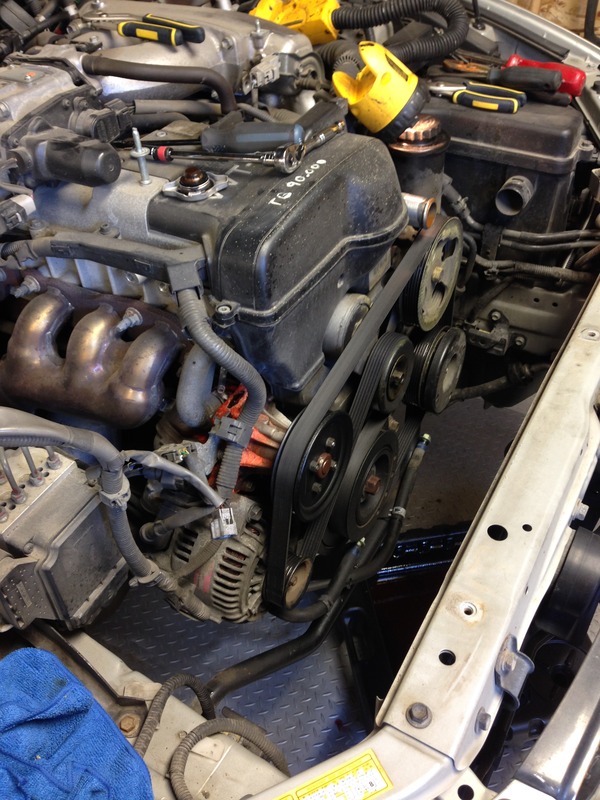
Remove accessory belt

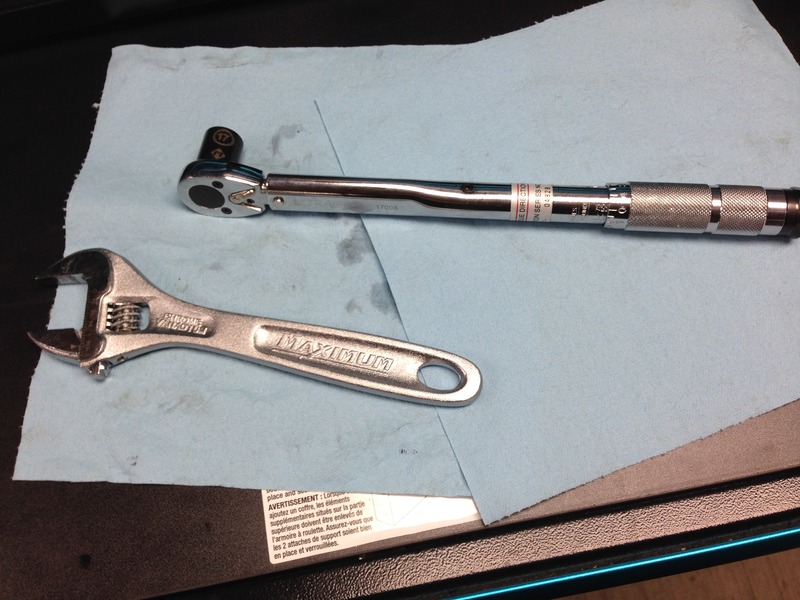
I bought the tool to hold the crank pulley in place. Worked like a treat with 2 breaker bars.
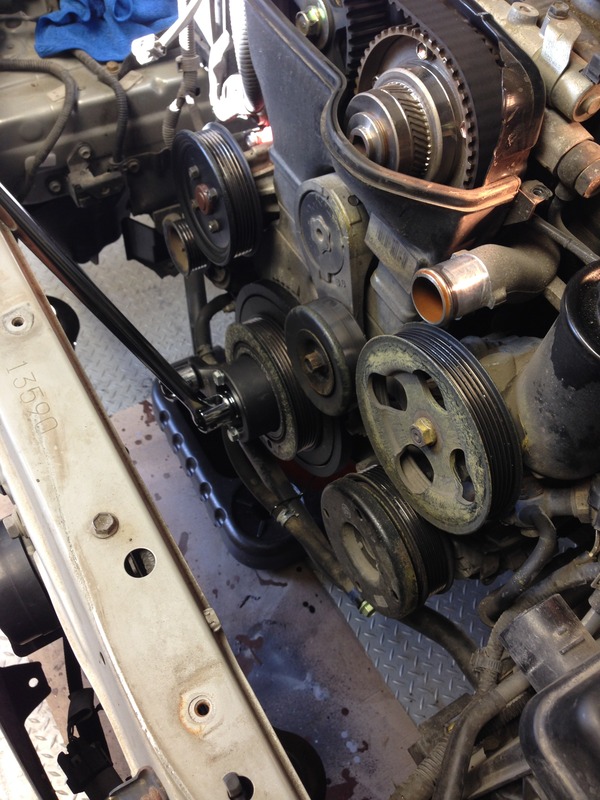
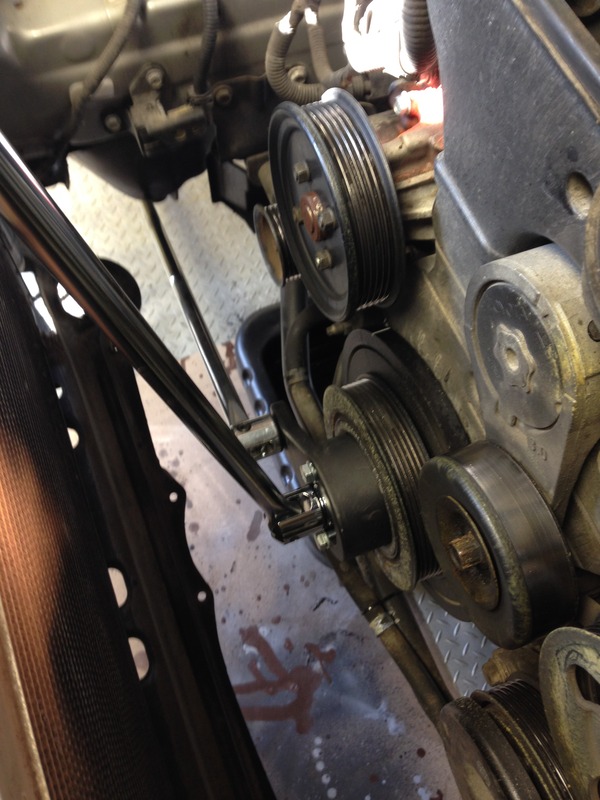
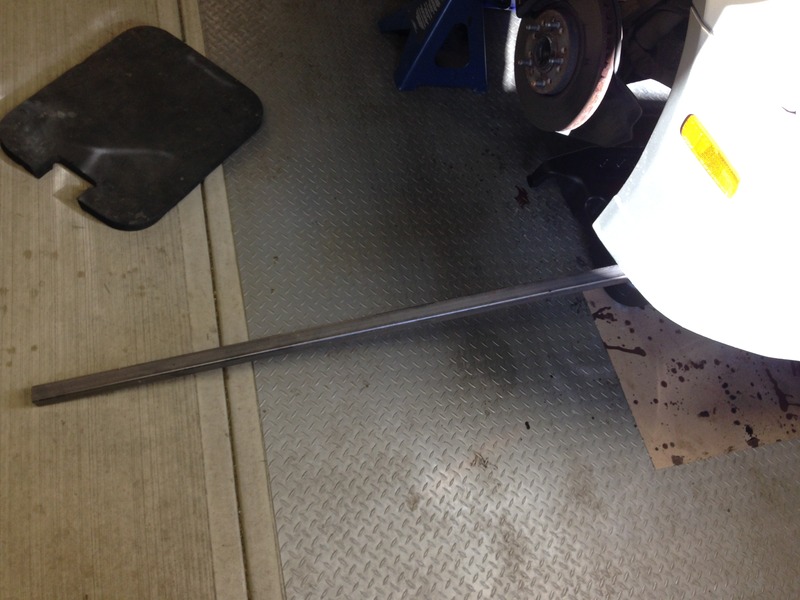
I had to put an extension on the one holding the pulley as my breaker bar was too short to reach the ground
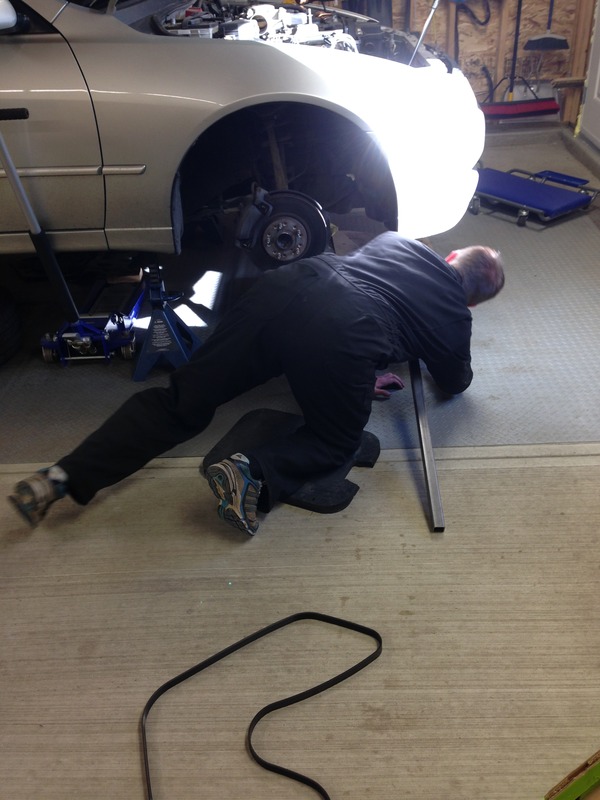
Here is a picture from just in front of the passenger side wheel
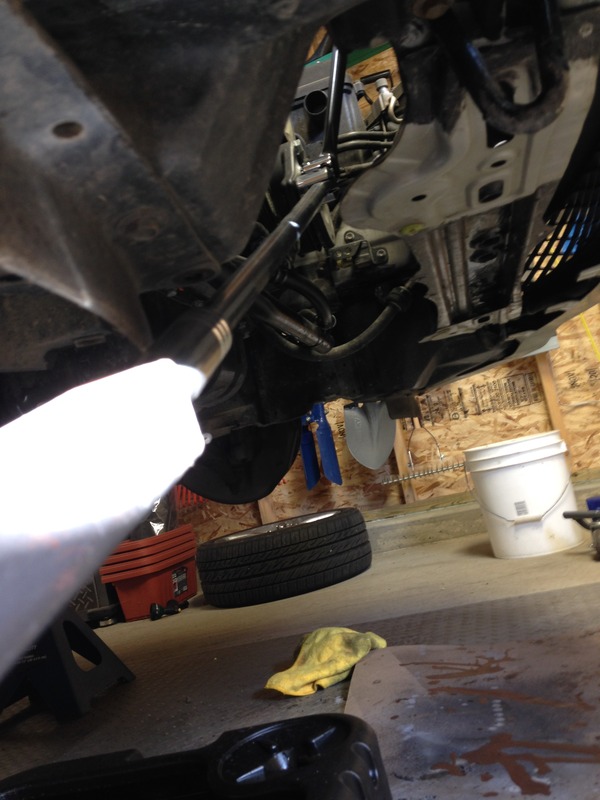
Here is a picture of me taking that picture

Remove radiator


Remove accessory belt


I bought the tool to hold the crank pulley in place. Worked like a treat with 2 breaker bars.


I had to put an extension on the one holding the pulley as my breaker bar was too short to reach the ground

Here is a picture from just in front of the passenger side wheel

Here is a picture of me taking that picture
 11-20-15, 09:33 PM
#35
Pit Crew
Thread Starter
Popped off with no fuss
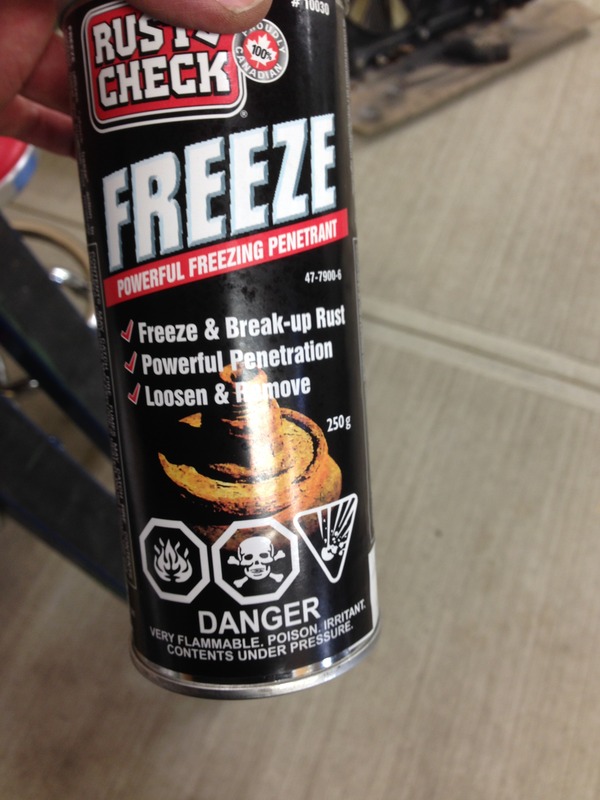
I dosed it in this Rust Check stuff but not sure if it actually did anything other than frost the bolt over a little bit
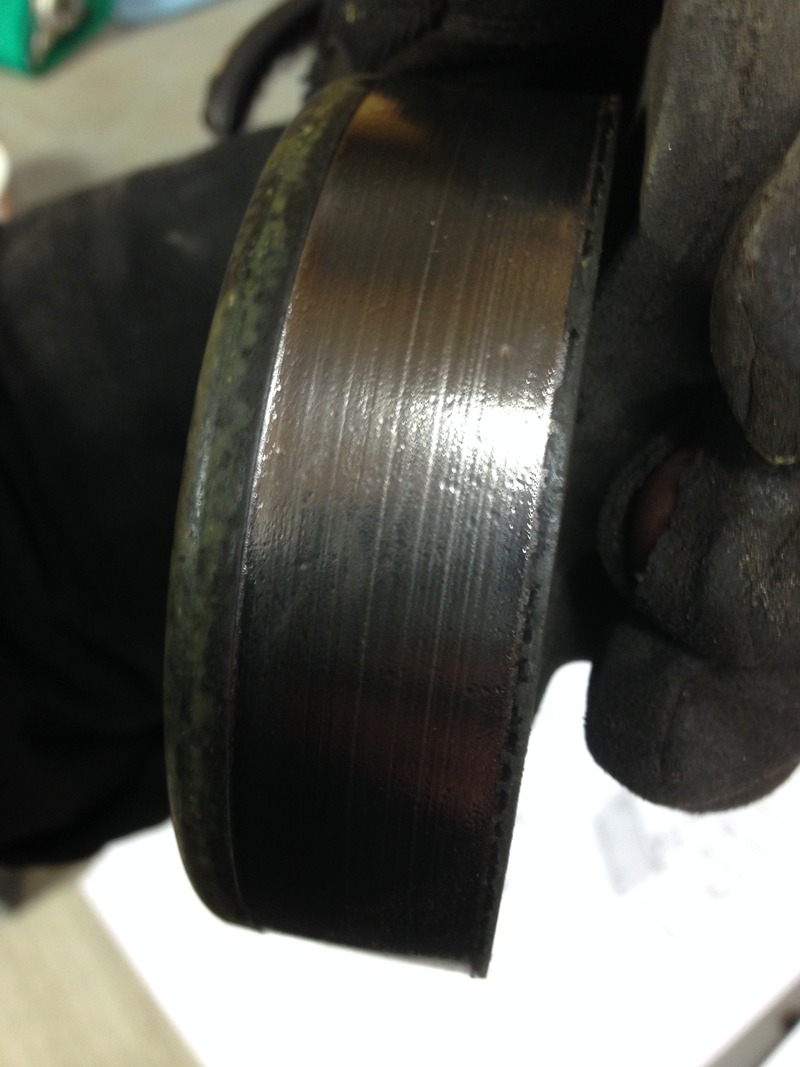
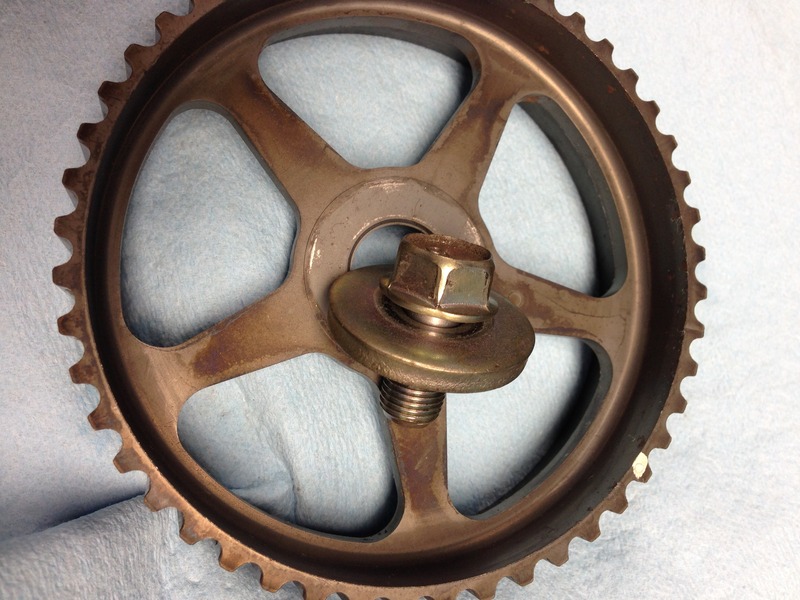
New tensioner. It looks as if there was too much tension since the belt wore down the pulley. That or the previous owner idled the car a lot. It was from Vancouver so lots of traffic is a possibility.
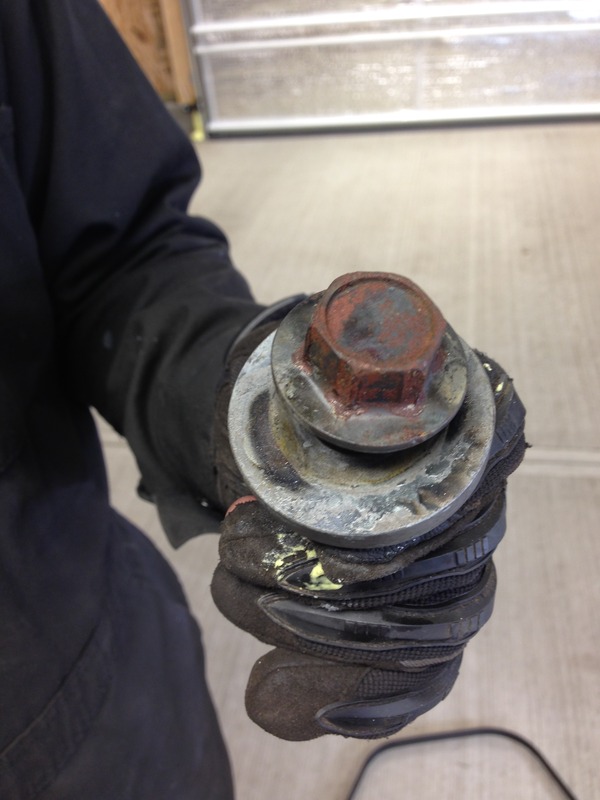
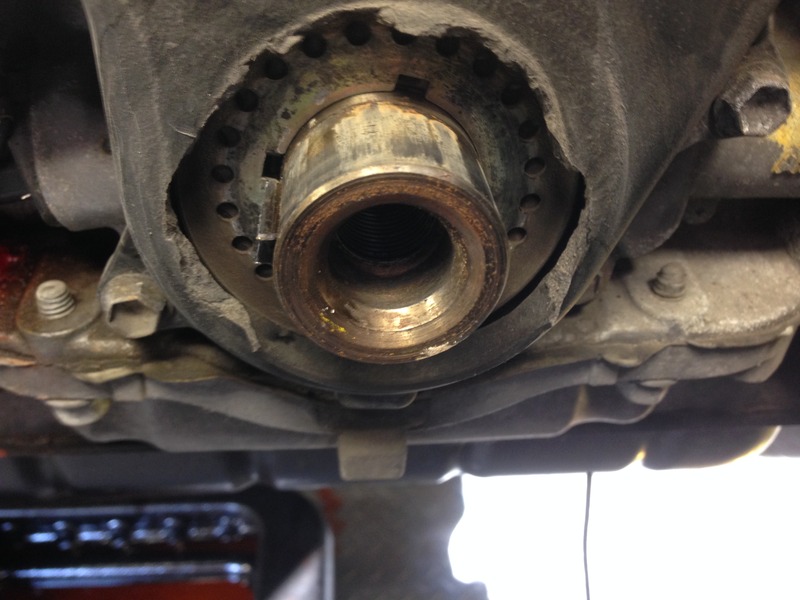
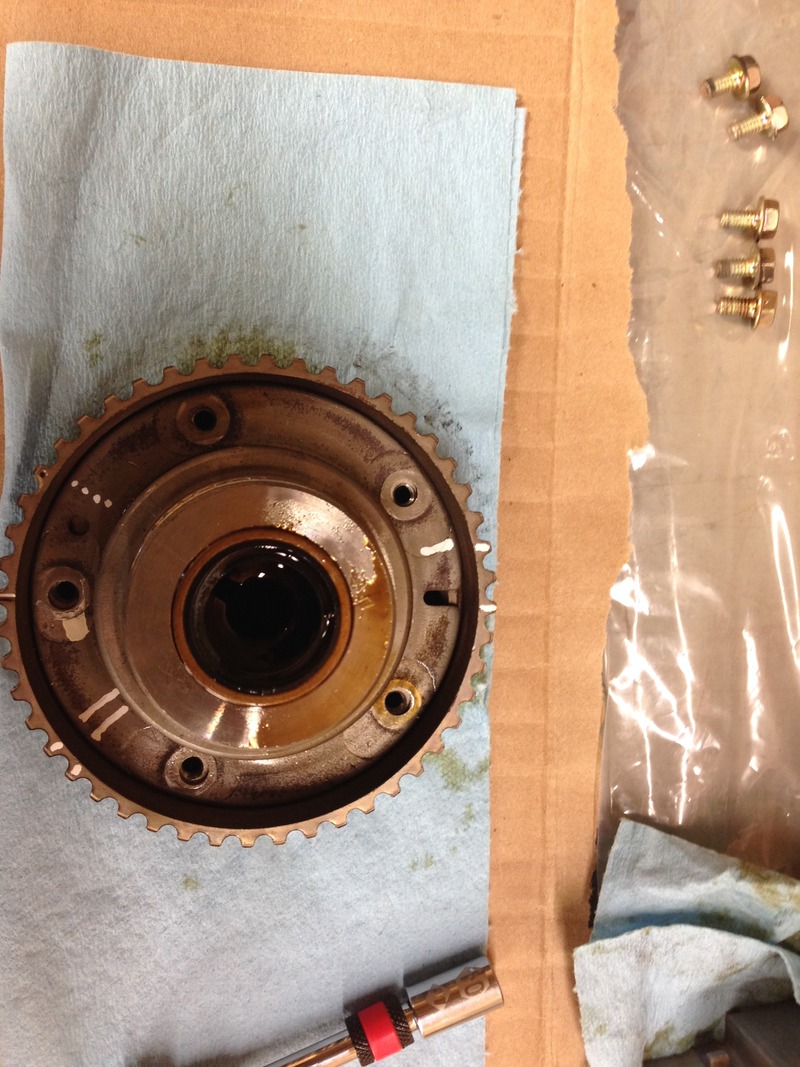
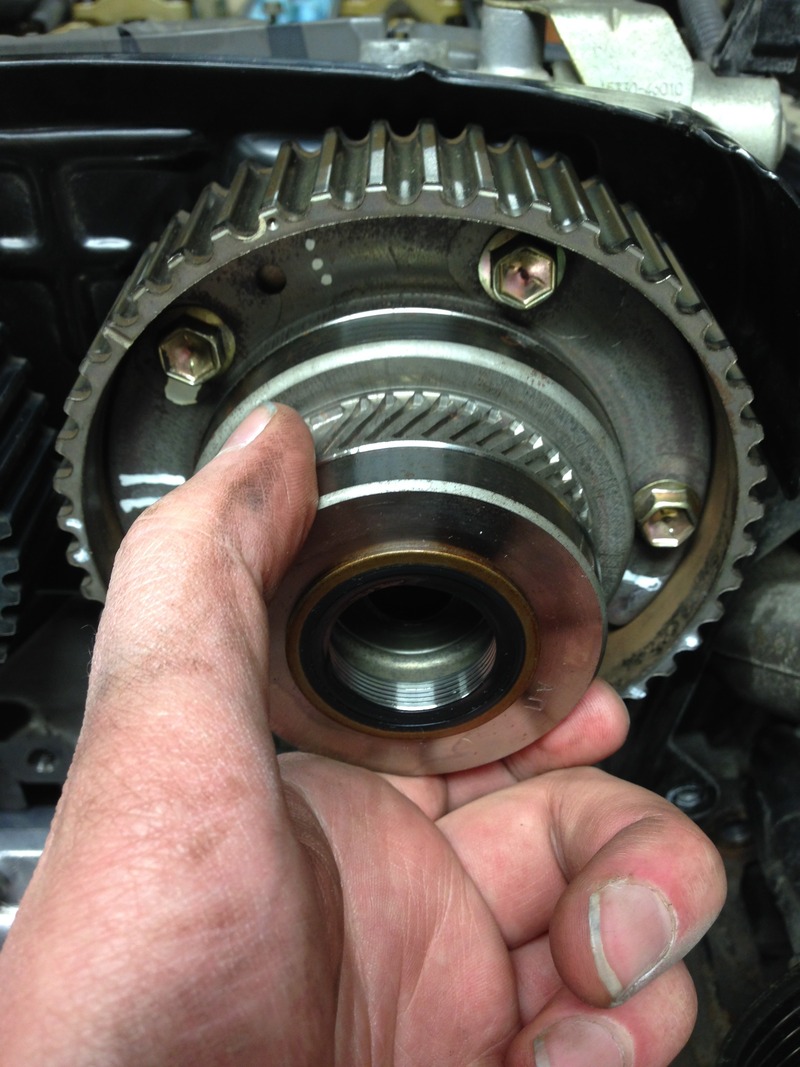
Slide the crank pulley off using a tool or gripping really hard
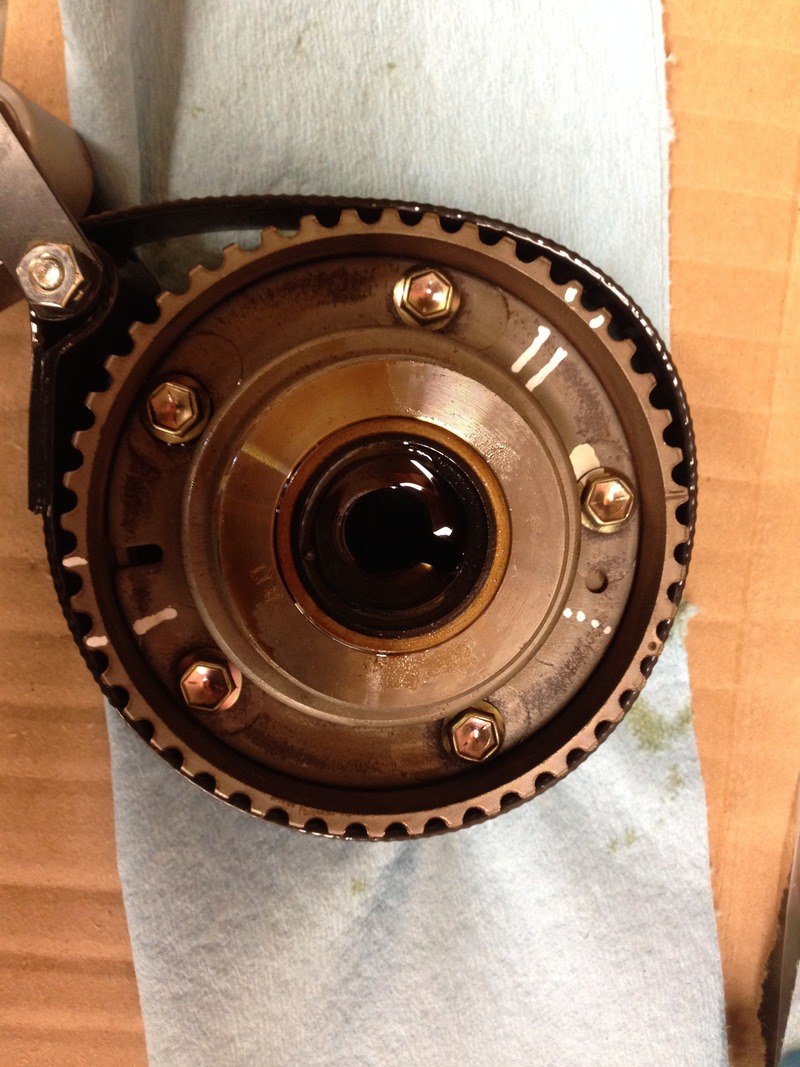
Make sure the first timing mark is still correct
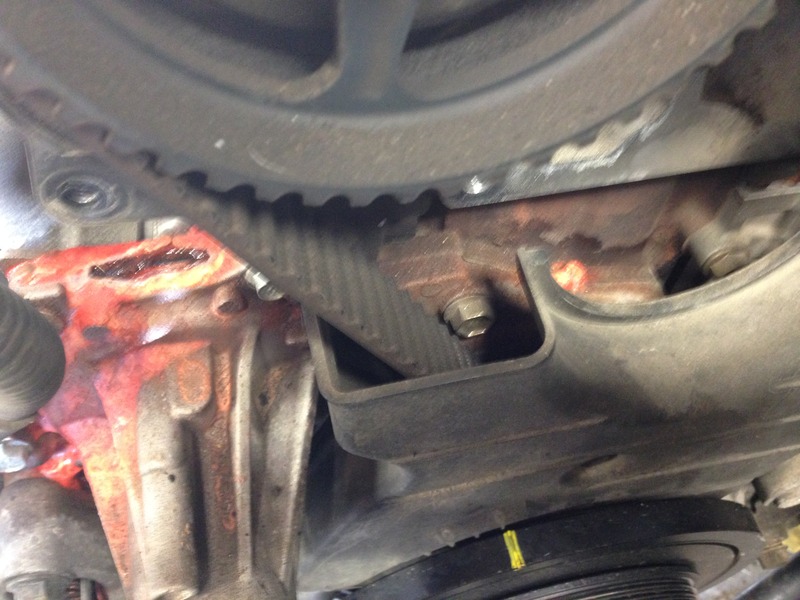
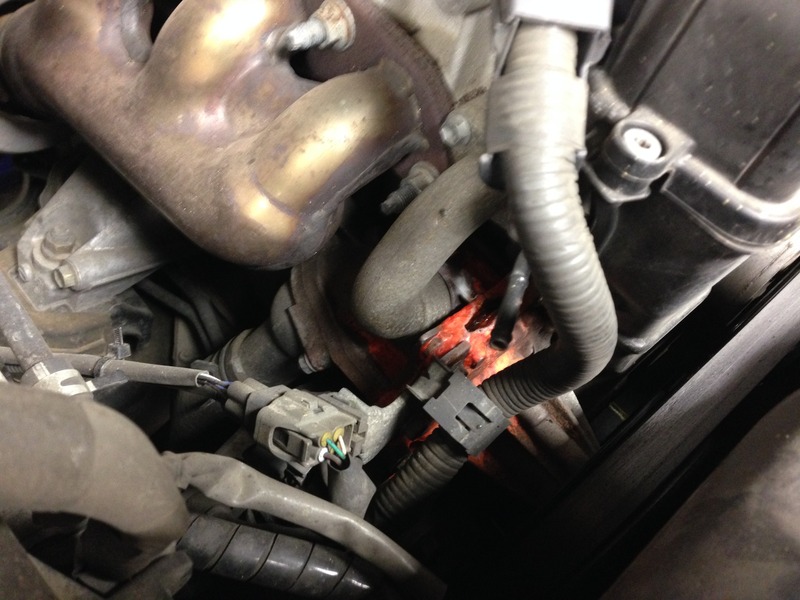
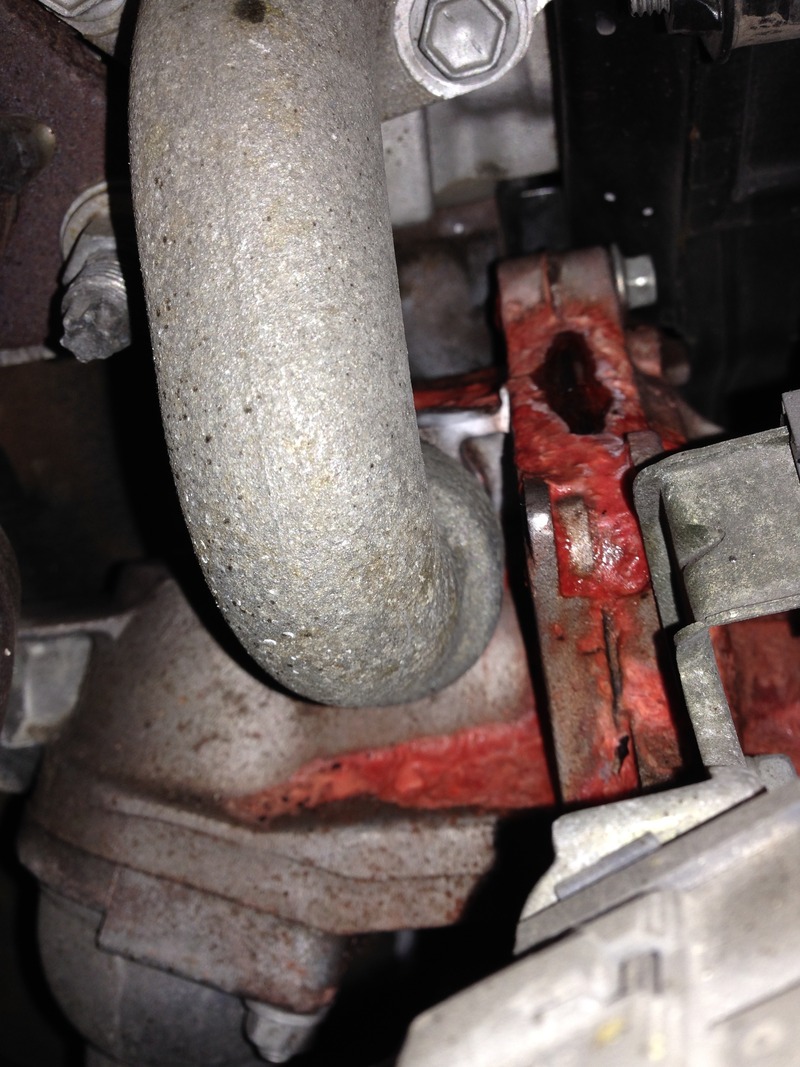
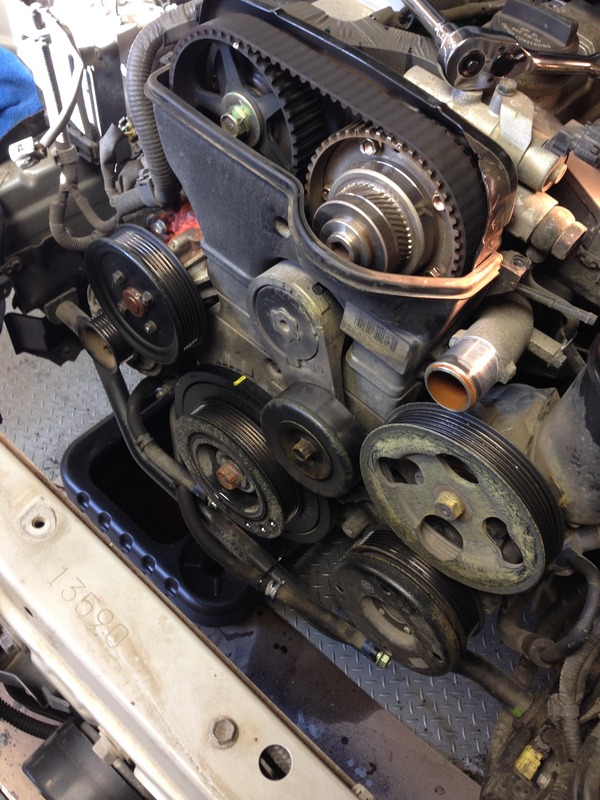
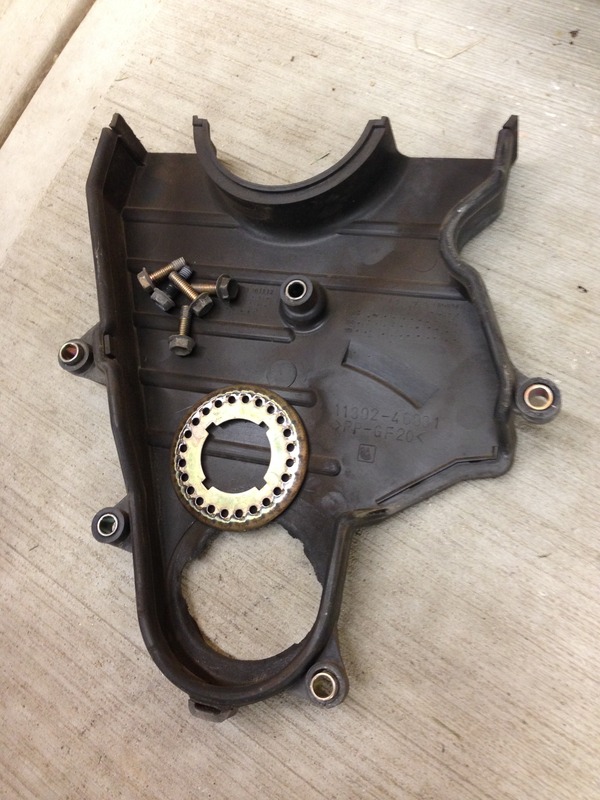
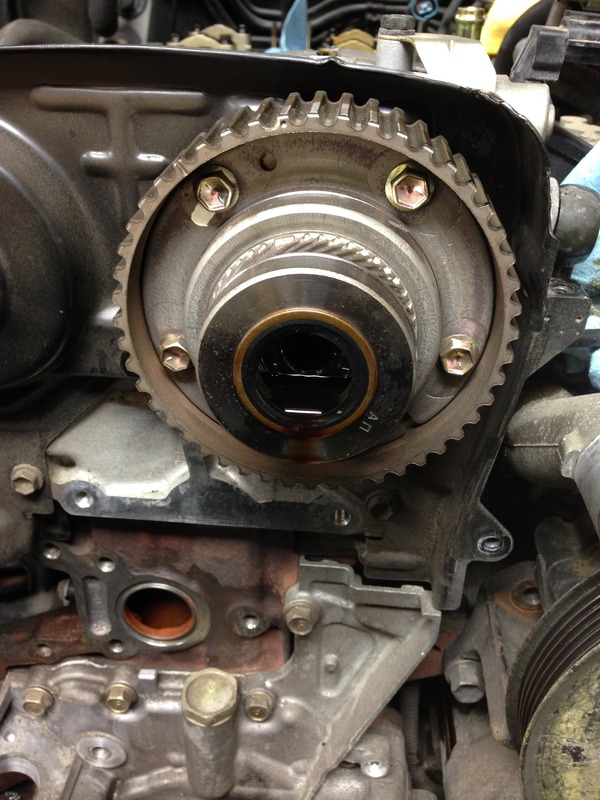
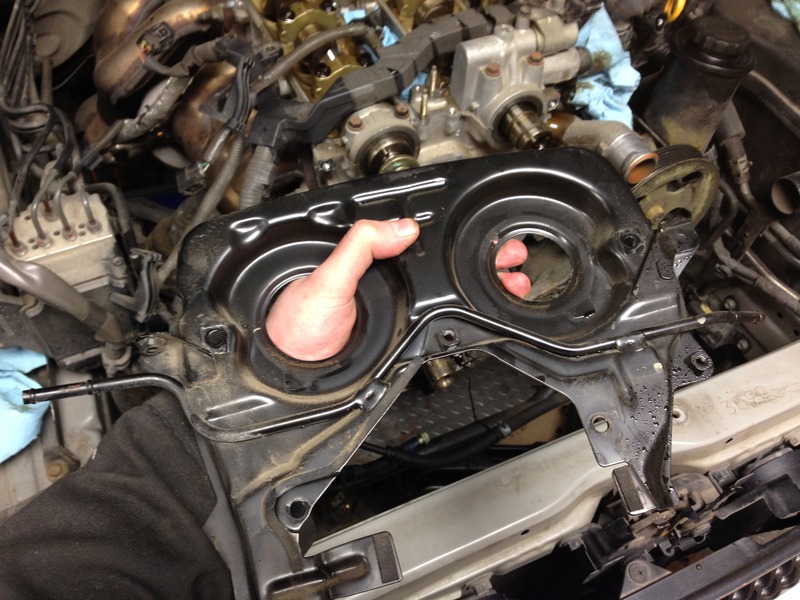
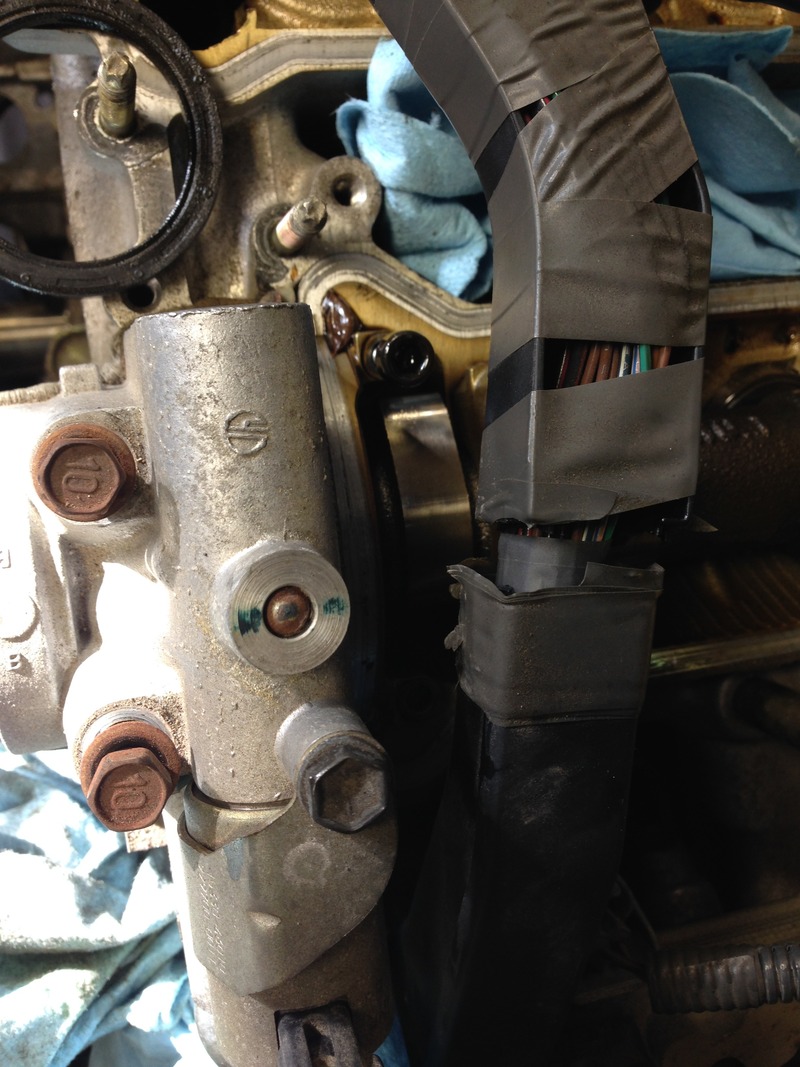
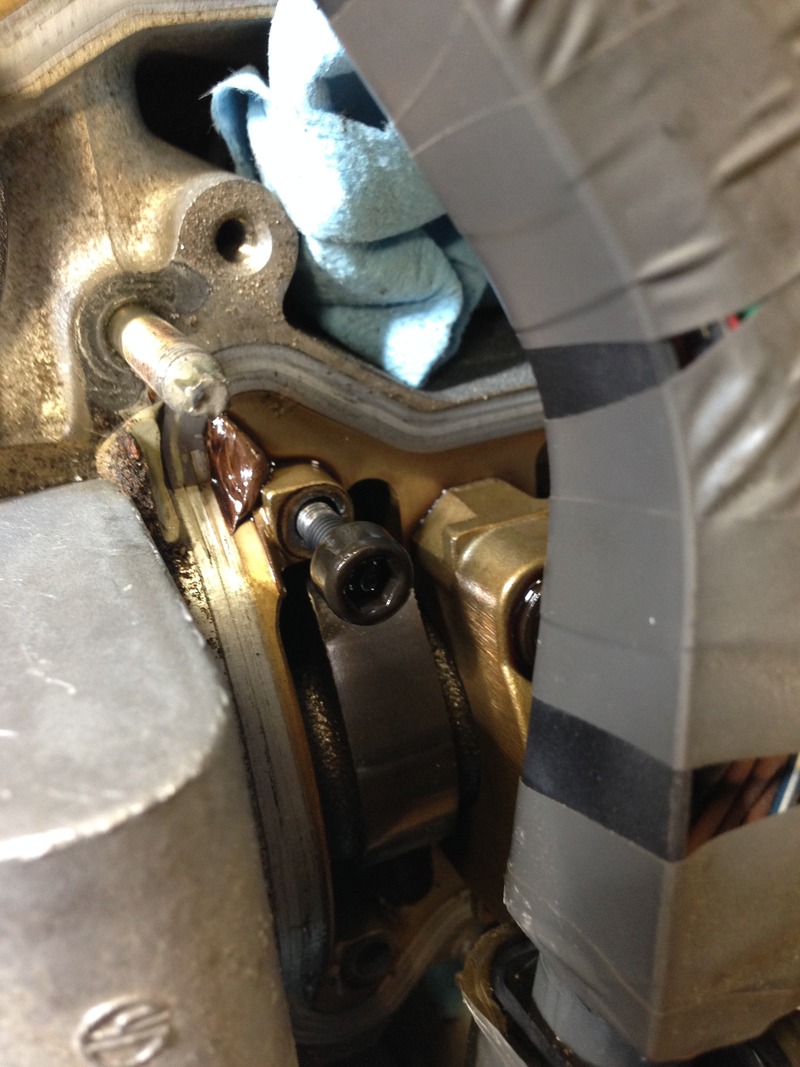
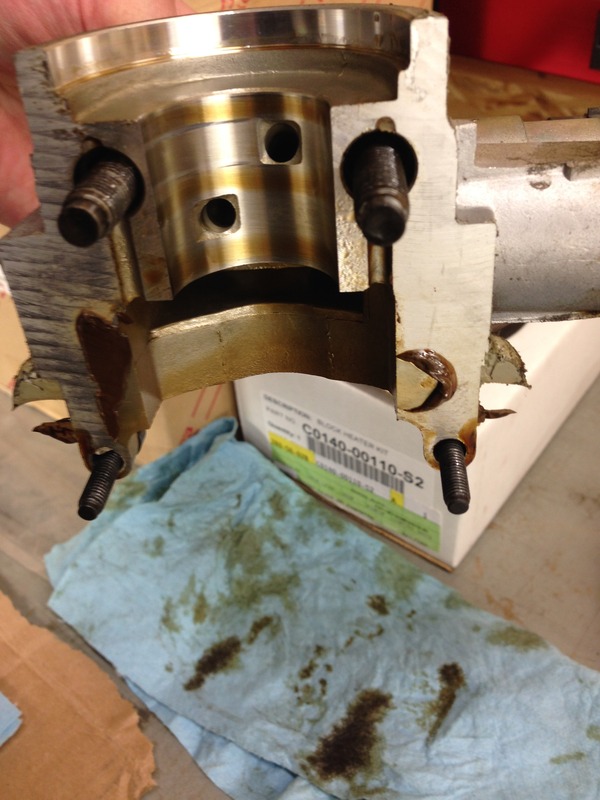
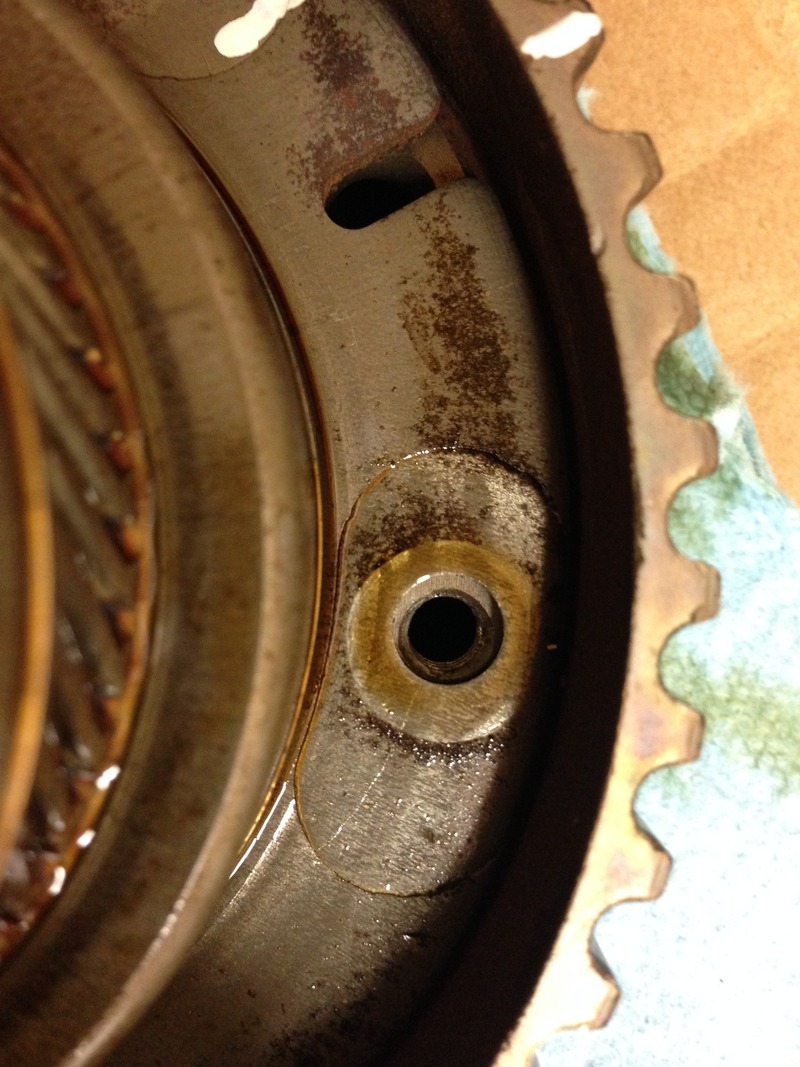
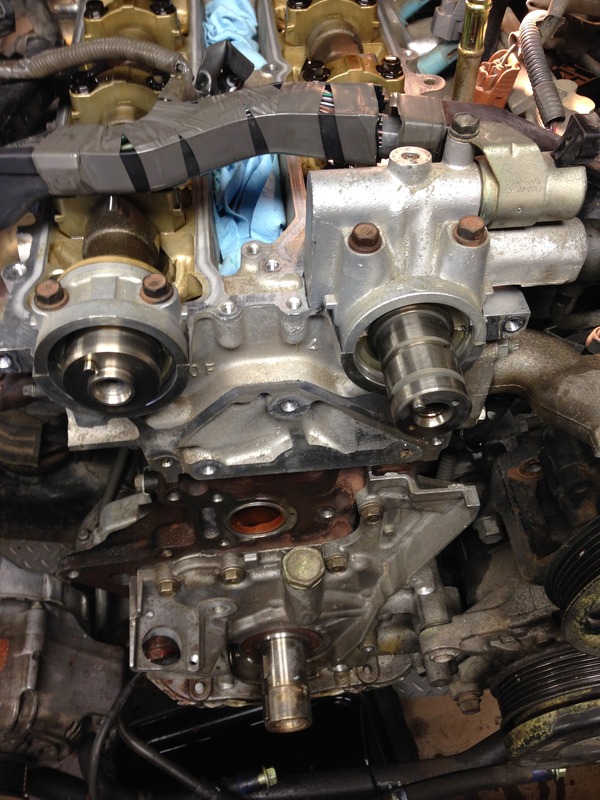
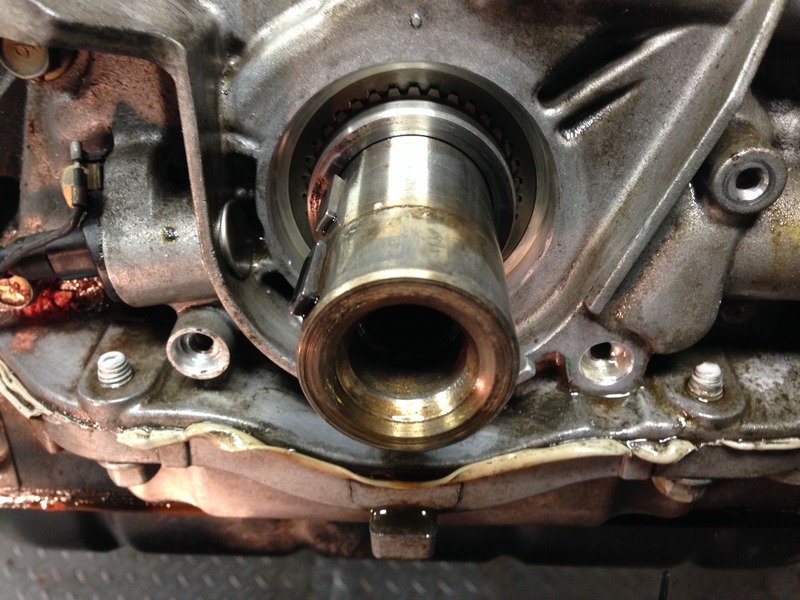
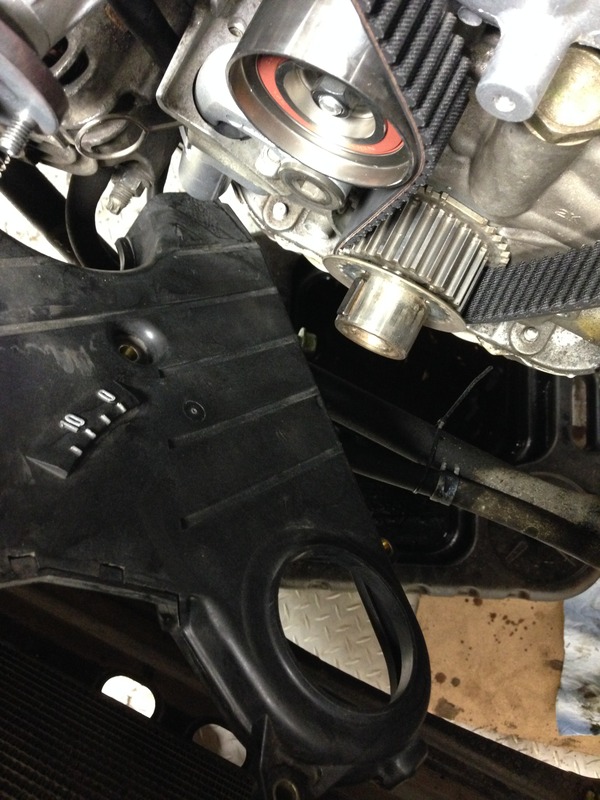
Once I pulled the pulley off I was shocked at what I saw. I’ve seen hack jobs before but dammit this one pissed me off. The previous Calgary shop forgot to put the timing belt guide washer on. So they decided to cut apart the timing cover to slide it on instead of taking everything apart to do it correctly. Here is what it looked like
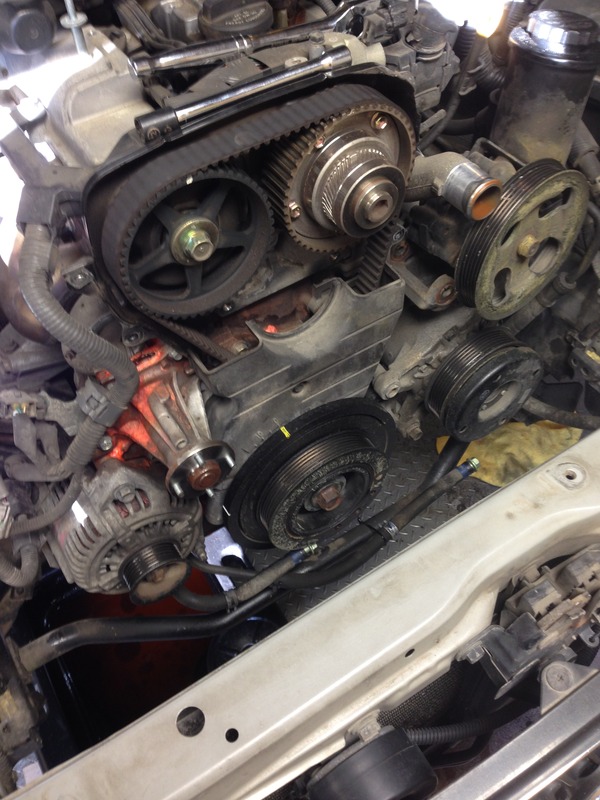
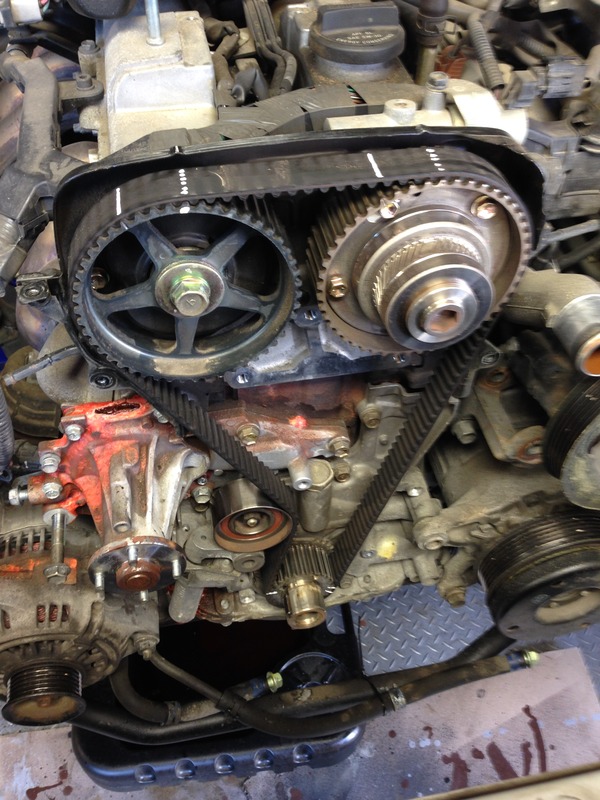
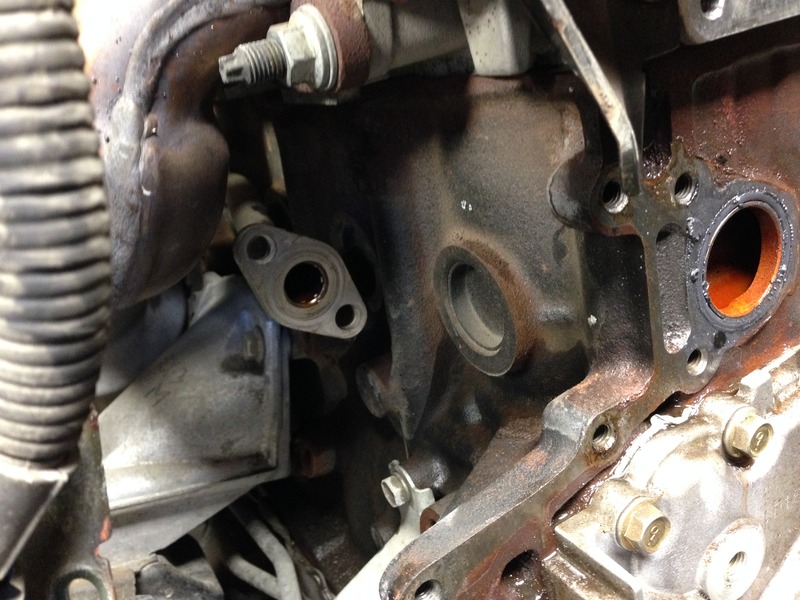
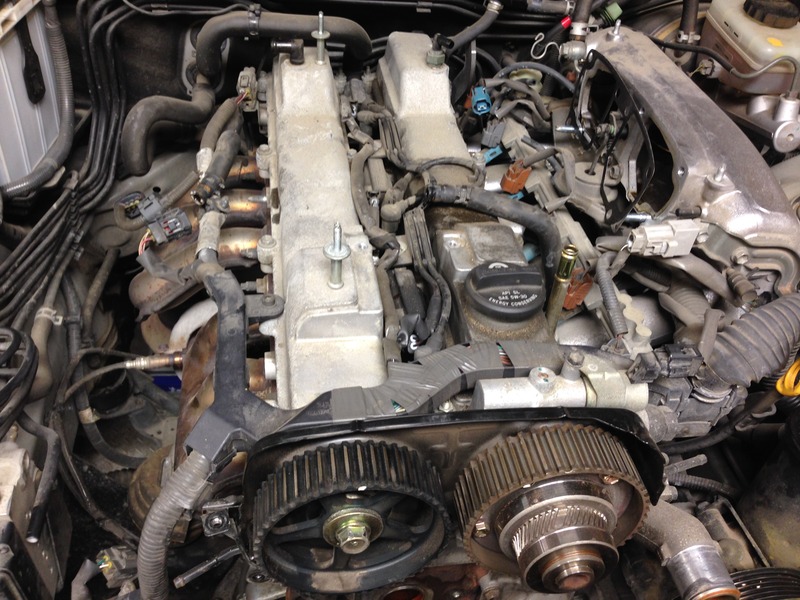
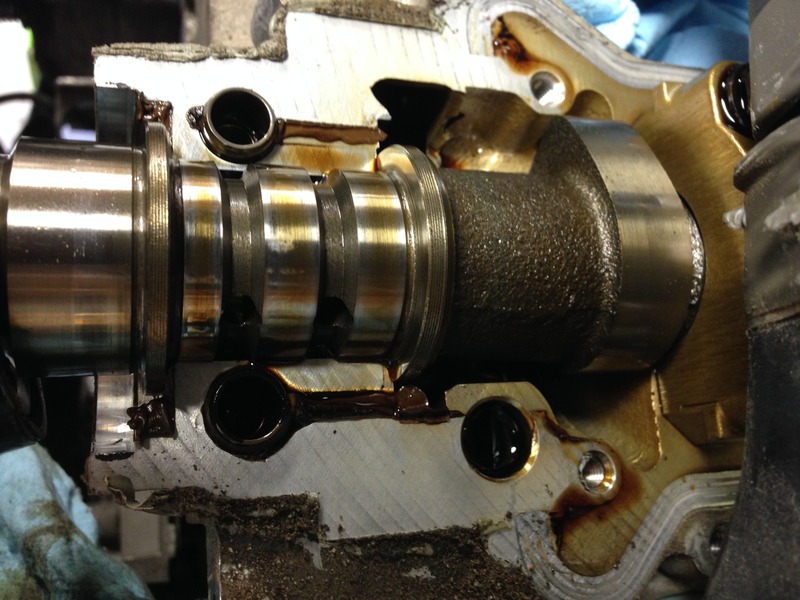
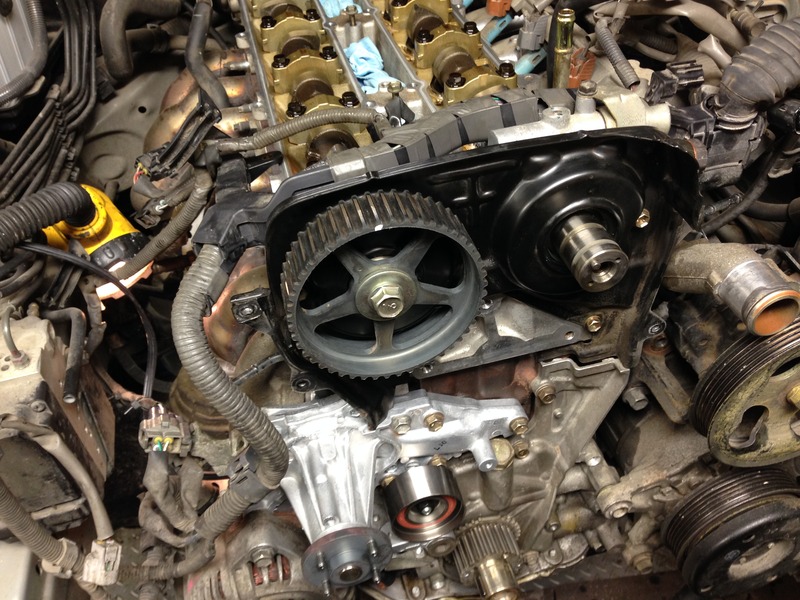
After you pull the cover off here is what you should see. Notice the leaking water pump which was leaking inside of the timing belt housing as well

I dosed it in this Rust Check stuff but not sure if it actually did anything other than frost the bolt over a little bit

New tensioner. It looks as if there was too much tension since the belt wore down the pulley. That or the previous owner idled the car a lot. It was from Vancouver so lots of traffic is a possibility.


Slide the crank pulley off using a tool or gripping really hard

Make sure the first timing mark is still correct

Once I pulled the pulley off I was shocked at what I saw. I’ve seen hack jobs before but dammit this one pissed me off. The previous Calgary shop forgot to put the timing belt guide washer on. So they decided to cut apart the timing cover to slide it on instead of taking everything apart to do it correctly. Here is what it looked like


After you pull the cover off here is what you should see. Notice the leaking water pump which was leaking inside of the timing belt housing as well
 11-20-15, 09:34 PM
#36
Pit Crew
Thread Starter
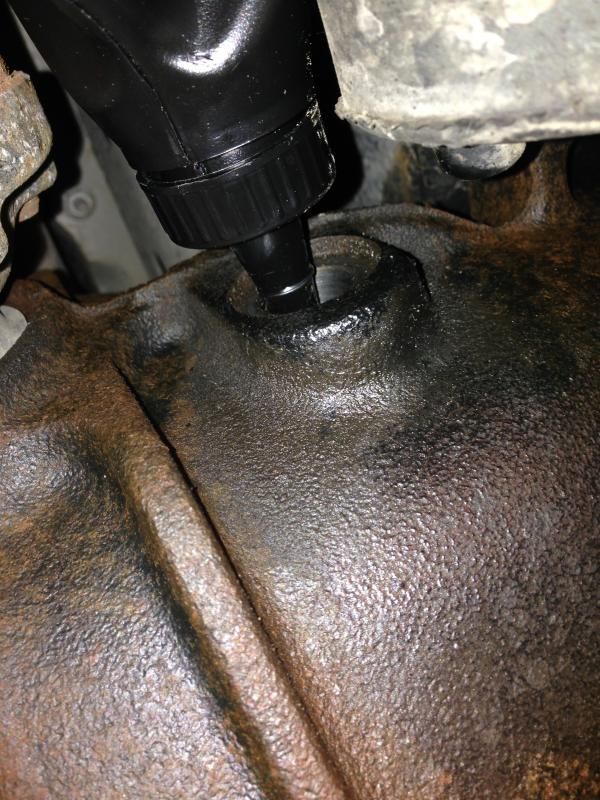
Remove the water bypass tube/extension
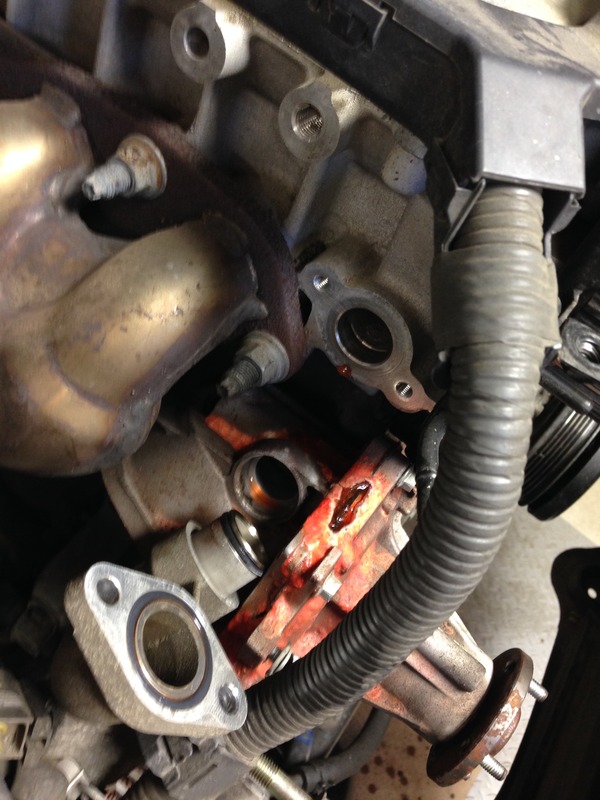
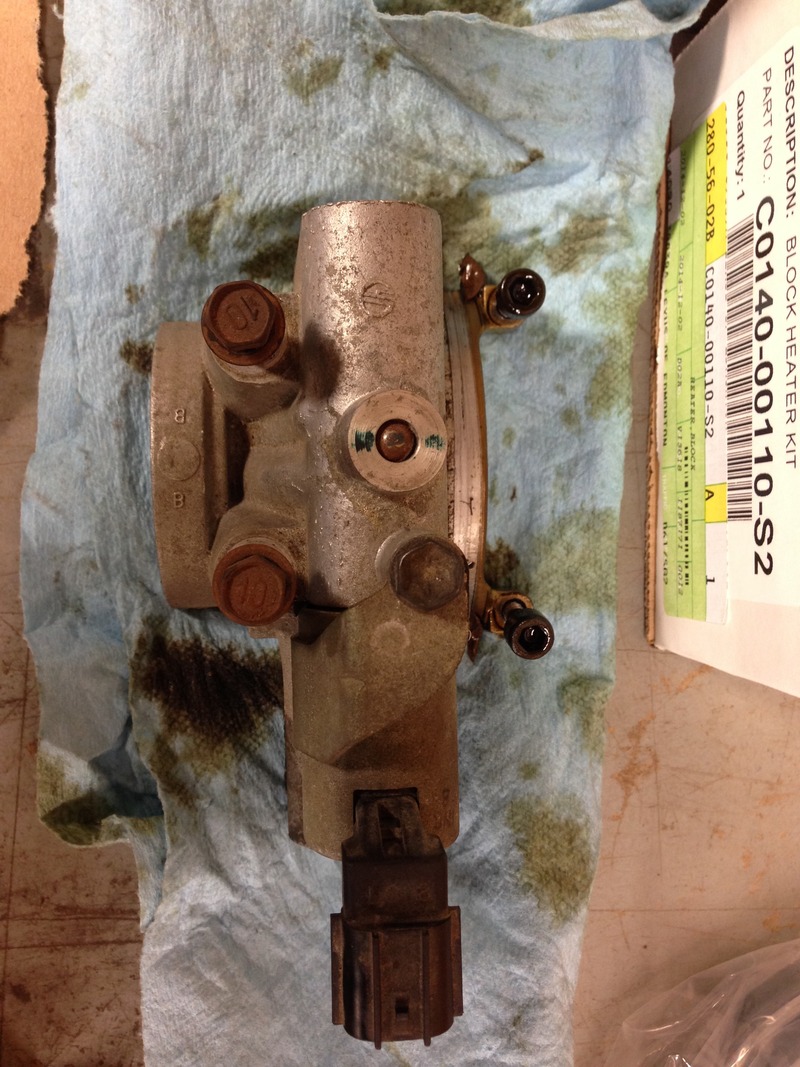
Remove the pump itself. The frost plug I’ll be installing the block heater into is behind the bypass pipe. More on that later
Le pump

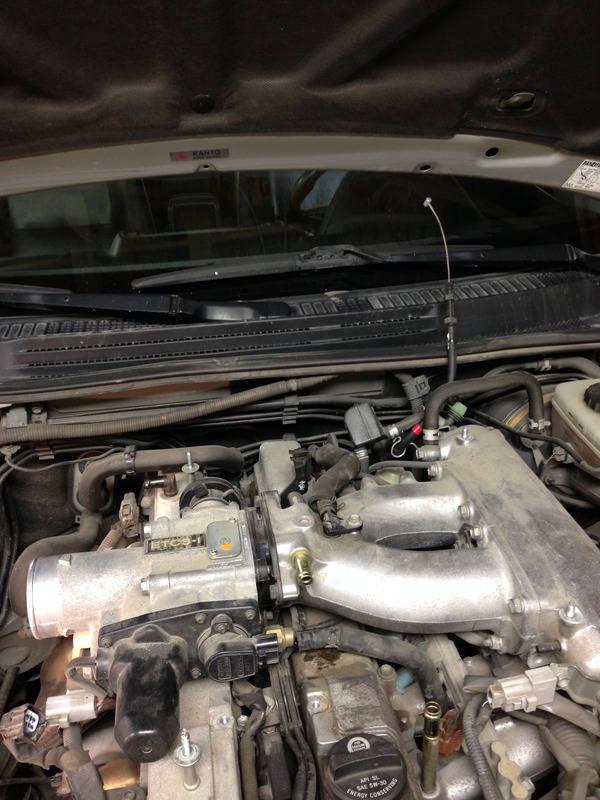
That’s basically it for a timing belt job if you want to stop there. I also wanted to check on the spark plugs so begin with the top side of the engine. Remove throttle cable
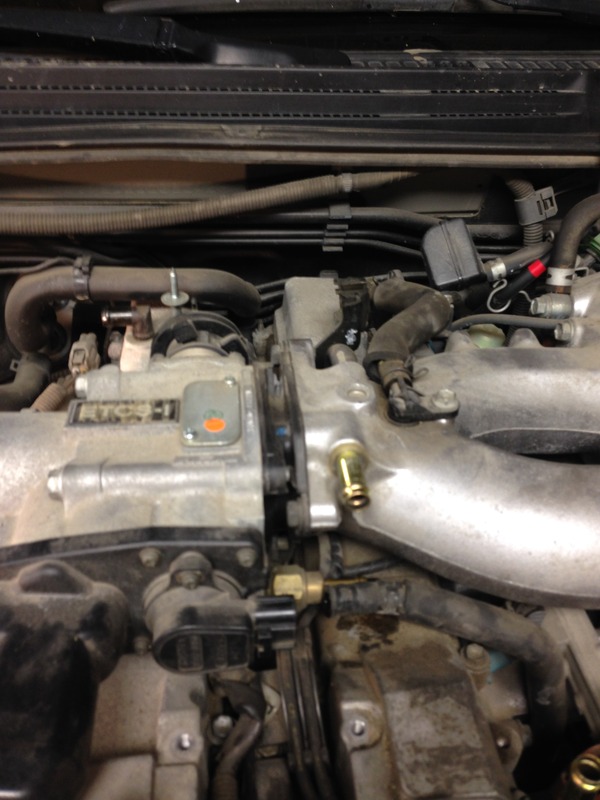
Take off the y-pipe bolts and the whole thing comes off as a unit
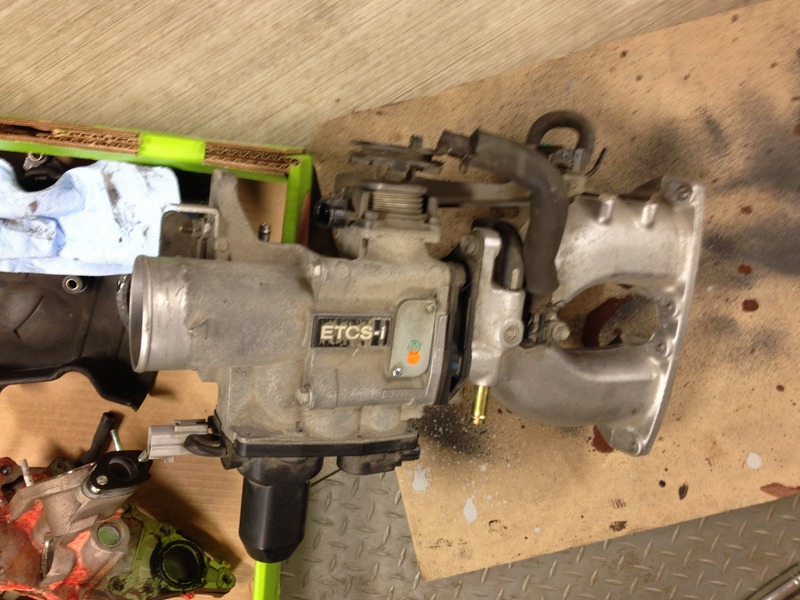

Little bit of oil in the intake chamber but not too much to worry about
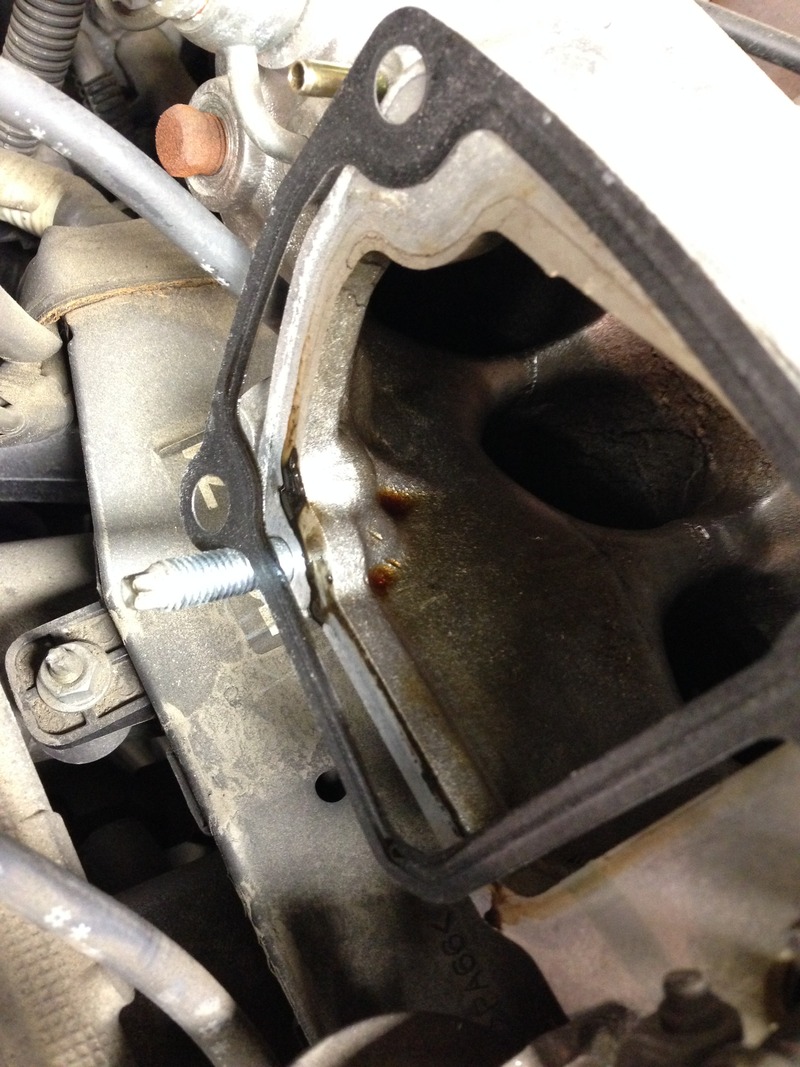
Intake butterfly valve which apparently helps with low end torque
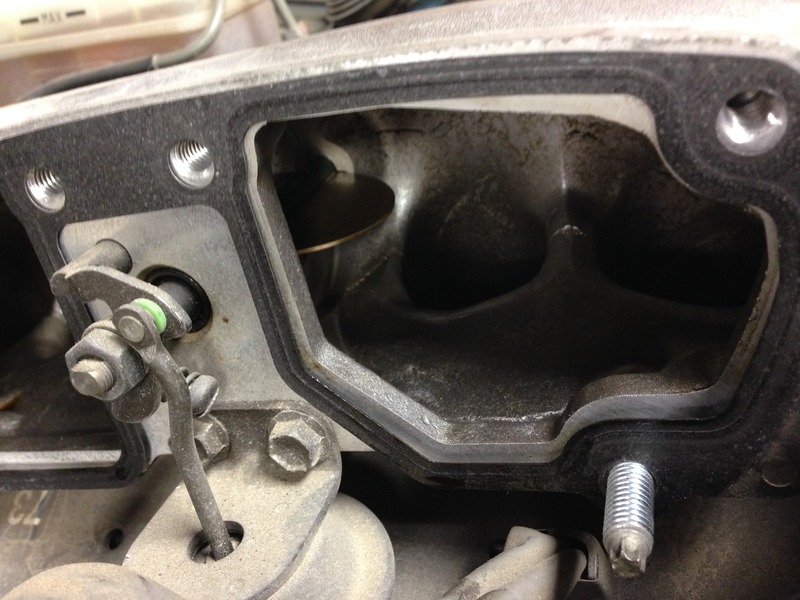
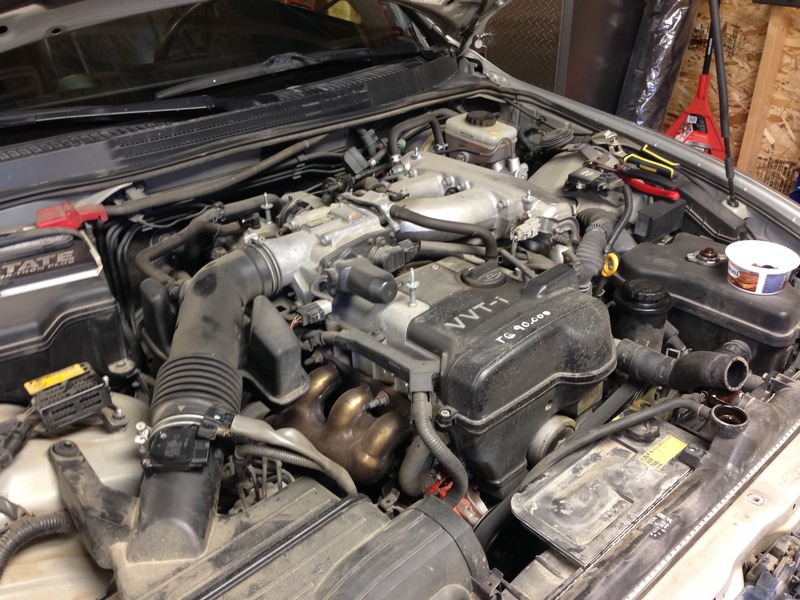
You should be left with this

Remove the pump itself. The frost plug I’ll be installing the block heater into is behind the bypass pipe. More on that later

Le pump

That’s basically it for a timing belt job if you want to stop there. I also wanted to check on the spark plugs so begin with the top side of the engine. Remove throttle cable


Take off the y-pipe bolts and the whole thing comes off as a unit


Little bit of oil in the intake chamber but not too much to worry about

Intake butterfly valve which apparently helps with low end torque

You should be left with this
 11-20-15, 09:35 PM
#37
Pit Crew
Thread Starter


Take off the spark plug wires. Notice how much crap accumulates in the holes. Clean it out as best you can


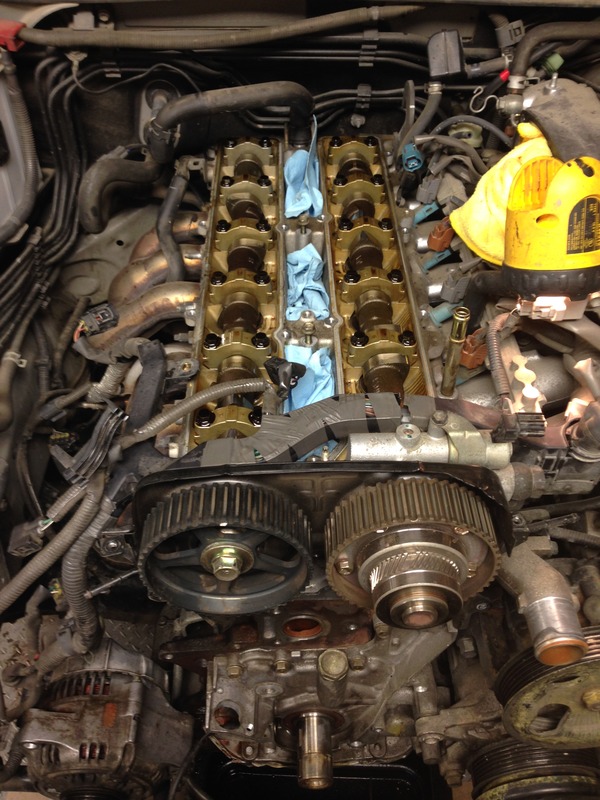
Only after you’ve cleaned the spark plug crevices out is when you take the valve covers off. Don’t want any sand getting into the cam shaft areas
Exhaust cover off
 11-20-15, 09:36 PM
#38
Pit Crew
Thread Starter
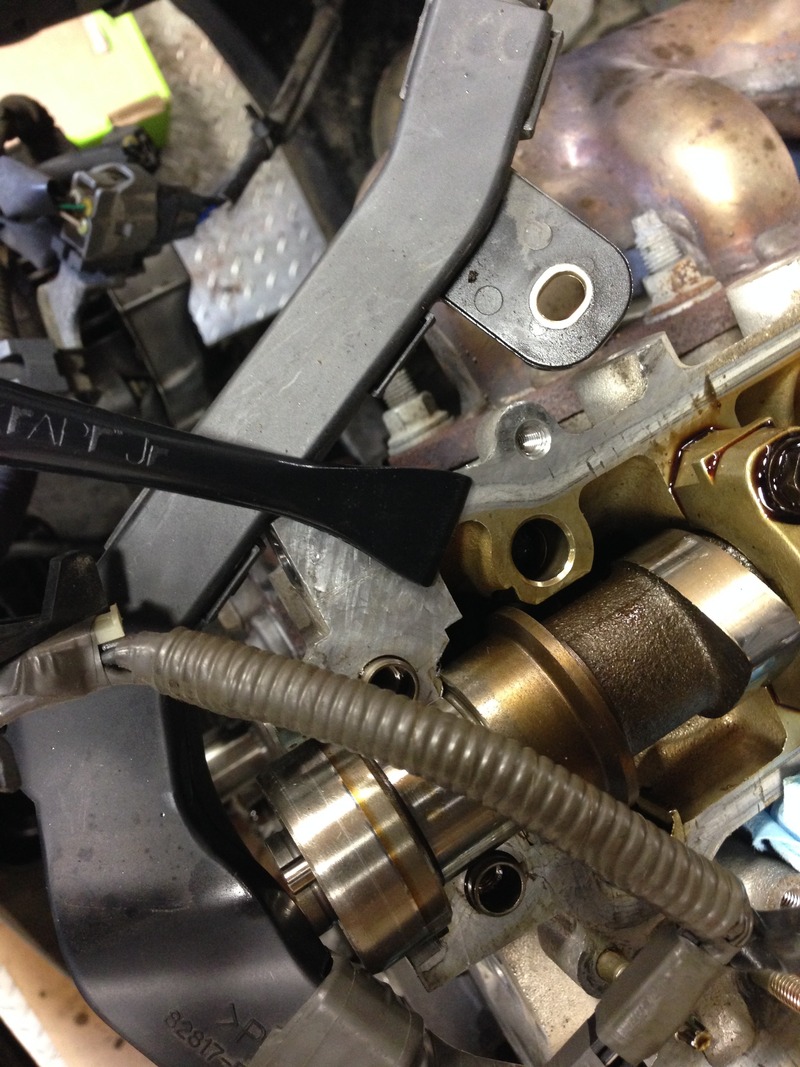
Both covers off
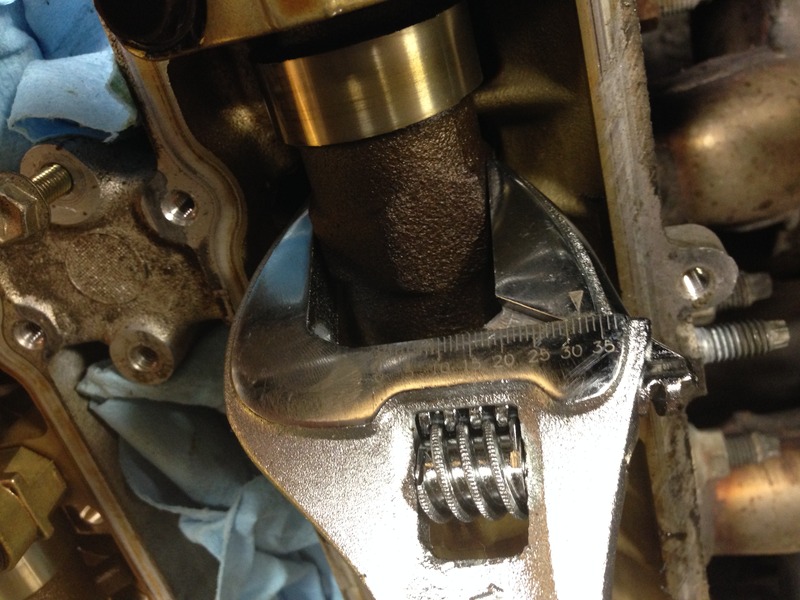
You can then proceed again with getting the cam gears off. You hold the camshaft with a 32 mm wrench
Here I’m “pumping” the oil out of the valve
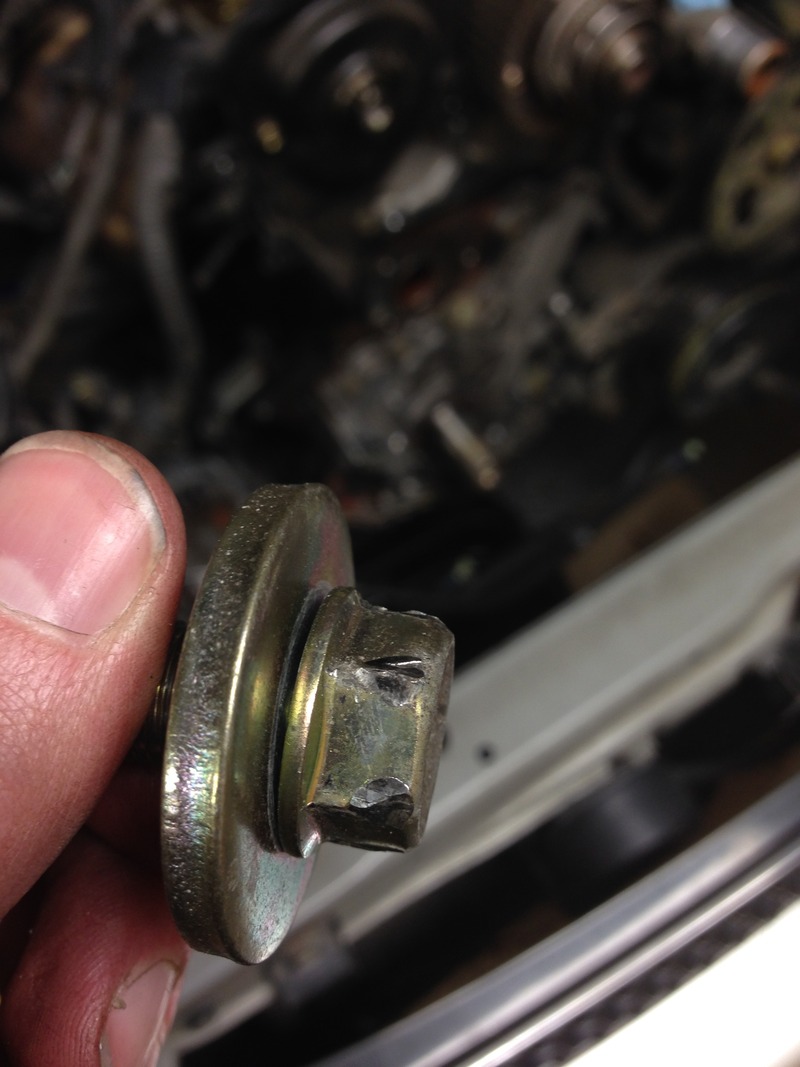
And again curse the previous shop. It seems like they were using SAE tools on the metric hardware. I bought a new bolt to replace this one
Pull off the outer cap of the vvti gear
Then pull off the vvti gear and take the backing plate off. For reference notice where the “disconnected” vacuum hose connections go….basically nowhere. They just connect to each other.
Pull the cam shaft retainers off. On the vvti side there are some Allen bolts you have to take out
The cam seals just pop out nice and easy
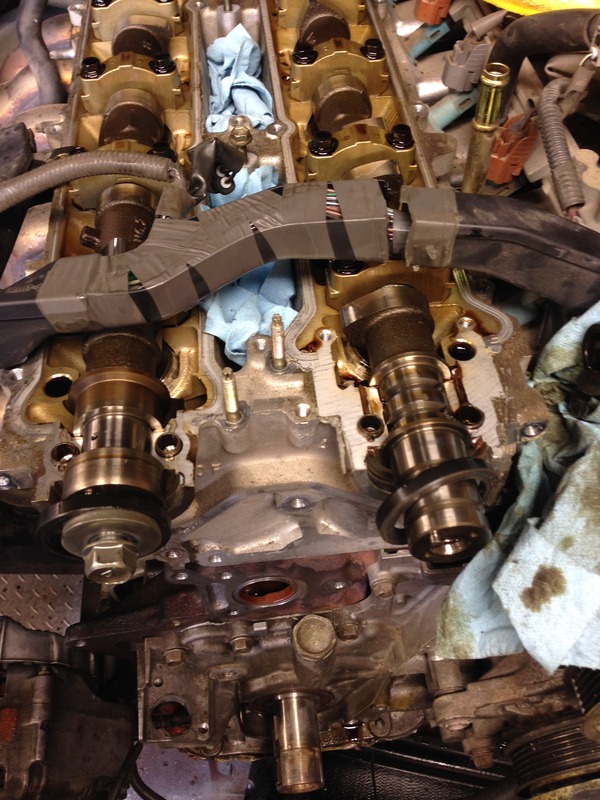

You can then proceed again with getting the cam gears off. You hold the camshaft with a 32 mm wrench

Here I’m “pumping” the oil out of the valve
And again curse the previous shop. It seems like they were using SAE tools on the metric hardware. I bought a new bolt to replace this one

Pull off the outer cap of the vvti gear

Then pull off the vvti gear and take the backing plate off. For reference notice where the “disconnected” vacuum hose connections go….basically nowhere. They just connect to each other.

Pull the cam shaft retainers off. On the vvti side there are some Allen bolts you have to take out


The cam seals just pop out nice and easy

 11-20-15, 09:37 PM
#39
Pit Crew
Thread Starter
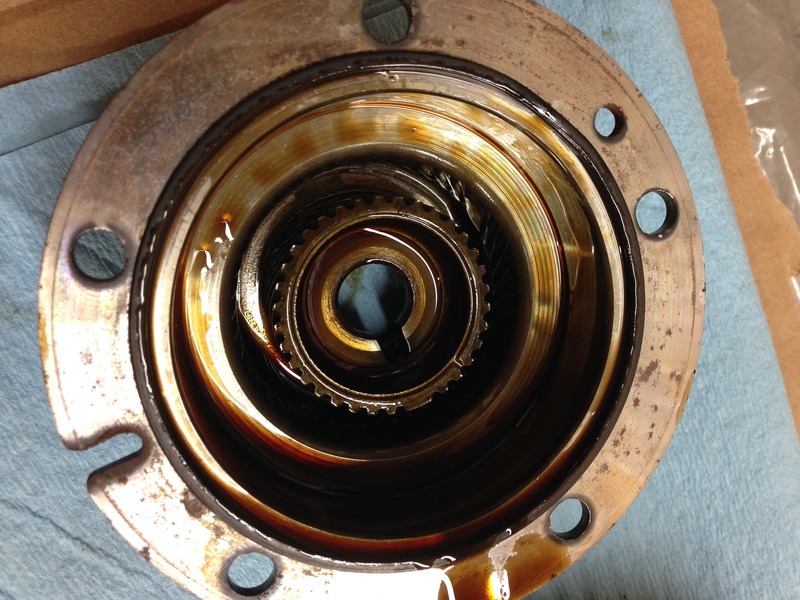
Here is the vvti oil control valve housing
With the ports
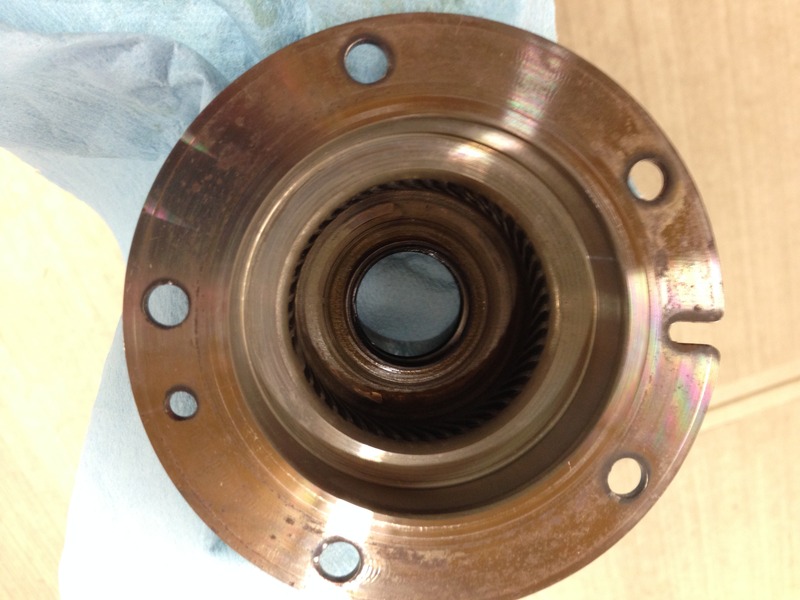
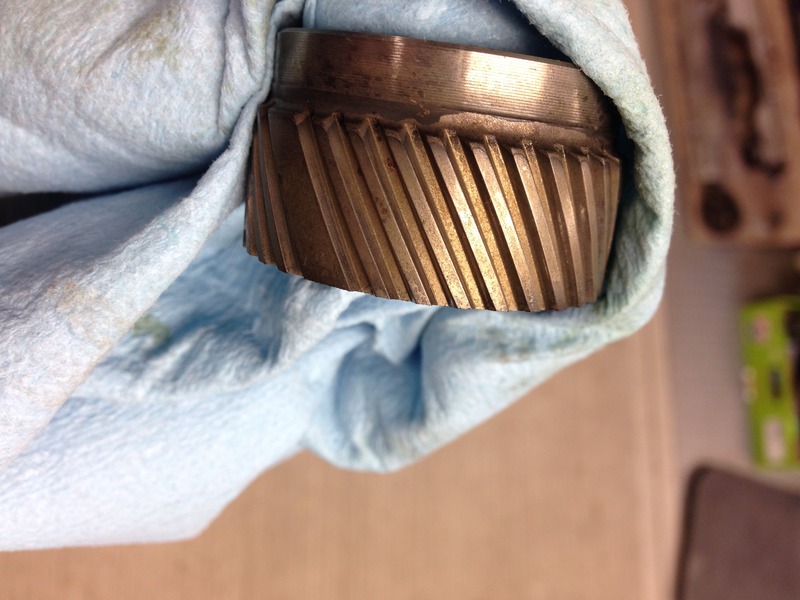
Here is the vvti gear itself. Mine wasn’t leaking but I’ll rebuild it anyway
Mark the locations for reference
Mine in particular was clocked all the way to the right
I had to separate mine with a socket as it was together pretty good
The culprit o-ring
The other side

With the ports

Here is the vvti gear itself. Mine wasn’t leaking but I’ll rebuild it anyway

Mark the locations for reference

Mine in particular was clocked all the way to the right

I had to separate mine with a socket as it was together pretty good

The culprit o-ring

The other side
 11-20-15, 09:39 PM
#40
Pit Crew
Thread Starter
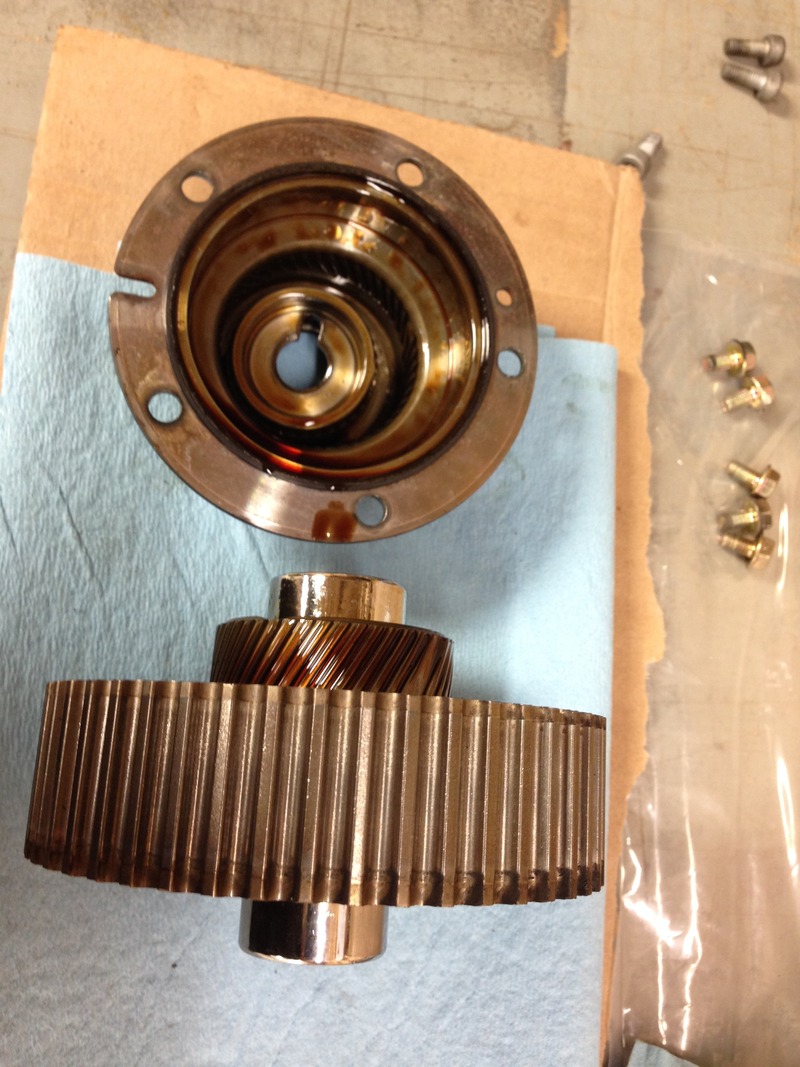
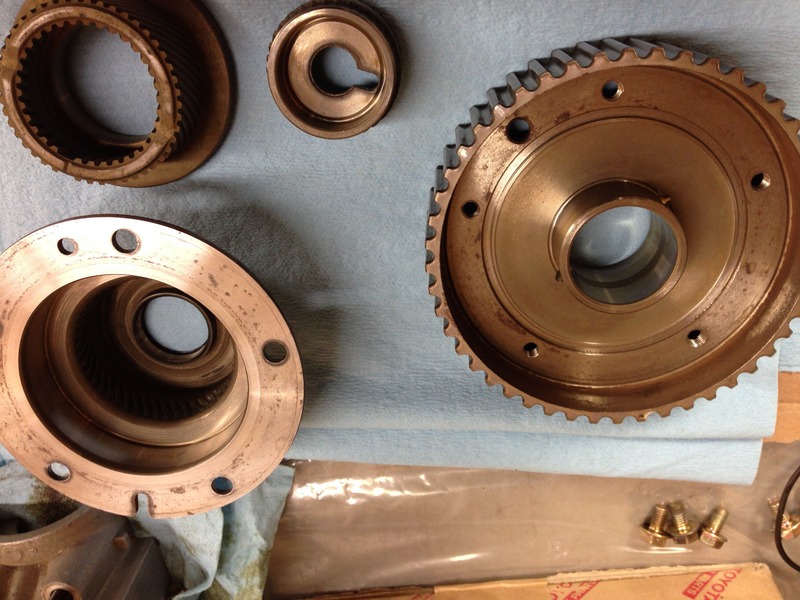
The driver gear
All 4 together
One of them had some gouges on it. Not sure how they got there
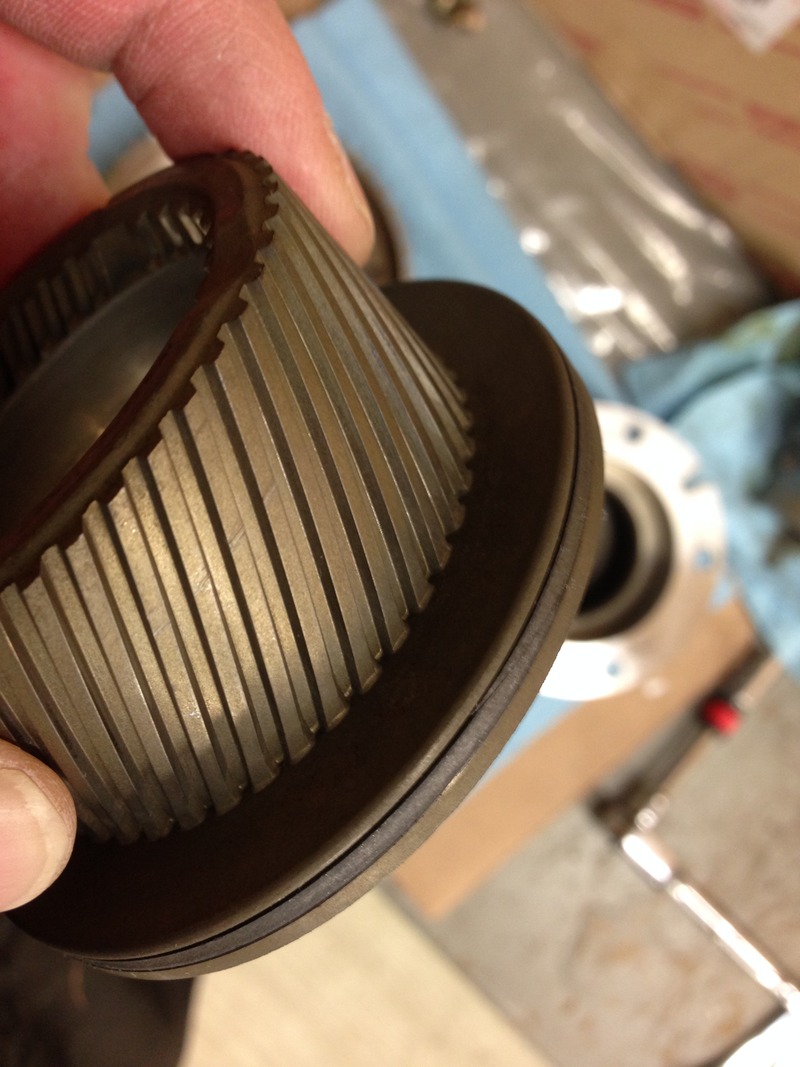
There is really only 1 way it can go back together. Some people say you can install it backwards but I didn’t see how
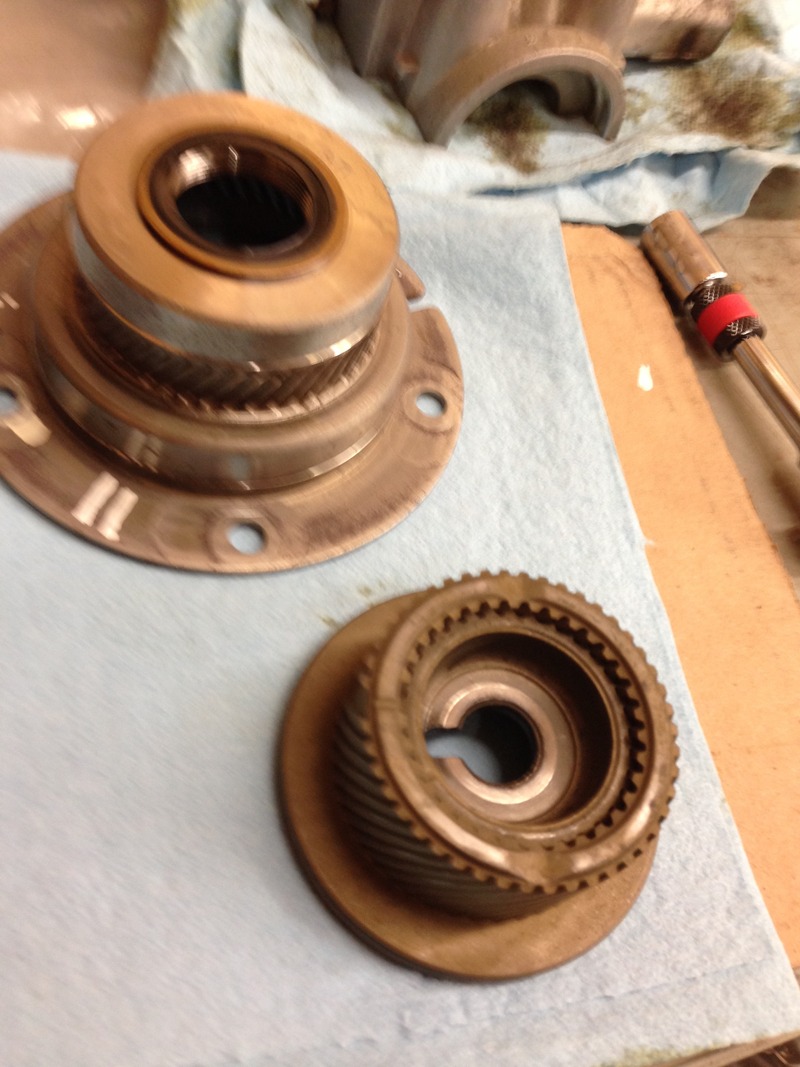
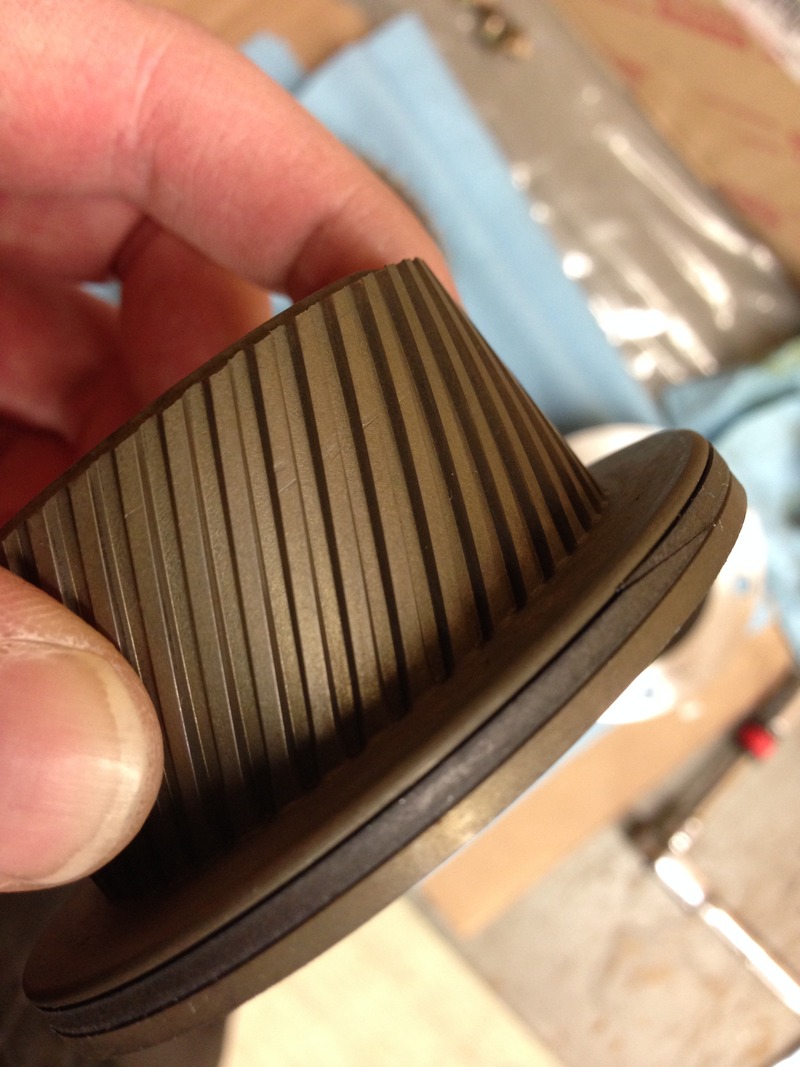
Here is the motion of the gear itself. The oil pressure “pushes” the driver gear out which rotates the outer driven gear to a different position
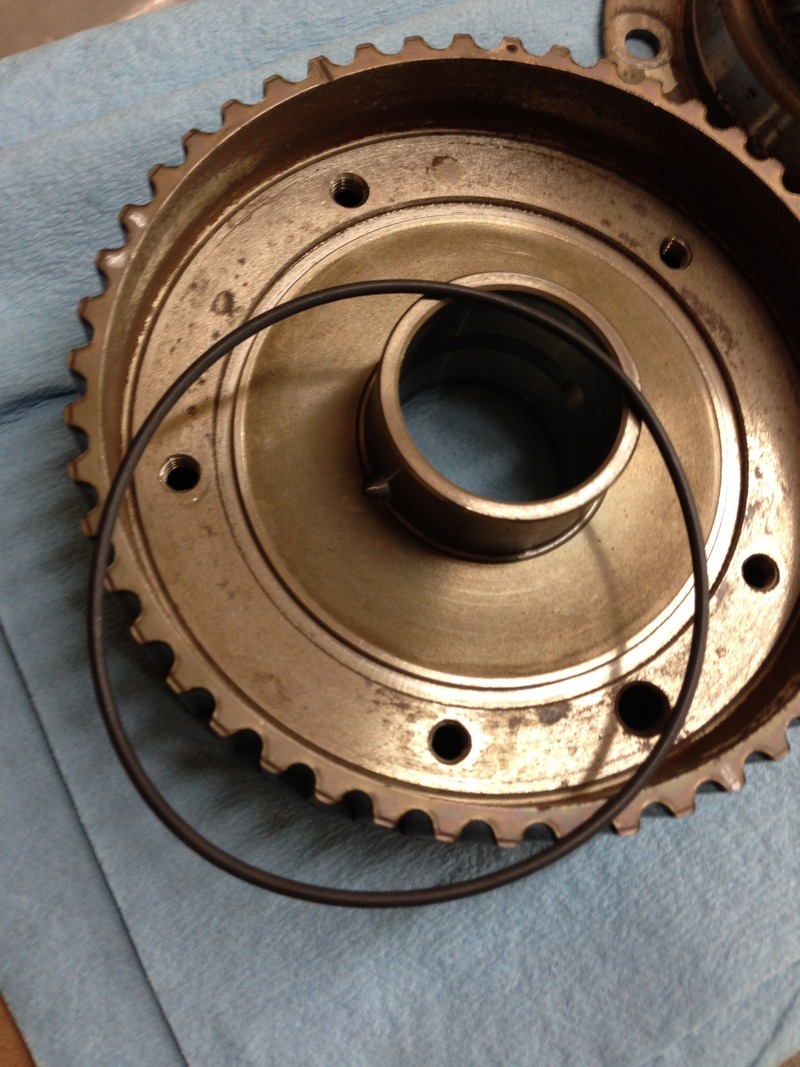
The replacement o-ring and its seat
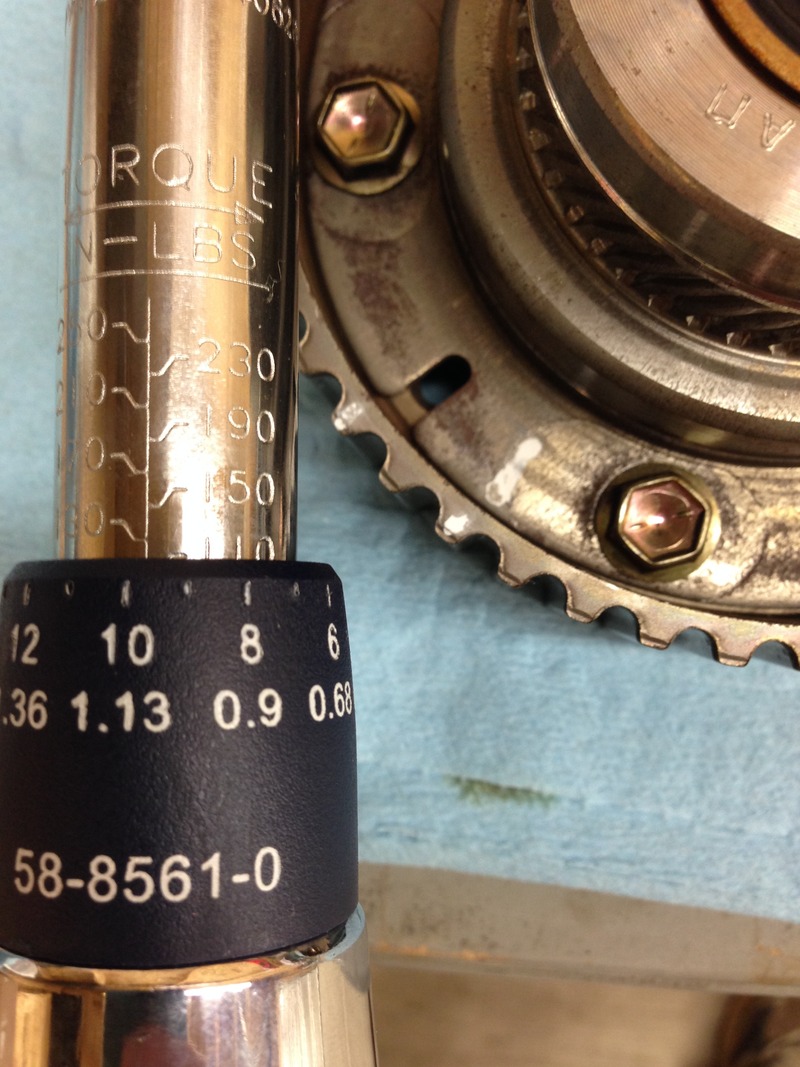
Put everything back together and torque it down. I used 10 ft-lb.
Scrape the old valve cover gasket off

All 4 together

One of them had some gouges on it. Not sure how they got there


There is really only 1 way it can go back together. Some people say you can install it backwards but I didn’t see how

Here is the motion of the gear itself. The oil pressure “pushes” the driver gear out which rotates the outer driven gear to a different position

The replacement o-ring and its seat

Put everything back together and torque it down. I used 10 ft-lb.

Scrape the old valve cover gasket off
 11-20-15, 09:40 PM
#41
Pit Crew
Thread Starter
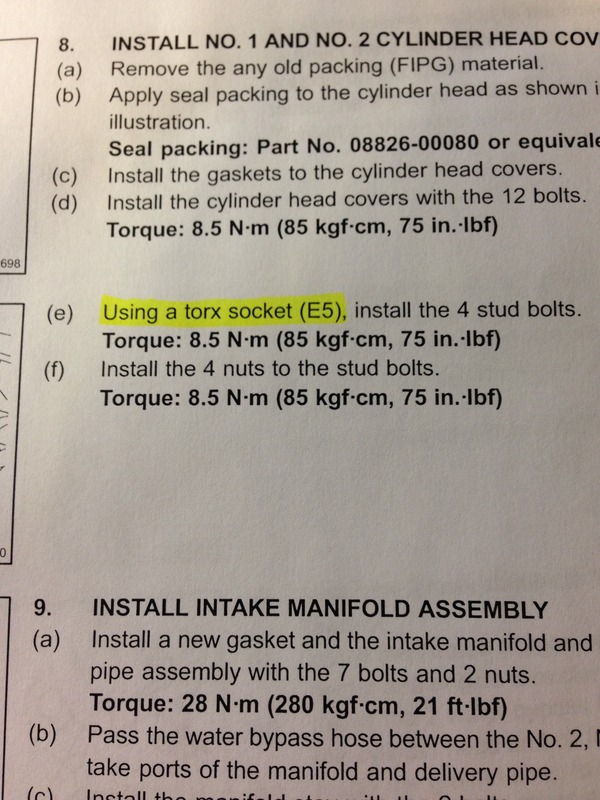
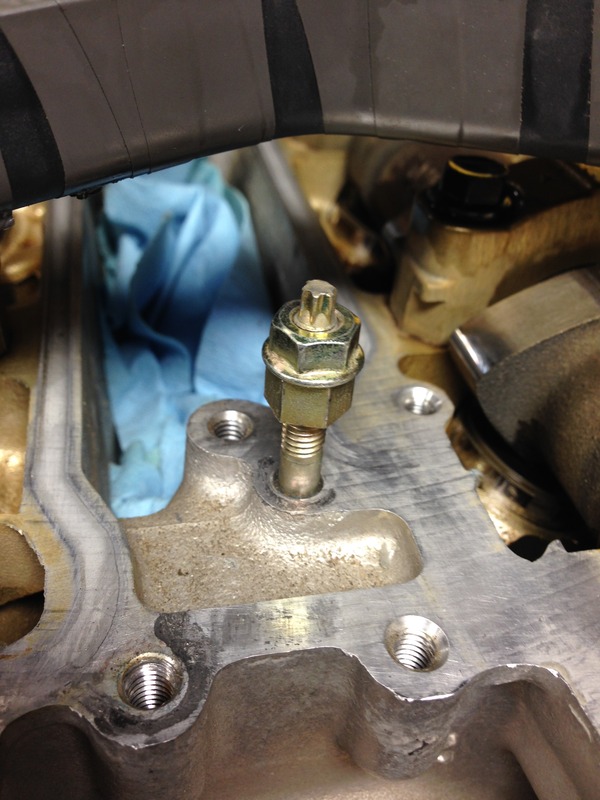
Realise why you had a ***** of a time removing the valve covers. Manual says to remove the torx studs. I didn’t have the E5 bit so I just double nutted
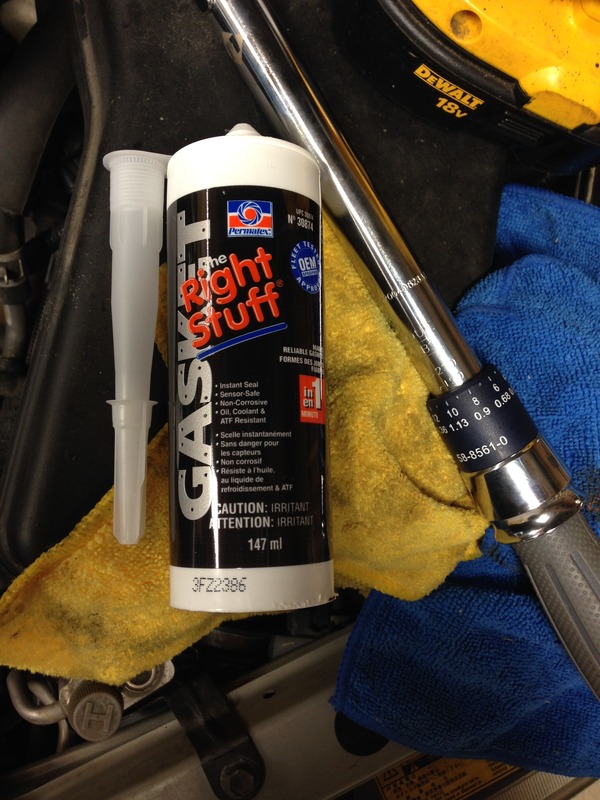
Put the cam shaft retainers back on. I use The Right Stuff. It’s never done me wrong but use whatever you feel comfortable with
Connect the oil feed to the vvti oil control valve. Use new gaskets

My filter had a few bits in it
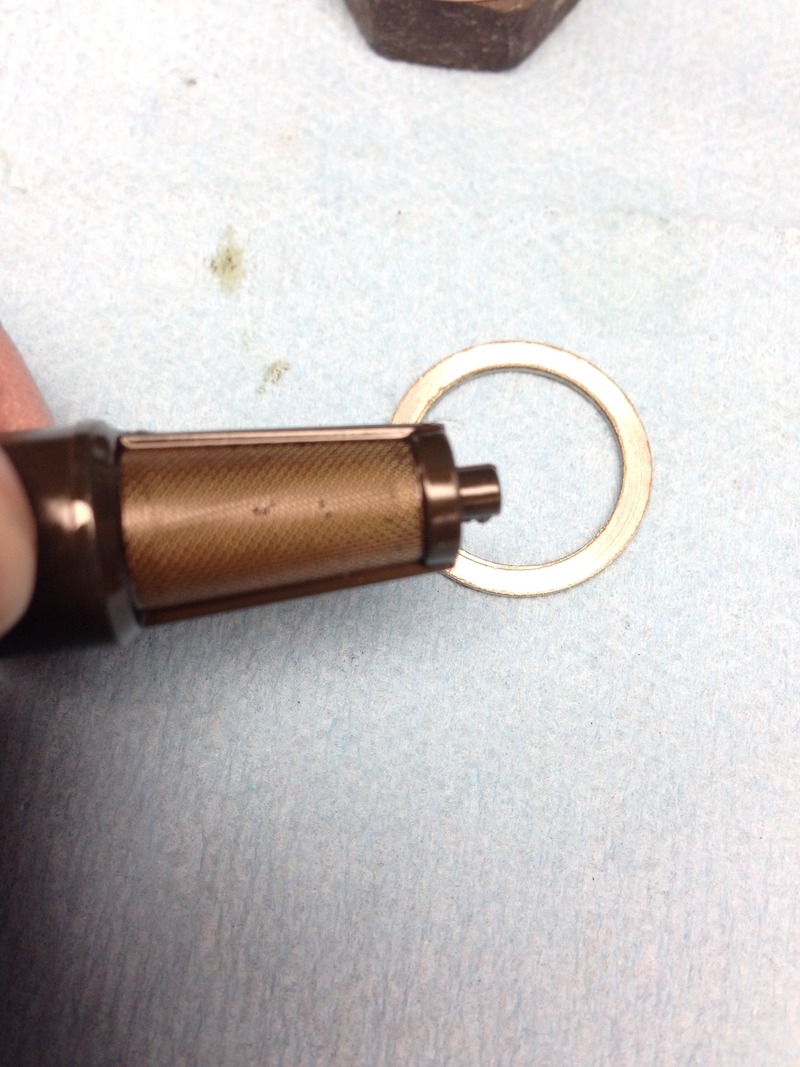
Then replace the cam and crank seals. I used the pipe adapter shown to push them in. Conveniently the small side was perfect for the cams and the larger side was perfect for the crank


Put the cam shaft retainers back on. I use The Right Stuff. It’s never done me wrong but use whatever you feel comfortable with


Connect the oil feed to the vvti oil control valve. Use new gaskets

My filter had a few bits in it

Then replace the cam and crank seals. I used the pipe adapter shown to push them in. Conveniently the small side was perfect for the cams and the larger side was perfect for the crank

 11-20-15, 09:41 PM
#42
Pit Crew
Thread Starter

Decide to take a break and clean the radiator off to let it dry. It was filthy


Break out the new water pump now. I honestly wasn’t too impressed with the casting as there were many rough edges but it was acceptably smooth where it counts


Looks like FedEx used the water pump as a soccer ball

Comes with all of the necessary o-rings/gaskets except for the water bypass tube. Luckily the dealer sent me extras
 11-20-15, 09:43 PM
#43
Pit Crew
Thread Starter

My water pump bolts needed to be cleaned off as they were covered in crap


Put new pump on


Put new thermostat in. Mine looked like it was used already. Came out of a sealed package so not sure why

Install the bypass tube (more on block heater later)

Put the bypass tube on
 11-20-15, 09:43 PM
#44
Pit Crew
Thread Starter
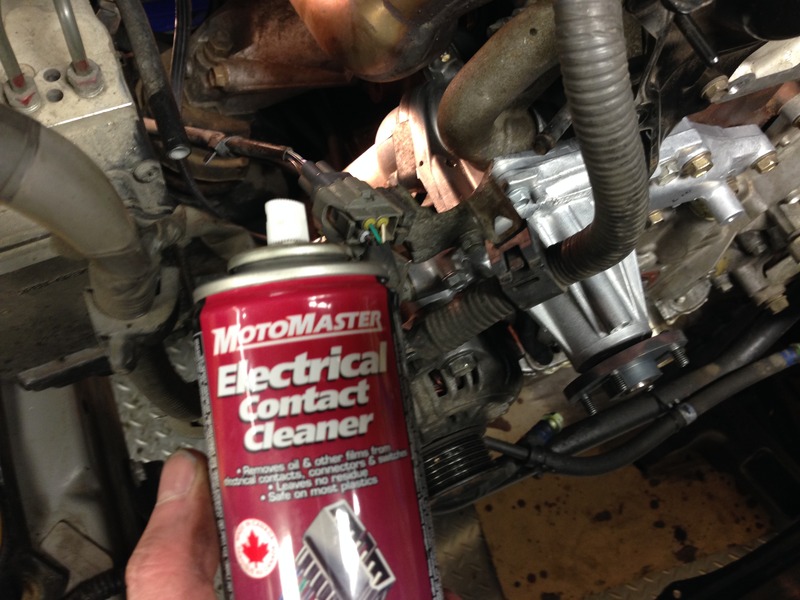
Connect the alternator
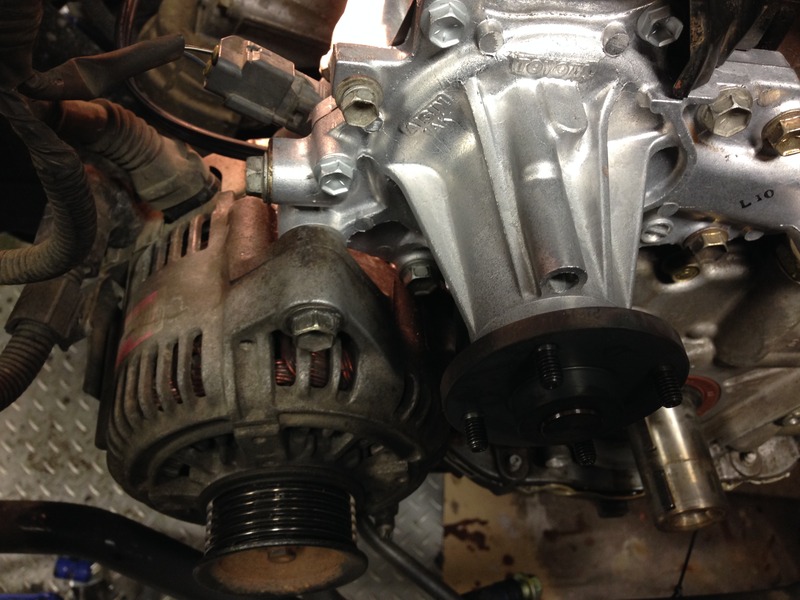
I sprayed all of my connections with this cleaner. It’s not overly necessary if the rubbers on the inside of the plug were in good condition
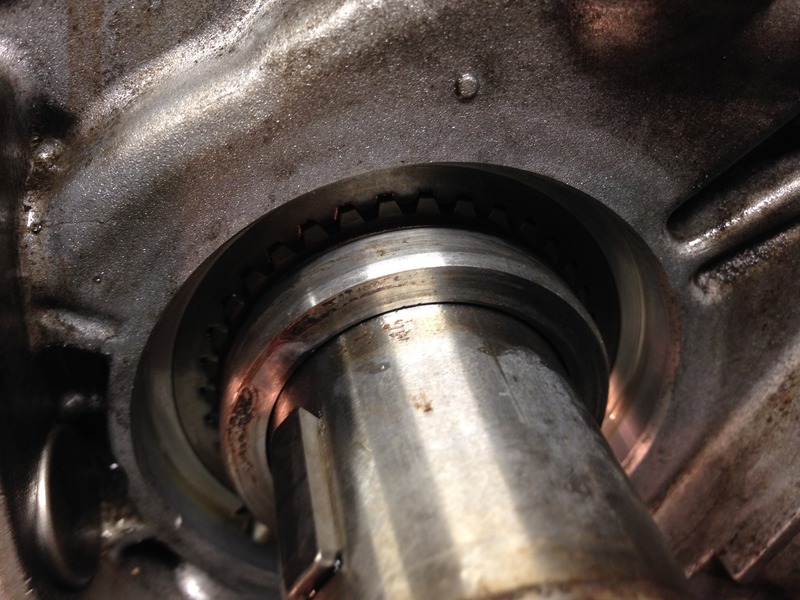
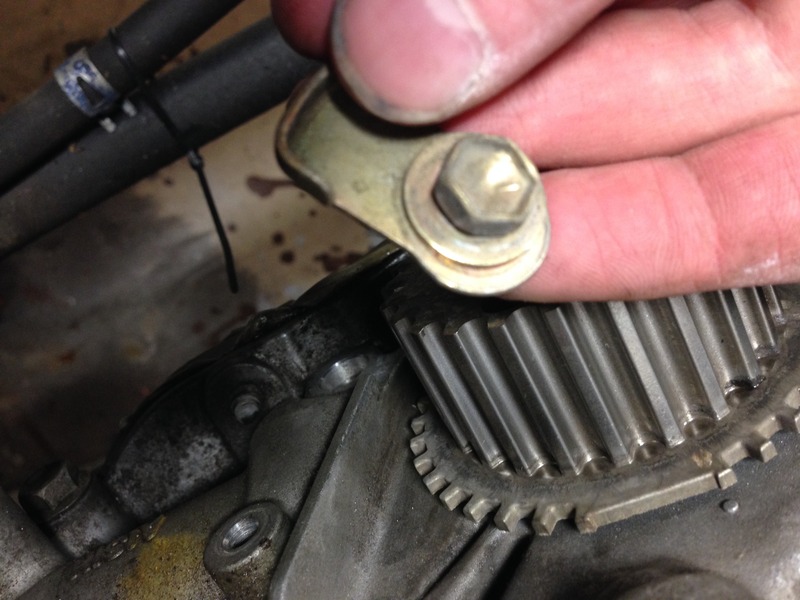
Put the crank sprocket back on and don’t forget this little retainer
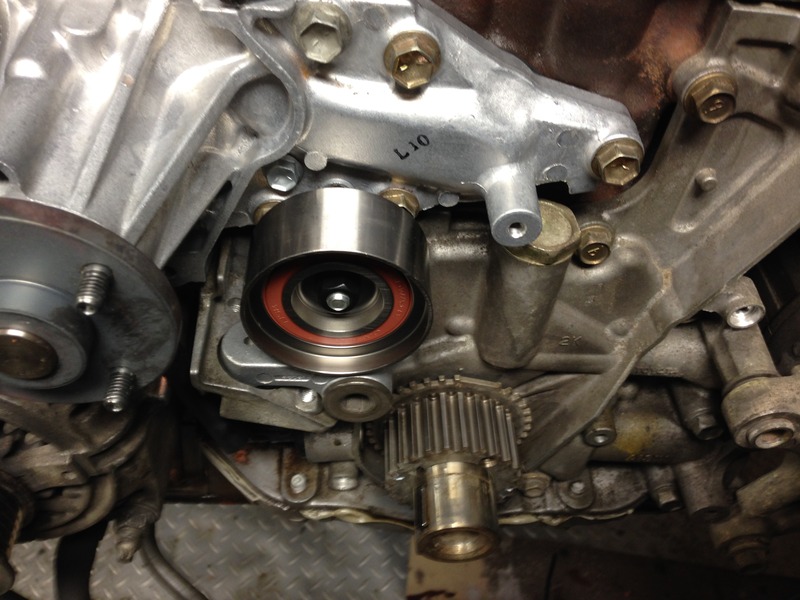
New idler pulley

Obtain a new bolt, clean the exhaust pulley off and re-install. I did the same method of holding the camshaft with a 32 mm wrench and tightening to proper torque

I sprayed all of my connections with this cleaner. It’s not overly necessary if the rubbers on the inside of the plug were in good condition

Put the crank sprocket back on and don’t forget this little retainer

New idler pulley


Obtain a new bolt, clean the exhaust pulley off and re-install. I did the same method of holding the camshaft with a 32 mm wrench and tightening to proper torque


 11-20-15, 09:45 PM
#45
Pit Crew
Thread Starter
Install the vvti pulley
It should move freely back and forth like before
Overall
Install new tensioner
Take time to clean off all of the build up inside the pulley grooves

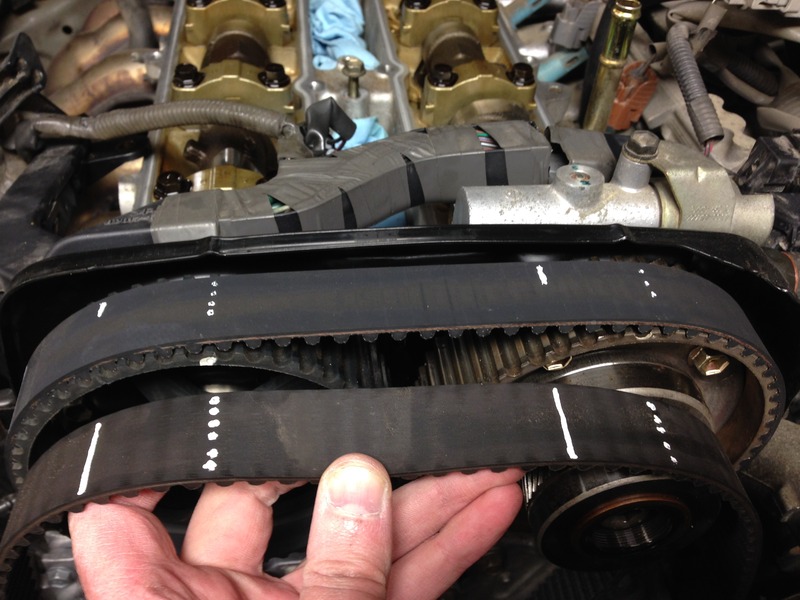
Bust out the shiny new timing belt
Re-draw your markings on it but not necessary. This is a very easy engine to align properly
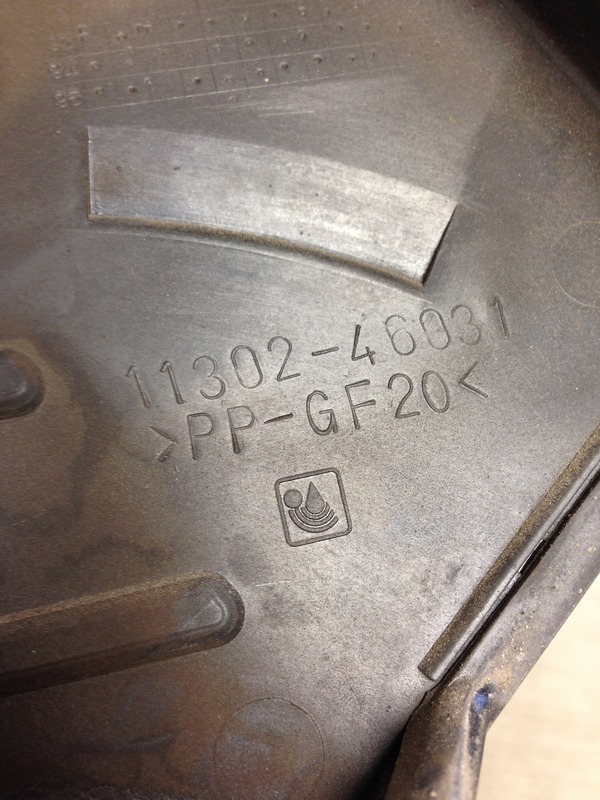
Obtain new timing cover from friend's blown Supra engine

It should move freely back and forth like before

Overall

Install new tensioner

Take time to clean off all of the build up inside the pulley grooves

Bust out the shiny new timing belt

Re-draw your markings on it but not necessary. This is a very easy engine to align properly

Obtain new timing cover from friend's blown Supra engine
