When you click on links to various merchants on this site and make a purchase, this can result in this site earning a commission. Affiliate programs and affiliations include, but are not limited to, the eBay Partner Network.
Your brackets for your coolers look great. I am working on an e-fan set up too. I am actually going to be using a Ford Taurus fan (3500 to 3800 cfm and 2 speed) and DCC fan controller. I am going to build a shroud out of aluminum. My only problem with the controller is that it gets its temp. signal from a push in style temp. sensor so I am working on a way to get a temp. sensor to go into the stock location for a signal.
Thank you. This fan is just for the trans cooler and the air conditioning.
I'm still planning on using a mechanical radiator fan at this point.
I used a taurus fan on my 5.0 4runner years ago. Great fan.
Do you already have the DCC ? there are a few styles that you could use a screw in style sender.
Need some meat to hook whatever this car ends up making for power.
I have 275-35-18's back there now. My buddy has some 315-35/17 MT ET Streets for his fox body notch. We decided to see if I could fit 315's. I told him I could, but he didn't believe me
This is the 275 vs 315
Wrong offset obviously, but I'm not planning on running this setup.
Even with the wrong offset they stick out 1/2" - 3/4"
Blown POS tein flex... but you can see that there's gobs of room left if I wanted something this wide with the correct offset.
Haven't done a whole lot on the car the last few weeks with family in town, house and car maintenance, a little local overlanding...
Got bored last weekend so I decided to install my BBK's. Front designed and built by me, and the rear kit from Andy at Arizona Performance.
Super nice guy. This is the kit he makes for the MKIV rear. I'm giving him a shout out because I want to show him that the 1st gen GS300 uses the same kit.
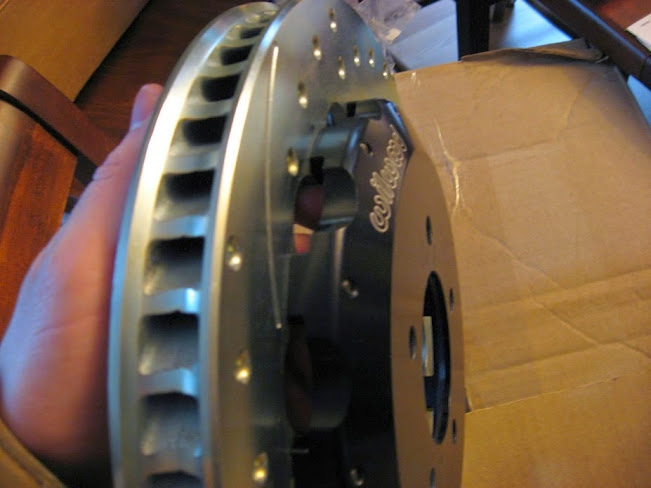
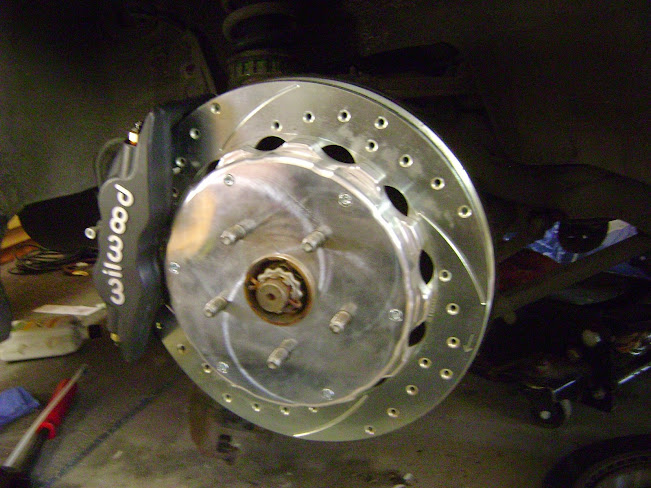
I'll show the front I made first and then his - here's mine.
(There was a few photos of this on page 1 but not as detailed).
Mocked up with acad and printed, pasted to cardboard and used washers to get all measurements before having them cut. (since then replicated on my torchmate)
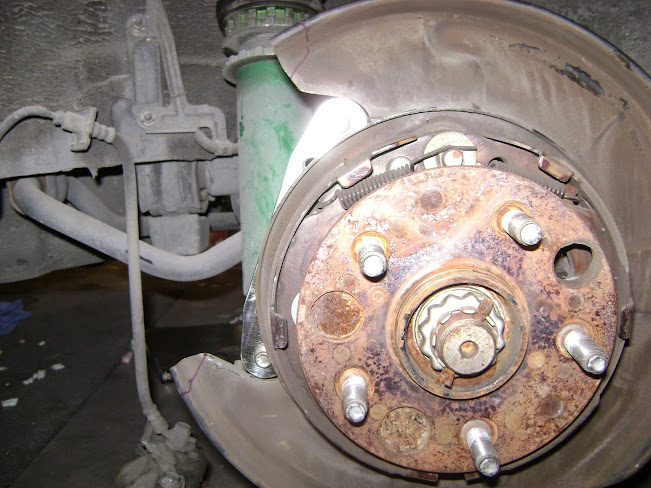
Awesome stock brakes with around 40k on the pads, a little pad mark since they've been sitting while the car is on jackstands and dolly's for about 5 years.
Remove the caliper and rotor with a 17mm socket
I removed the dust shield on mine with (4) 10mm bolts that are easily accessable with a box end wrench.
Brackets
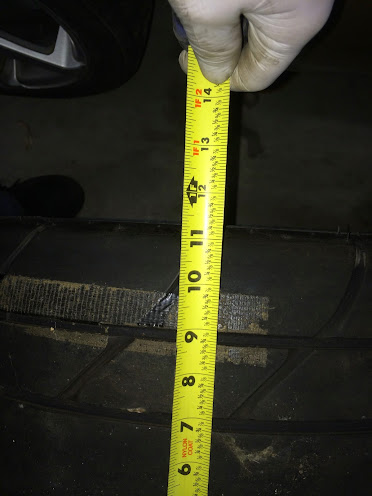
13.06 Wilwood rotor and 12x8.75 hat
Unfortunatly I skipped a few photos, but I still need to do the other side so ill take them, and add them back into this post.
Obviously those are not the tires that will stay on the rims. Im thinking R888's at this point. Maybe just some pilot sports... not sure yet. Too far away to tell.
Same deal as the front. Remove wheel and see rear brakes with who knows how many miles, i've owned the car for 14 years at this point and have driven it for 80k miles so they've certainly been replaced before.
Remove the two 17mm bolts
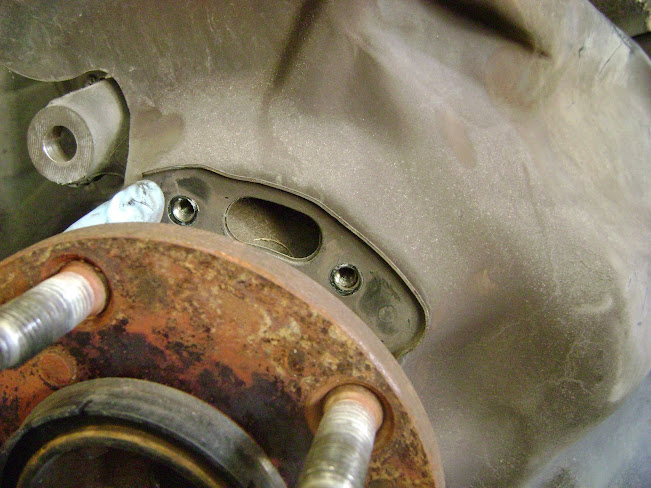
If you cant get the rotor off, there are two holes shown with arrows
Use 12mm bolts in the holes to remove them. Use only flat bottom bolts to prevent stripping the holes as the tapped surface is fairly thin.
I opted to keep the rear shield because its integral to the parking brake drum backing plate. It required minimal trimming in two locations where the caliper sits, shown in sharpie.
I actually used tin snips and cleaned it up with a small file. This is only temporary since im going to rip the whole car apart to clean and paint everything.
Next bit was to mark the adapter bracket with the mounting boss locations so you can see where it interferes with the casting on the rear spindle/knuckle.
Transfered this to the spindle area with sharpie. Very little area was trimmed. Less than the sharpie indicates even.
The adapter bracket uses two size allen sockets a 10mm and a 3/8"
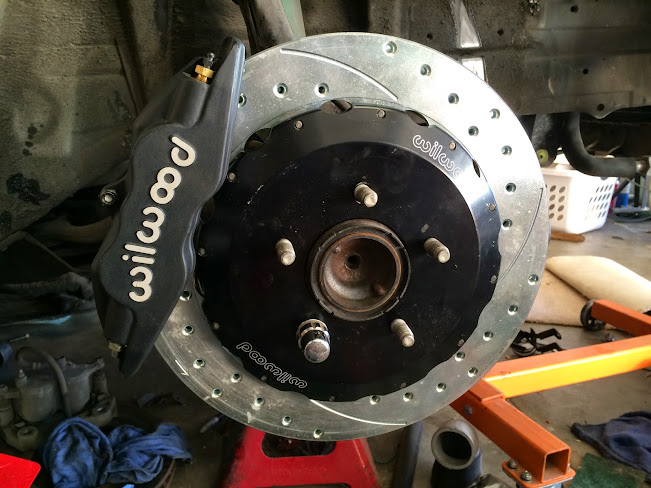
I mounted one of my fronts, on the rear so i could dream about how it will look one day when I can afford to swap them and make the front and rear match.
I started installing the Kaaz 2way diff earlier this year but got distracted with the garage modifications.
I decided it was time to finish it and get my workbench back so I can start another unrelated project...:lol:
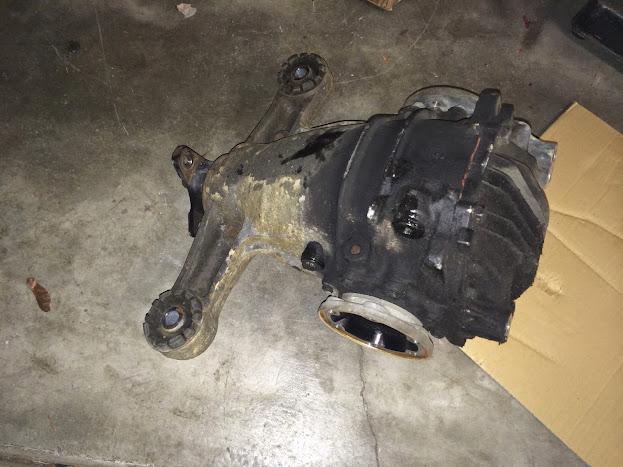
Picked up this diff on mega sale from FRS. Its the newest whizbang gadget I could get my hands on. The new "SuperQ" quiet series. Supposedly already broke in so I dont have to do an hour of figure 8's and throw up in my mouth a bunch of times.
Picked up a few cans of LSD fuild so I can change it out after a few hundred miles and visually check the gears and clutches.
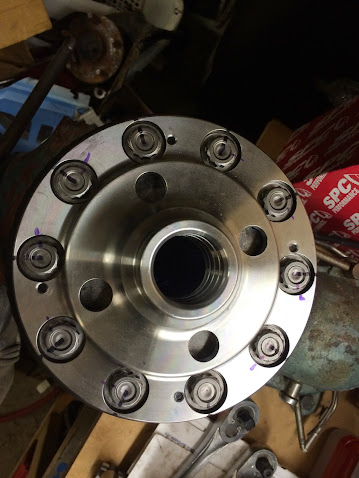
The sexxxy bish that no one even sees after the install. Such a shame we all get these wicked looking parts, only to get hidden in the motor and other parts of the car.
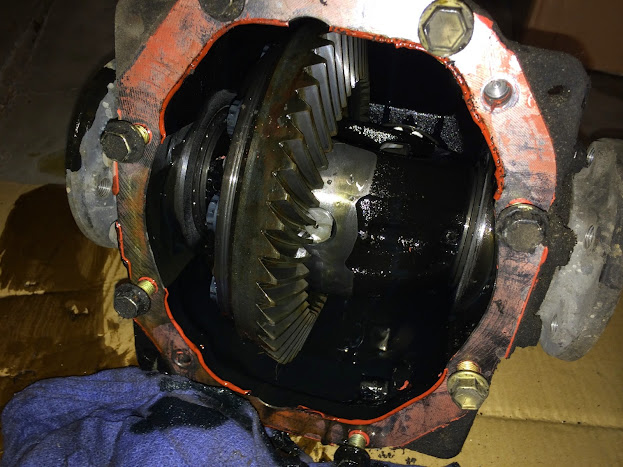
She's got 180k+ on the odo and i've changed the fluid twice in the 80k I put on
About what I would expect for this kind of mileage
This is how I get the ring gears off. A little easier than placing in an oven that I cook in... Continually turning it and she pops off in about a minute and a half.
Empty pumpkin gets wiped down and cleaned with brake clean, air and clean towels.
Inspect the gears for wear
Nothing like freshly machined materials without stinky lube on them
You use new ring gear bolts, not super cheap - but cheap insurance in the long run. A little thread lock and an extra 90 degree turn after the specified torque
Picked up some gear marking compound to make the job easier.
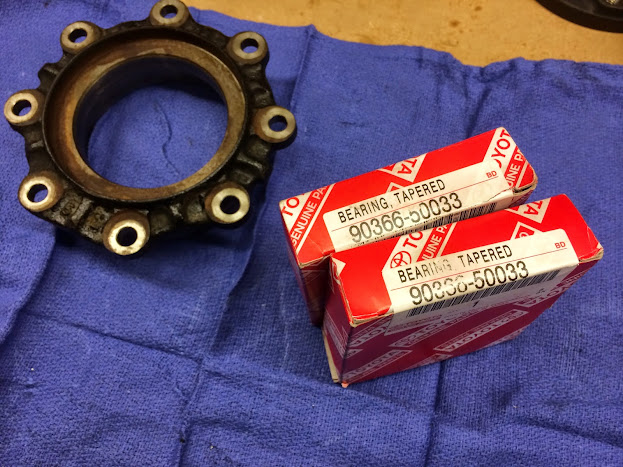
I couldn't find aftermarket bearings to save my life so I got these from toyota
This is a used bearing and race, but you get the idea
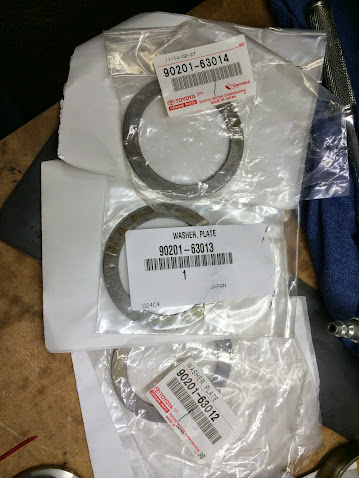
The NA supra and the GS have the same adjustment sytle for backlash. Kind of a PITA if you've never done this type before.
I swear I must have pressed the side bearing races in and out to install different shims elleventy billion times. I purchased three new sizes to play with and get the lash where I wanted it on the tight side of the factory specs.
Not sure why, but I cant find the photos of me pressing them in and out...
Heres the dial gauge at min and max
Here's one of many tests after setting the pinion shims
Axle flange seal
Gets pressed into here, and in this pick you can see the shim
Assortment of parts ready for reassembly
Dont forget to reinstall the retainer clips on the stub axles
Install o-rings on the side retainers and lube them up
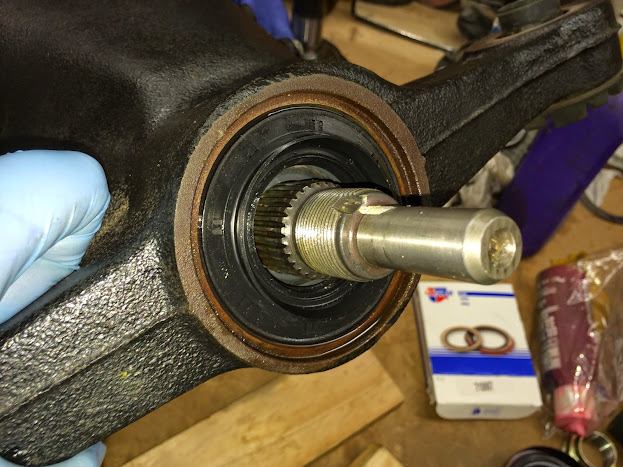
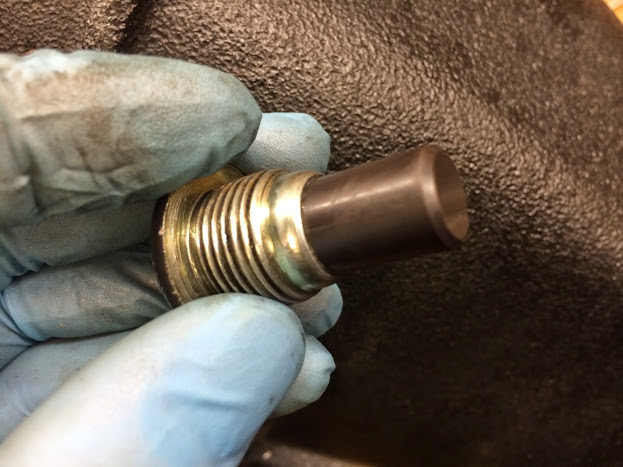
Factory pinion seal on the left, replacement on the right. Should have got a Toyota one...
Press that **** in, after rechecking the run-out
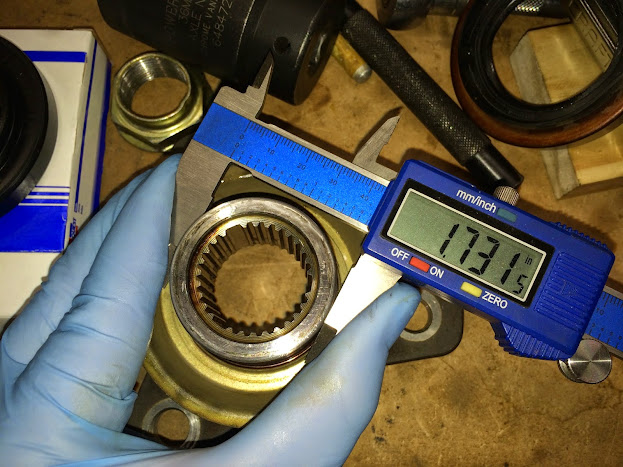
Mic'd the pinion flange for good measure to make sure there's no leaks.
Install the flange, install the nut and torque to correct preload specs. And dont forget to stake the nut
Clean all parts going back together especially the magnet. If you know what your looking at, you can sometimes detect premature failure by reviewing the shavings that are collected.
Load the stub axles
Last look inside before the FIPG and cover
I waited overnight and filled her up on the bench Sunday.
Last look at the fuel line fittings before completely blocking them off with the diff.
The help of an ATV jack, a few caffeinated beverages and one tired guy later this ***** was installed
I marked all of the nuts and bolts as they are torqued so I can visually verify any are left out
That wraps up this weekends adventure. Let me tell you that if you've never done this - it may pay you to have someone do it for you.
At least I can add this to the bag of tricks under my belt.
I've been a lazy fawk when it comes to the car for the last few weeks.
After a trip to the dunes on quads, 4 wheelin local, yard work already (cant believe i've mowed my lawn twice this year, while some areas of the country are getting snow...)
Anyway, my 2IS needs 4 tires, brakes at all 4 corners, alignment, emissions and tabs.
The 2GS needs a knock sensors, starter rebuild, alignment, emissions and tabs
The FJ needs emissions, tabs and a plethora of TLC.
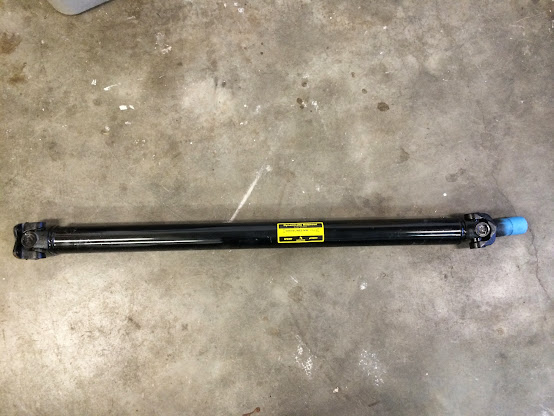
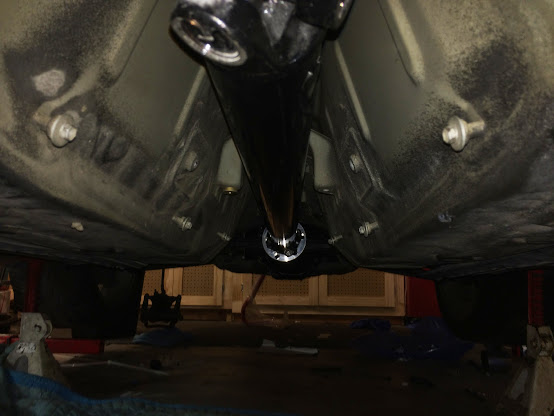
Anywho... I made the time to mock up the driveline and take measurements for a cross member.
Here's the 3rd member flange looking down the driveline tunnel
The BA driftmotion adapter that I showed earlier in the thread.
There are two sets of holes. Select the one that lines up and use the allen head hardware that comes with the adapter. Love the pilot hole that makes it shaft-centric (I made that up)
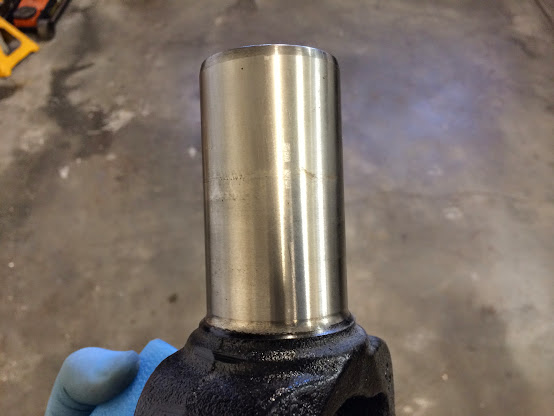
Here's the 1350 flange bolted up to check clearance
 02-02-15, 07:04 AM