SC530 Drift Build (LSx/T56 Swapped SC300) *Picture Dump*
 02-22-16, 12:37 PM
#61
Pole Position
Thread Starter
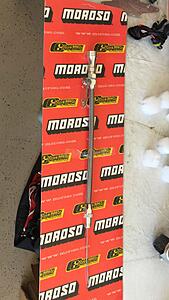
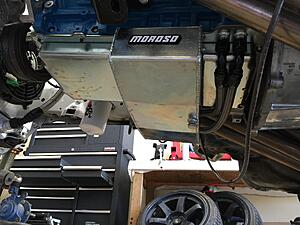
So today I got the Moroso dipstick shipped in. This is the dipstick that normally comes with the Fueled Racing kit, however, the down side is that you have to trim the stick in order to get the correct reading of oil on the dipstick. Fueled Racing is currently working on a billet dipstick that will not require any cutting or measuring. It will be a direct bolt in to their pans. Will be coming out soon, but it's not ready yet.
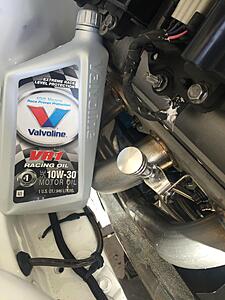
Anyways, got the oil pan filled up with exactly 6 quarts of Valvoline VR-1 10w-30 oil, cut the dipstick to length, and installed it all together. One step closer!
Anyways, got the oil pan filled up with exactly 6 quarts of Valvoline VR-1 10w-30 oil, cut the dipstick to length, and installed it all together. One step closer!


 02-26-16, 07:44 PM
#63
Pole Position
Thread Starter
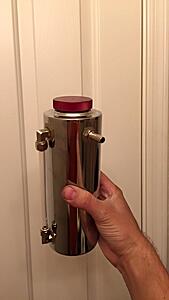
Got my catch can yesterday. It's a Mr. Gasket 9135 catch can that I picked up from Amazon for 55 bucks. Cheapest can I could find and the quality is GREAT!
Install incorporated the mounting hardware it came with, kinda flimsy, which explains why it sits a bit crooked, but it works non the less and I'm happy with it...
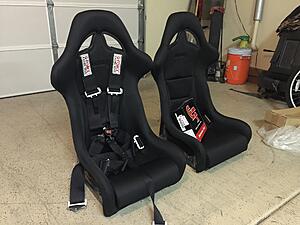
Also, got my seats and harness in today. I was on JEGS and came across these PROCAR "Drifter" seats. Stupid cheap at $178 each shipped WITH side mounts AND sliders. Now, I know a lot of you are thinking...you get what you pay for...As much as I believe in that, here's why I decided on these...
They're made by a proven company that mostly makes retro seats for domestic classics. All their other seats have had nothing but great reviews and not one horror story. It's not your cheap chinese ebay seat. So I bought them based off of reputation and price. Of course, they're not as well padded as a sparco and the cloth material isn't the nicest, but they look good fiberglass construction seems solid! The mounts are super beefy as well.
Also went with GFORCE 5 point camlock 3 inch harness from JEGS.
Now I'm just waiting one the Planted seat mounts to get made and shipped in...
Install incorporated the mounting hardware it came with, kinda flimsy, which explains why it sits a bit crooked, but it works non the less and I'm happy with it...


Also, got my seats and harness in today. I was on JEGS and came across these PROCAR "Drifter" seats. Stupid cheap at $178 each shipped WITH side mounts AND sliders. Now, I know a lot of you are thinking...you get what you pay for...As much as I believe in that, here's why I decided on these...
They're made by a proven company that mostly makes retro seats for domestic classics. All their other seats have had nothing but great reviews and not one horror story. It's not your cheap chinese ebay seat. So I bought them based off of reputation and price. Of course, they're not as well padded as a sparco and the cloth material isn't the nicest, but they look good fiberglass construction seems solid! The mounts are super beefy as well.
Also went with GFORCE 5 point camlock 3 inch harness from JEGS.

Now I'm just waiting one the Planted seat mounts to get made and shipped in...
03-04-16, 03:02 PM
#65
Pole Position
Thread Starter
03-08-16, 11:11 PM
#67
Pole Position
Thread Starter
IT STARTED!!!
So I have a quite bit of updating to do, and unfortunately, I haven't been taking that many pictures of the progress because I've been scrambling to get this thing running. I have a scheduled dyno tune on Thursday the 10th and need to get this thing running on it's own power ASAP!
Wiring has yet to be finished, but it was jimmy rigged to get it started at the very least. I was having an issue priming the engine, and it was of major concern. I cranked it over about 10 times for LONG periods and it just wasn't building pressure. I was just about ready to give up and decide I need to pull the engine to take the pan off and see what's going on. Then my friend Travis got a crazy idea to manually pressurize the oil pump with oil, just enough to get it soaked inside. His theory was that the pump was too dry to seal right and pick up anything from the pick-up tube. Next thing you know, here I am blowing oil with my mouth and lungs through one of the AN lines from the filter relocation. We put it all back together and by the 3rd attempt at cranking it, we build pressure!! Holy **** that worked!!!
Primed the engine a couple more times to ensure good lubrication, added fuel to the tank, primed the pump, and started it right up. It was perfect! The video doesn't do the sound of the car any justice. It's effing loud and deep!
I'll get more updates tomorrow. Here's the first start up video...
03-09-16, 03:23 PM
#68
Driver School Candidate

Yes! I'm pumped for you! I still have so much work to do 
Did you have the rods resized when you put in the arp bolts?
And what ecm did you use to start it up? I assume it's been flashed to remove vats and rear o2?
Did you have the rods resized when you put in the arp bolts?
And what ecm did you use to start it up? I assume it's been flashed to remove vats and rear o2?
03-09-16, 03:40 PM
#69
Pole Position
Thread Starter
I did have the rods resized! It's an absolute must!
As far as the PCM I had my tuner upload a base tune and then the rest of the tune will be on the dyno tomorrow! So yes, vats and emissions were deleted.
03-09-16, 04:00 PM
#70
Driver School Candidate

I hope tuning goes well. I'm looking forward to seeing this thing rip
03-15-16, 12:27 PM
#71
Pole Position
Thread Starter
Okay, I have a lot of updating to do. So much has happened since the start up, it's been a roller coaster haha.
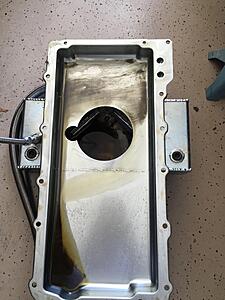
Firstly, the night of the startup, I noticed it was leaking oil from the rear of the pan. It was a weird location though because the oil was coming from the threads of the oil pan and not from anywhere else...

Decided to ignore it since I was on a time crunch to make it to my scheduled dyno tune. So more on this later...
Next morning I started her up again to get it to operating temperature and bleed the coolant system...
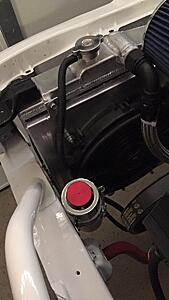
Then I notice this...
Apparently, some way somehow, the water pump developed a crack the day before the dyno tune. Lesson learned, don't but a cheap ebay waterpump from OAW. So I went out and shelled out some money on an expensive Duralast pump. Would've preferred a GM one, it's even cheaper, but couldn't wait on shipping, and it was too late to go to the parts department at the dealership.
The problem now was getting a -16AN fitting on the new pump. HUGE downside to AN fittings on certain parts. Luckily, I was able to get a hold of the machinist that built the engine last minute and had him salvage the fitting from the old pump and press it in to the new pump. Only way to get the fitting out was to melt the back of the pump to access the fitting and hammer it out lol.

To add to it, although I didn't get a picture of it, I was throwing a code for the camshaft position sensor. It wasn't getting a reading at the PCM and which explains the delay in starting up and occasional backfire at start up. Started scrambling through the wiring that night to only find that the reference wire to the PCM from the sensor wasn't pinned in properly, oops lol. Luckily it was a quick fix and now starts up like no other!
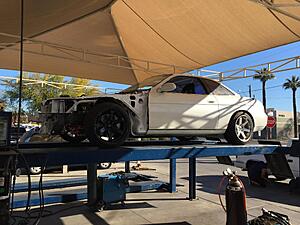
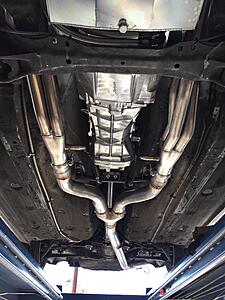
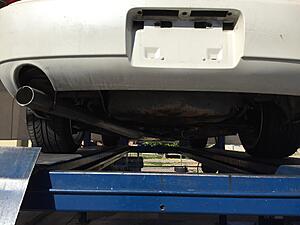
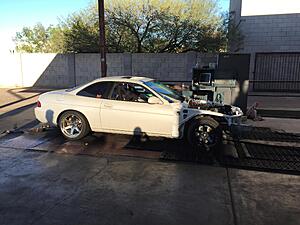
The next morning, day of the dyno tune, I got a windshield installed and got my exhaust done. For now, the exhaust is a 3" straight pipe single exit. I wanted a muffler, but they didn't have what I wanted in stock so I'll get that done at another time.
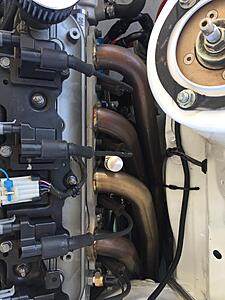
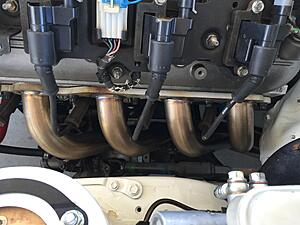
Once I got home, I noticed some weird discoloration on the passenger bank side runner. 1 was lighter than the rest and thought that maybe I had a dead cylinder. Some old fashioned spark and fuel check and it is firing. So now I was lead to believe that maybe those 3 other cylinders were building up way more heat and thus turning the metal that color.
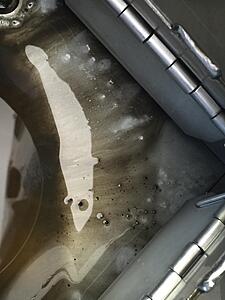
I had hours before the dyno tune, but wanted to look into this ASAP! Took off the valve covers and ****...
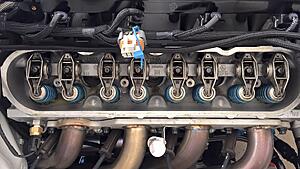
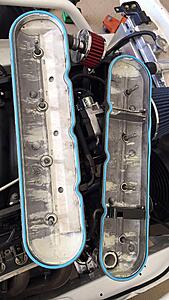
Looks just like water mixed with oil. I start getting all depressed and let the tuner know what I found and that I might not make it. One of my buddies told me that it could just be assembly lube working its way out of the engine, so I get some additional motivation and start some diagnosing. I drain the oil and it looks normal, dirty, but normal otherwise...
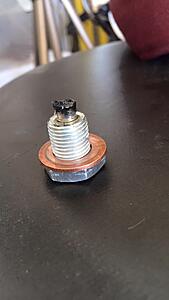
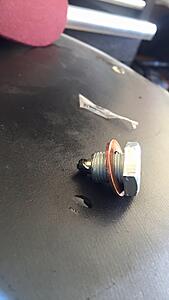
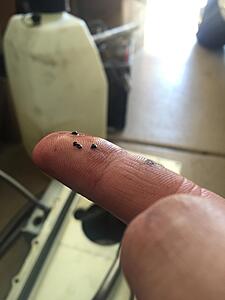
I do notice some shavings on the drain plug, but that's to be expected. However, there was a larger shiny piece that was a bit worrisome, but I said **** it.
Firstly, the night of the startup, I noticed it was leaking oil from the rear of the pan. It was a weird location though because the oil was coming from the threads of the oil pan and not from anywhere else...

Decided to ignore it since I was on a time crunch to make it to my scheduled dyno tune. So more on this later...
Next morning I started her up again to get it to operating temperature and bleed the coolant system...
Then I notice this...
Apparently, some way somehow, the water pump developed a crack the day before the dyno tune. Lesson learned, don't but a cheap ebay waterpump from OAW. So I went out and shelled out some money on an expensive Duralast pump. Would've preferred a GM one, it's even cheaper, but couldn't wait on shipping, and it was too late to go to the parts department at the dealership.
The problem now was getting a -16AN fitting on the new pump. HUGE downside to AN fittings on certain parts. Luckily, I was able to get a hold of the machinist that built the engine last minute and had him salvage the fitting from the old pump and press it in to the new pump. Only way to get the fitting out was to melt the back of the pump to access the fitting and hammer it out lol.

To add to it, although I didn't get a picture of it, I was throwing a code for the camshaft position sensor. It wasn't getting a reading at the PCM and which explains the delay in starting up and occasional backfire at start up. Started scrambling through the wiring that night to only find that the reference wire to the PCM from the sensor wasn't pinned in properly, oops lol. Luckily it was a quick fix and now starts up like no other!
The next morning, day of the dyno tune, I got a windshield installed and got my exhaust done. For now, the exhaust is a 3" straight pipe single exit. I wanted a muffler, but they didn't have what I wanted in stock so I'll get that done at another time.


Once I got home, I noticed some weird discoloration on the passenger bank side runner. 1 was lighter than the rest and thought that maybe I had a dead cylinder. Some old fashioned spark and fuel check and it is firing. So now I was lead to believe that maybe those 3 other cylinders were building up way more heat and thus turning the metal that color.


I had hours before the dyno tune, but wanted to look into this ASAP! Took off the valve covers and ****...


Looks just like water mixed with oil. I start getting all depressed and let the tuner know what I found and that I might not make it. One of my buddies told me that it could just be assembly lube working its way out of the engine, so I get some additional motivation and start some diagnosing. I drain the oil and it looks normal, dirty, but normal otherwise...

I do notice some shavings on the drain plug, but that's to be expected. However, there was a larger shiny piece that was a bit worrisome, but I said **** it.

 03-15-16, 12:28 PM
#72
Pole Position
Thread Starter
So at this point I don't find traces of water in the oil, told my tuner I might make it, do an oil change and rush right over. Make it 40 minutes late, but still left us with time to do the tune...
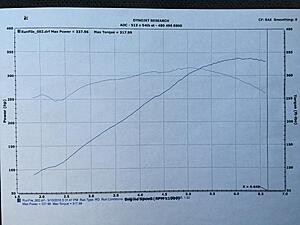
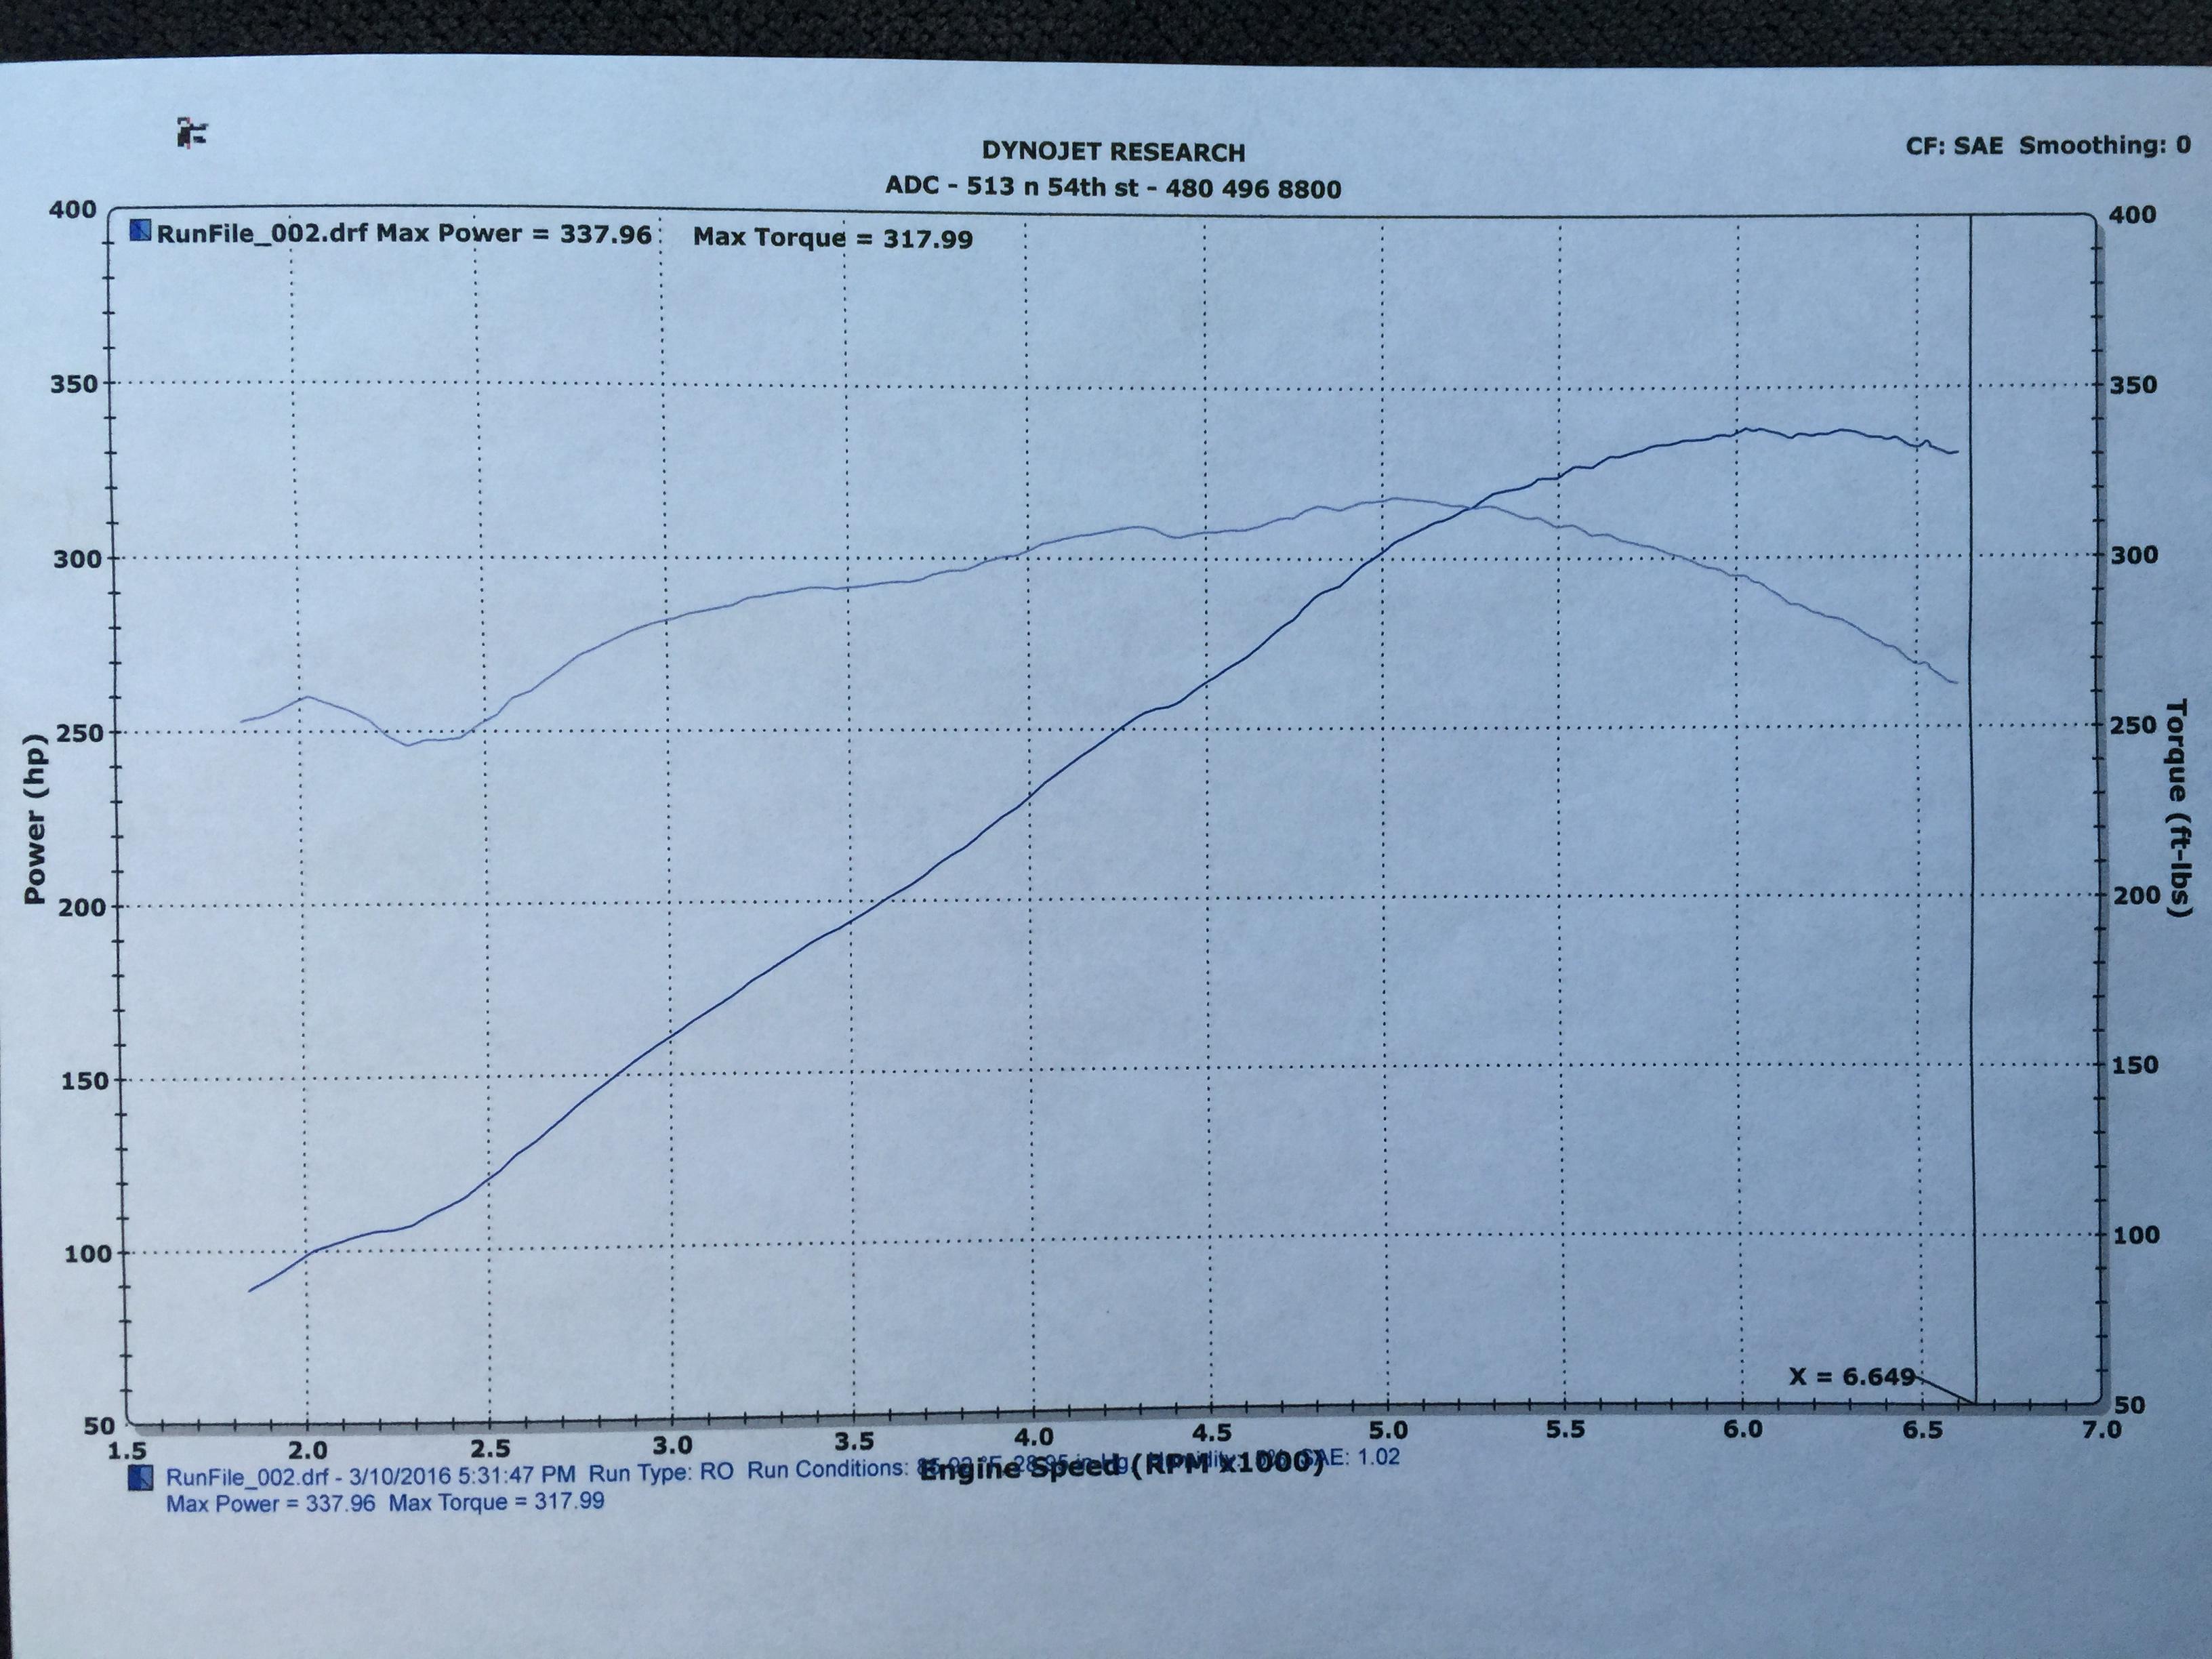
Ended up making 338HP 318TQ to the wheels which I'm SUPER happy with! Keep in mind that this is a stock 5.3 with a cam and headers. Stock 5.3's put down about 260ish to the wheels stock. Also, this is a low compression motor, so I won't make as much power as an LS1 and these stock 5.3 heads suck. So I have a ton of room to grow with in the future!
Got back home and couldn't even drive it because it was dark and I have no lights yet :-(. The next morning I took it out for its first true shakedown and try it out and it feels AMAZING! Power all the way up to 7K rpm, slides easy, breaks loose at a flick of the throttle. Needless to say, I'm ECSTATIC! So I take it back home and decide to tackle the oil leak. I HATE leaks, and although it'll bit a ton of work to just get the pan off, it needed to be done.
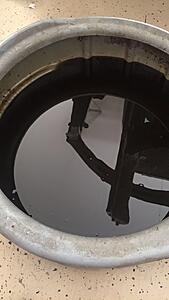
Then....****....
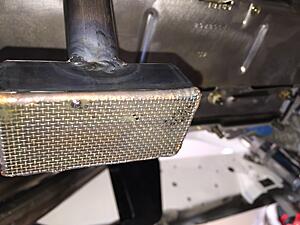
The oil is FILTHY and I find black chunks in the oil and on the oil pick up tube screen. Keep in mind that it had a fresh oil change and it only had about 5 hard pulls and 3 miles worth of driving. This was excessive to say the least. At this point I kind of give up and call up my machinist guy about it and he tells me to bring him the pan later when he gets to the shop. Go to the shop later and get a bit of relief. It all seems to be carbon build up coming from the engine cleaning itself out from all the **** it had before the rebuild in places that couldn't be reached to be cleaned. So I'm just going to continue going with the flow, drive it, keep doing frequent oil changes, and just keep an eye on it.
So I put the pan back on last night, added some Permatex "the right stuff", to the gasket, drove it for about a mile, let it idle for like 15 minutes, and no leaks to be found so far. Also ordered some restored headlights off of the forums and can't wait to throw them on! Now I'm just waiting on my friend Travis to come over to help me finish up wiring the car for lights and other small stuff.

Ended up making 338HP 318TQ to the wheels which I'm SUPER happy with! Keep in mind that this is a stock 5.3 with a cam and headers. Stock 5.3's put down about 260ish to the wheels stock. Also, this is a low compression motor, so I won't make as much power as an LS1 and these stock 5.3 heads suck. So I have a ton of room to grow with in the future!
Got back home and couldn't even drive it because it was dark and I have no lights yet :-(. The next morning I took it out for its first true shakedown and try it out and it feels AMAZING! Power all the way up to 7K rpm, slides easy, breaks loose at a flick of the throttle. Needless to say, I'm ECSTATIC! So I take it back home and decide to tackle the oil leak. I HATE leaks, and although it'll bit a ton of work to just get the pan off, it needed to be done.


Then....****....


The oil is FILTHY and I find black chunks in the oil and on the oil pick up tube screen. Keep in mind that it had a fresh oil change and it only had about 5 hard pulls and 3 miles worth of driving. This was excessive to say the least. At this point I kind of give up and call up my machinist guy about it and he tells me to bring him the pan later when he gets to the shop. Go to the shop later and get a bit of relief. It all seems to be carbon build up coming from the engine cleaning itself out from all the **** it had before the rebuild in places that couldn't be reached to be cleaned. So I'm just going to continue going with the flow, drive it, keep doing frequent oil changes, and just keep an eye on it.
So I put the pan back on last night, added some Permatex "the right stuff", to the gasket, drove it for about a mile, let it idle for like 15 minutes, and no leaks to be found so far. Also ordered some restored headlights off of the forums and can't wait to throw them on! Now I'm just waiting on my friend Travis to come over to help me finish up wiring the car for lights and other small stuff.
Last edited by outlaw0209; 03-15-16 at 10:28 PM.
The following users liked this post:
acacg (10-19-18)
03-15-16, 04:00 PM
#75
Pole Position
Thread Starter
It is a lot of work, but I used the stock bottom end and heads. A simple change of heads will place me near 400hp and plus intake would be over 400hp all motor.
It was never supposed to be a high horse power car. I built this to have "enough" power and be EXTREMELY reliable. I want to bash this thing event after event and not worry about it.
HOWEVER, when the motor was built, ARP bolts were used in the weak spots of the motor, and the rings were gapped for anticipation of boost in the future. That being said, my tuner told me that just a turbo and intake/throttle body upgrade will place me "easily" in the 600-700hp range to the wheels conservatively.
So it's a lot of work for long term potential and reliability. Not immediate high horsepower.