
92 SC400 cleaning it up geewwddd
 05-05-15, 06:00 PM
#136
Lexus Champion
Thread Starter

Did you get your door issue figured out?
I was thinking that you may have installed it upside down, or the wrong side (passenger side on driver's side door). That may cause a slight difference, which could have caused your issue.
Not even sure if that's possible, that's why i was asking.
I was thinking that you may have installed it upside down, or the wrong side (passenger side on driver's side door). That may cause a slight difference, which could have caused your issue.
Not even sure if that's possible, that's why i was asking.


 05-19-15, 10:57 AM
#138
Lexus Champion
Thread Starter
turns out the door and fender were just bent from me pulling the door out when i had the old hinge to remedy the popping of the door on the fender. so it's fine now. finally fixed the knuckle, had to take my car to a shop remove the lower caliper bolt that was stuck, they used acetylene and an irwin bolt extractor socket, came right out, got a new bolt from the dealership.
installed the new knuckle but the hand brake rubs for some reason, i tried adjusting the hand brake but it's either too loose to even engage or will rub on the rotor. so i think i'm just gonna let it rub until it fits or something. the driver side hand brake is broken somehow though, it won't tighten enough because the cable inside isn't tight, it's scrunched up like there isn't enough room for it, so gotta figure out what's wrong with that.
car is nearly all done! just rear rotors needed, body work/paint, and engine maintenance! i'm gonna upload a timelapse of me changing the knuckle soon, still gotta finish editing it and add some music or something.
EDIT: Here's the video
the song is just watever i could find royalty free lol
Last edited by oldManTan; 05-19-15 at 06:12 PM.
05-27-15, 08:13 AM
#139
Lexus Champion
Thread Starter
So got the click all figured out, sway bar end lin, the little hook washer slipped off the grooved ledge and was creating a gap so i couldn't tighten the ball joint down, slack was the clicking, i took the washer out completely and tightened it up.
Also finally finished my cluster, but hooked it up to the wrong wire lol, they turn off when i put the car in anything but P.
https://youtu.be/sRGsqkI7ML8
Also finally finished my cluster, but hooked it up to the wrong wire lol, they turn off when i put the car in anything but P.
https://youtu.be/sRGsqkI7ML8
 05-29-15, 12:36 PM
#141
Lexus Champion
Thread Starter
yea it definitely has come a long way still not even close to what i want it at though. so now that i have a fulltime job and hopefully will move out soon i'll be able to put more time and money into this pit lol. love this car so much, doing my best to take care of it.
05-30-15, 08:39 AM
#143
Lexus Champion
Thread Starter
06-02-15, 10:20 AM
#146
Lexus Champion
Thread Starter
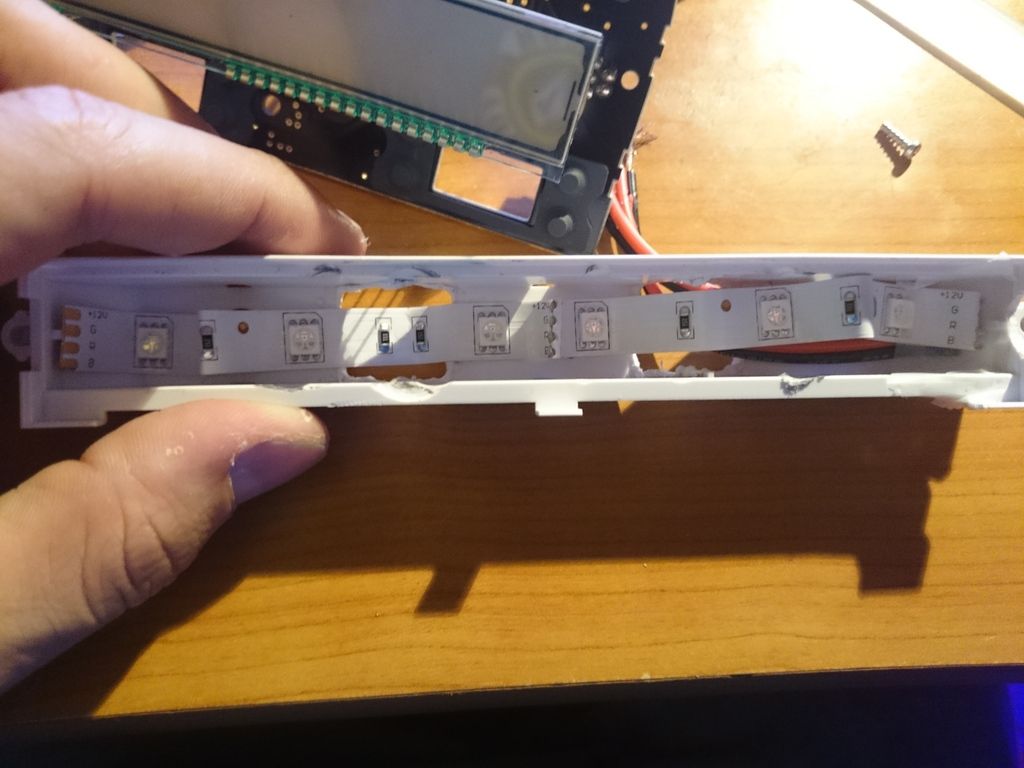
so moving on with my interior relighting, started working on the climate control. just waiting on some PLCC2 white LEDs to come in for the top button lights that are tiny. i'm using the same RGB LED strips as my cluster and they'll be connected with the cluster with some plugs i got so everything will be servicable and easily removable if needed, so i wont have a huge connected loom of wires that i can't take out without removing the entire interior.
this is a lot more modification intensive than the cluster. the cluster you can basically just take out the bulbs, put the strips in and run the wires through the holes. this however there's tons of little light bouncing surfaces that needed to be cut away and holes made for the wires to come out of the small front board, so if you don't wanna chop up and cut your climate control, i wouldn't recommend doing this and rather just solder in new lights for the back lighting.
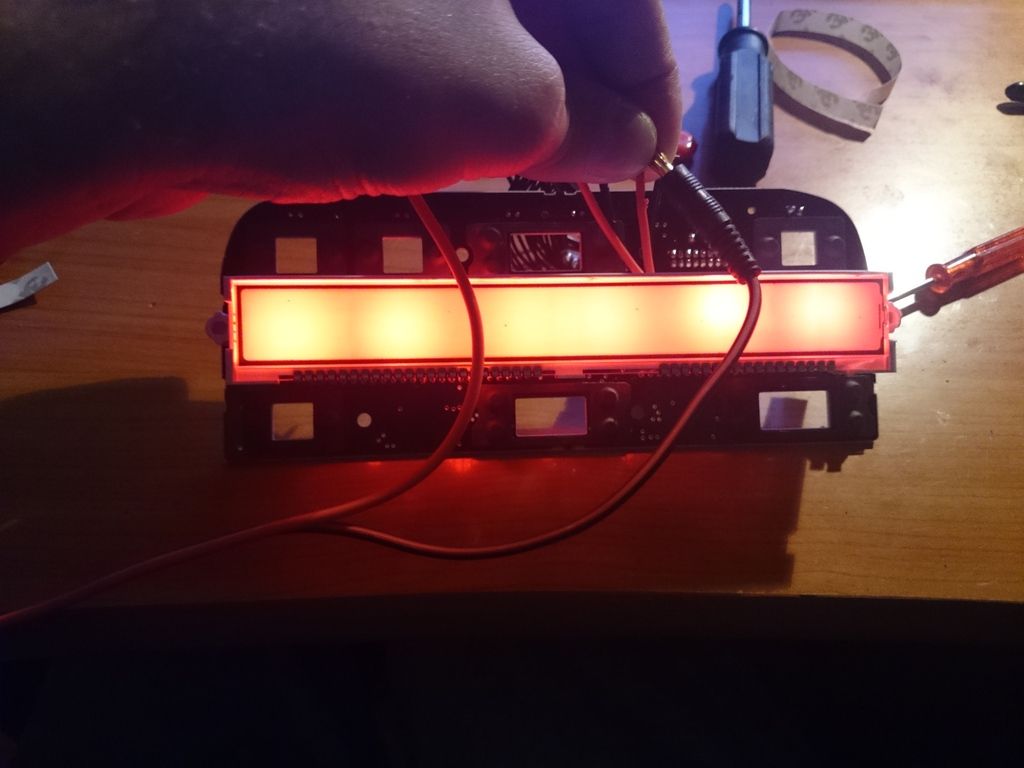
so this is for the LCD screen, had to cut out some ridges and then placed the LED strip in there, made holes for the wires to come through the bottom because a diffuser lays on top of the lights. i might replace this strip with one that has more lights, this one is a little hot spotty, but barely.
\
here's the diffuser that i had to scrape these little dots off, they were making dark spots on the screen. just scraped it off with a knife, fine sand paper could work too
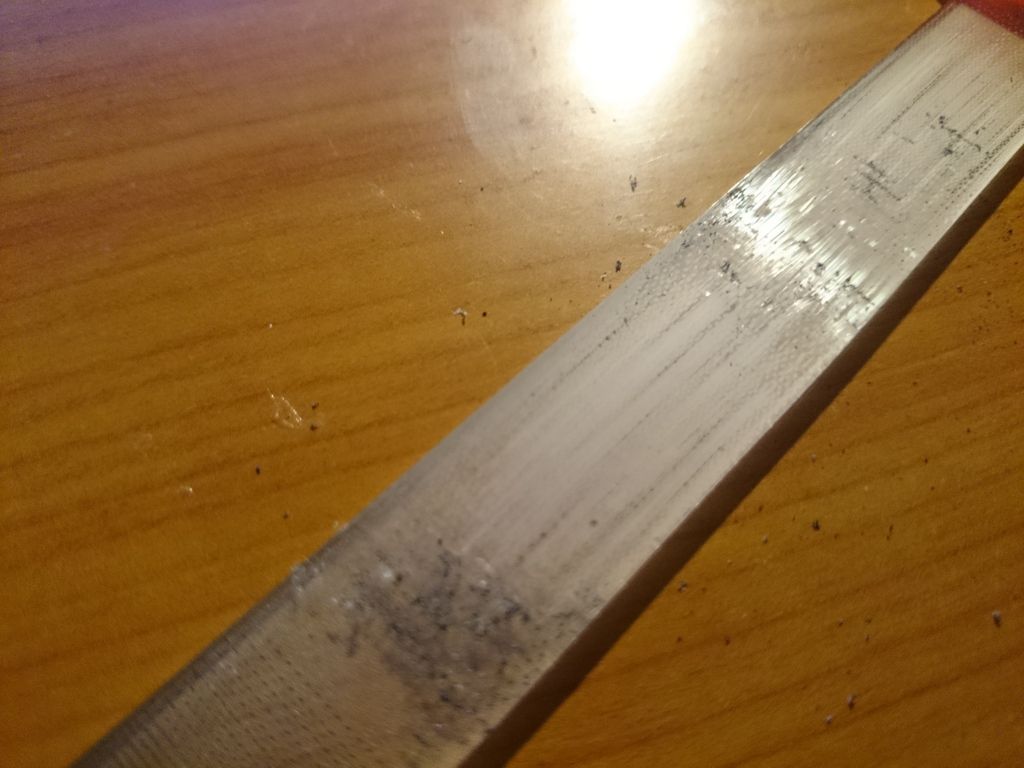
this is before scraping off the dots, you can see they make a huge difference
i'll get more pictures of how i did the buttons some other day, since i still gotta finalize some soldering and gluing down contacts so nothing ever comes apart.
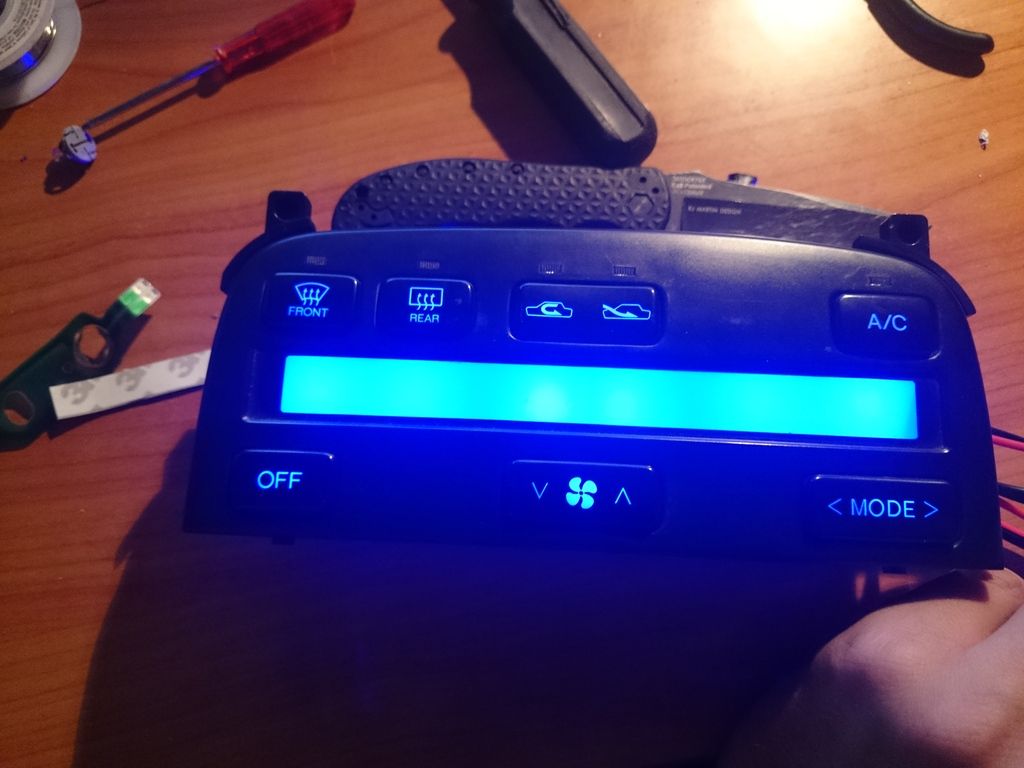
this is a lot more modification intensive than the cluster. the cluster you can basically just take out the bulbs, put the strips in and run the wires through the holes. this however there's tons of little light bouncing surfaces that needed to be cut away and holes made for the wires to come out of the small front board, so if you don't wanna chop up and cut your climate control, i wouldn't recommend doing this and rather just solder in new lights for the back lighting.
so this is for the LCD screen, had to cut out some ridges and then placed the LED strip in there, made holes for the wires to come through the bottom because a diffuser lays on top of the lights. i might replace this strip with one that has more lights, this one is a little hot spotty, but barely.
\

here's the diffuser that i had to scrape these little dots off, they were making dark spots on the screen. just scraped it off with a knife, fine sand paper could work too

this is before scraping off the dots, you can see they make a huge difference

i'll get more pictures of how i did the buttons some other day, since i still gotta finalize some soldering and gluing down contacts so nothing ever comes apart.

 06-03-15, 04:31 PM
#149
Lexus Champion
Thread Starter
thanks guys, i'll probably make a huge mega post on how to do the entire interior, i just need to start taking more pictures, i've been slackin a little lol.
06-03-15, 04:47 PM
#150
i'll speak for myself because I completely understand. your so in tune and in the zone with fixing/modifying stuff that you don't want to stop in the middle of a project just to take pictures. especially when you just want it to be done already so you can see the awesomeness you've created. haha. I get that way.