Build Threads Details on Club Lexus 2IS owner vehicles

NVIS 250 Build

Thread Tools
 
Search this Thread
 
Old 03-22-14, 12:50 PM
  #1  
daileycon
Lead Lap
Thread Starter
 
daileycon's Avatar
 
Join Date: Jan 2014
Location: NC
Posts: 612
Likes: 0
Received 0 Likes on 0 Posts
Default NVIS 250 Build


Stance:

SSR GTV01 19x9.5 20mm Phantom Silver
SSR GTV01 19x8.5 25mm Phantom Silver
225/35ZR19 88Y
255/35ZR19 96Y
Megan Racing EZ Street Coilovers
Megan Racing Rear Camber Kit
SPC Front Camber
F-sport front sway bar
F-sport rear sway bar
ARMA BBK (red)
Sport I Adams Rotors
StopTech SS brake lines
AREV Motorsports 60mm Blue Lug nuts
3mm Blue Hubcentric Wheel Spacers

Exterior:

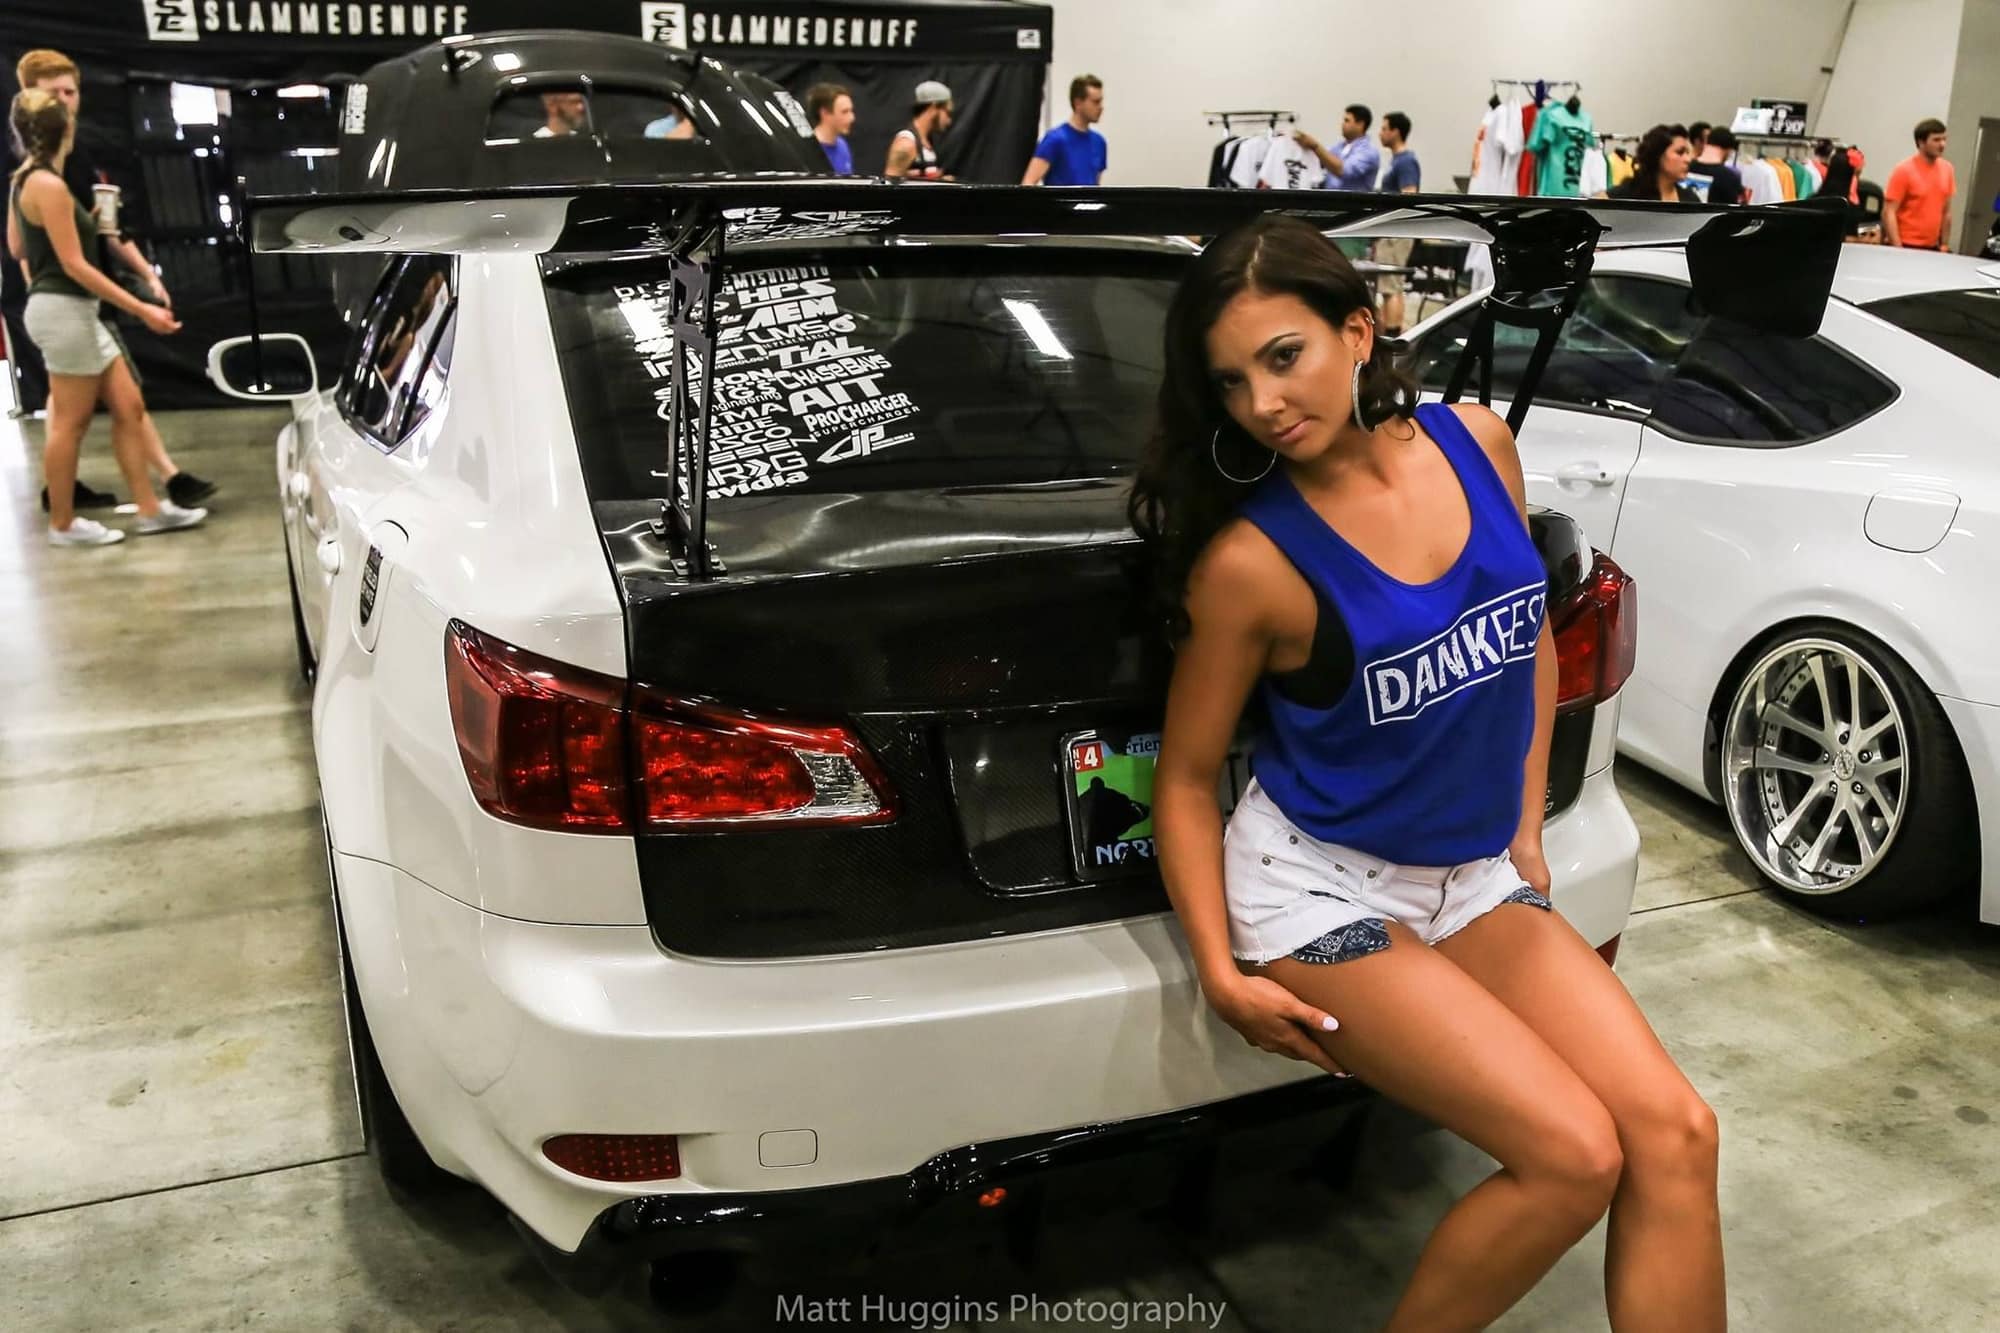
ISF Front Bumper Conversion
Seibon TS Carbon Fiber Hood
Seibon Carbon Fiber Trunk
Seibon 70" Carbon Fiber GT Wing
AeroCatch Hood Pins
33-SMD LED Rear Bumper Reflector Lights
Spyder LED Black Headlights
Carbon Fiber Wald rep rear spoiler
Carbon Fiber Roof Spoiler
Myride diffuser
Gladman Diffuser Fins
Carbon Fiber Pillar Panels
Carbon Fiber Rear Canards
Roof and grill surround painted glossy black
AIT Racing Carbon Fiber Side Skirt Diffusers
BMW M5 Carbon Fiber Front Splitter
Carbon Fiber Support Rods
Black Pearl Emblems
Black Anodized Quik-Latch Mini Latches
V-led puddle lights
6000K White H11 SMD LED Bulbs
6000K White 9005 LED DRL Kit
AVS Slim Visors
SpeedHunters Takata Tow Strap
35% Tint
Taillight redouts

Engine Bay:

LMS Supercharged
Procharger C2 Supercharger
Custom 2.15" pulley w/ Sur-Grip coating
TiAL Q BOV
Cusco Rear and Front Strut Bars
GReddy Evo3 Exhaust
GReddy Magnetic Oil Drain Plug
Invidia Mid Pipe
PPE long tube headers with black ceramic coating
High Flow Cats
Zex EFI Wet Blackout Nitrous System
Zex Nitrous Purge Kit
Zex Safety Blow Down Kit
Zex Nitrous Bottle Pressure Gauge
AIT Carbon Fiber Engine Cover
AIT Carbon Fiber Radiator Cover
HPS Radiator Hoses
HPS Coolant Hoses
HPS Vacuum Hoses
NRG washer clips
Braille Carbon Fiber Battery B3121C with Braille Mounting Bracket
ChaseBays Battery Cable
ChaseBays Engine Ground Kit
ChaseBays Coolant Overflow Tank
Injen Air Filter
Mishimoto oil cap
Mishimoto Oil Catch Can
Mishimoto Intercooler
Mishimoto & HPS Couplers
Mishimoto T-Bolt Clamps
AEM UEGO Digital Wideband
AEM Water Methanol Injection Kit
AEM Water Methanol Injection Filter
Auto Meter Boost/Vacuum Gauge
AREV Burnt Titanium Strut Tower Nuts
Custom Painted Fuse Box Covers
Add W1 Oil Catch Can
Billet Blue Washer Cap
SickSpeed Loud Horn

Interior:

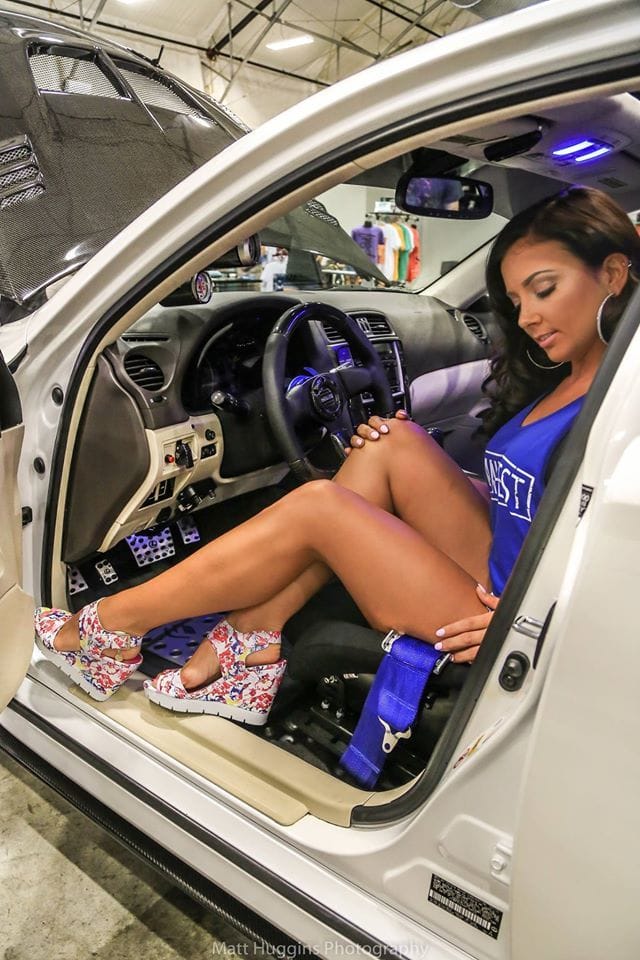
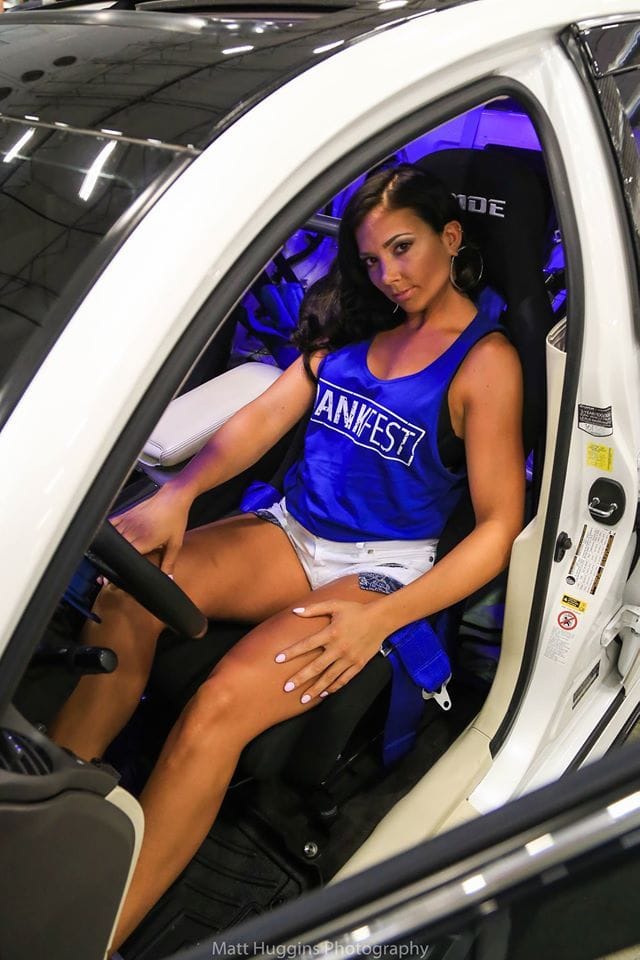
Bride VIOS Seats
Bride Seat Harness
NRG Harness Bar
NRG Carbon Fiber Flat Bottom Steering Wheel
NRG Gen 3.0 Steering Wheel Quick Release Kit - Blue
NRG Steering Wheel Hub
Apexi 410-A001 Throttle Control Smart Accel Controller
Planted Seat Brackets
Carbon Fiber Dash Kit
5050-SMD LED Interior Ultra Blue Lights
Weathertech Digifit Mats
F-Sport shift ****
Aluminum Sport Pedals
Figs CNC Foot Plate


Last edited by daileycon; 08-13-15 at 04:05 AM.
Old 03-22-14, 02:32 PM
  #2  
Boy1109
Driver
iTrader: (1)
 
Boy1109's Avatar
 
Join Date: Dec 2013
Location: ca
Posts: 193
Likes: 0
Received 0 Likes on 0 Posts
Default

Looking good man
Old 03-30-14, 09:54 PM
  #3  
willSFP
Driver
 
willSFP's Avatar
 
Join Date: Aug 2013
Location: CA - Bay Area
Posts: 109
Likes: 0
Received 0 Likes on 0 Posts
Default

Nice build so far . Did you notice any differences after installing the NRG voltage stabilizer?
Old 03-31-14, 05:24 AM
  #4  
daileycon
Lead Lap
Thread Starter
 
daileycon's Avatar
 
Join Date: Jan 2014
Location: NC
Posts: 612
Likes: 0
Received 0 Likes on 0 Posts
Default

Originally Posted by willSFP
Nice build so far . Did you notice any differences after installing the NRG voltage stabilizer?
I did notice a difference but I installed it with the RedTop battery so it could have been that.
Old 03-31-14, 08:18 AM
  #5  
06350F
Lead Lap
iTrader: (4)
 
06350F's Avatar
 
Join Date: Oct 2006
Location: LA
Posts: 407
Likes: 0
Received 1 Like on 1 Post
Default

Think the camber kit and arms were needed?
Old 03-31-14, 08:48 AM
  #6  
daileycon
Lead Lap
Thread Starter
 
daileycon's Avatar
 
Join Date: Jan 2014
Location: NC
Posts: 612
Likes: 0
Received 0 Likes on 0 Posts
Default

Originally Posted by BLAZE_TYLR
Think the camber kit and arms were needed?
Put them on with the springs so I couldn't tell you what it would be like without them. I know everything is lined up right and I don't see any tire ware.
Old 04-08-14, 02:16 PM
  #7  
Sfrt
Driver
 
Sfrt's Avatar
 
Join Date: Jun 2013
Location: Ontario
Posts: 134
Likes: 0
Received 0 Likes on 0 Posts
Default

Love the wheels ... Where does one pick those up?
Old 04-08-14, 03:15 PM
  #8  
MDHLexus
Pole Position
iTrader: (5)
 
MDHLexus's Avatar
 
Join Date: Sep 2013
Location: California
Posts: 287
Received 2 Likes on 2 Posts
Default

Damn! Love that engine bay, might have to swoop on some of that! I've been looking for some engine dress up goodies. Love your whip!

Did you paint those engine covers and just throw a decal on? if so, what paint?

~Matt

Last edited by MDHLexus; 04-08-14 at 03:25 PM.
Old 04-08-14, 04:29 PM
  #9  
daileycon
Lead Lap
Thread Starter
 
daileycon's Avatar
 
Join Date: Jan 2014
Location: NC
Posts: 612
Likes: 0
Received 0 Likes on 0 Posts
Default

Originally Posted by Sfrt
Love the wheels ... Where does one pick those up?
Thanks, check ebay 19" staggered hyper black LFA
Old 04-08-14, 04:31 PM
  #10  
daileycon
Lead Lap
Thread Starter
 
daileycon's Avatar
 
Join Date: Jan 2014
Location: NC
Posts: 612
Likes: 0
Received 0 Likes on 0 Posts
Default

Originally Posted by MDHLexus
Damn! Love that engine bay, might have to swoop on some of that! I've been looking for some engine dress up goodies. Love your whip!

Did you paint those engine covers and just throw a decal on? if so, what paint?

~Matt
Thanks, I painted them with Duplicolor MC201 - Blue Anodized. Just wait, in a few days I will have pics of my newest goodies installed.
Old 04-08-14, 04:44 PM
  #11  
MDHLexus
Pole Position
iTrader: (5)
 
MDHLexus's Avatar
 
Join Date: Sep 2013
Location: California
Posts: 287
Received 2 Likes on 2 Posts
Default

Originally Posted by daileycon
Thanks, I painted them with Duplicolor MC201 - Blue Anodized. Just wait, in a few days I will have pics of my newest goodies installed.
Did you have to sand the plastic down first, or did you just clean them and spray?
Old 04-08-14, 05:05 PM
  #12  
daileycon
Lead Lap
Thread Starter
 
daileycon's Avatar
 
Join Date: Jan 2014
Location: NC
Posts: 612
Likes: 0
Received 0 Likes on 0 Posts
Default

No sanding, I used an adhesion promoter and clear coat.
Old 04-09-14, 12:42 PM
  #13  
MDHLexus
Pole Position
iTrader: (5)
 
MDHLexus's Avatar
 
Join Date: Sep 2013
Location: California
Posts: 287
Received 2 Likes on 2 Posts
Default

Originally Posted by daileycon
No sanding, I used an adhesion promoter and clear coat.
Clear coat after the color coat (blue)? or before, like the DupliColor Ground Coat??

Cant wait to see the new pics!
Old 04-09-14, 01:08 PM
  #14  
daileycon
Lead Lap
Thread Starter
 
daileycon's Avatar
 
Join Date: Jan 2014
Location: NC
Posts: 612
Likes: 0
Received 0 Likes on 0 Posts
Default

I put on the adhesion promoter then the duplicolor MC201 and then clear coated it, then decals I got another can of the MC201 today. Plan on doing some more work with it.
Old 04-09-14, 01:54 PM
  #15  
MDHLexus
Pole Position
iTrader: (5)
 
MDHLexus's Avatar
 
Join Date: Sep 2013
Location: California
Posts: 287
Received 2 Likes on 2 Posts
Default

Originally Posted by daileycon
I put on the adhesion promoter then the duplicolor MC201 and then clear coated it, then decals I got another can of the MC201 today. Plan on doing some more work with it.
Haha thanks! I got a different color when i did it. Mine looks more dark/blue/purple.. I am going to throw a design on the main engine cover


Quick Reply: NVIS 250 Build


All times are GMT -7. The time now is 03:13 PM.