Form + Function: My IS300 to SXE10 project
 03-20-14, 10:23 AM
#1
Driver School Candidate
Thread Starter
Join Date: Mar 2014
Location: Michigan
Posts: 7
Likes: 0
Received 0 Likes
on
0 Posts
Greetings everyone! I figured it was due time to start a project log for my IS. Let me start by giving you a little background of myself seeing as this is my first post. I am a master certified automotive technician with approaching 10 years of experience. I am also a hardcore gearhead and road racing junkie! This is far from my first project car, and I doubt it will be my last. I am currently emploied by the Air Lift Company here in my hometown of Lansing, Michigan. If you haven't heard of us before, check out our webpage Air Lift Performance | Performance Air Suspension Systems. Ok so where to start...
I purchased my 2002 IS300 5 speed with LSD a year and ten days ago after my long time Subaru project decided it wanted to blow another engine. I had that car for 7 years, and in that time I went through 6 engines! Here is the last picture ever taken of her in its prime out at the Woodward Ave meets in Detroit. She spun a bearing 20 minutes after this was taken while just cruising. Mine has the white wheels.

After this devastating loss I decided it was time to move on. A friend of mine had just posted his IS for sale days prior. More back story: I have a deep love for the XE10 chassis. When I was young I used to race R/C cars. My two favorite bodies were my TRD Altezza and my Subaru 22B. Anyway the price was right, so after a quick trip to my loan officer at the bank I was handed this lone key.

Which was for my new, fairly clean, mostly stock IS

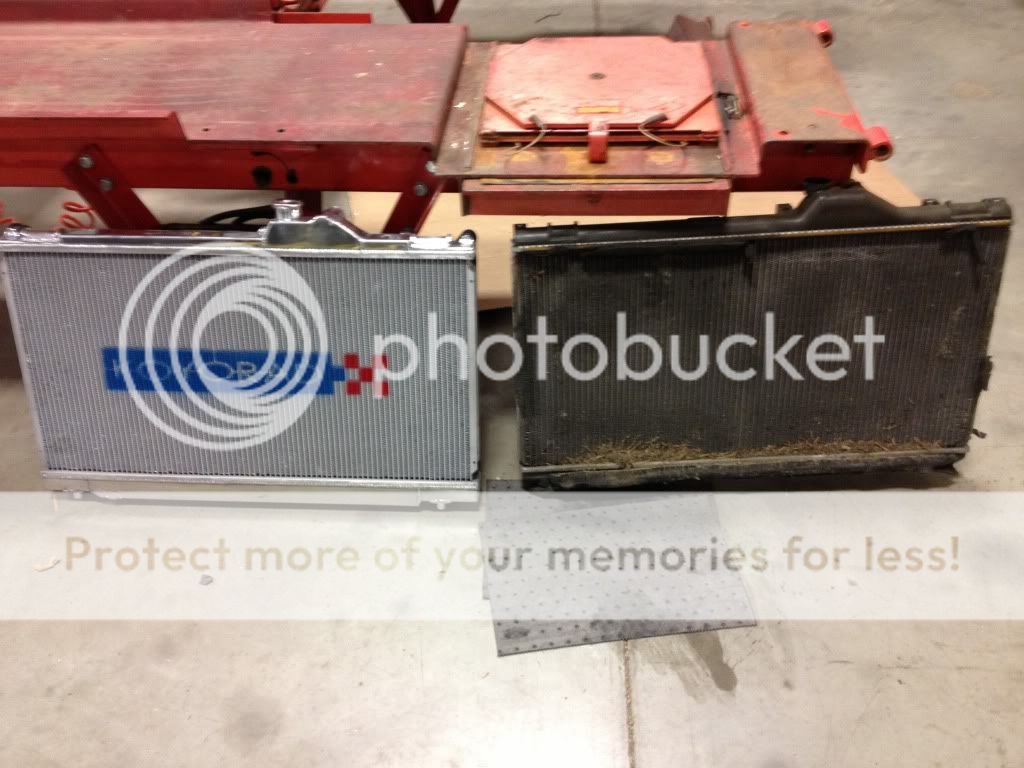
When I bought the car it had 201,000 miles on the odometer. It came with a Fidanza flywheel, ACT clutch, Megan racing header, short shifter and a 5Zigen exhaust. The previous owner included a full OEM timing belt kit that I promptly installed. I decided that since this would be my new project car, I needed to take it to a track to find its weaknesses. Beforehand I bought some goodies to make sure my track day would go without incident. This started with H&R Sport springs (not pictured) and a Koyo radiator. Old vs New:
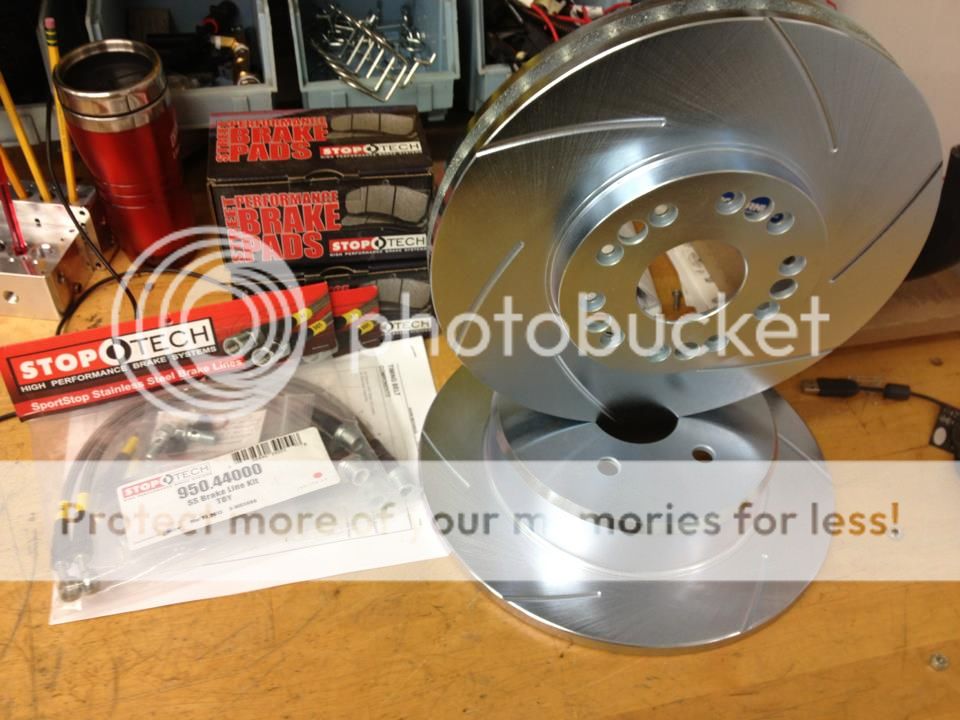
As well as some added stopping power, provided by a set of EBC slotted Zinc plated rotors, Stoptech brake lines and pads (for the street), ATE Super Blue brake fluid and EBC YellowStuff pads for the track. With the YellowStuff pads I really cannot understand why people run Supra calipers on these cars!
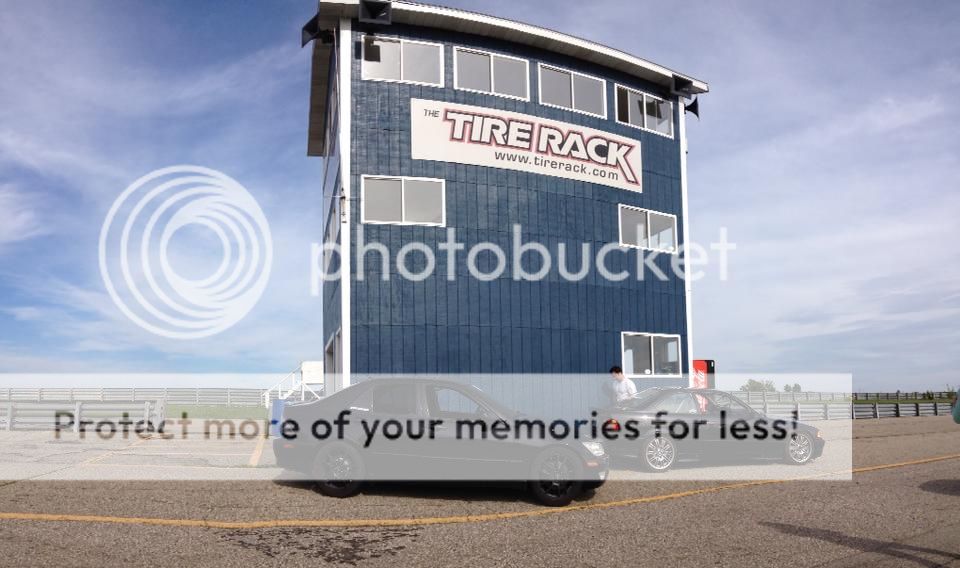
So off to the races we go! My favorite track in our state is Gingerman Raceway in South Haven. It is a technical 2 miles circuit with plenty of runoff area for any trouble you find yourself in. Here is my IS parked next to my coworker's E36
And of course I could not make it a whole day without a little drifting action! To be honest, this track does not allow drifting, period, so I was black flagged soon after this.

After a stern talking to by the marshals, I went back out and turned my fastest lap of the day! Check out the video of said lap below:
After this track day I learned that I had made the right choice for a new project. I beat the living hell out of the car all day without a single issue! But one thing became very obvious, the stock seats are NOT meant for racing. My legs and knees were bruised from bracing myself against the dash and door in those 1g turns. Which brings me to the next post...
I purchased my 2002 IS300 5 speed with LSD a year and ten days ago after my long time Subaru project decided it wanted to blow another engine. I had that car for 7 years, and in that time I went through 6 engines! Here is the last picture ever taken of her in its prime out at the Woodward Ave meets in Detroit. She spun a bearing 20 minutes after this was taken while just cruising. Mine has the white wheels.
After this devastating loss I decided it was time to move on. A friend of mine had just posted his IS for sale days prior. More back story: I have a deep love for the XE10 chassis. When I was young I used to race R/C cars. My two favorite bodies were my TRD Altezza and my Subaru 22B. Anyway the price was right, so after a quick trip to my loan officer at the bank I was handed this lone key.
Which was for my new, fairly clean, mostly stock IS
When I bought the car it had 201,000 miles on the odometer. It came with a Fidanza flywheel, ACT clutch, Megan racing header, short shifter and a 5Zigen exhaust. The previous owner included a full OEM timing belt kit that I promptly installed. I decided that since this would be my new project car, I needed to take it to a track to find its weaknesses. Beforehand I bought some goodies to make sure my track day would go without incident. This started with H&R Sport springs (not pictured) and a Koyo radiator. Old vs New:
As well as some added stopping power, provided by a set of EBC slotted Zinc plated rotors, Stoptech brake lines and pads (for the street), ATE Super Blue brake fluid and EBC YellowStuff pads for the track. With the YellowStuff pads I really cannot understand why people run Supra calipers on these cars!
So off to the races we go! My favorite track in our state is Gingerman Raceway in South Haven. It is a technical 2 miles circuit with plenty of runoff area for any trouble you find yourself in. Here is my IS parked next to my coworker's E36
And of course I could not make it a whole day without a little drifting action! To be honest, this track does not allow drifting, period, so I was black flagged soon after this.
After a stern talking to by the marshals, I went back out and turned my fastest lap of the day! Check out the video of said lap below:
After this track day I learned that I had made the right choice for a new project. I beat the living hell out of the car all day without a single issue! But one thing became very obvious, the stock seats are NOT meant for racing. My legs and knees were bruised from bracing myself against the dash and door in those 1g turns. Which brings me to the next post...
 03-20-14, 10:24 AM
#2
Driver School Candidate
Thread Starter
Join Date: Mar 2014
Location: Michigan
Posts: 7
Likes: 0
Received 0 Likes
on
0 Posts
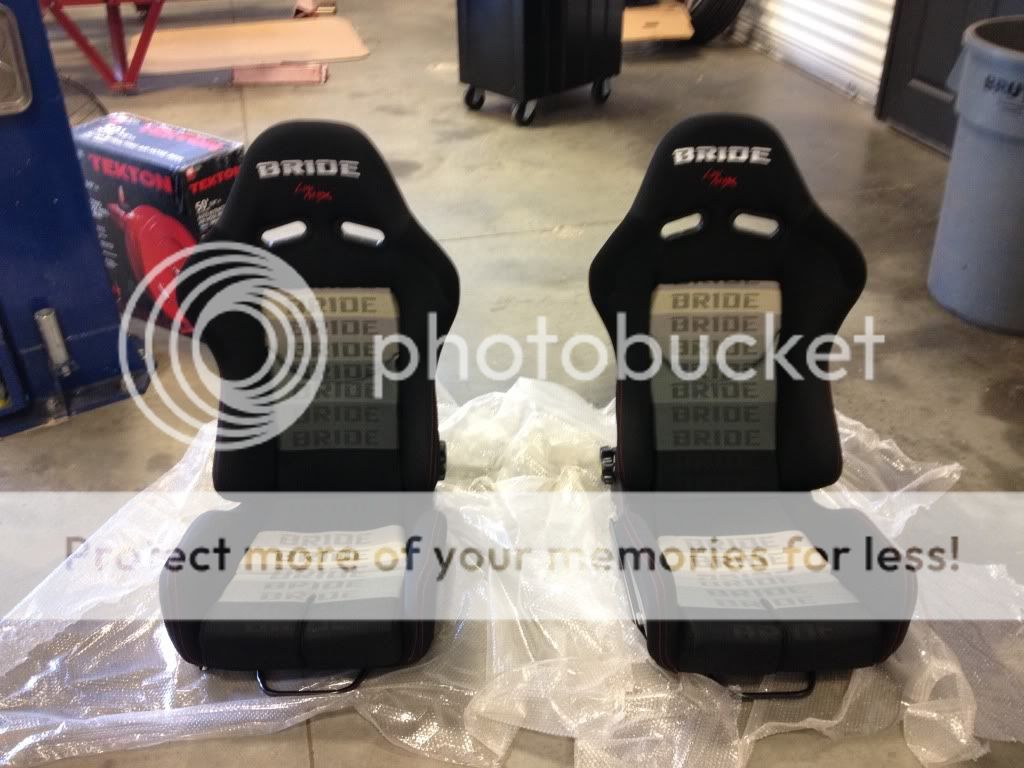
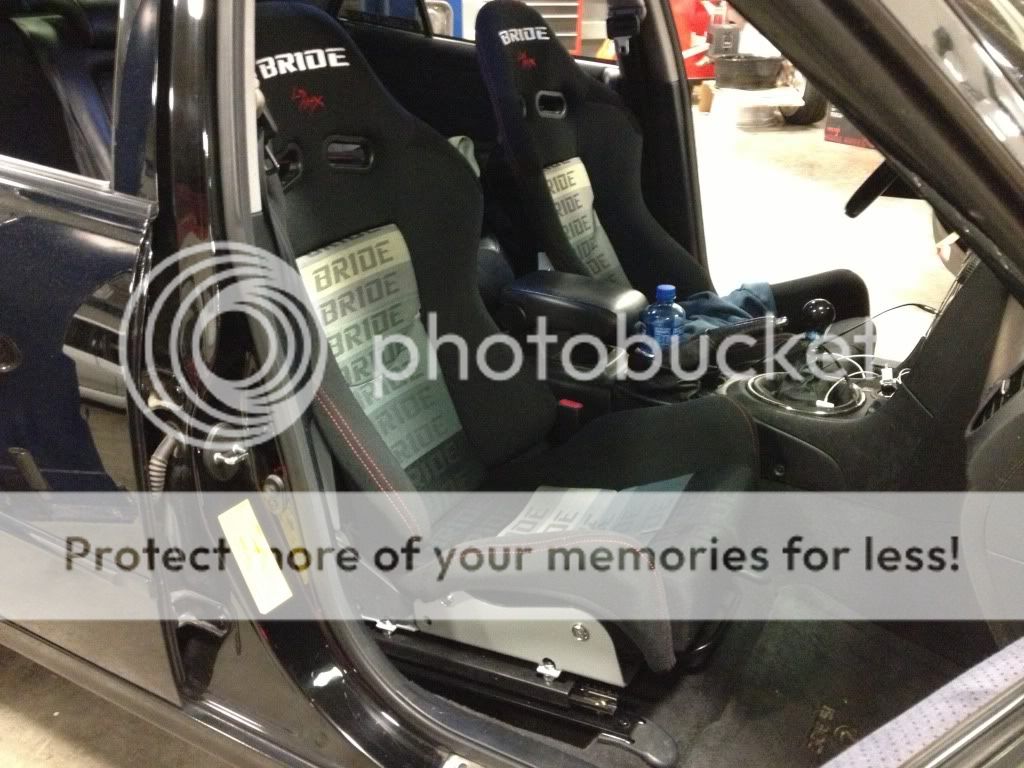
After much deliberation I settled on the seats I would buy. I wanted to keep as many parts authentic and name brand as possible as no one buys real parts around here. Everyone has knockoffs of knockoffs, so I found a killer deal on a pair of Bride Gias seats in the awesome graduation pattern. I couldn't justify forking out the extra cash for carbon, so I settled with fiberglass. Even so, I was far from disappointed!
I fabricated seat mounts using some thick flat steel to mount to the included sliders. I then took the stock seat rails and drilled the rivets out of the small plates that bolt to the body. While this rendered the stock seats useless, the outcome was worth it

When I was all done, the stock plastic bolt covers were still usable, leaving a very factory fresh look. For a total investment of $10 and a few hours time I couldn't have been happier!
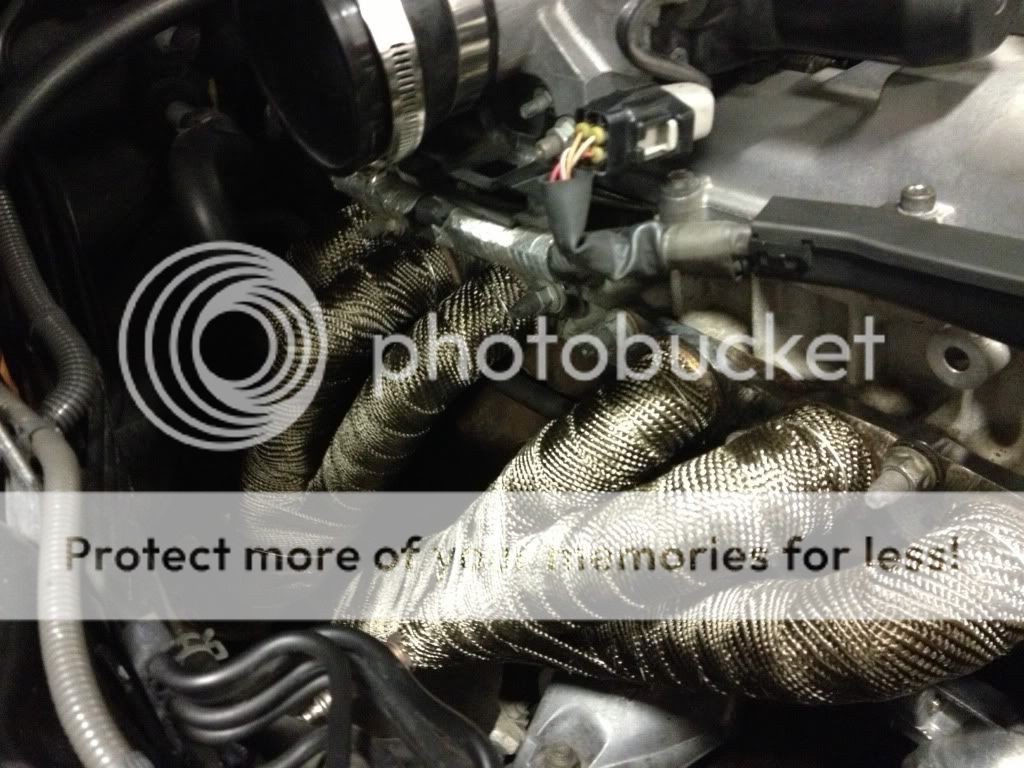
I noticed durring my track day that the header was putting out a substantial amount of heat. I cured this the best I could using some DEI Titanium header wrap
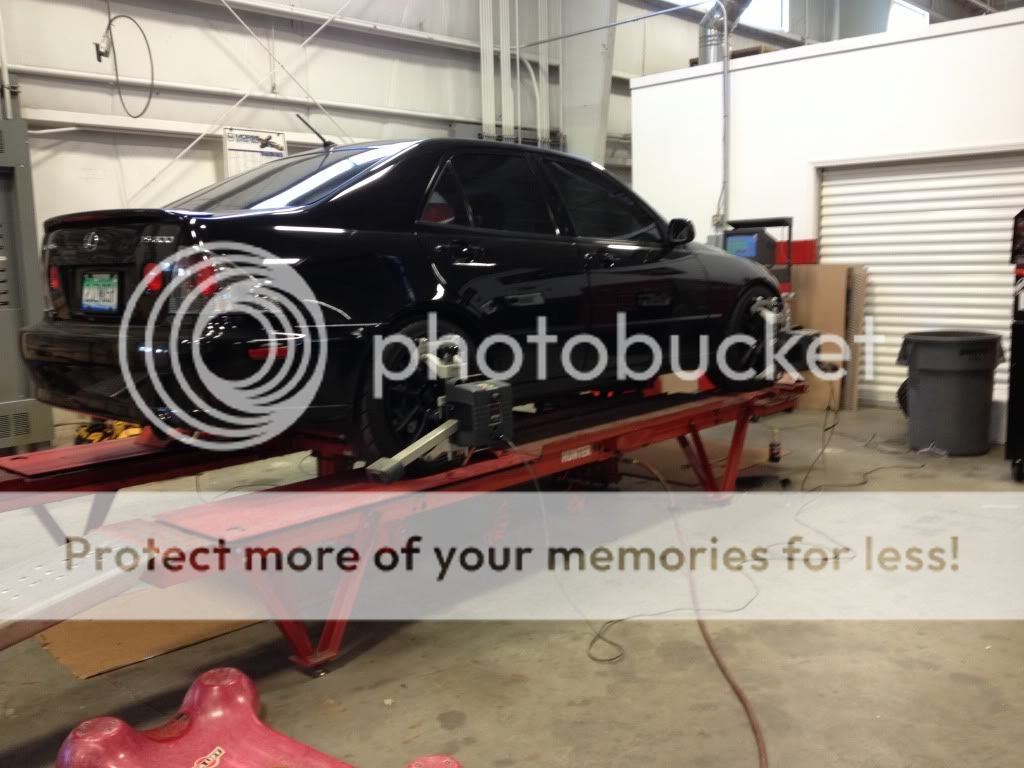
I also noticed that the stock dampers were very soft for the H&R springs I was running. I decided to scrounge around the old and prototype parts bins at work for a set of dampers that were the correct length and had damping rates close to where I thought they should be. I decided to run 8k front 6k rear springs as that is what most coilover companies are shipping for the IS. After a phone call to our pillow ball mount supplier I had myself a set of coilovers! Here it is on our alignment rack right after I corner weighted it. She tipped the scales at 3200lbs, not lightweight by any means. FYI the rear lifted on the jacks in this picture
So now it handled much better! Next on the agenda was to make this car look like the one I dreamed about as a child, it needed the famed TRD kit. After talking with many importers I managed to source the entire kit way out in Florida. It was only missing the TRD Sports grill, but I could live without it. After a few phone calls with the importers, I scored a good deal on the entire kit shipped. The only problem was, it was white.

Fortunately two of my close friends work at a body shop. After two weeks of spy photos I finally had them back in my possession. They had to hand sand each part down to bare plastic, seal and prime them then hit them with some color. I threw them some extra cash for a few more layers of clear coat to really make them shine. The end result? Flawless!
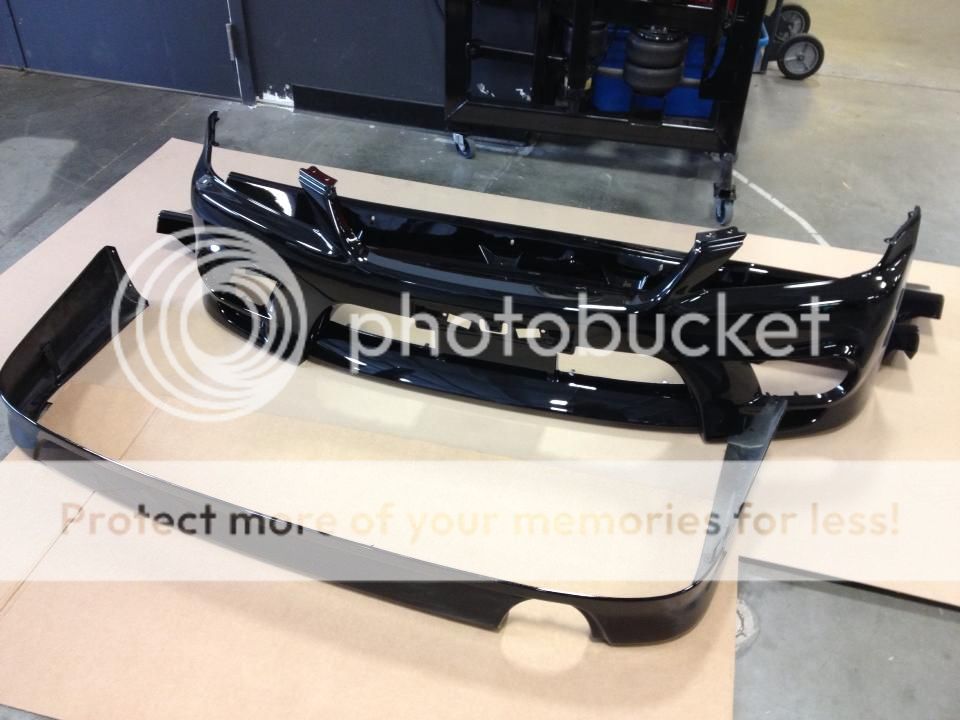
Two days later and they were on, and what a difference they made to the overall appearance of the car! Finally, it was starting to look like the R/C car that sat in room for years. At the same time I was installing the kit I decided to replace the old, nasty looking headlights. I found a much cleaner OEM set for cheap, and after much sanding and polishing, along with painting the housing black, I was satisfied with the result. Here it is right after I pulled it out of the shop with its new gear

This was the first time I had EVER done any type of body mods to one of my project cars. I always focus on mods that make the car more responsive and crisper to drive, as well as power. I will admit that this was one the most rewarding mod I had done to the car up to this point. With a big car show (Another Level Car Show) coming up in Chicago I decided to hit my crummy knockoff wheels (they came with the car!) with some bronze paint to give them some contrast. Here is a few of our local crew on the way to Chicago.

Of course a few friends and I had to hit up the Chi for some late night photos after the show!


By this point it was getting late in the 2013 season. With winter looming right around the corner it was time for more racing! The local Furrin Group holds badass Autocrosses each year at a drag strip about an hour from home. Here was my best lap of the day:
Did I mention I love some oversteer? The problem is, when you are running 245 tires on all four corners, with a lowered IS and fenders that are not rolled, this can happen... bacon fender anyone?

So much for a perfectly clean body. I used a fender roller, hammer and dolly to bend it back up. It is still far from perfect to this day. Oh well, the drivers side looks good still! Anyway we decided to hit up one last meet before the snow fell. This was taken at a Lowfurbish meet, about an hour south of home.

That concludes 2013 for my IS300 project. Tonight I will post up the fun stuff I have been working on over the winter! For now, I leave you with a picture of my frosty car, battling for traction in our cold Michigan winters. BTW this was the only time the car had ever seen snow!

I fabricated seat mounts using some thick flat steel to mount to the included sliders. I then took the stock seat rails and drilled the rivets out of the small plates that bolt to the body. While this rendered the stock seats useless, the outcome was worth it
When I was all done, the stock plastic bolt covers were still usable, leaving a very factory fresh look. For a total investment of $10 and a few hours time I couldn't have been happier!
I noticed durring my track day that the header was putting out a substantial amount of heat. I cured this the best I could using some DEI Titanium header wrap
I also noticed that the stock dampers were very soft for the H&R springs I was running. I decided to scrounge around the old and prototype parts bins at work for a set of dampers that were the correct length and had damping rates close to where I thought they should be. I decided to run 8k front 6k rear springs as that is what most coilover companies are shipping for the IS. After a phone call to our pillow ball mount supplier I had myself a set of coilovers! Here it is on our alignment rack right after I corner weighted it. She tipped the scales at 3200lbs, not lightweight by any means. FYI the rear lifted on the jacks in this picture
So now it handled much better! Next on the agenda was to make this car look like the one I dreamed about as a child, it needed the famed TRD kit. After talking with many importers I managed to source the entire kit way out in Florida. It was only missing the TRD Sports grill, but I could live without it. After a few phone calls with the importers, I scored a good deal on the entire kit shipped. The only problem was, it was white.
Fortunately two of my close friends work at a body shop. After two weeks of spy photos I finally had them back in my possession. They had to hand sand each part down to bare plastic, seal and prime them then hit them with some color. I threw them some extra cash for a few more layers of clear coat to really make them shine. The end result? Flawless!
Two days later and they were on, and what a difference they made to the overall appearance of the car! Finally, it was starting to look like the R/C car that sat in room for years. At the same time I was installing the kit I decided to replace the old, nasty looking headlights. I found a much cleaner OEM set for cheap, and after much sanding and polishing, along with painting the housing black, I was satisfied with the result. Here it is right after I pulled it out of the shop with its new gear
This was the first time I had EVER done any type of body mods to one of my project cars. I always focus on mods that make the car more responsive and crisper to drive, as well as power. I will admit that this was one the most rewarding mod I had done to the car up to this point. With a big car show (Another Level Car Show) coming up in Chicago I decided to hit my crummy knockoff wheels (they came with the car!) with some bronze paint to give them some contrast. Here is a few of our local crew on the way to Chicago.
Of course a few friends and I had to hit up the Chi for some late night photos after the show!
By this point it was getting late in the 2013 season. With winter looming right around the corner it was time for more racing! The local Furrin Group holds badass Autocrosses each year at a drag strip about an hour from home. Here was my best lap of the day:
Did I mention I love some oversteer? The problem is, when you are running 245 tires on all four corners, with a lowered IS and fenders that are not rolled, this can happen... bacon fender anyone?
So much for a perfectly clean body. I used a fender roller, hammer and dolly to bend it back up. It is still far from perfect to this day. Oh well, the drivers side looks good still! Anyway we decided to hit up one last meet before the snow fell. This was taken at a Lowfurbish meet, about an hour south of home.
That concludes 2013 for my IS300 project. Tonight I will post up the fun stuff I have been working on over the winter! For now, I leave you with a picture of my frosty car, battling for traction in our cold Michigan winters. BTW this was the only time the car had ever seen snow!
03-20-14, 04:31 PM
#4
Driver School Candidate
Thread Starter
Join Date: Mar 2014
Location: Michigan
Posts: 7
Likes: 0
Received 0 Likes
on
0 Posts
So, call me crazy, but I decided that the 2JZ just wasn't me. I have a deep love for high revving 4 cylinders, seeing as I came from a Honda and Subaru background. One of my favorite cars I have ever built was my 95 Civic sedan with a legit USDM ITR/B18C5 swap.
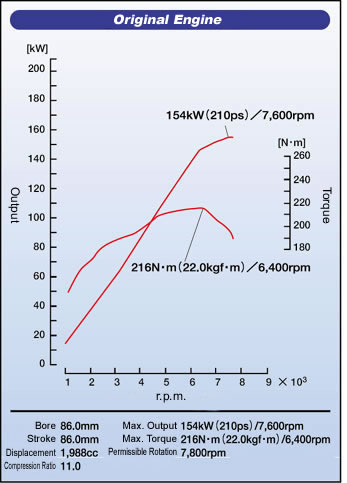
So, that being said, it is obvious that a 3SGE BEAMS swap was in my near future! I will be writing a engine swap guide after I complete the swap. Here is a quick rundown of the 5th gen BEAMS engine, taken from the Beams Owners Group
After talking with the guys that sourced my TRD kit, this showed up a week later
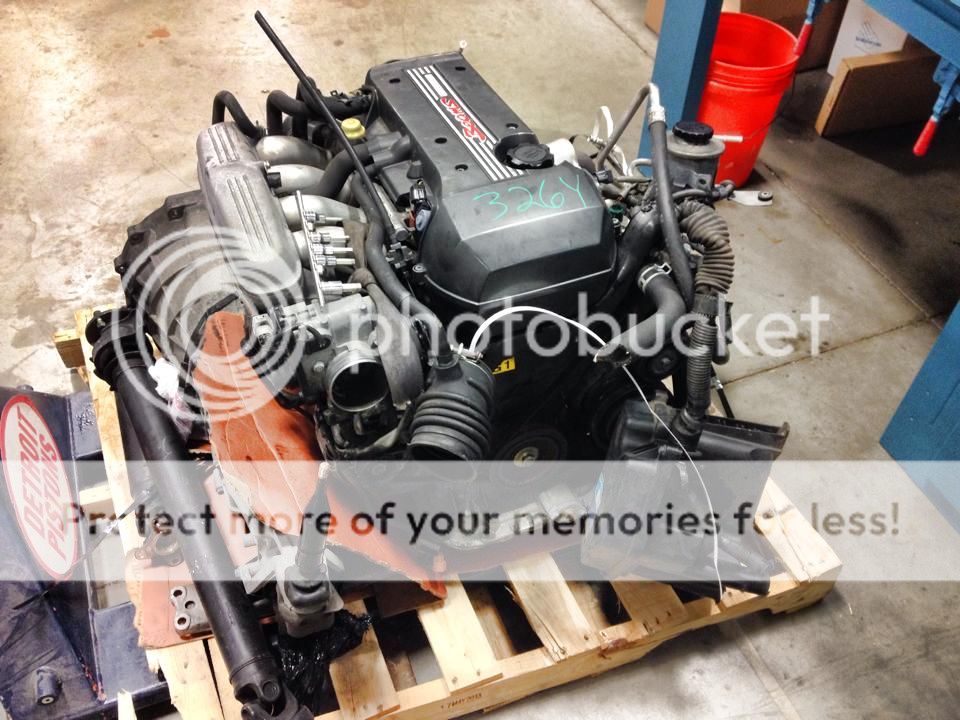
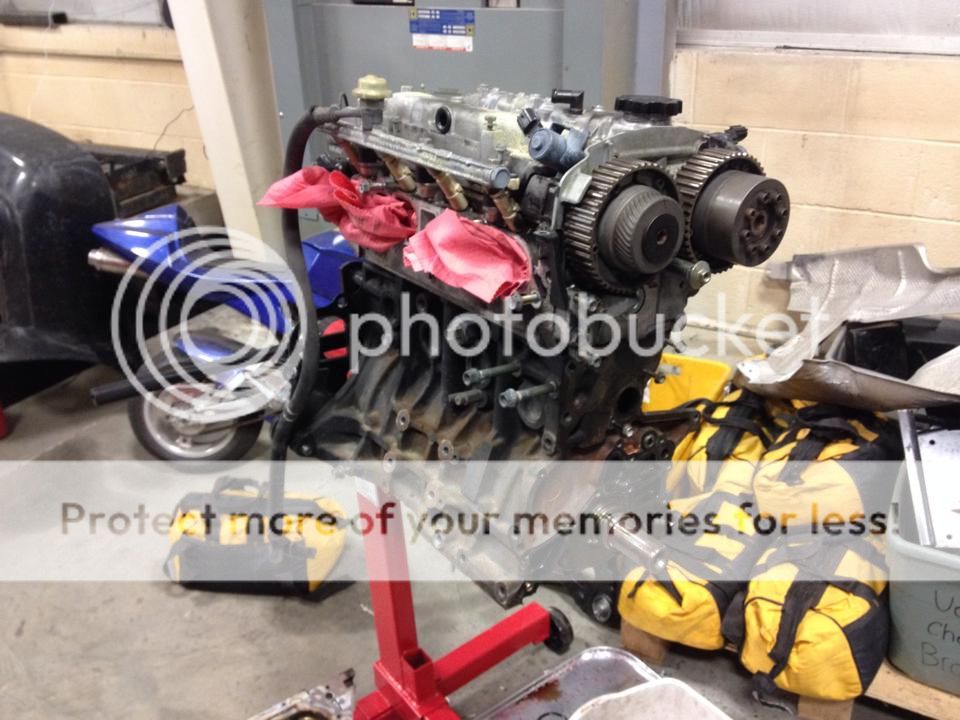
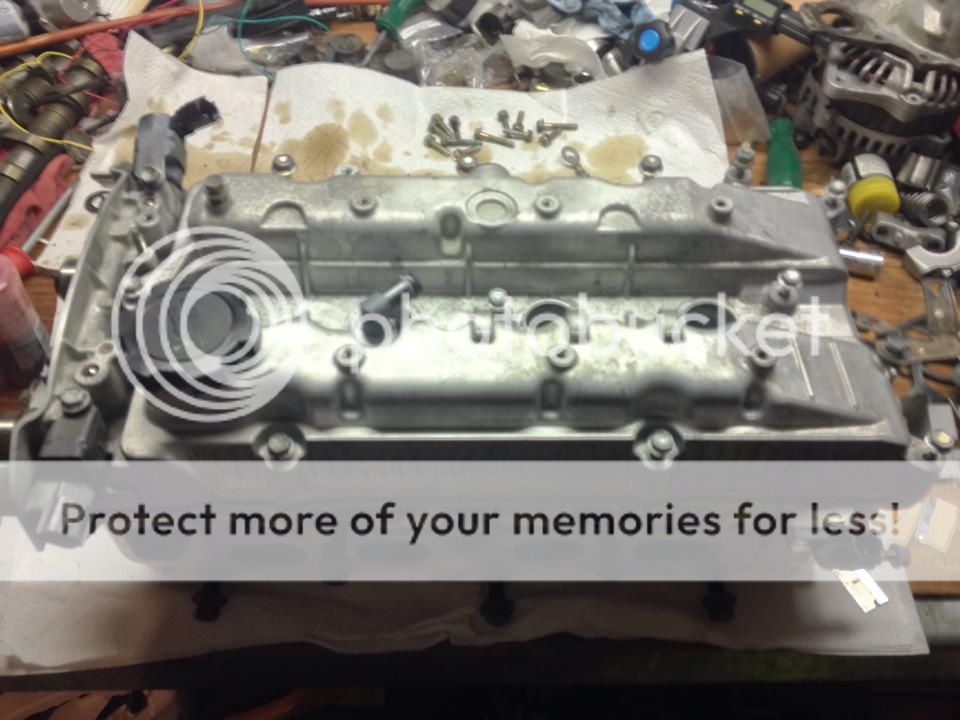
According the the stickers on the ECU cover, the engine had it's last service at 96,000km. And after seeing how clean the oil was after draining it, I'm guessing it has 65k-70k miles. Even with this low of miles, I decided to source a OEM gasket kit and rebuild it. Here it is after removing most of the accessories.
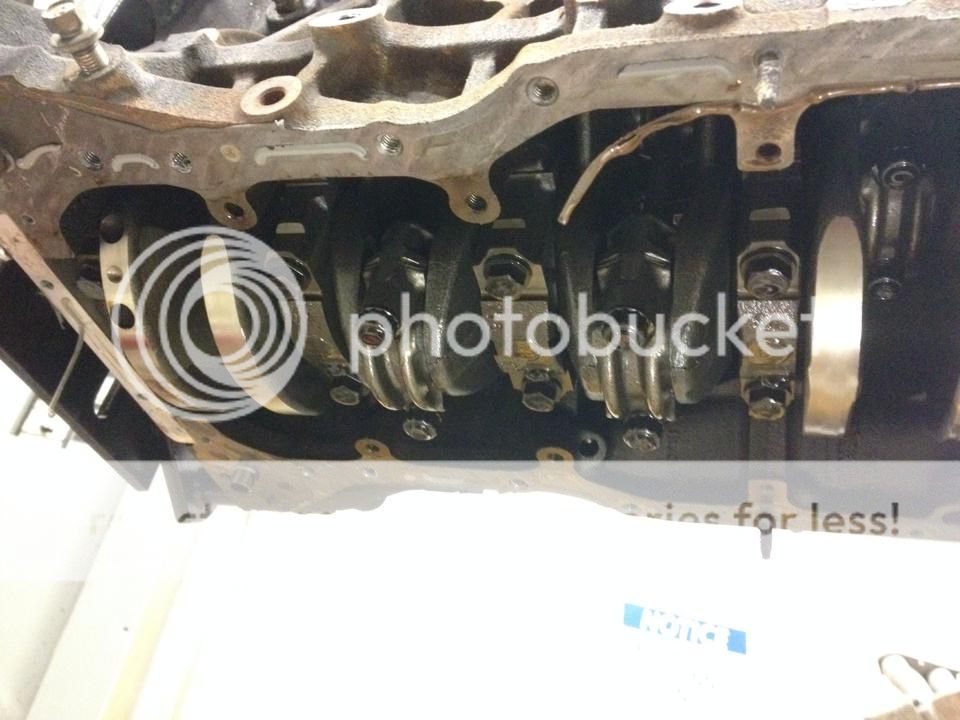
Next up was removing the oil pan. This consists of two steps. First you have to remove the steel lower pan to gain access to the bolts hidden within. Next, remove all the bolts from the aluminum upper pan. I used a pry bar in the cutouts at the back of the pan to break the seal. This is after all the accessories were removed as well. Check out how clean the crank is!
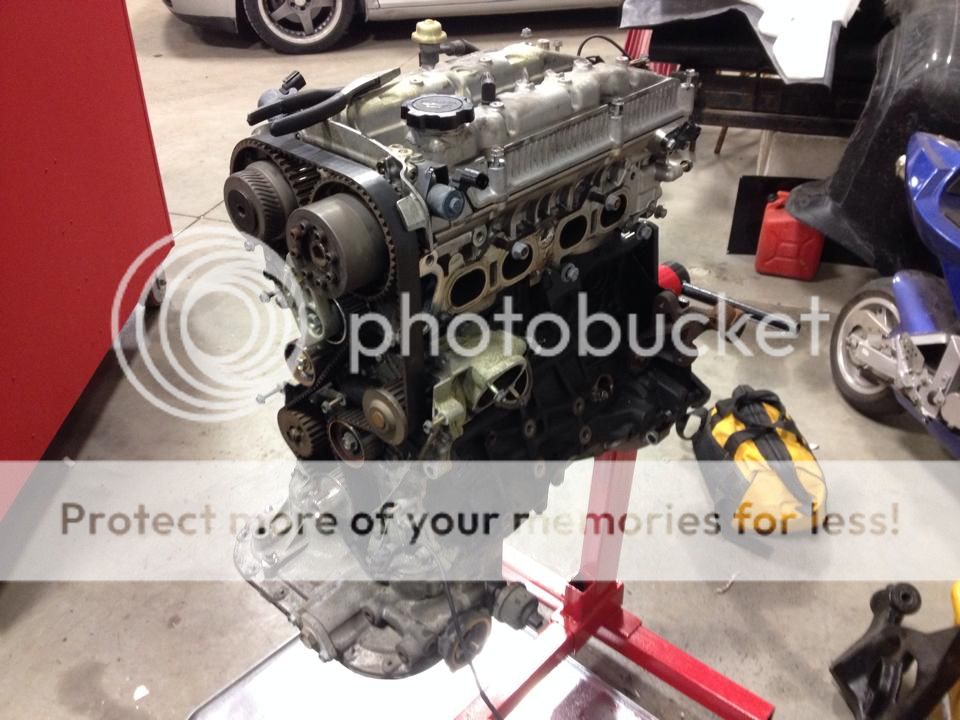
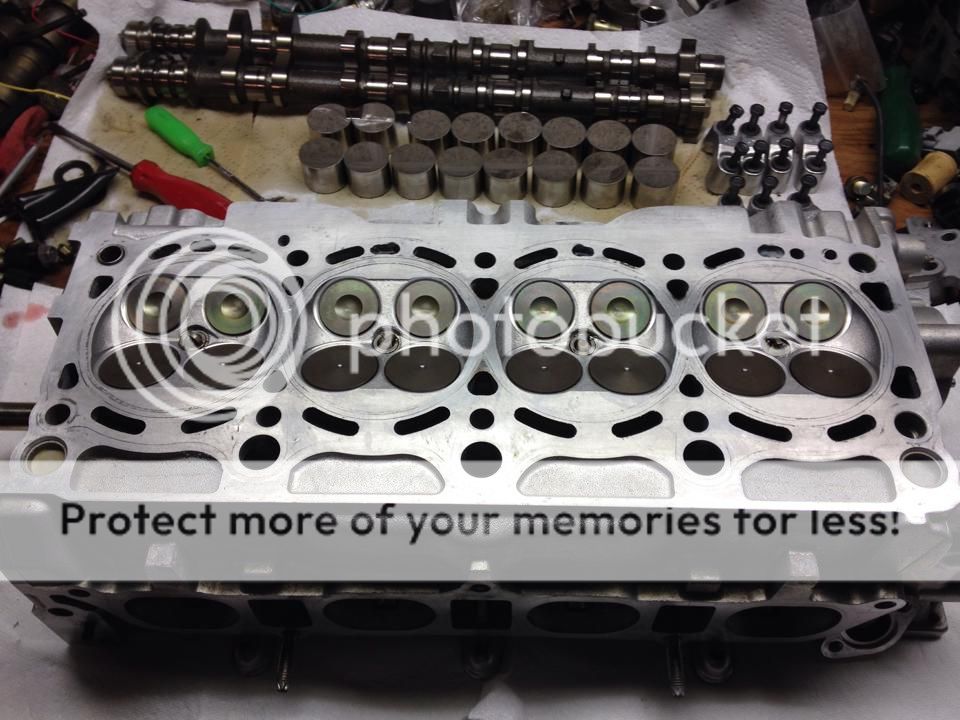
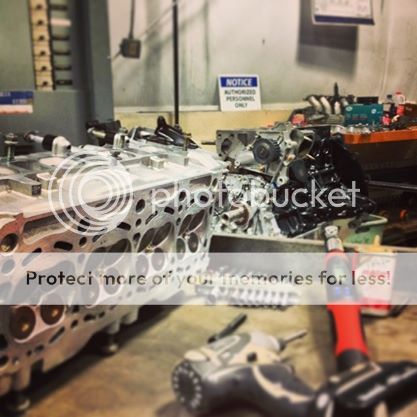
The trend of clean internals continued the farther I tore in to it. I ordered a factory service manual from a place out in NZ to assist with my tear down. Unfortunately it was VERY incomplete. It did, however, help me get the head off. The top of this thing was super clean, without even a trace of sludge. The chambers did not look bad either for an engine with this many miles.
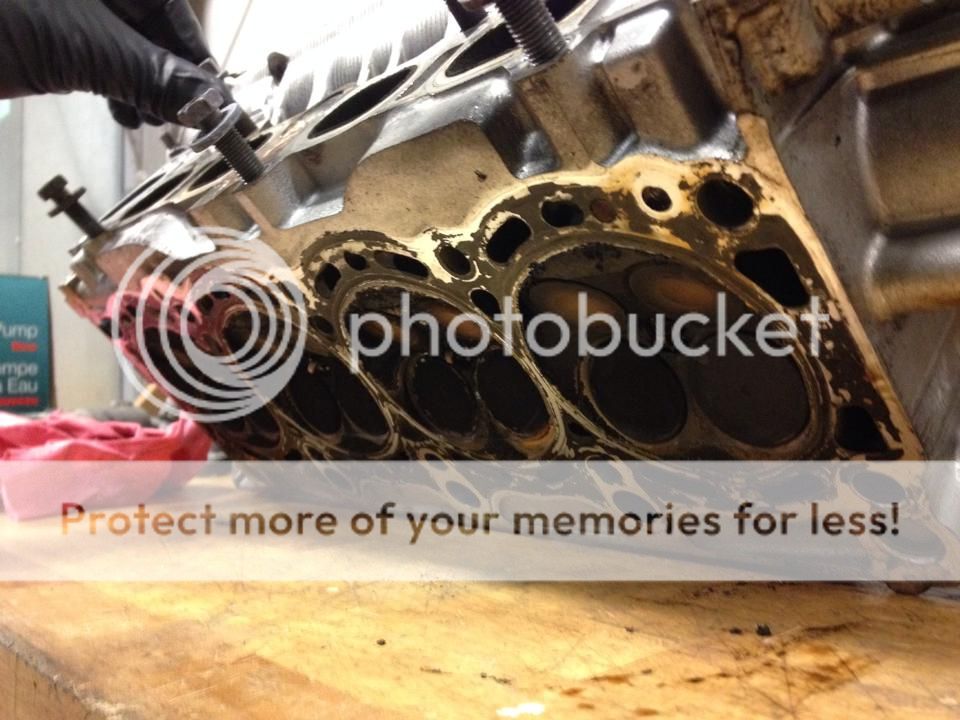
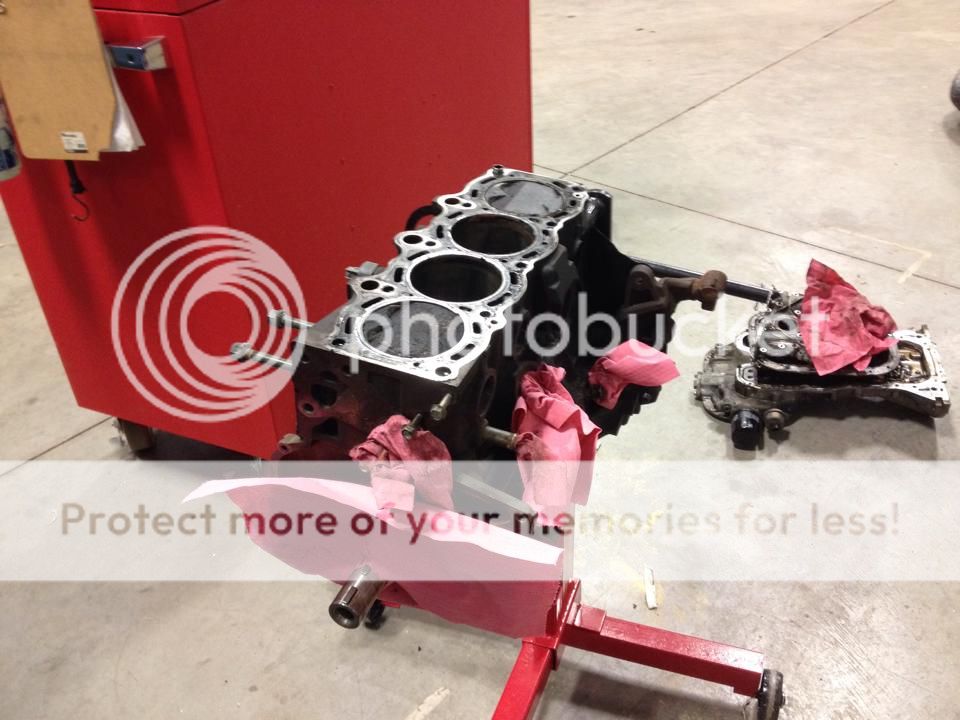
Next up was to decide if I should rebuild both the block and head, or just the head. Upon closer examination I determined I would just rebuild the head. Check out that factory crosshatch on the cylinder walls. I doubt this thing will give me trouble/burn oil any time soon. By the way, that is a weird reflection, not rust on the cylinder wall.

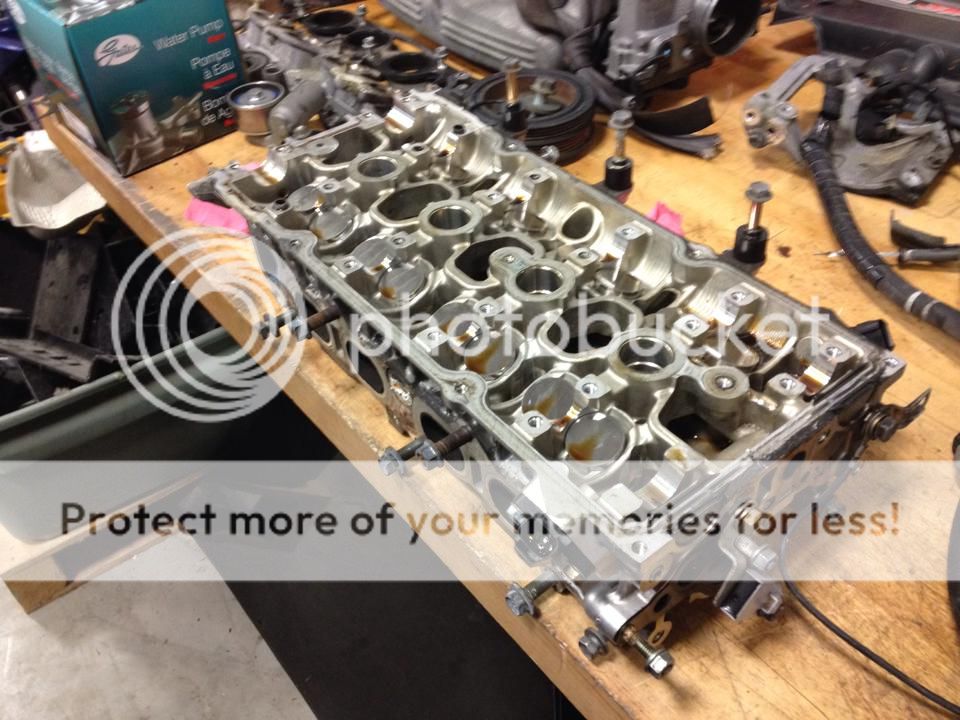
I took the head home to start the disassembly and cleaning process. Here it is, stripped bare, sitting on my work bench. Yes I know my work bench is messy
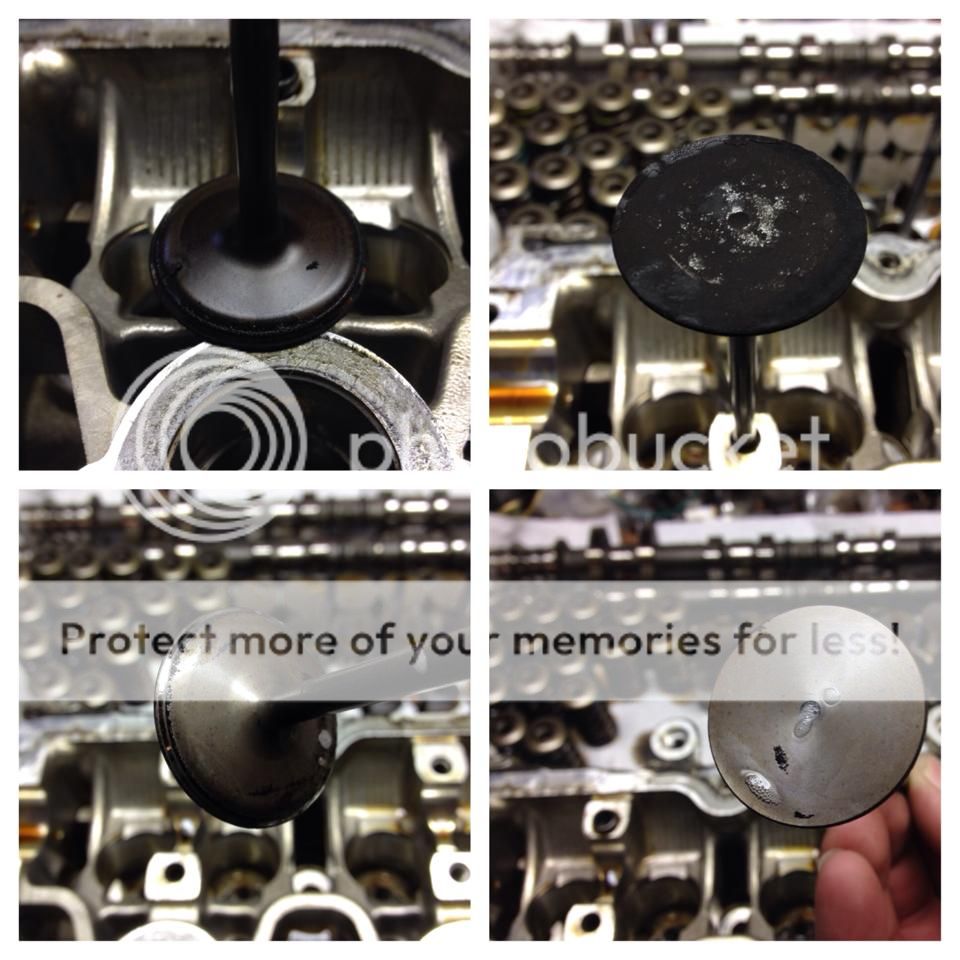
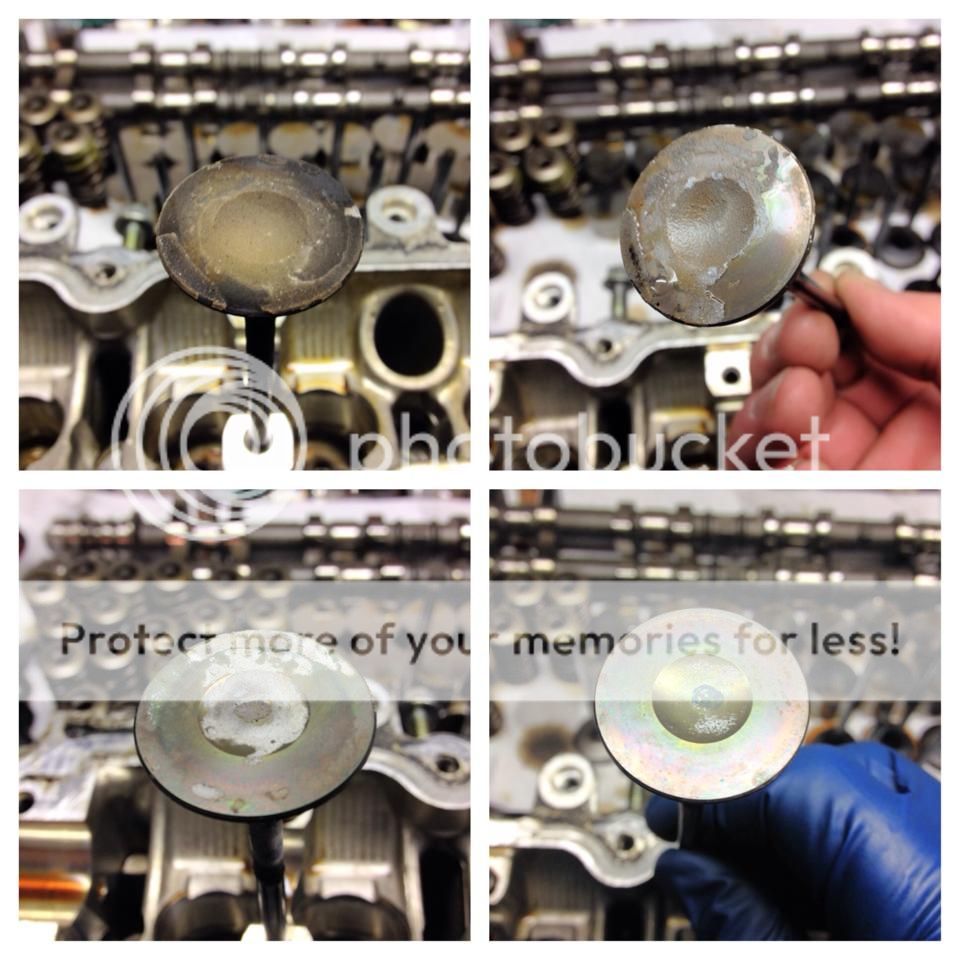
As stated earlier, the 3SGE uses titanium valves. For those that don't know, Ti is VERY VERY picky about what you can and can't clean it with. No brake cleaner, nothing that is chlorinated and very few solvents are acceptable. While all of these solvents will get the valves clean, they change the Ti at a microscopic level, and over time, will cause valve failure. Same goes for my conventional method of using a soft wire wheel. After more research I found that the motorcycle guys were having very good luck with ultrasonic cleaners. Fortunately we have a Harbor Freight right down the street. $85 later I had myself the best ultrasonic cleaner they sold. The solvent of choice you ask? A 50/50 mixture of Original Pine Sol to water! I was very skeptical of this, but I figured I would give it a try. It took about 20 minutes per valve, but look at the results!! The first picture is of an intake valve with only 5 minutes in the ultrasonic bath.
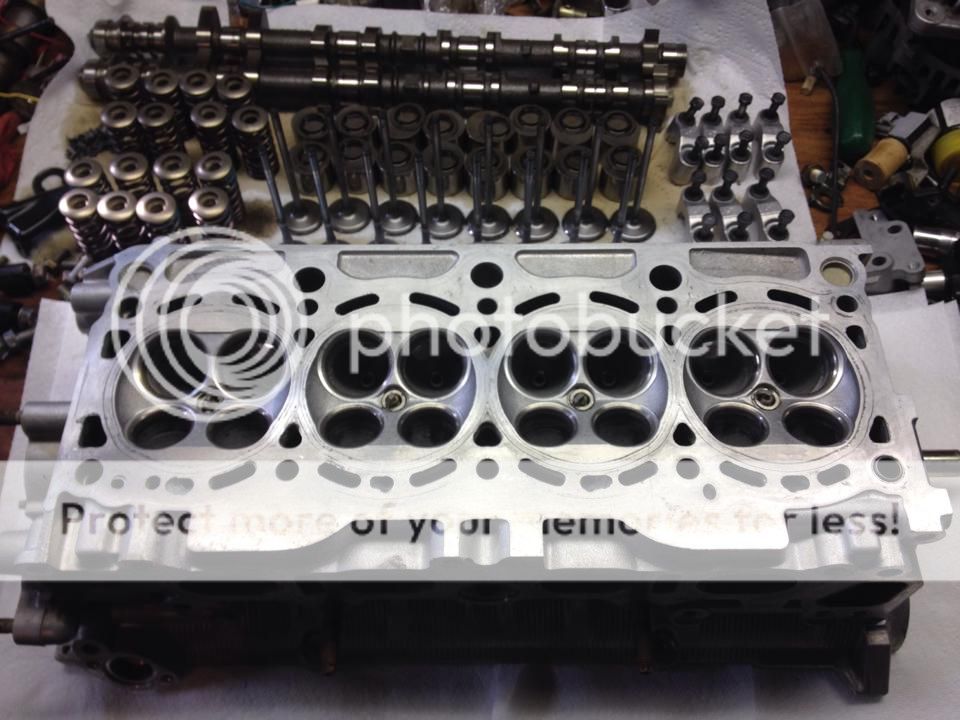
Next up was to clean the rest of the cylinder head and parts. I use 100% Purple Power Cleaner whenever I am cleaning aluminum. It have noticed it works much better than Simple Green on oil, sludgy oil and carbon deposits. I used many new razor blades as well a fine ScotchBrite to clean the head gasket mating surface. Some say you need to resurface the head every time, I have been doing it this way for years and never had an issue.

Now that everything was factory fresh, I installed a new set of OEM valve seals. Pro tip: I use a small amount of moly grease on the inside of the seal, then press them down with my finger until they stop. I have not had luck with the socket trick in the past. Next, I lubed up the valve stems with a thin coat of grease, then slid them in. I also used assembly lube on the contact surfaces of the spring seats, springs and retainers. Using my home made valve spring compressor (big *** c-clamp with a tube that I cut a window out of) and grease to hold the keepers in place, I installed all of the valves. I made sure to not mix up ANY of the parts. If it came out of the first exhaust valve on cylinder three, that is where it went back. Since I did not do any type of valve job, this was mandatory for the valves themselves. I am a bit **** when it comes to this kind of stuff, so even the springs and retainers when back in to their respective homes.
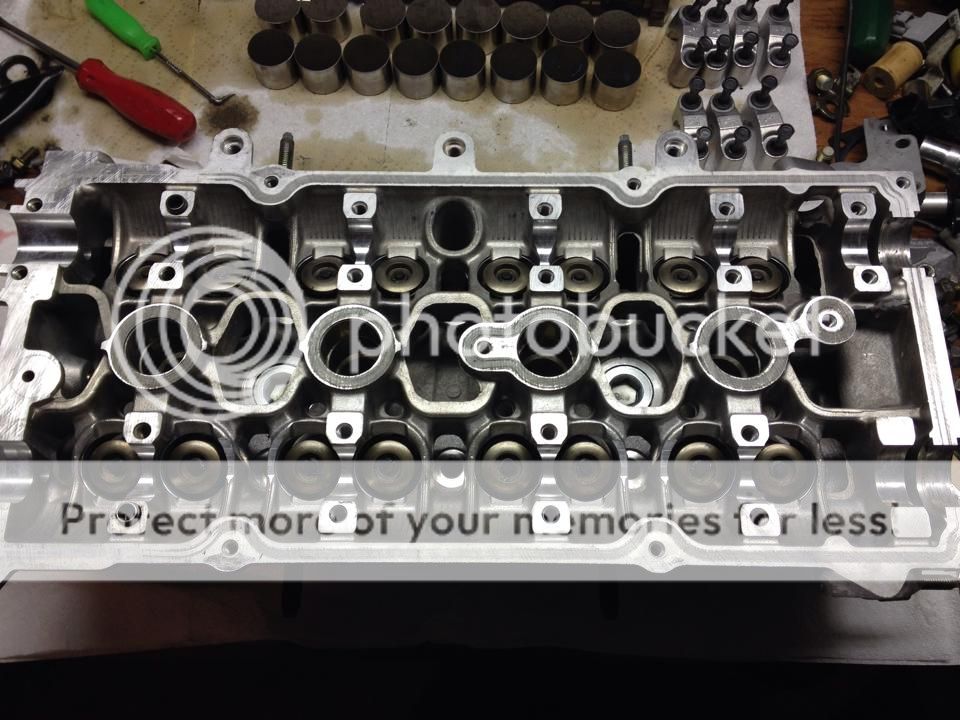
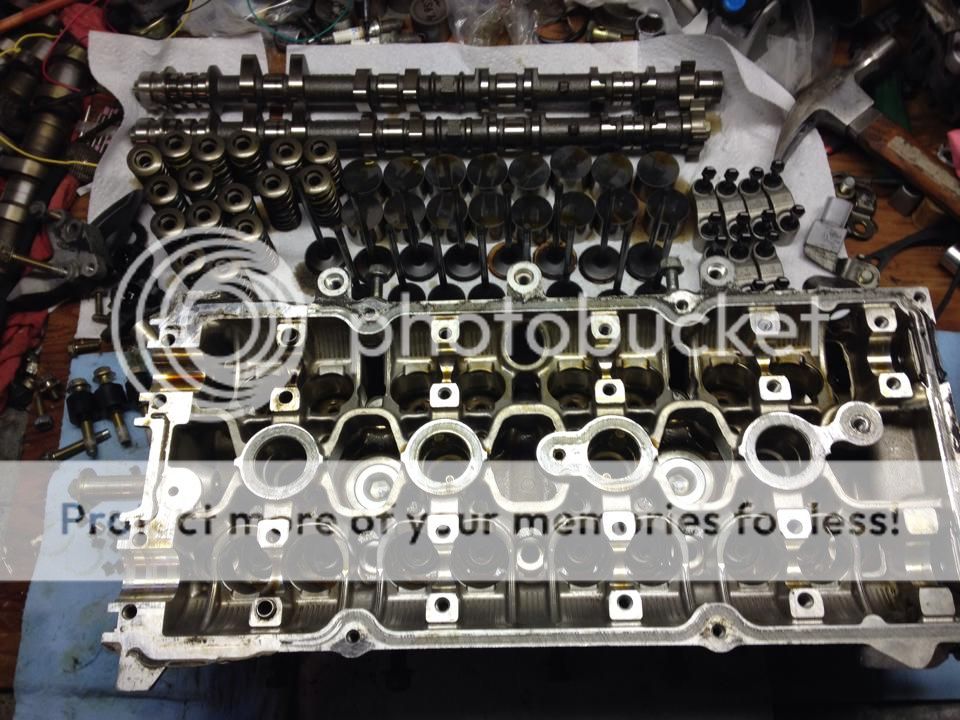
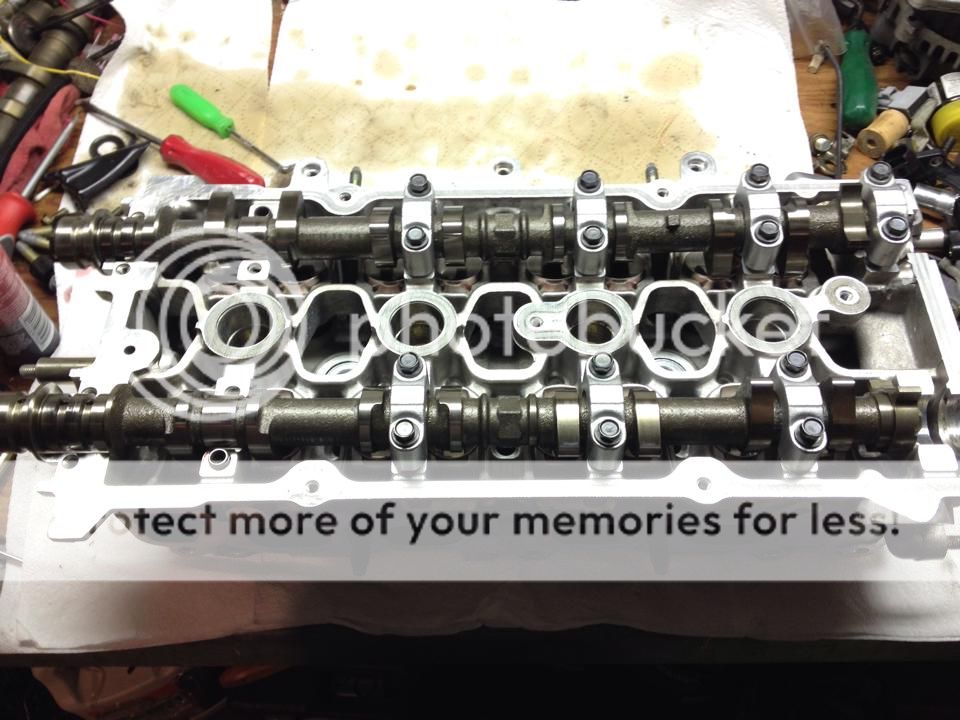
For the cam caps, bolts, buckets and shims, I dropped them in the ultrasonic with a 10% Purple Power solution for less than 1 minute. I took extra caution with the buckets and shims to make sure they did not get mixed up. And here it is, all ready to be bolted back on the block! I thoroughly coated the buckets with assembly lube before installing them in the head. Also, the cams are not torqued down here. This reduces the risk of bending a valve while I was transporting it. Plus, the cams have to be out to torque it down to the block!
Wow that is a ton of pics! On to the next post...
So, that being said, it is obvious that a 3SGE BEAMS swap was in my near future! I will be writing a engine swap guide after I complete the swap. Here is a quick rundown of the 5th gen BEAMS engine, taken from the Beams Owners Group
Originally Posted by http://www.beams-redtop.com/blackhome.htm
In 1998, a second version of the Beams 3S-GE engine series was release known as the Beams Blacktop upgraded with dual VVT-I, titanium valves, battery packed injectors and a slightly higher compression ratio. This engine powered the Altezza RS200 only available in Japan.
According the the stickers on the ECU cover, the engine had it's last service at 96,000km. And after seeing how clean the oil was after draining it, I'm guessing it has 65k-70k miles. Even with this low of miles, I decided to source a OEM gasket kit and rebuild it. Here it is after removing most of the accessories.
Next up was removing the oil pan. This consists of two steps. First you have to remove the steel lower pan to gain access to the bolts hidden within. Next, remove all the bolts from the aluminum upper pan. I used a pry bar in the cutouts at the back of the pan to break the seal. This is after all the accessories were removed as well. Check out how clean the crank is!
The trend of clean internals continued the farther I tore in to it. I ordered a factory service manual from a place out in NZ to assist with my tear down. Unfortunately it was VERY incomplete. It did, however, help me get the head off. The top of this thing was super clean, without even a trace of sludge. The chambers did not look bad either for an engine with this many miles.
Next up was to decide if I should rebuild both the block and head, or just the head. Upon closer examination I determined I would just rebuild the head. Check out that factory crosshatch on the cylinder walls. I doubt this thing will give me trouble/burn oil any time soon. By the way, that is a weird reflection, not rust on the cylinder wall.
I took the head home to start the disassembly and cleaning process. Here it is, stripped bare, sitting on my work bench. Yes I know my work bench is messy
As stated earlier, the 3SGE uses titanium valves. For those that don't know, Ti is VERY VERY picky about what you can and can't clean it with. No brake cleaner, nothing that is chlorinated and very few solvents are acceptable. While all of these solvents will get the valves clean, they change the Ti at a microscopic level, and over time, will cause valve failure. Same goes for my conventional method of using a soft wire wheel. After more research I found that the motorcycle guys were having very good luck with ultrasonic cleaners. Fortunately we have a Harbor Freight right down the street. $85 later I had myself the best ultrasonic cleaner they sold. The solvent of choice you ask? A 50/50 mixture of Original Pine Sol to water! I was very skeptical of this, but I figured I would give it a try. It took about 20 minutes per valve, but look at the results!! The first picture is of an intake valve with only 5 minutes in the ultrasonic bath.
Next up was to clean the rest of the cylinder head and parts. I use 100% Purple Power Cleaner whenever I am cleaning aluminum. It have noticed it works much better than Simple Green on oil, sludgy oil and carbon deposits. I used many new razor blades as well a fine ScotchBrite to clean the head gasket mating surface. Some say you need to resurface the head every time, I have been doing it this way for years and never had an issue.
Now that everything was factory fresh, I installed a new set of OEM valve seals. Pro tip: I use a small amount of moly grease on the inside of the seal, then press them down with my finger until they stop. I have not had luck with the socket trick in the past. Next, I lubed up the valve stems with a thin coat of grease, then slid them in. I also used assembly lube on the contact surfaces of the spring seats, springs and retainers. Using my home made valve spring compressor (big *** c-clamp with a tube that I cut a window out of) and grease to hold the keepers in place, I installed all of the valves. I made sure to not mix up ANY of the parts. If it came out of the first exhaust valve on cylinder three, that is where it went back. Since I did not do any type of valve job, this was mandatory for the valves themselves. I am a bit **** when it comes to this kind of stuff, so even the springs and retainers when back in to their respective homes.
For the cam caps, bolts, buckets and shims, I dropped them in the ultrasonic with a 10% Purple Power solution for less than 1 minute. I took extra caution with the buckets and shims to make sure they did not get mixed up. And here it is, all ready to be bolted back on the block! I thoroughly coated the buckets with assembly lube before installing them in the head. Also, the cams are not torqued down here. This reduces the risk of bending a valve while I was transporting it. Plus, the cams have to be out to torque it down to the block!
Wow that is a ton of pics! On to the next post...
Last edited by WanabSXE10; 03-20-14 at 05:49 PM.
03-20-14, 05:12 PM
#5
Driver School Candidate
Thread Starter
Join Date: Mar 2014
Location: Michigan
Posts: 7
Likes: 0
Received 0 Likes
on
0 Posts
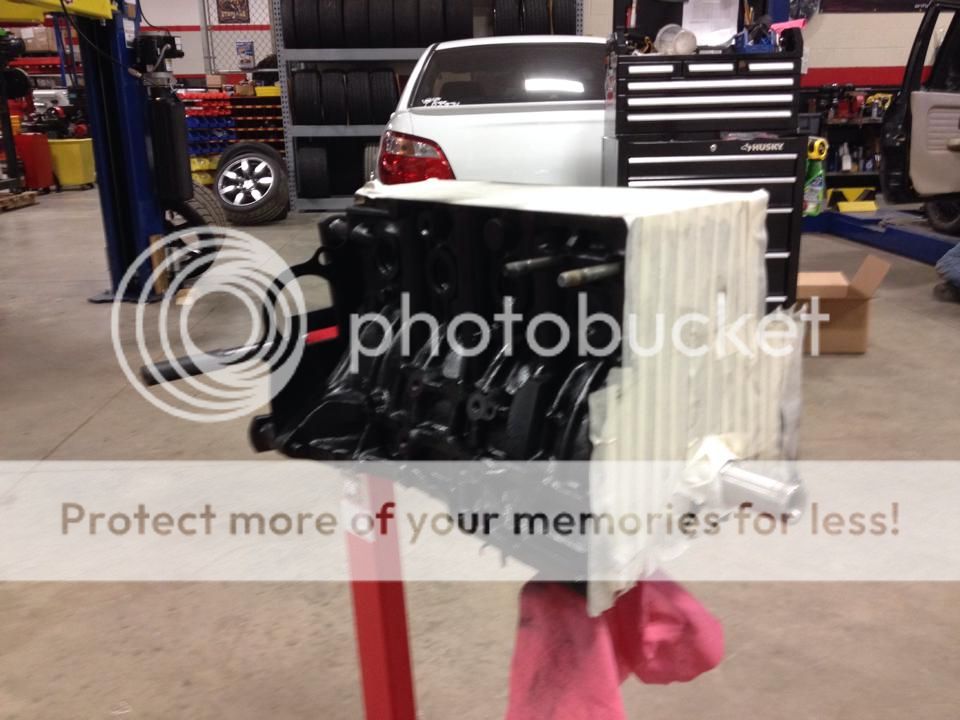
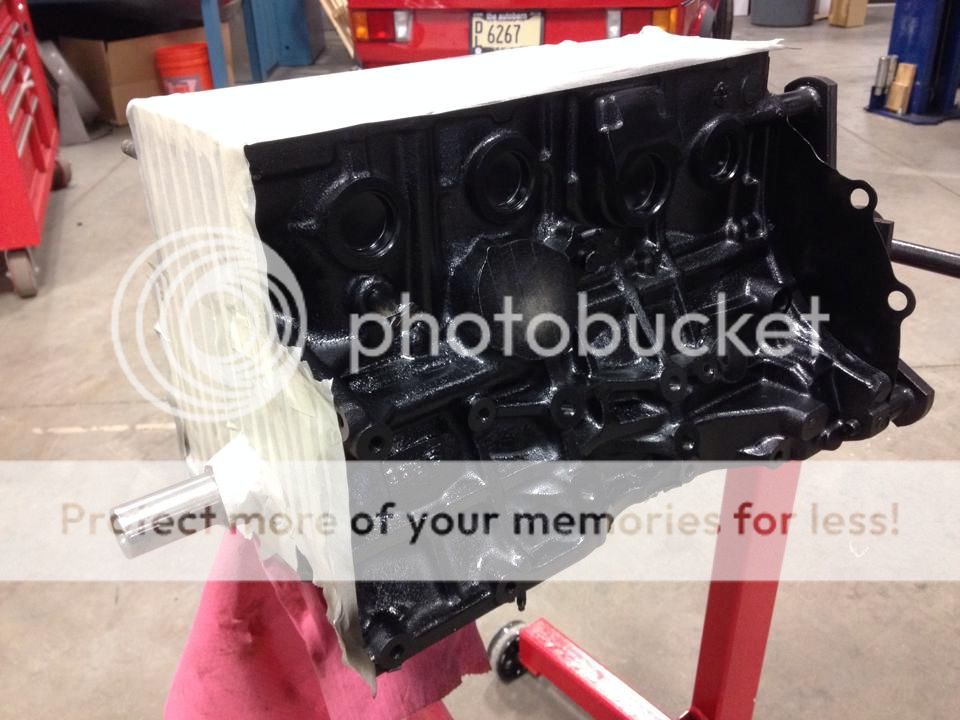
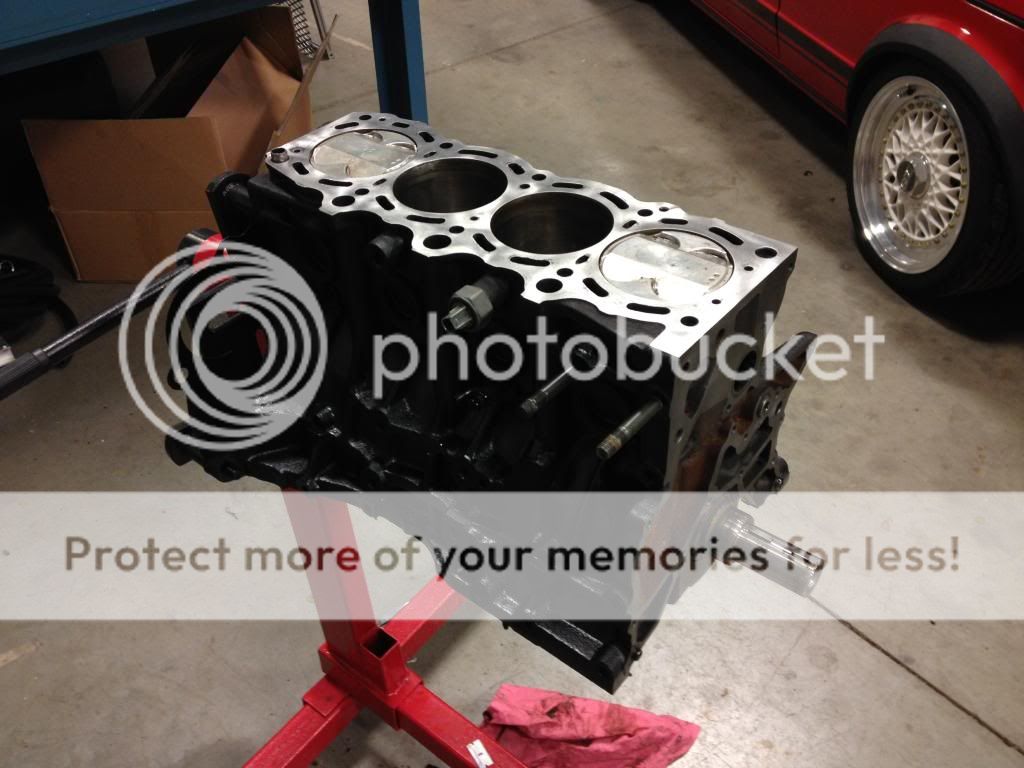
After looking at the block, I decided it needed some paint. After I had cleaned the headgasket mating surface the same way as the head, and scrubbed all the carbon off the pistons, I taped it off. I made sure to cover the entire top and front of the engine, as well as the knock sensor and oil cooler mounts. Here is the end result, much better!
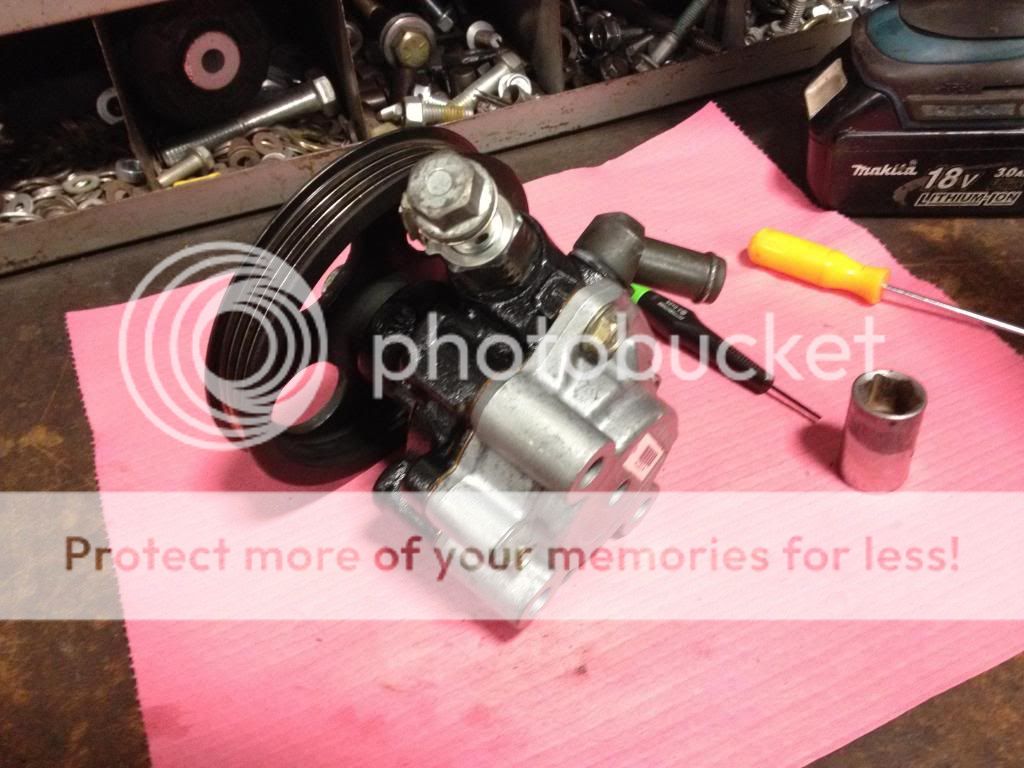
As the paint dried on the block, I figured it would be a good time to rebuild my power steering pump(called a "Vane Pump" by Toyota). I had read about these pumps having a common issue with leaking at the front seal. Mine was no exception, and it was obvious that the pump had been leaking for some time as well. I decided to just order a complete rebuild kit. Here it is dissassembled, after I had cleaned everything and painted the cast steel portion. Note the new seal already pressed in the black housing. I used a socket that was barely smaller then the seal and a hammer to drive it in.
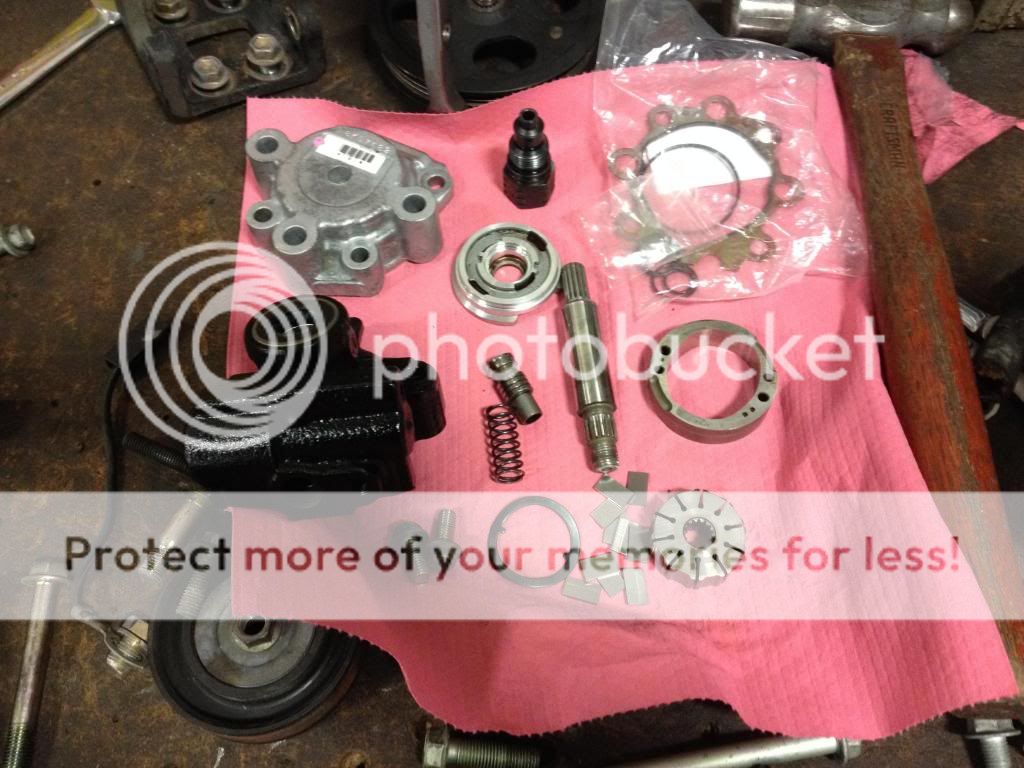
Back together and like new! You will never see a store bought remanufactured pump look this clean
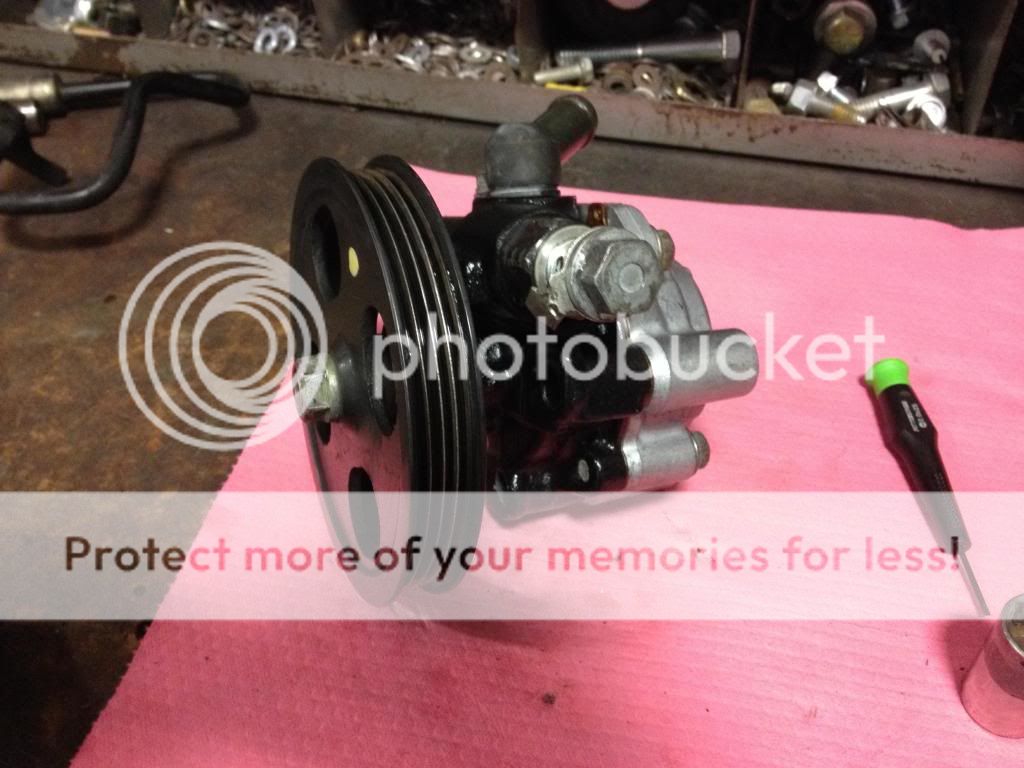
Back to the block. I soaked the pistons with acetone to soften the carbon buildup, then used a small pick tool and brass wire brush to scrub the pistons clean. More acetone and some compressed air easily cleaned out any debris that fell between the piston and sleeve. Seeing as how acetone will eat paint, it is important to do this BEFORE painted the block. Note the knock sensor reinstalled and torqued.
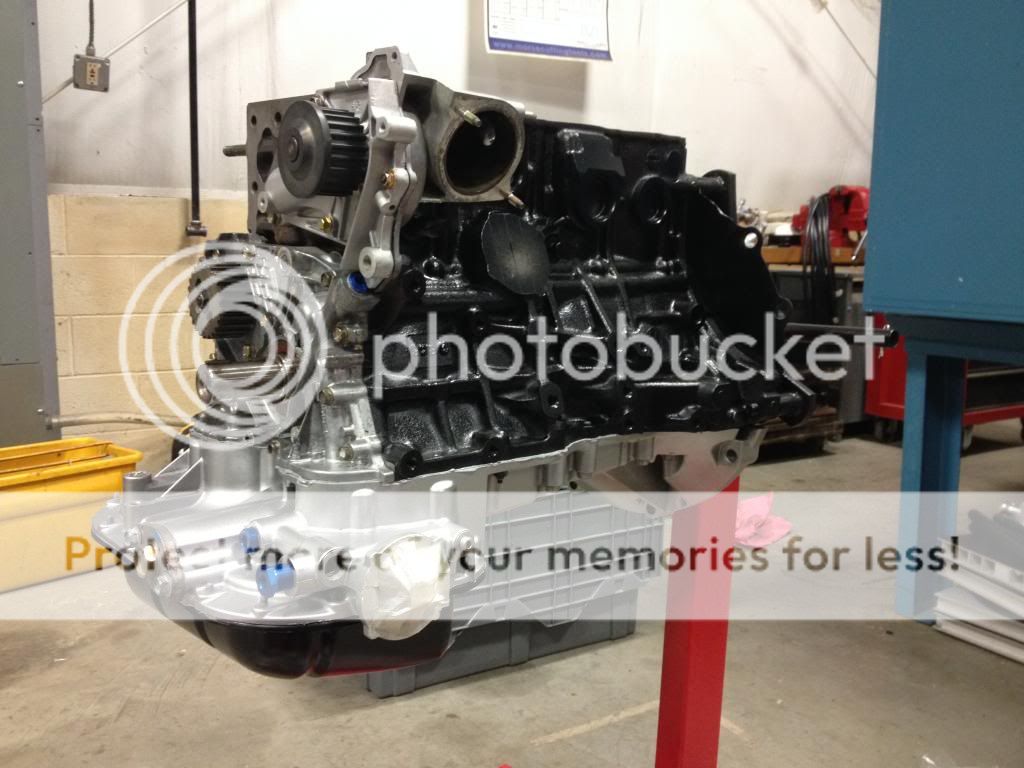
More parts installed! I cleaned both halves of the pan, then scuffed and painted them for a super clean look. Notice the blue plugs? I ordered some Areoquip aluminum 3/8" NPT plugs to replaced the rusty stock steel that once was in there. Note that JDM engines are tapped in BSPT, not NPT, so a tap must be chased down to threads to do this. I cleaned and rebuilt the oil pump using a new front seal for it. The crankshaft also received new new seal. I also replaced the water pump with a Gates part that I sourced here in the states.
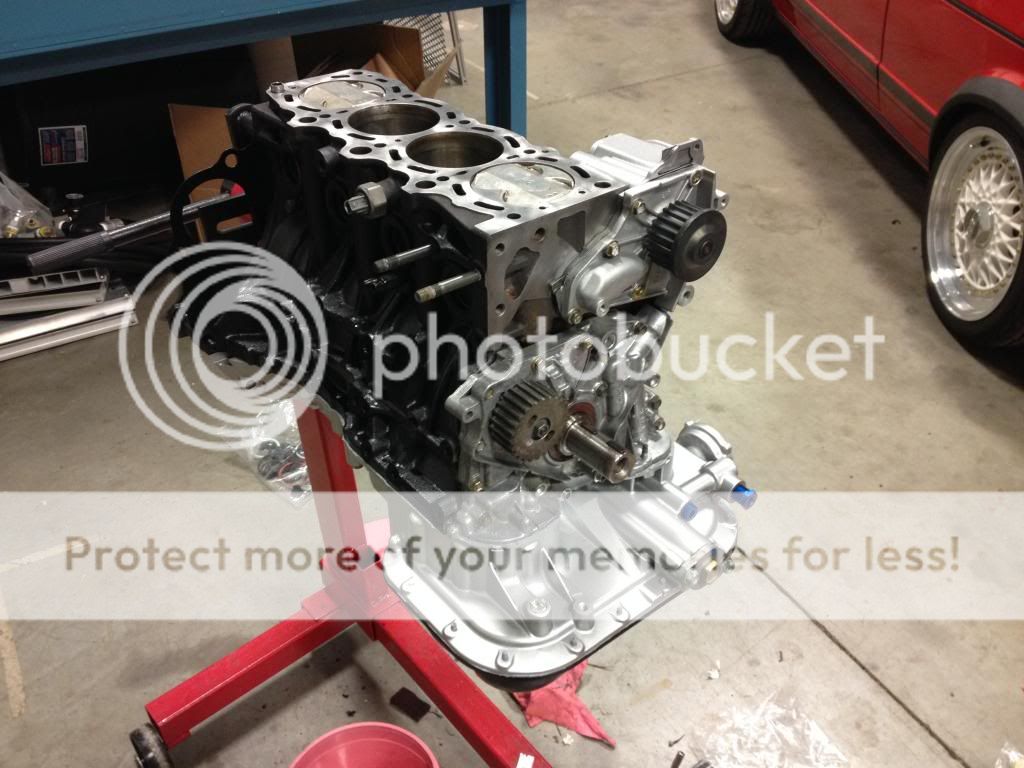
Now things get exciting
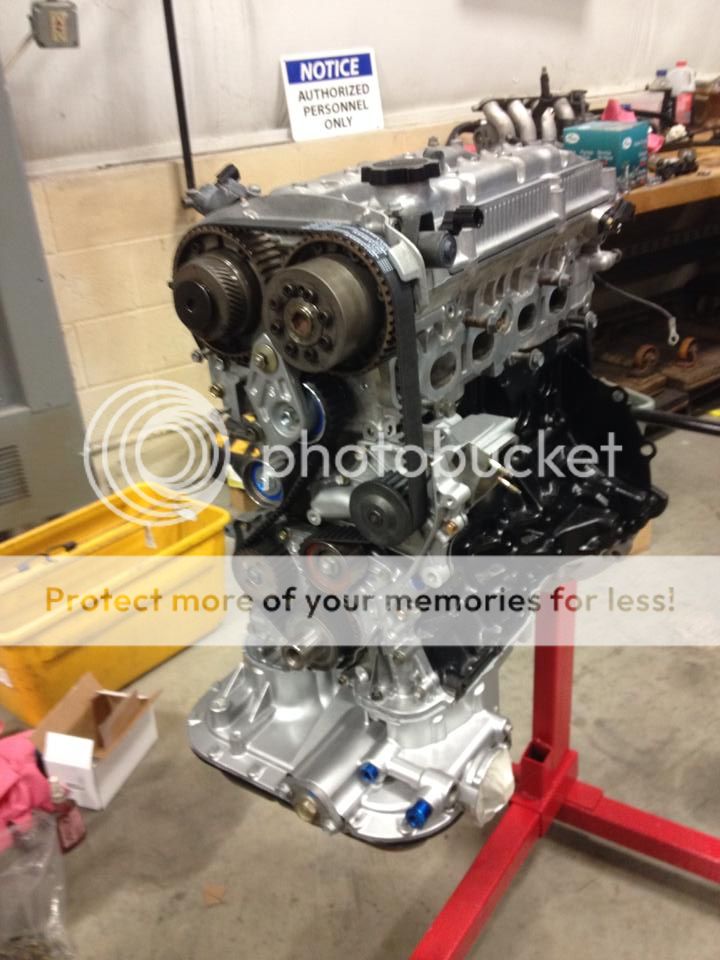
It was time to make the block and head one again! You cannot reuse the stock head bolts as they are torque to yield, meaning they stretch when installed. I used some old ARP head stud nuts to see if I could order a set of head studs. Unfortunately, the 6mt BEAMS engine has large 33mm buckets, which take up any and all room to fit a nut. No worries, I'm not planning on making 500hp any time soon. My stock 3SGTE bolts finally showed up, and then...
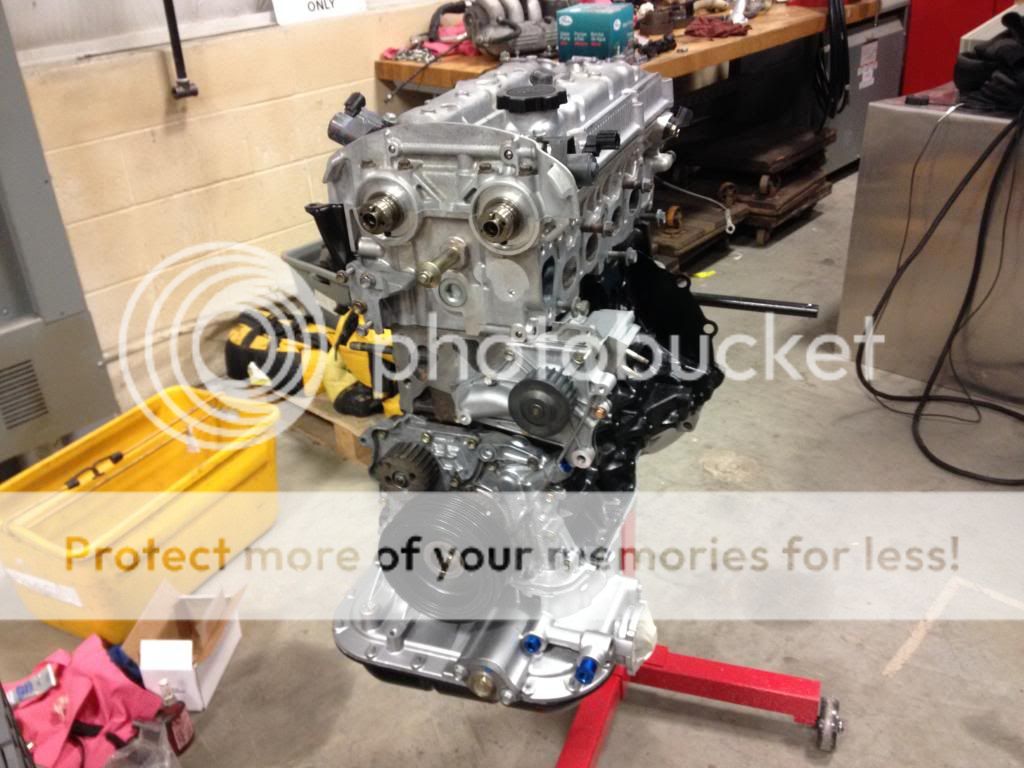
Boom! Next up was a new OEM timing belt, tensioner and bearings. At this point I could hand crank it for the first time, and, drumroll please... it made compression!
That is all for now. I need to get back to work on this thing, as I plan on pulling the 2JZ out tomorrow night!
As the paint dried on the block, I figured it would be a good time to rebuild my power steering pump(called a "Vane Pump" by Toyota). I had read about these pumps having a common issue with leaking at the front seal. Mine was no exception, and it was obvious that the pump had been leaking for some time as well. I decided to just order a complete rebuild kit. Here it is dissassembled, after I had cleaned everything and painted the cast steel portion. Note the new seal already pressed in the black housing. I used a socket that was barely smaller then the seal and a hammer to drive it in.
Back together and like new! You will never see a store bought remanufactured pump look this clean
Back to the block. I soaked the pistons with acetone to soften the carbon buildup, then used a small pick tool and brass wire brush to scrub the pistons clean. More acetone and some compressed air easily cleaned out any debris that fell between the piston and sleeve. Seeing as how acetone will eat paint, it is important to do this BEFORE painted the block. Note the knock sensor reinstalled and torqued.
More parts installed! I cleaned both halves of the pan, then scuffed and painted them for a super clean look. Notice the blue plugs? I ordered some Areoquip aluminum 3/8" NPT plugs to replaced the rusty stock steel that once was in there. Note that JDM engines are tapped in BSPT, not NPT, so a tap must be chased down to threads to do this. I cleaned and rebuilt the oil pump using a new front seal for it. The crankshaft also received new new seal. I also replaced the water pump with a Gates part that I sourced here in the states.
Now things get exciting
It was time to make the block and head one again! You cannot reuse the stock head bolts as they are torque to yield, meaning they stretch when installed. I used some old ARP head stud nuts to see if I could order a set of head studs. Unfortunately, the 6mt BEAMS engine has large 33mm buckets, which take up any and all room to fit a nut. No worries, I'm not planning on making 500hp any time soon. My stock 3SGTE bolts finally showed up, and then...
Boom! Next up was a new OEM timing belt, tensioner and bearings. At this point I could hand crank it for the first time, and, drumroll please... it made compression!
That is all for now. I need to get back to work on this thing, as I plan on pulling the 2JZ out tomorrow night!
 03-20-14, 05:39 PM
#7
Driver School Candidate
Thread Starter
Join Date: Mar 2014
Location: Michigan
Posts: 7
Likes: 0
Received 0 Likes
on
0 Posts
Screw it, one more quick post! Since I'm now caught up to where I'm currently at, I have to share this

As I said before, I work for the Air Lift Company. Fortunately for me, the XE10 was on this years list of cars that we want to release kits for! I can't post pictures of the setup yet as the kit is going to be announced in a week or so. Anyway, here it is, slammed to the earth on our first production intent Performance Air Suspension kit! I was rocking S14 wheels as I waited for my new ones to arrive.

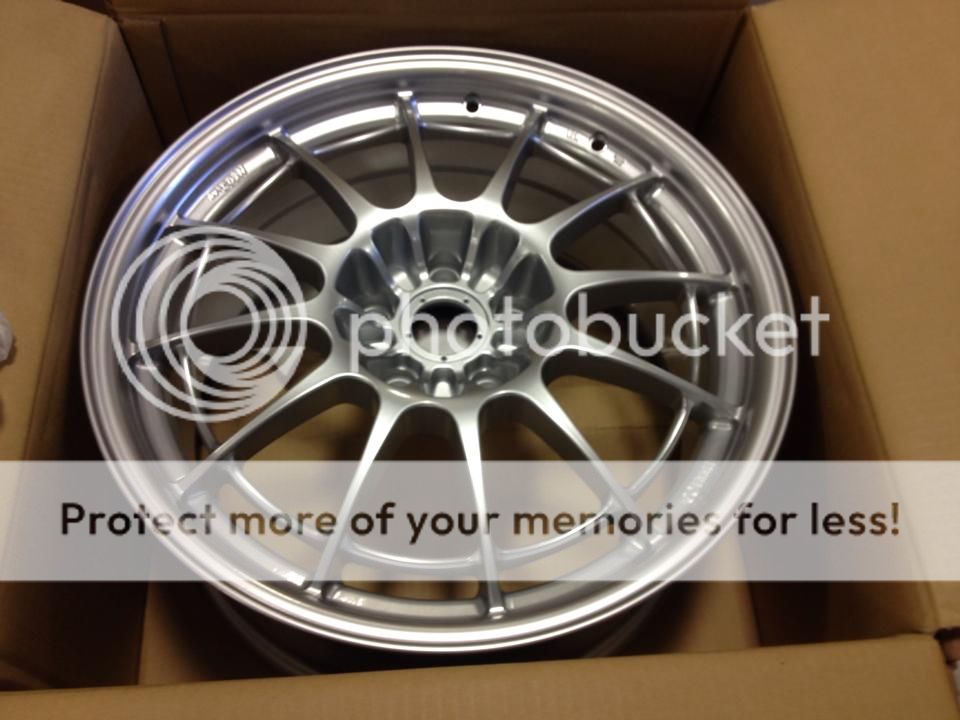
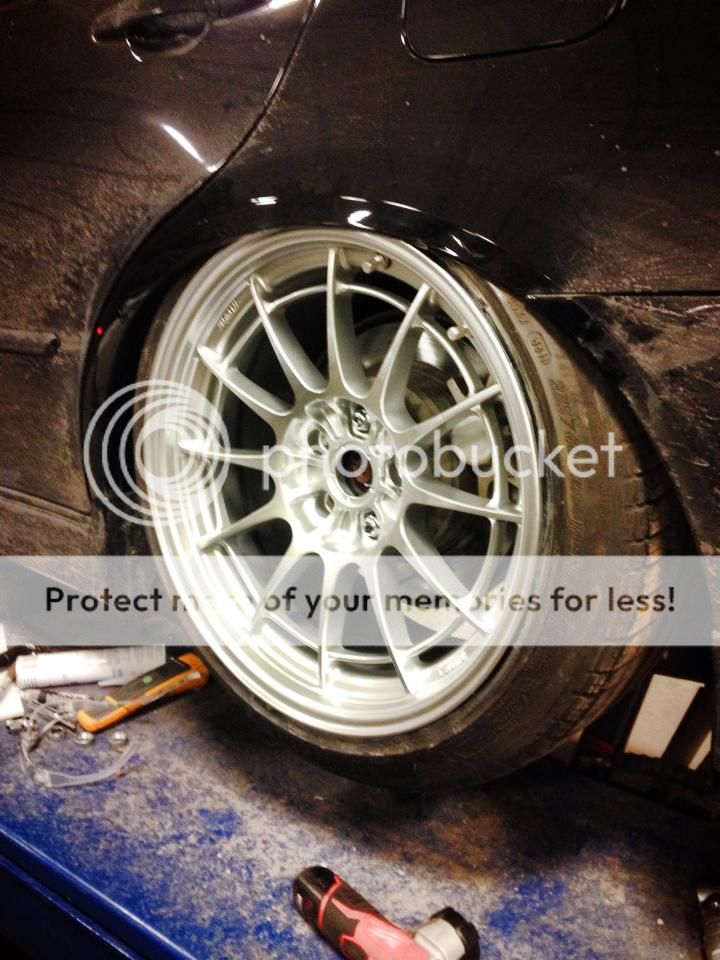
After seeing it like this, i realized I needed some fresh wheels. I decided on a set of Enkei NT03+M wheels in 18x8.5 +37 front, 18x9.5 +27 rear, wrapped in 225/40 and 235/40 tires. Here they are when I first opened the boxes

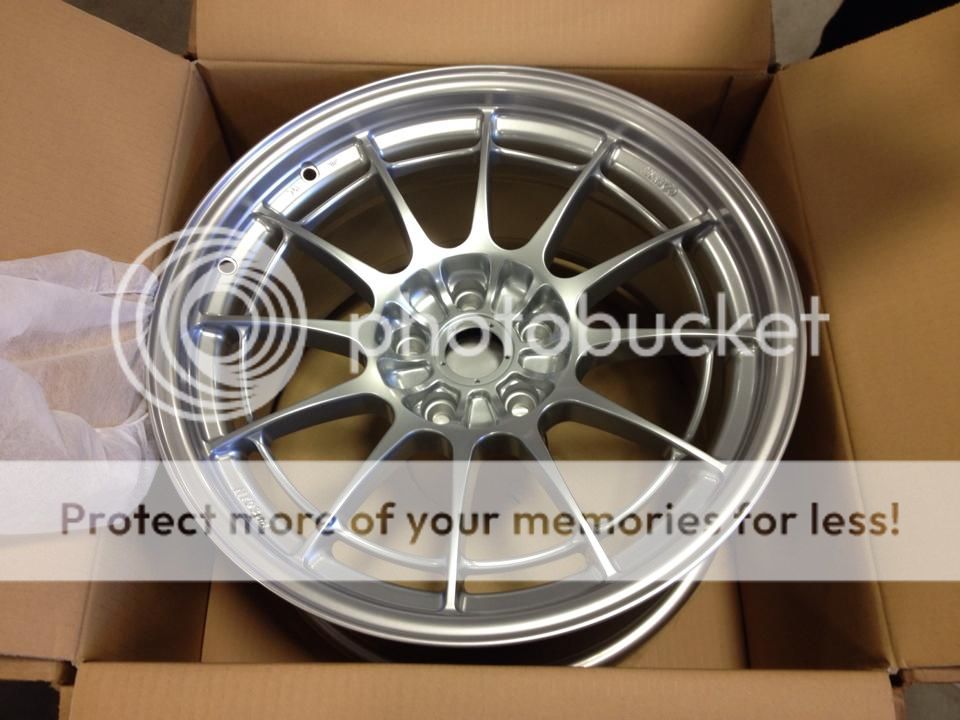
After bolting them on for the first time, it became apparent that some rear fender mods were in order.
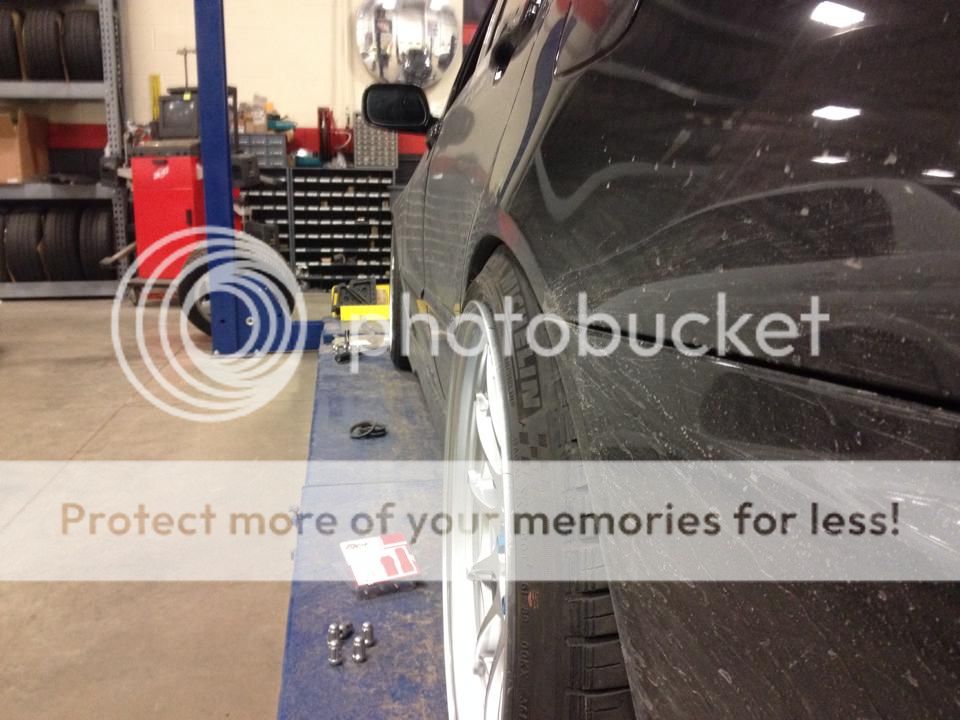
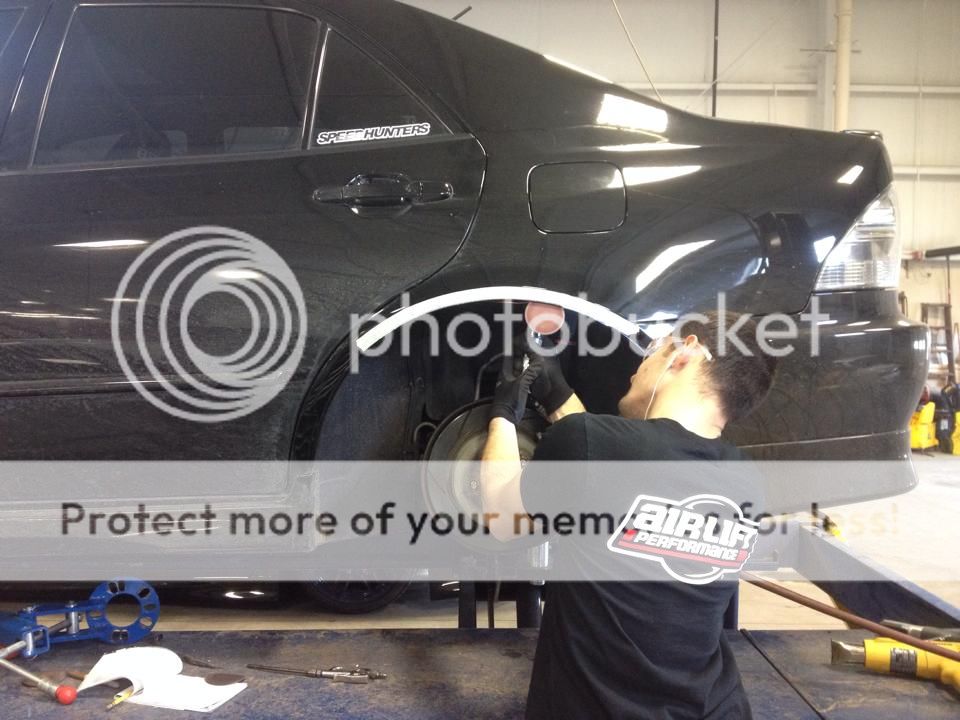
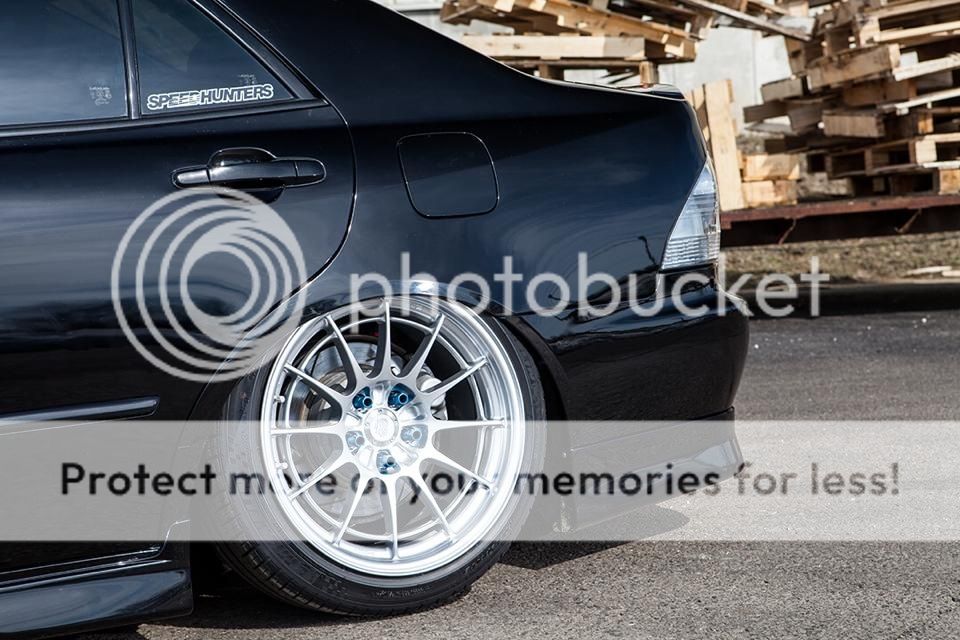
My good friend and coworker Rex did a killer job! He cut the inner fender lip, used a fender roller to push the inner sheet metal upward, did a slight pull then seam sealed everything. This way I don't have to worry about my fenders rusting out down the road. It was a scary sight seeing sparks flying off my rear fenders!
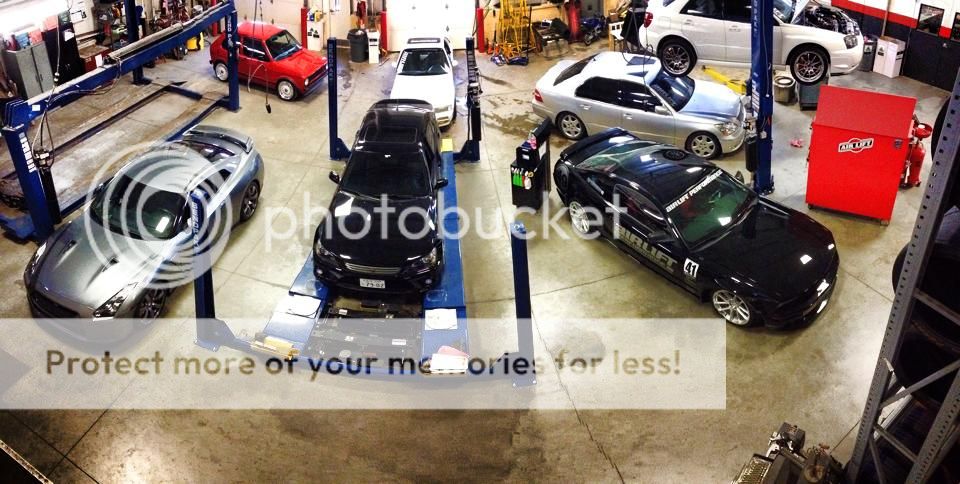
How about a quick snap of our shop?
The end result? I can roll with the car completely aired out! Rex did a killer job. He spent about 3 days working on them and I couldn't be happier!!
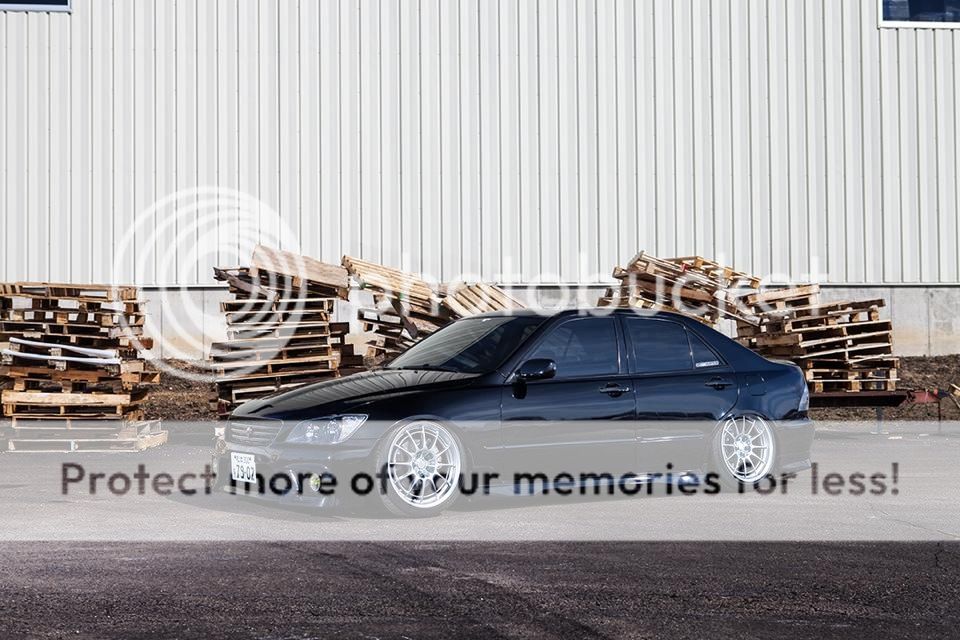
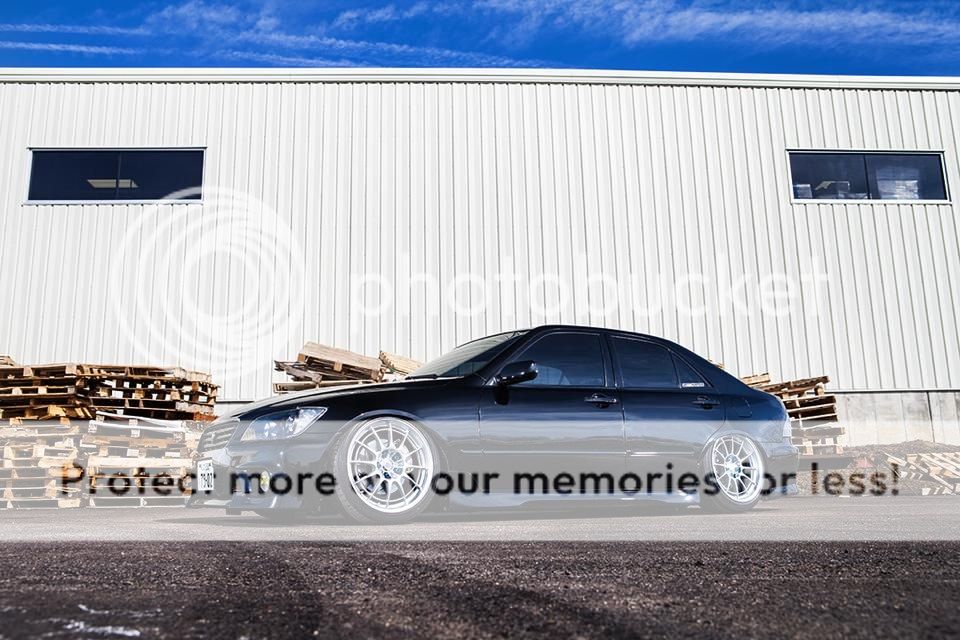
Like I said, we are about to release the XE10 kit, so one of our photographers stopped in to take some catalog worthy photos of my ride. I'll just leave these here...
Trending Topics

 03-24-14, 06:57 AM
#11
Driver School Candidate
Thread Starter
Join Date: Mar 2014
Location: Michigan
Posts: 7
Likes: 0
Received 0 Likes
on
0 Posts
03-27-14, 10:03 AM
#12
Driver School Candidate
Thread Starter
Join Date: Mar 2014
Location: Michigan
Posts: 7
Likes: 0
Received 0 Likes
on
0 Posts
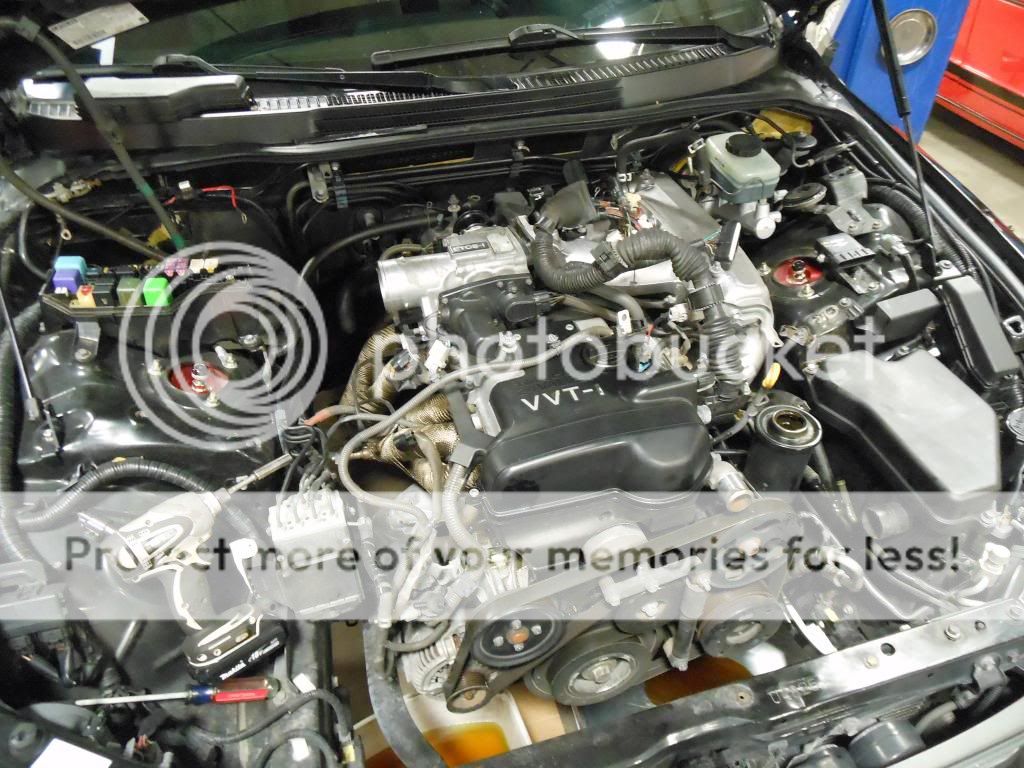
Update! The new engine is in!! But lets start here:
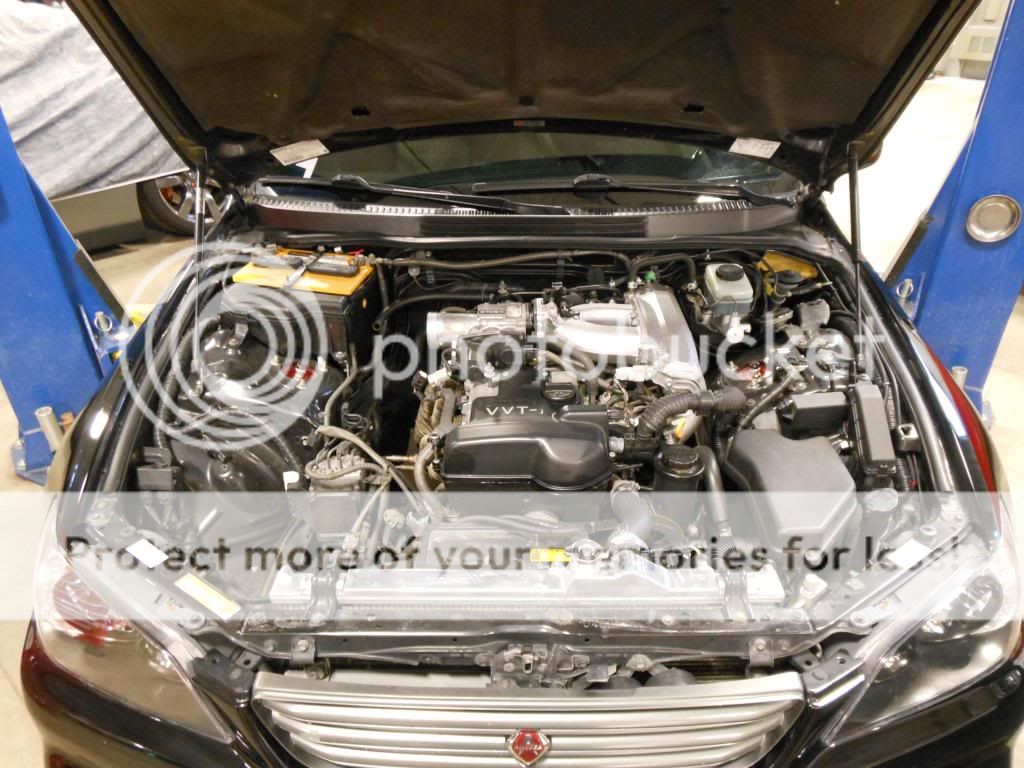
So I started pulling the engine last Friday. Here she is right after I put it on the hoist
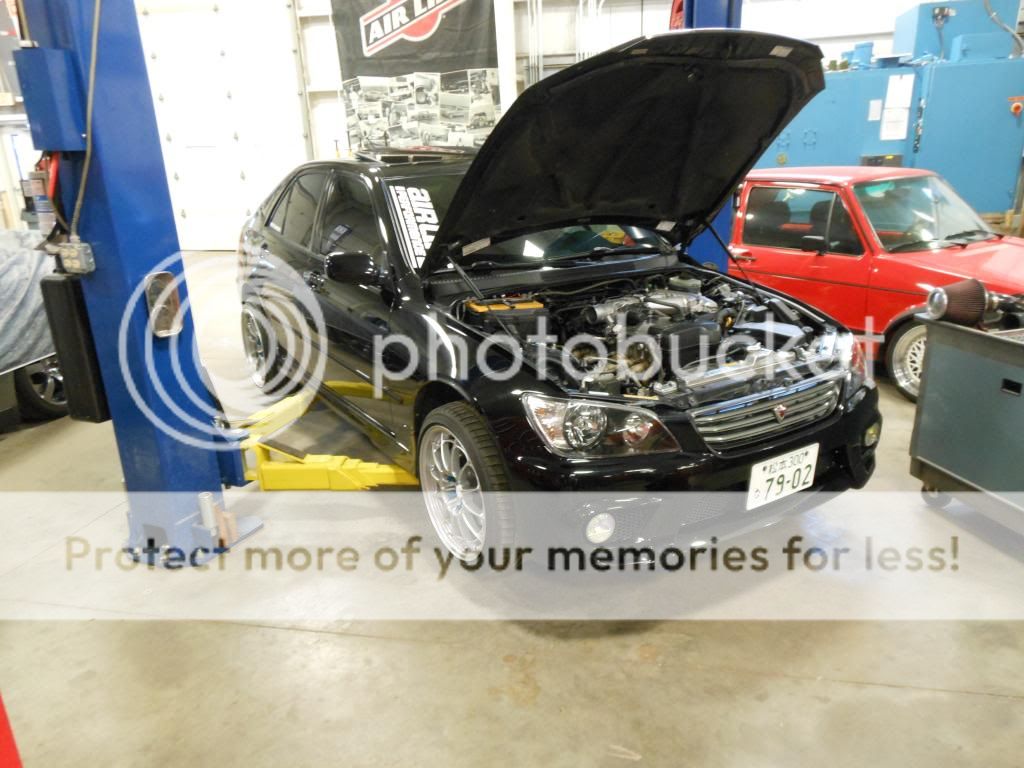
Bye bye 2JZ. This is the last time you will see this big bish in the bay
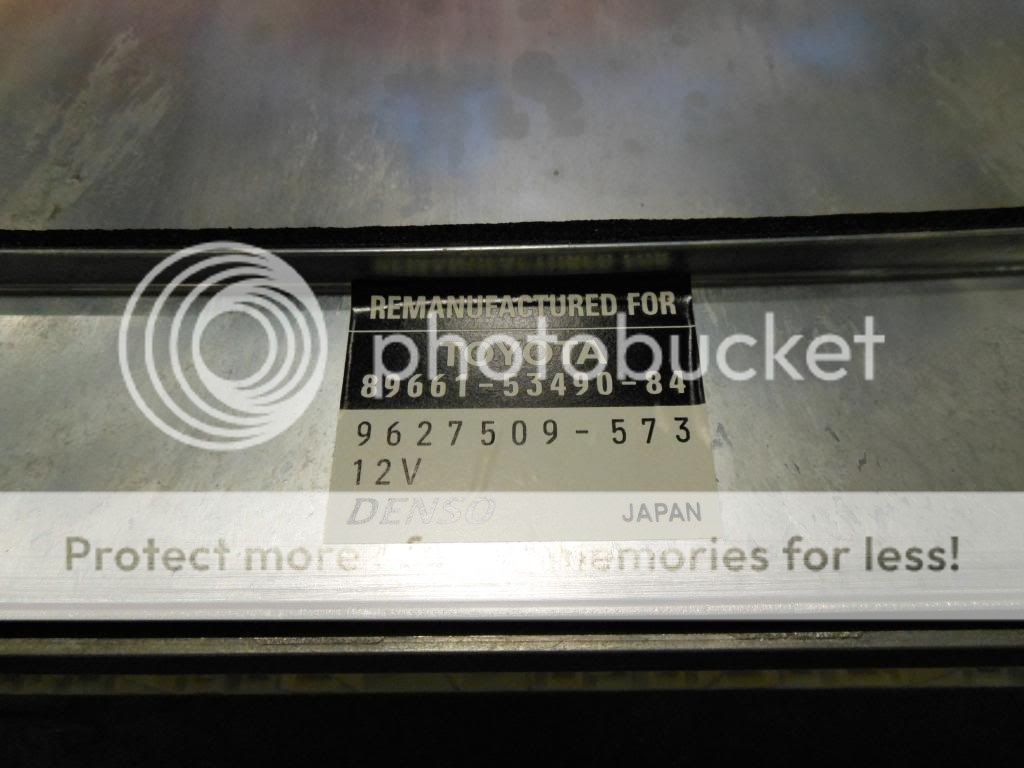
As I was taking it apart I noticed that I had a Reman ECU... interesting
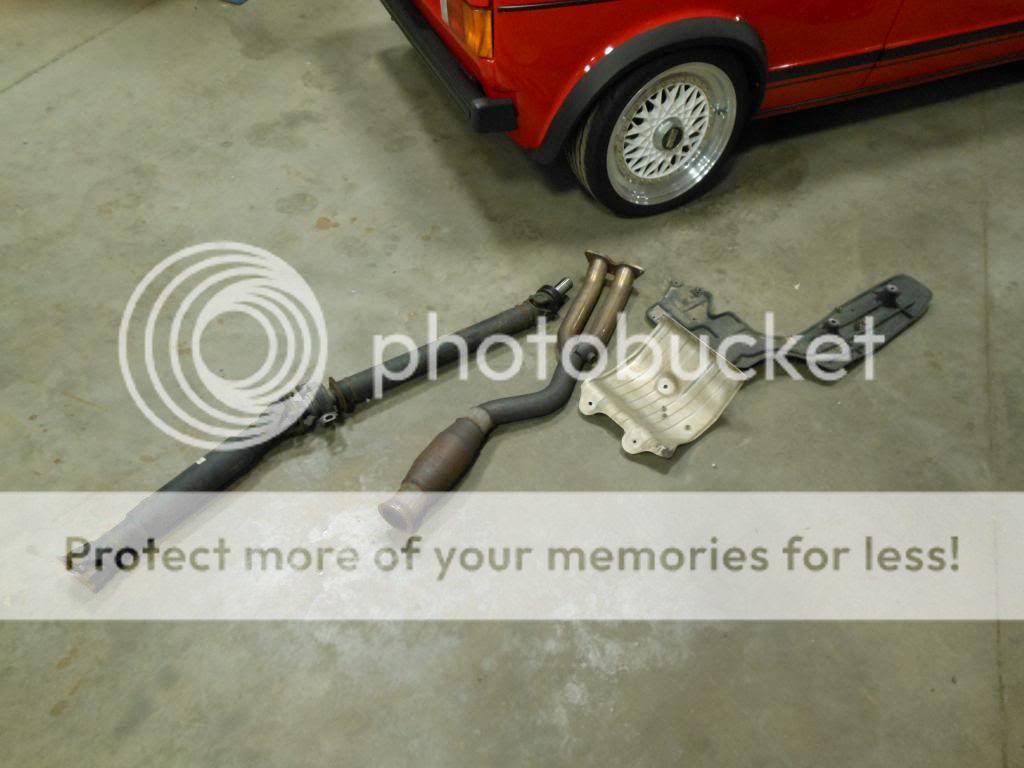
After draining all the fluids from the engine and trans, I started by removing the heat shields, plastic under trays and my cat/mid pipe
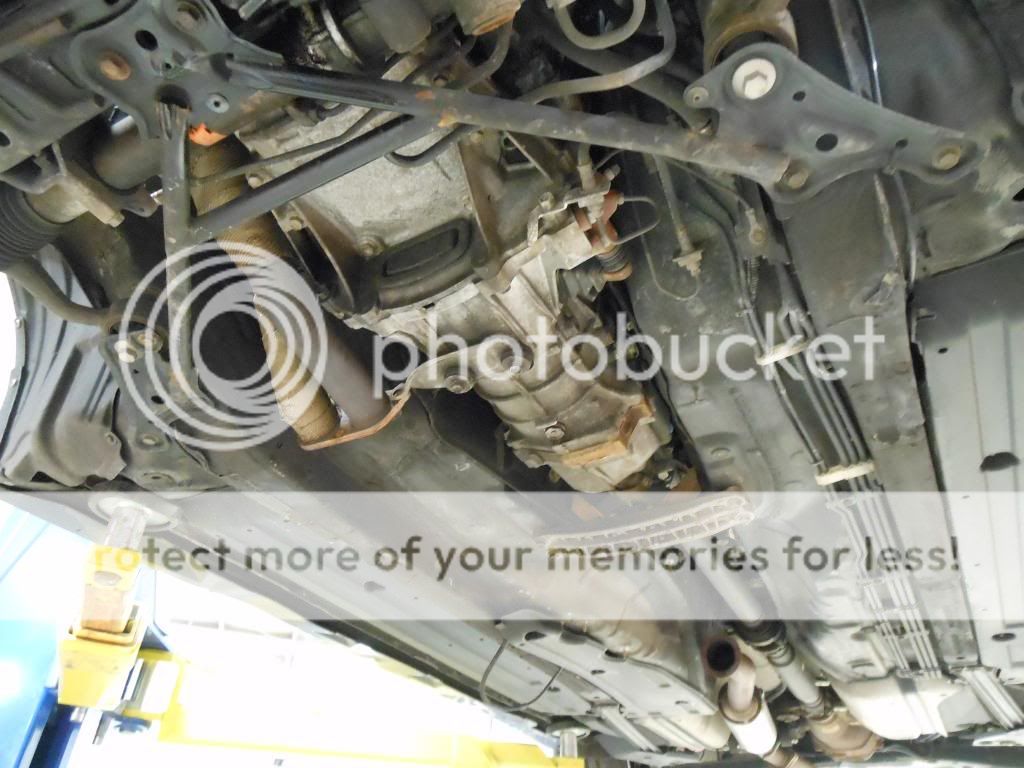
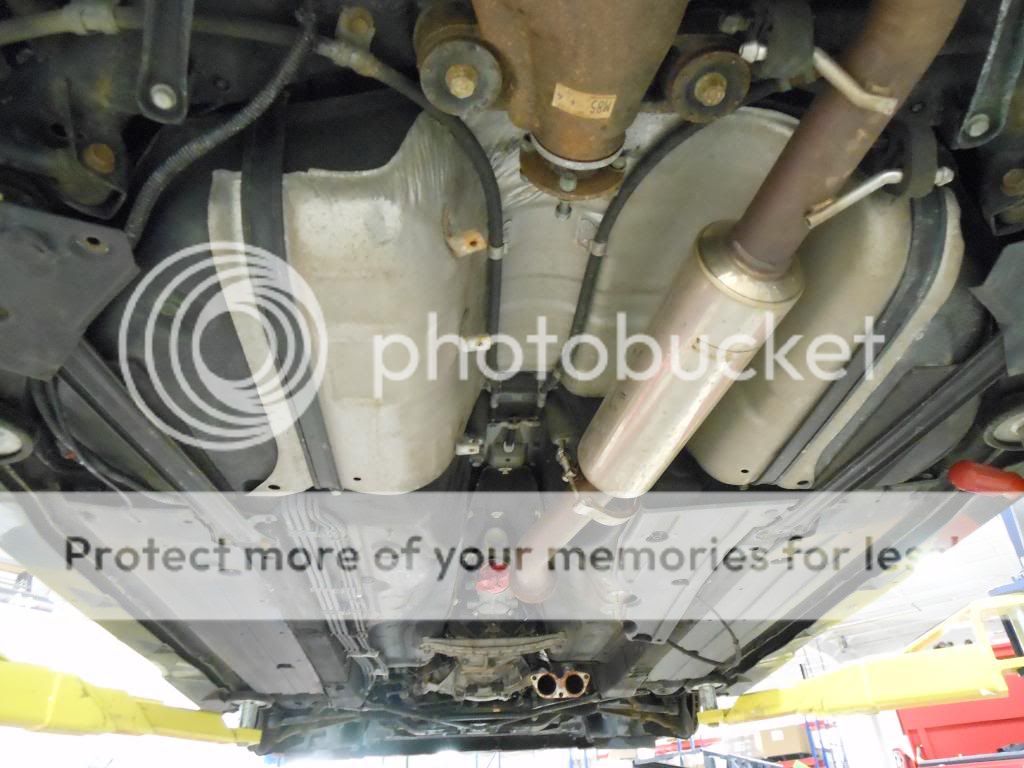
Driveshaft out. This is super easy on a hoist. Oh wait, what diff is that?
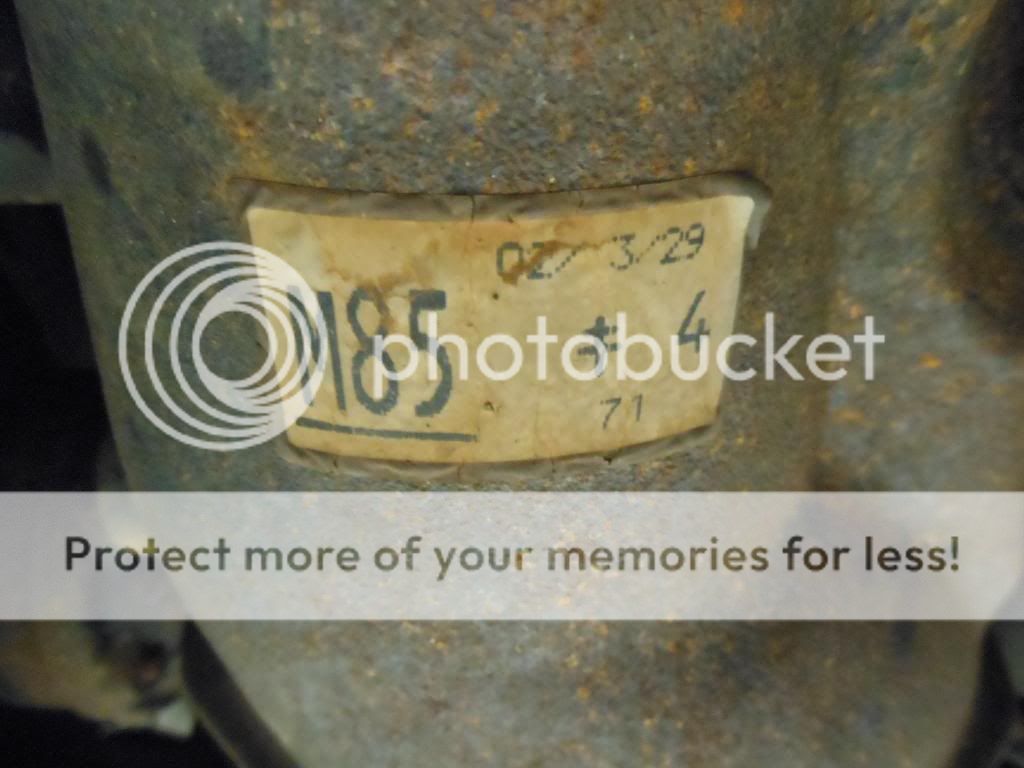
The good ol M85! This will be getting rebuilt with a higher final drive (4.544) soon
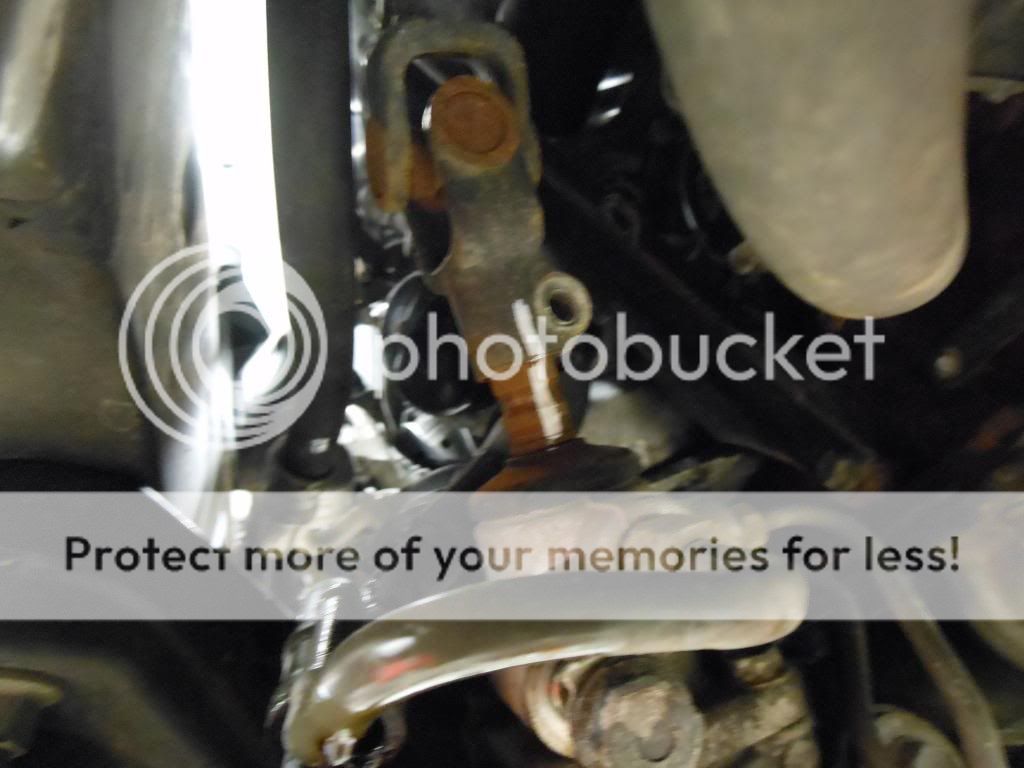
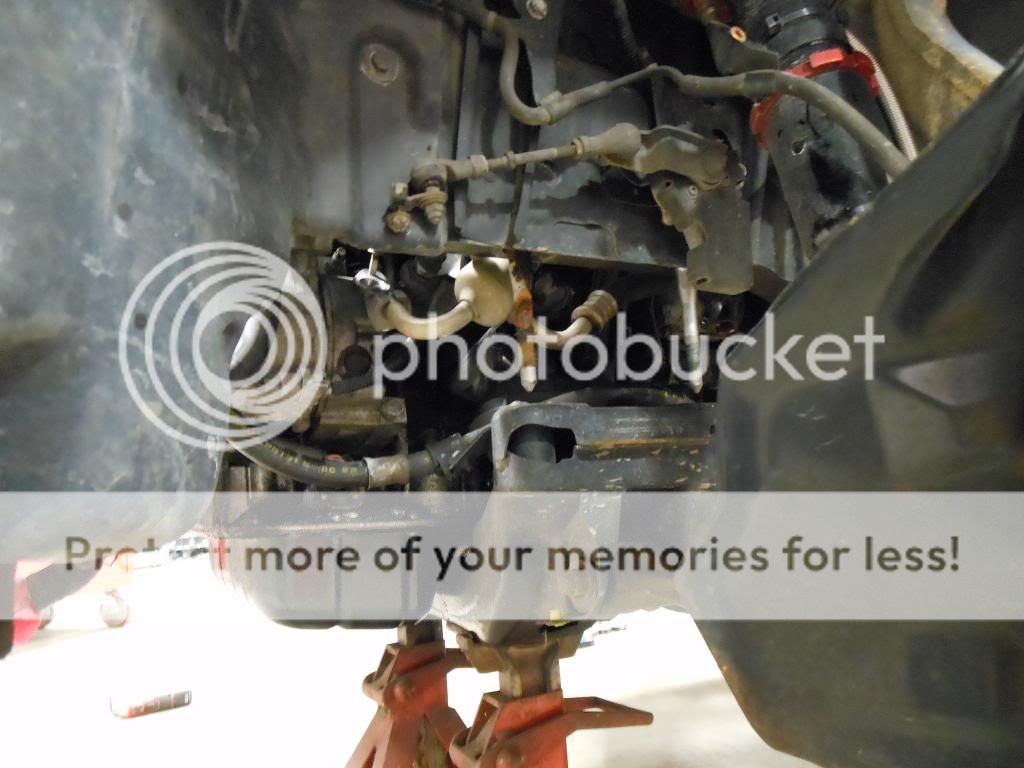
Since I am going to drop the crossmember with the engine, the steering linkage must be removed. Make sure to mark it with a paint marker so you have proper alignment when it goes back together!
Getting there. Power steering and A/C lines were removed. **Make sure you take your car to a certified shop to have your A/C evacuated BEFORE starting your swap!!
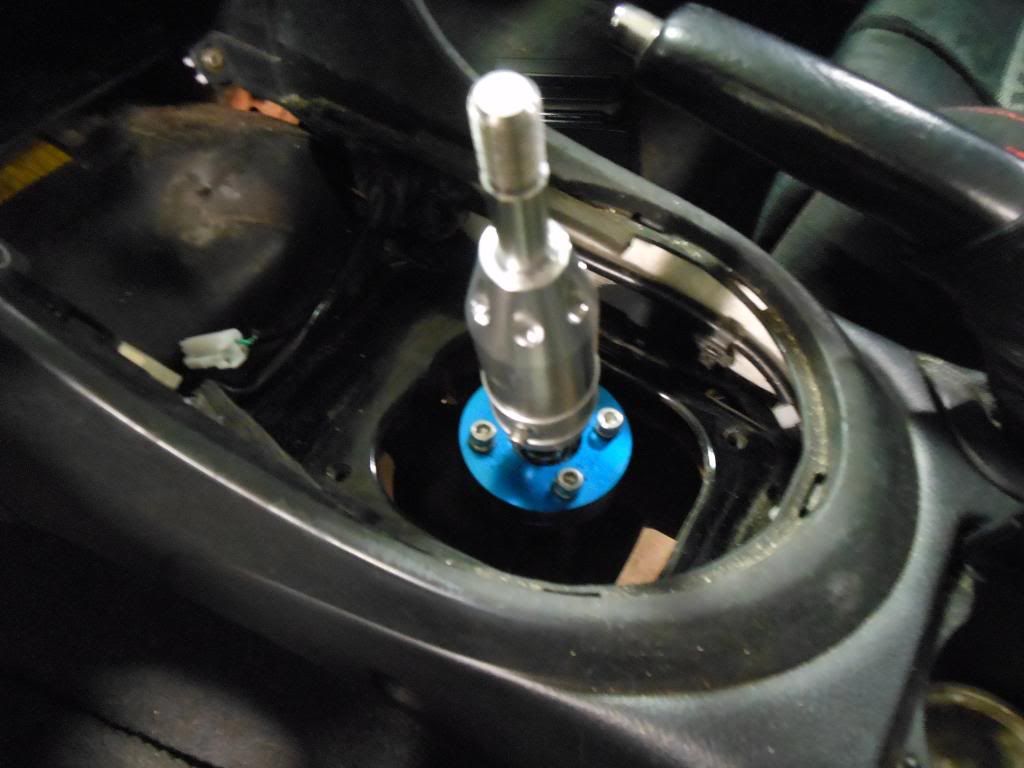
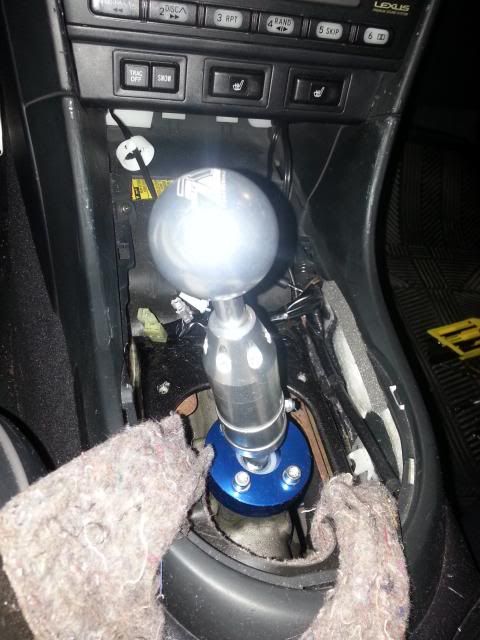
I then went in the interior and removed the rubber shifter boot. Anyone know what brand of short throw this is? Looks to be very high quality
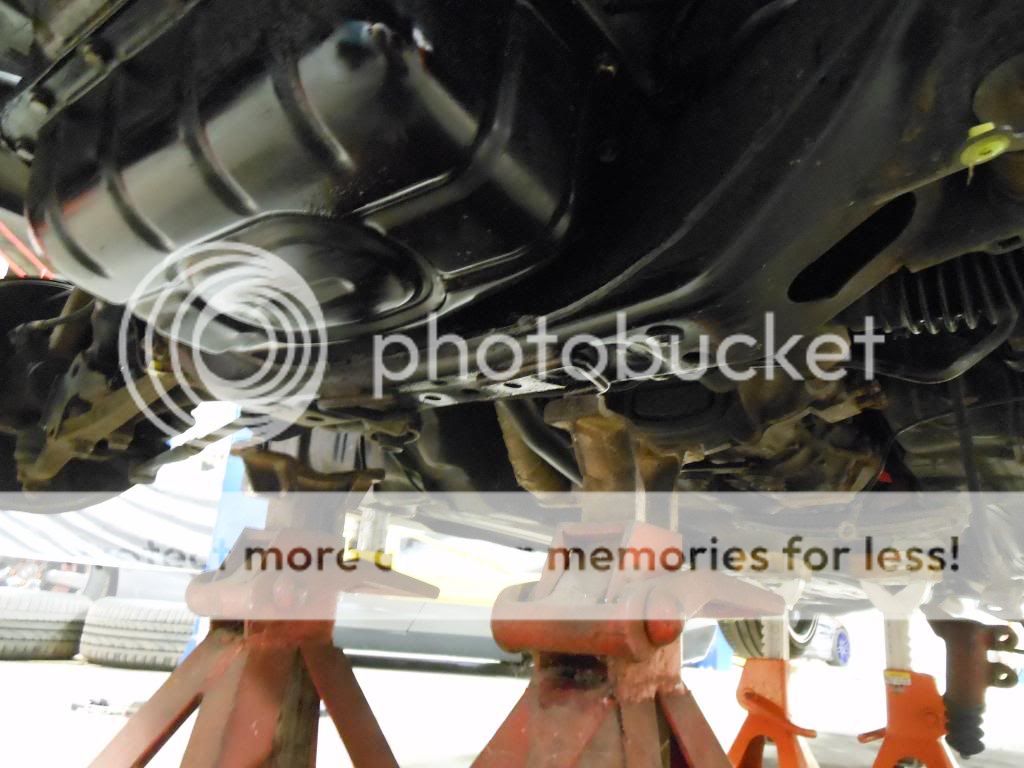
I then placed jack stands under the front and trans crossmembers
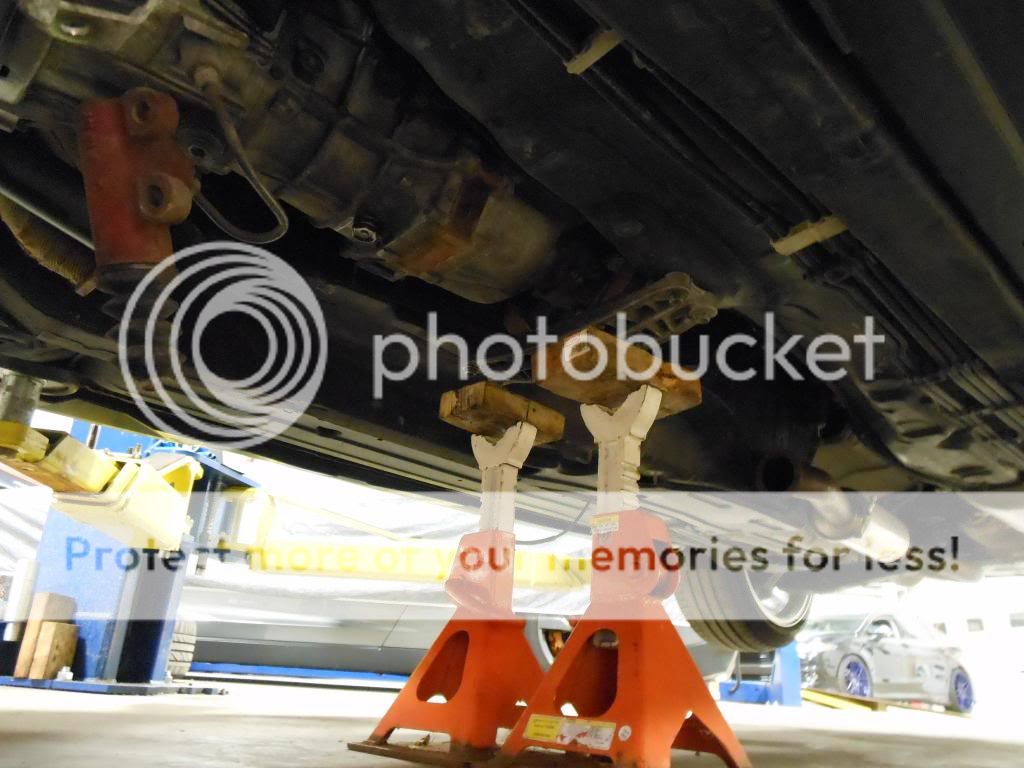
After taking all the crossmember bolts out...
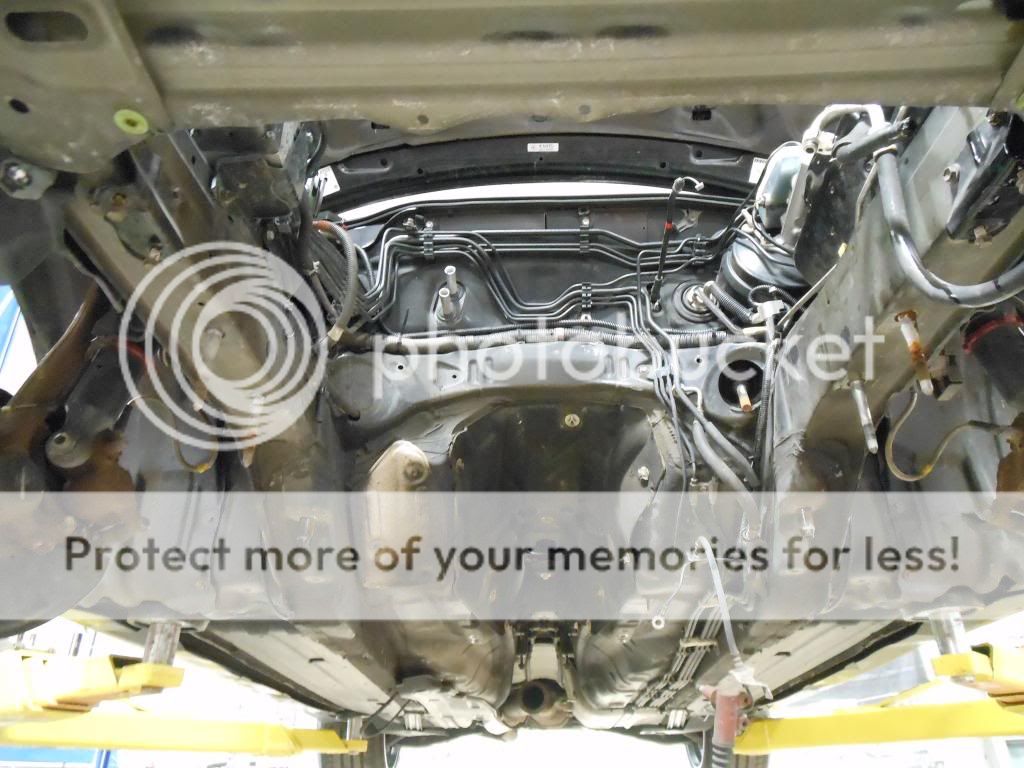
It's out! I just lifted the car off of the engine with a friend pushing the steering shaft out of the way to clear the intake manifold
Empty bay. Going to remove all of that sound deadening material soon
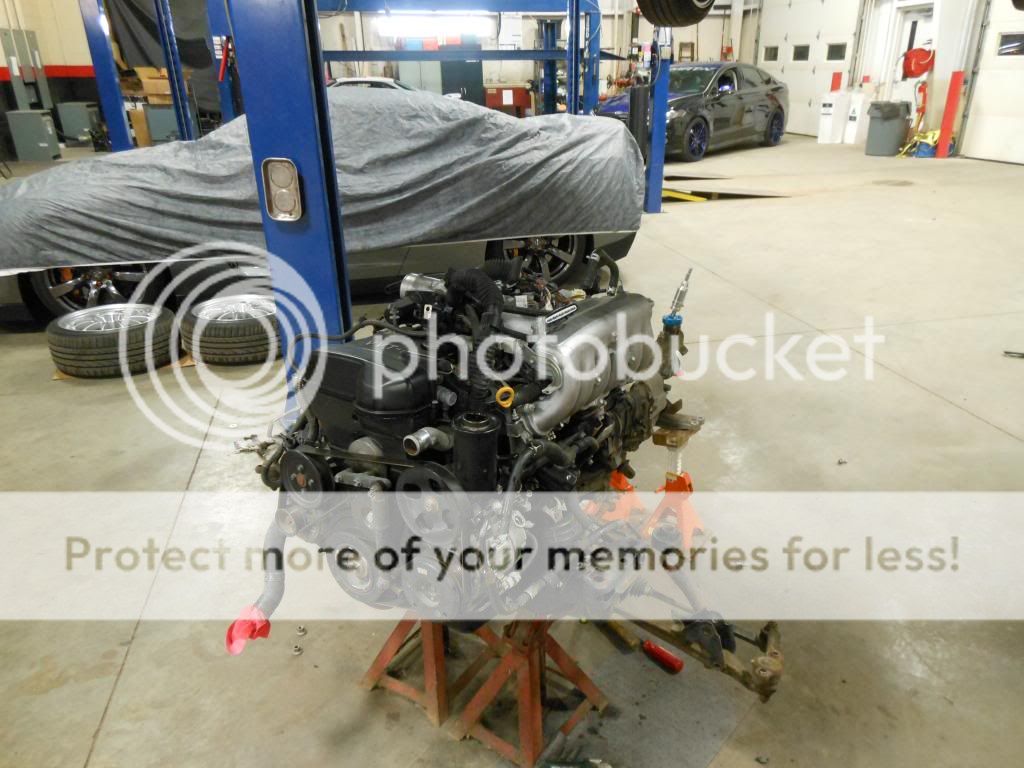
Working by myself it took about 4 hours to remove the engine. Here is the old lump
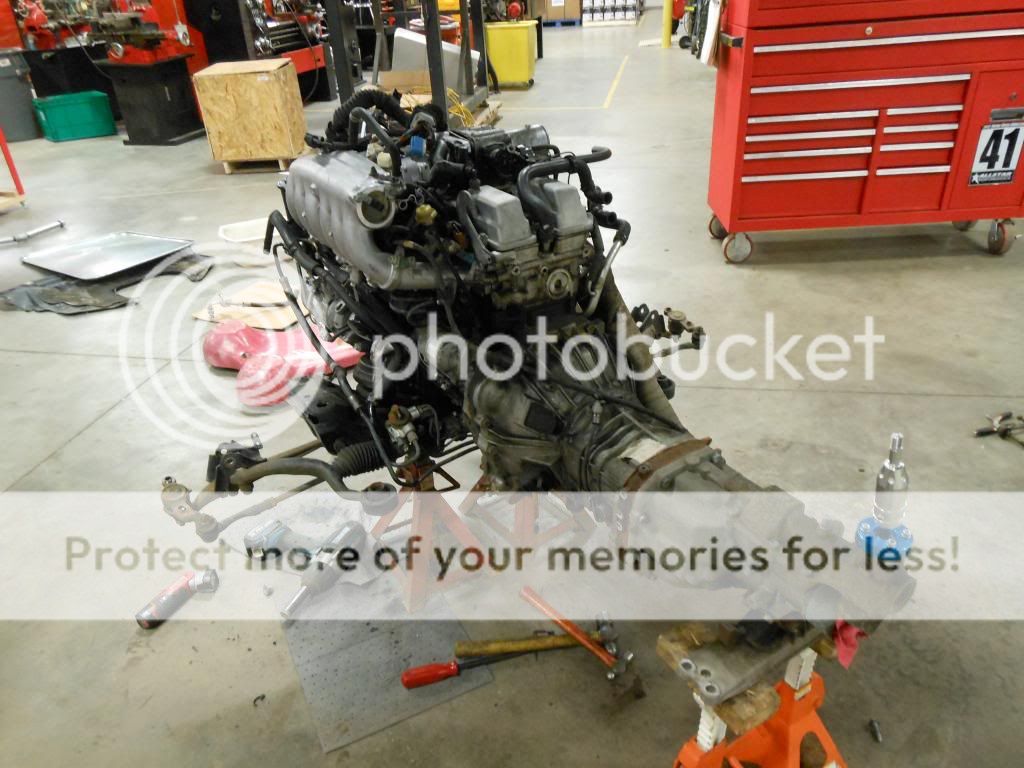
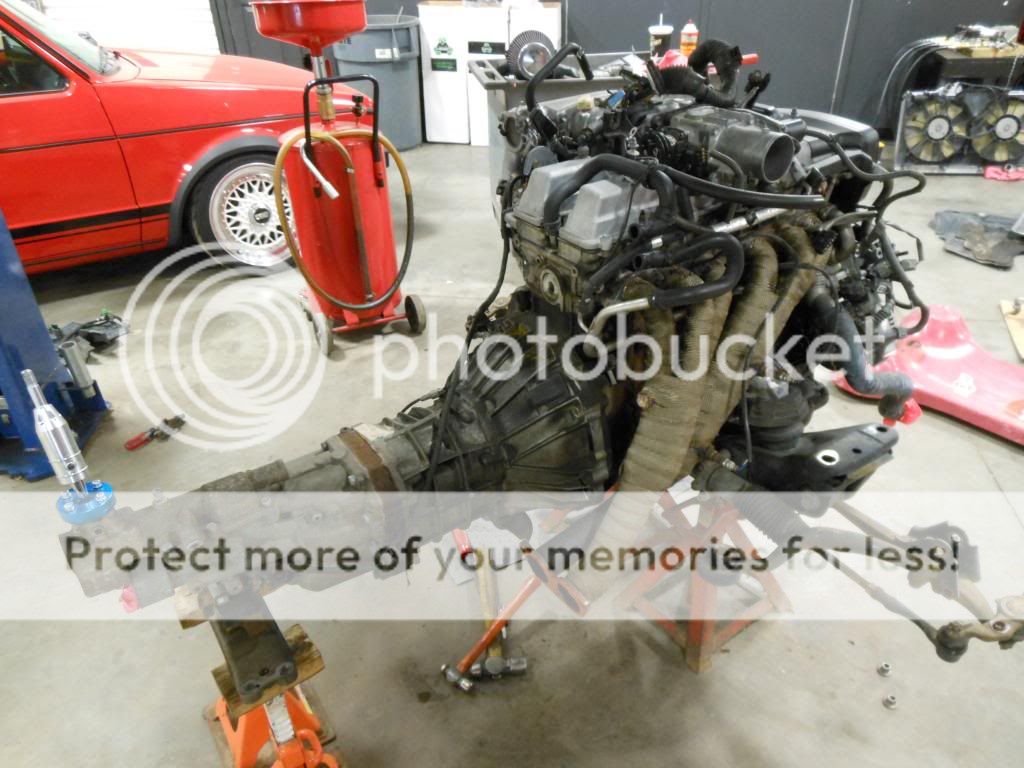
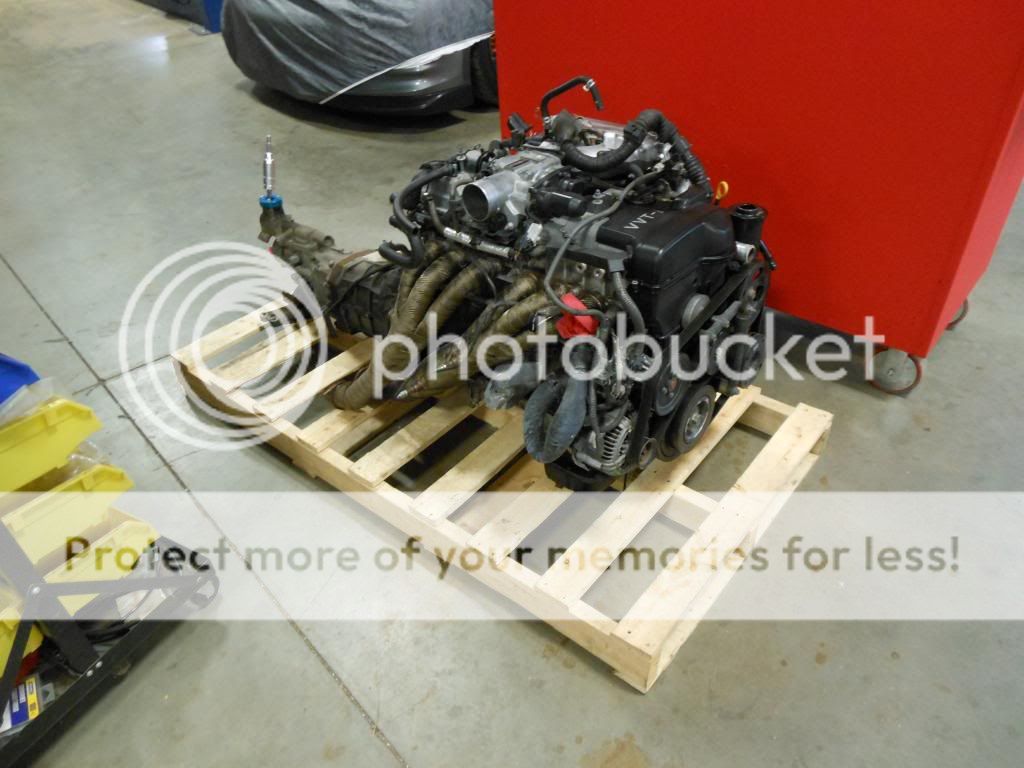
Next up, removing the engine from the crossmember. Then, this happened...
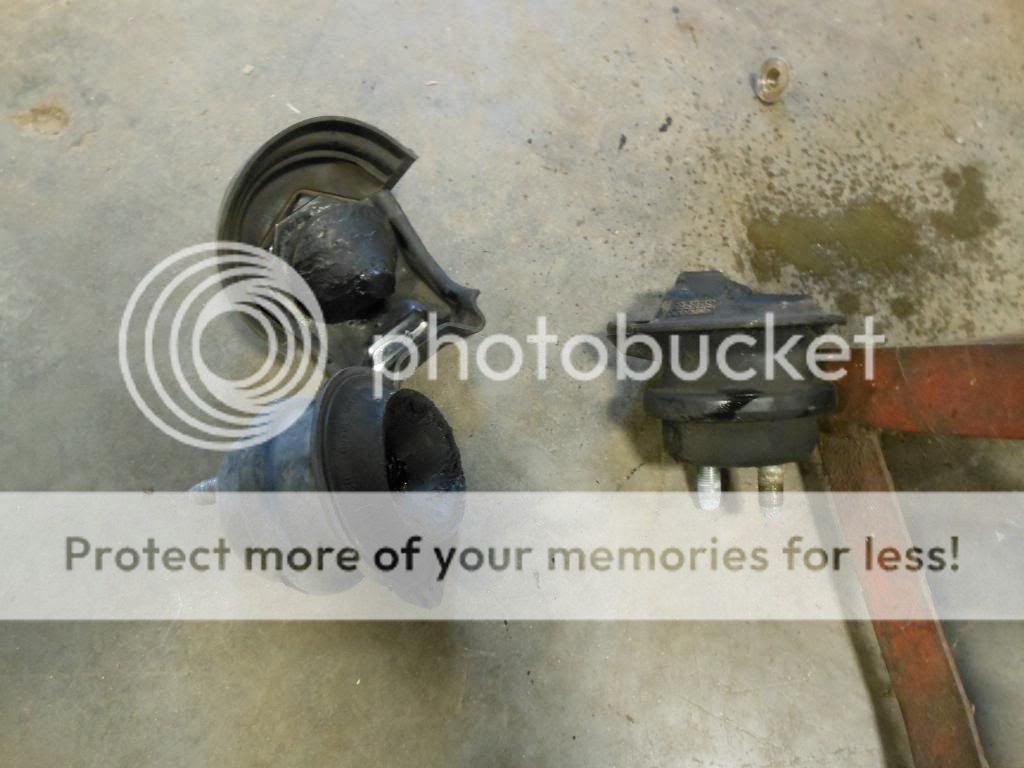
I have a work around for those mounts I will show you guys soon. Dropped the engine and trans on a pallet so I could move it around. I think this thing will be finding its way in to a drift missile soon!
After some Purple Power cleaner a scrub brush and a pressure washer, I had the crossmember looking new!
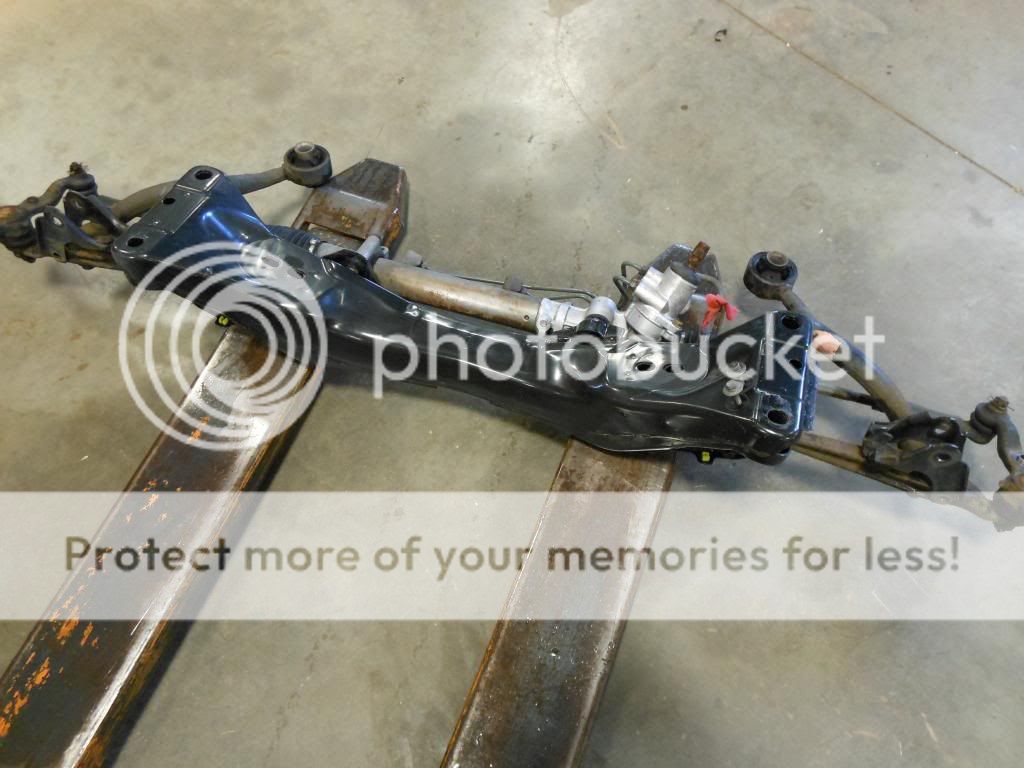
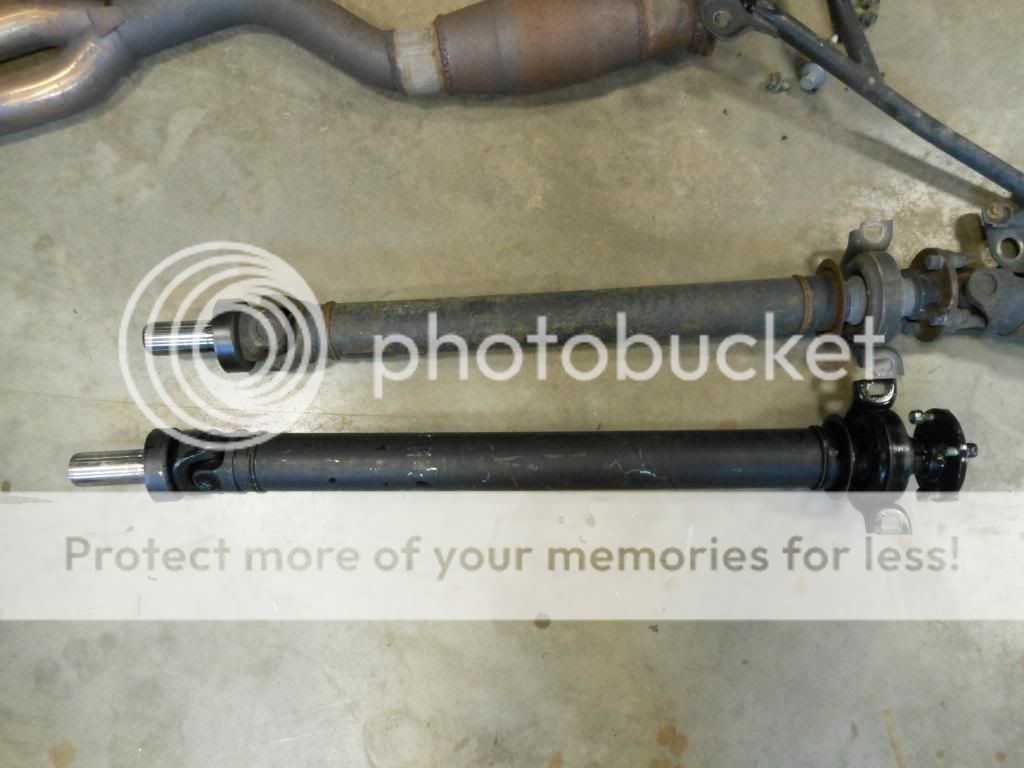
Just a heads up, if your doing this swap you MUST have the front half of the driveshaft. You can see the 3SGE shaft is about 2" longer then the 2J
That's all for now. I will write another post later tonight as I have made it much further than this in the past few days!
So I started pulling the engine last Friday. Here she is right after I put it on the hoist
Bye bye 2JZ. This is the last time you will see this big bish in the bay
As I was taking it apart I noticed that I had a Reman ECU... interesting
After draining all the fluids from the engine and trans, I started by removing the heat shields, plastic under trays and my cat/mid pipe
Driveshaft out. This is super easy on a hoist. Oh wait, what diff is that?
The good ol M85! This will be getting rebuilt with a higher final drive (4.544) soon
Since I am going to drop the crossmember with the engine, the steering linkage must be removed. Make sure to mark it with a paint marker so you have proper alignment when it goes back together!
Getting there. Power steering and A/C lines were removed. **Make sure you take your car to a certified shop to have your A/C evacuated BEFORE starting your swap!!
I then went in the interior and removed the rubber shifter boot. Anyone know what brand of short throw this is? Looks to be very high quality
I then placed jack stands under the front and trans crossmembers
After taking all the crossmember bolts out...
It's out! I just lifted the car off of the engine with a friend pushing the steering shaft out of the way to clear the intake manifold
Empty bay. Going to remove all of that sound deadening material soon
Working by myself it took about 4 hours to remove the engine. Here is the old lump
Next up, removing the engine from the crossmember. Then, this happened...
I have a work around for those mounts I will show you guys soon. Dropped the engine and trans on a pallet so I could move it around. I think this thing will be finding its way in to a drift missile soon!
After some Purple Power cleaner a scrub brush and a pressure washer, I had the crossmember looking new!
Just a heads up, if your doing this swap you MUST have the front half of the driveshaft. You can see the 3SGE shaft is about 2" longer then the 2J
That's all for now. I will write another post later tonight as I have made it much further than this in the past few days!
03-27-14, 10:10 PM
#15
Nice build. Not sure how i feel about the air bags going round the track...that video just shows numbers, lol. Still like how the direction it's going though!
Shifter looks like the Ralcor. Mine vs yours:

Shifter looks like the Ralcor. Mine vs yours:

