GS400 2JZGTE Build in the Mitten State
 06-05-14, 10:42 AM
#76

You will need to redo your AC lines. Have fun :P
https://www.clublexus.com/forums/gs-...-ac-lines.html
https://www.clublexus.com/forums/gs-...-ac-lines.html
___________________________________________________________
Not a lot to report from the garage this week. I spent some time in Georgia with family and the craziness of traveling with two little ones did not lend itself to much work getting done in the garage in between. In fact, I�m not sure I touched the car or the engine since my last update.
While I may not have accomplished much this week, I did have some parts arrive for the build. The first was a small order from Curt at Elmhurst Toyota. I really can�t say enough about their customer service. I emailed Curt some part numbers and he responded within ten minutes to say everything was in stock. The parts showed up at my door the next day- pretty impressive.
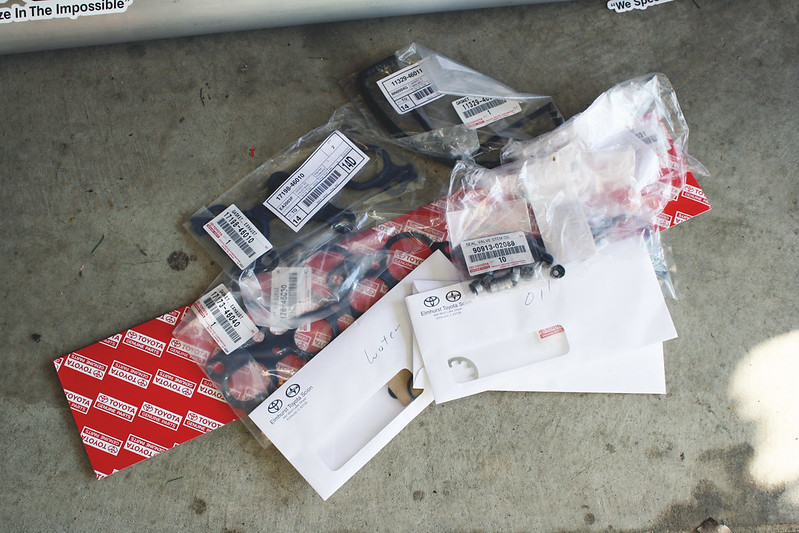
I had originally purchased only the gaskets I planned to replace in my mild overhaul, but after tearing the engine down more than I anticipated there were more items I needed. I�ve essentially bought the entire engine gasket kit at this point, but oh well. This order consisted of exhaust and intake manifold gaskets, a few miscellaneous oil and water related gaskets, and valve stem seals.
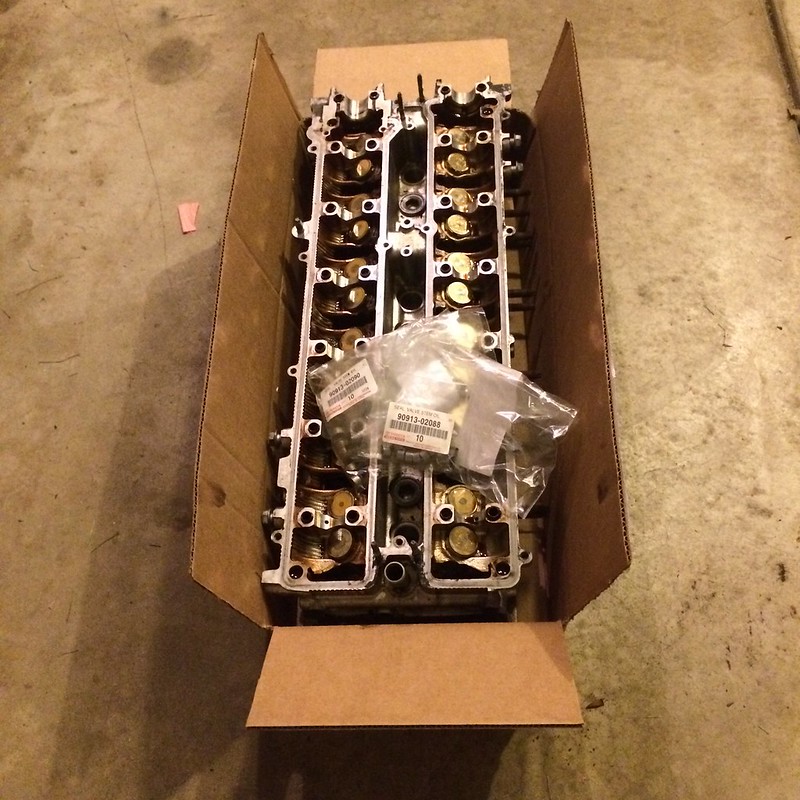
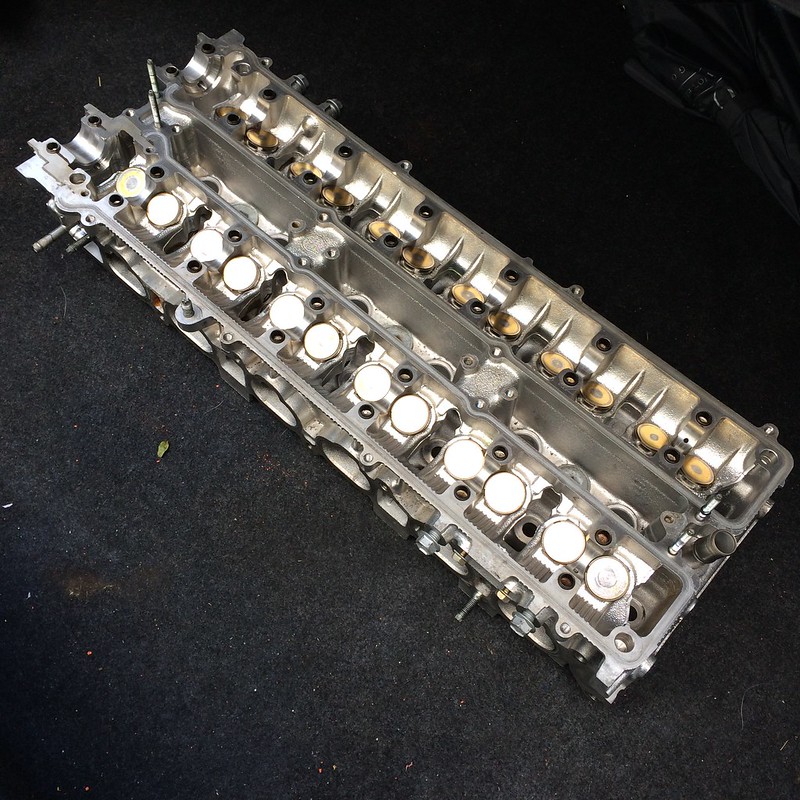
I dropped the head off at the local machine shop to be inspected, decked, and to have the new valve stem seals installed. I didn�t take a decent photo, but here�s one from Instagram on my way to drop it off:
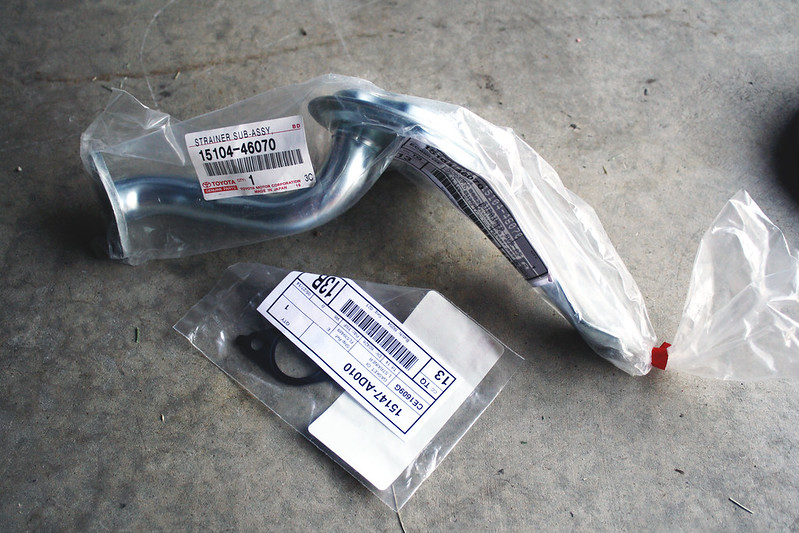
I also decided to replace the oil strainer and gasket. It was common for SR20 engines to suffer oil starvation from the pickup failing, so I replaced it on that build and figured it was a good idea to replace this one as well despite the fact that I haven�t necessarily heard this is an issue with the 2JZGTE.
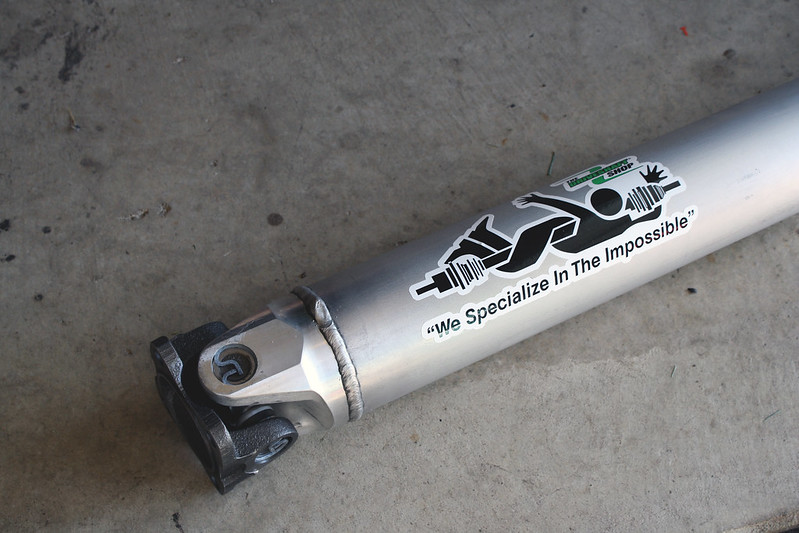
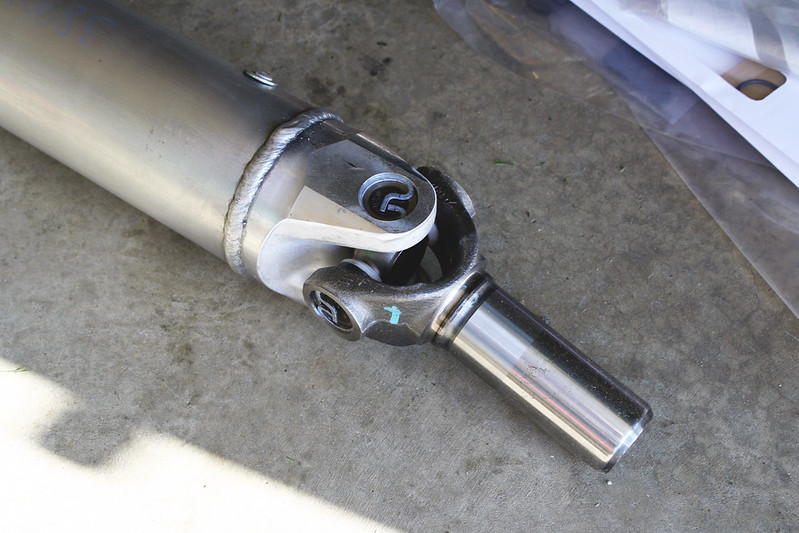
The last major piece to the drivetrain puzzle was the driveshaft. I decided to have The DriveShaft Shop build me a custom 3.5″ aluminum driveshaft to mate the GS400′s rear differential with the R154 manual transmission. They told me the lead time was four weeks on this piece, so I was pretty surprised when they sent me tracking information only four or five days after I placed the order.
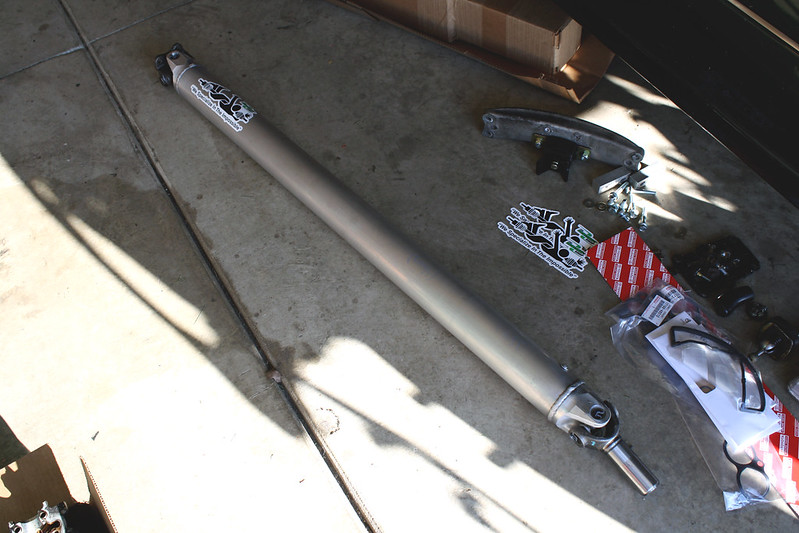
Quality looks to be top notch. Hopefully my measurements check out and this thing fits like a glove when the time comes to bolt it in. Something tells me the stock open differential is going to need to be replaced ASAP�
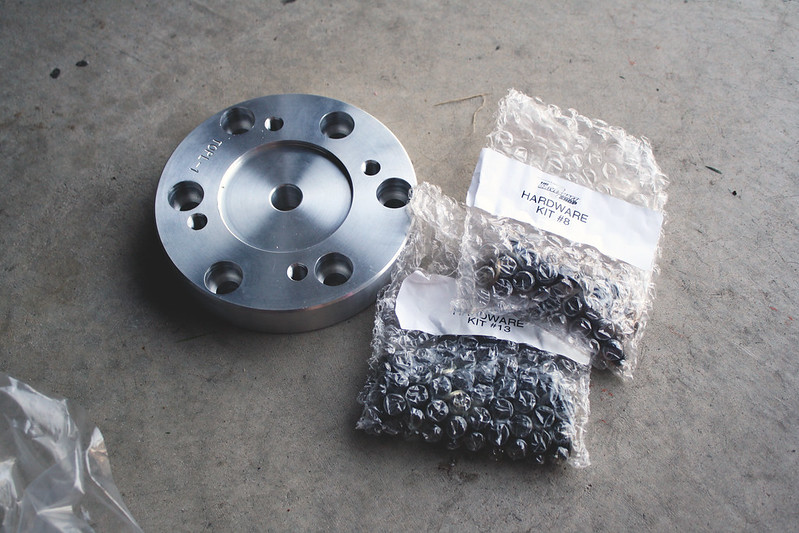
The price also included the necessary adapter to mate the driveshaft with the car�s differential flange:
 06-16-14, 12:32 PM
#79
Thanks a lot, appreciate it!
I haven't gotten around to the fuel system work yet since I have been so busy with rebuilding the engine, but I will definitely document it and post some photos when the time comes!
____________________________________________________________
I'm a little behind on my update for last week, but I knew that I had a three day weekend for Father's Day and was hoping to get some work done on the car during that time, so I decided to hold off on posting an update until today. I didn't get as far as I had hoped, but things always take longer than I think they will. So with that being said, I'm happy with my progress!
After checking out the bottom end a bit, I decided to proceed with reassembly without getting into pistons, rods, etc. I took the same approach with my SR20DET and was happy with the results, so fingers crossed that I'll end up in the same place with the 2JZ.
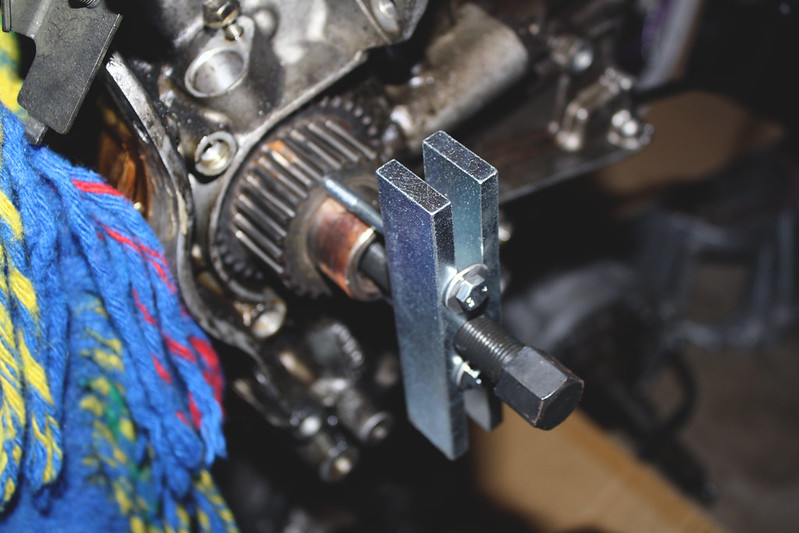
The first order of business was to remove the timing gear from the front of the engine, allowing me to swap the old oil pump out for the new unit. I had to purchase a gear puller from Auto Zone since my typical two-jaw puller wouldn�t work with this type of pulley. The included bolts were too large and standard thread pitch, so I had to make a trip to the hardware store for some new bolts. Once I had those in place, the puller made quick work of removing the gear.
With the gear out of the way, I was able to pull the oil pump. I needed to press the new front crank seal into the new oil pump, but was having a hard time finding something to press the seal in evenly with. I read that a piece of PVC pipe worked well, but it was about 1 AM at the time, so all of the local hardware stores were closed. I ended up removing a piece of PVC pipe from the side of my house that I had repaired at one time (something to do with my washing machine) and it was the perfect diameter! A redneck solution? Yes. But it got the job done! I promptly reinstalled it before my wife noticed I ripped the house apart�
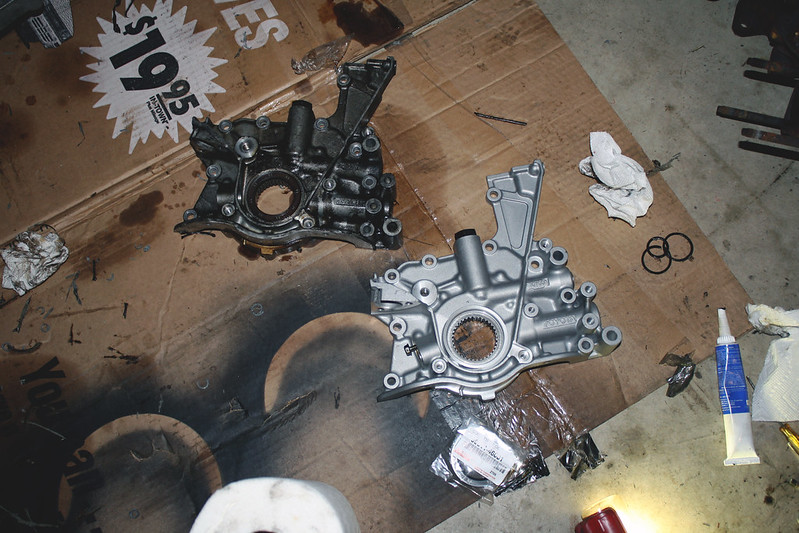
Here�s a shot of the old oil pump and front crank seal with the new OEM Toyota unit:
I also replaced the three o-rings on the engine block- two of which are situated behind the oil pump. Seemed like a good time to get these freshened up:


With those seals installed, I was able to bolt the fresh oil pump into place. Much better:

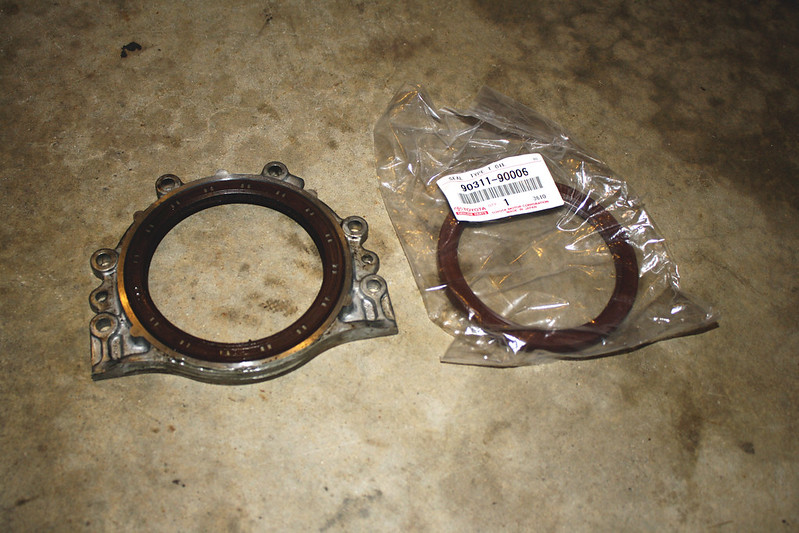
I also took the time to replace the rear main seal. I didn�t have any reason to believe it was bad, but this is a nasty one to get into once the engine is in the car. Might as well, right?
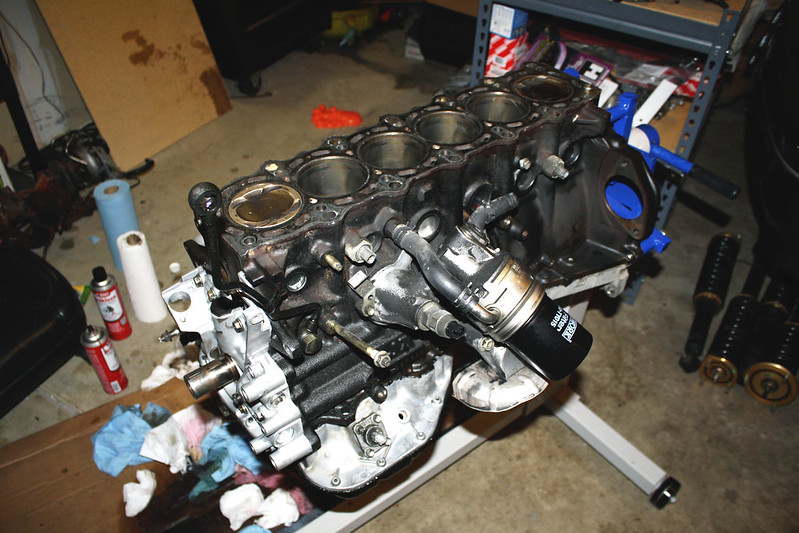
Next up was the upper oil pan, oil baffle plate, and a new oil strainer & gasket:
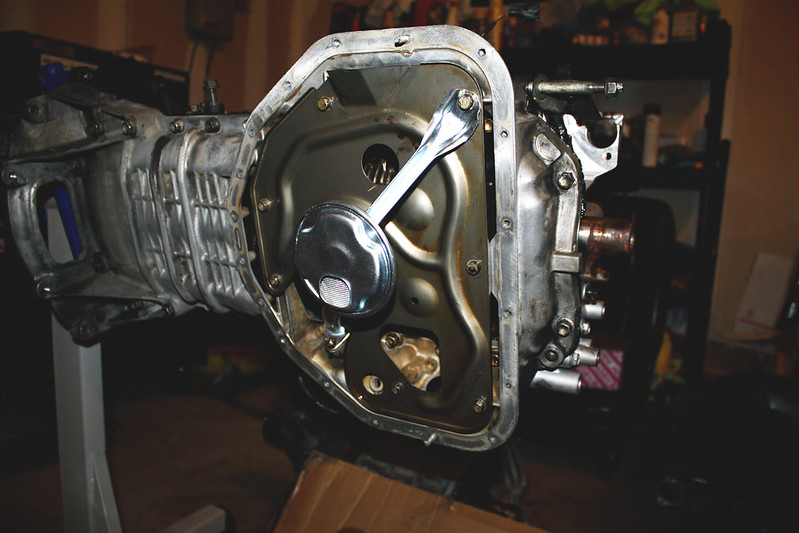
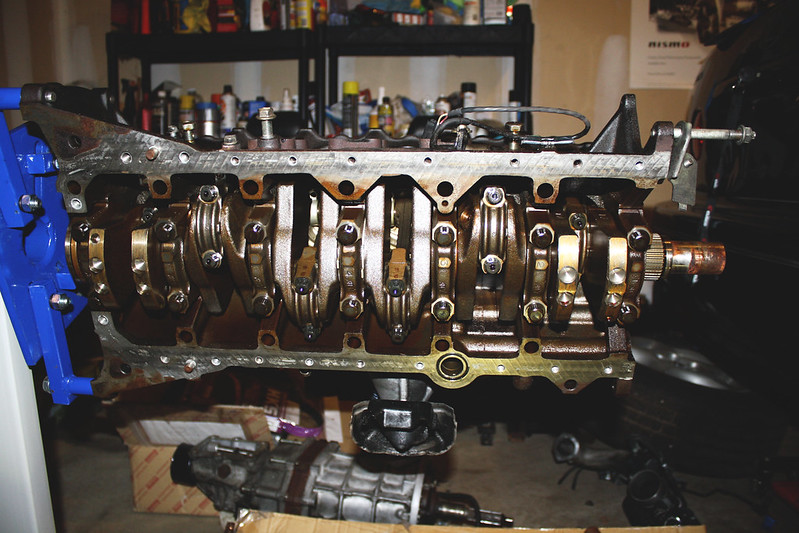
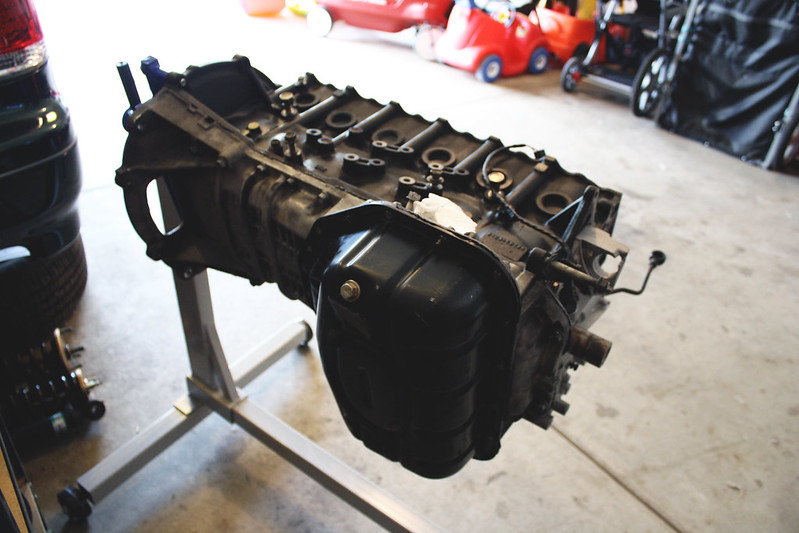
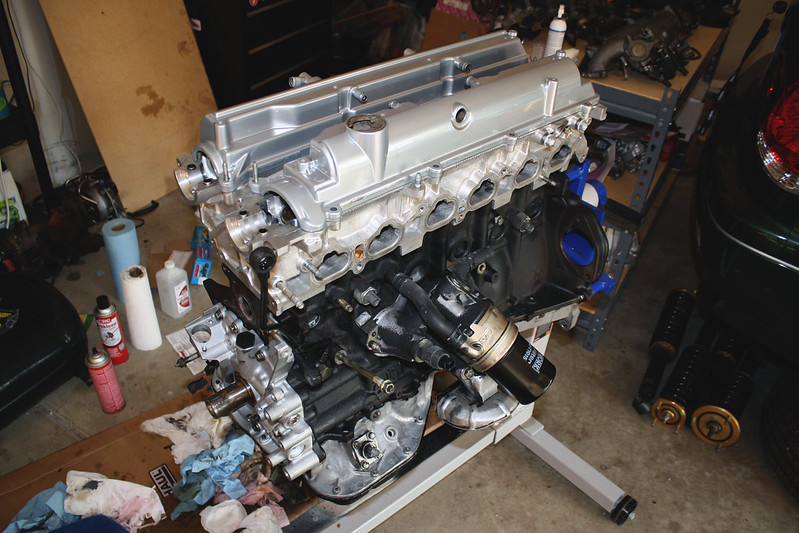
And finally, the lower oil pan. Here�s how the engine sits today:

I got the head back from the machine shop late last week, freshly decked and with new OEM intake and exhaust valve stem seals installed. I was hoping to have the head, head gasket, and ARP head studs installed by this morning, but the surface of the block still needs to be cleaned up quite a bit before I am able to complete that work. Hopefully by the next update it�ll be back together.
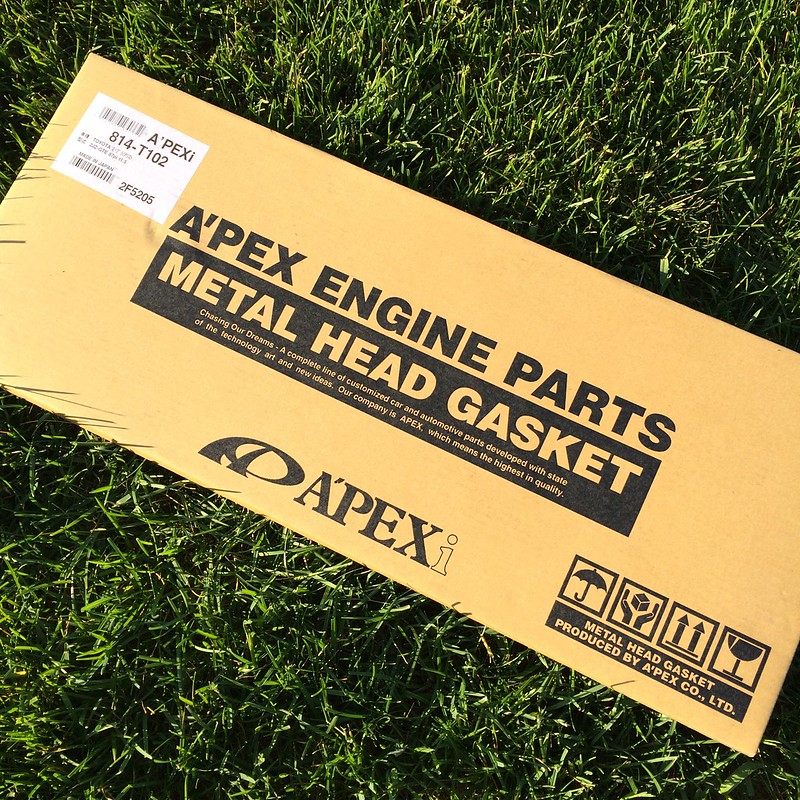
So, on to the items that arrived since last time. I had great luck with my Apexi head gasket in the SR, so I decided to grab one for this engine build as well. The OEM gasket would have been a little cheaper, but hey, bonus points for my mod list. Thanks to Mike at Evasive Motorsports for helping me out with getting this quickly!
I�ve been meaning to order Bride seat rails for a while now, but drivetrain components have taken priority. I spent some time translating Bride�s website to find the rails I need, but just hadn�t pulled the trigger yet. Fortunately, I just happened to find a fellow in Chicago selling the driver�s side seat rail I was after for a great price. Not to mention the fact that next day shipping is essentially a guarantee from Chicago to my house. Really excited to have the seat rail here so quickly without a long wait from Japan:

I sat it in the car, but got distracted before I bolted it down. It was fun to actually sit in the car since the factory seats were removed when I got it and I hadn�t bothered to bolt the black leather OEM seats into the car previously.

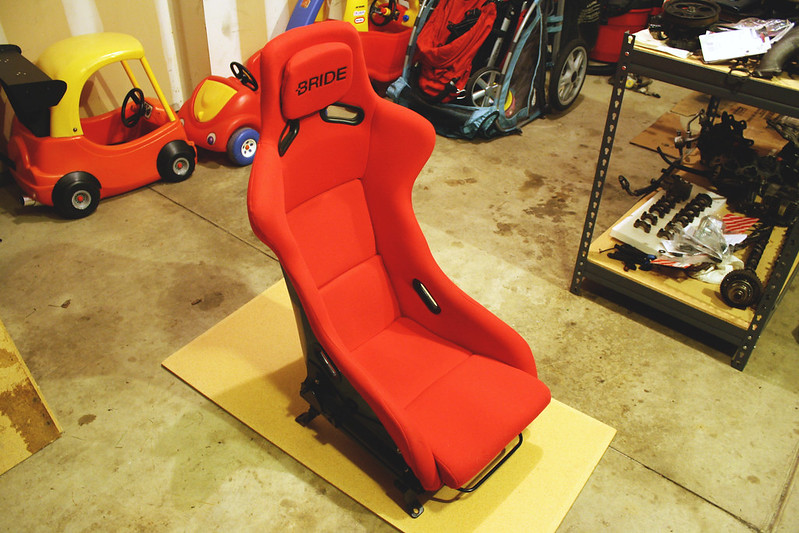
And hey, here�s an out-of-focus photo of the seat:
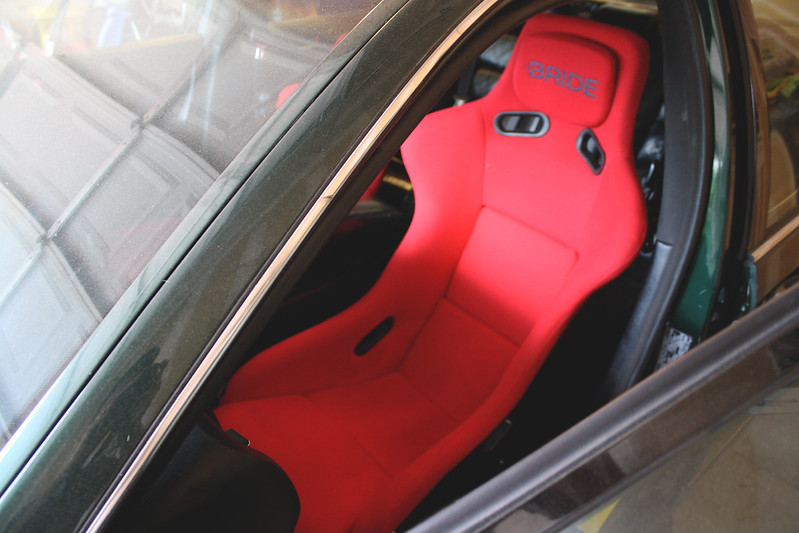
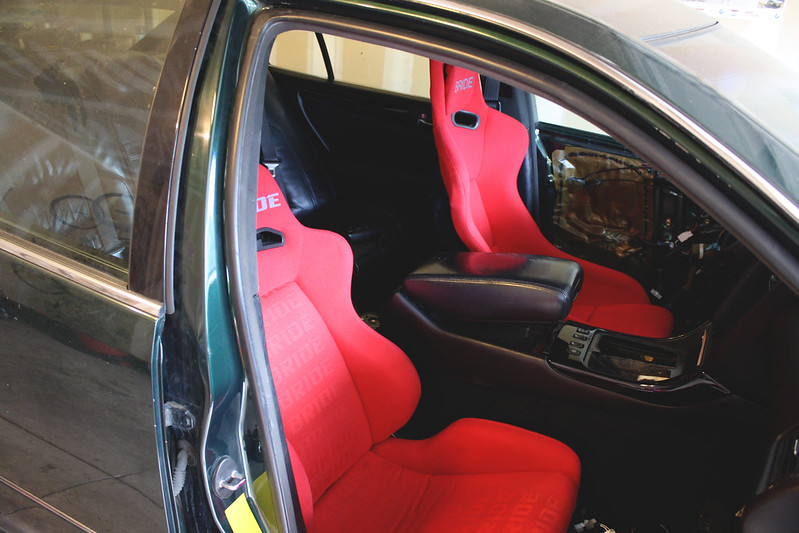
Speaking of long waits from Japan, I finally got a nice box from the motherland early last week after waiting about two months. Inside I found a really clean Bride Ergo that I picked up from Juicey on Zilvia for an awesome price. This was an impulse buy that resulted in me picking up the Zeta II to match, but I am really glad I did:

I also grabbed a Nardi Classic 350mm steering wheel to complete the package. I�m really excited about this setup since it is so similar to my S13 interior that I miss immensely:
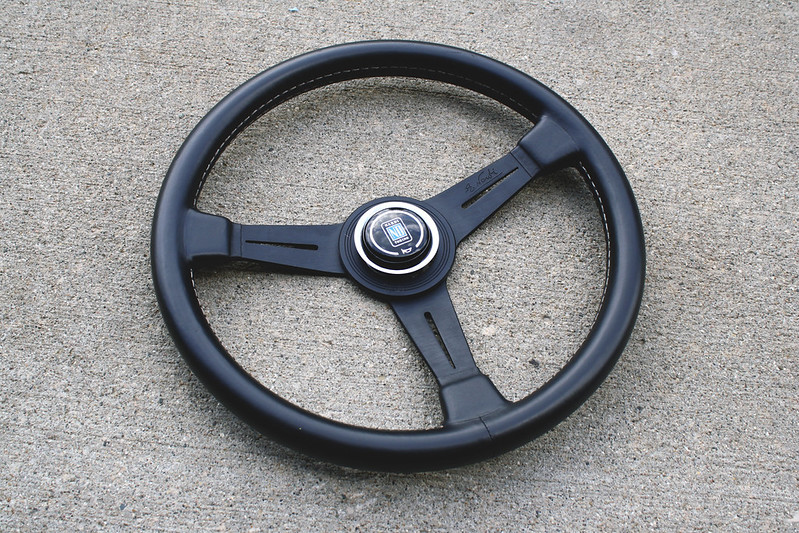
I just need to pick up a Works Bell hub and a Bride rail for the passenger side and then the interior should be very close to complete. I�m sure a set of red checkered mats from Japan for the Aristo will be the icing on the cake. I�m still considering installing red Bride fabric on the door panels, but I almost prefer the subtle black leather look with the contrasting red seats in this car.
Alicia was kind enough to give me some more time in the garage last night after our Father�s Day festivities to reset things a bit and get organized. The garage was completely out of control and I was worried about losing critical engine components, so it was great to be able to get a handle on it to stay organized.
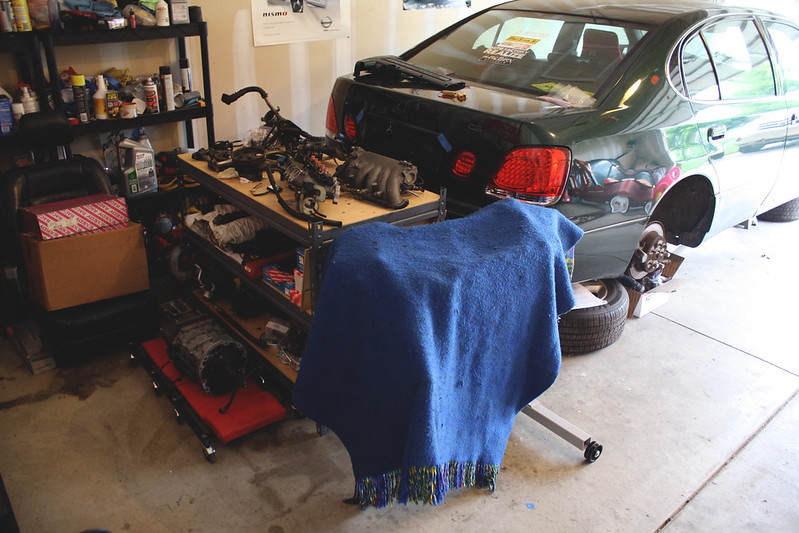
I�m looking forward to getting the drivetrain assembled and into the car soon. This might happen before my turbo setup is all sorted out and installed, but I am guessing it will be much easier to install a single turbo with the engine in the car than it would be to install the twins. I have a lot of research to do before the turbo setup will be here and ready to go, but I pretty much have everything to get the rest of the engine and transmission together and in the car. I always seem to under estimate how long these things take, but here�s to hoping I�ll be dropping it in within the next month or so.
____________________________________________________________
I'm a little behind on my update for last week, but I knew that I had a three day weekend for Father's Day and was hoping to get some work done on the car during that time, so I decided to hold off on posting an update until today. I didn't get as far as I had hoped, but things always take longer than I think they will. So with that being said, I'm happy with my progress!
After checking out the bottom end a bit, I decided to proceed with reassembly without getting into pistons, rods, etc. I took the same approach with my SR20DET and was happy with the results, so fingers crossed that I'll end up in the same place with the 2JZ.
The first order of business was to remove the timing gear from the front of the engine, allowing me to swap the old oil pump out for the new unit. I had to purchase a gear puller from Auto Zone since my typical two-jaw puller wouldn�t work with this type of pulley. The included bolts were too large and standard thread pitch, so I had to make a trip to the hardware store for some new bolts. Once I had those in place, the puller made quick work of removing the gear.
With the gear out of the way, I was able to pull the oil pump. I needed to press the new front crank seal into the new oil pump, but was having a hard time finding something to press the seal in evenly with. I read that a piece of PVC pipe worked well, but it was about 1 AM at the time, so all of the local hardware stores were closed. I ended up removing a piece of PVC pipe from the side of my house that I had repaired at one time (something to do with my washing machine) and it was the perfect diameter! A redneck solution? Yes. But it got the job done! I promptly reinstalled it before my wife noticed I ripped the house apart�
Here�s a shot of the old oil pump and front crank seal with the new OEM Toyota unit:
I also replaced the three o-rings on the engine block- two of which are situated behind the oil pump. Seemed like a good time to get these freshened up:
With those seals installed, I was able to bolt the fresh oil pump into place. Much better:
I also took the time to replace the rear main seal. I didn�t have any reason to believe it was bad, but this is a nasty one to get into once the engine is in the car. Might as well, right?
Next up was the upper oil pan, oil baffle plate, and a new oil strainer & gasket:
And finally, the lower oil pan. Here�s how the engine sits today:
I got the head back from the machine shop late last week, freshly decked and with new OEM intake and exhaust valve stem seals installed. I was hoping to have the head, head gasket, and ARP head studs installed by this morning, but the surface of the block still needs to be cleaned up quite a bit before I am able to complete that work. Hopefully by the next update it�ll be back together.
So, on to the items that arrived since last time. I had great luck with my Apexi head gasket in the SR, so I decided to grab one for this engine build as well. The OEM gasket would have been a little cheaper, but hey, bonus points for my mod list. Thanks to Mike at Evasive Motorsports for helping me out with getting this quickly!
I�ve been meaning to order Bride seat rails for a while now, but drivetrain components have taken priority. I spent some time translating Bride�s website to find the rails I need, but just hadn�t pulled the trigger yet. Fortunately, I just happened to find a fellow in Chicago selling the driver�s side seat rail I was after for a great price. Not to mention the fact that next day shipping is essentially a guarantee from Chicago to my house. Really excited to have the seat rail here so quickly without a long wait from Japan:
I sat it in the car, but got distracted before I bolted it down. It was fun to actually sit in the car since the factory seats were removed when I got it and I hadn�t bothered to bolt the black leather OEM seats into the car previously.
And hey, here�s an out-of-focus photo of the seat:
Speaking of long waits from Japan, I finally got a nice box from the motherland early last week after waiting about two months. Inside I found a really clean Bride Ergo that I picked up from Juicey on Zilvia for an awesome price. This was an impulse buy that resulted in me picking up the Zeta II to match, but I am really glad I did:
I also grabbed a Nardi Classic 350mm steering wheel to complete the package. I�m really excited about this setup since it is so similar to my S13 interior that I miss immensely:
I just need to pick up a Works Bell hub and a Bride rail for the passenger side and then the interior should be very close to complete. I�m sure a set of red checkered mats from Japan for the Aristo will be the icing on the cake. I�m still considering installing red Bride fabric on the door panels, but I almost prefer the subtle black leather look with the contrasting red seats in this car.
Alicia was kind enough to give me some more time in the garage last night after our Father�s Day festivities to reset things a bit and get organized. The garage was completely out of control and I was worried about losing critical engine components, so it was great to be able to get a handle on it to stay organized.
I�m looking forward to getting the drivetrain assembled and into the car soon. This might happen before my turbo setup is all sorted out and installed, but I am guessing it will be much easier to install a single turbo with the engine in the car than it would be to install the twins. I have a lot of research to do before the turbo setup will be here and ready to go, but I pretty much have everything to get the rest of the engine and transmission together and in the car. I always seem to under estimate how long these things take, but here�s to hoping I�ll be dropping it in within the next month or so.
06-23-14, 12:13 PM
#81
It sure doesn't feel like it sometimes, but thanks for the vote of confidence! haha
______________________________________________________________
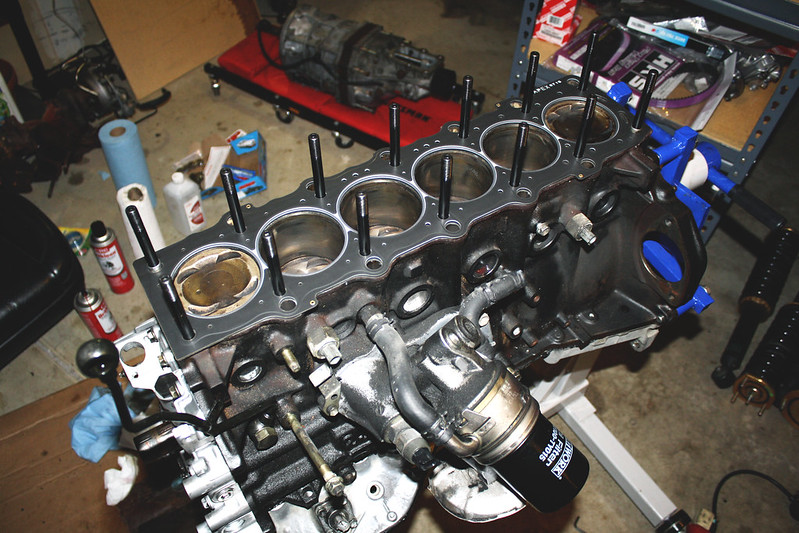
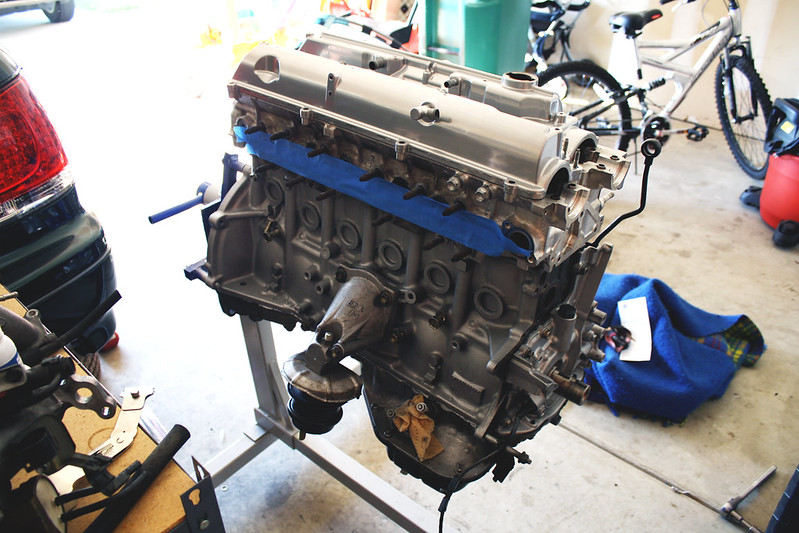
It took quite a while to remove all of the old head gasket material from the block. I was really nervous about damaging the block or introducing junk into the bottom end, so I had to spend a ton of time with a razor blade cleaning the surface. Hopefully I got it clean enough though and things will seal up nicely.
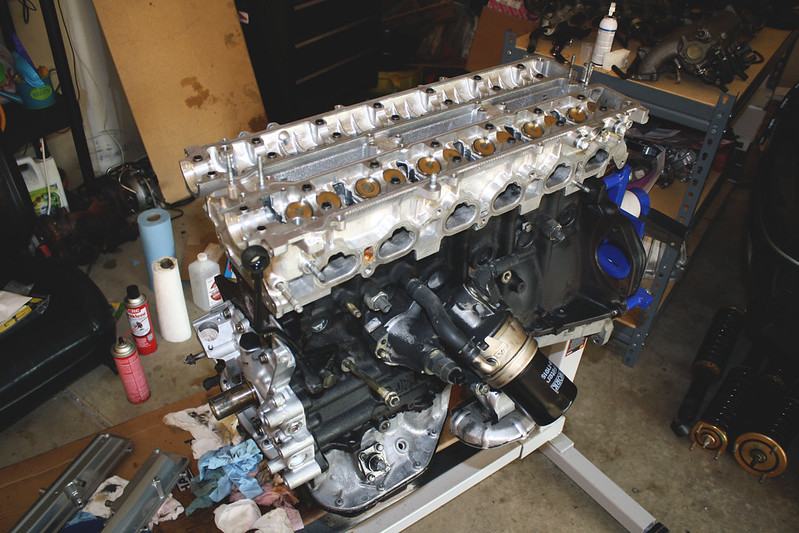
I installed the ARP head studs, followed by the Apexi head gasket. I learned the hard way that the head needs to be mated to the block before the head studs can be installed or you won�t be able to put the washers onto the studs. After removing each stud individually and placing the washer in first, I was able to get everything all buttoned up.

I must have borrowed a 12 point deep 1/2″ socket when I did this with my SR, because I didn�t have one to torque the head studs down. I�ll have to pick one up this week and take care of that.
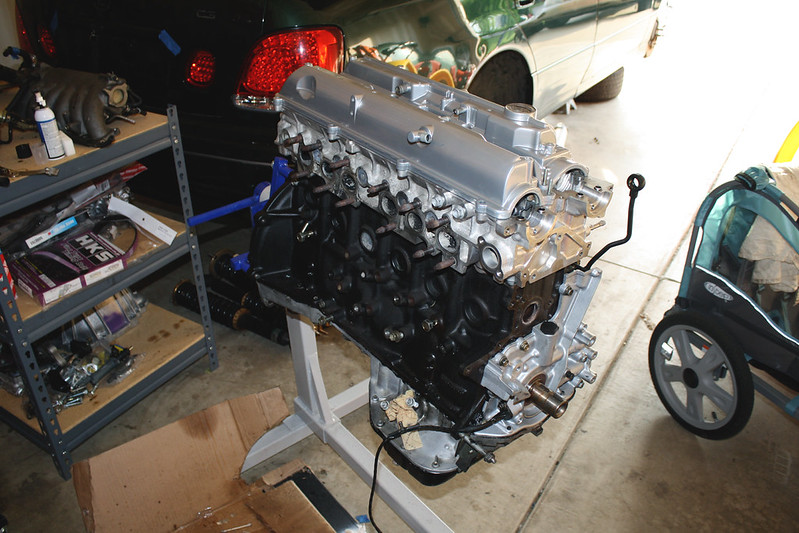
I got my valve covers came back from powder coating last week. They didn�t turn out as chrome as I had expected, but they look kind of cool. Much better than the dirty and dull condition they were in previously.

The next order of business is to decide on camshafts. The cam gear bolt on the intake side is stuck in the cam, so I need to break that free and replace it regardless of if I go with OEM cams or Tomei Poncams. Everything else for the intake side and timing related should be ready to go once that is sorted out though. I�m thinking about painting the block silver while it�s apart as well.
______________________________________________________________
It took quite a while to remove all of the old head gasket material from the block. I was really nervous about damaging the block or introducing junk into the bottom end, so I had to spend a ton of time with a razor blade cleaning the surface. Hopefully I got it clean enough though and things will seal up nicely.
I installed the ARP head studs, followed by the Apexi head gasket. I learned the hard way that the head needs to be mated to the block before the head studs can be installed or you won�t be able to put the washers onto the studs. After removing each stud individually and placing the washer in first, I was able to get everything all buttoned up.
I must have borrowed a 12 point deep 1/2″ socket when I did this with my SR, because I didn�t have one to torque the head studs down. I�ll have to pick one up this week and take care of that.
I got my valve covers came back from powder coating last week. They didn�t turn out as chrome as I had expected, but they look kind of cool. Much better than the dirty and dull condition they were in previously.
The next order of business is to decide on camshafts. The cam gear bolt on the intake side is stuck in the cam, so I need to break that free and replace it regardless of if I go with OEM cams or Tomei Poncams. Everything else for the intake side and timing related should be ready to go once that is sorted out though. I�m thinking about painting the block silver while it�s apart as well.
06-30-14, 12:55 PM
#84
Hopefully if I don't go broke first! lol. I'm sure it'll look a little rough for a while, but it all takes time as I'm sure you know.
Thanks for the heads up! I still really want to go Tomei, but if not I will reuse my stock cams.
___________________________________________________________________
Fairly light update once again this week. My oldest daughter turned two over the weekend, so we were pretty busy. I managed to sneak a couple hours in last week though. Here�s a recap of what went down.
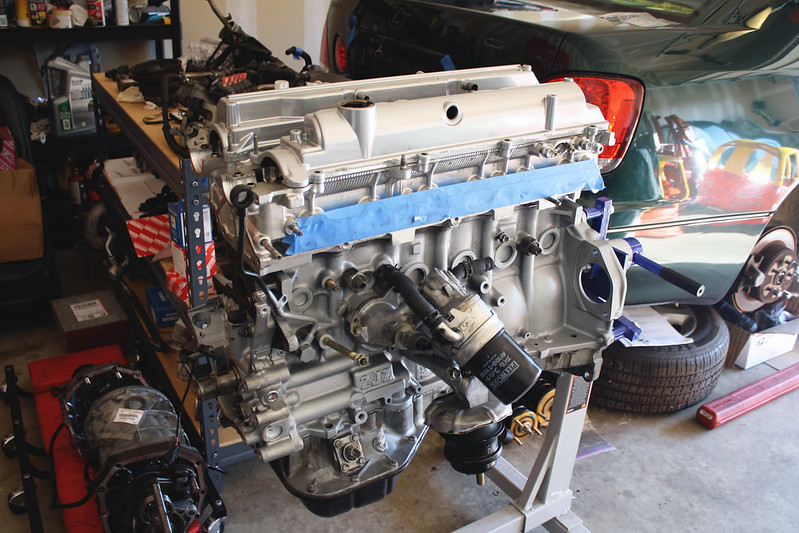
The first order of business was to tighten up the head studs. I finally managed to find the proper 12 point deep socket and was able to get this all taken care of. The next step will be to install the cams. I�m thinking I will install the factory cams for now so that things keep moving and I�ll add a set of Tomei Poncams later on when I can swing it. I�m starting to get a little anxious to have the engine assembled.

My intake cam gear bolt is stuck in the camshaft and beginning to round out, so I ordered a replacement bolt for when I finally break that free. This is one of the reasons I want to purchase new cams instead of messing with it, but maybe the machine shop can break it free if I am not able to figure it out. I also picked up the pilot bearing needed for the automatic to manual swap:

Some of the paint was coming off of the block, so I decided to hit it with a quick coat of high temp silver. I guess iron blocks are typically black and not silver like aluminum ones, so maybe it was in poor taste. I might shoot it black, but I might leave it too- we�ll see what happens.
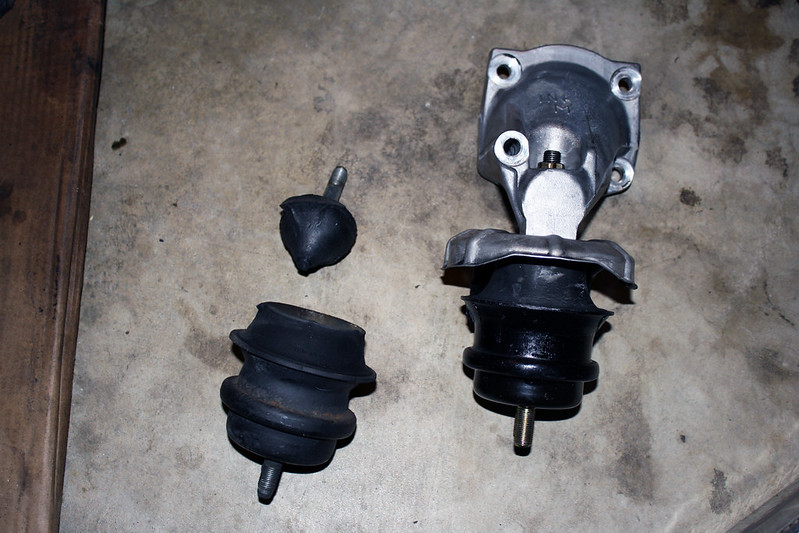
The engine mounts that came with my swap were old and brittle. One of them managed to snap in half during my test fit, so I needed to replace them. I am not usually one to buy parts from Megan Racing, but I could not find any other aftermarket replacement engine mount for this chassis. I had hoped to find some solid Cusco mounts like I had in the S13, but no such luck. For now I guess these will get the job done.
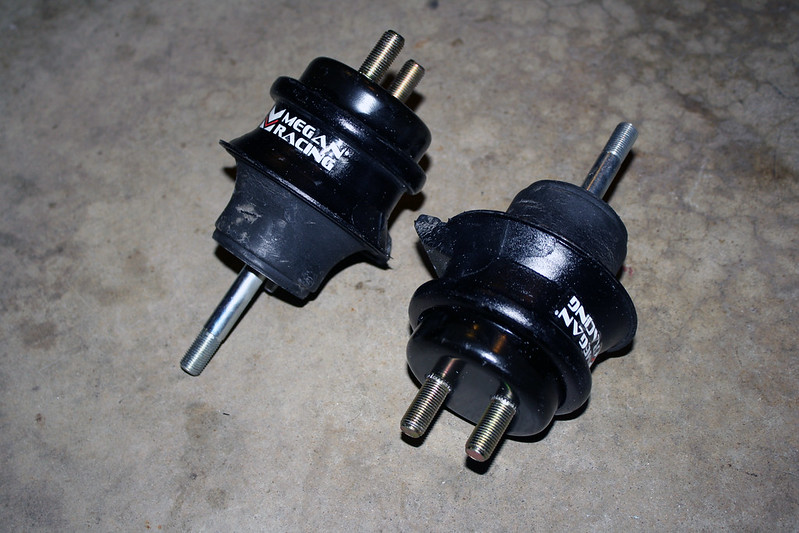
Old broken engine mount vs. the new mount:
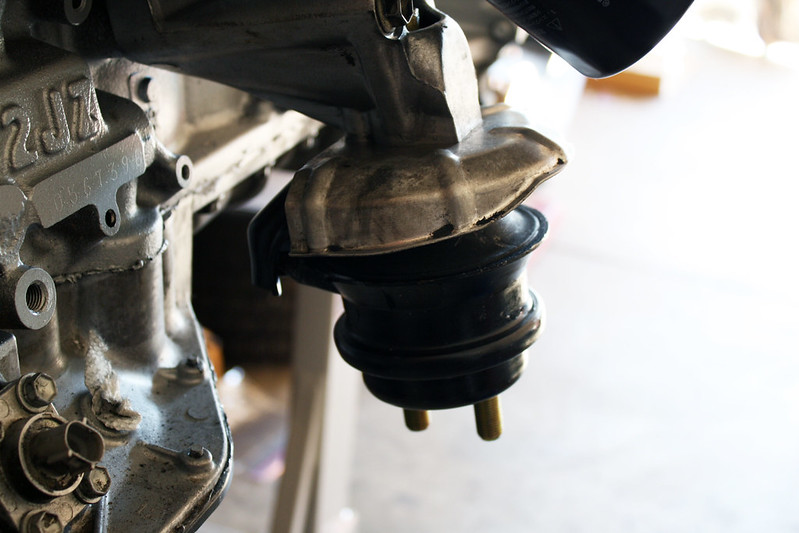
Installed:
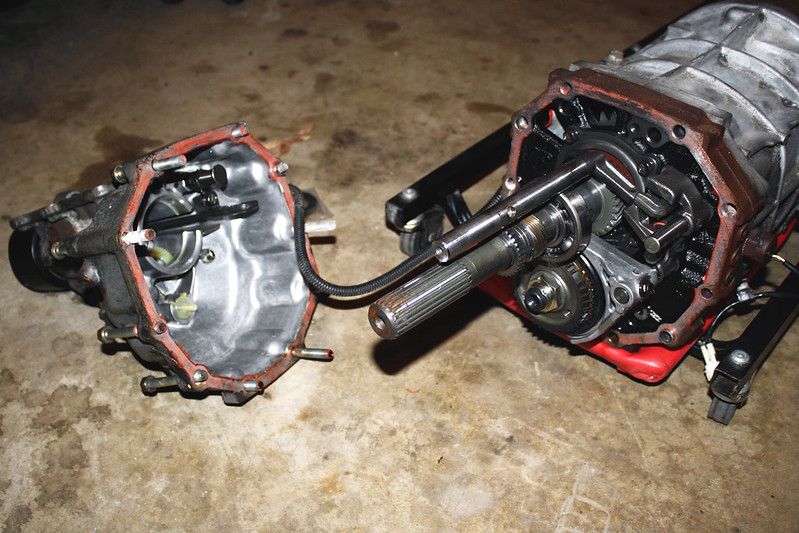
With progress slowed down a bit on the engine, I turned my attention to the transmission. I started by installing the output shaft seal:

Next I moved on to installing the shifter extension, rear case, and shifter housing:
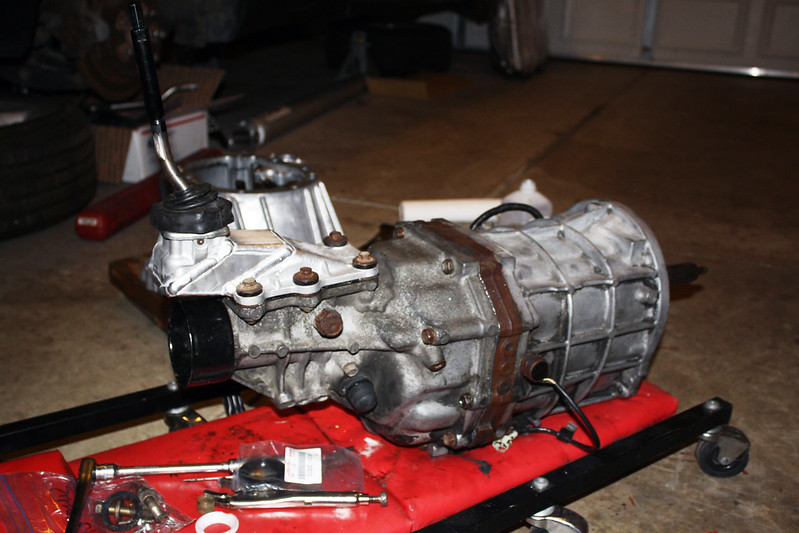
I also installed the Marlin Crawler shifter bushings while I was at it.

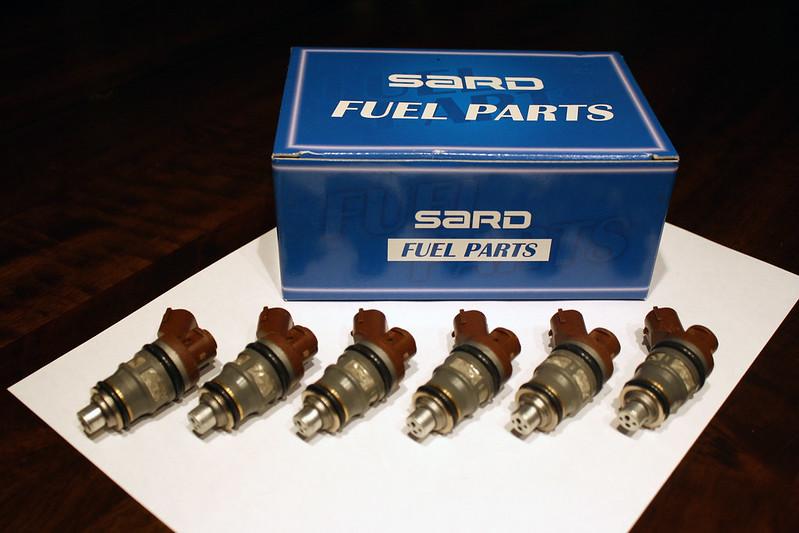
Next up will be installing the bellhousing, input shaft seal, and slave cylinder. One last piece of the puzzle arrived last week- a set of 840cc SARD fuel injectors.
Thanks for the heads up! I still really want to go Tomei, but if not I will reuse my stock cams.
___________________________________________________________________
Fairly light update once again this week. My oldest daughter turned two over the weekend, so we were pretty busy. I managed to sneak a couple hours in last week though. Here�s a recap of what went down.
The first order of business was to tighten up the head studs. I finally managed to find the proper 12 point deep socket and was able to get this all taken care of. The next step will be to install the cams. I�m thinking I will install the factory cams for now so that things keep moving and I�ll add a set of Tomei Poncams later on when I can swing it. I�m starting to get a little anxious to have the engine assembled.
My intake cam gear bolt is stuck in the camshaft and beginning to round out, so I ordered a replacement bolt for when I finally break that free. This is one of the reasons I want to purchase new cams instead of messing with it, but maybe the machine shop can break it free if I am not able to figure it out. I also picked up the pilot bearing needed for the automatic to manual swap:
Some of the paint was coming off of the block, so I decided to hit it with a quick coat of high temp silver. I guess iron blocks are typically black and not silver like aluminum ones, so maybe it was in poor taste. I might shoot it black, but I might leave it too- we�ll see what happens.
The engine mounts that came with my swap were old and brittle. One of them managed to snap in half during my test fit, so I needed to replace them. I am not usually one to buy parts from Megan Racing, but I could not find any other aftermarket replacement engine mount for this chassis. I had hoped to find some solid Cusco mounts like I had in the S13, but no such luck. For now I guess these will get the job done.
Old broken engine mount vs. the new mount:
Installed:
With progress slowed down a bit on the engine, I turned my attention to the transmission. I started by installing the output shaft seal:
Next I moved on to installing the shifter extension, rear case, and shifter housing:
I also installed the Marlin Crawler shifter bushings while I was at it.
Next up will be installing the bellhousing, input shaft seal, and slave cylinder. One last piece of the puzzle arrived last week- a set of 840cc SARD fuel injectors.
06-30-14, 08:52 PM
#86
Jet Pump killer install in my build thread for anyone who needs the info:
https://www.clublexus.com/forums/8606441-post72.html
https://www.clublexus.com/forums/8606441-post72.html
Last edited by Revive; 06-30-14 at 09:05 PM.
07-01-14, 10:52 AM
#87
Jet Pump killer install in my build thread for anyone who needs the info:
https://www.clublexus.com/forums/8606441-post72.html
https://www.clublexus.com/forums/8606441-post72.html
 07-04-14, 04:16 AM
#90
there are 2 companies that make a solid mount that i know of, one is token solution for the is300 and the other is vibra-technics
http://www.vibra-technics.com/toyota...s161_mk2_97_05
http://www.tokensolutions.net/lexus-...ine-mounts-v2/
http://www.vibra-technics.com/toyota...s161_mk2_97_05
http://www.tokensolutions.net/lexus-...ine-mounts-v2/