GS400 2JZGTE Build in the Mitten State

 04-28-14, 08:08 PM
#47

Thanks for the kid words as always!
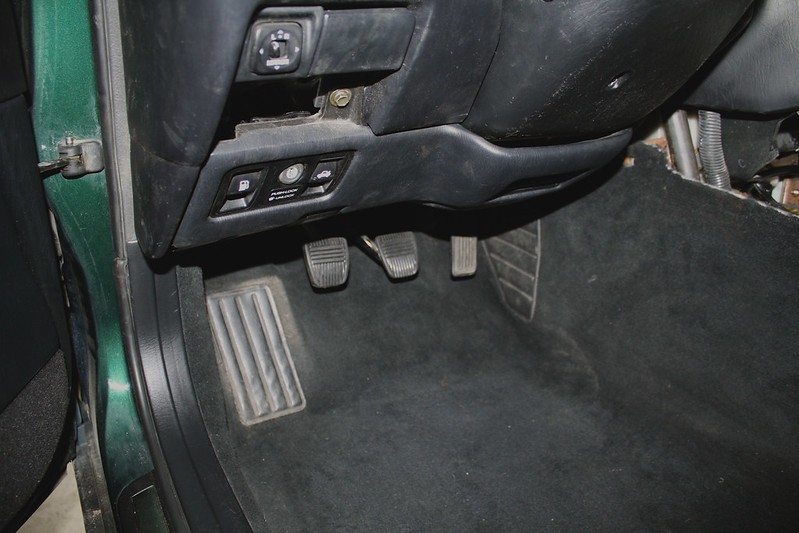
I used the JZA80 Supra clutch pedal and master cylinder assemblies. I had to hack it up pretty good to get it to fit and build some custom brackets to mount it securely. It was a bit tedious, but not terrible all said and done. It's a tight fit under there...
______________________________________________________________________________
I was finally able to finish the clutch pedal assembly. It took a lot of work to make brackets and support bracing for the clutch housing, but I finally got it to a point where I was happy with it. I cut the brake pedal down to a more fitting size for a manual transmission setup and I’m happy to say that even though clearances are tight and it isn’t perfect, I think it should work really well. Fitment was tight around the brake booster connectors near the clutch master cylinder, but that worked out nicely as well.
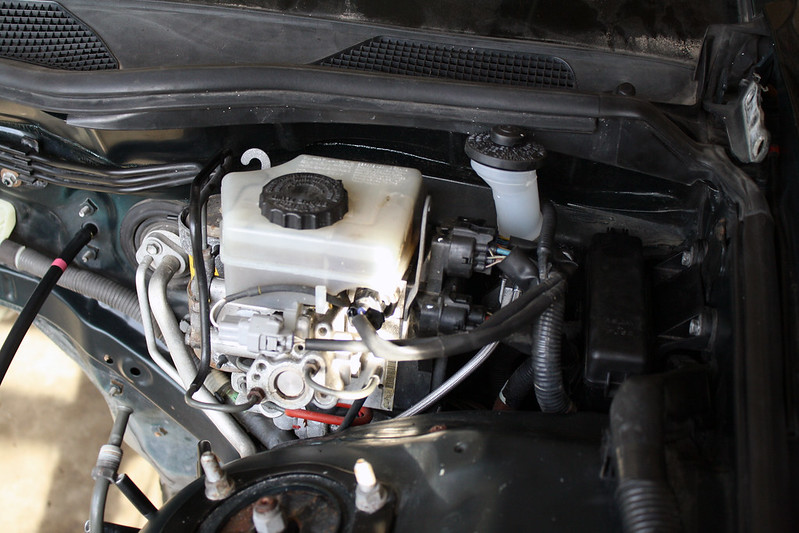
While I was at it, I installed the JZA80 throttle cable and the braided stainless steel clutch line. The engine bay had a decent amount of grimy build up in certain areas, especially on the front subframe, so I was able to clean that up a pretty good amount. I’ll probably hit that with a fresh coat of paint before dropping the engine in. I’m debating painting some areas of the firewall as well, but I know it’s going to be far from perfect under the hood for a while. For now the goal is to get the car running and clean things up when possible, but it won’t be nearly as clean as the 240′s engine bay was. Perhaps details like that will be addressed down the road, but when you start with a car requiring this much work you have to pick your battles.
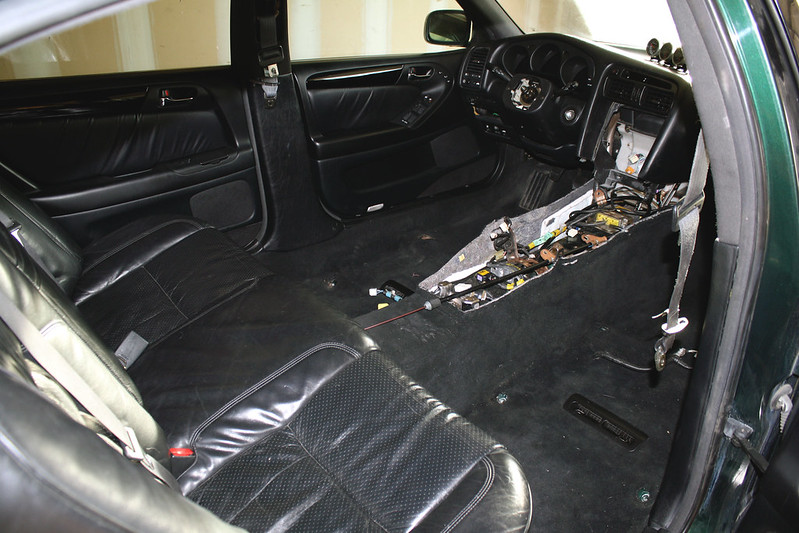
With the clutch pedal assembly finally complete, I was able to install the black dashboard and carpeting. Man, what a difference it makes to see the remaining interior pieces installed! It’s really starting to come together now and seeing the tan interior replaced by the much nicer black components really gave me a boost in motivation. I’m waiting on my steering wheel to arrive from Japan and still need to order a Works Bell hub for that, so it’ll stay like this for a little while. I was missing the mounting brackets for the radio and climate control, so I’m on hold there as well right now.
The gauges are just sitting on the dash for now, but those will need to be mounted and wired up down the road. I have oil pressure, oil temp, and boost for the time being. I’m considering adding a water temp gauge and possibly a wideband O2 as well, which will be mounted somewhere hidden if I do go that route. I could probably use Broadfield’s help for some of this stuff, but we’ll see what happens.

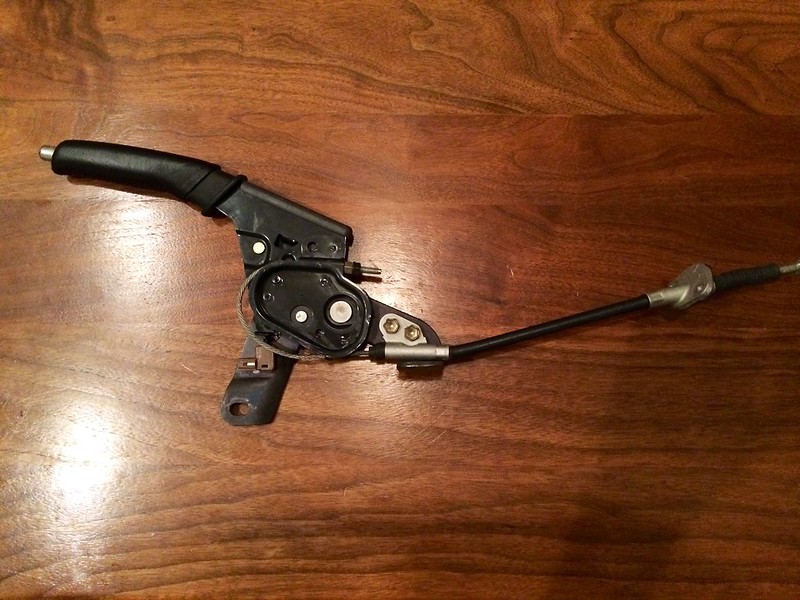
I also picked up a Lexus IS300 emergency brake assembly to retrofit. I’ve been doing some research on Yahoo! Japan and in Hyper Rev to get an idea of how to tackle this, so hopefully I will be able to figure something out.
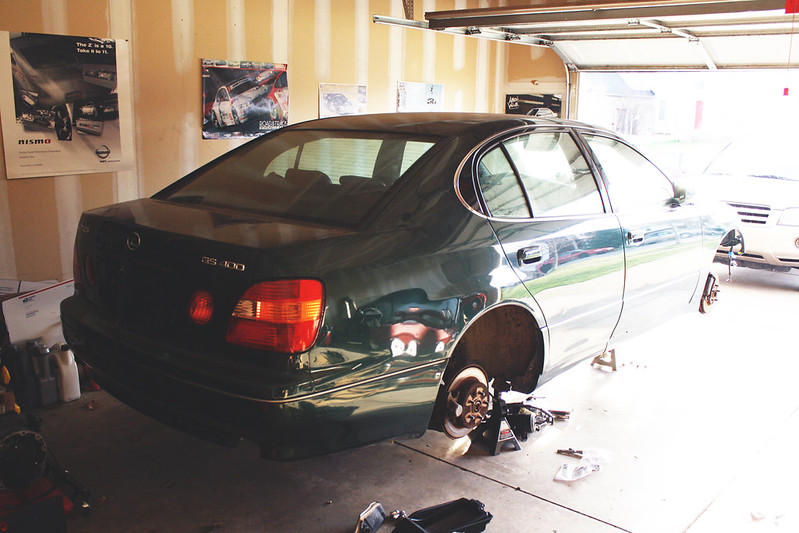
I got the car up on stands this weekend and cleaned things up a bit under it as well. I hadn’t seen it yet without the wheels on, so it was nice to take a peek at the brakes and other suspension stuff. I’ll need to do some work on the brakes before it’s all said and done, as well as repair a broken wheel stud. All in due time I’m sure…
Lastly, I also purchased the supplies needed to run my fuel return line from the pump assembly to the engine.

During the next week I am going to try to focus on finishing up a couple odd details in the interior, namely bolts for the rear seats and the center console, and perhaps take a crack at installing the emergency brake. From there it’s time to move on to maintenance work on the engine and transmission. I’m still really hoping to have that in the car by first or second week in May, but I’m quickly running out of time. We’ll see how it goes!
______________________________________________________________________________
I was finally able to finish the clutch pedal assembly. It took a lot of work to make brackets and support bracing for the clutch housing, but I finally got it to a point where I was happy with it. I cut the brake pedal down to a more fitting size for a manual transmission setup and I’m happy to say that even though clearances are tight and it isn’t perfect, I think it should work really well. Fitment was tight around the brake booster connectors near the clutch master cylinder, but that worked out nicely as well.
While I was at it, I installed the JZA80 throttle cable and the braided stainless steel clutch line. The engine bay had a decent amount of grimy build up in certain areas, especially on the front subframe, so I was able to clean that up a pretty good amount. I’ll probably hit that with a fresh coat of paint before dropping the engine in. I’m debating painting some areas of the firewall as well, but I know it’s going to be far from perfect under the hood for a while. For now the goal is to get the car running and clean things up when possible, but it won’t be nearly as clean as the 240′s engine bay was. Perhaps details like that will be addressed down the road, but when you start with a car requiring this much work you have to pick your battles.
With the clutch pedal assembly finally complete, I was able to install the black dashboard and carpeting. Man, what a difference it makes to see the remaining interior pieces installed! It’s really starting to come together now and seeing the tan interior replaced by the much nicer black components really gave me a boost in motivation. I’m waiting on my steering wheel to arrive from Japan and still need to order a Works Bell hub for that, so it’ll stay like this for a little while. I was missing the mounting brackets for the radio and climate control, so I’m on hold there as well right now.
The gauges are just sitting on the dash for now, but those will need to be mounted and wired up down the road. I have oil pressure, oil temp, and boost for the time being. I’m considering adding a water temp gauge and possibly a wideband O2 as well, which will be mounted somewhere hidden if I do go that route. I could probably use Broadfield’s help for some of this stuff, but we’ll see what happens.
I also picked up a Lexus IS300 emergency brake assembly to retrofit. I’ve been doing some research on Yahoo! Japan and in Hyper Rev to get an idea of how to tackle this, so hopefully I will be able to figure something out.
I got the car up on stands this weekend and cleaned things up a bit under it as well. I hadn’t seen it yet without the wheels on, so it was nice to take a peek at the brakes and other suspension stuff. I’ll need to do some work on the brakes before it’s all said and done, as well as repair a broken wheel stud. All in due time I’m sure…
Lastly, I also purchased the supplies needed to run my fuel return line from the pump assembly to the engine.
During the next week I am going to try to focus on finishing up a couple odd details in the interior, namely bolts for the rear seats and the center console, and perhaps take a crack at installing the emergency brake. From there it’s time to move on to maintenance work on the engine and transmission. I’m still really hoping to have that in the car by first or second week in May, but I’m quickly running out of time. We’ll see how it goes!
 04-29-14, 07:33 AM
#51
Thanks guys! This was definitely a bump in motivation. Excited to get that engine and transmission sitting in there...
It's actually listed for sale in this thread, but unfortunately it's pretty beat. Probably going in the trash this weekend:
https://www.clublexus.com/forums/2ge...trans-etc.html
It's actually listed for sale in this thread, but unfortunately it's pretty beat. Probably going in the trash this weekend:
https://www.clublexus.com/forums/2ge...trans-etc.html
05-05-14, 11:20 AM
#52
I’m pretty excited about my progress in the past week. Even though I didn’t spend a ton of time in the garage, I do feel like things are really starting to fall into place and pick up steam.
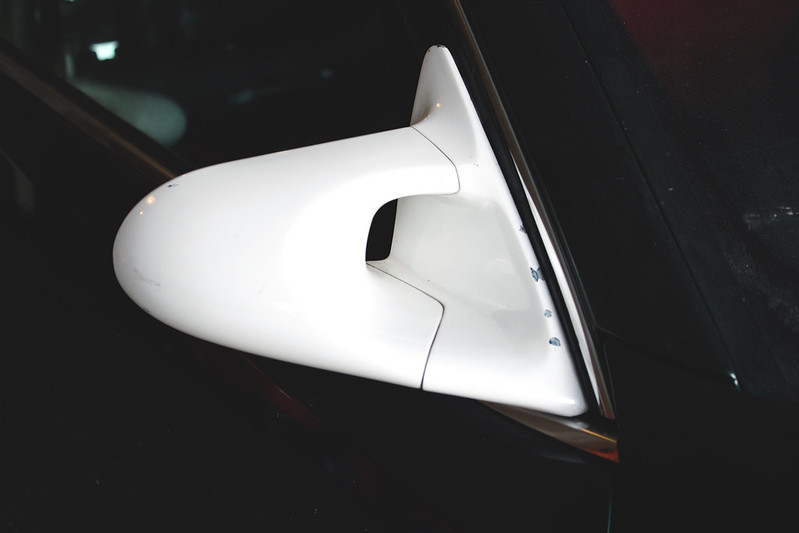
Things were kicked off last week by the arrival of a couple of goodies from Hong Kong. I’ve been searching for a pair of Ganador mirrors for this chassis since I decided I wanted to build one, but I really was not running into much info about them. I could barely even find any photos of cars that were running them. Junction Produce sells them as their own brand of mirrors, but if you know anything about me you know that I just wasn’t going to be content with that. Fortunately, a used pair popped up on eBay and I was able to snag them.

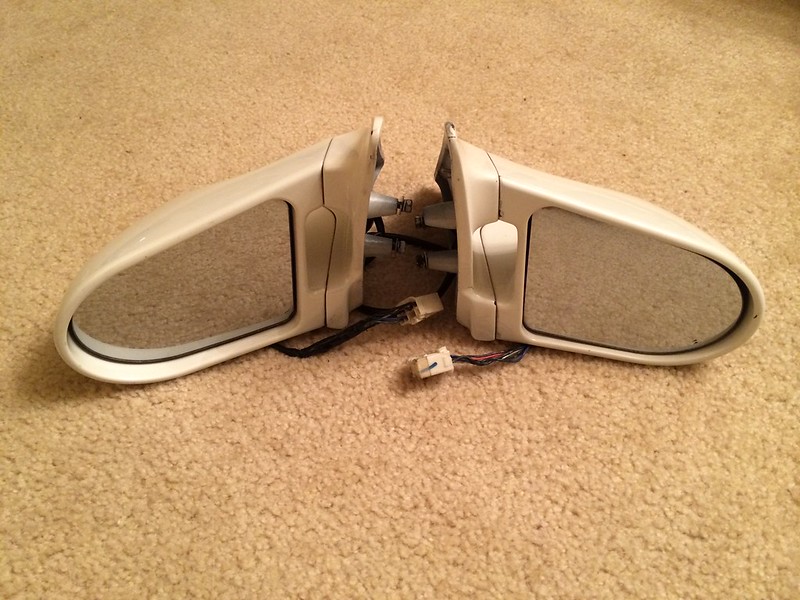
I will of course need to have them painted, but I am super pumped to have these. Though I really shouldn’t be focused on the exterior of the car at all right now, it’s nice to take a break and shift focus occasionally for a day or two to keep your interest in the project going strong. Had to toss one on for a quick test fit:
Little-known fact: I never take the time to try to make the power function on my Ganador mirrors work on any of my cars… haha.
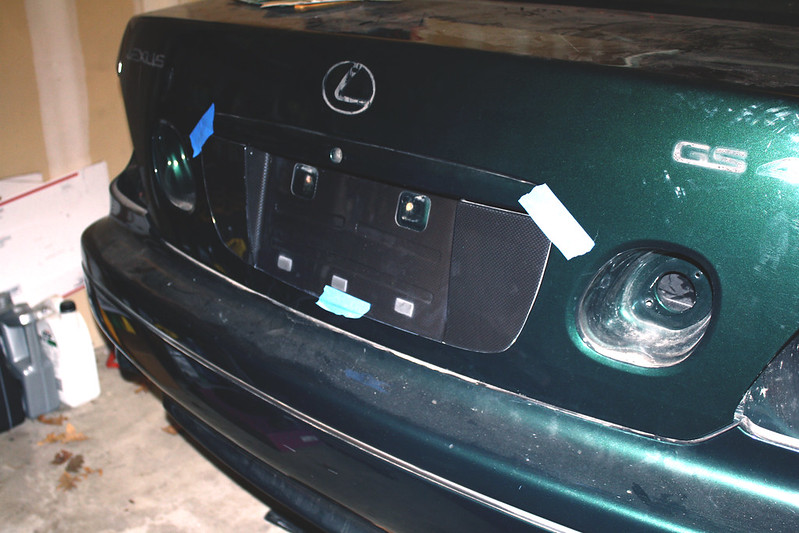
The same seller also had a Toyota Japan/TRD carbon fiber license plate garnish for sale so I was able to score a deal on both pieces. This is basically a fake CF trim panel that goes around the license plate and fills out the trunk opening a bit. I just thought it was a cool detail to have:

This will actually come in handy since I found out last week that my car had an aftermarket backup camera installed in the trunk resulting in a hole being hacked into the sheet metal near the license plate. This piece will cover that hole, even though I’ll probably end up having the trunk redone or replaced at some point anyway.
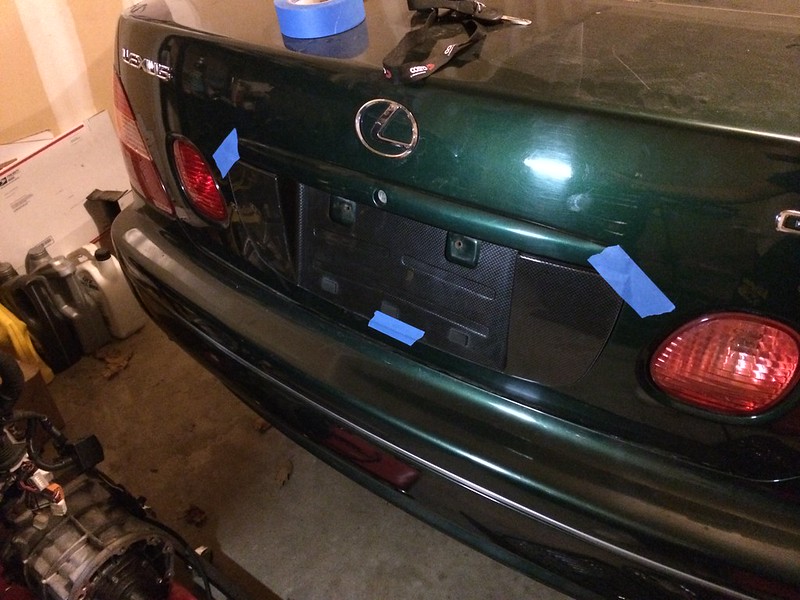
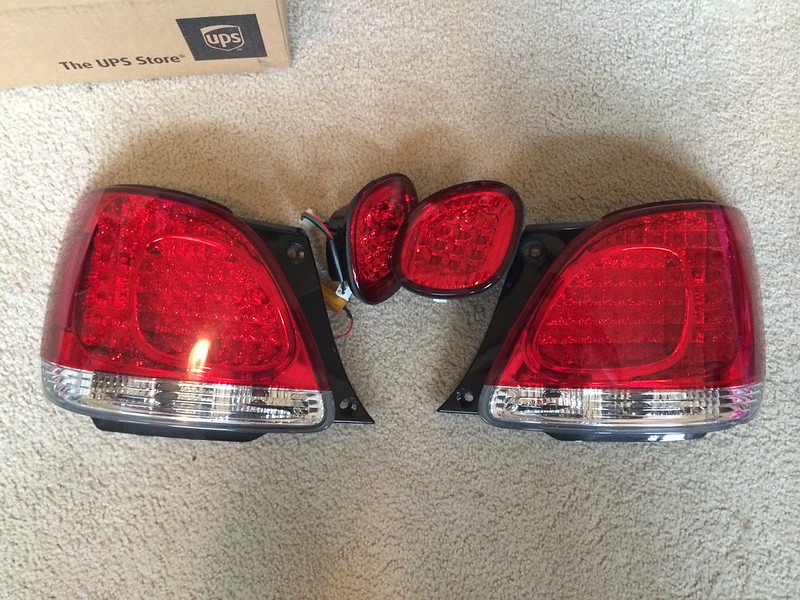
I decided to remove the emblems while I was messing around. I’m not sure if I will end up running the Toyota badges back here to match the front grille or if I’ll just leave the car badgeless. Fortunately I have plenty of time to decide. A friend of mine is hooking me up with a cheap set of LED tail lights, so I went ahead and removed the factory tails to make room for those when they arrive.
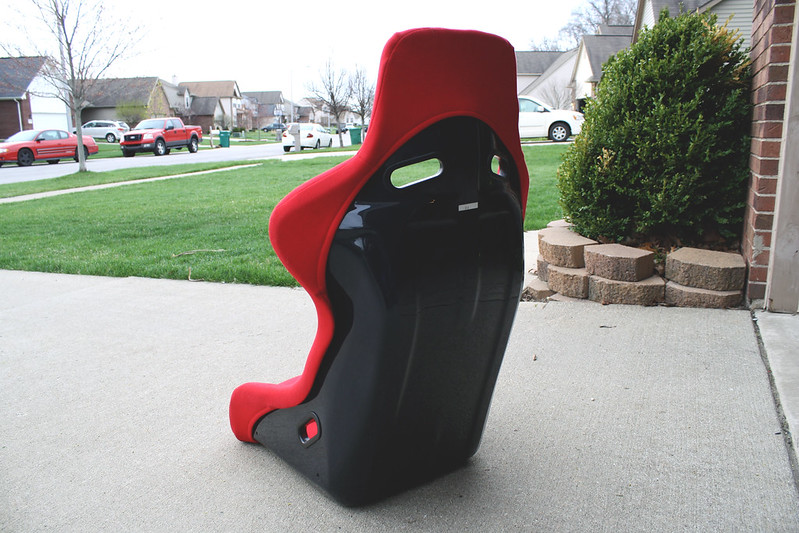
Another friend of mine on the West side of the state bought my Aristo automatic transmission to use as a core, as well as my front and rear tan seats. I went out and delivered those on Thursday. While I was out that way, I met up with a good friend from Indiana to pick up what is probably one of the cleanest Bride Zeta IIs left out there, let alone stateside:

Pretty excited that it has the head pillow with it as well. The back of the seat is virtually scratch-free. Pretty crazy…
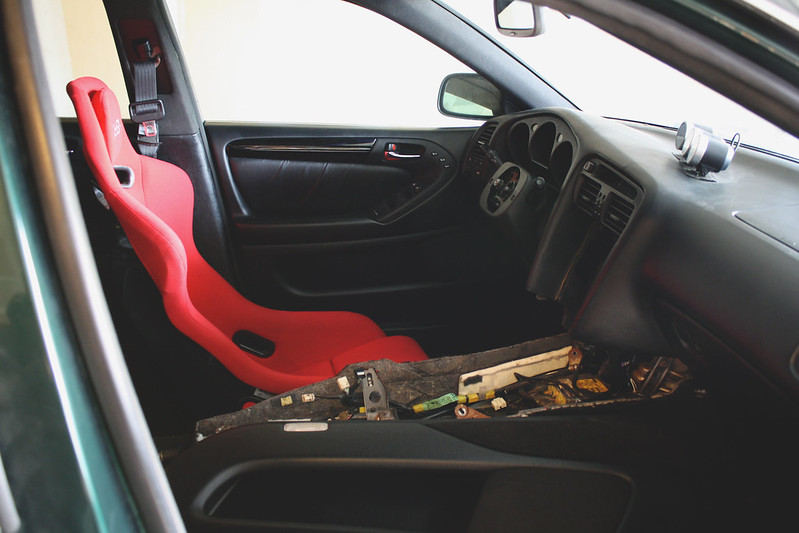
I have a passenger seat on the way from Japan as well, but we’ll just have to wait for a future update to see that. I was able to do some detective work on Bride Japan’s site and found the seat rails I need for each side, so I’m sure there will be a wait on those when the time comes. I had to toss it in without the rail for a preview though:
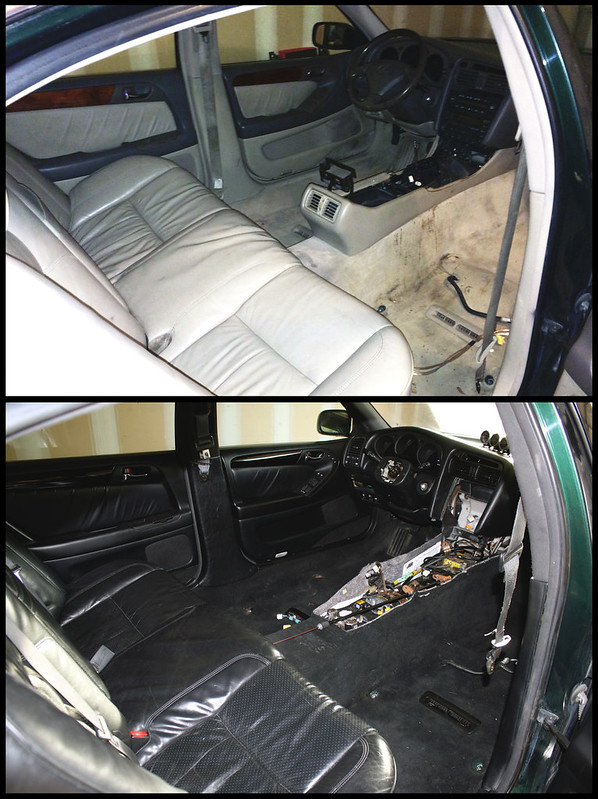
I did a quick comparison picture of the interior when I got the car two months ago and how it sits today (even though I clearly still have some work to do.) I can’t wait to see this completed- I think it should be pretty cool.
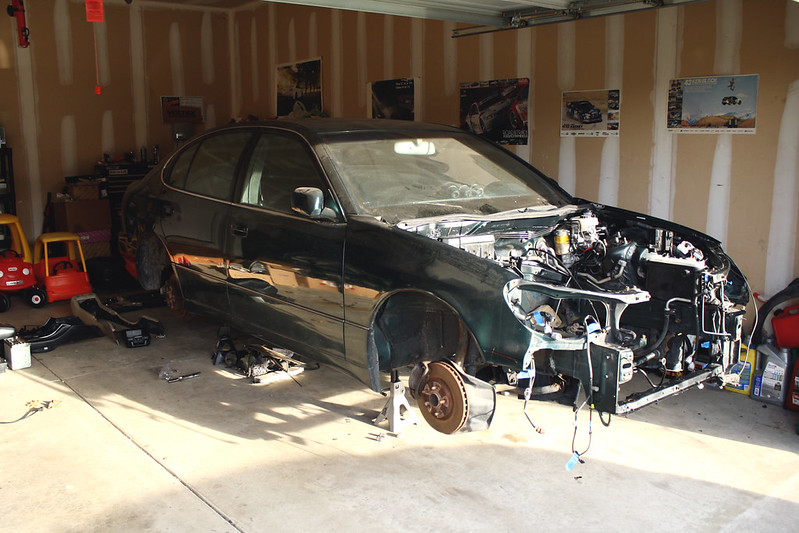
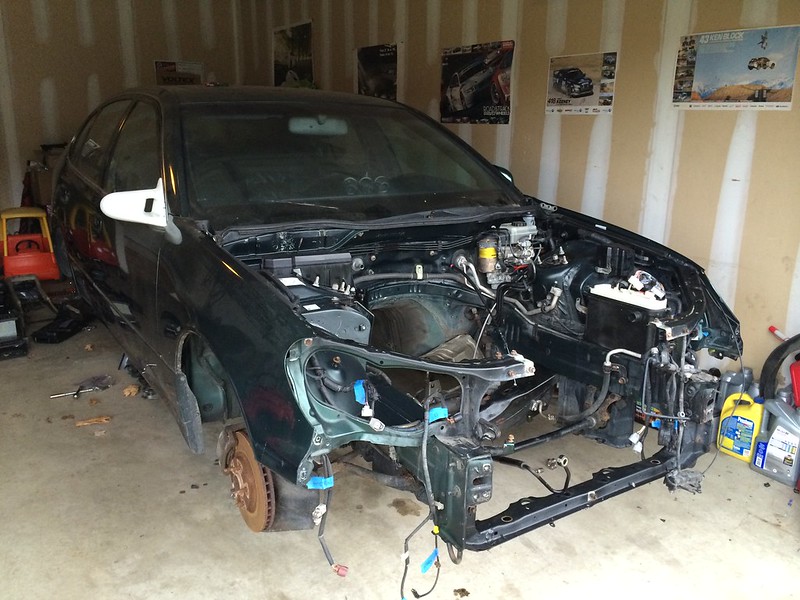
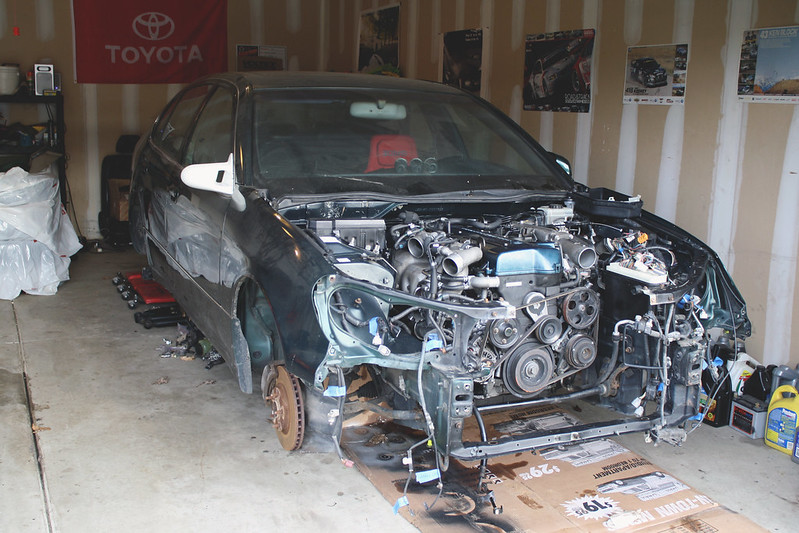
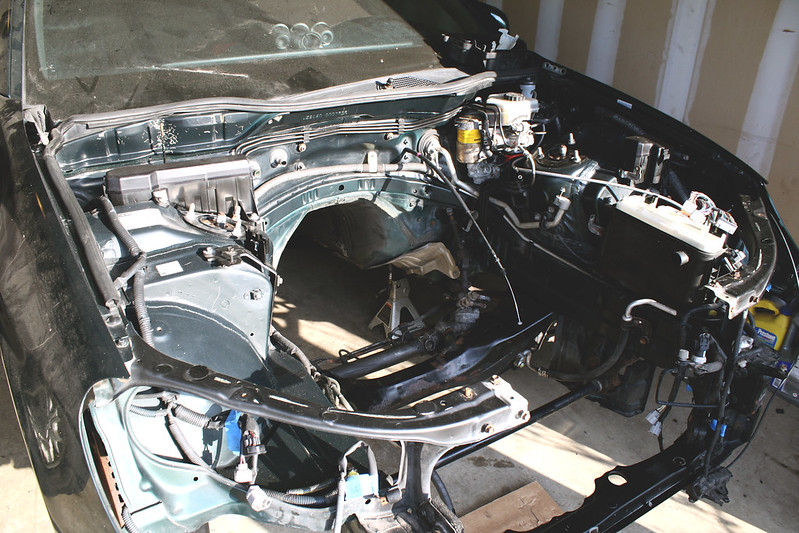
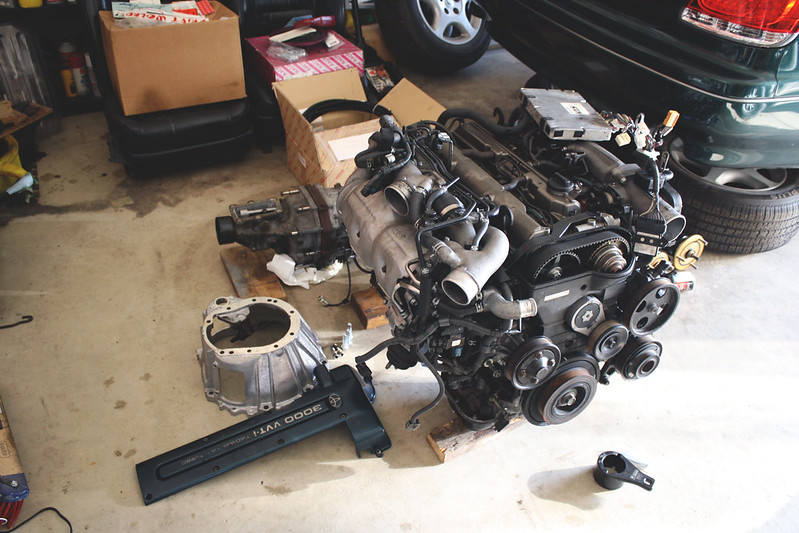
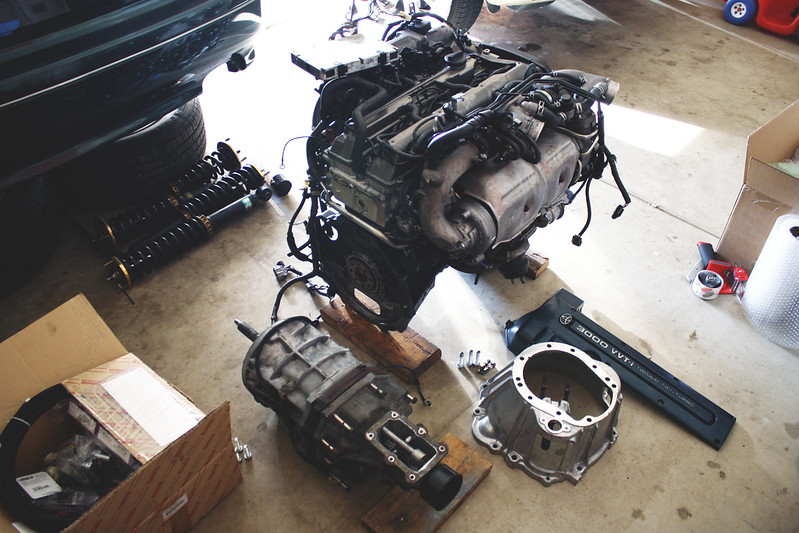
With the interior in decent enough shape for now, I moved on to actually trying to get this thing running over the weekend. I’m waiting on a tool and a new thermostat before I dive into all of the engine maintenance and assembly, so I decided to mock up the engine and transmission in the car. I was curious to see how things fit since I had heard about various issues with the firewall and the heater core fittings with the swap.
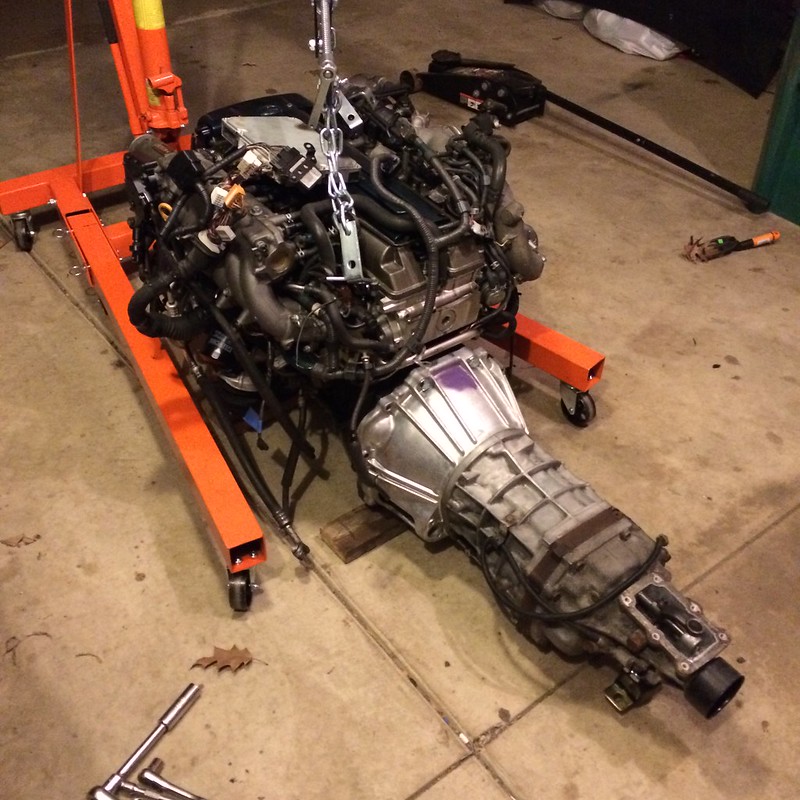
Unfortunately I learned the hard way that if you pick up and tilt a 2JZGTE with oil in it and without a clutch or flywheel installed, the oil will politely excuse itself from the engine and leak out the bellhousing. Annoying, but lesson learned.
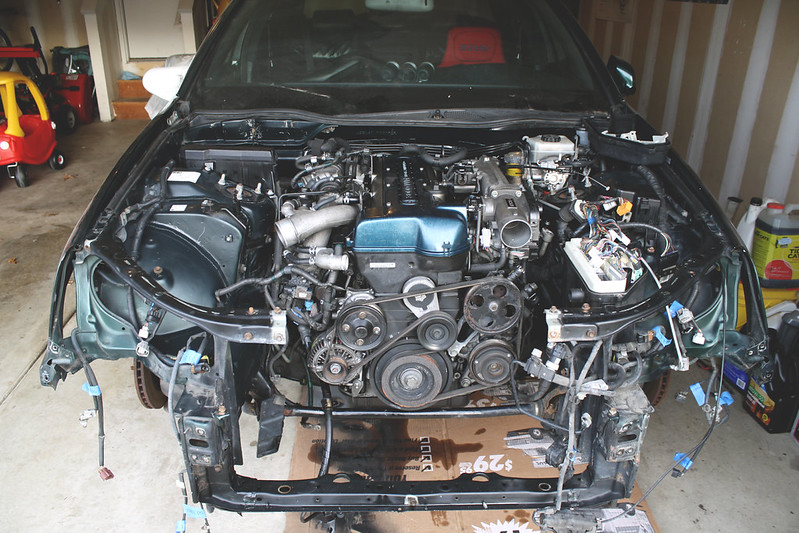
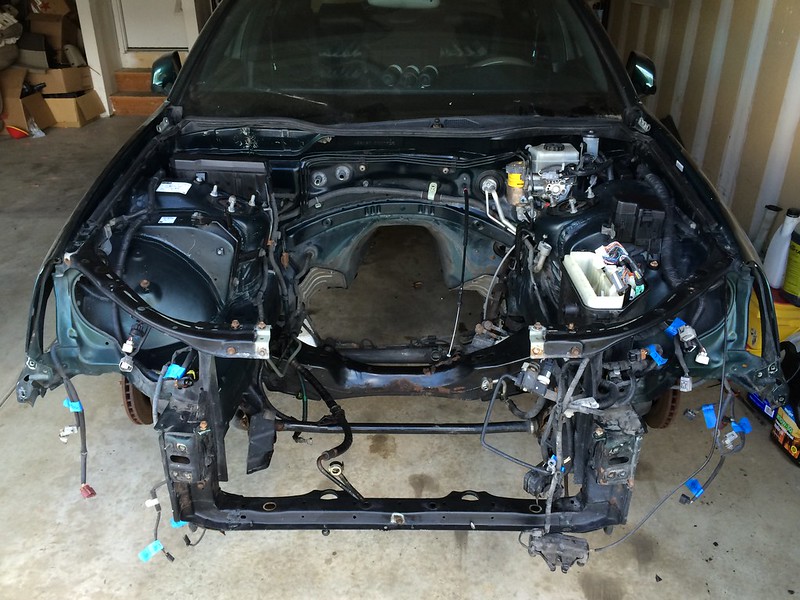
I was actually pretty surprised how smooth dropping the engine went by myself. It’s really nice that the core support is removable on this car so that I don’t have to worry about the top of the cherry picker hitting the garage door. I’ll have to modify the top port for the heater core somehow to clear the twin turbos, but otherwise things look pretty solid overall.

I also spent some time assembling the clutch release hub and bearing so that the clutch assembly is all ready to go in when the engine and transmission come back out:
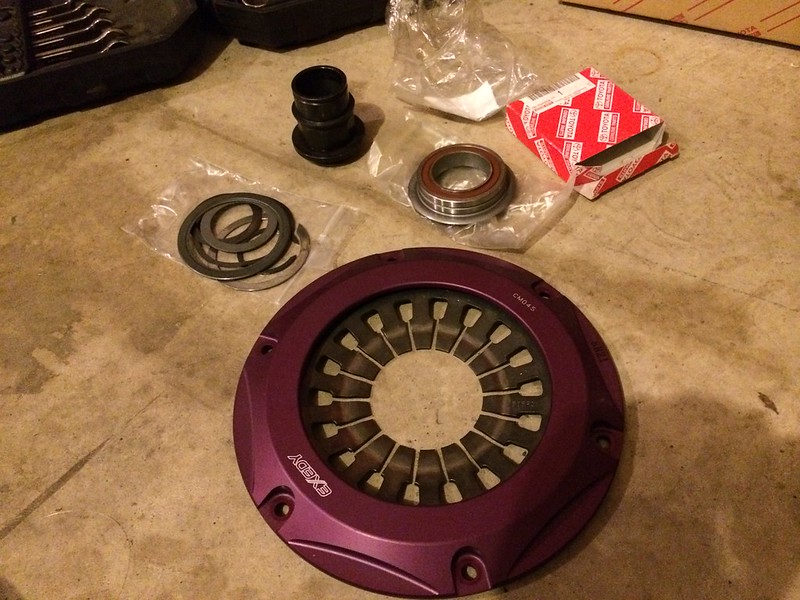
I’m having a hard time getting the final snap ring in place by myself, so I’ll have to keep trying with some assistance to see if I can take care of that. Shouldn’t be too bad though, I just really need another set of hands.

I picked up a set of used Tein Comfort Sport coilovers that a kid was selling as-is. I guess they came in the trunk of a GS he just bought and he wasn’t sure of the condition they were in, so he let them go super cheap. I wasn’t planning to get into these just yet, but it was definitely worth the gamble. I think at least one of them may be leaking, so I’ll probably end up having Tein rebuild them if possible.

The plan of attack for this week? The first order of business is to take the necessary measurements for the driveshaft and shifter extension so that I can get the order in for those. I am also going to install the Drift Motion transmission mount to make sure that’s lined up and set to go when things are bolted in for good. As soon as those things are done, I’ll pull the drivetrain back out to go through the engine and transmission maintenance items to be sure everything is fresh and ready to go. I’m hoping to have that work completed and everything in the car again within two weeks if possible.
Hopefully the progress continues through the next couple weeks...
Things were kicked off last week by the arrival of a couple of goodies from Hong Kong. I’ve been searching for a pair of Ganador mirrors for this chassis since I decided I wanted to build one, but I really was not running into much info about them. I could barely even find any photos of cars that were running them. Junction Produce sells them as their own brand of mirrors, but if you know anything about me you know that I just wasn’t going to be content with that. Fortunately, a used pair popped up on eBay and I was able to snag them.
I will of course need to have them painted, but I am super pumped to have these. Though I really shouldn’t be focused on the exterior of the car at all right now, it’s nice to take a break and shift focus occasionally for a day or two to keep your interest in the project going strong. Had to toss one on for a quick test fit:
Little-known fact: I never take the time to try to make the power function on my Ganador mirrors work on any of my cars… haha.
The same seller also had a Toyota Japan/TRD carbon fiber license plate garnish for sale so I was able to score a deal on both pieces. This is basically a fake CF trim panel that goes around the license plate and fills out the trunk opening a bit. I just thought it was a cool detail to have:
This will actually come in handy since I found out last week that my car had an aftermarket backup camera installed in the trunk resulting in a hole being hacked into the sheet metal near the license plate. This piece will cover that hole, even though I’ll probably end up having the trunk redone or replaced at some point anyway.
I decided to remove the emblems while I was messing around. I’m not sure if I will end up running the Toyota badges back here to match the front grille or if I’ll just leave the car badgeless. Fortunately I have plenty of time to decide. A friend of mine is hooking me up with a cheap set of LED tail lights, so I went ahead and removed the factory tails to make room for those when they arrive.
Another friend of mine on the West side of the state bought my Aristo automatic transmission to use as a core, as well as my front and rear tan seats. I went out and delivered those on Thursday. While I was out that way, I met up with a good friend from Indiana to pick up what is probably one of the cleanest Bride Zeta IIs left out there, let alone stateside:
Pretty excited that it has the head pillow with it as well. The back of the seat is virtually scratch-free. Pretty crazy…
I have a passenger seat on the way from Japan as well, but we’ll just have to wait for a future update to see that. I was able to do some detective work on Bride Japan’s site and found the seat rails I need for each side, so I’m sure there will be a wait on those when the time comes. I had to toss it in without the rail for a preview though:
I did a quick comparison picture of the interior when I got the car two months ago and how it sits today (even though I clearly still have some work to do.) I can’t wait to see this completed- I think it should be pretty cool.
With the interior in decent enough shape for now, I moved on to actually trying to get this thing running over the weekend. I’m waiting on a tool and a new thermostat before I dive into all of the engine maintenance and assembly, so I decided to mock up the engine and transmission in the car. I was curious to see how things fit since I had heard about various issues with the firewall and the heater core fittings with the swap.
Unfortunately I learned the hard way that if you pick up and tilt a 2JZGTE with oil in it and without a clutch or flywheel installed, the oil will politely excuse itself from the engine and leak out the bellhousing. Annoying, but lesson learned.
I was actually pretty surprised how smooth dropping the engine went by myself. It’s really nice that the core support is removable on this car so that I don’t have to worry about the top of the cherry picker hitting the garage door. I’ll have to modify the top port for the heater core somehow to clear the twin turbos, but otherwise things look pretty solid overall.
I also spent some time assembling the clutch release hub and bearing so that the clutch assembly is all ready to go in when the engine and transmission come back out:
I’m having a hard time getting the final snap ring in place by myself, so I’ll have to keep trying with some assistance to see if I can take care of that. Shouldn’t be too bad though, I just really need another set of hands.
I picked up a set of used Tein Comfort Sport coilovers that a kid was selling as-is. I guess they came in the trunk of a GS he just bought and he wasn’t sure of the condition they were in, so he let them go super cheap. I wasn’t planning to get into these just yet, but it was definitely worth the gamble. I think at least one of them may be leaking, so I’ll probably end up having Tein rebuild them if possible.
The plan of attack for this week? The first order of business is to take the necessary measurements for the driveshaft and shifter extension so that I can get the order in for those. I am also going to install the Drift Motion transmission mount to make sure that’s lined up and set to go when things are bolted in for good. As soon as those things are done, I’ll pull the drivetrain back out to go through the engine and transmission maintenance items to be sure everything is fresh and ready to go. I’m hoping to have that work completed and everything in the car again within two weeks if possible.
Hopefully the progress continues through the next couple weeks...

 05-13-14, 12:41 PM
#60
Thanks!
I bought it from JDM Engine World in New York. It turns over nicely by hand, looks pretty clean, and the compression videos they sent me were good- so hopefully it works out OK for me. I haven't had a chance to inspect the condition of the turbos yet. It's always a bit of a crap shoot with old engines from Japan like this no matter where you buy it though.
Thanks Nigel, doing what I can with limited garage time. Sure am jealous of that turbo you just strapped on the car, haha.
I wish! His car is just too darn nice. So jealous it is a true Aristo, haha.
___________________________________________________________
I didn�t spend much time in the garage this week, but I made a little bit of progress. With the engine and transmission test fitted in the car, I measured for the one piece driveshaft and shifter extension.
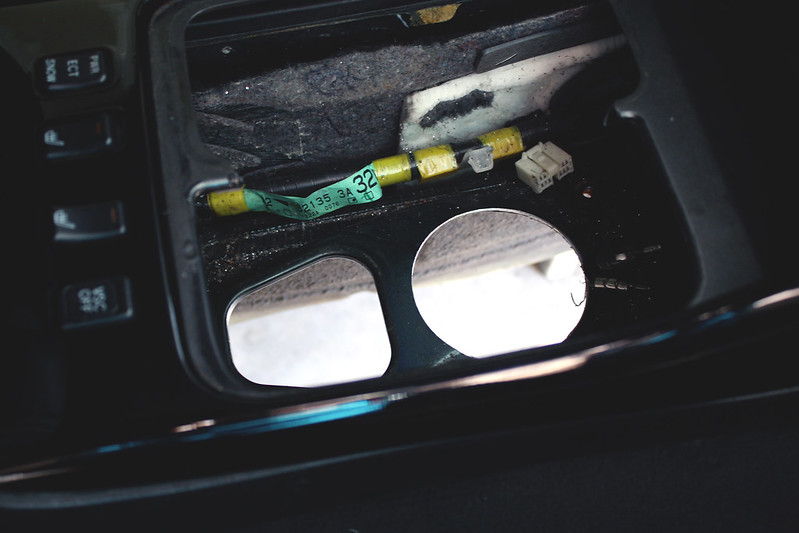
After test fitting the center console, I found that positioning the manual shifter through the existing hole for the factory automatic transmission linkage left the shifter too far back, so I had to cut a new hole in the transmission tunnel for the shifter to reside within. A hole saw bit made quick work of this:

While the engine was in there, I also noticed that the heater core fittings are contacting the back of one of the turbo assemblies. I�ll have to find a way to modify this to clear (or just bolt on a big single- hmmmm�)

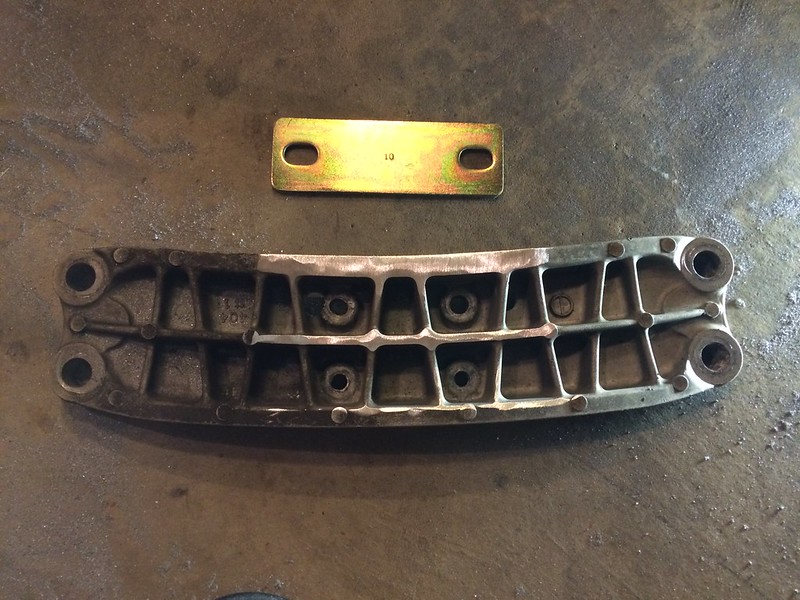
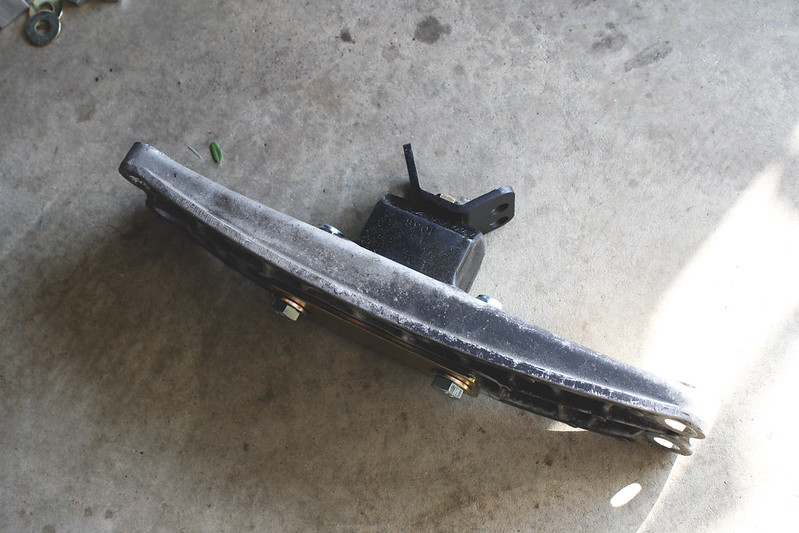
I mocked up the Drift Motion/ Energy Suspension transmission mount and after a bit of grinding I was able to get it to fit perfectly. The back side of the factory transmission crossmember had to be ground down to allow for the mounting plate to sit correctly and some new holes needed to be marked and drilled, but otherwise it went together pretty easily.
After the necessary measurements were taken and I was finished mocking things up, I pulled the drivetrain back out of the car and began disassembly. My next step will be to go through the engine and transmission to install all of the maintenance items I�ve collected.
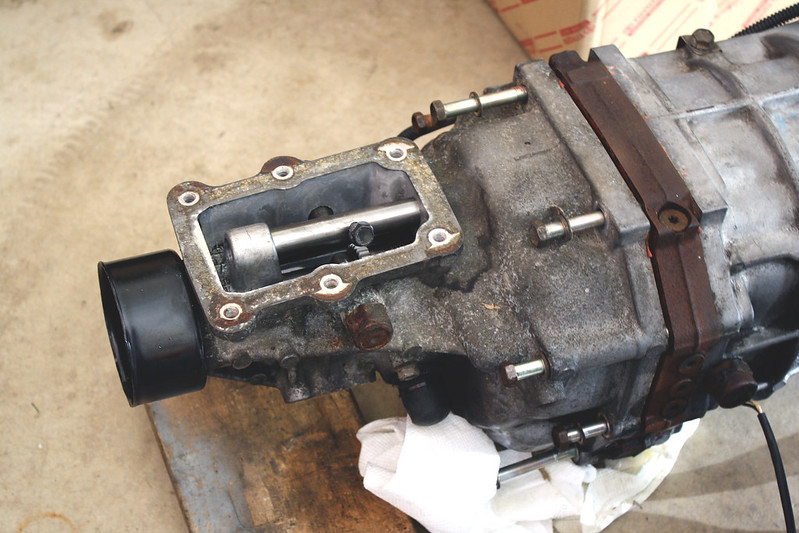
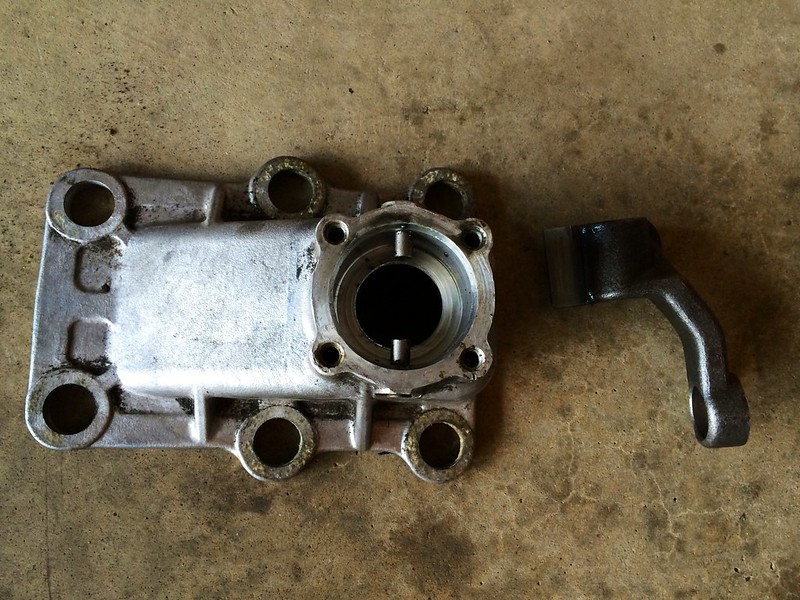
I pulled the case of the R154 apart to remove the shifter housing and linkage. I shipped these pieces out to be extended 2.5″ at Freed Engineering out East and should hopefully have them back sometime next week.
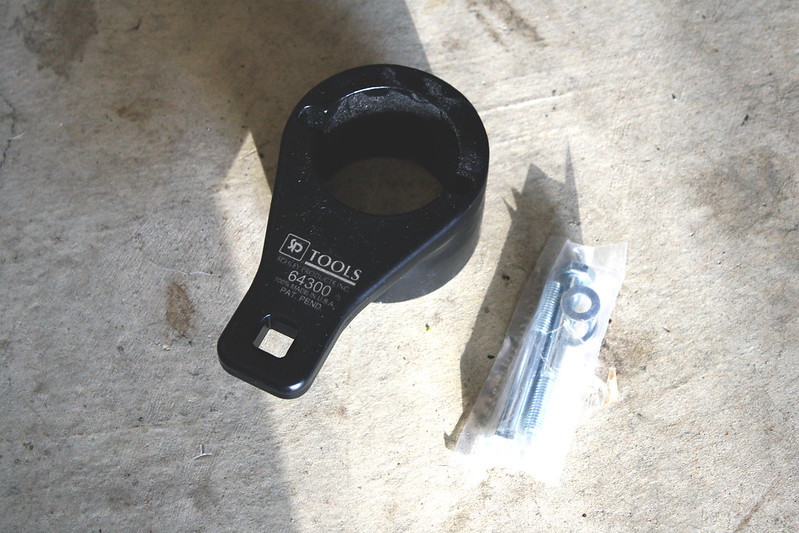
The tool to remove the crank pulley arrived so that I can replace the timing belt:
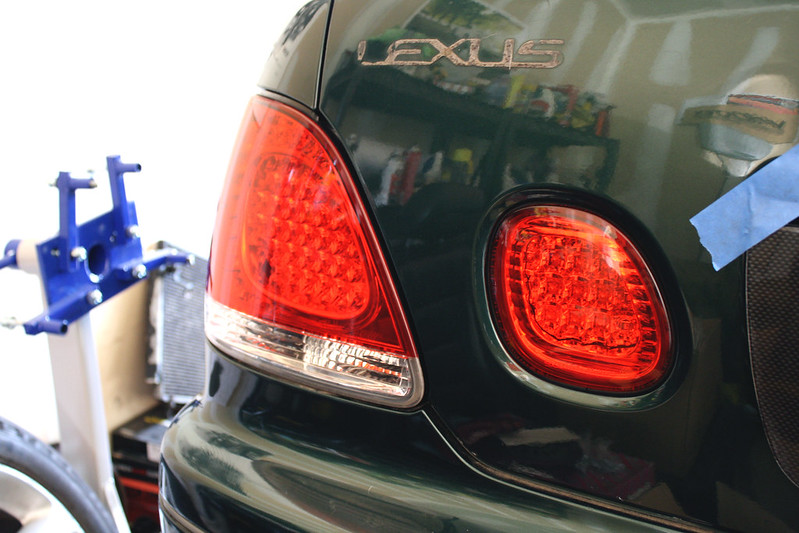
I also scored a cheap pair of LED tail lights from a friend. One of them needs a resistor replaced, but I couldn�t pass them up for the price. I�ll have to see if I can get them to work at some point later on, but they look cool on the car in the mean time.

I�m hoping to spend my time on engine maintenance and cleanup this week. I should be able to move ahead with the timing belt service, water pump, thermostat, and miscellaneous gaskets and seals. As soon as that�s complete I can begin the final assembly of the engine and transmission.