Project Snail's Pace
 05-15-14, 07:25 PM
#31
Lexus Test Driver
SSmith, the difference is in the profile of the tire. You are running a 295/30/19 which has a rolling diameter of 659.6mm. Scereal is running a 315/25/19 which has a rolling diameter of 640.1mm. Your sidewalls are taller then his, therefore your car will be taller by almost 10mm, given the same suspension height. Thats why you had to raise it.
 05-18-14, 02:34 PM
#32
Got to spend a couple hours with the car today. No pics unfortunately this time just minor updates.
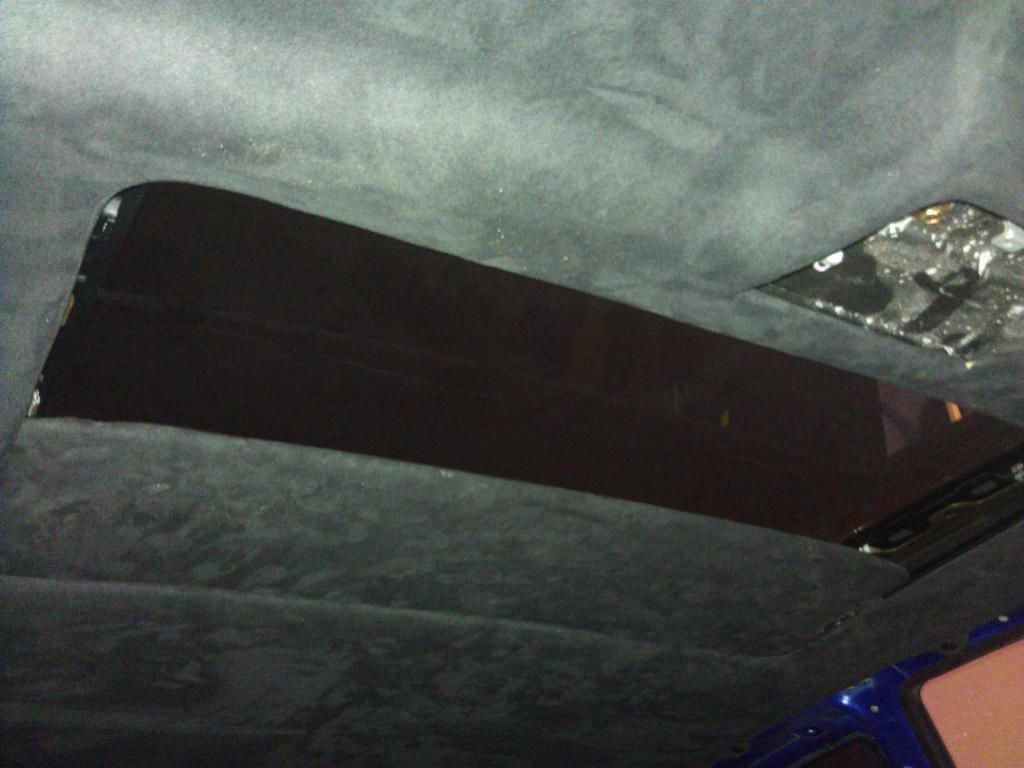
Got the headliner down and managed to pull the sunroof shade out without dropping the whole assembly. Just have to be super careful and it came out intact. That should all get covered in suede this week and reinstalled next weekend.
Pulled dildomatic shifter out but found that at least in a 97 sc3 the shift linkage is too long for the gated shifter. And yes I have the proper one, not the sc4 unit. I have a linkage on my aristo trans that I'm going to try next weekend but otherwise I'll try to source a 98 sc3 linkage.
Got another little mod in the works but I won't spill the beans on it just yet. Not too many guys do it seems like and I'm not sure why but I think it'll be sweet.
05-19-14, 04:59 PM
#34
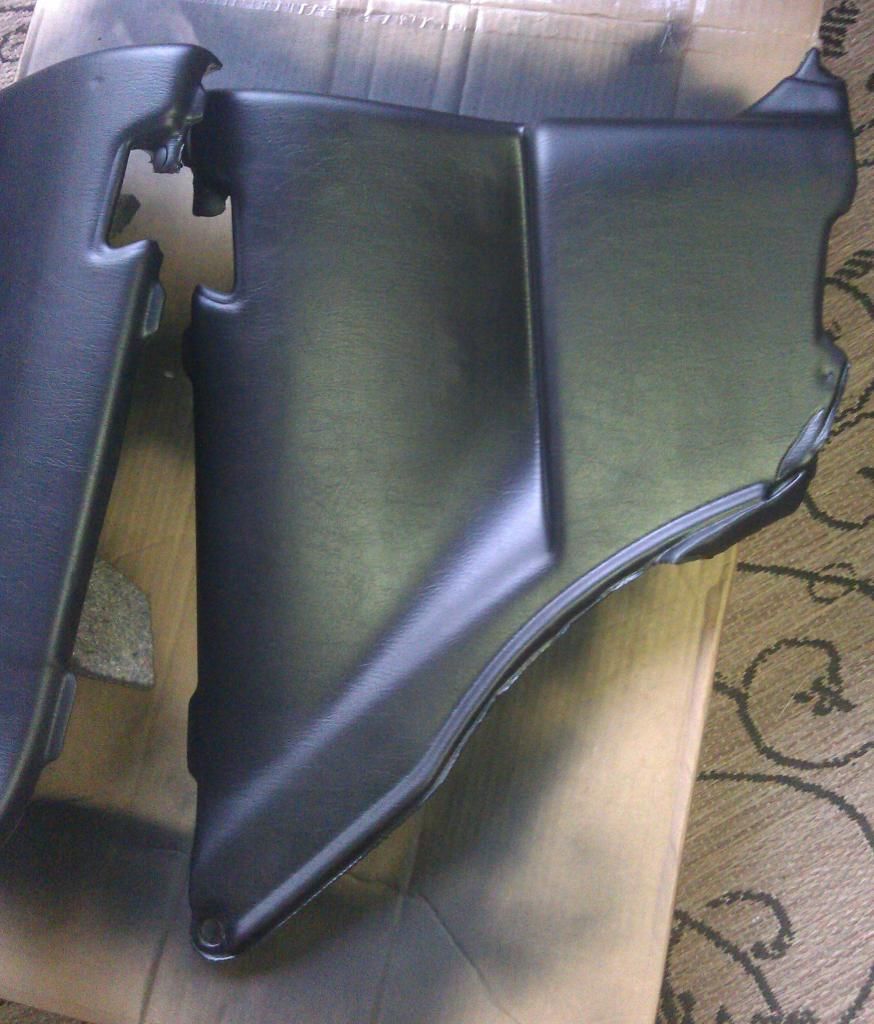
Got a little cosmetic progress done today. Nothing major just the rear trim panels dyed black. I went the proper way and they turned out amazing looking. Clean a few times with SEM soap and a 400 grit sanding sponge, use their leather prep and then 3 light coats of classic coat in midnight black. This is not the same as the color coat in landau black but it looks the same. This is a formula for leather not plastic so should work better.
one coat
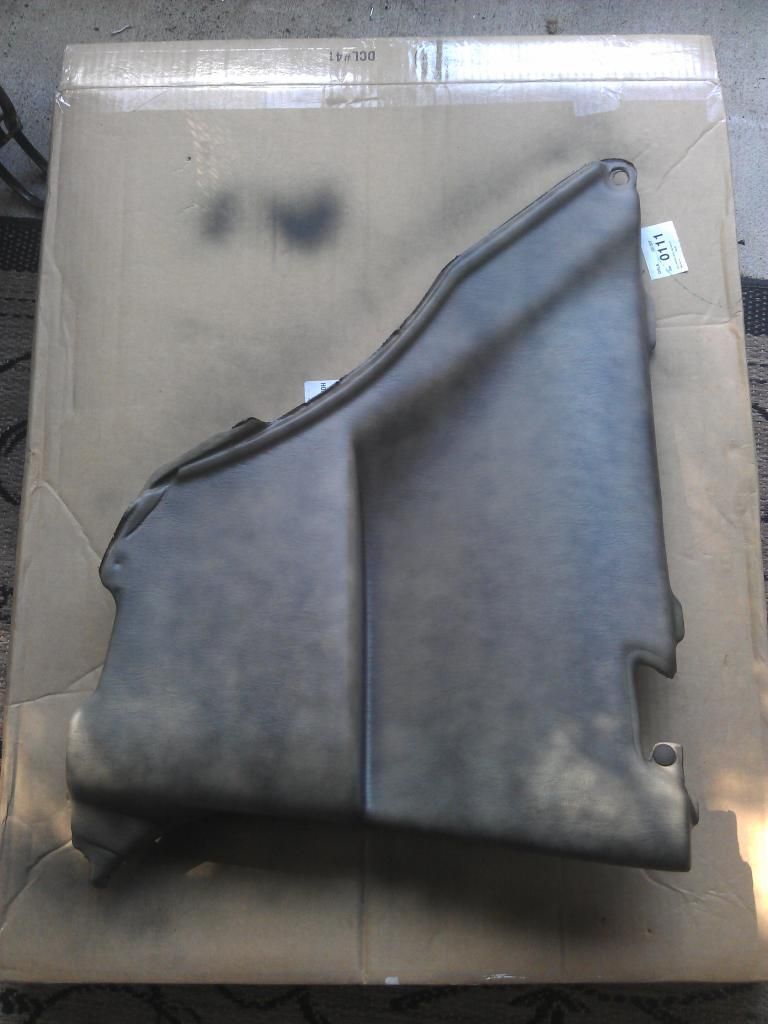
three coats
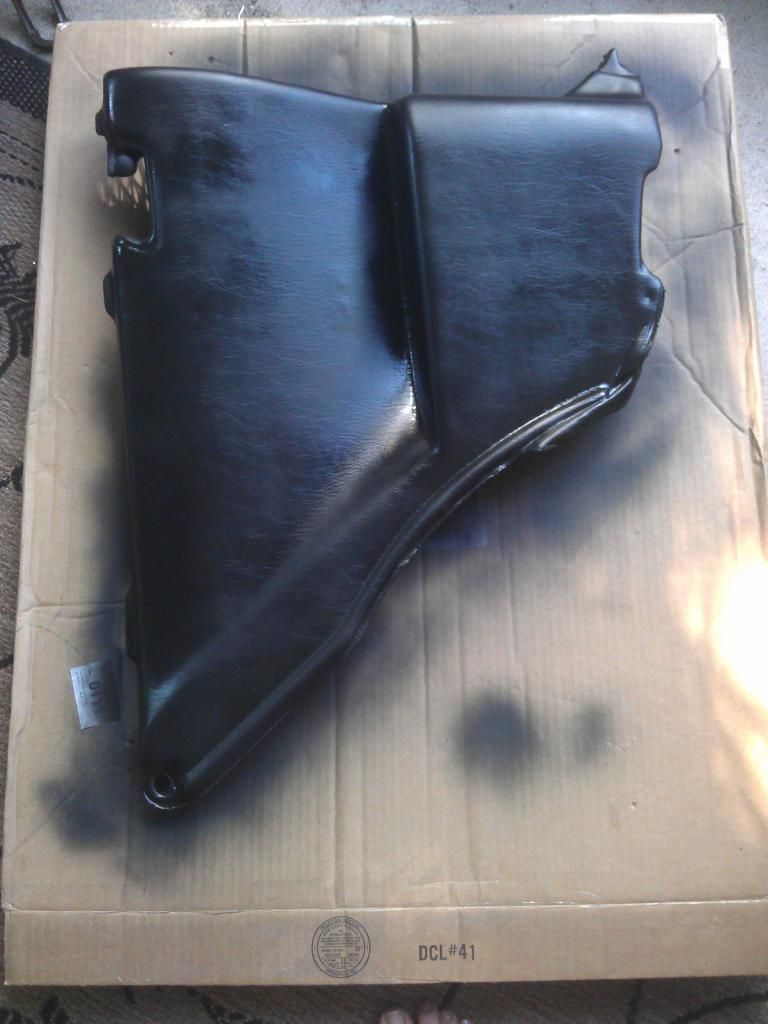
final product, looks OEM
one coat
three coats
final product, looks OEM
05-20-14, 05:39 PM
#35
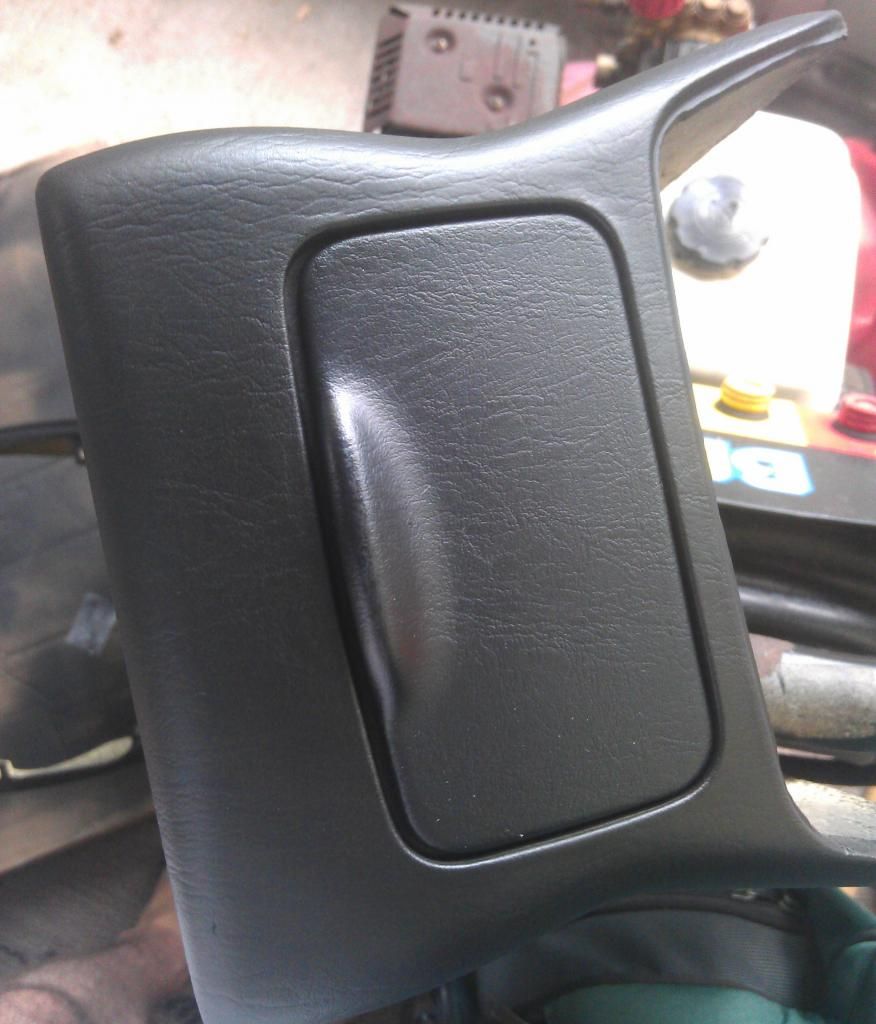
Got the center console painted today. Here's a good shot that shows just how well this matches OEM. the ashtray door was black from the factory, the rest was not.
Also got the soldering done on my other little project, ready to install with the new interior.
Also got the soldering done on my other little project, ready to install with the new interior.
05-28-14, 01:07 PM
#37
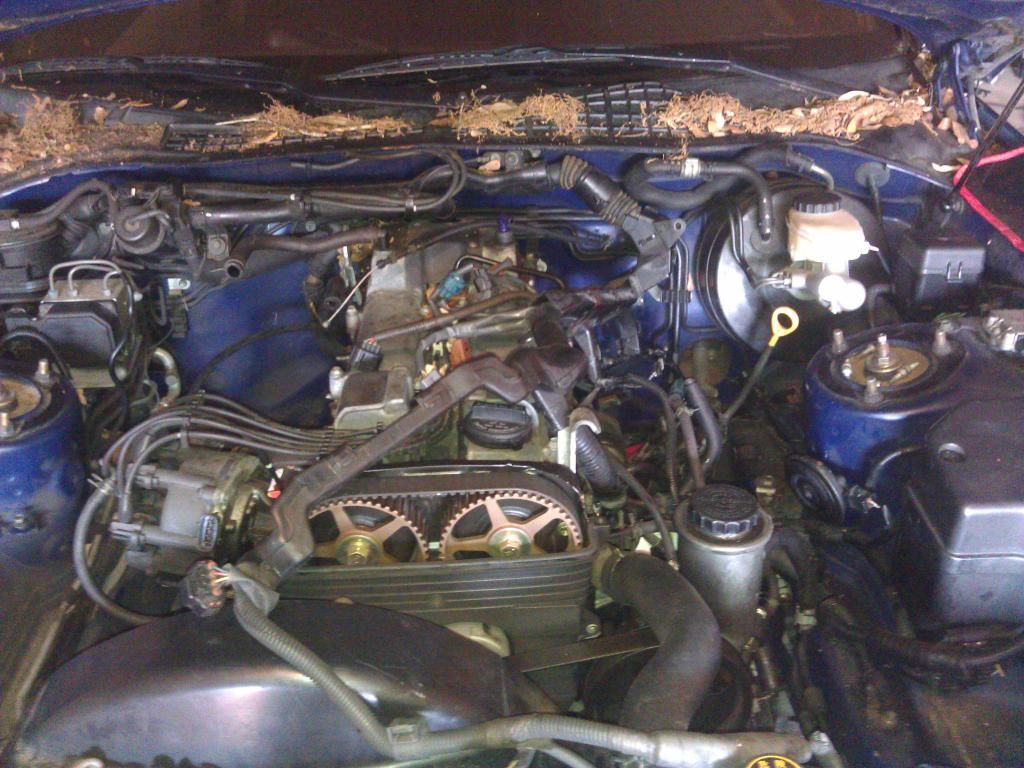
I decided to just dive in head first and get busy tearing stuff down. It was friggin hot which slowed me down plus I had to move my toolbox to the new shop which is no small task. I got the intake completely out and the exhaust down to the stock midpipe. Ran into a couple unexpected issues so called it a day.
Here she sits now
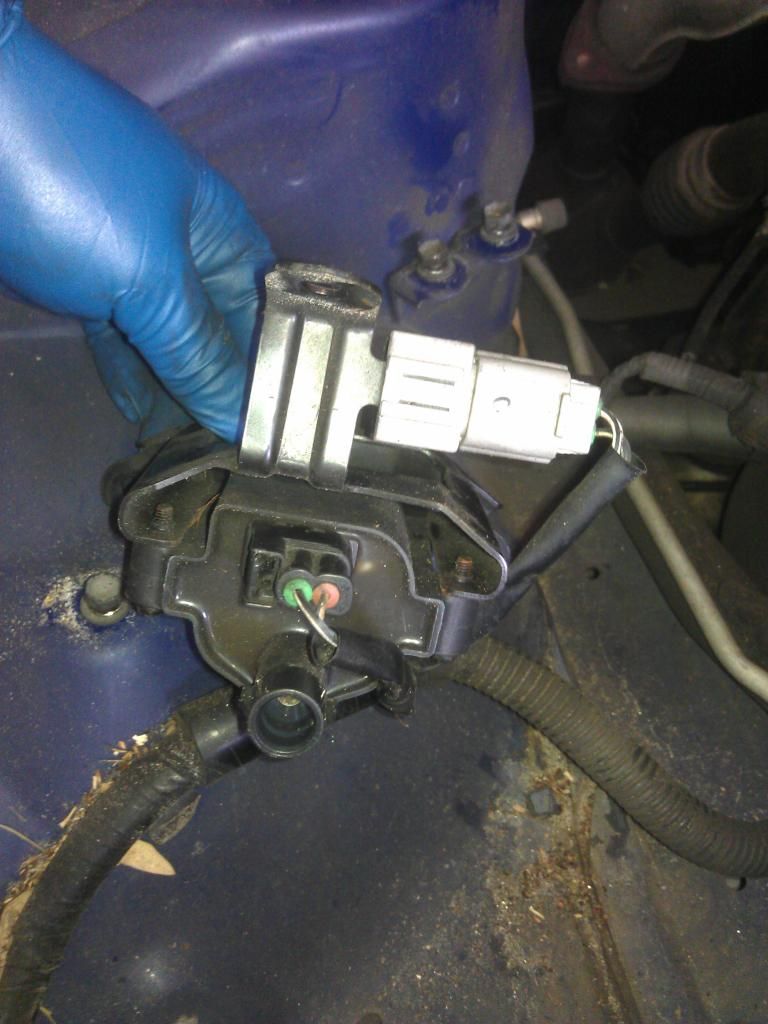
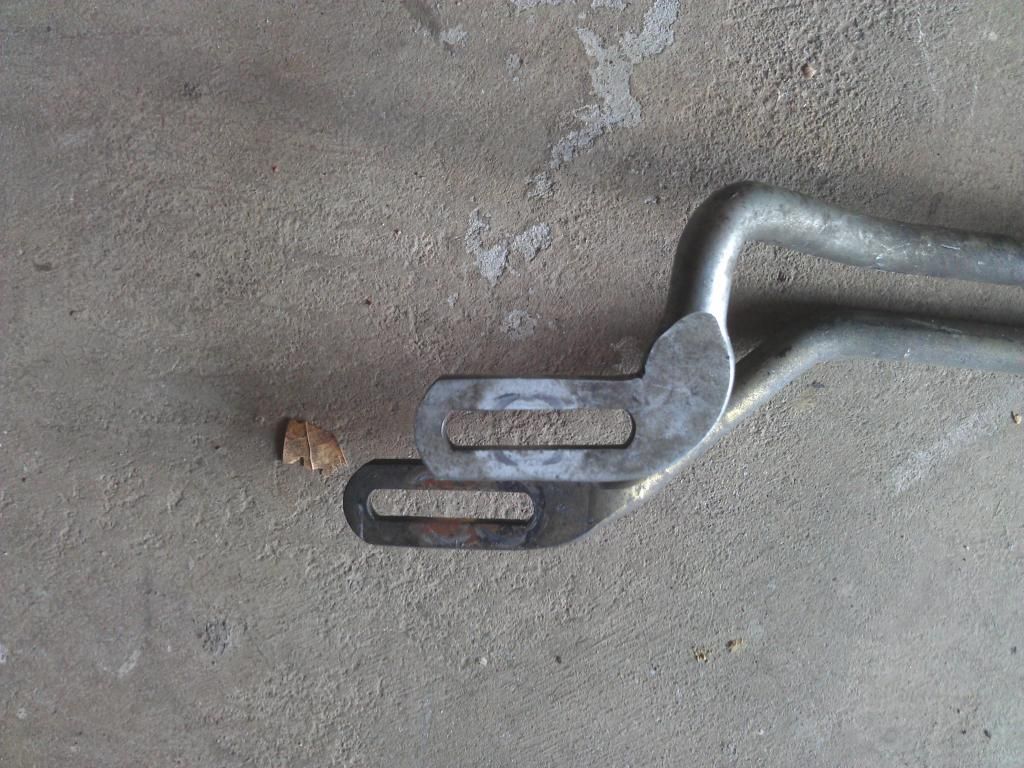
Anyone know what this part is? it's attached to the coil bracket. seems to be some kind of relay or something.
Next steps will be to address the coolant line that ran through the throttle body, clean up the crud as best I can and get the pan drilled for oil return and get oil feed sorted. Going to try my best to leave the wiring looms intact but they might drive me nuts with the new setup and may end up having to reloom it all. Time will tell on that one.
Here she sits now
Anyone know what this part is? it's attached to the coil bracket. seems to be some kind of relay or something.
Next steps will be to address the coolant line that ran through the throttle body, clean up the crud as best I can and get the pan drilled for oil return and get oil feed sorted. Going to try my best to leave the wiring looms intact but they might drive me nuts with the new setup and may end up having to reloom it all. Time will tell on that one.
06-02-14, 02:12 PM
#38
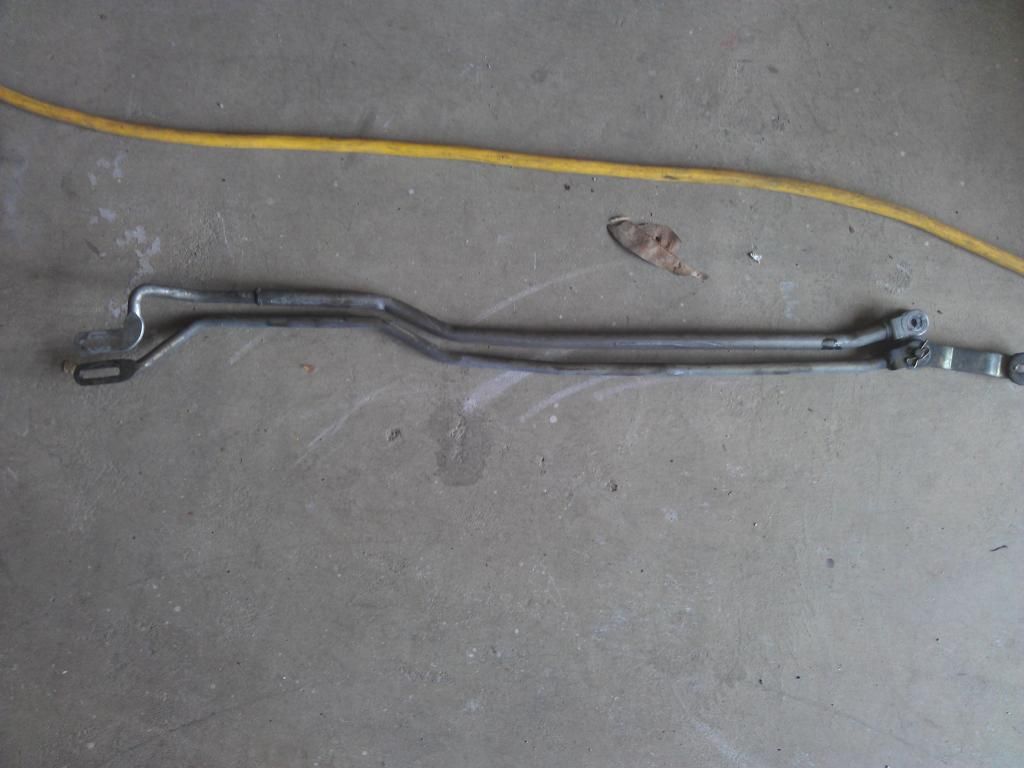
I got to spend a little time over the weekend with it, not too much got done. Got the sunroof visor and headliner back in after suede. Pics look grey, it's black and I'm very happy with it. I monkeyed about with the shifter linkage since my stock one did not work with the gated shifter. The gated shifter has a long throw it seems so a shorter linkage was in order. I had a linkage on my aristo trans which happened to be about 1" shorter but it doesn't work either. going to try to bend it a bit more.
on with the pics.
heres the shifters, neither work.
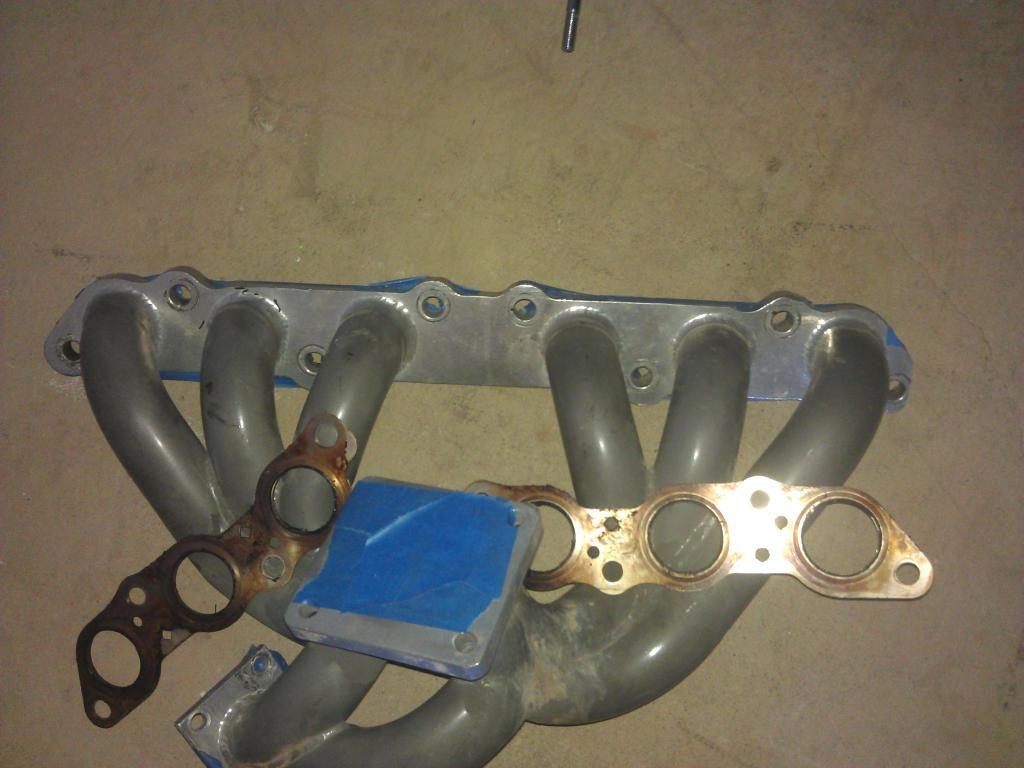
I also test fit my exh mani. it's a boost logic GE and looks like the turbo is going to sit way low and kind of cockeyed. be real interesting to see how it mounts up. Still have to weld up my coolant line, didnt have time to drain the coolant and deal with all that. hopefully this weekend.
on with the pics.
heres the shifters, neither work.
I also test fit my exh mani. it's a boost logic GE and looks like the turbo is going to sit way low and kind of cockeyed. be real interesting to see how it mounts up. Still have to weld up my coolant line, didnt have time to drain the coolant and deal with all that. hopefully this weekend.
06-04-14, 06:30 AM
#39
Lead Lap

Join Date: Aug 2013
Location: ohio
Posts: 476
Likes: 0
Received 0 Likes
on
0 Posts
random question
can you post a picture of your boostlogic mani?
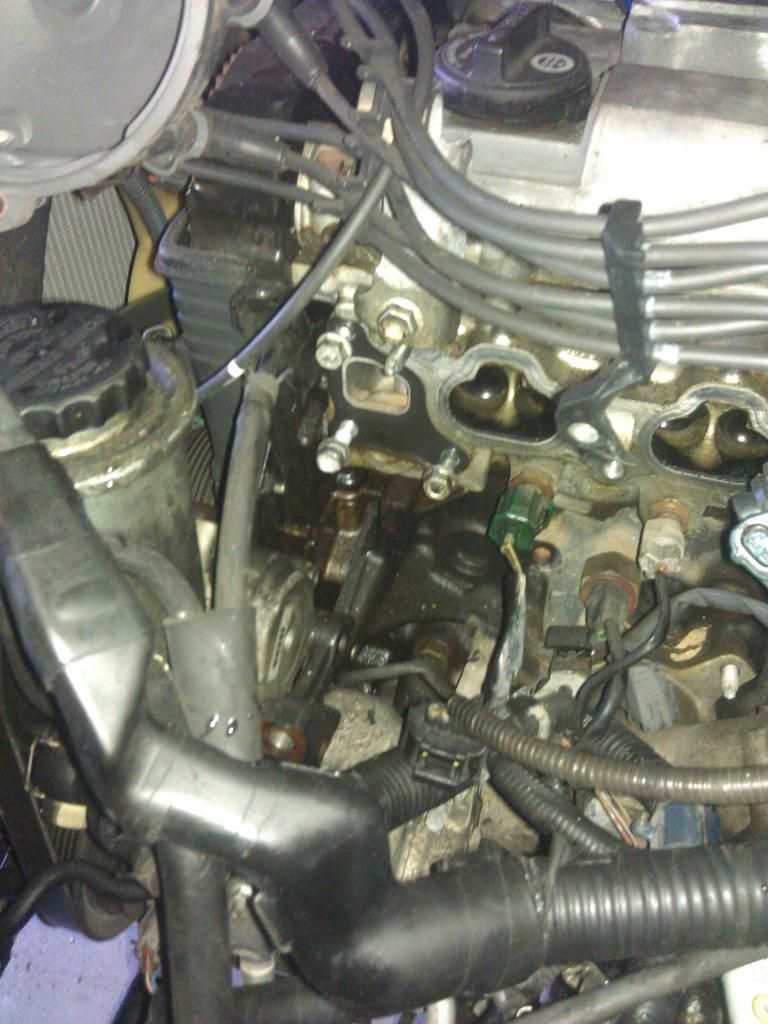
I ended up getting one second hand and I am having some fitment issues on the coolant hose on the front of the engine behind the distributor
do you have that problem?
can you post a picture of your boostlogic mani?
I ended up getting one second hand and I am having some fitment issues on the coolant hose on the front of the engine behind the distributor
do you have that problem?
06-04-14, 07:55 AM
#40
I don't recall having a problem test fitting it but I'll get a pic next time im down at the shop for you. I do recall it snagging on something the first time but it didn't take enough effort to get it on properly for me to take note of any issue.
06-04-14, 04:22 PM
#41
Made a little progress tonight. baby steps.
Heres the requested pic of my manifold, slips on no issues for me.
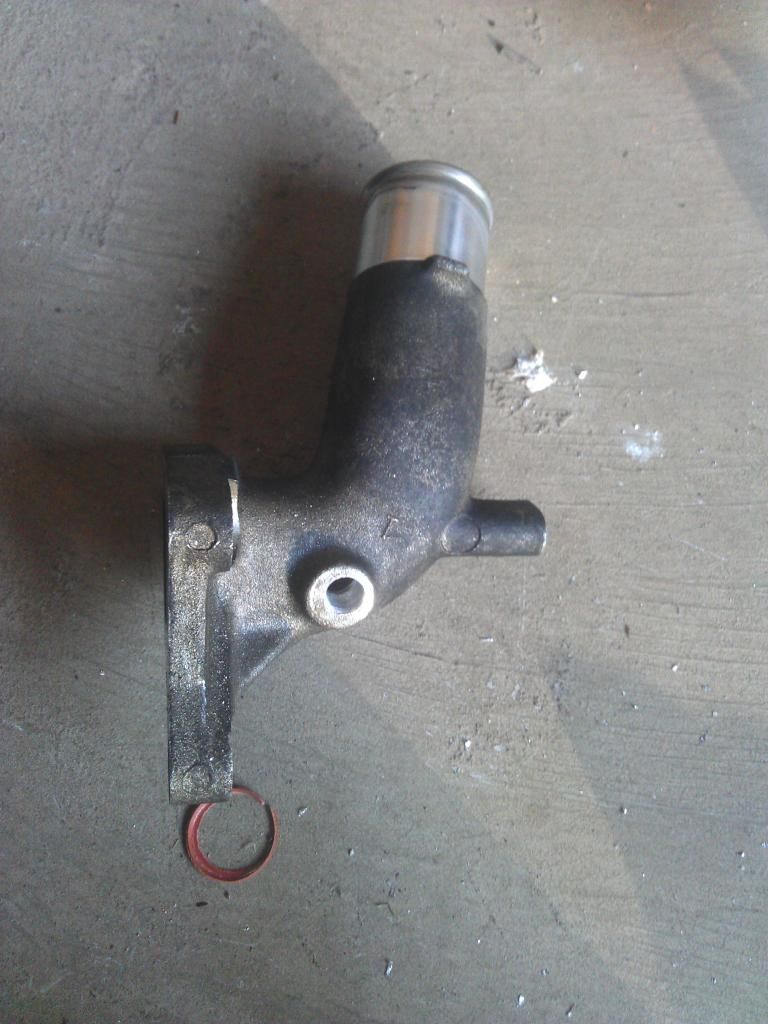
Here's the spot with the coolant fitting that can be drilled/tapped for a sender or just plug it up when going with a FFIM.
And here is said piece, drilled and tapped 1/8NPT
ANNND just a sneak peek preview of what's coming down the pipe
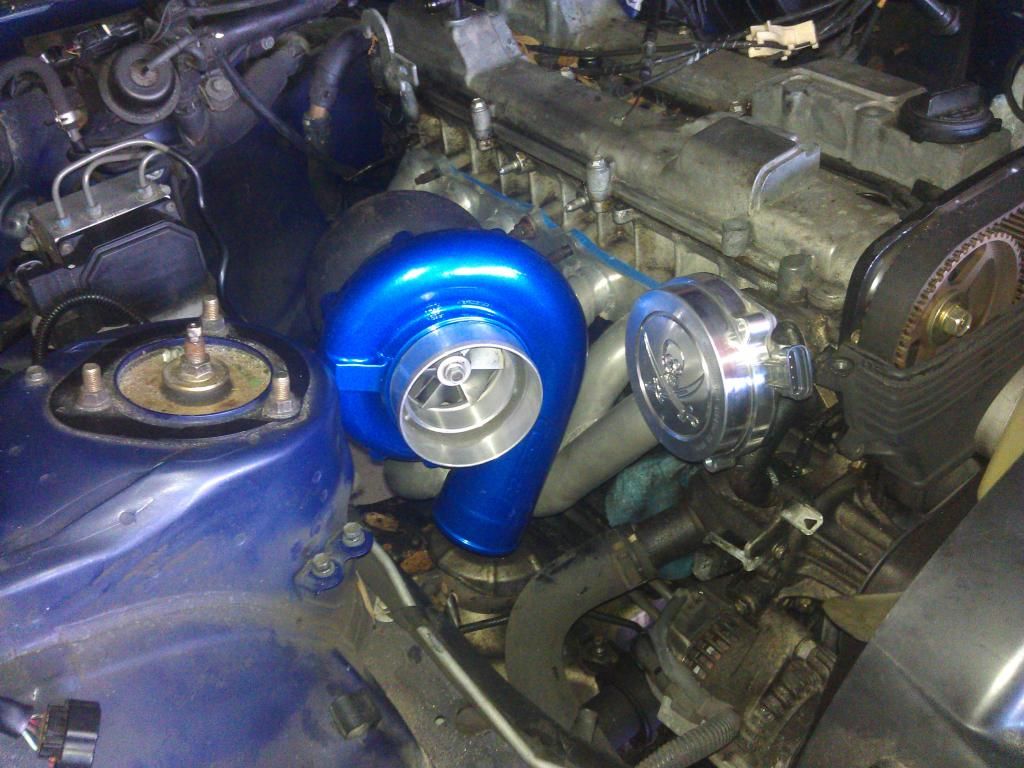
Heres the requested pic of my manifold, slips on no issues for me.
Here's the spot with the coolant fitting that can be drilled/tapped for a sender or just plug it up when going with a FFIM.
And here is said piece, drilled and tapped 1/8NPT
ANNND just a sneak peek preview of what's coming down the pipe
 06-05-14, 11:47 AM
#44
Lead Lap
Join Date: Aug 2013
Location: ohio
Posts: 476
Likes: 0
Received 0 Likes
on
0 Posts
hmmm my manifold looks exactly the same.
maybe I just need to try a little bit harder to get it past that coolant line.
or I might just take it off and put the manifold on then reattach it.
thanks for posting that pic!
did you polish then paint your compressor?
or just painted it? what paint did you use?
maybe I just need to try a little bit harder to get it past that coolant line.
or I might just take it off and put the manifold on then reattach it.
thanks for posting that pic!
did you polish then paint your compressor?
or just painted it? what paint did you use?
06-05-14, 01:20 PM
#45
The compressor housing is powdercoated. It's the same stuff that's on my rear calipers. It's pretty close to the RSP in the sun but a dingy engine bay looks way different.
Get ready to mod your DP. I didn't realize how clocked over it was to clear the dizzy and how low it was going to sit. I haven't test fit that part yet but I just don't see how it's going fit without modding it.
Get ready to mod your DP. I didn't realize how clocked over it was to clear the dizzy and how low it was going to sit. I haven't test fit that part yet but I just don't see how it's going fit without modding it.