When you click on links to various merchants on this site and make a purchase, this can result in this site earning a commission. Affiliate programs and affiliations include, but are not limited to, the eBay Partner Network.
hmmm damn.
wish I didn't hear that but I heard that...
bought a downpipe (used) and it was already wrapped.
let me know how much you need to modify yours
I have a 46mm wg and the flange should be in tomorrow. Hopefully welder can get it done for the weekend. I'd like to have the exhaust side figured out this weekend.
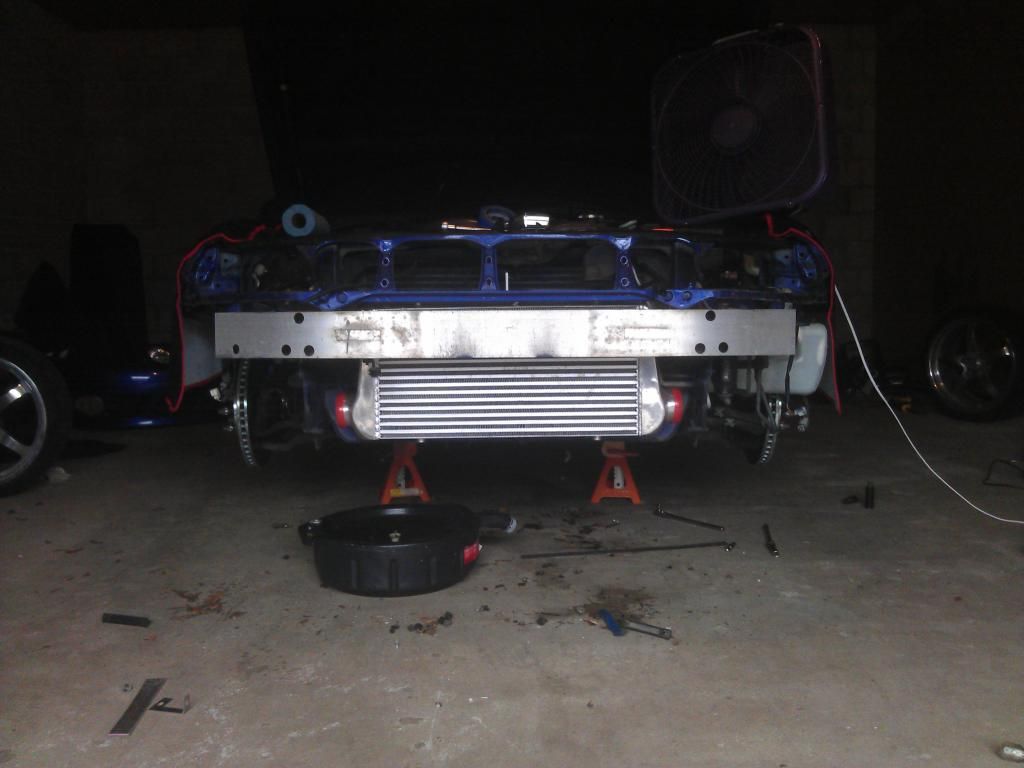
Small update. I've decided to just go vband and not deal with the 4 bolt flange. Selling my WG in the classifieds. Also fabbed up a bracket for the FMIC. Word of caution, don't buy the CXRacing bracket, it doesn't fit. at all. Not even close. The only thing I ended up using it for was to stiffen the brace I made. I just bent up a bit of aluminum from Ace and mounted it to the crash bar supports. Just need to fab up some lower brackets and the IC is done.
I'm going to try to route my piping around the coolant tank but i've removed the power steering "cooler" in favor of a proper cooler I'll mount somewhere as of yet undetermined. I'm also in the process of converting my entire PS system over to AN so that'll be done once my line and fittings come in this week. Should have some good updates after this weekend.
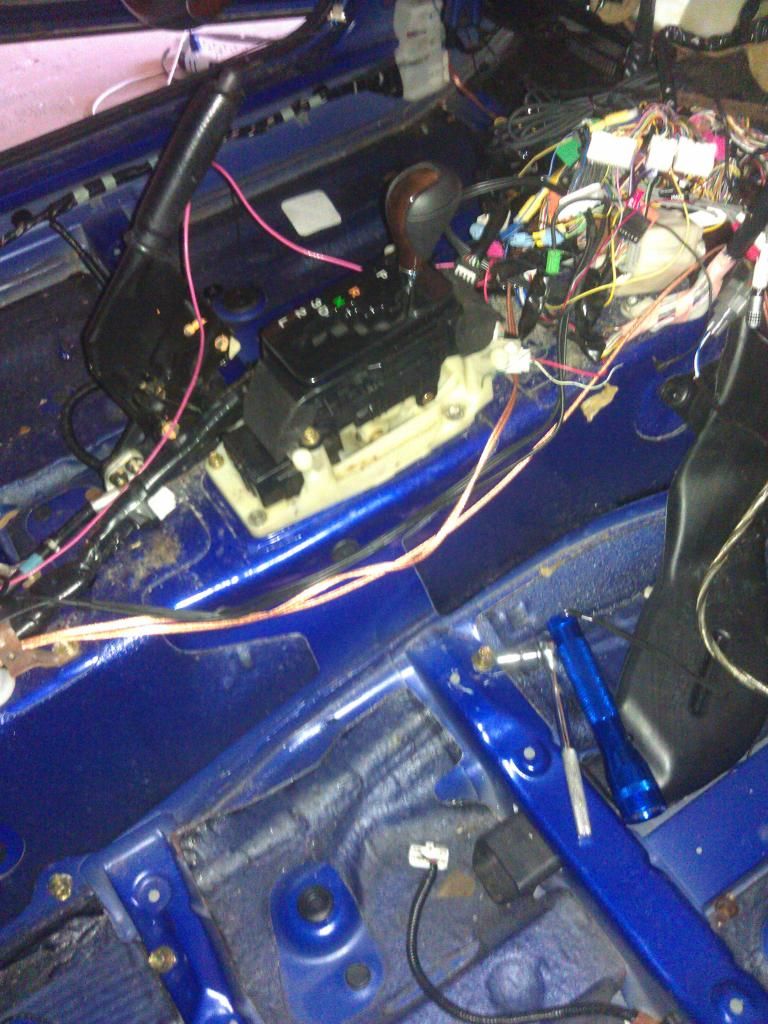
Managed to get a couple milestones finished. First up the gated shifter that vexed me for so long. Shortening my existing rod by and inch and welding back together did the trick. Now all gear detents are in the proper place and just have to wire it up now.
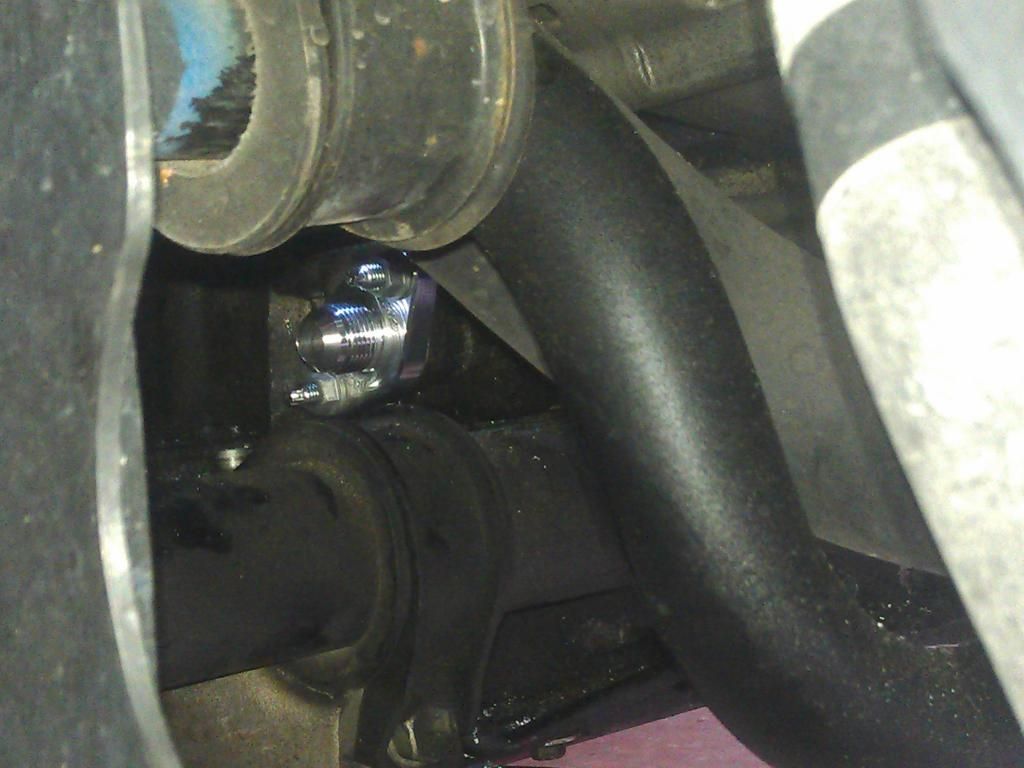
And playing peek a boo is this little fella. A 90 degree drill and a step bit made quick work of it. Very soft aluminum. Even tapping it was very easy. No room to spin tap handle so used vice grips and worked great. Time to invent a ratcheting tap.
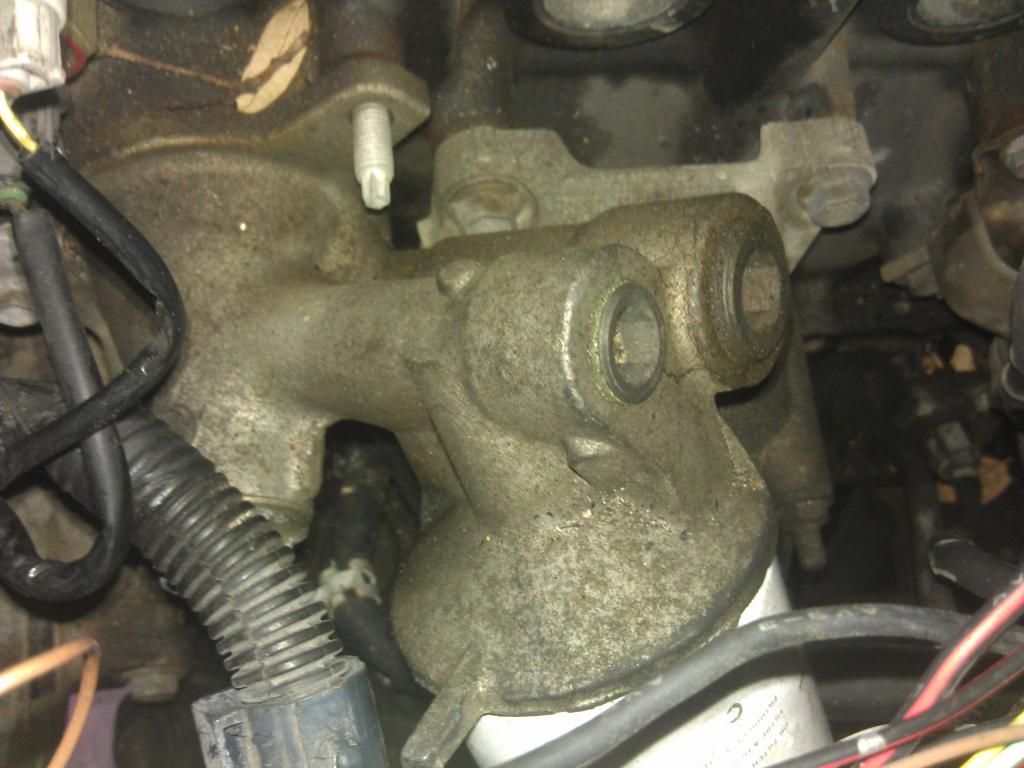
Lastly has anyone tried using these ports here for an oil cooler?
I found a thread on sf about eliminating it and using a sandwich plate which I'll probably do down the road but was curious what those where.
Hopefully have under hood wiring buttoned up soon and fuel sorted.
I got the wrong size vband for my dp so not sure but looks like dp will need to be shortened a tad to work with my manifold. I'll know more once proper vband gets here.
Haven't had an update in a while. Haven't been able to spend much time and it's so friggin hot I can't bear to spend more than a few hours in the shop at a time. Found a ton of oil in the plug valley so valve covers came off. ordered new seals and looking for some TT VC. started hacking up the wiring and hacked up my DP to get it to fit. that's going to be a hassle to get fitted right with my limited experience / metal working tools.
hahahaha I found tons of oil down the side of the block thanks to those valve cover seals...
its the exact opposite up here. these past few days its been getting down to the 50s at night with a high of 70.
its july I want 90 degree temps!
So yeah, I took a big long break from the car, remodeled my kitchen and once the weather cooled down a bit started back at it. Haven't been on much but wanted to get this thread caught up.
Headliner is in as are some of the rear bits of trim. I put some dynamat extreme all over the rear deck and down the rear seat bucket. Recovered my rear deck in suede to match the headliner.
Managed to score a set of TT valve covers. Since I had to pull the old ones off anyway might as well. Had -12AN bungs welded on for the breather set up. Going to fab my own based off PHR design.
Fixed up the power steering line with some -6AN hi pressure hose. the 45 angle really makes it fit nicely and hug the pump.
Test fitting the VWR intake with RMR throttle body. Throttle cable is off a land cruiser. I was confused at first because the bracket did not fit but once I looked at how it went together I realized you just have to swap the bracket with the one off the SC and it's good to go. VERY uncomfortable swap for a big guy like me.
Here the exhaust mani is installed for good (hopefully) and I've run the oil feed line. I ended up putting a sandwich plate on and running -10AN out to a big cooler but it also had 2 ports, one of which i used for a pressure sender. the other will be temp eventually. For the feed line I used the union bolt and ran the line down under the motor and back up by the dizzy to the turbo.
Now here's something I haven't seen discussed much on here but I stumbled across this issue while running my IC piping. The water neck out of the pump points out towards the frame rail. kinda in the way.
The solution? unbolt it and flip it 180. Points almost straight down now. Chop a few inches off the hose to the rad and good to go. Hugs the alt and runs under it now instead to the side. Apparently this is only an option for GE, GTE i think you're stuck using the rotators the vendors sell. Plenty of room now for my 3" piping.
Here's me bragging to my friend on the fit up I got first time fabbing up piping.
Heres the result. FYI electrical tape works great if you don't have the ability to tack weld. Just be sure to mark them up prior to taping so you can reassemble later for full welding. I also marked after taping to ensure that the tape didnt slip or anything. It will hold a surprising amount of force.
I thought for sure I was going to have to either remove or modify my washer fluid reservoir but nope, was able to accommodate it just fine as is.
Heres the turbo side. I ran it down and under the sway bar at the pivot point so it should be able to swing freely.
Finished pieces, not nearly as complicated looking outside of the car as I thought they'd be. Dropped off at the welders today.
As for the downpipe modifications, I just ended up buying the boostlogic one and ditching the other. There's a decent amount of difference between the two but Im sure it could be modified. I just didnt want to deal with it.
Been trying to squeeze in time to work on the car when I can so have a little update to share. I dont have a lot of pics unfortunately since i was working feverishly but i'll share what pics i do have.
Since the last update:
Got IC pipes welded up and polished a bit
Finished up installing dynamat. Ended up using more than the bulk pack but it's covered from firewall to rear glass and all points in between.
Installed oil cooler and filter relocate kit (don't have a good pic of this) I used a sandwich plate with -10AN fittings out to a big cooler. Then I added a PHR filter relocate since I wouldn't be able to reach the filter in stock location with my intake installed. the plate also had a tap for my oil pressure sender that will run to the popformance lxcc unit.
Fabbed a mount and mounted a fuelab FPR. I went a little overboard here and used a 4AN braided line for pressure reference instead of a silicone hose. I kept it off the firewall just in case i ever want to drag race it and ended up mounting it below the brake booster. Installed a sender to run to the popformance lxcc for fuel pressure monitoring in cab.
Finished wiring. Extended a few things, TPS and MAP. Swapped the injector clips from the OEM to the new style. Extended their wires too so i could keep them all below the intake and just pop up between the runners to plug into the injectors.
Installed the wideband O2 sensor in the downpipe and ran the harness into the cabin. Plan is to put the gauge in the glove box and it has a 5V output that will run to the lxcc unit to display my AFR.
Installed and wired up the steering wheel controls. Found a post here in the GS section on using the OEM controls with the aftermarket adapter to run my AVIC. Really excited to see that work. I use the hell out of them in my truck.
The big milestone for me is installed the intake. I wasn't sure if I'd be able to install it with the motor still in the car but a ridiculous amount of flexible extensions got me to the bottom bolts. I'll be picking up a ratcheting obstruction wrench this week to make sure it's all properly tight.
At this point it's about ready to fire up. Toyota red coolant will be here tomorrow and i'll be filling her up with fluids in preparation. Hope to hear it run this weekend. Still have to pull the cluster to jumper that resistor so the tach will work and install the interior but that's nothing compared to hearing it run and having the turbo spinning.
Hopefully a success story and video will follow in the next week or two!
One Sexy SC: This Lexus Build May Be Going Slowly, but We're Willing to Wait
One Sexy SC: This Lexus Build May Be Going Slowly, but We're Willing to Wait
Forum member SCereal is taking his time modifying his 1997 Lexus SC 300, which is why he calls it "Project Snail's Pace." Despite how slowly he thinks he's moving, he's making quite a lot of progress.


 06-18-14, 12:05 PM