
Lucky Number 14.
 01-22-19, 04:57 PM
#1
Rookie
Thread Starter

Ive been a lurker here for awhile and every once in a blue moon Ill post some wheels for sale. Ive decided to share my current build with y'all.
To catch some of you up, heres a quick list and some photos of my recent cars, ALL of which have been sold. Some quicker than others:eyebrows
1971 Volkswagen Type 3 Squareback
2001 Nissan Xterra
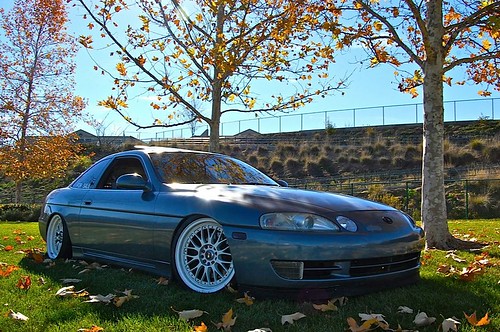
1993 Lexus Sc300
by Bryan Boeldt, on Flickr
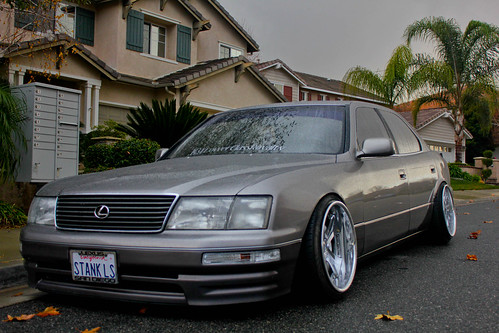
1995 Lexus Ls400
by Bryan Boeldt, on Flickr
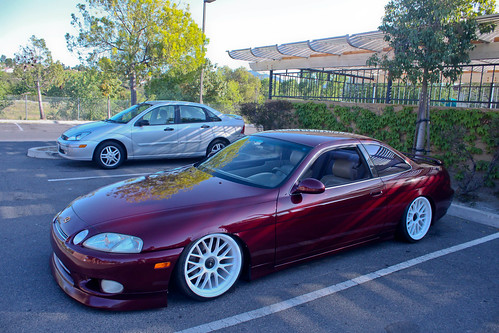
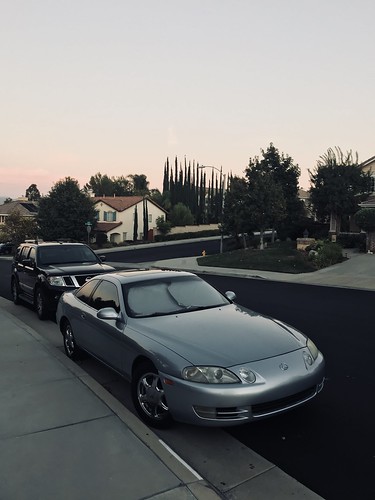
1997 Lexus Sc400
by Bryan Boeldt, on Flickr
2002 Chevrolet S10
2001 Kia Spectra
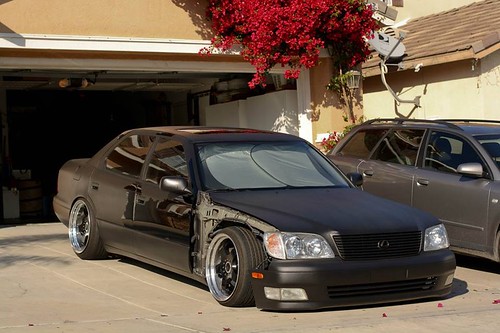
1998 Lexus Ls400
by Bryan Boeldt, on Flickr
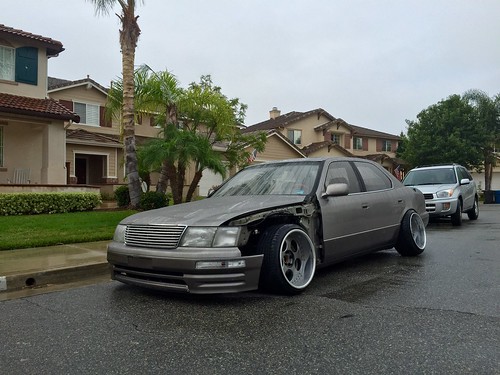
1995 Lexus Ls400
by Bryan Boeldt, on Flickr
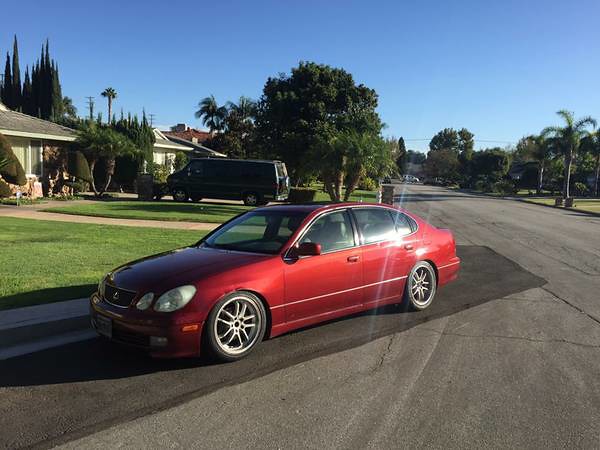
2001 Lexus Gs300
by Bryan Boeldt, on Flickr
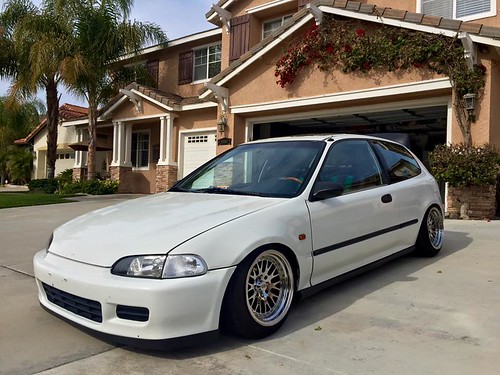
1993 Honda Civic EG hatch
by Bryan Boeldt, on Flickr
1990 Lexus Ls400
2006 Infiniti M45
by Bryan Boeldt, on Flickr
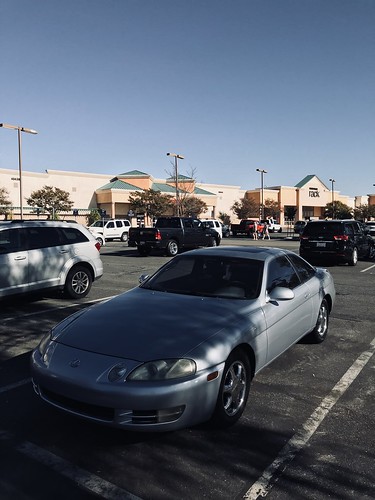
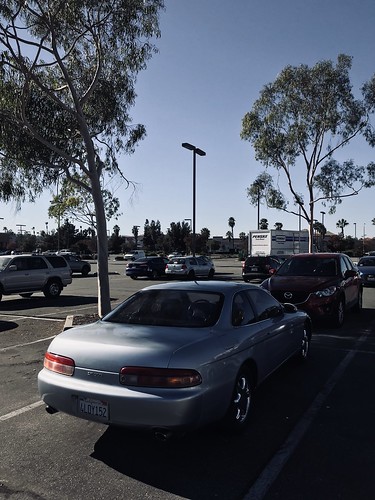
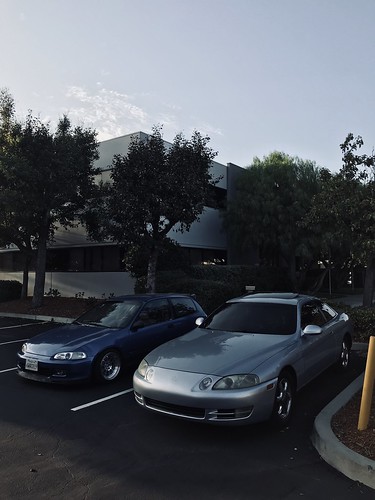
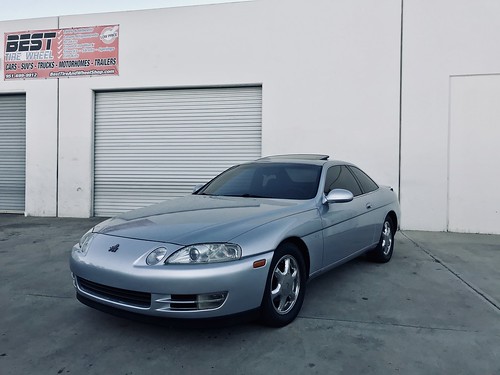
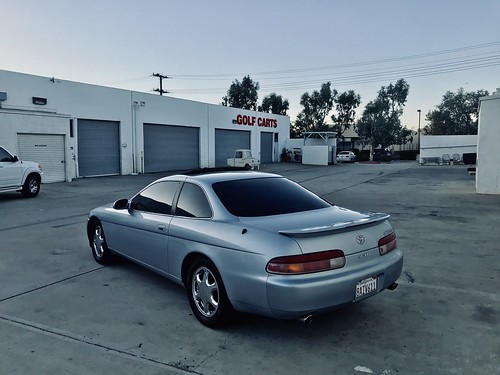
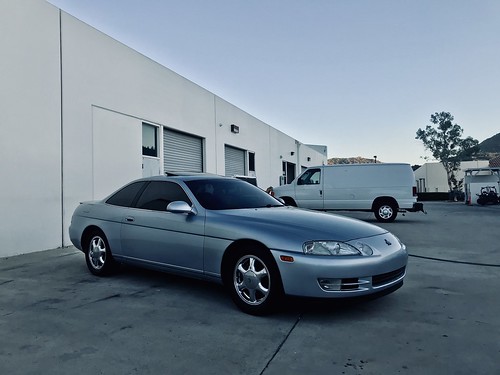
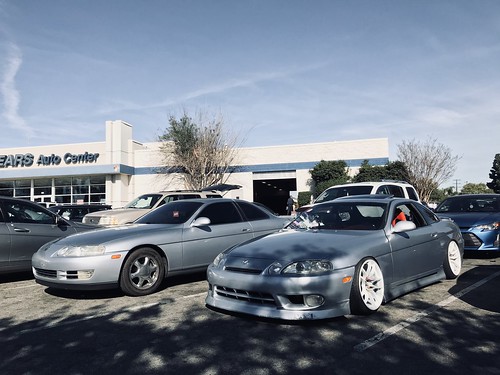
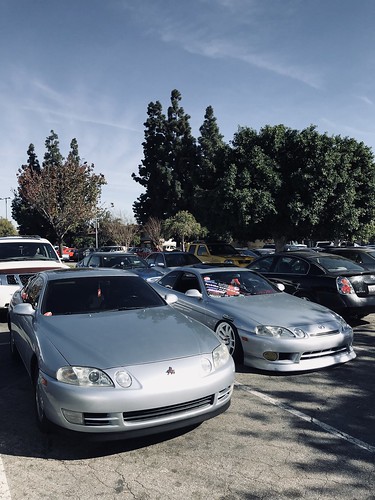
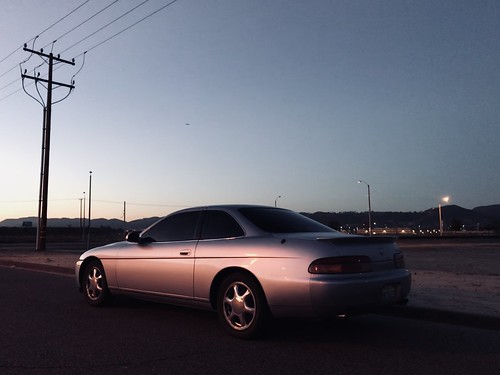
And that brings me to this. My favorite and lucky number is the number 14. And it just so happens that the 14th car I own, is the same very car that I rode around countless times in as a child with my grandfather.
by Bryan Boeldt, on Flickr
by Bryan Boeldt, on Flickr
by Bryan Boeldt, on Flickr
by Bryan Boeldt, on Flickr
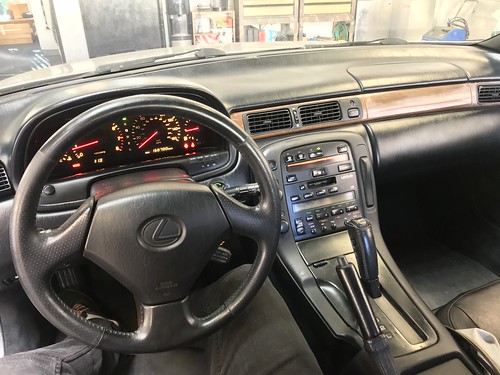
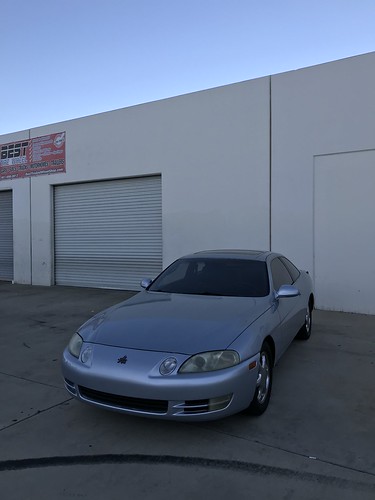
That car is a 1996 Lexus SC300. Another Lexus, I know, shocker :rofl BUT ITS GOT BLACK LEATHER INTERIOR:alright:alright
Anyways, he gifted me the car on October 14, 2017, the day of my daughters baby shower
My fianc� and I are expecting and I just sold my M45 to get out of the loan so it would free up more money for baby expenditures lol. #dadlife
And yes I know! "Why did you sell a 4 door and get a 2 door?!" Well plain and simple. Get out of said car loan. Acquire free and paid off car. Pay off debts. Save up and buy truck/SUV lol.
BUT! I. WILL. NOT. KEEP. THIS. CAR. STOCK!
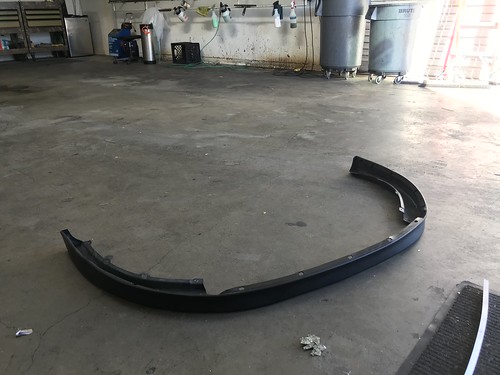
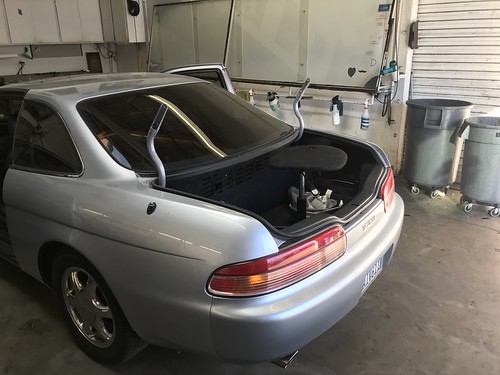
That being said, I have already done some tinkering with the car. The long term plan is undecided at the moment, but for short term, the plan is to go a purist OEM+ look with JDM goodies. I have a OEM front lip from a Sc400 waiting to go on, a Soarer trunk with spoiler, Soarer hood emblem and thats about it.
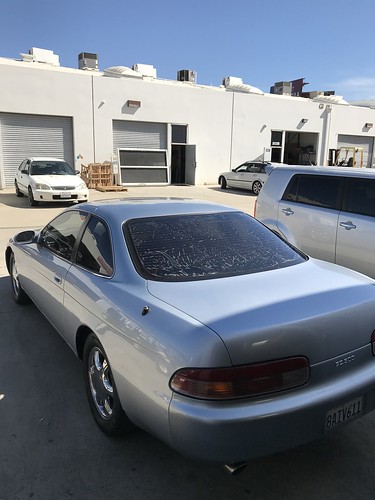
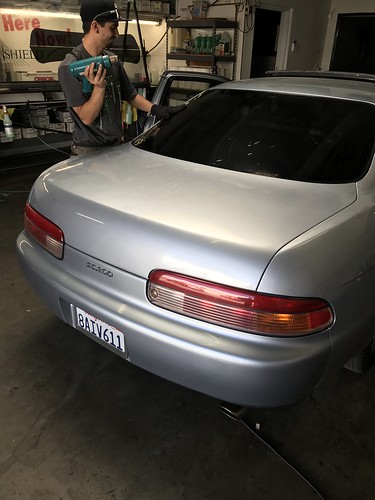
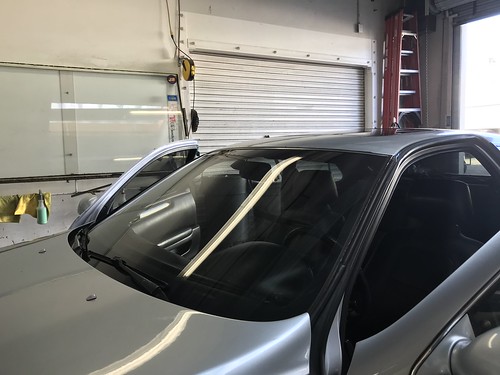
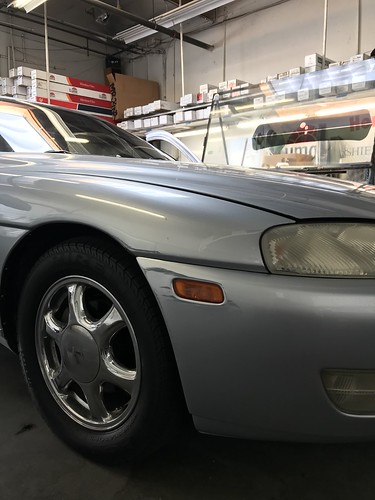
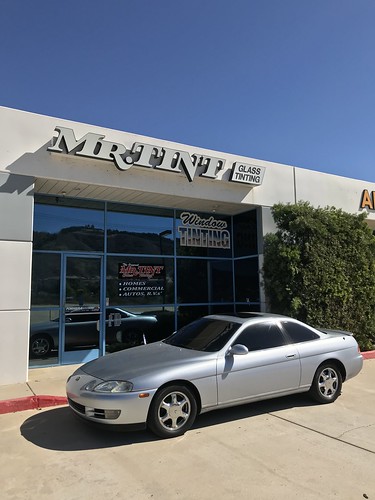
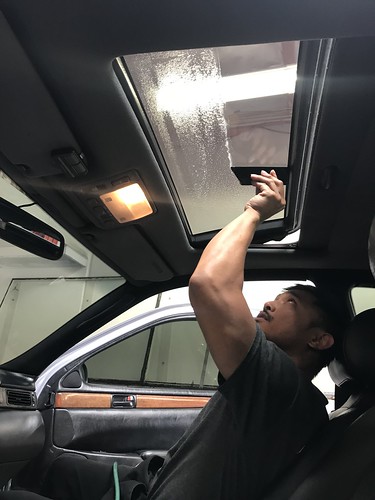
I work for a window tint shop in my local town and the car was tinted back in 2001 and the tint now was shot. First step is to remove all the old tint without damaging the defroster lines, easier said than done.
by Bryan Boeldt, on Flickr
This is the us trying to "bake" the film off with old film laying around
by Bryan Boeldt, on Flickr
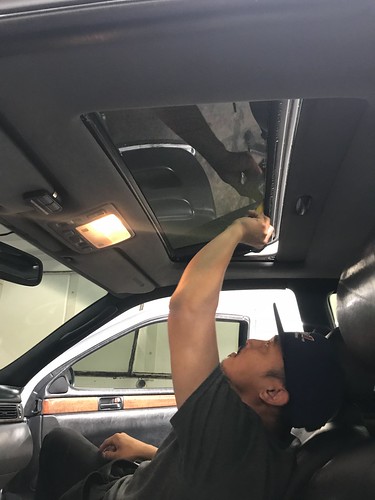
Putting on a layer to remove quickly to pull off any leftover film (not me)
by Bryan Boeldt, on Flickr
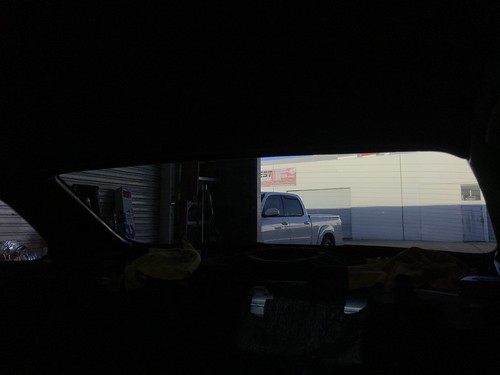
This was the visibility AFTER removing the old film. My boss applied a new layer of film and were still currently letting it sit to hopefully remove all the left behind layers when we remove the new film in the upcoming week.
by Bryan Boeldt, on Flickr
by Bryan Boeldt, on Flickr
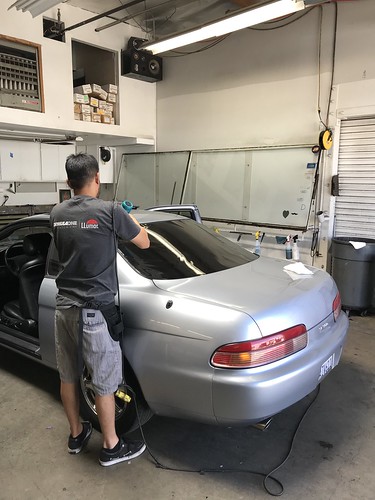
Working at a tin shop has its benefits especially when living in the desert, like free windshield tint lol
Removing the rear view mirror for more window access
by Bryan Boeldt, on Flickr
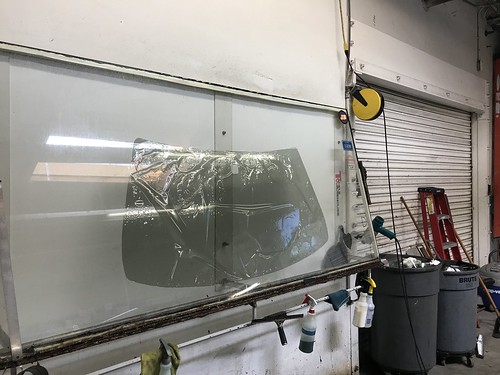
The film going on the windshield
by Bryan Boeldt, on Flickr
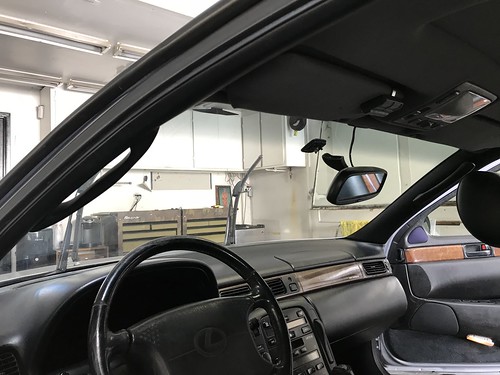
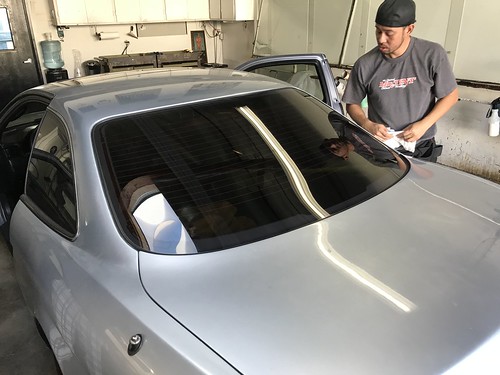
The interior view after installation
by Bryan Boeldt, on Flickr
by Bryan Boeldt, on Flickr
It might not look like much but BELIEVE ME, it makes a HUGE difference. Plus all that distortion will dry out over time, it already has.
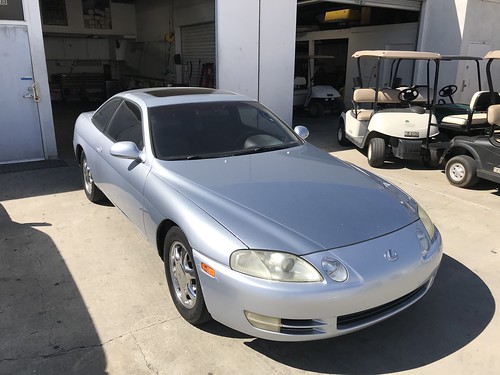
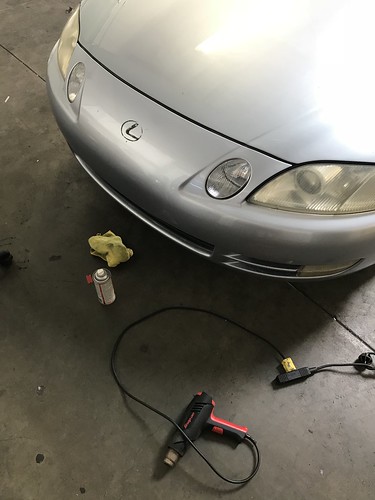
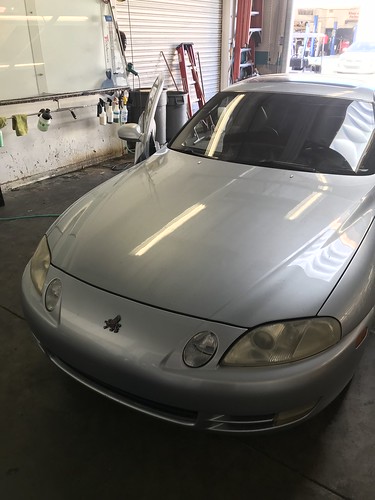
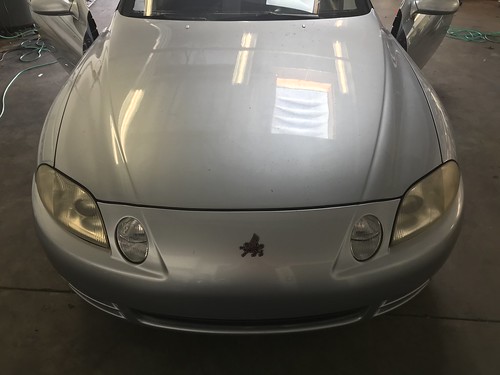
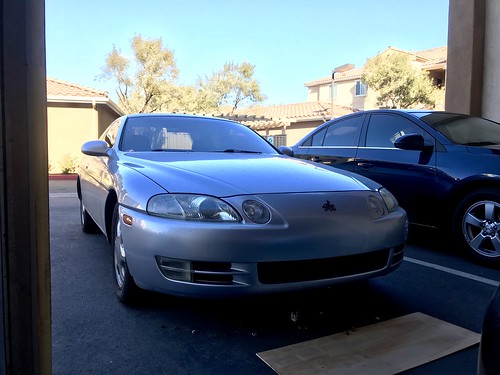
Also had some free time so I decided to debadge the front bumper in preparation to "install" the Soarer emblem this week
by Bryan Boeldt, on Flickr
by Bryan Boeldt, on Flickr
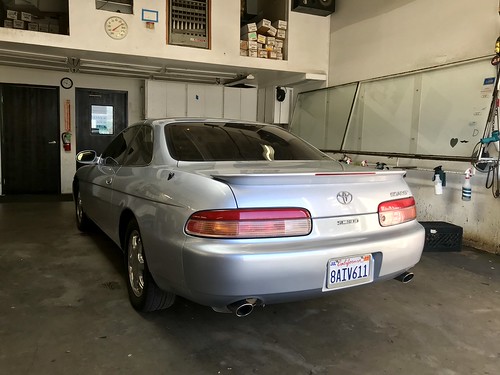
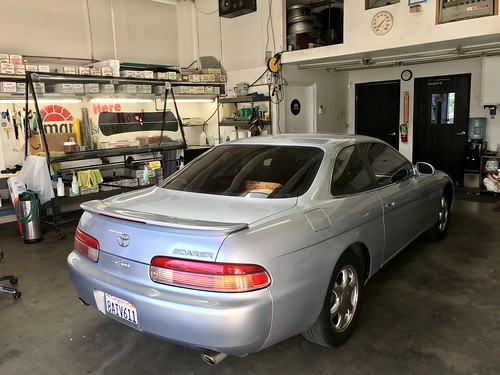
Looks weird without an emblem. Also, dont know if you guys noticed but my rear trunk is already debadged. I found this giant emblem in the glove box so I assume my grandfather had the trunk debadged and the holes filled and just couldn't come to terms with tossing a Lexus emblem lol
by Bryan Boeldt, on Flickr
To catch some of you up, heres a quick list and some photos of my recent cars, ALL of which have been sold. Some quicker than others:eyebrows
1971 Volkswagen Type 3 Squareback
2001 Nissan Xterra
1993 Lexus Sc300
1995 Lexus Ls400
1997 Lexus Sc400
2002 Chevrolet S10
2001 Kia Spectra
1998 Lexus Ls400
1995 Lexus Ls400
2001 Lexus Gs300
1993 Honda Civic EG hatch
1990 Lexus Ls400
2006 Infiniti M45

And that brings me to this. My favorite and lucky number is the number 14. And it just so happens that the 14th car I own, is the same very car that I rode around countless times in as a child with my grandfather.

That car is a 1996 Lexus SC300. Another Lexus, I know, shocker :rofl BUT ITS GOT BLACK LEATHER INTERIOR:alright:alright
Anyways, he gifted me the car on October 14, 2017, the day of my daughters baby shower
My fianc� and I are expecting and I just sold my M45 to get out of the loan so it would free up more money for baby expenditures lol. #dadlife
And yes I know! "Why did you sell a 4 door and get a 2 door?!" Well plain and simple. Get out of said car loan. Acquire free and paid off car. Pay off debts. Save up and buy truck/SUV lol.
BUT! I. WILL. NOT. KEEP. THIS. CAR. STOCK!
That being said, I have already done some tinkering with the car. The long term plan is undecided at the moment, but for short term, the plan is to go a purist OEM+ look with JDM goodies. I have a OEM front lip from a Sc400 waiting to go on, a Soarer trunk with spoiler, Soarer hood emblem and thats about it.
I work for a window tint shop in my local town and the car was tinted back in 2001 and the tint now was shot. First step is to remove all the old tint without damaging the defroster lines, easier said than done.
This is the us trying to "bake" the film off with old film laying around
Putting on a layer to remove quickly to pull off any leftover film (not me)
This was the visibility AFTER removing the old film. My boss applied a new layer of film and were still currently letting it sit to hopefully remove all the left behind layers when we remove the new film in the upcoming week.

Working at a tin shop has its benefits especially when living in the desert, like free windshield tint lol
Removing the rear view mirror for more window access
The film going on the windshield
The interior view after installation

It might not look like much but BELIEVE ME, it makes a HUGE difference. Plus all that distortion will dry out over time, it already has.
Also had some free time so I decided to debadge the front bumper in preparation to "install" the Soarer emblem this week
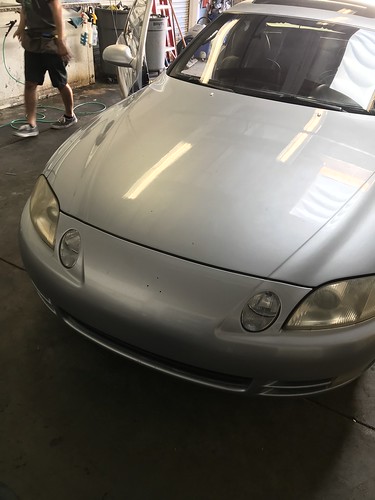
Looks weird without an emblem. Also, dont know if you guys noticed but my rear trunk is already debadged. I found this giant emblem in the glove box so I assume my grandfather had the trunk debadged and the holes filled and just couldn't come to terms with tossing a Lexus emblem lol

 01-22-19, 05:02 PM
#2
Rookie
Thread Starter
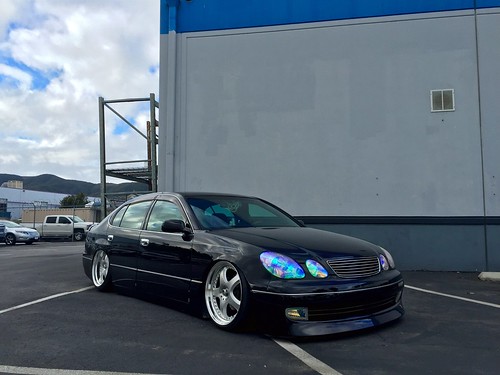
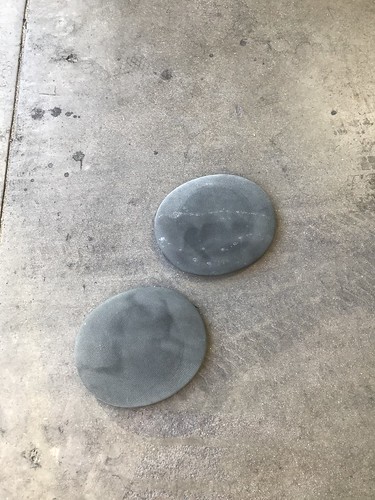
My boss has a super clean GS and he changed out his factory steering wheel to a woodgrain RX350 wheel.
by Bryan Boeldt, on Flickr
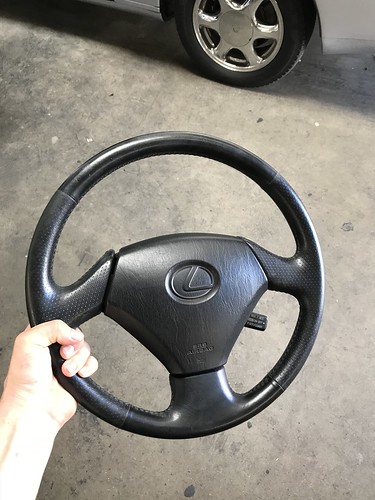
He still had his factory GS wheel hanging around so he said I could have it for free! SCORE! And its black leather:alright
by Bryan Boeldt, on Flickr
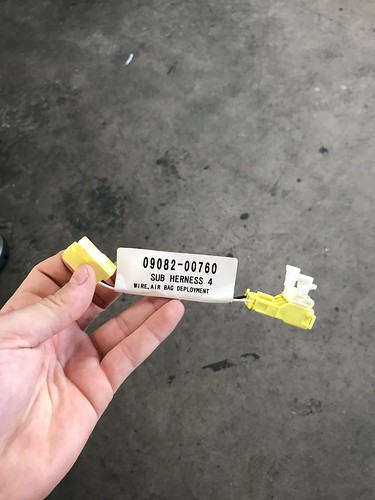
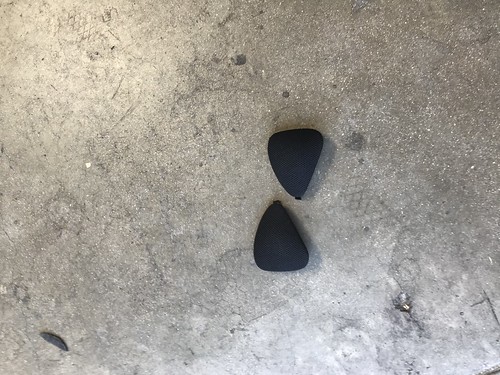
Now you need an adapter for the airbag sensor to work, so here it is, its for a Toyota MR2.
by Bryan Boeldt, on Flickr
And Im kicking myself over this for not taking any photos, but you need to switch the cruise control assembly system and wiring over to the GS wheel for cruise control to work. And don't forget to attach the ground wire!
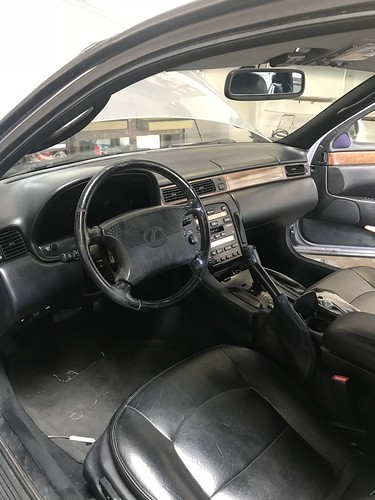
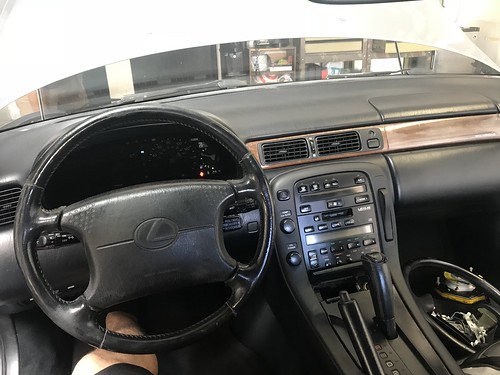
Some before and after photos!
by Bryan Boeldt, on Flickr
by Bryan Boeldt, on Flickr
by Bryan Boeldt, on Flickr
by Bryan Boeldt, on Flickr
Looks way better in my opinion!
Also noticed some scuff marks that my aunt did when she borrowed my grandfathers car for a few months. Used this adhesive remover and it came off with ease.
by Bryan Boeldt, on Flickr
by Bryan Boeldt, on Flickr
So far thats all Ive got. This week I will be installing my front lip and switching out the trunks to my JDM soarer one.
Looking forward to posting it up, heres some photos from work with my co-employees cars to hold you guys over!
by Bryan Boeldt, on Flickr
by Bryan Boeldt, on Flickr
by Bryan Boeldt, on Flickr
He still had his factory GS wheel hanging around so he said I could have it for free! SCORE! And its black leather:alright
Now you need an adapter for the airbag sensor to work, so here it is, its for a Toyota MR2.
And Im kicking myself over this for not taking any photos, but you need to switch the cruise control assembly system and wiring over to the GS wheel for cruise control to work. And don't forget to attach the ground wire!
Some before and after photos!

Looks way better in my opinion!
Also noticed some scuff marks that my aunt did when she borrowed my grandfathers car for a few months. Used this adhesive remover and it came off with ease.
So far thats all Ive got. This week I will be installing my front lip and switching out the trunks to my JDM soarer one.
Looking forward to posting it up, heres some photos from work with my co-employees cars to hold you guys over!

 01-22-19, 05:04 PM
#3
Rookie
Thread Starter
So today I had some free time at work. Decided to throw on the Soarer badge I picked up a few months back for $50. Granted its a little worn but theyre normally going for $100+ for same condition ones.
by Bryan Boeldt, on Flickr
Anyways, I lined it up best I could. "custom" cut some 3m double sided tape on their and stuck it on. Not bad, Im still on the fence about it. Might be a little too far right but whatevs :shrug
by Bryan Boeldt, on Flickr
by Bryan Boeldt, on Flickr
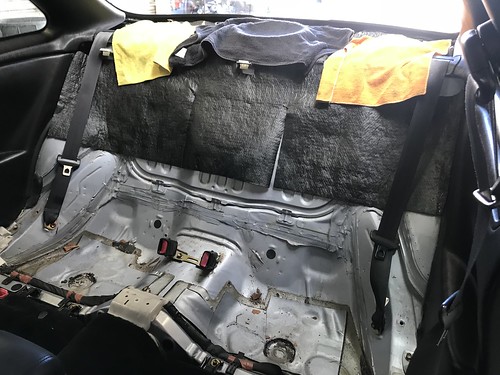
Then I jumped to the back window to finally get it prepped for the new tint going on. Let me tell you, that **** sucked lol.
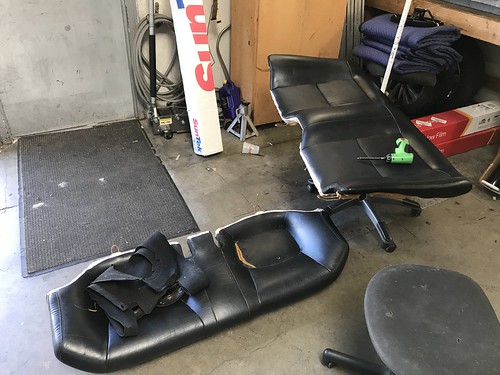
I removed the back deck lid/dash/cover whatever you want to call it, and as I did so, it literally crumbled into pieces.:rofl Leave it to Lexus to put a carpet wrapped piece of cardboard as the back deck lid in a $50k+ car back in the 90s.
Anyways, I also took out the back seat to get to the deck lid. mehh..
by Bryan Boeldt, on Flickr
by Bryan Boeldt, on Flickr
I plan on replacing the back seats so no worries about the cracked leather and ****ty condition
Removed the carpet liner on the deck lid to make a new piece with this "template"
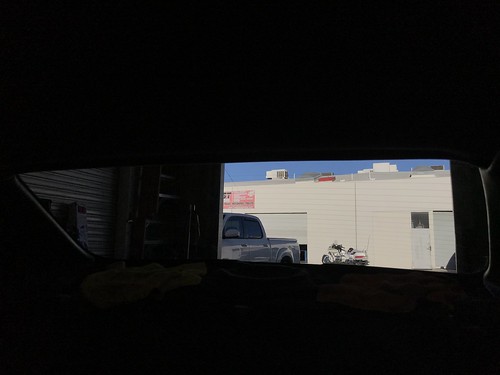
by Bryan Boeldt, on Flickr
Clean back window before tint
by Bryan Boeldt, on Flickr
After tint, just went with 15%
by Bryan Boeldt, on Flickr
by Bryan Boeldt, on Flickr
So, thats it for today. I went to Home Depot tonight after everything and got some hardware to mount up my OEM front lip. Im still kicking myself for throwing out the OEM hardware and thinking I wasnt going to need it.
Yay for DIY mounting bracket :rofl
Stay tuned for that tomorrow and the Soarer trunk/boot with spoiler in a few days.
by Bryan Boeldt, on Flickr

Anyways, I lined it up best I could. "custom" cut some 3m double sided tape on their and stuck it on. Not bad, Im still on the fence about it. Might be a little too far right but whatevs :shrug
Then I jumped to the back window to finally get it prepped for the new tint going on. Let me tell you, that **** sucked lol.
I removed the back deck lid/dash/cover whatever you want to call it, and as I did so, it literally crumbled into pieces.:rofl Leave it to Lexus to put a carpet wrapped piece of cardboard as the back deck lid in a $50k+ car back in the 90s.
Anyways, I also took out the back seat to get to the deck lid. mehh..
I plan on replacing the back seats so no worries about the cracked leather and ****ty condition
Removed the carpet liner on the deck lid to make a new piece with this "template"

Clean back window before tint
After tint, just went with 15%
So, thats it for today. I went to Home Depot tonight after everything and got some hardware to mount up my OEM front lip. Im still kicking myself for throwing out the OEM hardware and thinking I wasnt going to need it.
Yay for DIY mounting bracket :rofl
Stay tuned for that tomorrow and the Soarer trunk/boot with spoiler in a few days.
 01-22-19, 05:06 PM
#4
Rookie
Thread Starter
Im a little behind on posting because the last few days have been busy. Installed some coils on my buddys Lancer Ralliart, that sucked, and just been busy with work.
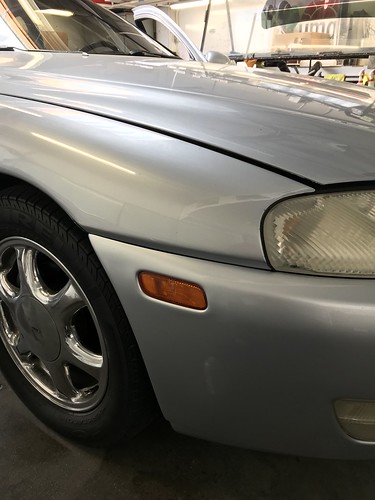
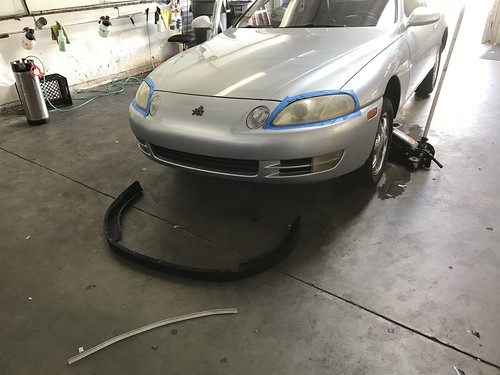
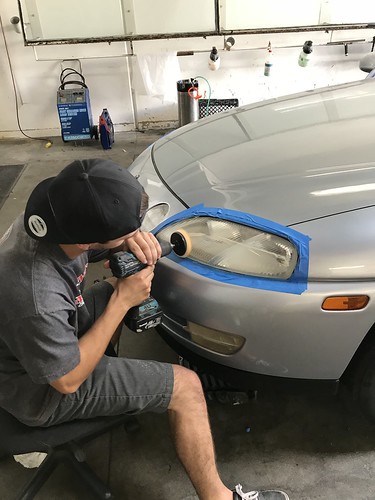
Other than that, there has been some down time and I was finally able to get my front lip on, my trunk installed and did a quick polish/wax on my headlights and fogs.
The front lip was easier than I expected, like I mentioned above I tossed out the mounting hardware and I was pissed about it and bought some hardware from Home Depot.
Well none of it worked and ended up just using simple bolts, washers and mounting hardware :rofl
by Bryan Boeldt, on Flickr
by Bryan Boeldt, on Flickr
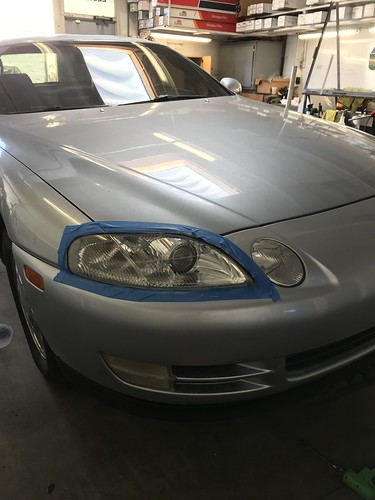
As you can tell I masked off the headlights to have my work buddy polish up my headlights for me while I was working on the front lip install.
by Bryan Boeldt, on Flickr
by Bryan Boeldt, on Flickr
After one quick pass, it literally looked 100x better
by Bryan Boeldt, on Flickr
by Bryan Boeldt, on Flickr
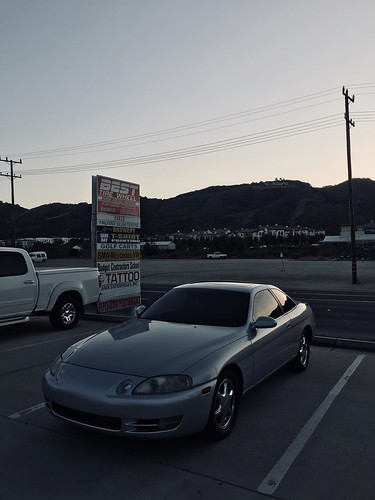
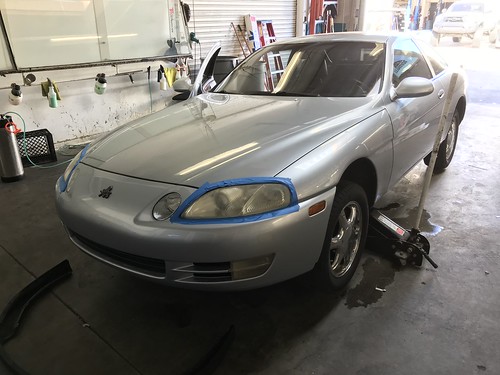
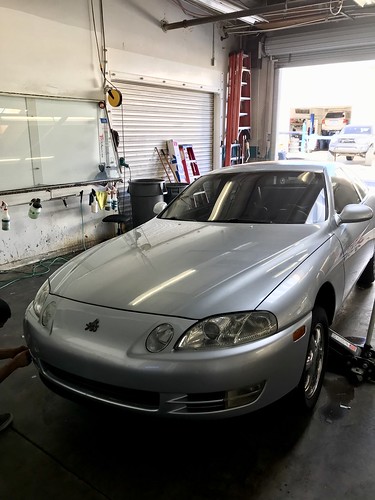
Some after photos with the headlights and fogs done and the lip installed!
by Bryan Boeldt, on Flickr
by Bryan Boeldt, on Flickr
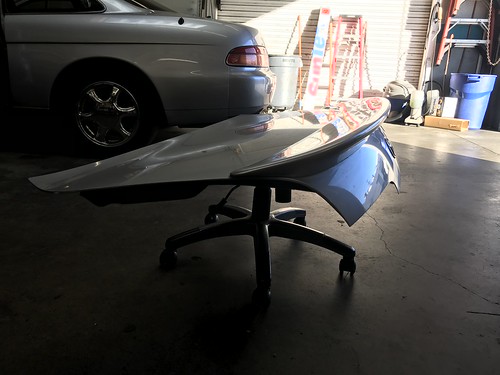
Brought my JDM trunk to work yesterday and installed it before our first few appointments. I ****ing love this trunk with this spoiler so much. I just got so lucky to find one the exact color code of my car:alright
by Bryan Boeldt, on Flickr
by Bryan Boeldt, on Flickr
by Bryan Boeldt, on Flickr
Once it was installed:alright
by Bryan Boeldt, on Flickr
by Bryan Boeldt, on Flickr
Now I didnt get any photos of it but I removed all the side window tint from old faded and blue 20% film to a ceramic based 15% film. While I had the door panel off, I took the time to spray paint some interior speakers that have faded or turned purple :rofl
Before
by Bryan Boeldt, on Flickr
After
by Bryan Boeldt, on Flickr
Spray paint works wonders, until it builds up at the spray tip and drops heavy drips on the things your painting, oh well :shrug
Before
by Bryan Boeldt, on Flickr
After
by Bryan Boeldt, on Flickr
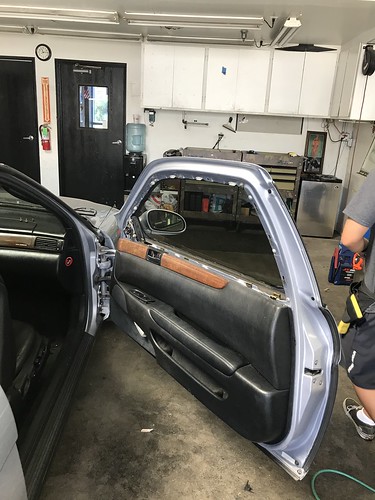
And for anyone with an SC that is looking to remove the door panels, be warened, they are a ***** lol
by Bryan Boeldt, on Flickr
by Bryan Boeldt, on Flickr
Didnt get any interior photos of the speakers installed but it looks good to me lol
These will be some of the last major upgrades done to the car until I can save up some money for bigger things like coils and wheels. Have a little girl coming in December whos about to take all my money lol #dadlife
Anyways, heres some photos of everything all together. See you guys next time!
by Bryan Boeldt, on Flickr
by Bryan Boeldt, on Flickr
by Bryan Boeldt, on Flickr
by Bryan Boeldt, on Flickr
Other than that, there has been some down time and I was finally able to get my front lip on, my trunk installed and did a quick polish/wax on my headlights and fogs.
The front lip was easier than I expected, like I mentioned above I tossed out the mounting hardware and I was pissed about it and bought some hardware from Home Depot.
Well none of it worked and ended up just using simple bolts, washers and mounting hardware :rofl
As you can tell I masked off the headlights to have my work buddy polish up my headlights for me while I was working on the front lip install.
After one quick pass, it literally looked 100x better
Some after photos with the headlights and fogs done and the lip installed!


Brought my JDM trunk to work yesterday and installed it before our first few appointments. I ****ing love this trunk with this spoiler so much. I just got so lucky to find one the exact color code of my car:alright

Once it was installed:alright
Now I didnt get any photos of it but I removed all the side window tint from old faded and blue 20% film to a ceramic based 15% film. While I had the door panel off, I took the time to spray paint some interior speakers that have faded or turned purple :rofl
Before
After
Spray paint works wonders, until it builds up at the spray tip and drops heavy drips on the things your painting, oh well :shrug
Before
After

And for anyone with an SC that is looking to remove the door panels, be warened, they are a ***** lol
Didnt get any interior photos of the speakers installed but it looks good to me lol
These will be some of the last major upgrades done to the car until I can save up some money for bigger things like coils and wheels. Have a little girl coming in December whos about to take all my money lol #dadlife
Anyways, heres some photos of everything all together. See you guys next time!
 01-22-19, 05:07 PM
#5
Rookie
Thread Starter
Well one more quick edit lol
Had time in between appointments today, so for **** and giggles we tinted my sunroof in Limo lol
Now every single window on my car is tinted :rofl :alright
NOT ME just fyi lol
Before
by Bryan Boeldt, on Flickr
After
by Bryan Boeldt, on Flickr
Had time in between appointments today, so for **** and giggles we tinted my sunroof in Limo lol
Now every single window on my car is tinted :rofl :alright
NOT ME just fyi lol
Before
After
 01-22-19, 05:09 PM
#6
Rookie
Thread Starter
Been awhile since Ive posted, no crazy updates. Life has been moving pretty fast though.
Left my tint job to work for the father in law, baby is almost here, shes gonna take up a lot of my time and money too :rofl
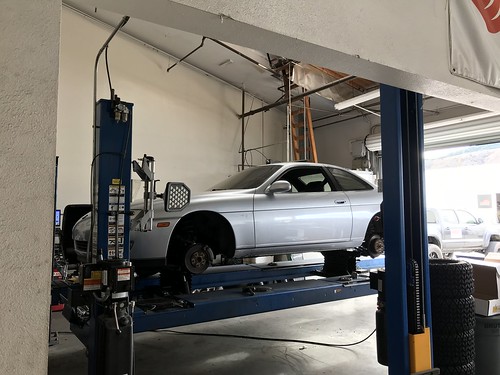
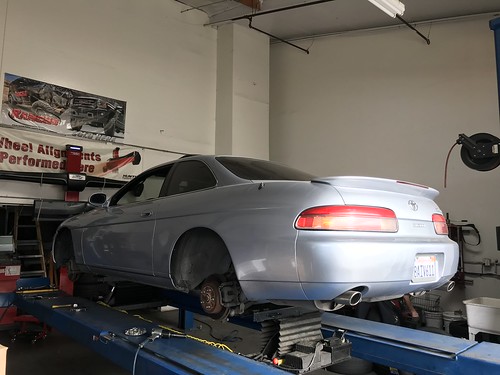
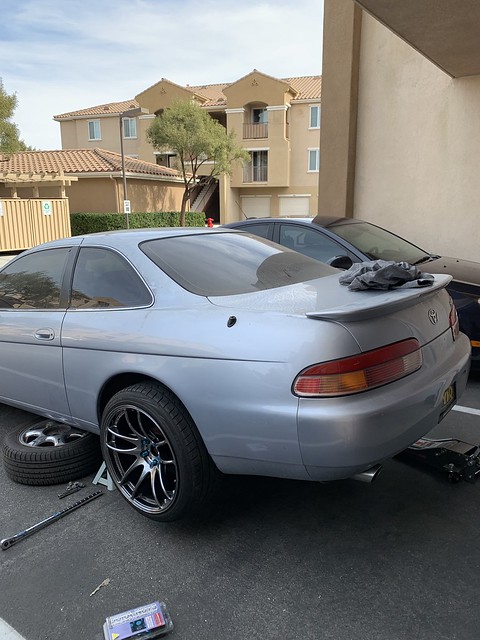
But before I left my tint job I managed to get some new tires and a much needed alignment on the car.
by Bryan Boeldt, on Flickr
by Bryan Boeldt, on Flickr
by Bryan Boeldt, on Flickr
Nothing crazy, just OEM spec, now the car doesnt pull slightly to the left anymore :alright
by Bryan Boeldt, on Flickr
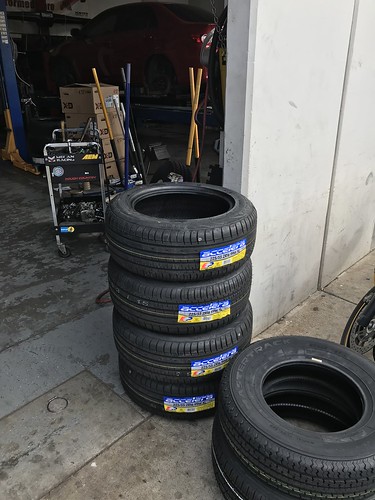
Some new cheap tires lol
by Bryan Boeldt, on Flickr
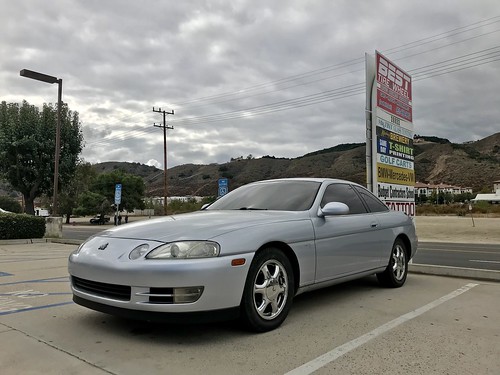
All done!
by Bryan Boeldt, on Flickr
Also put a deposit on some wheels, but ya'll gonna have to wait till they get here to see them. :eyebrows
Left my tint job to work for the father in law, baby is almost here, shes gonna take up a lot of my time and money too :rofl
But before I left my tint job I managed to get some new tires and a much needed alignment on the car.
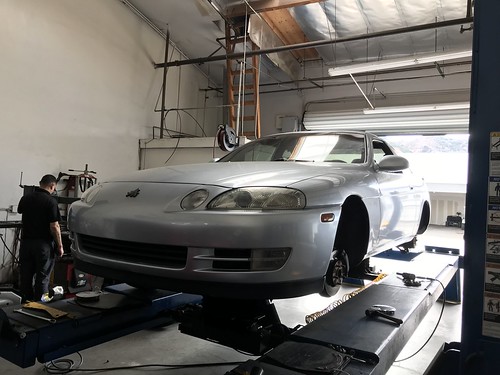
Nothing crazy, just OEM spec, now the car doesnt pull slightly to the left anymore :alright

Some new cheap tires lol
All done!
Also put a deposit on some wheels, but ya'll gonna have to wait till they get here to see them. :eyebrows
01-22-19, 05:10 PM
#7
Rookie
Thread Starter
Long time no talk guys lol
Anyways, my daughter was born December 15th, weighing a beautiful 7 lbs 2 oz.
She has since taken up all my attention lol.
So heres some car photos from my new job, and yet somehow I still cant manage to get away from Honda co-employees lol
by Bryan Boeldt, on Flickr
by Bryan Boeldt, on Flickr
by Bryan Boeldt, on Flickr
I was able to get some time alone for a day and I drove a couple hours to meet up with a buddy for some OEM parts. I traded him my shaved OEM trunk for some 97+ sideskirts.
by Bryan Boeldt, on Flickr
by Bryan Boeldt, on Flickr
I ended up selling my front lip and the sideskirts for a pretty penny to a buddy out in Indiana. So buh bye :eyebrows
by Bryan Boeldt, on Flickr
by Bryan Boeldt, on Flickr
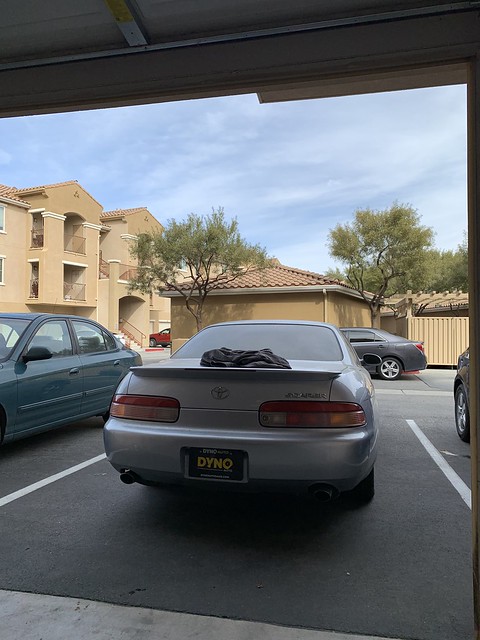
Took a few early morning shots, and then my vanity plate came in:eyebrows:eyebrows
by Bryan Boeldt, on Flickr
by Bryan Boeldt, on Flickr
:devillook:devillook
by Bryan Boeldt, on Flickr
Still making tiny moves on parts. Yall see what Ive got up my sleeves in due time...
Anyways, my daughter was born December 15th, weighing a beautiful 7 lbs 2 oz.
She has since taken up all my attention lol.
So heres some car photos from my new job, and yet somehow I still cant manage to get away from Honda co-employees lol


I was able to get some time alone for a day and I drove a couple hours to meet up with a buddy for some OEM parts. I traded him my shaved OEM trunk for some 97+ sideskirts.
I ended up selling my front lip and the sideskirts for a pretty penny to a buddy out in Indiana. So buh bye :eyebrows

Took a few early morning shots, and then my vanity plate came in:eyebrows:eyebrows
:devillook:devillook

Still making tiny moves on parts. Yall see what Ive got up my sleeves in due time...
Trending Topics
01-22-19, 05:12 PM
#8
Rookie
Thread Starter
Small update...
Since my daughter has been born, the wife and I have been trying to save, lol, for a house and were doing pretty good, but when great deals come up, its hard to look away:eyebrows
Anyways, here are some things I have picked up that will EVENTUALLY go on the car, I think Im going to wait until we get our house to start installing stuff.
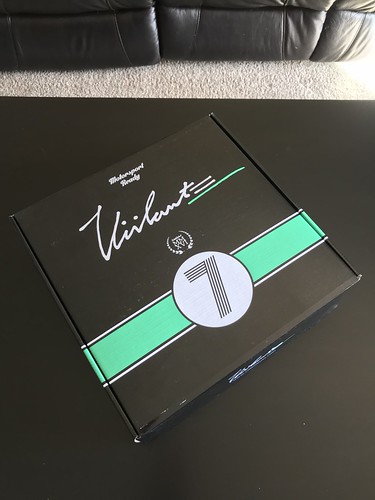
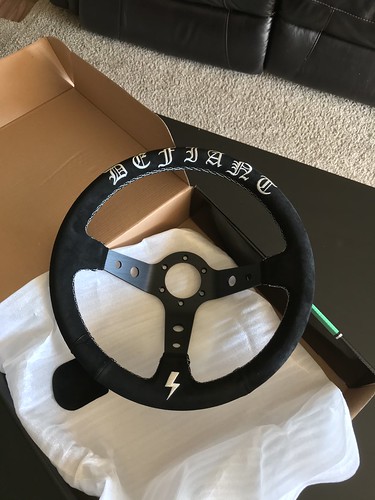
Viilante Collab steering wheel
by Bryan Boeldt, on Flickr
Had to get it since my last name is Boeldt (pronounced BOLT)
by Bryan Boeldt, on Flickr
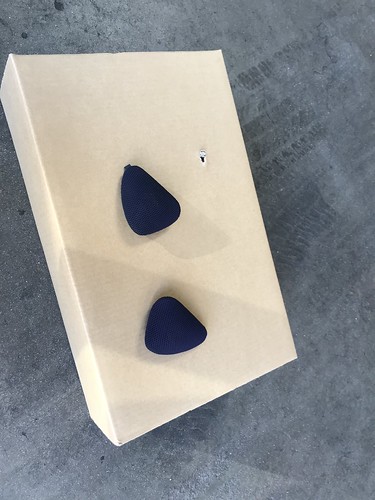
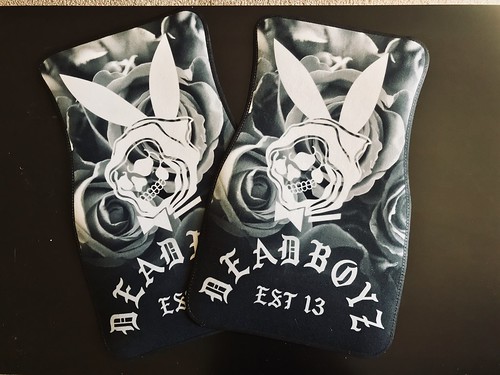
DeadBoys floor mats - Some IG guy I follow
by Bryan Boeldt, on Flickr
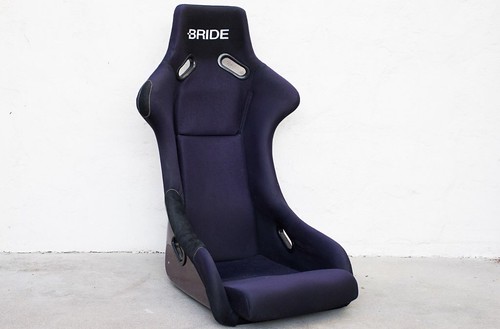
Bride VIOS I Curtesy of @getjpn on IG
by Bryan Boeldt, on Flickr
I plan on reupholstering the whole seat and repainting the back :eyebrows
by Bryan Boeldt, on Flickr
by Bryan Boeldt, on Flickr
my RARE AS **** Enkei Phalenx wheels - I will rebuild in future:
by Bryan Boeldt, on Flickr
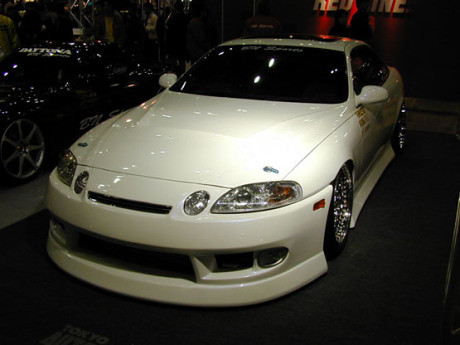
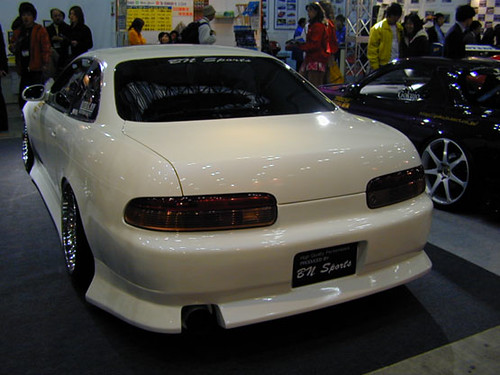
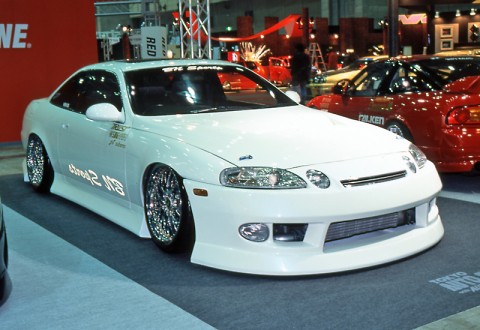
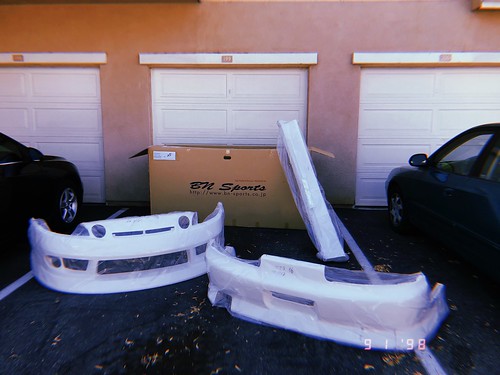
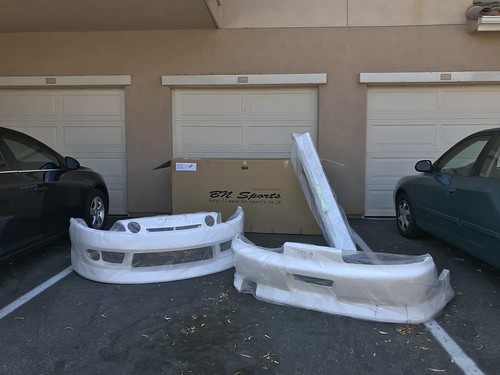
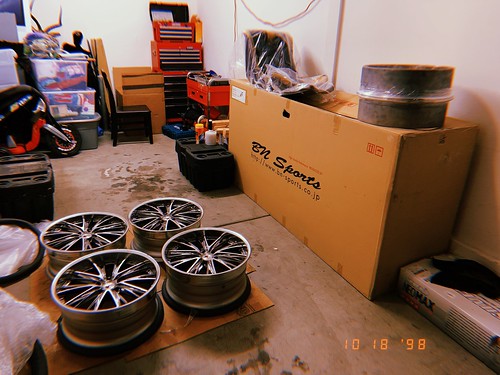
I also, LOWKEY lol, purchased a BN Sports Type 2 kit from Mastermind North America back in March. The kit takes 3-3.5 months to manufacture and deliver, so slowly waiting...
by Bryan Boeldt, on Flickr
by Bryan Boeldt, on Flickr
by Bryan Boeldt, on Flickr
by Bryan Boeldt, on Flickr
by Bryan Boeldt, on Flickr
Also, I had @clctve.us on IG render my build with everything I plan on doing, soooo.....be out on the lookout for that:eyebrows:alright
by Bryan Boeldt, on Flickr
by Bryan Boeldt, on Flickr
If you would like to follow my slow build here thats cool, or on Instagram add me here: @half_lung
I also ordered a roof spoiler not too long ago so that should be here soon
Some things I still need for my build:
Coilovers
Front upper control arms
Exhuast
Steering wheel hub
Seat rails
Ganador Mirrors
Tires
and new lips for the wheels:eyebrows
Bigger house/garage :rofl
Now you guys are all caught up! Also I have those half lung stickers if anyone would like to buy one!
$5 shipped
Just message me here, or on insta: @half_lung or email: bbolt14@yahoo.com
by Bryan Boeldt, on Flickr
Since my daughter has been born, the wife and I have been trying to save, lol, for a house and were doing pretty good, but when great deals come up, its hard to look away:eyebrows
Anyways, here are some things I have picked up that will EVENTUALLY go on the car, I think Im going to wait until we get our house to start installing stuff.
Viilante Collab steering wheel
Had to get it since my last name is Boeldt (pronounced BOLT)
DeadBoys floor mats - Some IG guy I follow
Bride VIOS I Curtesy of @getjpn on IG
I plan on reupholstering the whole seat and repainting the back :eyebrows


my RARE AS **** Enkei Phalenx wheels - I will rebuild in future:

I also, LOWKEY lol, purchased a BN Sports Type 2 kit from Mastermind North America back in March. The kit takes 3-3.5 months to manufacture and deliver, so slowly waiting...


Also, I had @clctve.us on IG render my build with everything I plan on doing, soooo.....be out on the lookout for that:eyebrows:alright


If you would like to follow my slow build here thats cool, or on Instagram add me here: @half_lung
I also ordered a roof spoiler not too long ago so that should be here soon
Some things I still need for my build:
Coilovers
Front upper control arms
Exhuast
Steering wheel hub
Seat rails
Ganador Mirrors
Tires
and new lips for the wheels:eyebrows
Bigger house/garage :rofl
Now you guys are all caught up! Also I have those half lung stickers if anyone would like to buy one!
$5 shipped
Just message me here, or on insta: @half_lung or email: bbolt14@yahoo.com
 01-22-19, 05:13 PM
#9
Rookie
Thread Starter
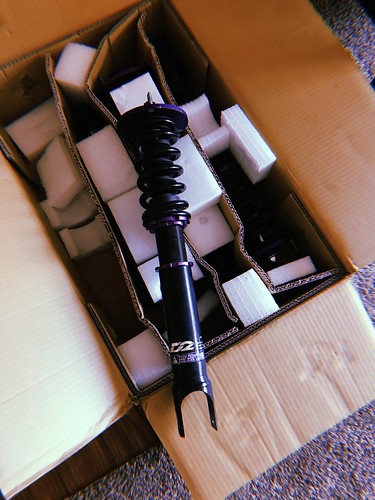
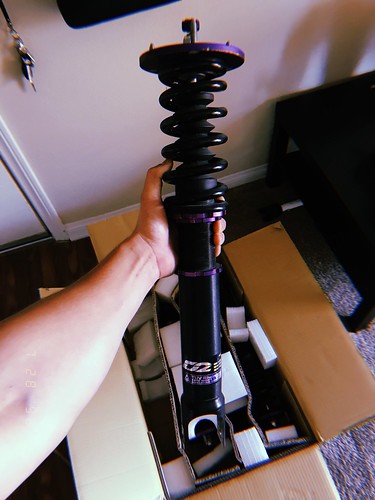
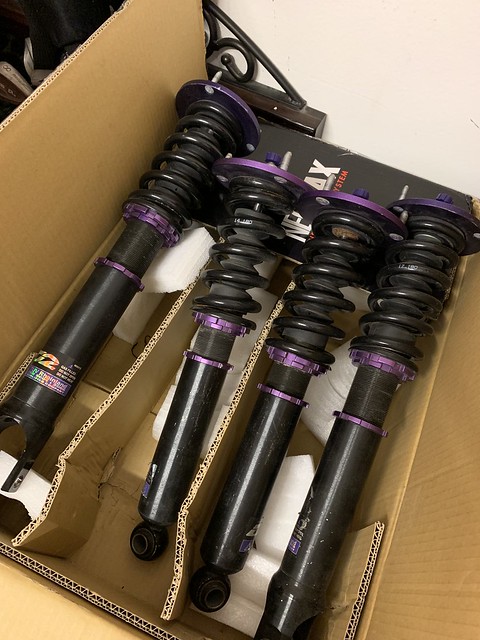
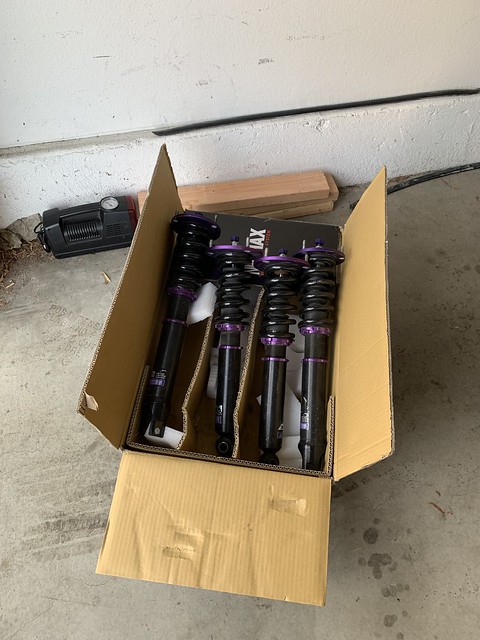
No crazy update, but my coils came in.
Got a used set of D2 Racing coils. Theyll do for now until I can save up and get some PBMs later down the road after acquiring more important parts
by Bryan Boeldt, on Flickr
by Bryan Boeldt, on Flickr
Also, I ordered 5.5" lips from threepiece.us for my wheels to rebuild them, Im ****ing PRAYING they fit cause my wheels are 30 hole and the only lips I can think of that will fit are LXZ cause they are 30/60 hole as well. So fingers crossed.
The build has slowed down quite a bit. The car is experiencing some electrical issues that are common amongst 95-96 years. Just need to replace the ECU with a rebuilt one, but **** it, aesthetics are more important lol and I have no need to drive it so she waits.
ETA on the kit should be sometime around early to mid September, taking longer than expected, but it will be worth the wait.
Thats it for now. Toodaloo
MY KIT CAME IN!!!
by Bryan Boeldt, on Flickr
Just want to give a HUUUGE shout out to Mastermind North America for giving me such a great deal on this kit!
by Bryan Boeldt, on Flickr
I ordered the kit back in March, took 5.5 months to get here. So yes, I have had it since September and Ive just been lagging on updating this.
by Bryan Boeldt, on Flickr
Dont know when Ill have time to install it because the car is currently not running and funds have been kinda dry since the wife and I just got married in Hawaii on October 13th:alright
by Bryan Boeldt, on Flickr
BUT! Before we left for Hawaii, I sold my rare as **** Enkei's
by Bryan Boeldt, on Flickr
To get these :eyebrows
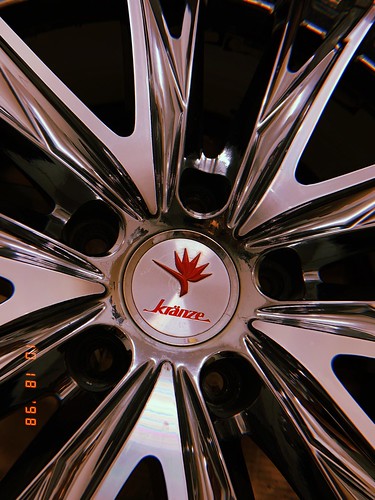
by https://www.flickr.com/photos/87780680@N08/, on Flickr
Even RARER Weds Kranze Elaborar. Im almost positive these are the only set in the US, but thats only because I havent seen another set. And I could be wrong so dont fact check me lol
by Bryan Boeldt, on Flickr
by Bryan Boeldt, on Flickr
by Bryan Boeldt, on Flickr
Garage at the moment, will be like so until I have free time to get to business. Anyways, thats it for now. See y'all soon:alright
by Bryan Boeldt, on Flickr
by Bryan Boeldt, on Flickr
Got a used set of D2 Racing coils. Theyll do for now until I can save up and get some PBMs later down the road after acquiring more important parts
Also, I ordered 5.5" lips from threepiece.us for my wheels to rebuild them, Im ****ing PRAYING they fit cause my wheels are 30 hole and the only lips I can think of that will fit are LXZ cause they are 30/60 hole as well. So fingers crossed.
The build has slowed down quite a bit. The car is experiencing some electrical issues that are common amongst 95-96 years. Just need to replace the ECU with a rebuilt one, but **** it, aesthetics are more important lol and I have no need to drive it so she waits.
ETA on the kit should be sometime around early to mid September, taking longer than expected, but it will be worth the wait.
Thats it for now. Toodaloo
MY KIT CAME IN!!!
Just want to give a HUUUGE shout out to Mastermind North America for giving me such a great deal on this kit!

I ordered the kit back in March, took 5.5 months to get here. So yes, I have had it since September and Ive just been lagging on updating this.
Dont know when Ill have time to install it because the car is currently not running and funds have been kinda dry since the wife and I just got married in Hawaii on October 13th:alright

BUT! Before we left for Hawaii, I sold my rare as **** Enkei's
To get these :eyebrows
Even RARER Weds Kranze Elaborar. Im almost positive these are the only set in the US, but thats only because I havent seen another set. And I could be wrong so dont fact check me lol
Garage at the moment, will be like so until I have free time to get to business. Anyways, thats it for now. See y'all soon:alright
 01-22-19, 05:15 PM
#10
Rookie
Thread Starter
Thanks man, then it pains me to say....I traded them lol
Yup, got new wheels AGAIN!
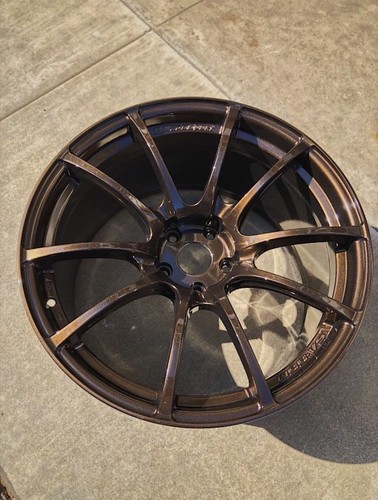
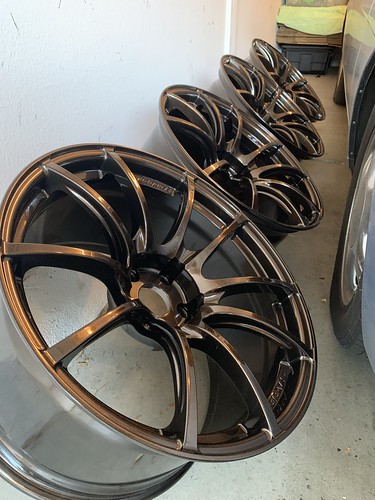
Traded them for some WedsSport SA-55M in a better spec'd 19x10.5 +24 squared, and the wheels have recently been freshly powder-coated this amazing brown....buuutt I MIGHT get them chromed lol
by Bryan Boeldt, on Flickr
by Bryan Boeldt, on Flickr
by Bryan Boeldt, on Flickr
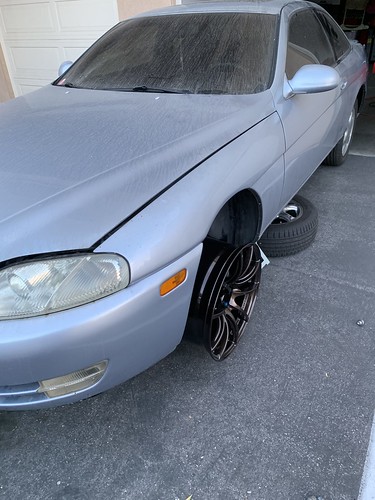
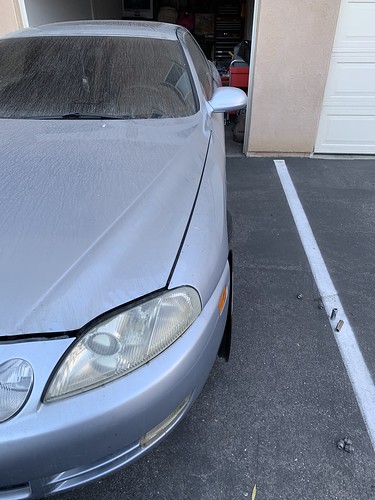
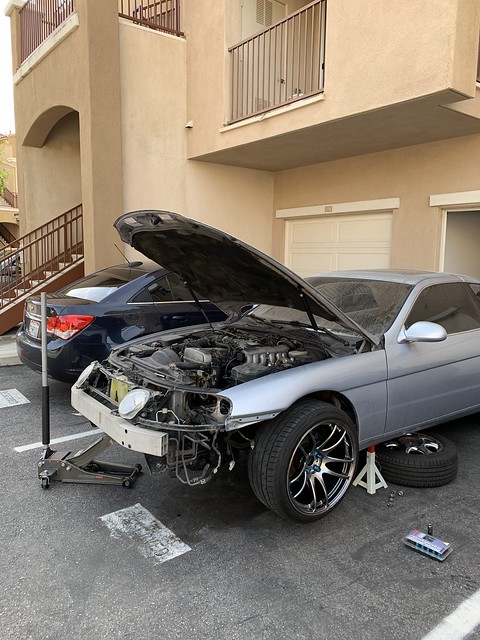
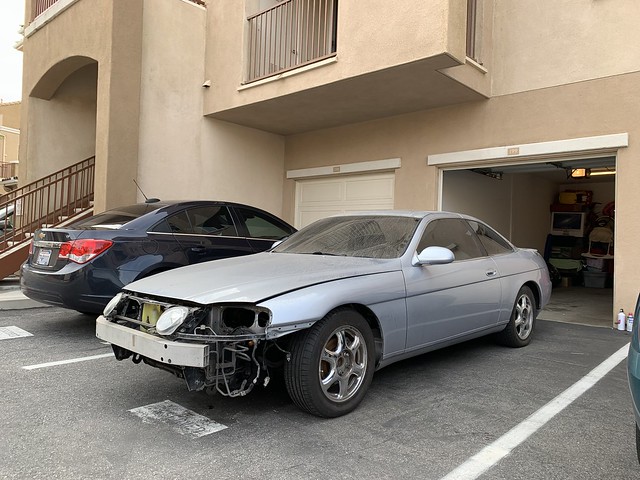
Hey guys not much has progressed unfortunately. Work has become slow due to the holidays and financially tight, so funds for the car are on hold until further notice, most likely until tax season. But I did find a buyer for my stock bumper so I took some time to take it off to sell.
AND MAN LET ME TELL YOU! These damn Sc's and their ridiculous amount of screws and bolts required to remove the front bumper:mad
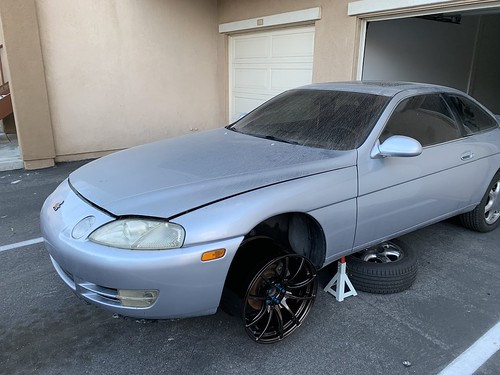
But before I got started, I decided to test fit the WedsSports to get an idea on fitment and appearance with my Rays lug nuts
by Bryan Boeldt, on Flickr
by Bryan Boeldt, on Flickr
And on the car:alright
by Bryan Boeldt, on Flickr
by Bryan Boeldt, on Flickr
by Bryan Boeldt, on Flickr
Now granted this is on stock suspension and droop, so once coils are on it will naturally camber about 4 degrees giving me a good fitment
by Bryan Boeldt, on Flickr
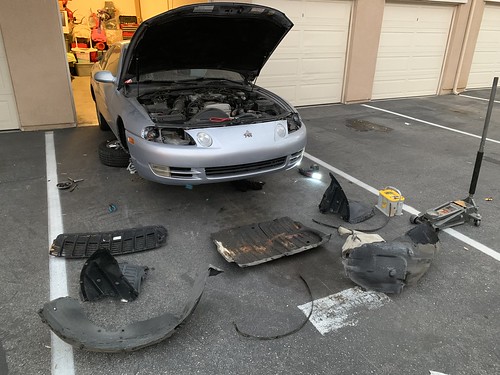
Now onto the biggest pain, the bumper.
by Bryan Boeldt, on Flickr
Here is whats needed to remove said bumper:
Philips head screwdriver or drill
10mm socket and ratchet
Some dykes for cutting uncooperative plastics
Obviously a floor jack and stands
**** to take the wheels off
Some patience
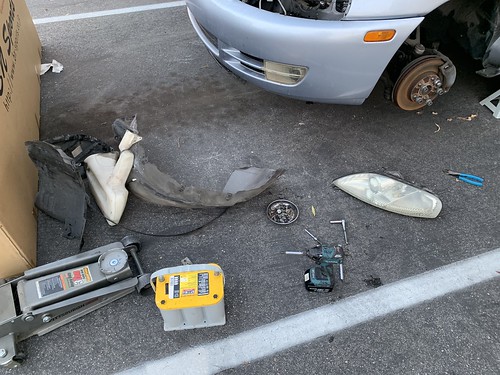
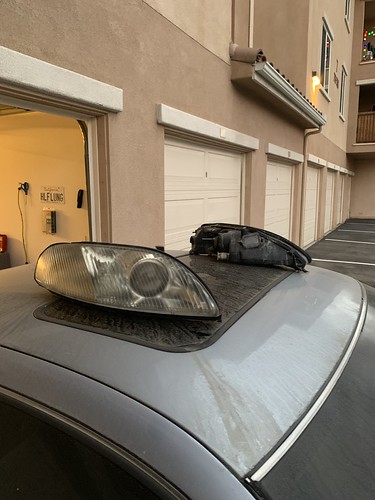
Anyways after removing 40+ screws and bolts, remove the splash guard underneath the engine, the wheel well covers, windshield washer fluid reservoir, headlights, unclip high beams, weather stripping on top of bumper, and thats about it.
by Bryan Boeldt, on Flickr
by Bryan Boeldt, on Flickr
by Bryan Boeldt, on Flickr
by Bryan Boeldt, on Flickr
by Bryan Boeldt, on Flickr
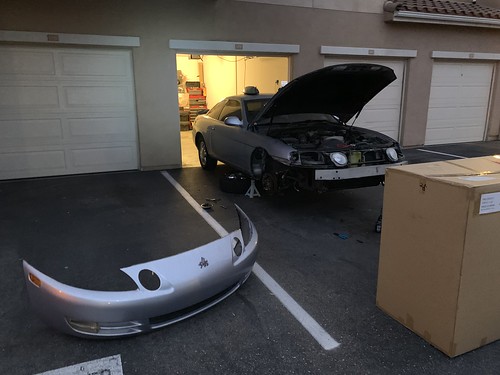
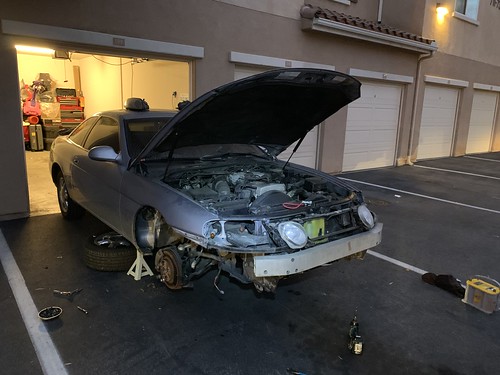
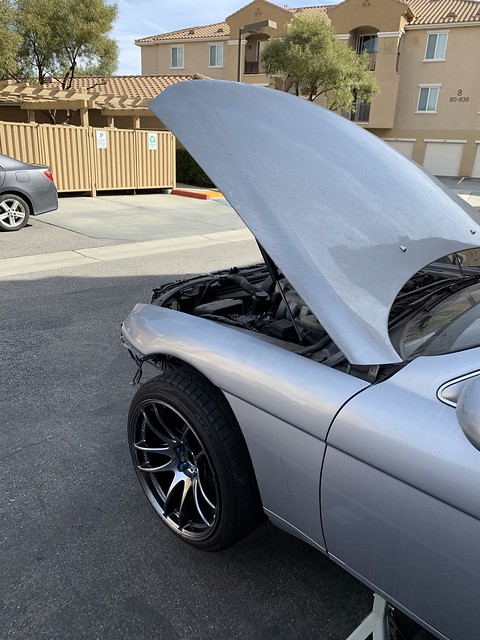
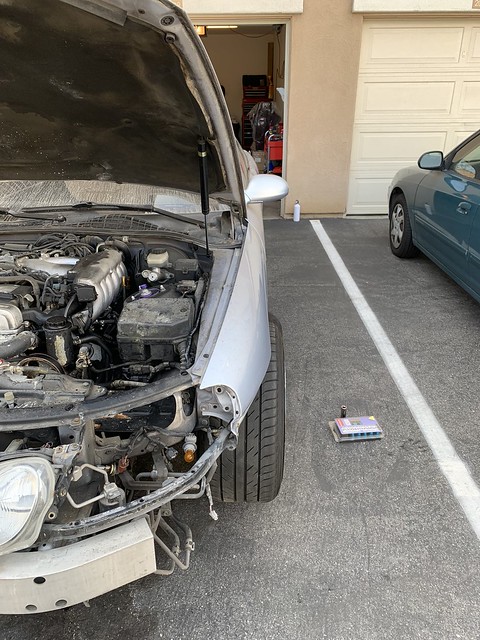
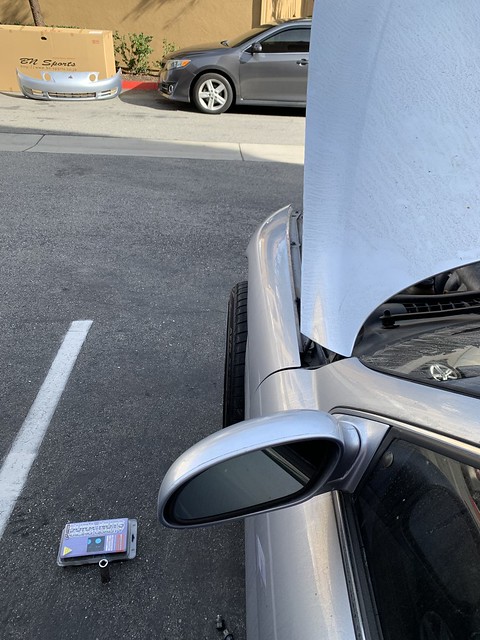
And then clean all the **** up, throw the car int he garage and go upstairs and drink lots of alcohol.
by Bryan Boeldt, on Flickr
Now that the hardest OEM part is removed, I may start tackling other parts of the car that needs to be removed like the rear bumper and fenders so I can relocate the wiring harness.
Also, at my shop were building a halfpipe for ****s and giggles so the boss (aka my father in law) said I can bring the car in and finish it up in our warehouse since we'll have some space. So fingers crossed for some ACTUAL work space.:eyebrows
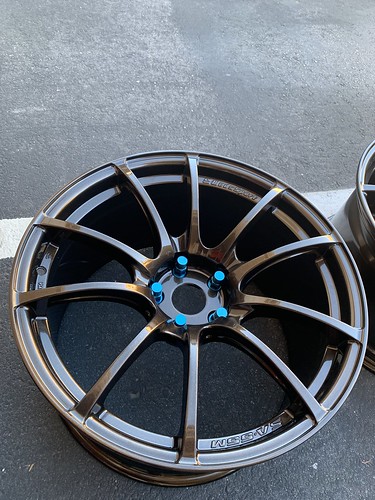
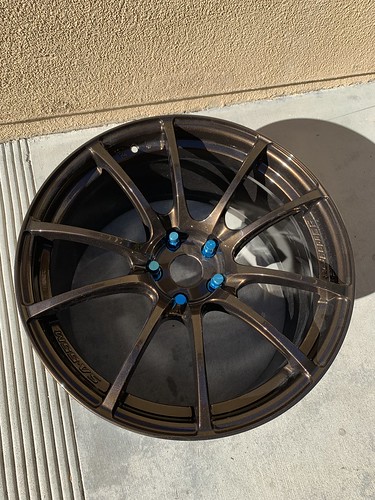
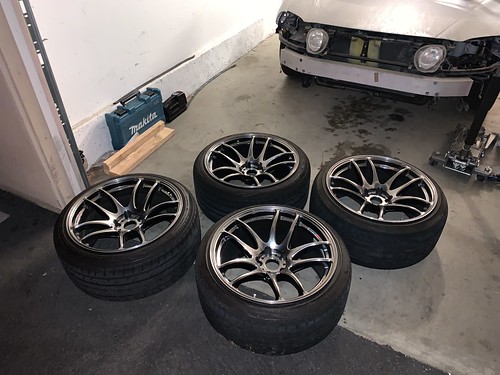
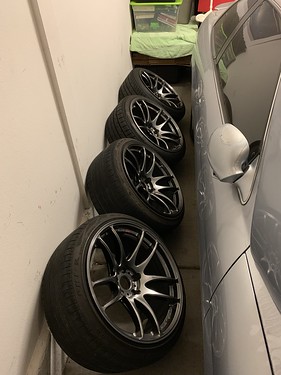
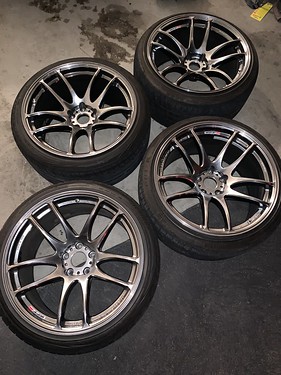
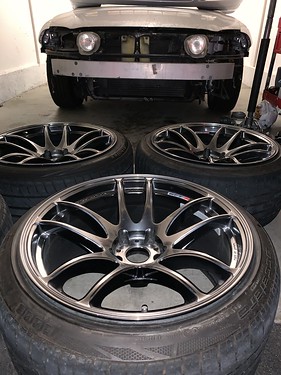
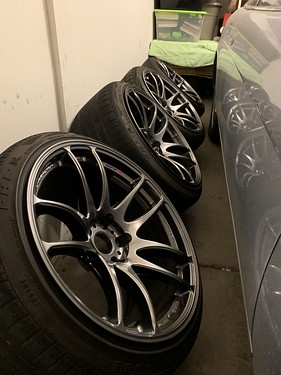
I GOT NEW WHEELS...AGAIN...*****ES!!
Straight traded the WedsSports for some Work Emotion Kiwamis in 19x10.5+12 squared including tires
Time to start throwing everything on! :alright
by Bryan Boeldt, on Flickr
by Bryan Boeldt, on Flickr
by Bryan Boeldt, on Flickr
by Bryan Boeldt, on Flickr
by Bryan Boeldt, on Flickr
NOW YOU GUYS ARE ALL CAUGHT UP. Ill make sure to update this thread when I update my other ones
Yup, got new wheels AGAIN!
Traded them for some WedsSport SA-55M in a better spec'd 19x10.5 +24 squared, and the wheels have recently been freshly powder-coated this amazing brown....buuutt I MIGHT get them chromed lol

Hey guys not much has progressed unfortunately. Work has become slow due to the holidays and financially tight, so funds for the car are on hold until further notice, most likely until tax season. But I did find a buyer for my stock bumper so I took some time to take it off to sell.
AND MAN LET ME TELL YOU! These damn Sc's and their ridiculous amount of screws and bolts required to remove the front bumper:mad
But before I got started, I decided to test fit the WedsSports to get an idea on fitment and appearance with my Rays lug nuts
And on the car:alright
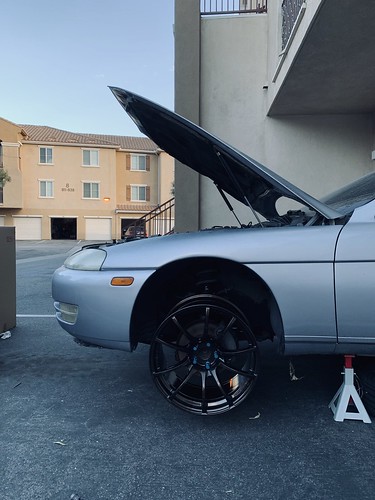
Now granted this is on stock suspension and droop, so once coils are on it will naturally camber about 4 degrees giving me a good fitment
Now onto the biggest pain, the bumper.
Here is whats needed to remove said bumper:
Philips head screwdriver or drill
10mm socket and ratchet
Some dykes for cutting uncooperative plastics
Obviously a floor jack and stands
**** to take the wheels off
Some patience
Anyways after removing 40+ screws and bolts, remove the splash guard underneath the engine, the wheel well covers, windshield washer fluid reservoir, headlights, unclip high beams, weather stripping on top of bumper, and thats about it.

And then clean all the **** up, throw the car int he garage and go upstairs and drink lots of alcohol.

Now that the hardest OEM part is removed, I may start tackling other parts of the car that needs to be removed like the rear bumper and fenders so I can relocate the wiring harness.
Also, at my shop were building a halfpipe for ****s and giggles so the boss (aka my father in law) said I can bring the car in and finish it up in our warehouse since we'll have some space. So fingers crossed for some ACTUAL work space.:eyebrows
I GOT NEW WHEELS...AGAIN...*****ES!!
Straight traded the WedsSports for some Work Emotion Kiwamis in 19x10.5+12 squared including tires
Time to start throwing everything on! :alright
NOW YOU GUYS ARE ALL CAUGHT UP. Ill make sure to update this thread when I update my other ones
01-22-19, 05:18 PM
#11
Rookie
Thread Starter
Just another minor update guys.
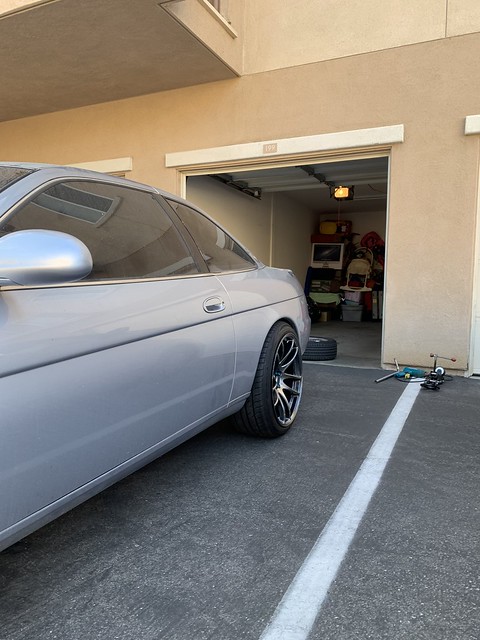
When lowering "most" Lexus' the wiring harness usually needs to be relocated from under the wheel well to give more clearance and to not rub through it and **** everything up.
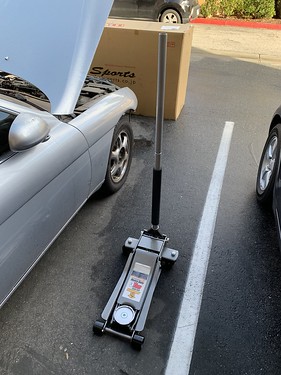
I got a Harbor Freight gift card for christmas and I was overdue for a new floor jack, so.....
by Bryan Boeldt, on Flickr
by Bryan Boeldt, on Flickr
I ****ing love this thing!
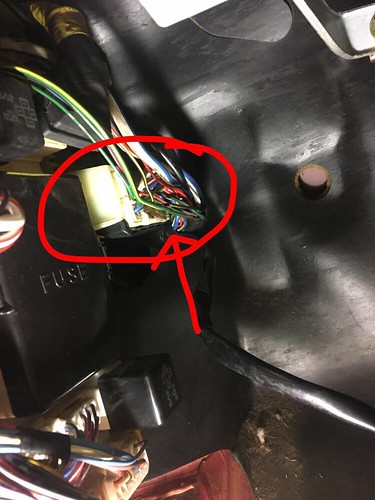
Anyways, I watched this youtube video and the guy was extremely detailed and it helped me SO MUCH. HOWEVER, I forgot to latch one simple latch after reinstalling the wiring harness plugs which led to a 3+ hour troubleshooting/head scratching episode because the car would not start.
https://www.youtube.com/watch?v=HttqY_biua8&t=150s I eventually turned to Facebook and was given the advice to put the latch back up to secure the plug thus allowing me to turn on the car:eyebrows:alright
by Bryan Boeldt, on Flickr
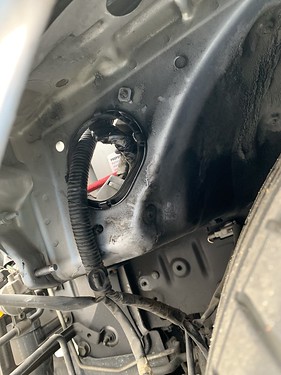
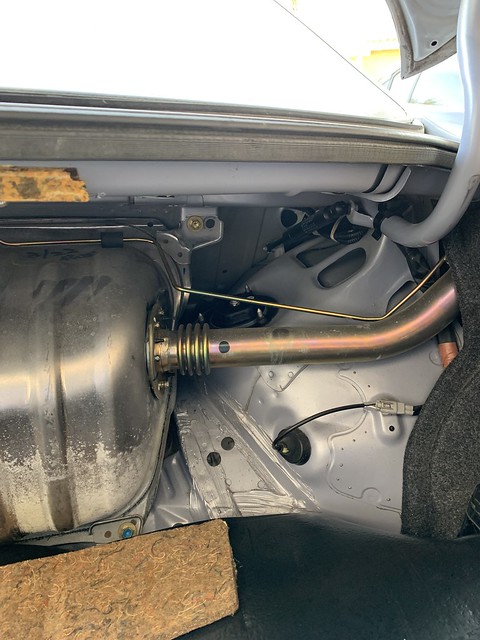
Anyways, heres some AFTER photos of said relocation. Also wrapped everything in new electrical tape for a cleaner look.
by Bryan Boeldt, on Flickr
by Bryan Boeldt, on Flickr
by Bryan Boeldt, on Flickr
NOW THAT THATS DONE...
I am planning on putting the coils on sometime soon, However its going to be raining for the next week here in sunny Southern California. So time will tell,
Till next time!
When lowering "most" Lexus' the wiring harness usually needs to be relocated from under the wheel well to give more clearance and to not rub through it and **** everything up.
I got a Harbor Freight gift card for christmas and I was overdue for a new floor jack, so.....

I ****ing love this thing!
Anyways, I watched this youtube video and the guy was extremely detailed and it helped me SO MUCH. HOWEVER, I forgot to latch one simple latch after reinstalling the wiring harness plugs which led to a 3+ hour troubleshooting/head scratching episode because the car would not start.
https://www.youtube.com/watch?v=HttqY_biua8&t=150s I eventually turned to Facebook and was given the advice to put the latch back up to secure the plug thus allowing me to turn on the car:eyebrows:alright
Anyways, heres some AFTER photos of said relocation. Also wrapped everything in new electrical tape for a cleaner look.


NOW THAT THATS DONE...
I am planning on putting the coils on sometime soon, However its going to be raining for the next week here in sunny Southern California. So time will tell,
Till next time!
01-22-19, 05:22 PM
#12
Rookie
Thread Starter
Its been A LONG TIME COMING, but I finally installed my coil overs. Ive had them since last year and I really havent had the motivation to throw them on because I had wheels with no tires or wheels that needed to be rebuilt so there was no point in lowering the car cause I hate lowered cars on stock wheels/tires.
As you know, I traded my Weds for a set of Works with tires, and ever since I have had the urge to install everything. Next up is to start on the kit mounting and then exhaust work. or Vice versa. But for now I tried to do my best to give as much of a detailed process as possible. HERE WE GO.
by Bryan Boeldt, on Flickr
by Bryan Boeldt, on Flickr
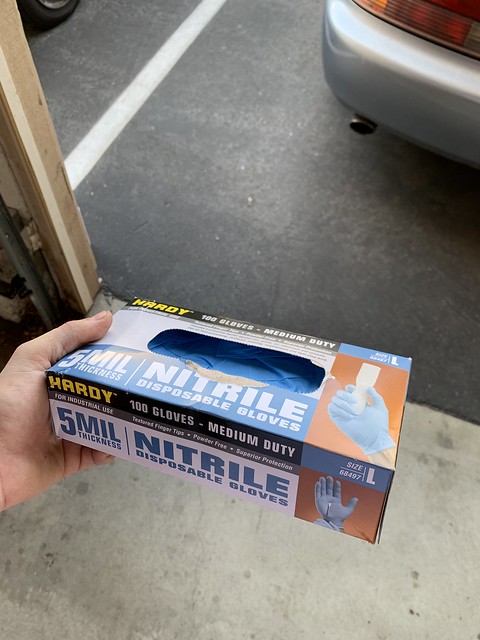
PRO TIP: THESE ARE YOUR FRIENDS AND WILL SAVE YOU TONS OF TIME OF CLEAN UP AFTERWORDS
by Bryan Boeldt, on Flickr
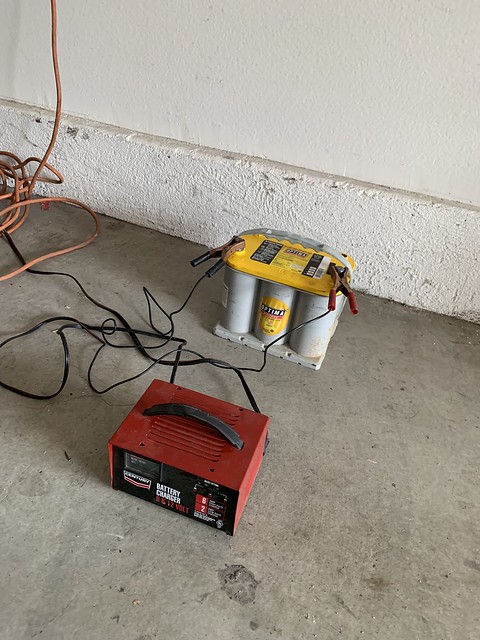
First off, Im a complete dumbass for leaving my brand new and expensive battery hooked up to a car that NEVER gets driven so immediately had to start charging that *****.
by Bryan Boeldt, on Flickr
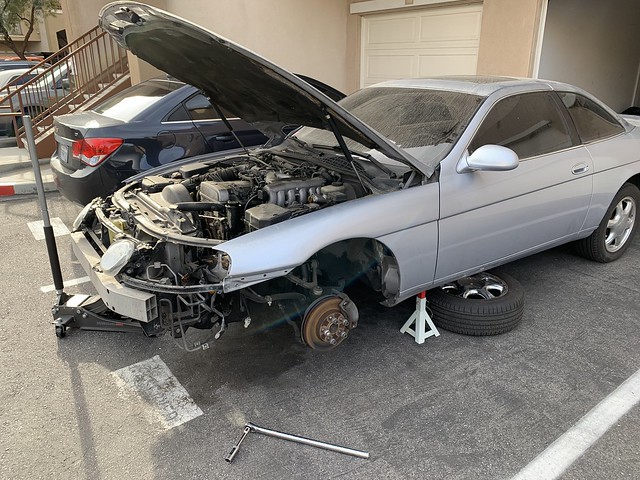
Figured I would do the fronts first as they are the hardest to tackle, thats what Ive gathered from tons of YouTube How To videos
SAFTEY FIRST: ALWAYS put stock wheels under car near jack stands JUST IN CASE the stands give out.
by Bryan Boeldt, on Flickr
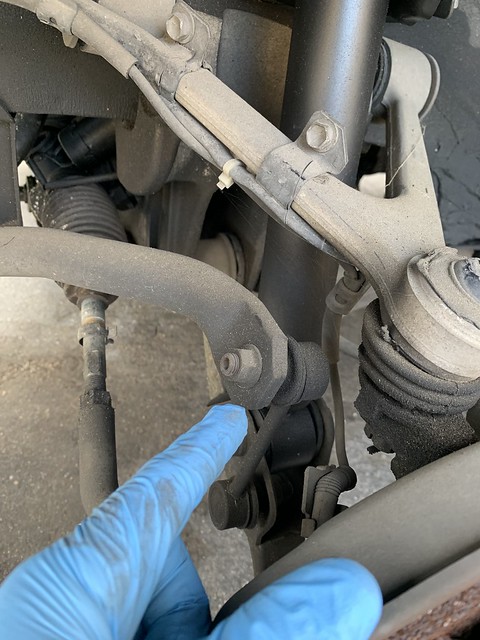
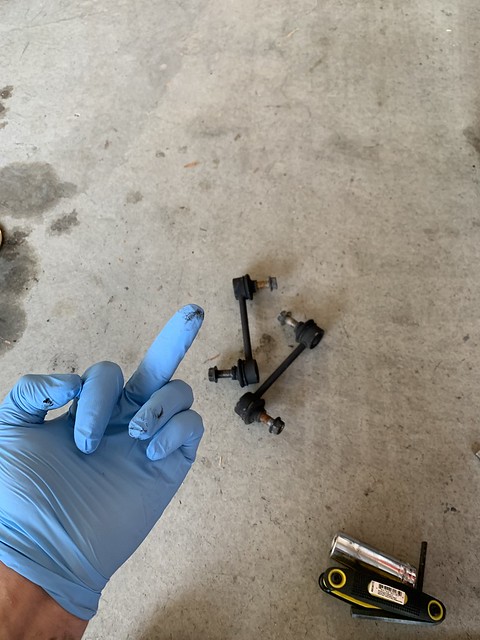
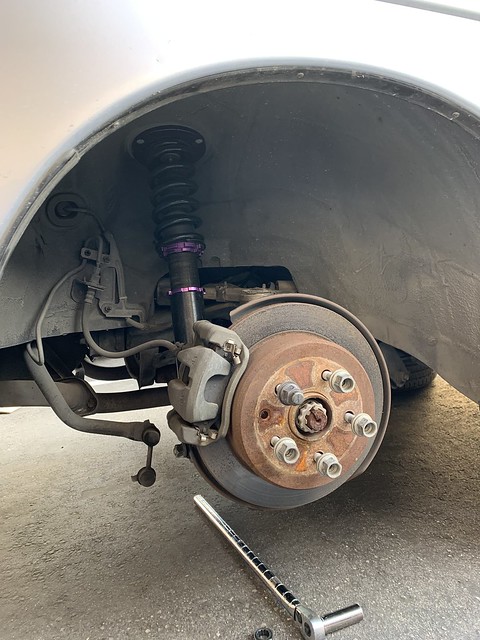
When doing the fronts its easiest to unbolt and remove these sway bar end links. They require a 5m Allen key and a 14mm wrench.
by Bryan Boeldt, on Flickr
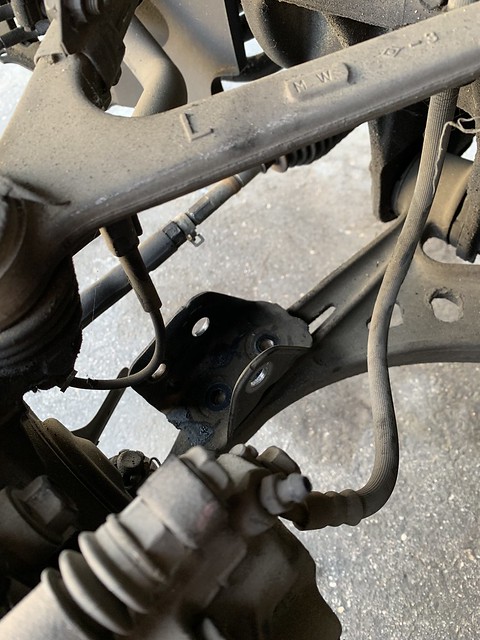
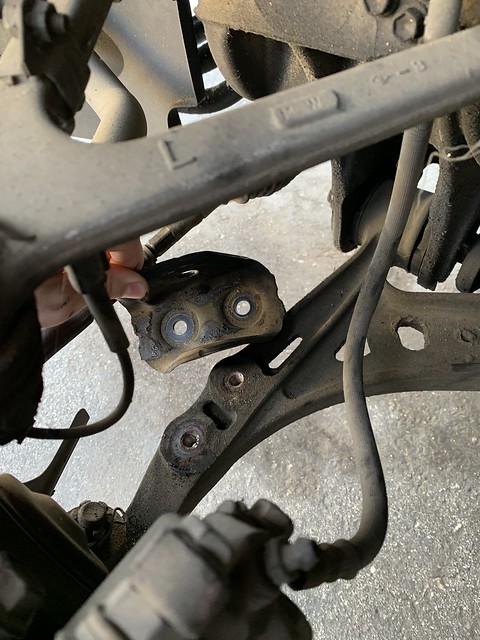
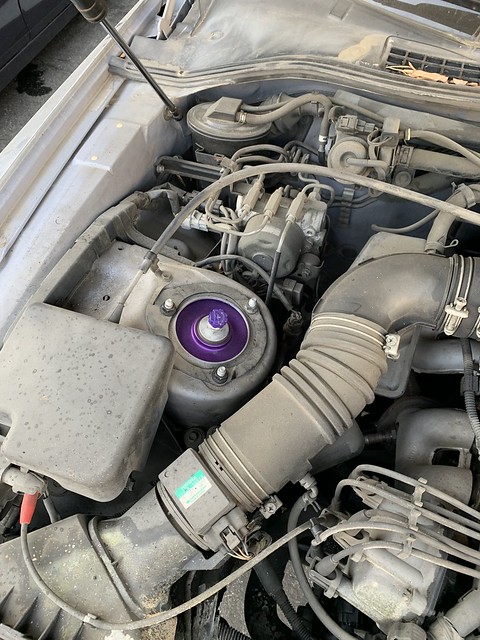
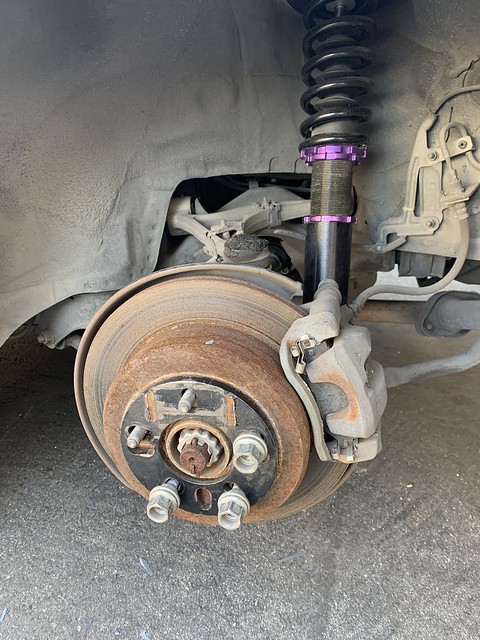
Once its unbolted/removed, undo the top 3 14mm bolts holding the top hat of the stock strut. Loosen and remove the 19mm bolt at the bottom of the stock strut. Push the strut forward and backward to access to 14mm bolts underneath the strut bolting a mounting bracket to the lower control arm. This will allow the mounting bracket to be freely removed allowing for easy removal of the strut vs. having to undo the upper control arms.
by Bryan Boeldt, on Flickr
by Bryan Boeldt, on Flickr
Before/During
by Bryan Boeldt, on Flickr
by Bryan Boeldt, on Flickr
by Bryan Boeldt, on Flickr
Passenger side
by Bryan Boeldt, on Flickr
by Bryan Boeldt, on Flickr
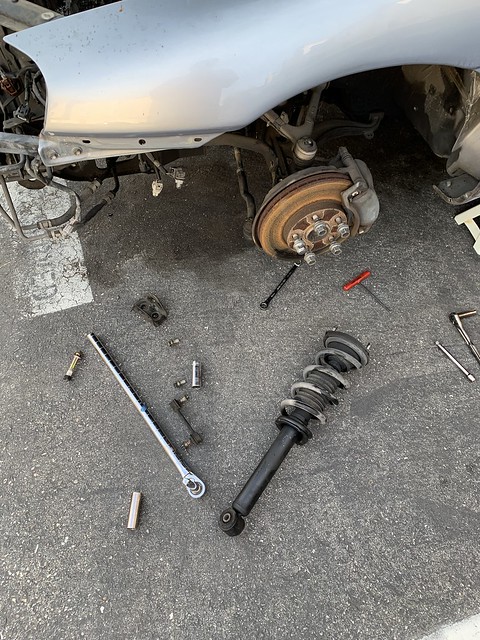
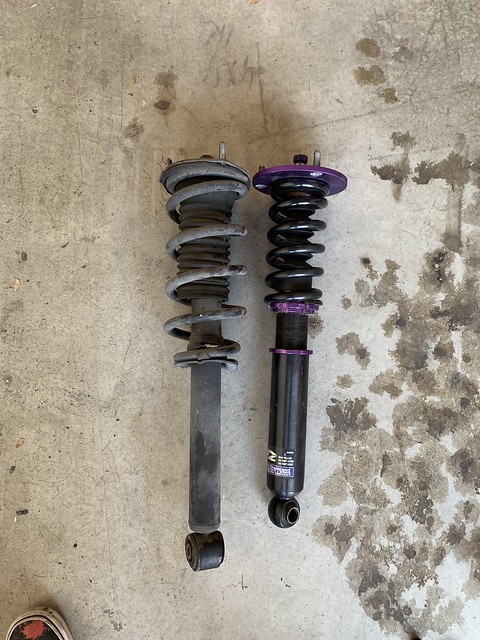
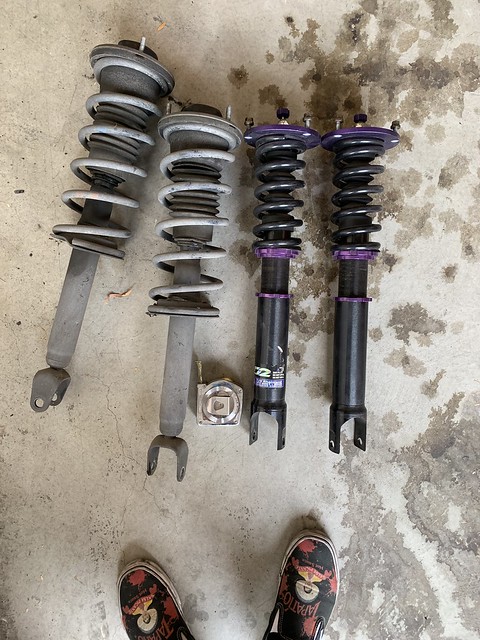
Now before installing my new(to me) D2 Racing coils, I measured them up next to the stock struts and only tweaked them to a 2" drop. Going conservative for now, can always slam it later.
by Bryan Boeldt, on Flickr
The fronts
by Bryan Boeldt, on Flickr
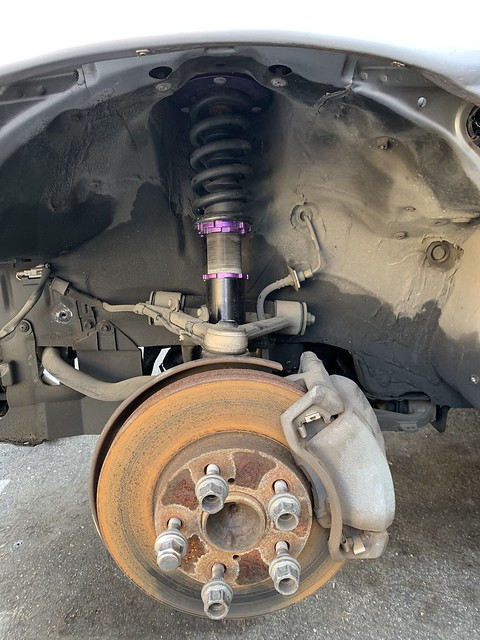
And all installed
by Bryan Boeldt, on Flickr
by Bryan Boeldt, on Flickr
by Bryan Boeldt, on Flickr
by Bryan Boeldt, on Flickr
**** THESE THINGS. Took me a good amount of WD40 to get these ****ers out.
by Bryan Boeldt, on Flickr
Decided to test fit the front wheels. With a squared setup technically they are all the front AND rear wheels so I just grabbed the closest one:alright
by Bryan Boeldt, on Flickr
My blue Rays lug nuts look good on the GT Silver
by Bryan Boeldt, on Flickr
Pokes juuuuuust a bit :rofl Nothing camber wont fix
by Bryan Boeldt, on Flickr
by Bryan Boeldt, on Flickr
As you know, I traded my Weds for a set of Works with tires, and ever since I have had the urge to install everything. Next up is to start on the kit mounting and then exhaust work. or Vice versa. But for now I tried to do my best to give as much of a detailed process as possible. HERE WE GO.
PRO TIP: THESE ARE YOUR FRIENDS AND WILL SAVE YOU TONS OF TIME OF CLEAN UP AFTERWORDS
First off, Im a complete dumbass for leaving my brand new and expensive battery hooked up to a car that NEVER gets driven so immediately had to start charging that *****.
Figured I would do the fronts first as they are the hardest to tackle, thats what Ive gathered from tons of YouTube How To videos
SAFTEY FIRST: ALWAYS put stock wheels under car near jack stands JUST IN CASE the stands give out.
When doing the fronts its easiest to unbolt and remove these sway bar end links. They require a 5m Allen key and a 14mm wrench.
Once its unbolted/removed, undo the top 3 14mm bolts holding the top hat of the stock strut. Loosen and remove the 19mm bolt at the bottom of the stock strut. Push the strut forward and backward to access to 14mm bolts underneath the strut bolting a mounting bracket to the lower control arm. This will allow the mounting bracket to be freely removed allowing for easy removal of the strut vs. having to undo the upper control arms.
Before/During


Passenger side
Now before installing my new(to me) D2 Racing coils, I measured them up next to the stock struts and only tweaked them to a 2" drop. Going conservative for now, can always slam it later.
The fronts
And all installed

**** THESE THINGS. Took me a good amount of WD40 to get these ****ers out.
Decided to test fit the front wheels. With a squared setup technically they are all the front AND rear wheels so I just grabbed the closest one:alright
My blue Rays lug nuts look good on the GT Silver
Pokes juuuuuust a bit :rofl Nothing camber wont fix
 01-22-19, 05:25 PM
#13
Rookie
Thread Starter
Fronts done, doesnt look like much cause stock wheels/tires and ****ty dirty car
by Bryan Boeldt, on Flickr
by Bryan Boeldt, on Flickr
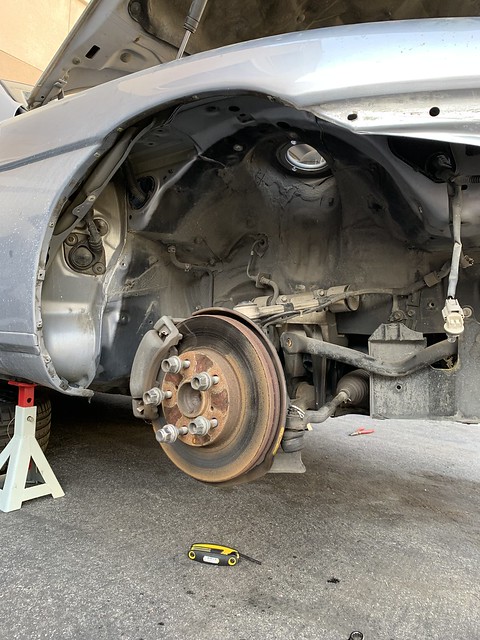
NOW for the rears, First step is to chalk the front wheels so the ****ing car doesnt roll away SAFTEY FIRST
by Bryan Boeldt, on Flickr
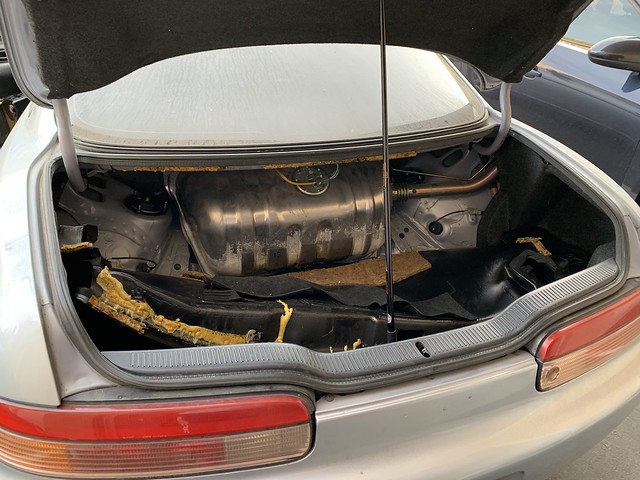
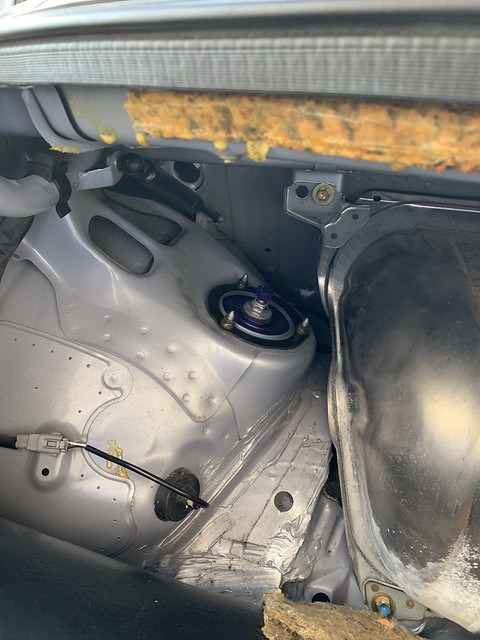
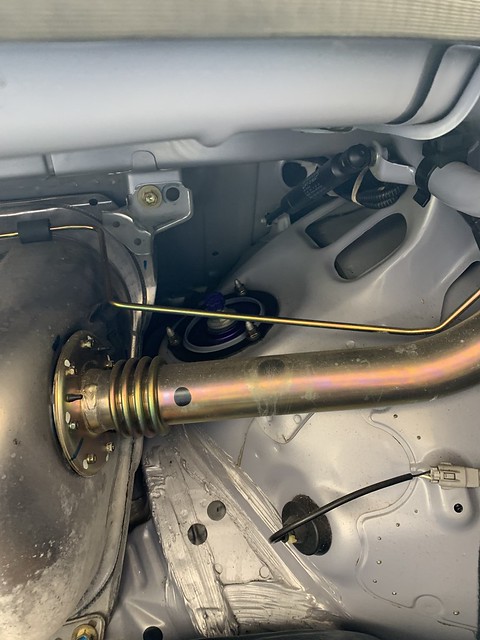
To access the rear top hats you need to pull back the carpeting/cardboard **** that covers the gas tank. Yes I know, the gas tank is in the trunk.
by Bryan Boeldt, on Flickr
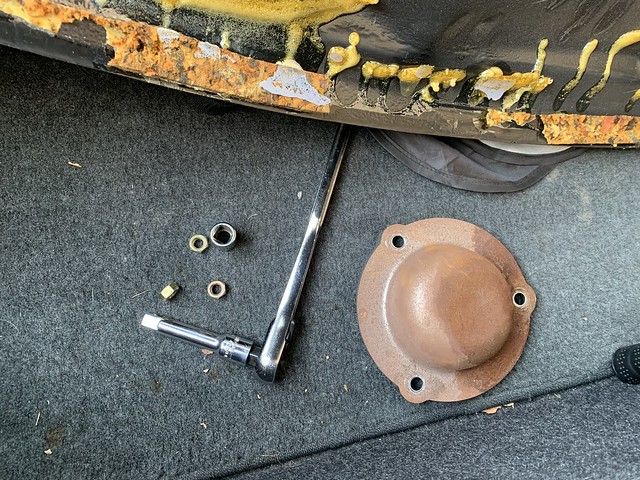
Six 12mm bolts hold on the dust covers for the tops hats, 3 on each side
by Bryan Boeldt, on Flickr
Clearance might be an issue on the rear passenger side, so just suck it up
by Bryan Boeldt, on Flickr
by Bryan Boeldt, on Flickr
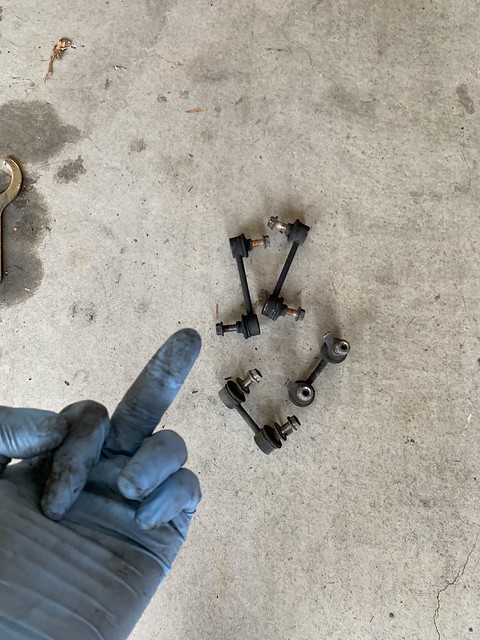
Now I didnt get any pictures but remove/unbolt the sway bar end links for the rear too so you have more room to push down the rear end to pull the struts out. Jk yes I got pictures
by Bryan Boeldt, on Flickr
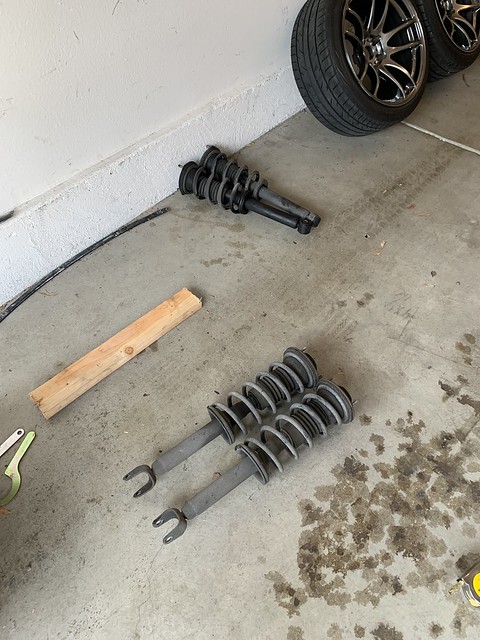
Before/During
by Bryan Boeldt, on Flickr
by Bryan Boeldt, on Flickr
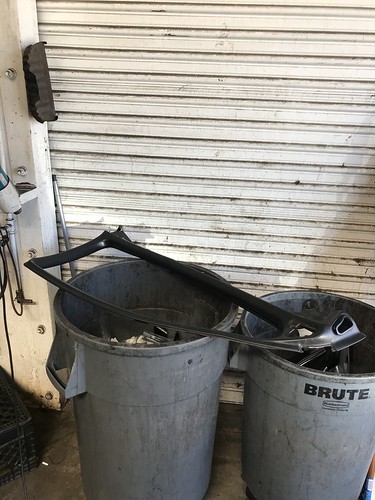
TRASH
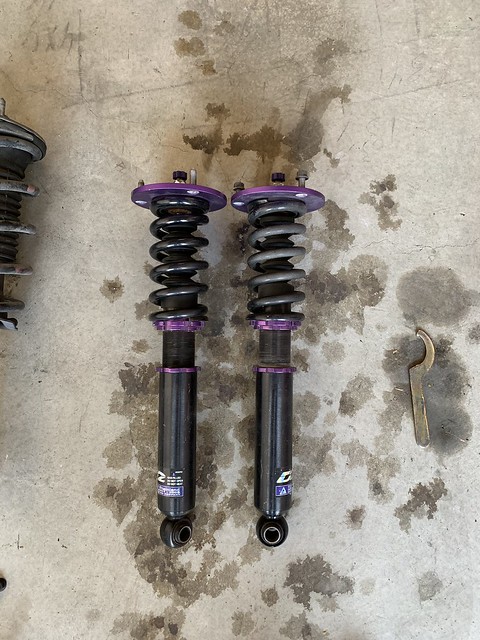
by Bryan Boeldt, on Flickr
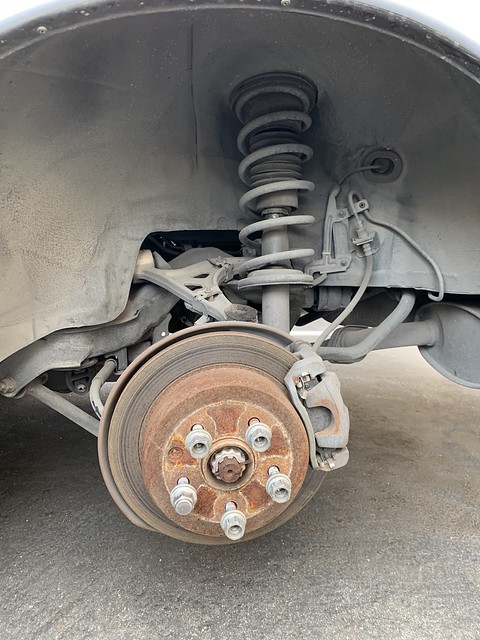
Same thing as the fronts. Measured and then added a 2" drop. Featuring my custom Tapatio Vans
by Bryan Boeldt, on Flickr
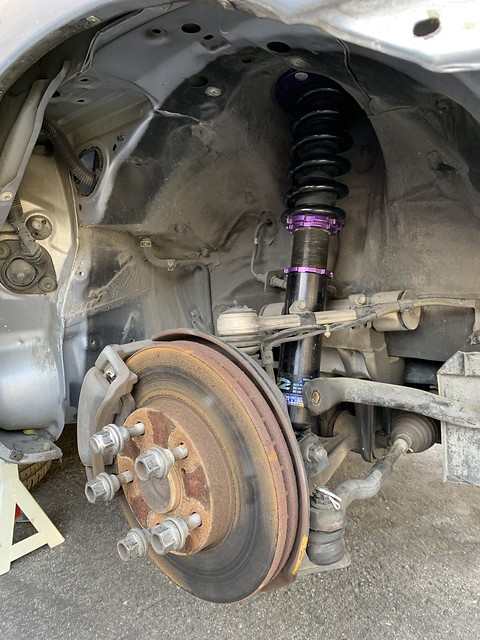
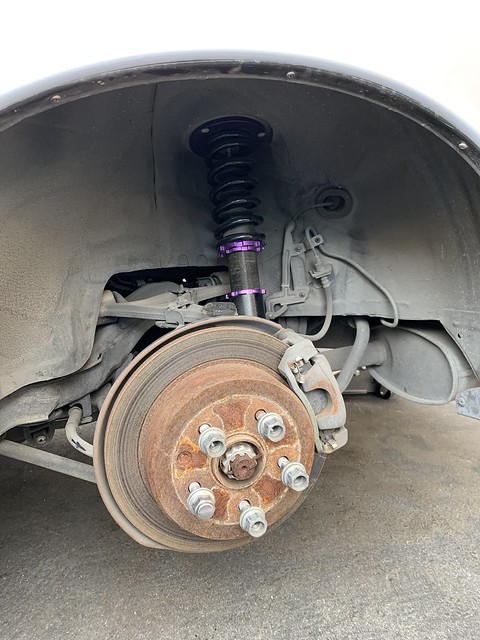
Installed
by Bryan Boeldt, on Flickr
by Bryan Boeldt, on Flickr
by Bryan Boeldt, on Flickr
by Bryan Boeldt, on Flickr
Now it doesnt matter but I just wanted to add, my coils are 36 way adjustable so I set the fronts and rears to around 20. Just because...
**** YOU, go with your family of trash
by Bryan Boeldt, on Flickr
And you know me, had the **** off, MIGHT AS WELL TEST FIT:alright
by Bryan Boeldt, on Flickr
by Bryan Boeldt, on Flickr
by Bryan Boeldt, on Flickr
Poke isnt as nearly as bad as fronts, not going to camber the rear as much so Im going to go with a little flared fender
by Bryan Boeldt, on Flickr
by Bryan Boeldt, on Flickr
ALL DONE, again doesnt look like **** cause going conservative until fenders are rolled and wheels fitted
by Bryan Boeldt, on Flickr
by Bryan Boeldt, on Flickr
As of right now the plan goes as follows:
Remove rear bumper
Remove exhaust and replace with catback exhaust
Roll fenders
Replace two tires with smaller tires for the front, 255 aint cutting it
Put on wheels
Fit the kit with everything on
Stand back and cry
Other than that, Hope you guys enjoyed the write up as well as the Lunar Eclipse tonight. Goodnight!


NOW for the rears, First step is to chalk the front wheels so the ****ing car doesnt roll away SAFTEY FIRST

To access the rear top hats you need to pull back the carpeting/cardboard **** that covers the gas tank. Yes I know, the gas tank is in the trunk.
Six 12mm bolts hold on the dust covers for the tops hats, 3 on each side
Clearance might be an issue on the rear passenger side, so just suck it up

Now I didnt get any pictures but remove/unbolt the sway bar end links for the rear too so you have more room to push down the rear end to pull the struts out. Jk yes I got pictures

Before/During

TRASH
Same thing as the fronts. Measured and then added a 2" drop. Featuring my custom Tapatio Vans
Installed
Now it doesnt matter but I just wanted to add, my coils are 36 way adjustable so I set the fronts and rears to around 20. Just because...
**** YOU, go with your family of trash
And you know me, had the **** off, MIGHT AS WELL TEST FIT:alright

Poke isnt as nearly as bad as fronts, not going to camber the rear as much so Im going to go with a little flared fender


ALL DONE, again doesnt look like **** cause going conservative until fenders are rolled and wheels fitted
As of right now the plan goes as follows:
Remove rear bumper
Remove exhaust and replace with catback exhaust
Roll fenders
Replace two tires with smaller tires for the front, 255 aint cutting it
Put on wheels
Fit the kit with everything on
Stand back and cry
Other than that, Hope you guys enjoyed the write up as well as the Lunar Eclipse tonight. Goodnight!
Last edited by Scweet14; 01-22-19 at 05:29 PM.
01-24-19, 02:30 PM
#14
Rookie
Thread Starter
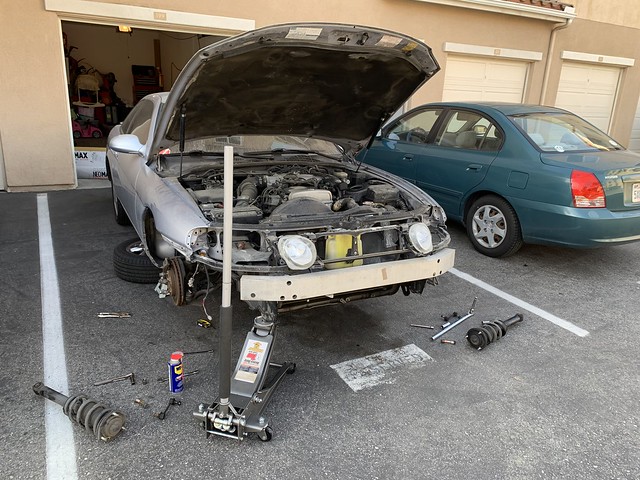
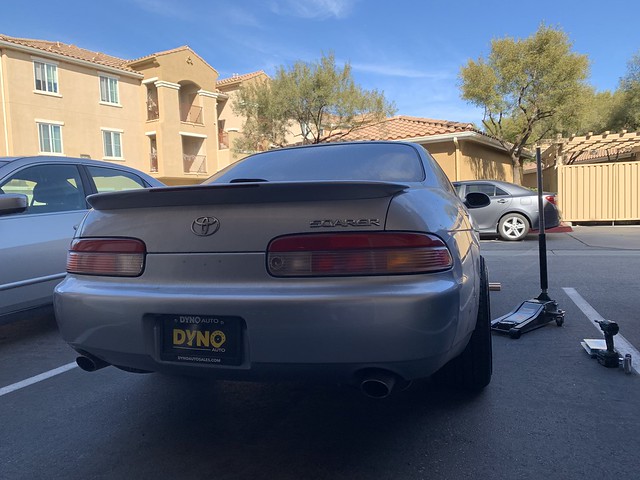
So today was meant to be productive. I was going to throw the rear wheels on, measure how much lower I need to go to get the fender and lip within half an inch of each other/maybe closer, roll the fenders, lower the car, then leave it until I can get thinner front tires. Buuuuuuttt....thats not how things ended up going
I borrowed my former bosses (the guy with the GS300) Powered By Max fender roller, these things are so much nicer that Eastwoods. And I didn't plan on it but he also lent me a heat gun. Im notorious for fender rolling and not heating my fenders causing them to paint crack like a mother****er lol
by Bryan Boeldt, on Flickr
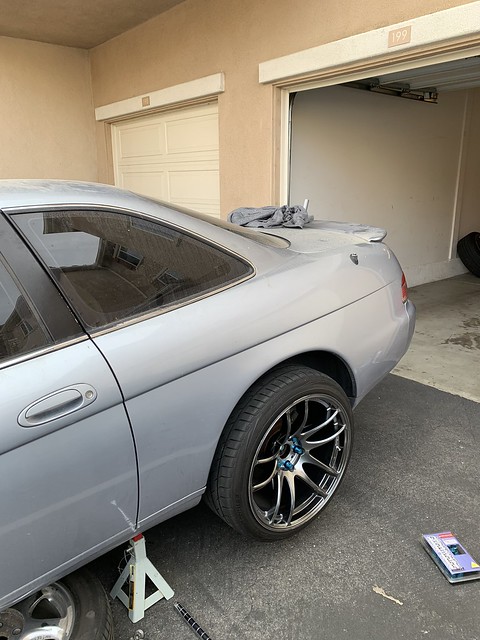
And last time I think it was this thread or another but someone complained that I didn't put the car on the ground with the Works on, and thats partially due to the fact that the fenders needed rolling and more low.
So to please that person, here you go.
Some poke, gross height. Much work.
by Bryan Boeldt, on Flickr
by Bryan Boeldt, on Flickr
Some fitment angles lol
by Bryan Boeldt, on Flickr
by Bryan Boeldt, on Flickr
by Bryan Boeldt, on Flickr
Well as I was rolling the **** out of the fender, I heard a crack/popping noise. Didn't think anything of it and kept going. Tighter and tighter as I twisted the roller pushing out the fender until suddenly, POP!
The ****ing thing snapped right at the welds. Texted my boss, he said its cool, we have a mutual friend that can reweld it back to fix it. I asked him if PBM has a warranty cause I would think they would cover that since it snapped at the weld and not somewhere else.
by Bryan Boeldt, on Flickr
by Bryan Boeldt, on Flickr
by Bryan Boeldt, on Flickr
Sucks cause I really wanted to get those fenders done, but whatever, at least nothing on the car broke.
Later guys!
I borrowed my former bosses (the guy with the GS300) Powered By Max fender roller, these things are so much nicer that Eastwoods. And I didn't plan on it but he also lent me a heat gun. Im notorious for fender rolling and not heating my fenders causing them to paint crack like a mother****er lol

And last time I think it was this thread or another but someone complained that I didn't put the car on the ground with the Works on, and thats partially due to the fact that the fenders needed rolling and more low.
So to please that person, here you go.
Some poke, gross height. Much work.
Some fitment angles lol

Well as I was rolling the **** out of the fender, I heard a crack/popping noise. Didn't think anything of it and kept going. Tighter and tighter as I twisted the roller pushing out the fender until suddenly, POP!
The ****ing thing snapped right at the welds. Texted my boss, he said its cool, we have a mutual friend that can reweld it back to fix it. I asked him if PBM has a warranty cause I would think they would cover that since it snapped at the weld and not somewhere else.


Sucks cause I really wanted to get those fenders done, but whatever, at least nothing on the car broke.
Later guys!
02-02-19, 02:58 PM
#15
Rookie
Thread Starter
Nothing crazy, but I sold my stock bumper with my Soarer badge, gonna use the cash for some new tires
by https://www.flickr.com/photos/87780680@N08/, on Flickr
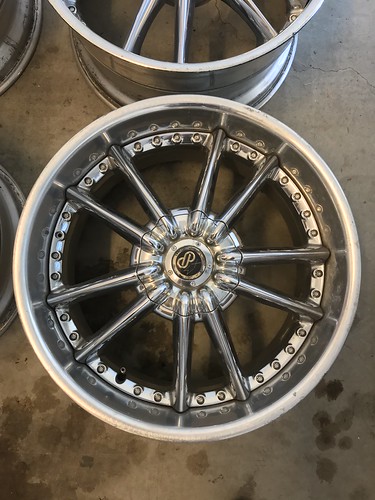
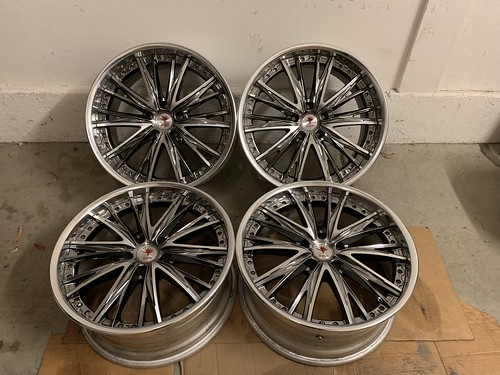
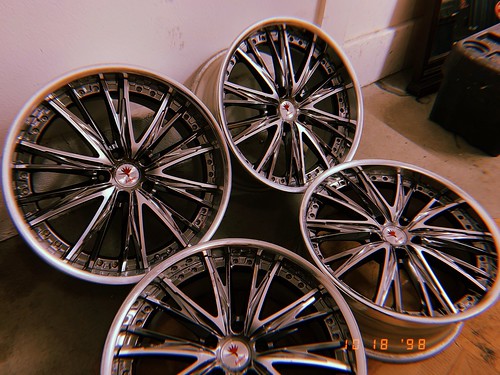
Also, I missed have 3 piece wheels, so..... I traded my wheels....again :rofl
by https://www.flickr.com/photos/87780680@N08/, on Flickr
by https://www.flickr.com/photos/87780680@N08/, on Flickr
by https://www.flickr.com/photos/87780680@N08/, on Flickr
by https://www.flickr.com/photos/87780680@N08/, on Flickr
Theyre OG spec'd too which is cool
Theyre 19x9 +9 and 19x10 -17
Should fit nice!

Also, I missed have 3 piece wheels, so..... I traded my wheels....again :rofl

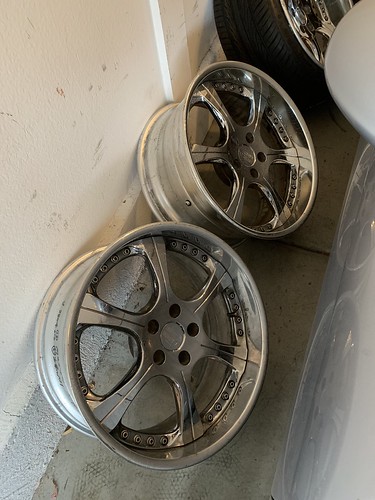

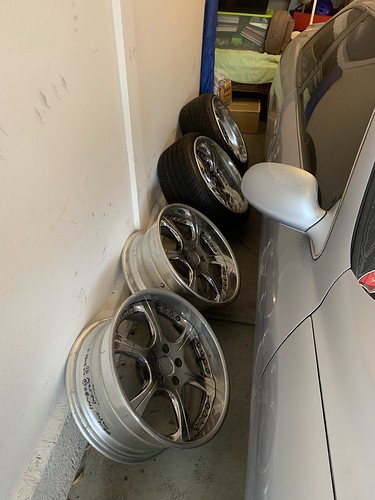
Theyre OG spec'd too which is cool
Theyre 19x9 +9 and 19x10 -17
Should fit nice!