Project AARP Casino Cruiser - LS400 5spd drift car build

 02-05-13, 06:21 AM
#77
Driver
Thread Starter

Yup that's the plan, but on a later date once the car is running and driving and I've done the much needed maintenance on the Mini.
02-17-13, 08:24 PM
#78
Driver
Thread Starter
Update #11 2/17/13
Been a few weeks since I updated this build. I'd like to have more consistent updates but I've been slaving away at the new job and between training, getting use to the long hours and the freak apocalyptic snow storm we had here in CT I haven't been able to get any time until now to make progress, though I have good news. What I've been told is the hardest part of this build is over.
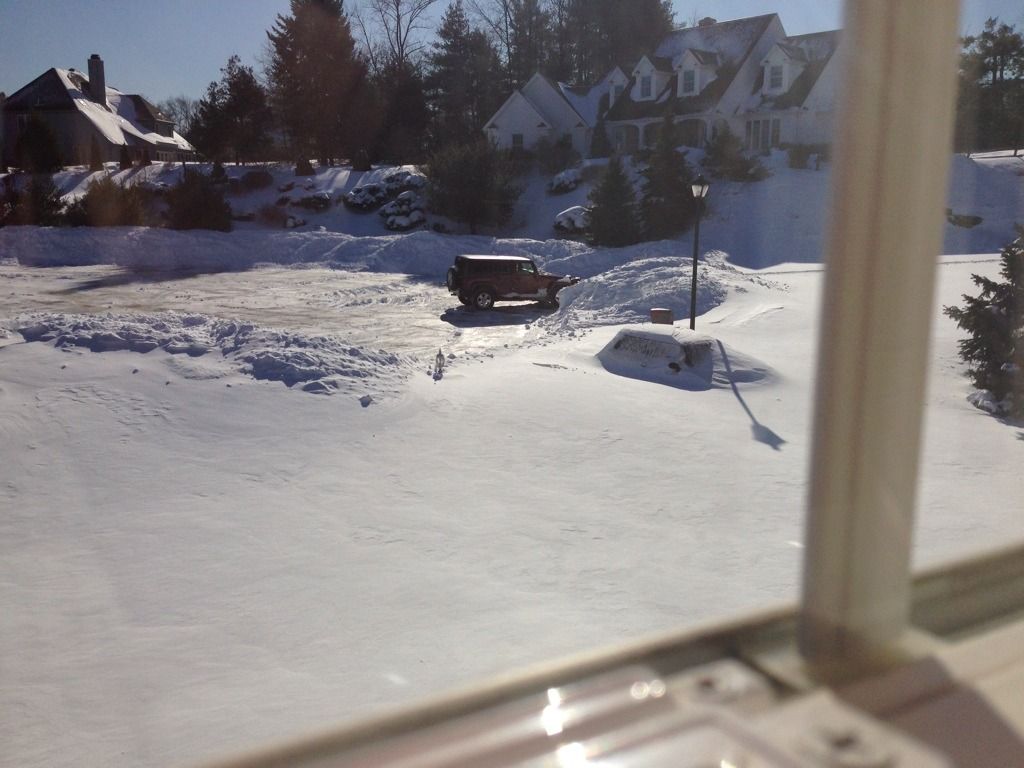
Snow hit up hard here. We're use to this amount of snow as the TOTAL accumulation for the entire season, not a 20 hour time span. That lump of mirror and roof is my Mini. My parents have a guy that does out yard work and plows the driveway when it snows. Guy decided to not come until Sunday @ 1:30pm. It snowed Thursday night into Friday. Thanks guy.
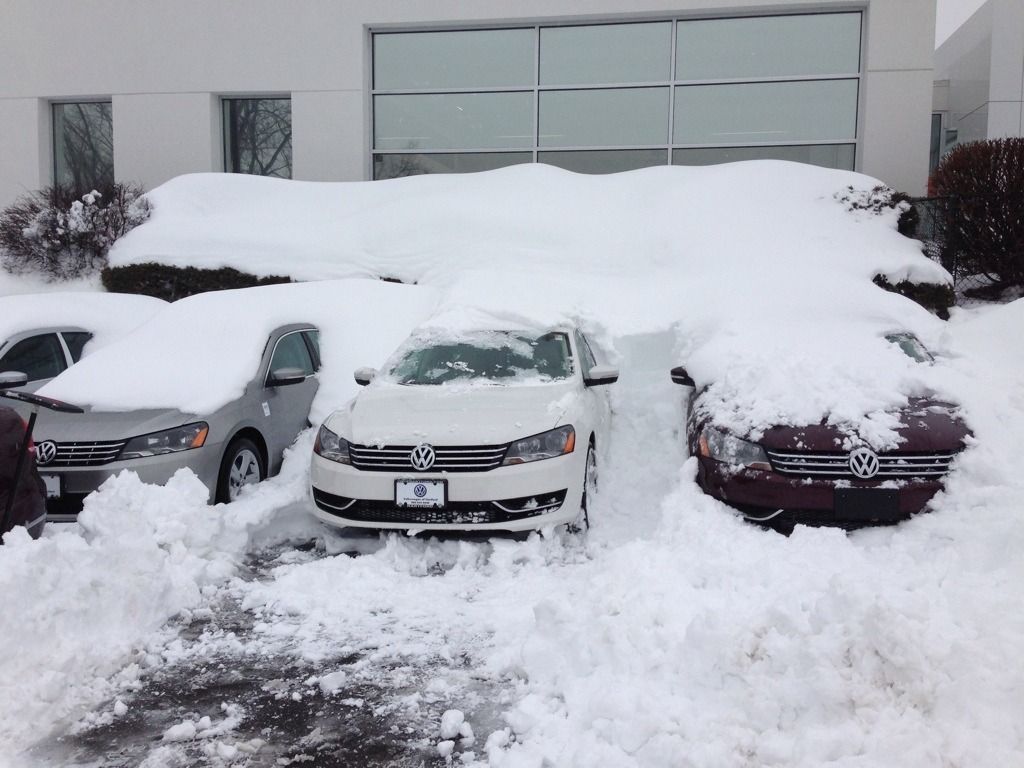
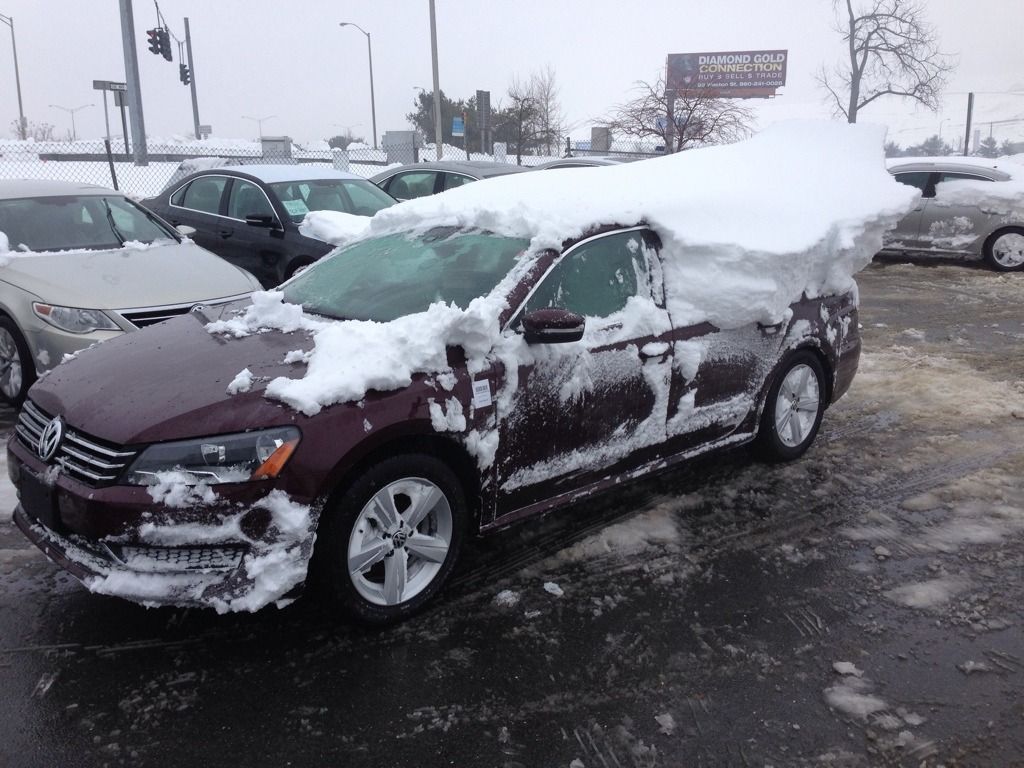
Work update. Enjoying the new job quite a bit. Selling is fun. Meeting new people and genuinely helping them get into whatever it is they need/want/can afford is fun and its never the same thing. Pay is decent so far though I've only sold a couple of vehicles. Hopefully traffic starts to pick up soon. Came into work on Monday to the same amount of snow in my driveway on every single one of the 100+ cars we have on the lot. Mon-Wed = shoveling, Joy.
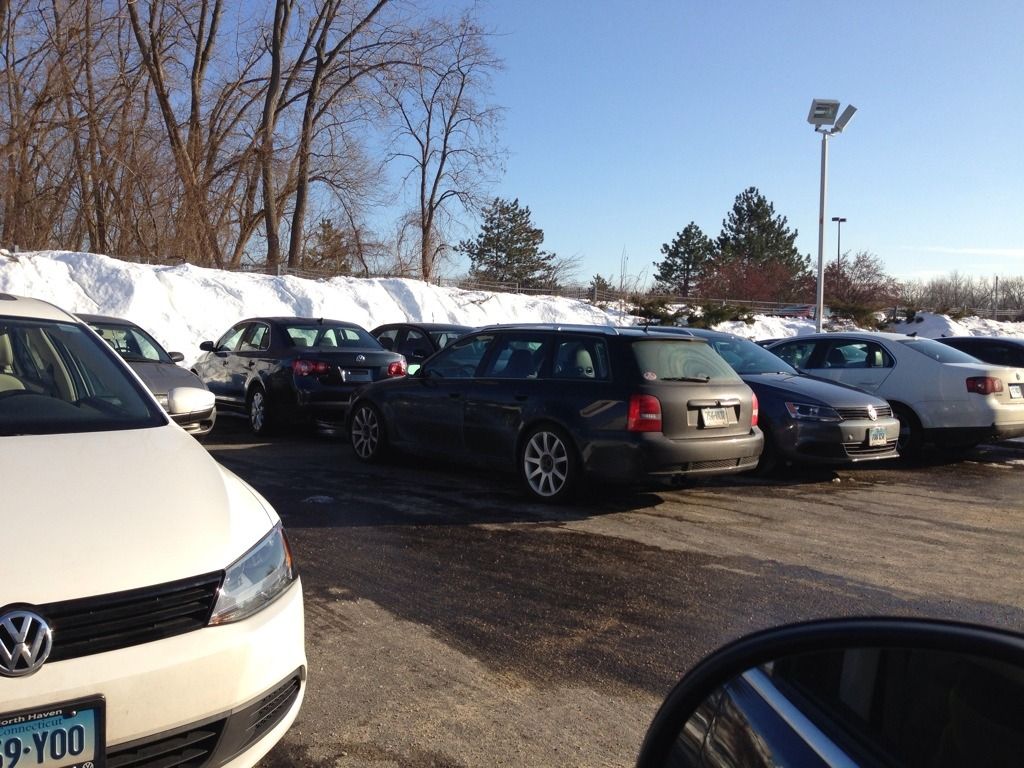
Also spotted this. USDM B5 S4 Avant with an RS4 full body conversion, and Tial 605 kit. Awesome.
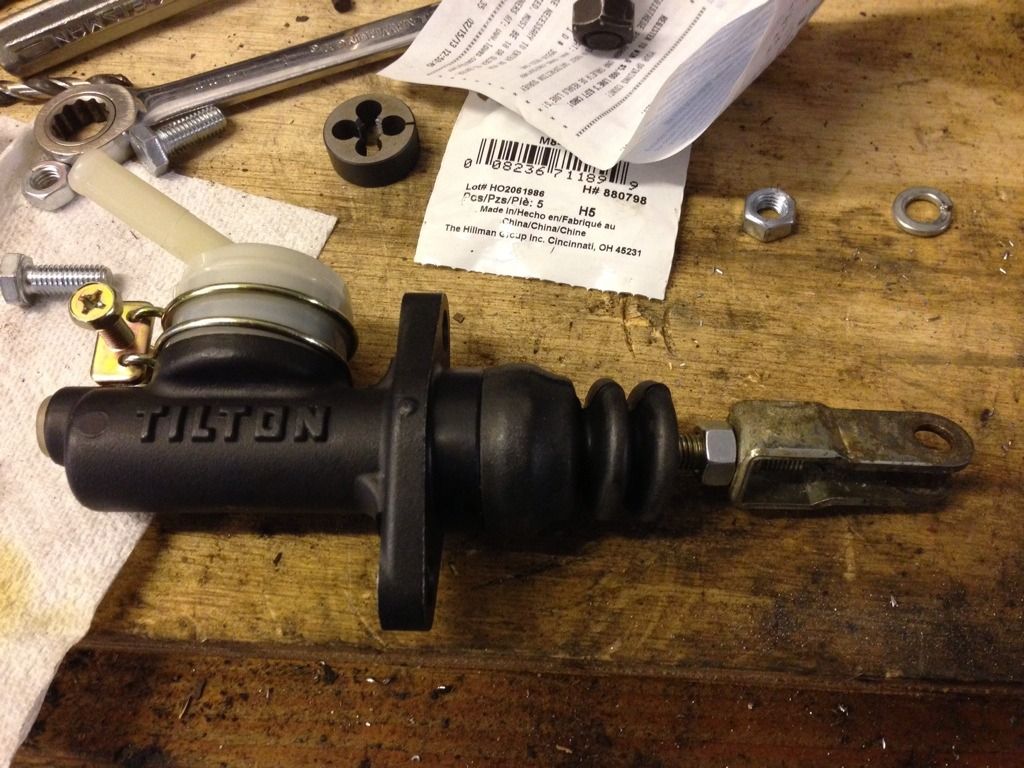
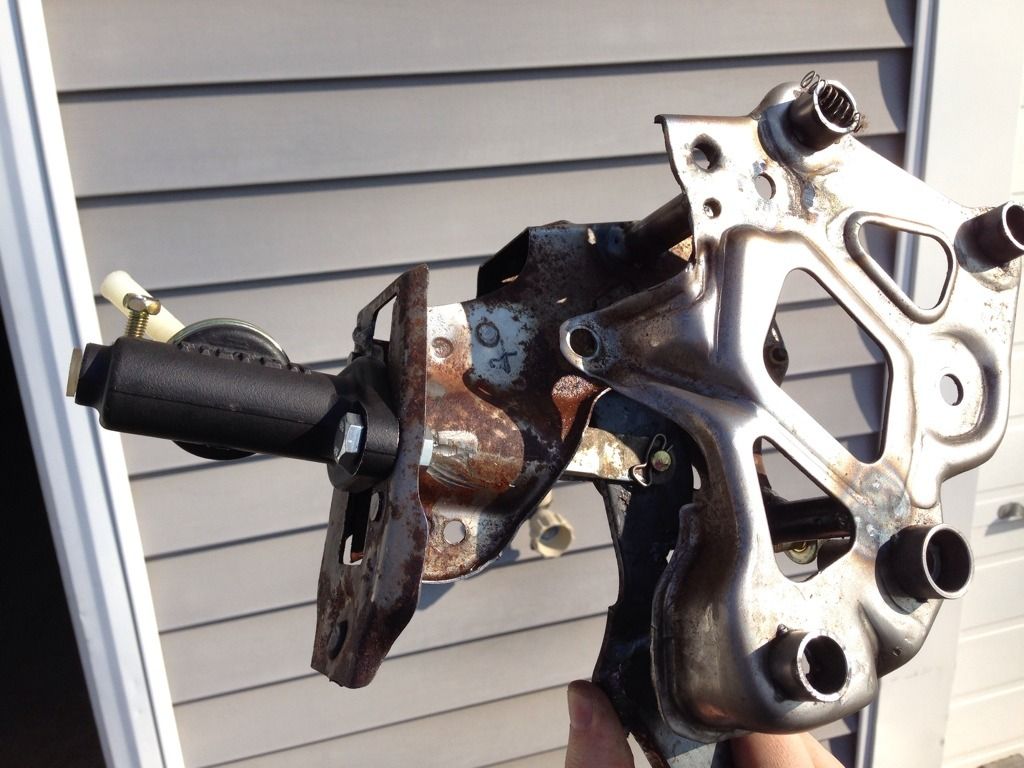
So back to the build. I had the pedal all set now I just needed to figure out the master situation. Talked to Mike and he said he used a Tilton 75 series so I looked into it and decided to go with one of those as well. 2 days later Summit Racing had it at my door. Love free fast shipping.
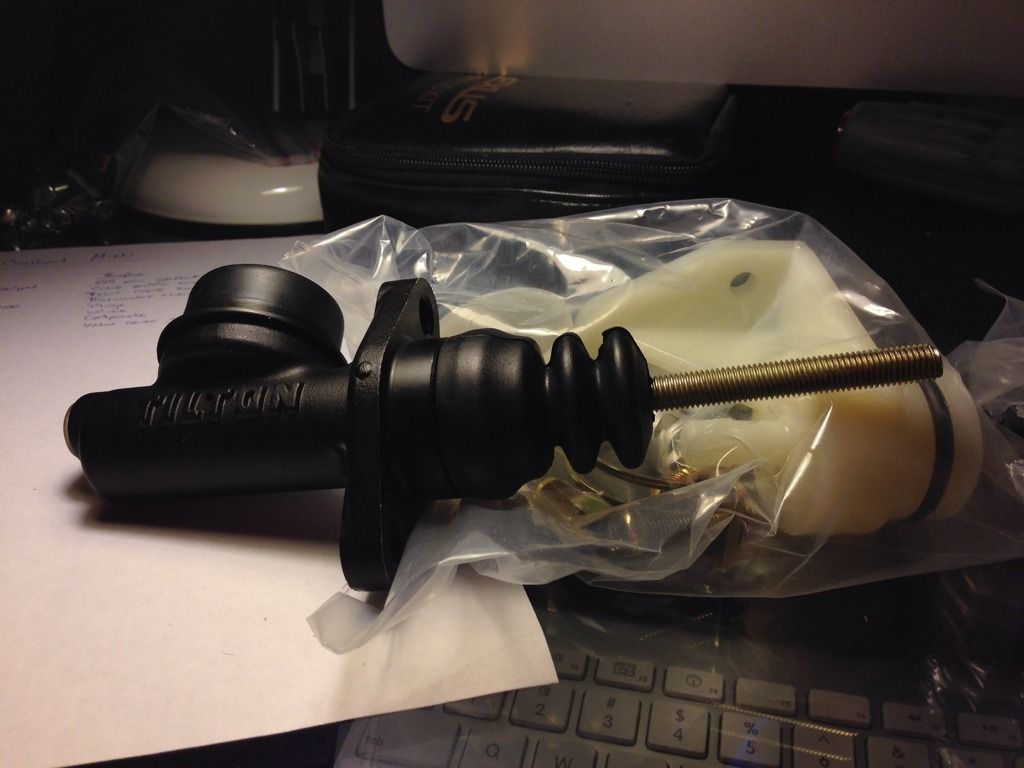
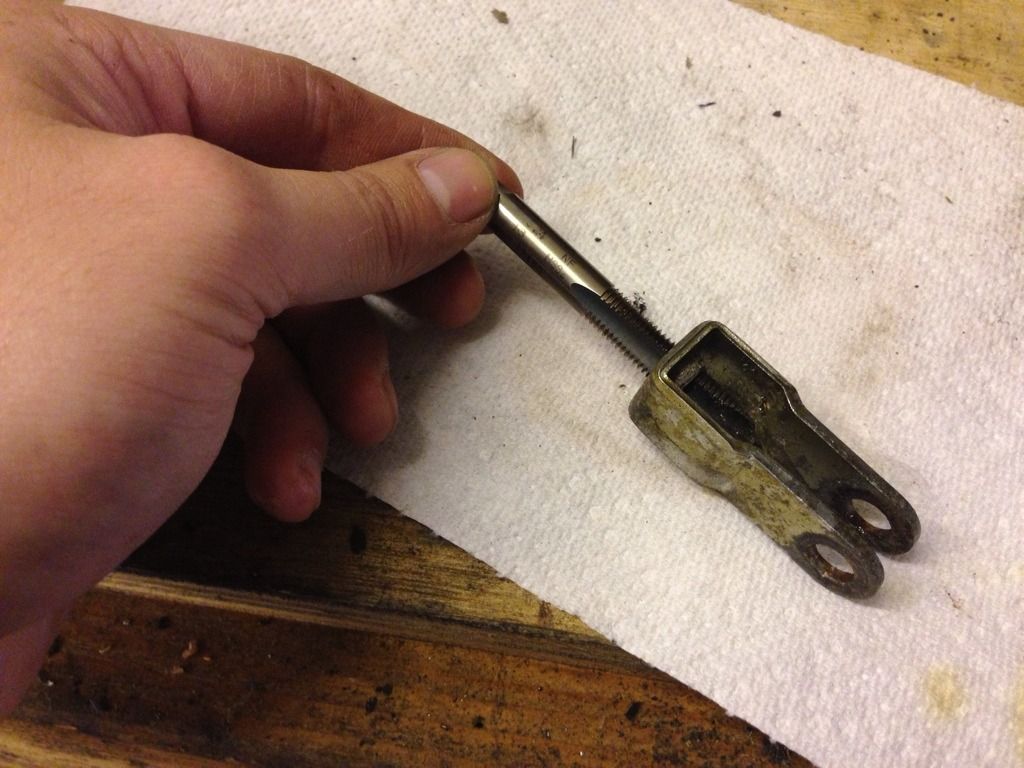
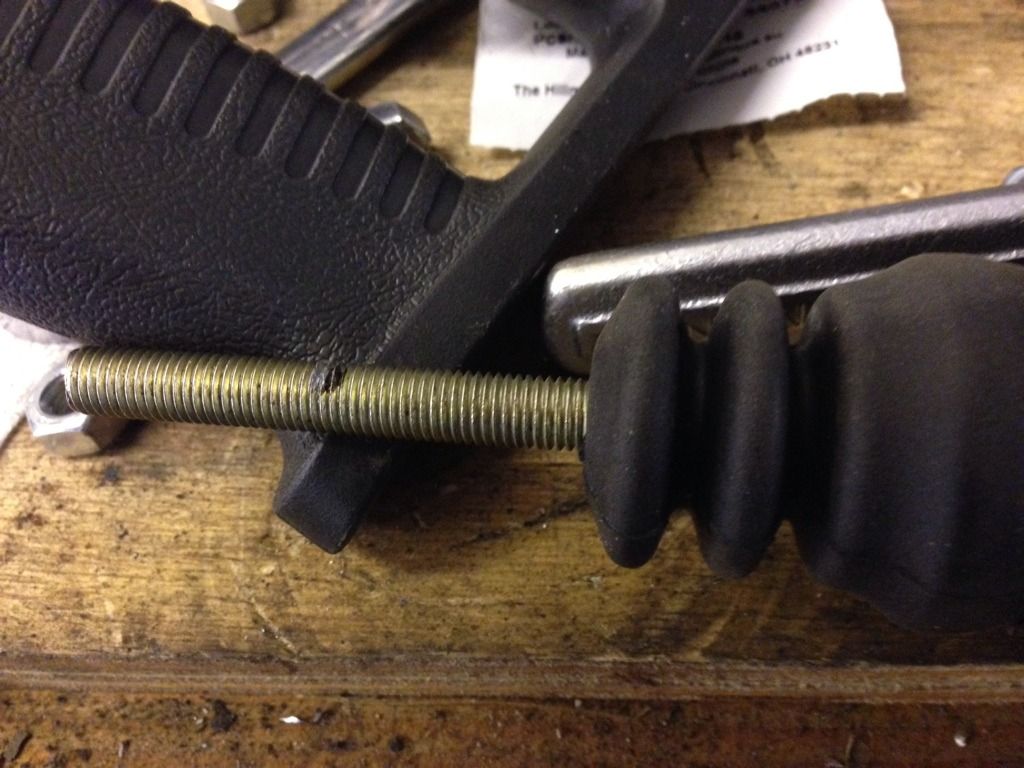
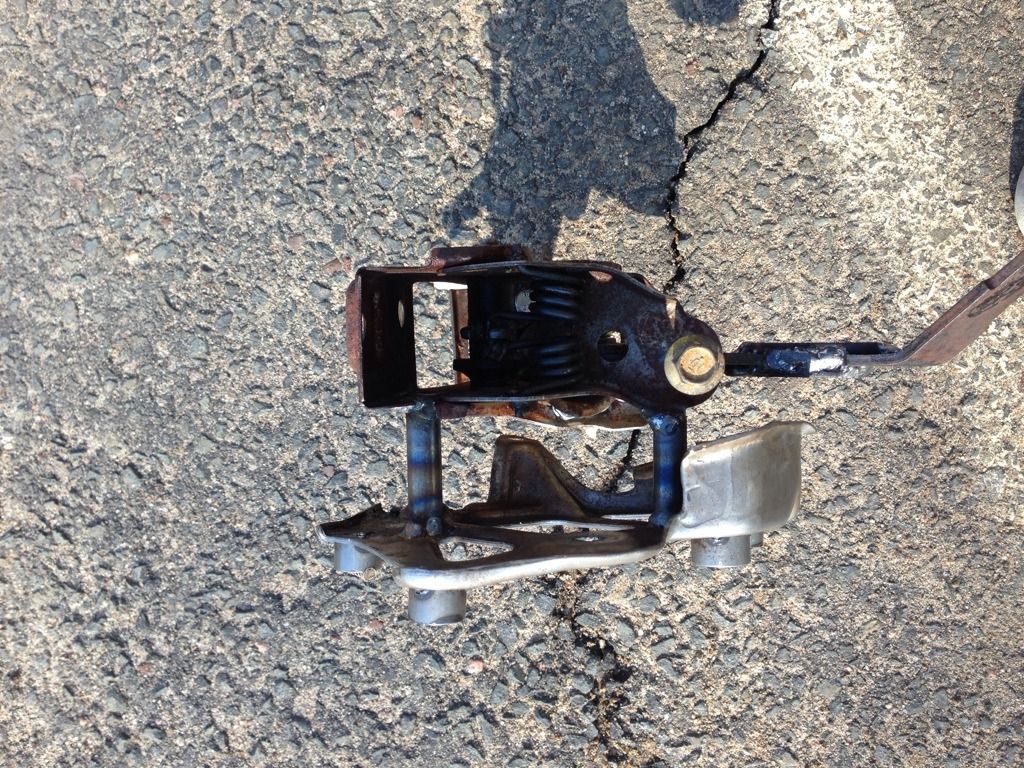
So now I had to figure out how to attach the plunger to the pedal and mount it. My buddy had let me borrow a 240SX Master cylinder so I took the bracket off that and tried to use it on the Tilton master, didn't fit. Thread pitch on the Tilton is 5/16th x 24, 240SX is M10x1.5 I think. So I re tapped the bracket, but since I didn't have a vise I had to improvise.

Progress!
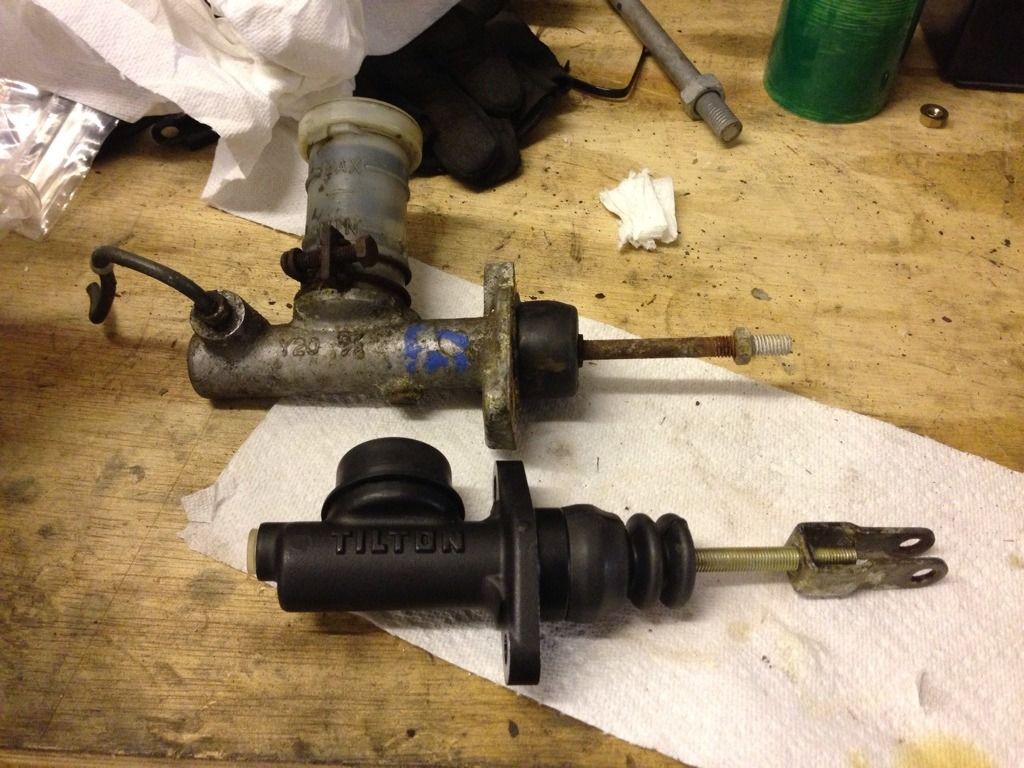
Next I drilled some holes to mount the master and see how much of the plunger I needed to cut off if any. Again no vise, so back to the cupboard door.
Almost finished product.
And vouala!
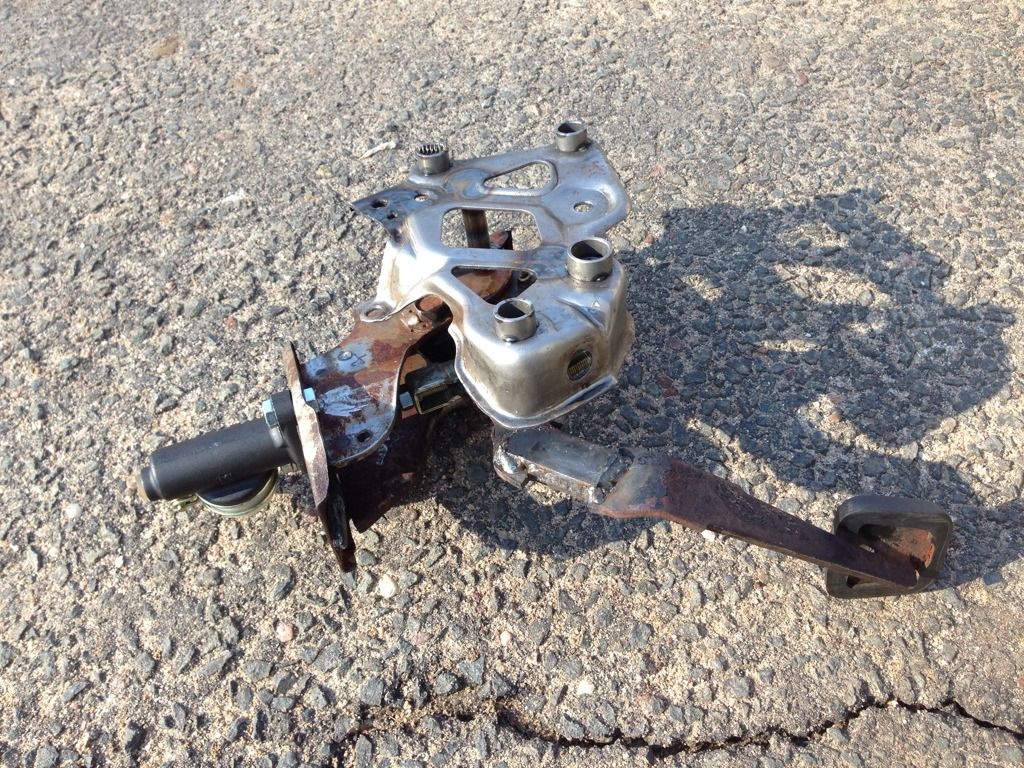

Next was to get through the firewall. Took that stud you guys saw before and put a huge 1/2" extension on it. Hammered the **** out of it and finally I was able to get the stud out. Gave me a nice pilot hole for the hole saw. Used a 3" hole saw to make the hole.
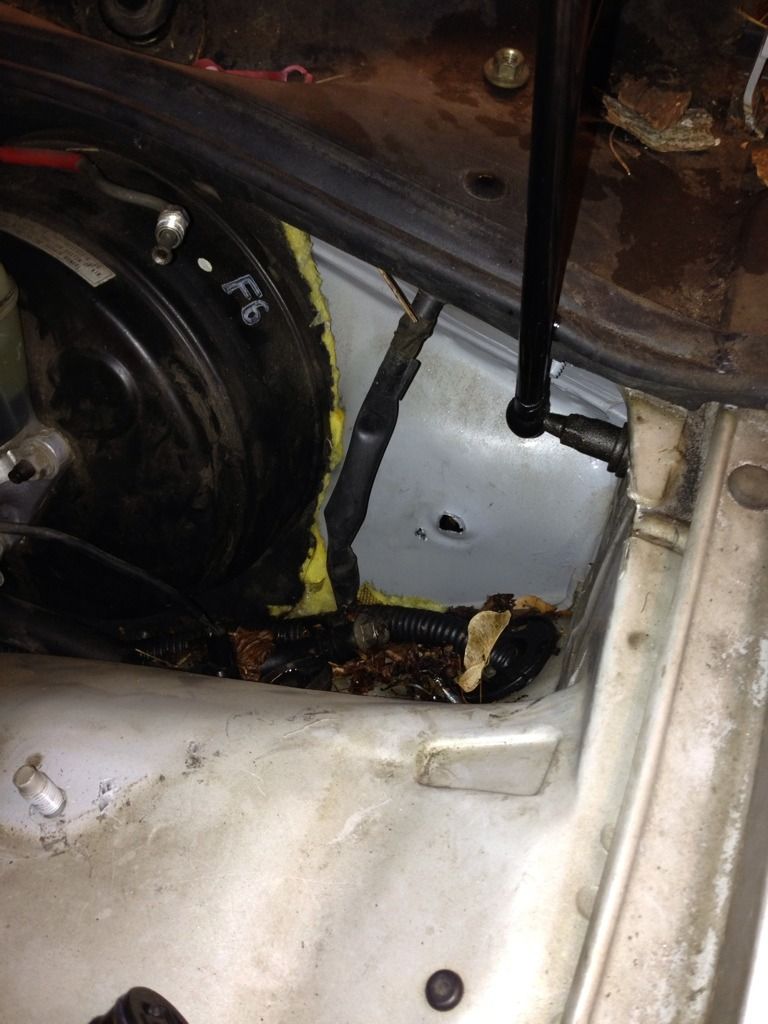

Shot from the inside of the pedal mounted. The nipple was hitting the firewall and I wasn't going to be able to put it through the firewall like I wanted so I had to rotate it back and loop the line out through the big 3" hole.
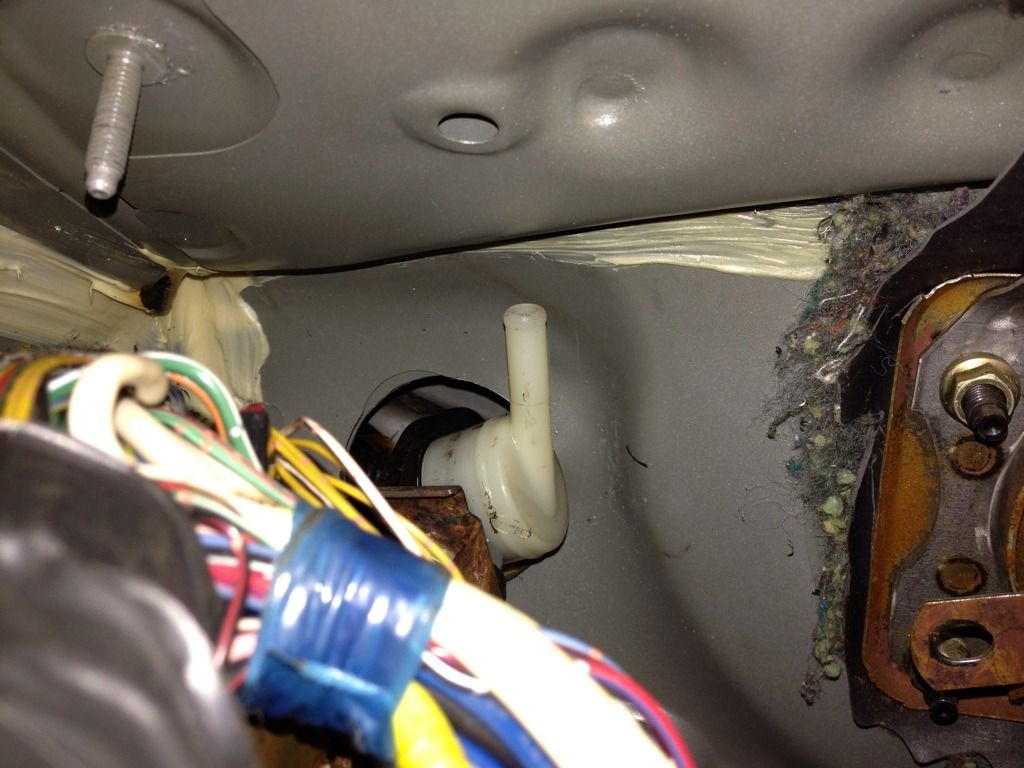
Can't believe how well it ended up working out. Realistically I could of hammered the crap out of the firewall and it would of fit because there's maybe 1/8th of an inch sticking through the hole of the master and its exactly the part where the clutch line is going to go. Awesome.
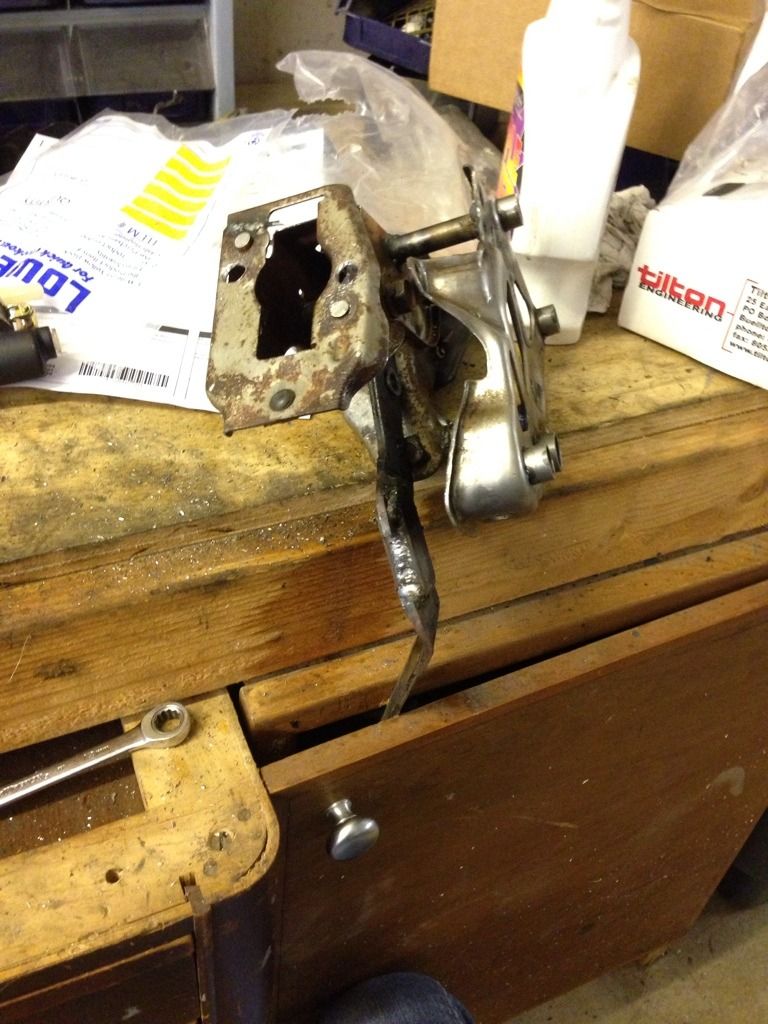
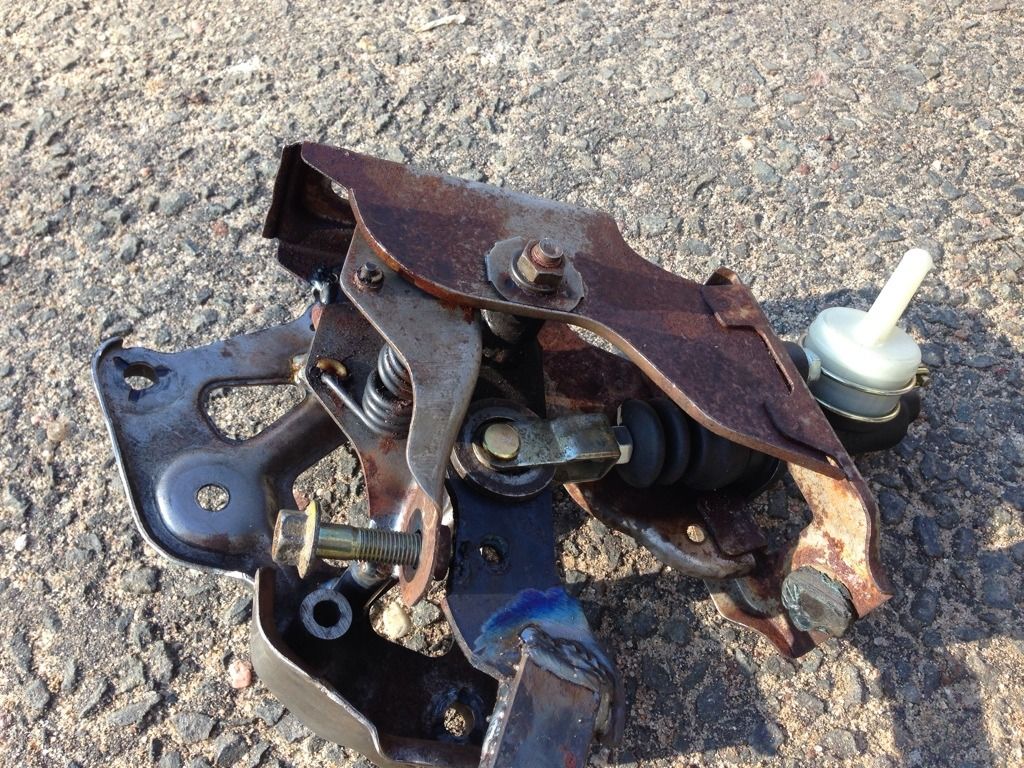
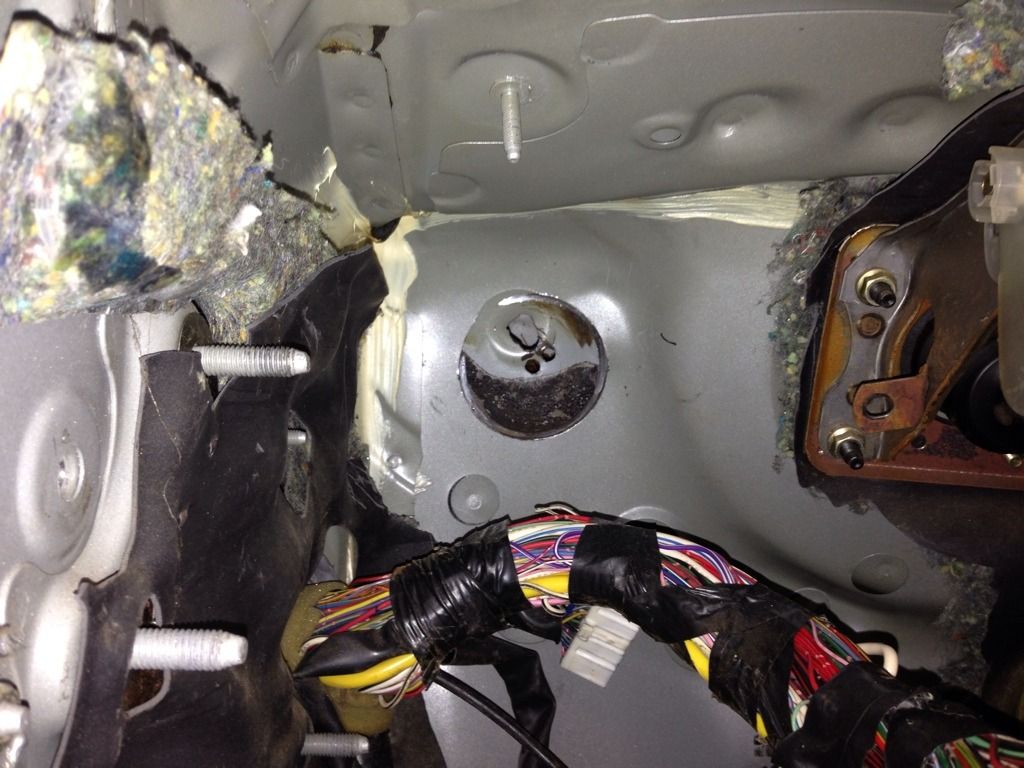
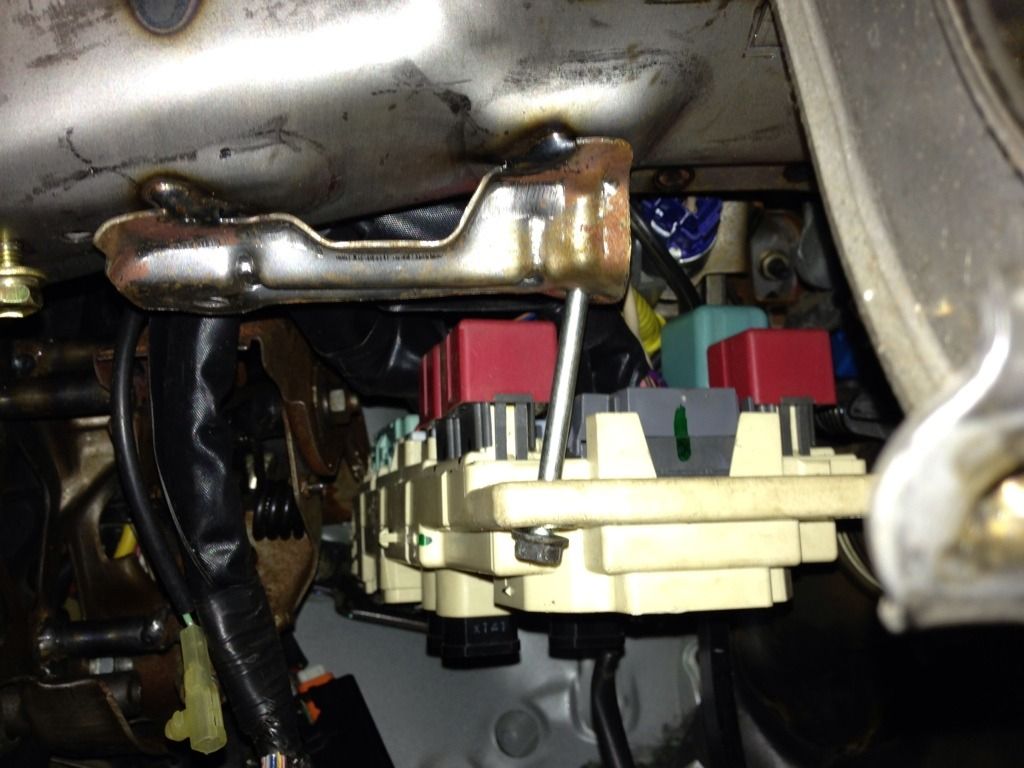
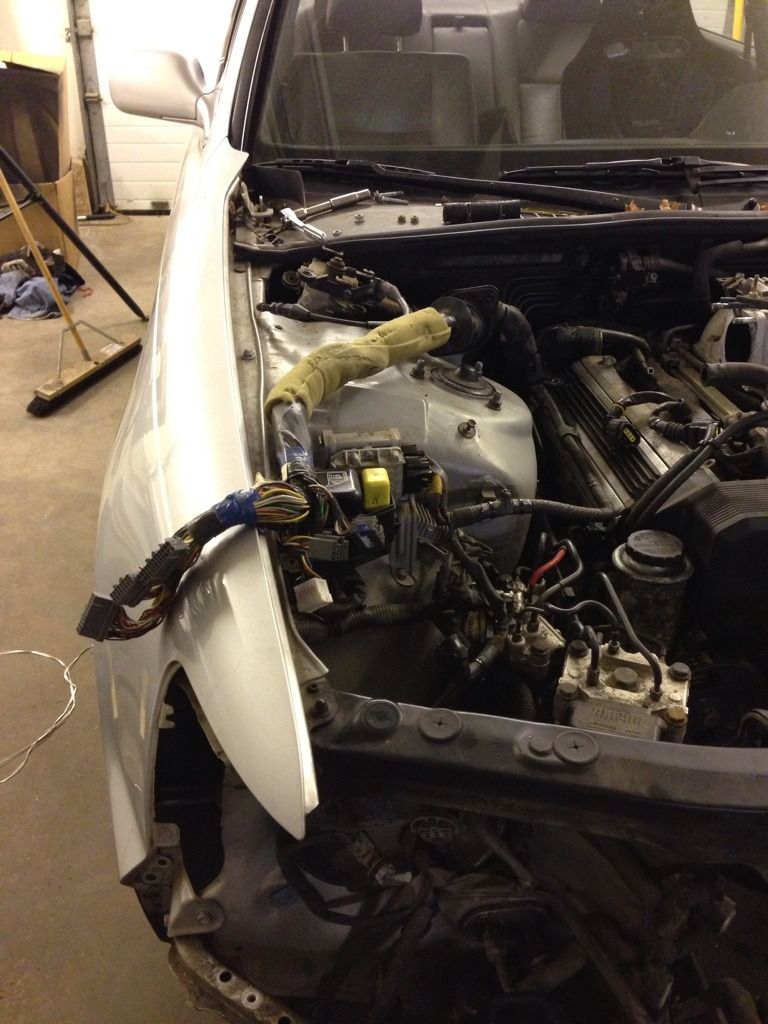
Now came the tricky part, what the hell am I going to do with that annoying fuse box. Started trying out certain thinks and ended up with this. Used the stock bracket with some spacers because the insulation and whatnot spaced it out before. Bolted it on and beat the **** out of it to twist it towards the passenger side. Resulted in the following.
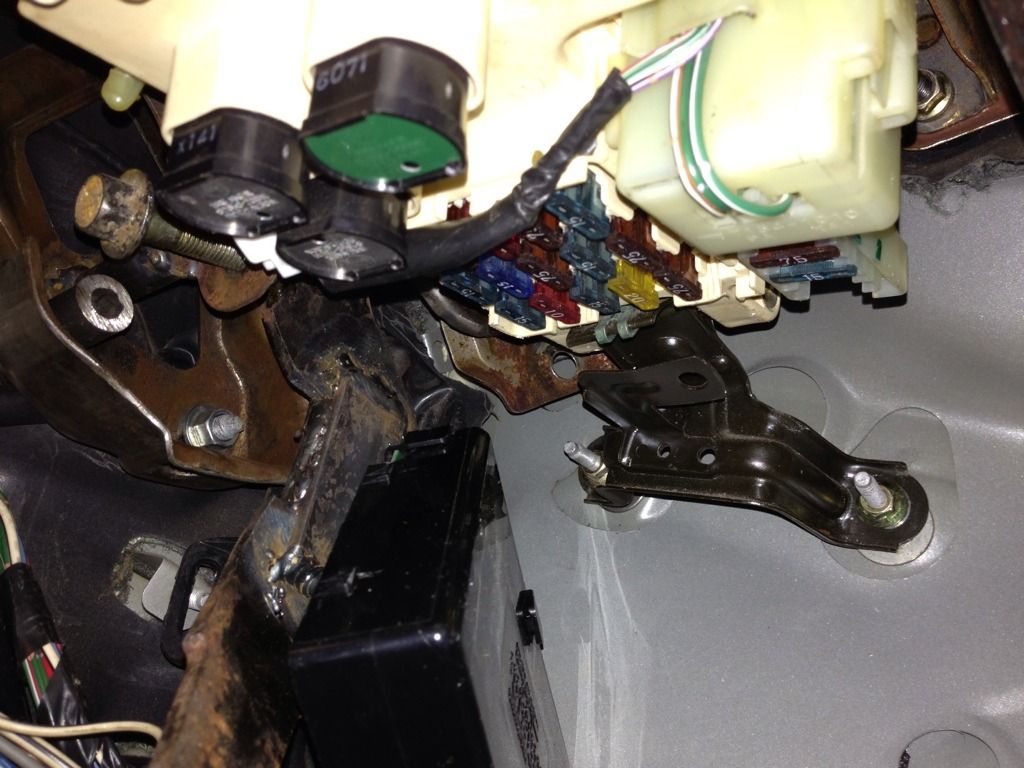
Call it ghetto, I don't care. Its mounted, its solid, its not going anywhere and its not going to get in my way.
Took a Honda Ruckus crankcase bolt and threaded it into the stock mounting location for the fuse box but since I had the clutch pedal in now I had to put the outside hole to the inside threaded hole and to give myself a bit more clearance I bent the mounting location. Success!
Been a few weeks since I updated this build. I'd like to have more consistent updates but I've been slaving away at the new job and between training, getting use to the long hours and the freak apocalyptic snow storm we had here in CT I haven't been able to get any time until now to make progress, though I have good news. What I've been told is the hardest part of this build is over.
Snow hit up hard here. We're use to this amount of snow as the TOTAL accumulation for the entire season, not a 20 hour time span. That lump of mirror and roof is my Mini. My parents have a guy that does out yard work and plows the driveway when it snows. Guy decided to not come until Sunday @ 1:30pm. It snowed Thursday night into Friday. Thanks guy.
Work update. Enjoying the new job quite a bit. Selling is fun. Meeting new people and genuinely helping them get into whatever it is they need/want/can afford is fun and its never the same thing. Pay is decent so far though I've only sold a couple of vehicles. Hopefully traffic starts to pick up soon. Came into work on Monday to the same amount of snow in my driveway on every single one of the 100+ cars we have on the lot. Mon-Wed = shoveling, Joy.
Also spotted this. USDM B5 S4 Avant with an RS4 full body conversion, and Tial 605 kit. Awesome.
So back to the build. I had the pedal all set now I just needed to figure out the master situation. Talked to Mike and he said he used a Tilton 75 series so I looked into it and decided to go with one of those as well. 2 days later Summit Racing had it at my door. Love free fast shipping.
So now I had to figure out how to attach the plunger to the pedal and mount it. My buddy had let me borrow a 240SX Master cylinder so I took the bracket off that and tried to use it on the Tilton master, didn't fit. Thread pitch on the Tilton is 5/16th x 24, 240SX is M10x1.5 I think. So I re tapped the bracket, but since I didn't have a vise I had to improvise.
Progress!
Next I drilled some holes to mount the master and see how much of the plunger I needed to cut off if any. Again no vise, so back to the cupboard door.
Almost finished product.
And vouala!
Next was to get through the firewall. Took that stud you guys saw before and put a huge 1/2" extension on it. Hammered the **** out of it and finally I was able to get the stud out. Gave me a nice pilot hole for the hole saw. Used a 3" hole saw to make the hole.
Shot from the inside of the pedal mounted. The nipple was hitting the firewall and I wasn't going to be able to put it through the firewall like I wanted so I had to rotate it back and loop the line out through the big 3" hole.
Can't believe how well it ended up working out. Realistically I could of hammered the crap out of the firewall and it would of fit because there's maybe 1/8th of an inch sticking through the hole of the master and its exactly the part where the clutch line is going to go. Awesome.
Now came the tricky part, what the hell am I going to do with that annoying fuse box. Started trying out certain thinks and ended up with this. Used the stock bracket with some spacers because the insulation and whatnot spaced it out before. Bolted it on and beat the **** out of it to twist it towards the passenger side. Resulted in the following.
Call it ghetto, I don't care. Its mounted, its solid, its not going anywhere and its not going to get in my way.
Took a Honda Ruckus crankcase bolt and threaded it into the stock mounting location for the fuse box but since I had the clutch pedal in now I had to put the outside hole to the inside threaded hole and to give myself a bit more clearance I bent the mounting location. Success!
02-17-13, 08:26 PM
#79
Driver
Thread Starter
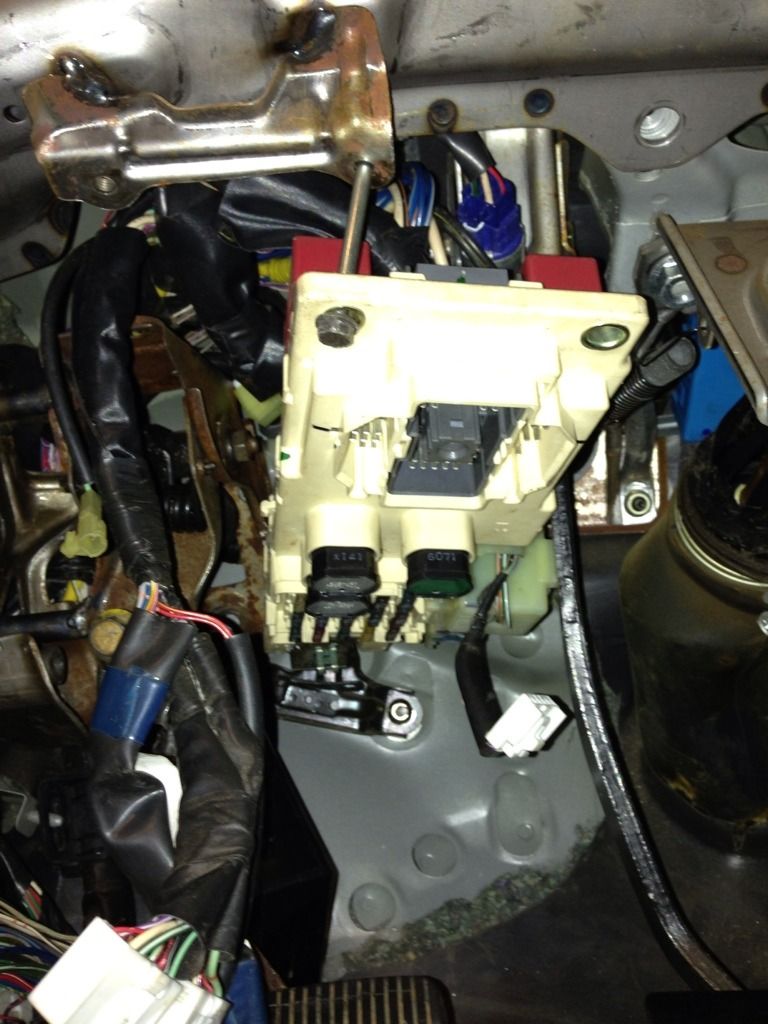
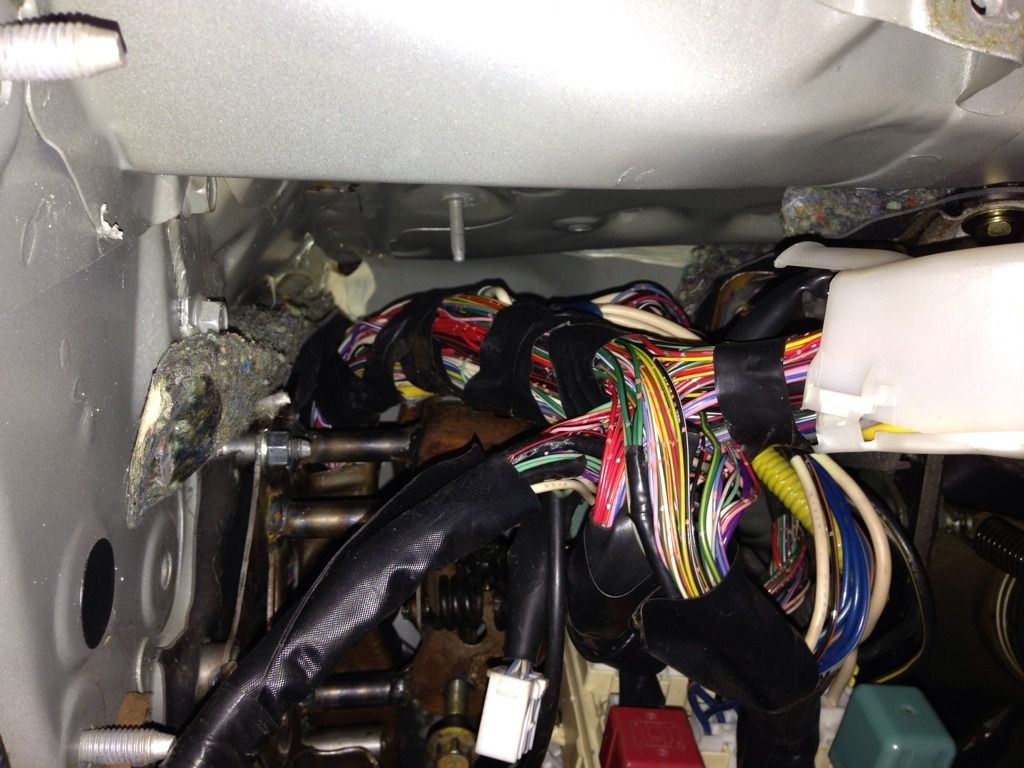
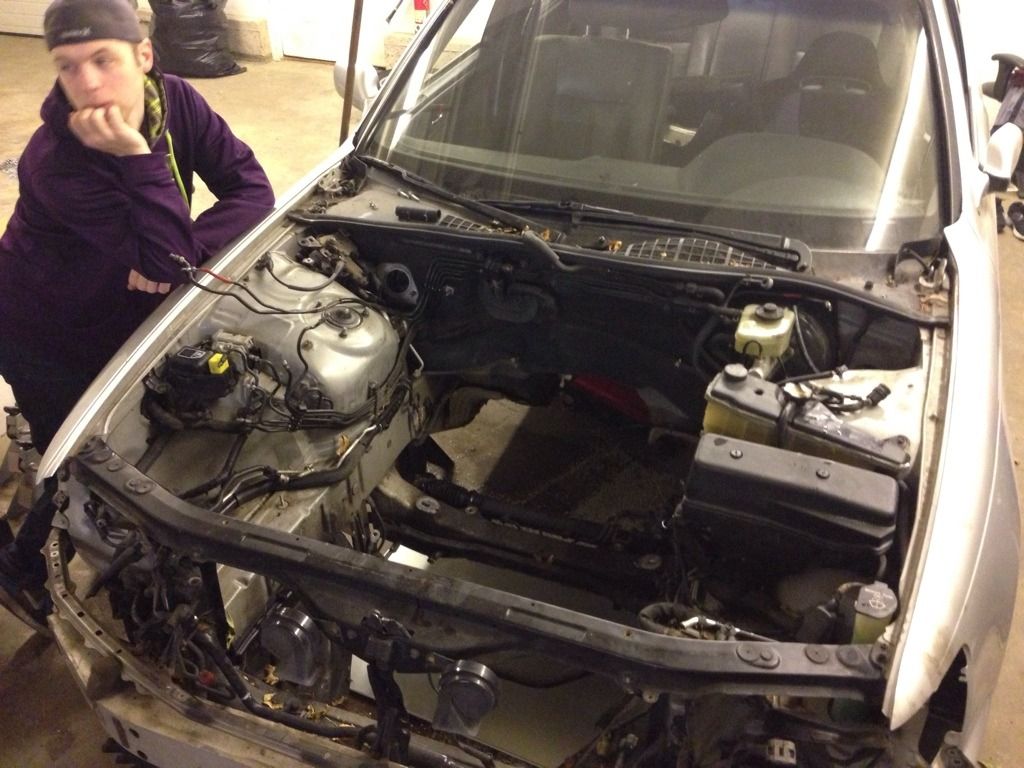
Wiring is nicely tucked above the pedal assembly and won't be in the way or exposed to anything that can cause a break.
Aaaaaand drum roll....
Tadaa!
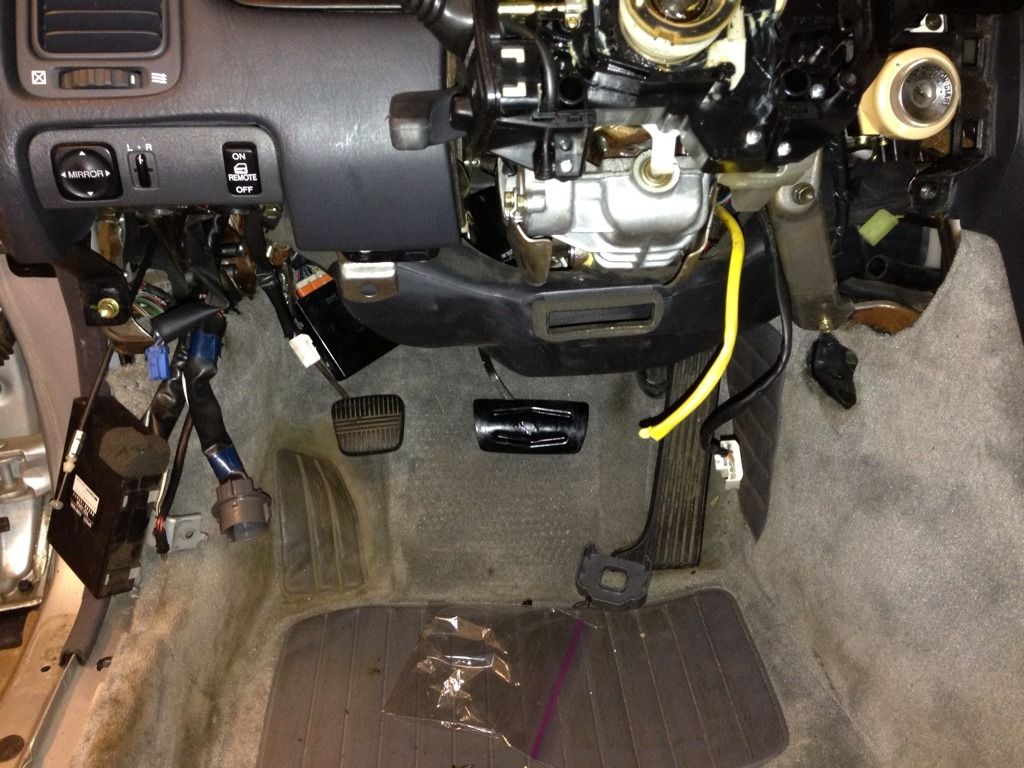
The only thing that's in the way is a black control box labeled Theft Warning. Car won't run without it so I'll have to find a place for it, but for now the car is pretty much back together. It started first try without any issues or hesitations and revved without any hiccups so it looks like I didn't break any connections thankfully.
That's all for now folks. Hope to have the rest of the kicker panels back in this week and start pulling the motor and trans together on Friday or Sunday since those are my days off. Fingers crossed!
Aaaaaand drum roll....
Tadaa!
The only thing that's in the way is a black control box labeled Theft Warning. Car won't run without it so I'll have to find a place for it, but for now the car is pretty much back together. It started first try without any issues or hesitations and revved without any hiccups so it looks like I didn't break any connections thankfully.
That's all for now folks. Hope to have the rest of the kicker panels back in this week and start pulling the motor and trans together on Friday or Sunday since those are my days off. Fingers crossed!
02-19-13, 08:45 PM
#81
Driver
Thread Starter
Not completely on its side, its at a 40-50 degree angle I'd say. It theoretically shouldn't matter though since the nipple is pointing in an upward position so it should gravity feed down.
 02-20-13, 06:10 PM
#83
Driver
Thread Starter
No, but the problem is the harness for that box is super short so I don't really have anywhere to move it. I'll figure it out somehow.
02-22-13, 12:17 PM
#84
Driver School Candidate

Join Date: Apr 2009
Location: Fl
Posts: 5
Likes: 0
Received 0 Likes
on
0 Posts
although the ka tranny's are cheap, they will break 3rd gear once you reach the 300tlb of tq range. trust me i know. we broke a bunch when i drove for enjuku. i would have went with a w58 or r154.
02-22-13, 08:52 PM
#85
Driver
Thread Starter
W58 or R154 swaps would have cost me substantially more. If it ever comes to that I'll source a clean SR 5spd and swap bell housings.
03-04-13, 06:01 PM
#86
Driver
Thread Starter
Update #12 3/4/13
Progress has slowed due to work, but I have managed to get some time in over the last few weeks. Started like this,
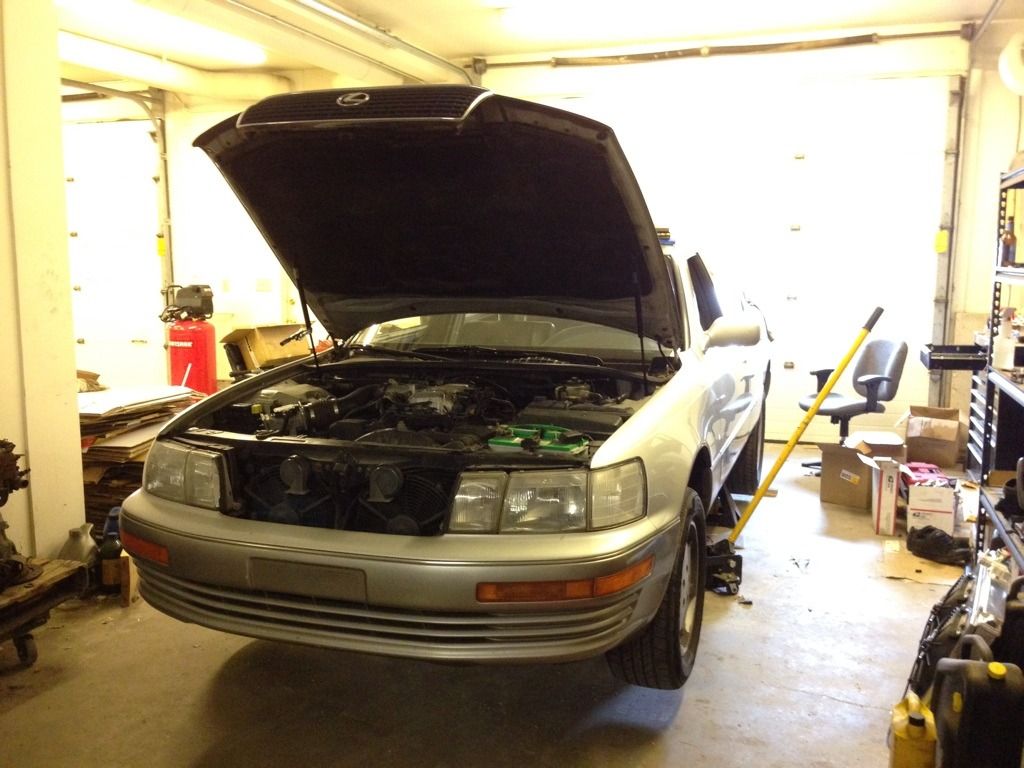
and progressed through the following.

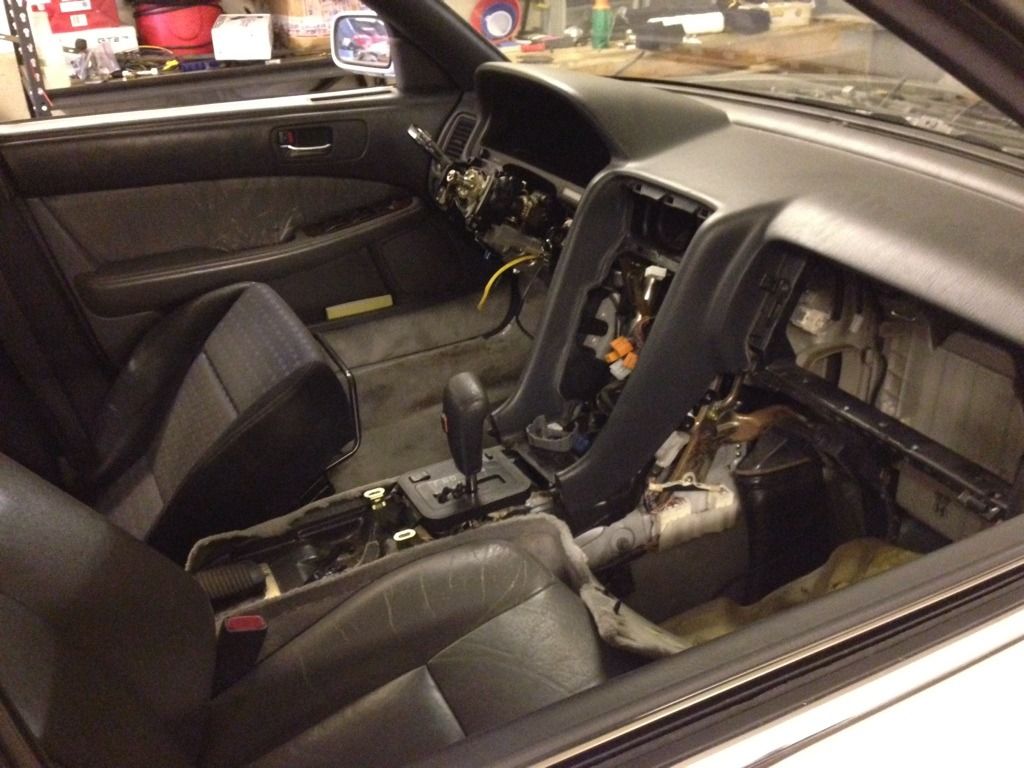
Decided to pull the harness from the dash rather than off the motor as per PureDrifters suggestion. MUCH easier.
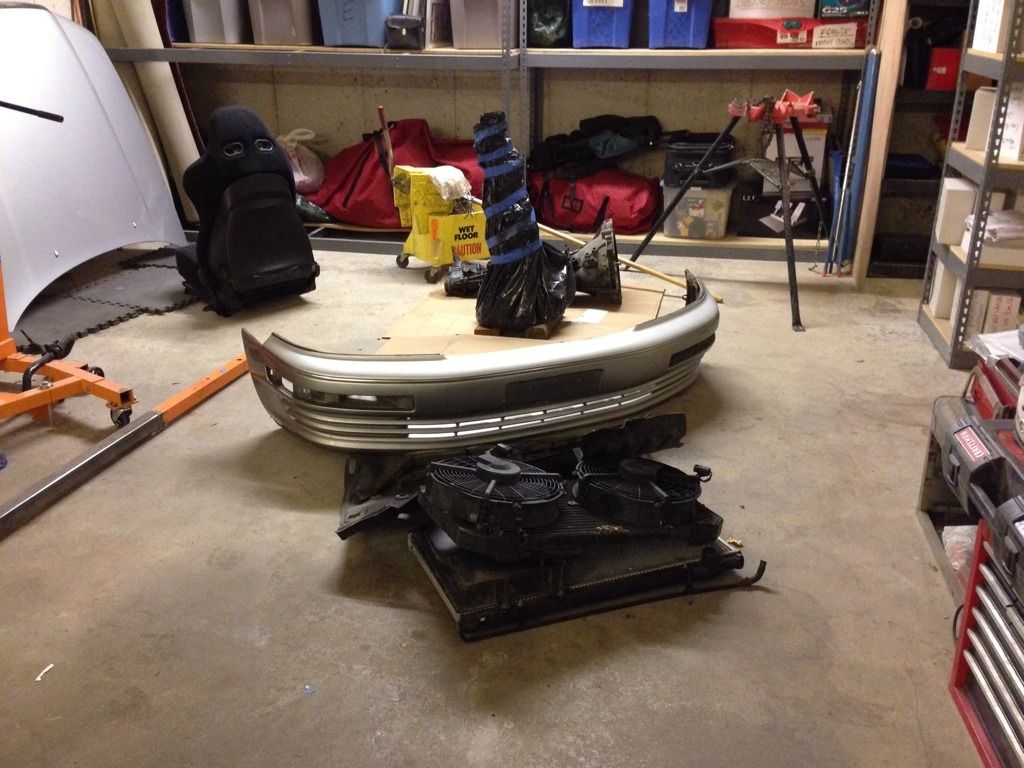
Bumper, headlights, radiator, centrifugal fan, a/c condenser, cooling fans, abs accumulator, TRAC module, and a few other odds and ends are off.
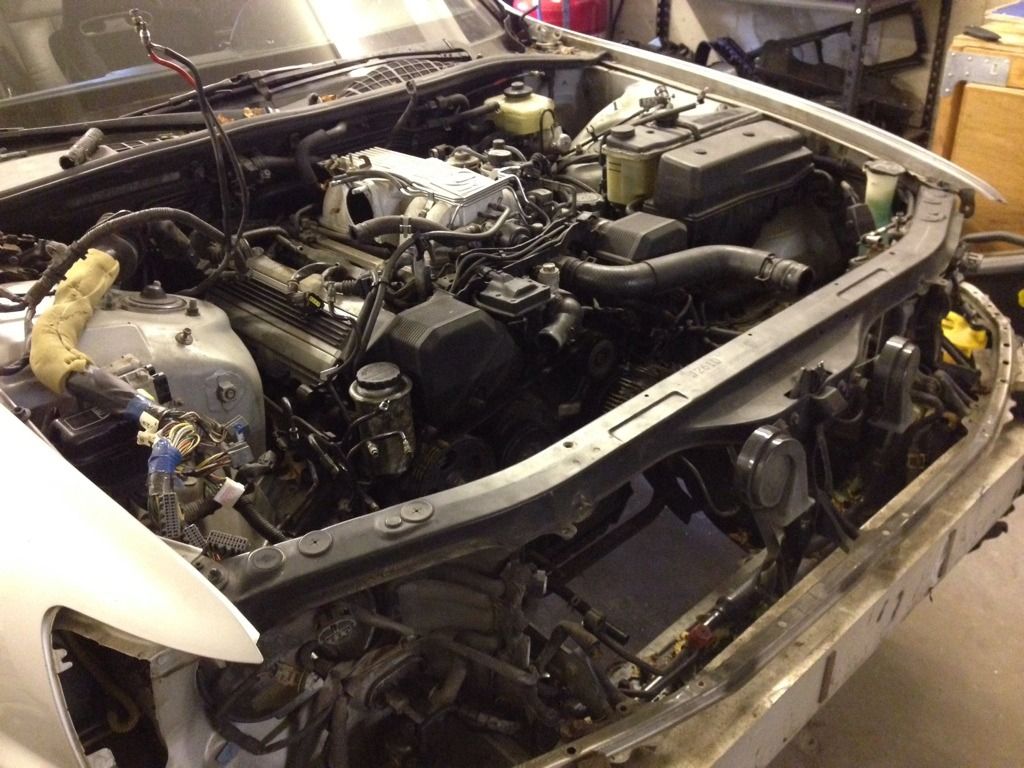
Had to pull the carpets up to unplug the o2 sensors so I could take the Y pipe off..what a nightmare -_-.

Now for those of you who payed attention, those are Evo 8 Recaros. Snatched them up for 400 bucks from a local guy, can't wait to toss them in. Weigh in @ 29lbs with rails. Winning. Also found out my cats are shot. The platinum cores are toast and rattling around all loose in the cats, so I'm thinking about gutting them and shoving a straight pipe in and just welding it in place. Only concern is it being stupid obnoxious loud, thinking about running a pair of 22" Cherry Bombs in the straight section of the exhaust and then the Titanium muffler out back on the Pass side.
Progress has slowed due to work, but I have managed to get some time in over the last few weeks. Started like this,
and progressed through the following.
Decided to pull the harness from the dash rather than off the motor as per PureDrifters suggestion. MUCH easier.
Bumper, headlights, radiator, centrifugal fan, a/c condenser, cooling fans, abs accumulator, TRAC module, and a few other odds and ends are off.
Had to pull the carpets up to unplug the o2 sensors so I could take the Y pipe off..what a nightmare -_-.
Now for those of you who payed attention, those are Evo 8 Recaros. Snatched them up for 400 bucks from a local guy, can't wait to toss them in. Weigh in @ 29lbs with rails. Winning. Also found out my cats are shot. The platinum cores are toast and rattling around all loose in the cats, so I'm thinking about gutting them and shoving a straight pipe in and just welding it in place. Only concern is it being stupid obnoxious loud, thinking about running a pair of 22" Cherry Bombs in the straight section of the exhaust and then the Titanium muffler out back on the Pass side.
 03-04-13, 09:48 PM
#88
Driver
Thread Starter
03-10-13, 08:51 AM
#89
Driver
Thread Starter
Update #13 3/9/13
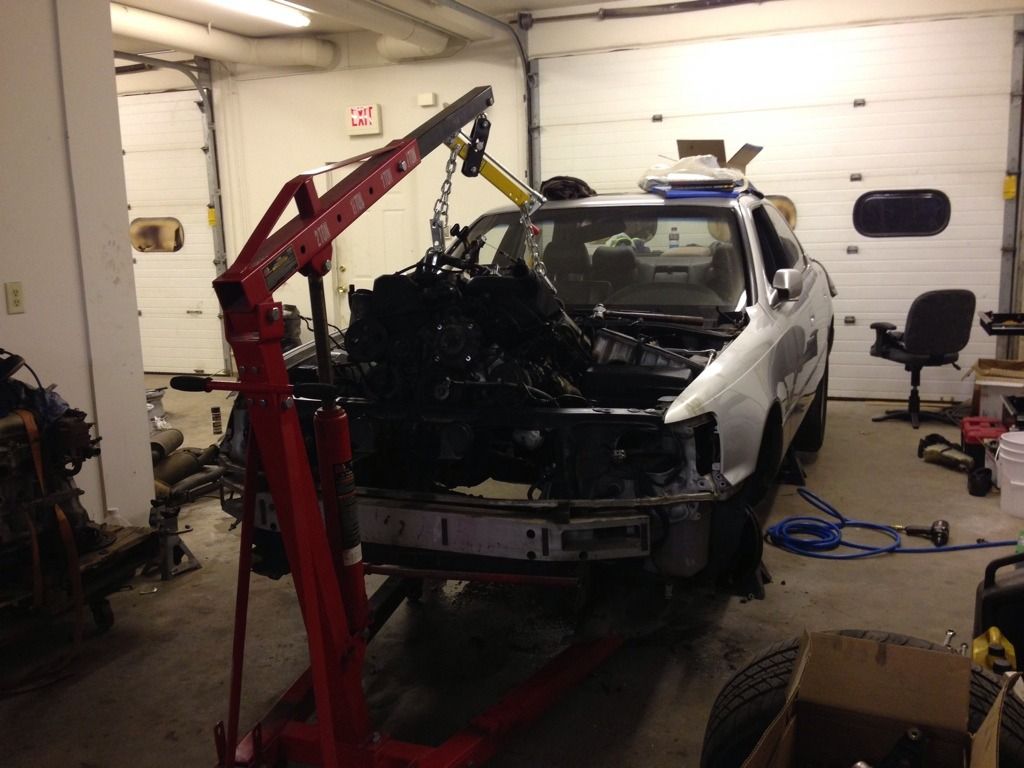
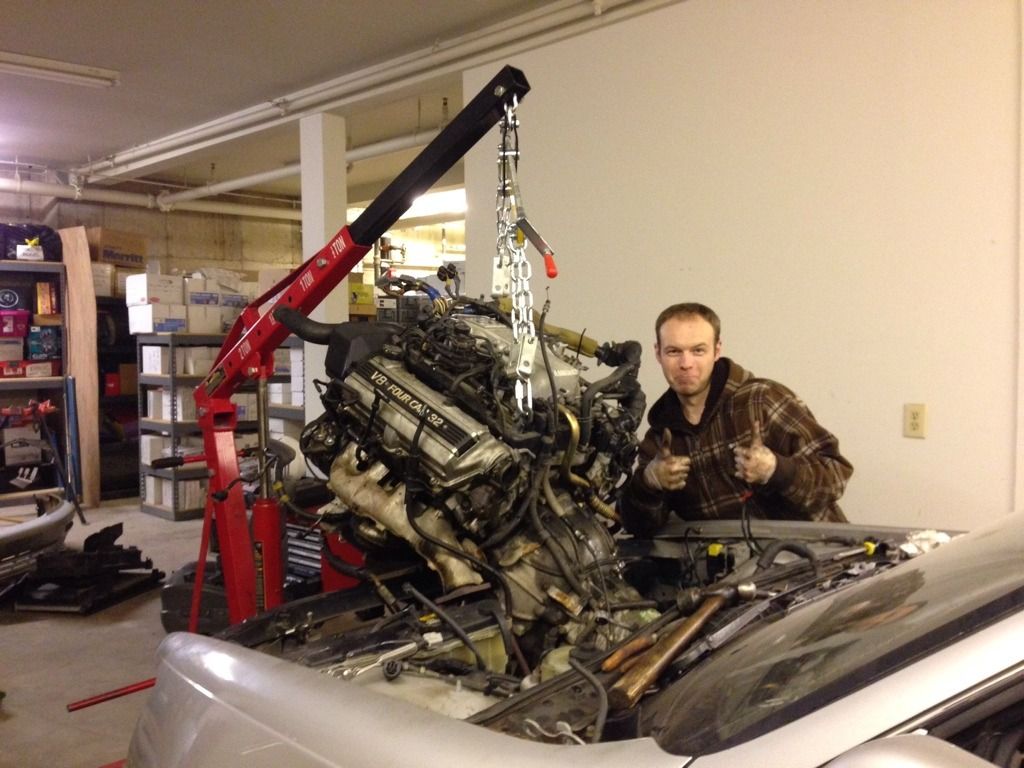
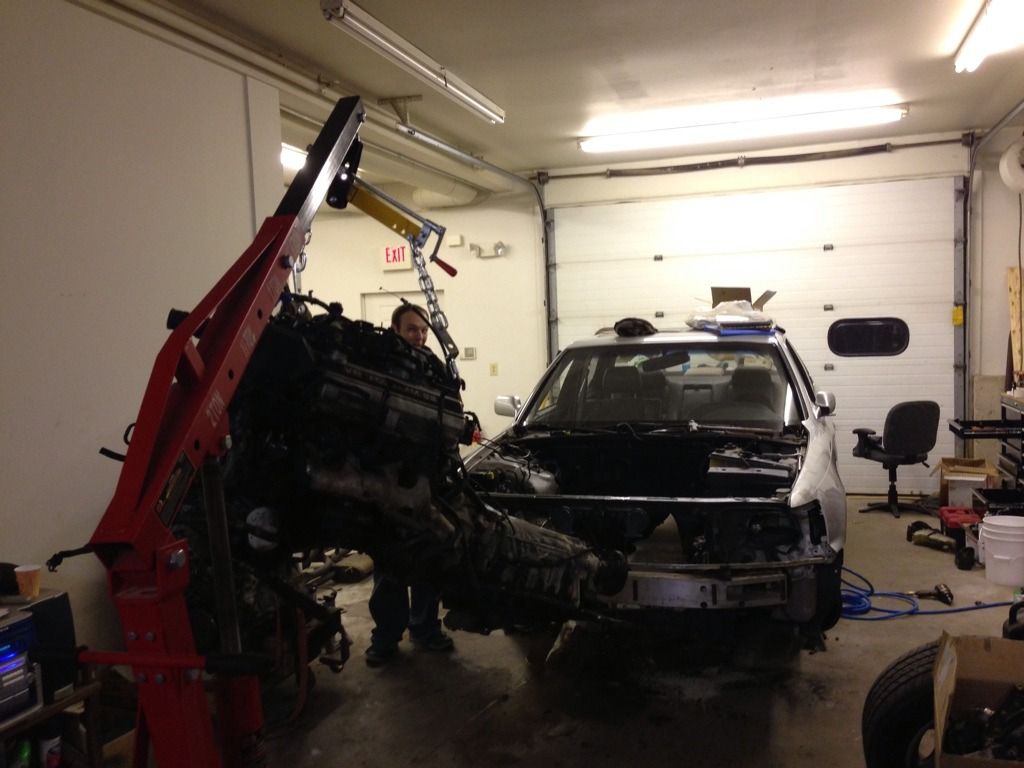
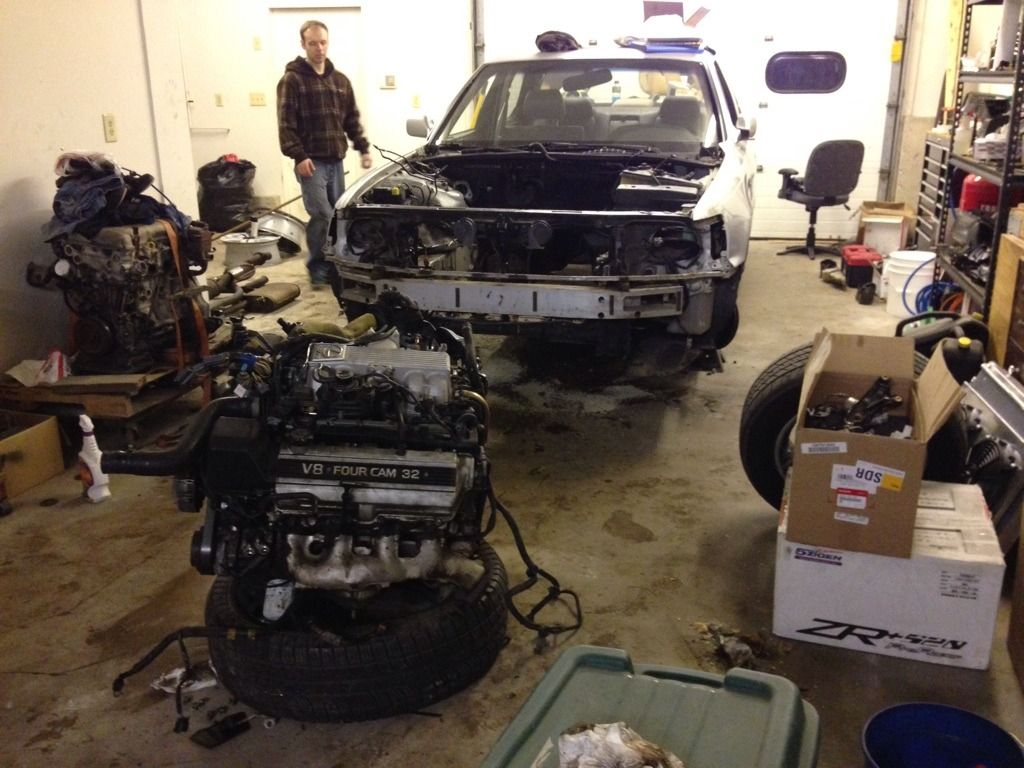
So last night my friend and I went to town after I got out of work. Motor and trans are out!
My goober of a best friend.
The hoist was able to get high enough to clear the oil pan over the rad support. Chris had to jump in the engine bay and pick the motor up by the prop shaft to level it out and get it over the rad support.
Woohoo!

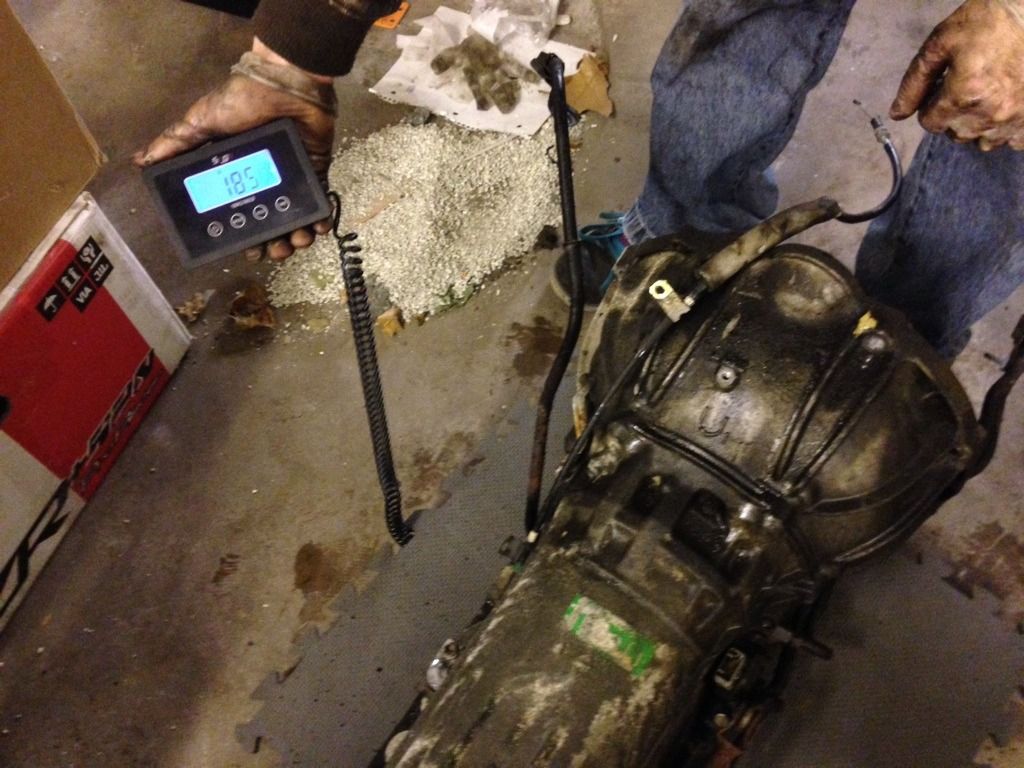
Since I was on a roll, I decided to pull off the auto trans and weight it. This is without fluid, without the flex plate, but with the torque convertor.
Lighting sucks at the shop, but thats 185.1lbs. The KA trans is 92 on the dot. Automatic 100lb weight savings. 3200lb goal still possible!
Today I'm going to focus on cleaning out the grease and grime. Hopefully start removing more garbage I don't need like A/C lines and brake lines.
Next step is EGR delete, and some basic gaskets on the uz. Till next time!
So last night my friend and I went to town after I got out of work. Motor and trans are out!
My goober of a best friend.
The hoist was able to get high enough to clear the oil pan over the rad support. Chris had to jump in the engine bay and pick the motor up by the prop shaft to level it out and get it over the rad support.
Woohoo!
Since I was on a roll, I decided to pull off the auto trans and weight it. This is without fluid, without the flex plate, but with the torque convertor.
Lighting sucks at the shop, but thats 185.1lbs. The KA trans is 92 on the dot. Automatic 100lb weight savings. 3200lb goal still possible!
Today I'm going to focus on cleaning out the grease and grime. Hopefully start removing more garbage I don't need like A/C lines and brake lines.
Next step is EGR delete, and some basic gaskets on the uz. Till next time!