8052JZ's NA-T Build
 02-19-17, 09:53 PM
#1126

On a side note, got the intake manifold, fuel rail and the rmr 90mm tb coated. The fuel rail is coated clear over polished to give the all black bay some contrast. I've never done a clear over polished so hopefully the polish doesn't fade.


Last edited by 8052JZ; 02-21-17 at 08:15 AM.
 03-09-17, 01:42 PM
#1127
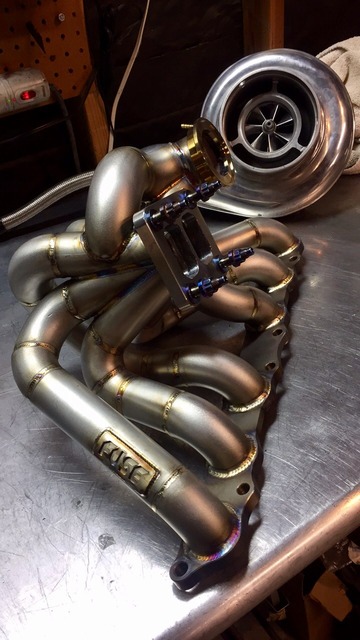
Small update. My new manifold setup is being finished up and hopefully shipped over tomorrow.
Few pics from the builder Kyle at Fuse Fabrication.
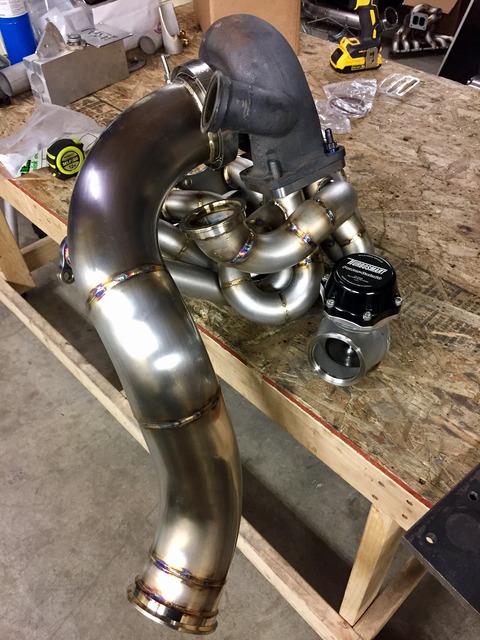
60mm Turbosmart gate, 2.5" dump tube.
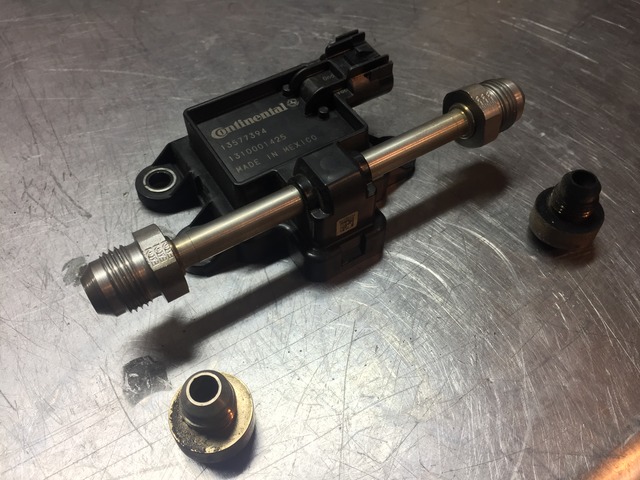
Also welded on -8 fittings on the flexfuel sensor from -6. Fuel system will be -12 to external pump, pump to -10 feed and -8 return.
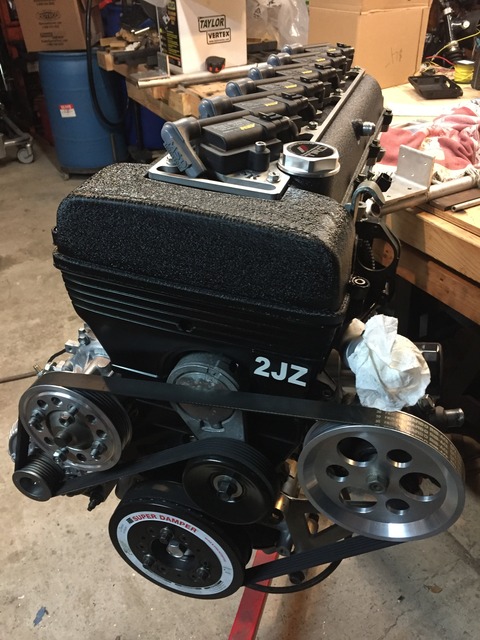
And the motor waiting for all its glory to come to together.
Few pics from the builder Kyle at Fuse Fabrication.


60mm Turbosmart gate, 2.5" dump tube.
Also welded on -8 fittings on the flexfuel sensor from -6. Fuel system will be -12 to external pump, pump to -10 feed and -8 return.

And the motor waiting for all its glory to come to together.
 03-29-17, 08:46 AM
#1128
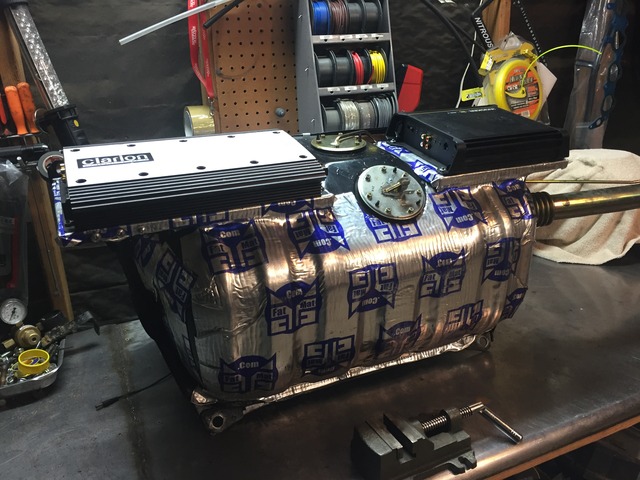
Continuing to slowly work on the upgraded fuel system. Fuel tank is modified with fittings welded to the tank and the FPR is mounted.
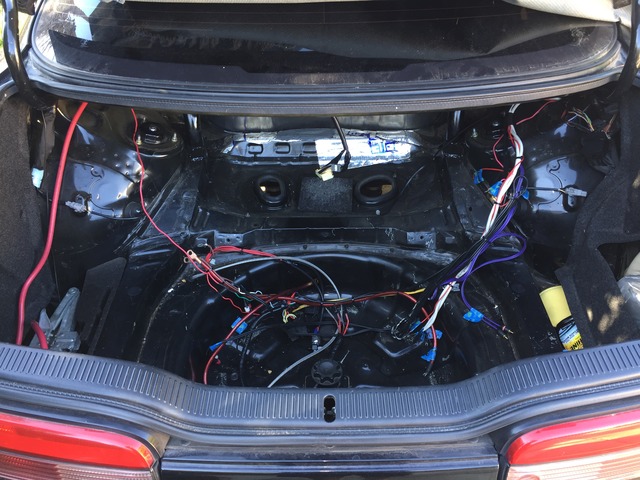
Started by removing the amps off the tank. I'll be replacing the speaker amp with something more compact that I can hide in the trunk. Even though this is a "race car", I still want the radio hooked up.
And the trunk wiring will also get cleaned up.
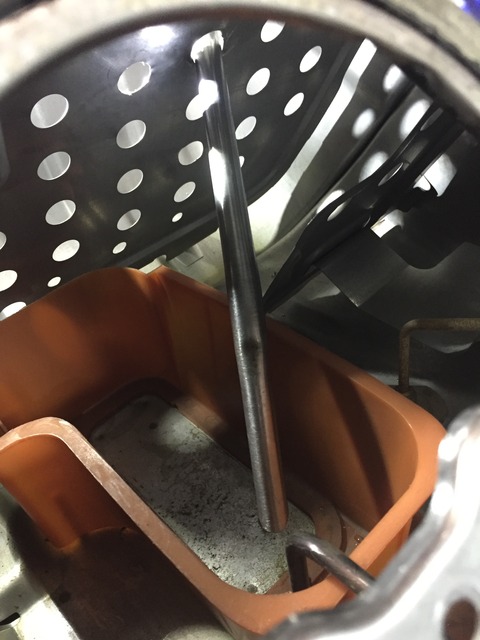
This is the -8 return port that gets fuel back into the sump inside the tank like factory.
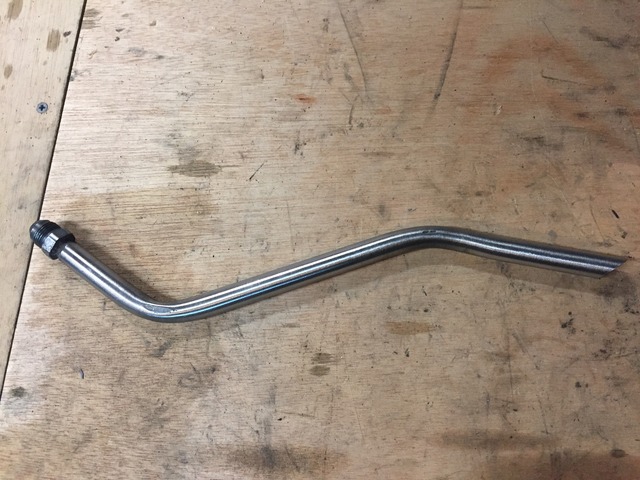
Return tube landing inside the sump.
Turn port on top of the tank welded up.
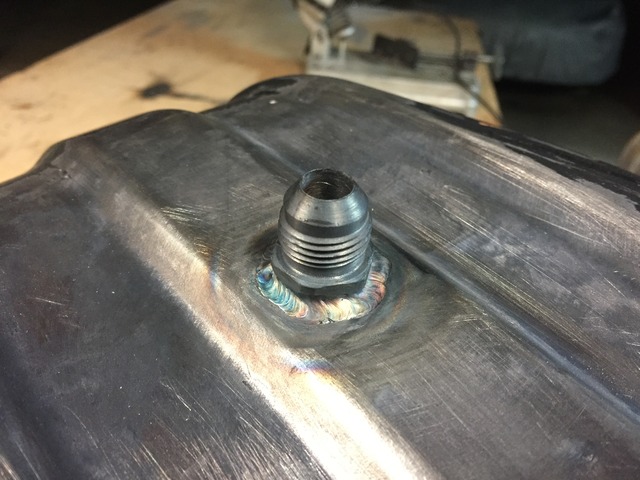
This is the -12 feed port that is welded to the bottom of the tank that is also within the sump inside that tank. I decided to go this route so I didn't have to run a separate pump inside the tank to feed the Weldon pump.
The feed goes straight out of the car toward the wheel well where the pump will be mounted.
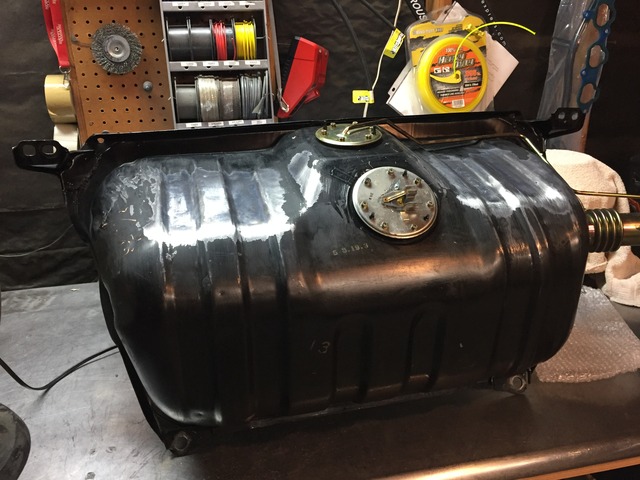
And a fresh spray of paint on the tank.
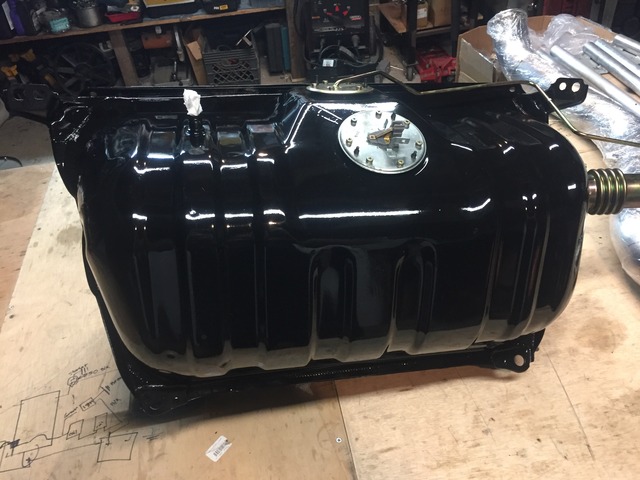
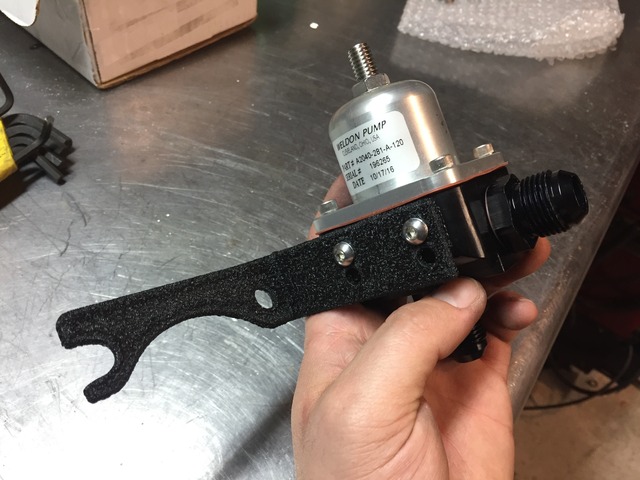
And the massive Weldon FPR mounted next to the brake cylinder to easy access to the fittings, regulator screw, pressure sensor and vacuum line.

Next thing I will do is cut out the wheel well, seal and rivet in 3/16" aluminum sheet in its place. Then mount the pump and start making the fuel lines.
Started by removing the amps off the tank. I'll be replacing the speaker amp with something more compact that I can hide in the trunk. Even though this is a "race car", I still want the radio hooked up.


And the trunk wiring will also get cleaned up.

This is the -8 return port that gets fuel back into the sump inside the tank like factory.

Return tube landing inside the sump.

Turn port on top of the tank welded up.

This is the -12 feed port that is welded to the bottom of the tank that is also within the sump inside that tank. I decided to go this route so I didn't have to run a separate pump inside the tank to feed the Weldon pump.


The feed goes straight out of the car toward the wheel well where the pump will be mounted.

And a fresh spray of paint on the tank.

And the massive Weldon FPR mounted next to the brake cylinder to easy access to the fittings, regulator screw, pressure sensor and vacuum line.


Next thing I will do is cut out the wheel well, seal and rivet in 3/16" aluminum sheet in its place. Then mount the pump and start making the fuel lines.
Last edited by 8052JZ; 03-29-17 at 10:48 AM.
04-07-17, 03:01 PM
#1129
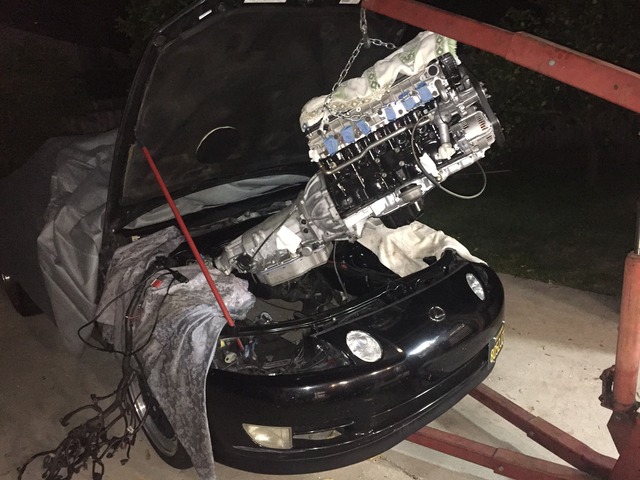
Got a few more things done before I get busy with moving into the new house. Motor is in and I started to get the passenger side of things back in the car.
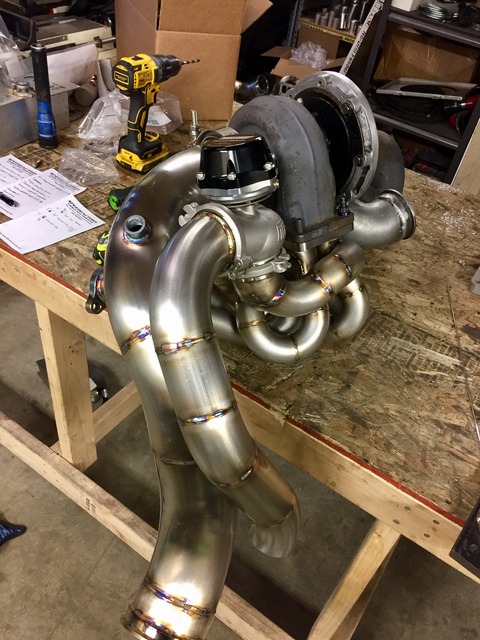
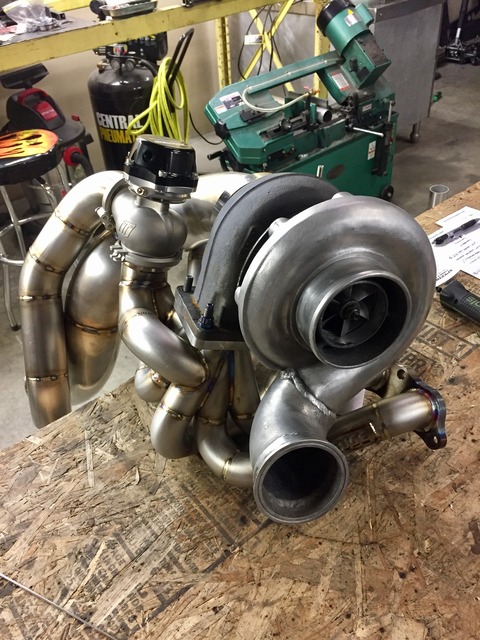
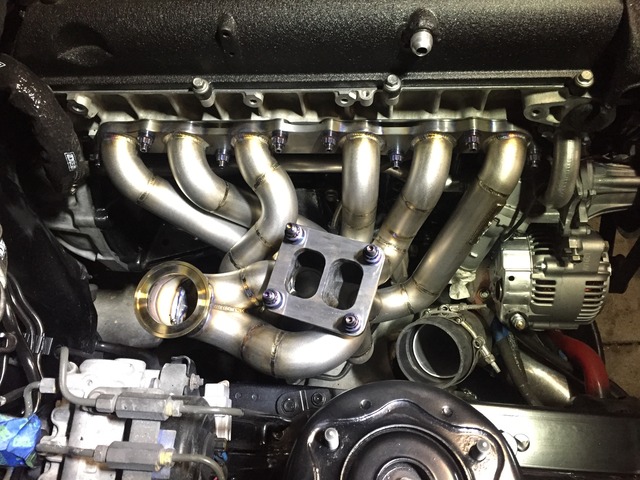
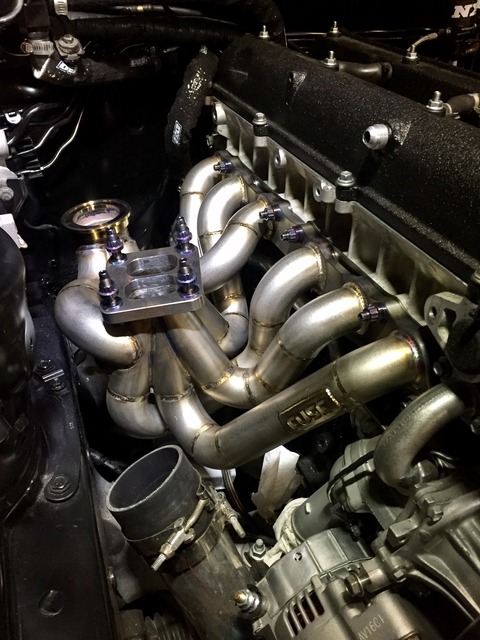
If anyone is looking for a extremely quality turbo manifold, I highly recommend Kyle at Fuse Fabrication. Took a bit longer then I expected but I got a full kit from him and man, is this thing beautiful. There was a bit of a mix on the down pipe and dump tube fitment but I contacted him and I will be sending it back for him to fix at no cost. He was more then delighted to work it out so customer service is also top notch!
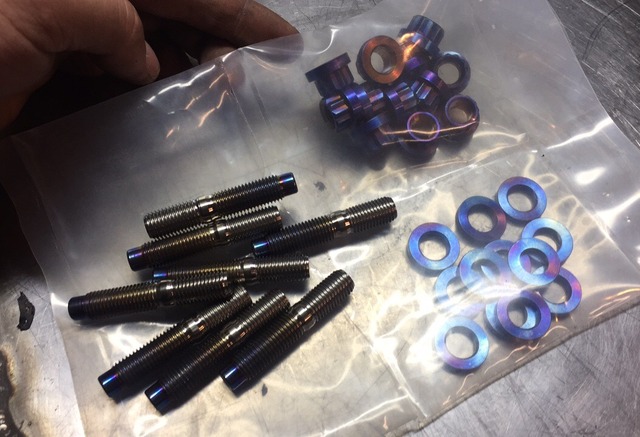
He also threw in some titanium exhaust studs which compliment the manifold very well. The fitment of this thing is amazing. no fighting or struggling to get it on and bolt it on! Super happy with it.
Motor going back in FINALLY!
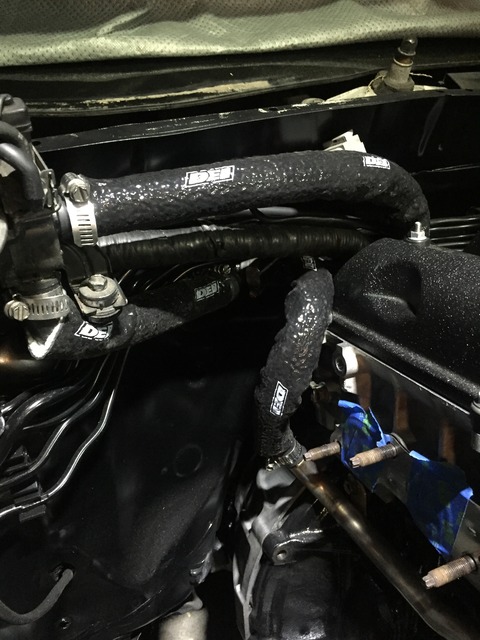
Heater Hoses wrapped in the DEI fire sleeve.
and the work of art!
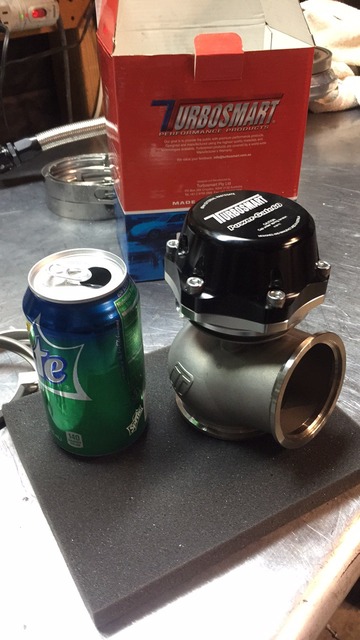
And just a scale comparison too how big a 60mm wastgate is
If anyone is looking for a extremely quality turbo manifold, I highly recommend Kyle at Fuse Fabrication. Took a bit longer then I expected but I got a full kit from him and man, is this thing beautiful. There was a bit of a mix on the down pipe and dump tube fitment but I contacted him and I will be sending it back for him to fix at no cost. He was more then delighted to work it out so customer service is also top notch!
He also threw in some titanium exhaust studs which compliment the manifold very well. The fitment of this thing is amazing. no fighting or struggling to get it on and bolt it on! Super happy with it.
Motor going back in FINALLY!

Heater Hoses wrapped in the DEI fire sleeve.

and the work of art!


And just a scale comparison too how big a 60mm wastgate is


 . Thanks ...
05-03-17, 01:48 PM
. Thanks ...
05-03-17, 01:48 PM
#1134
Slowly working on the car while being busy with the new house but here's some info that might help some out.
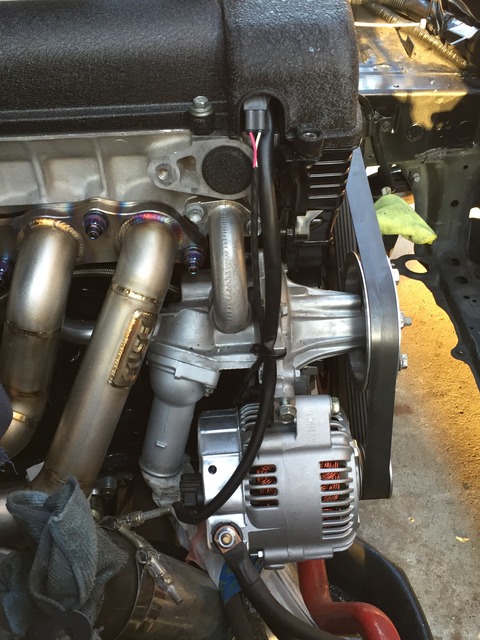
For those that are NA-T and want to use GTE cams. Here's how I did it. Wiring might not be the same for all year SC's but you'll get the idea.
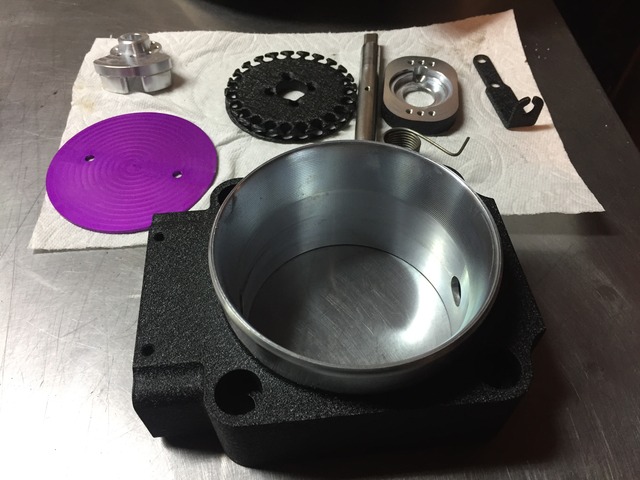
First you need to get a cam and crank sensor, GTE oil pump and trigger wheel to make this all work.
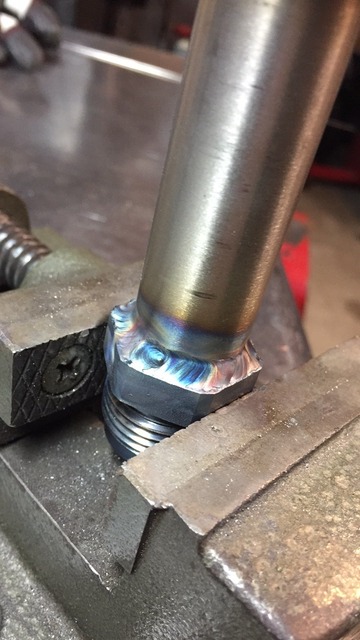
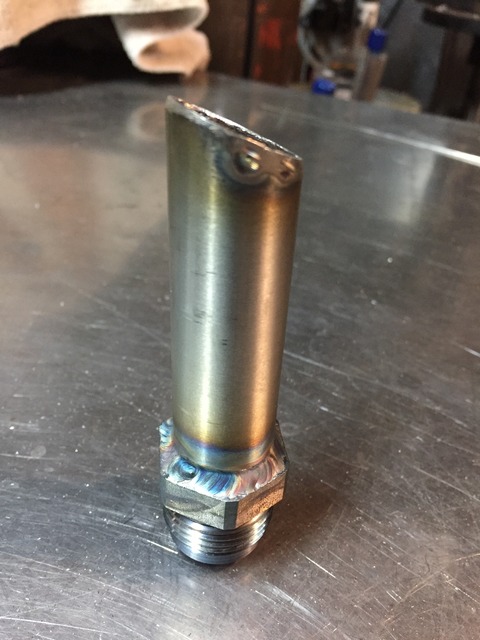
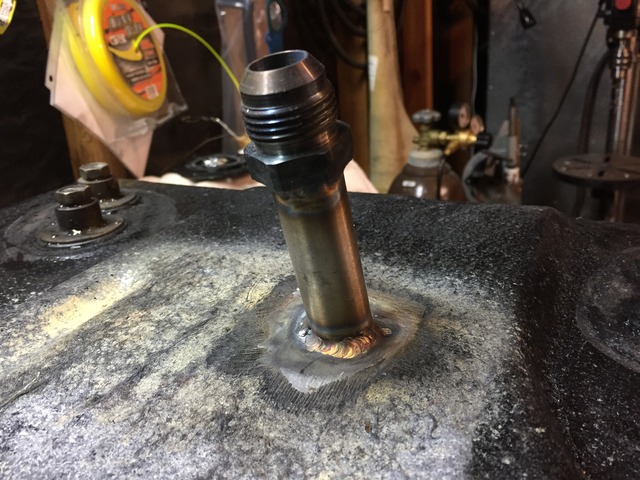
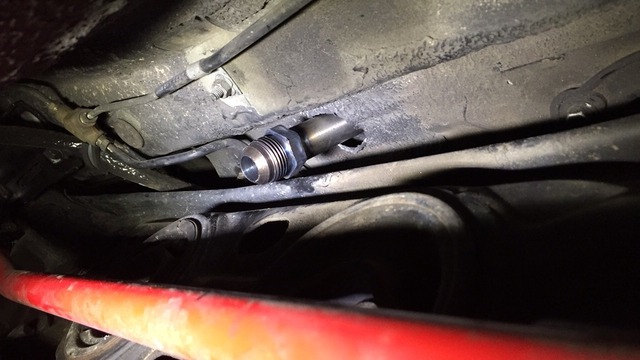
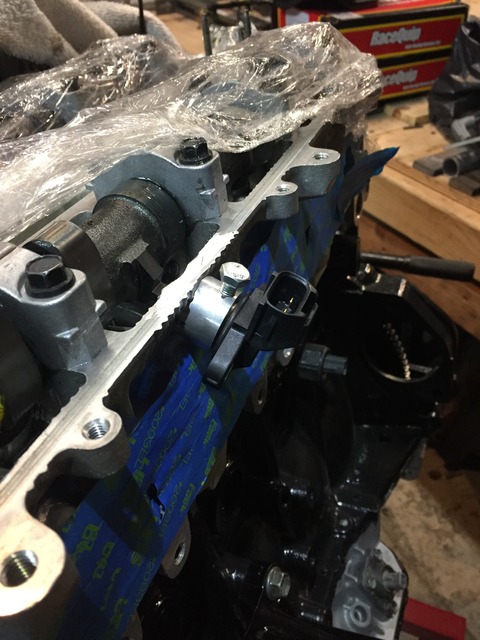
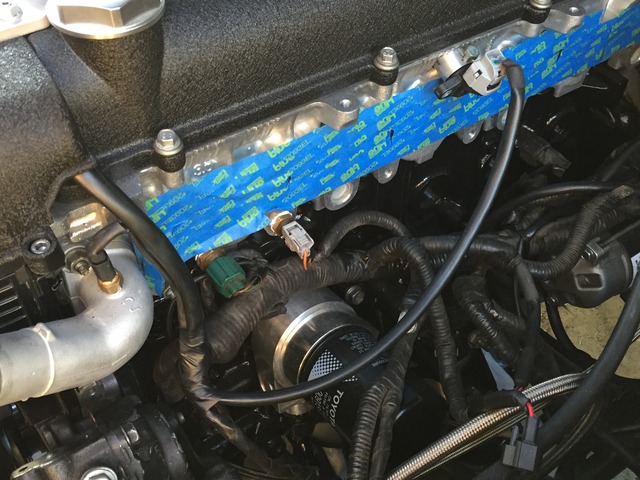
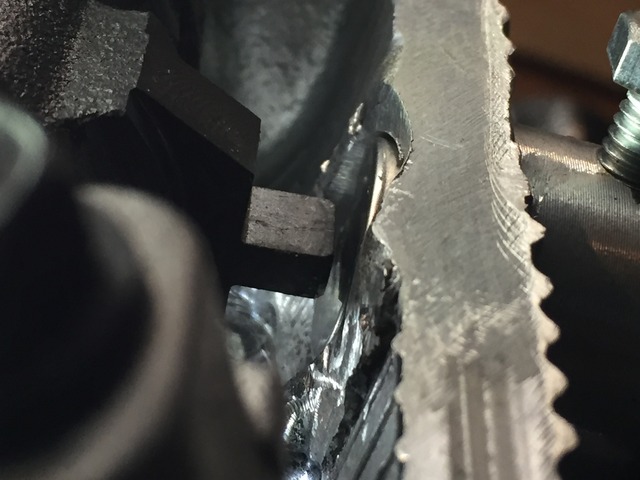
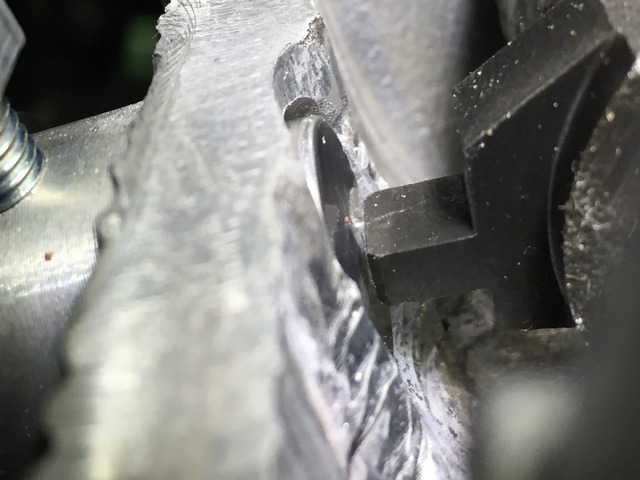
Cut a hole, weld or bolt on a GTE cam sensor bung. You can now buy the bung or adapter from a few places or you can just make one like I did. I used fpig to seal off the sensor to make sure it doesn't leak oil.
Make sure you have the gte cam in place because you need to have the proper gap for the sensor to cam trigger lobe. That's about it for the cam sensor.
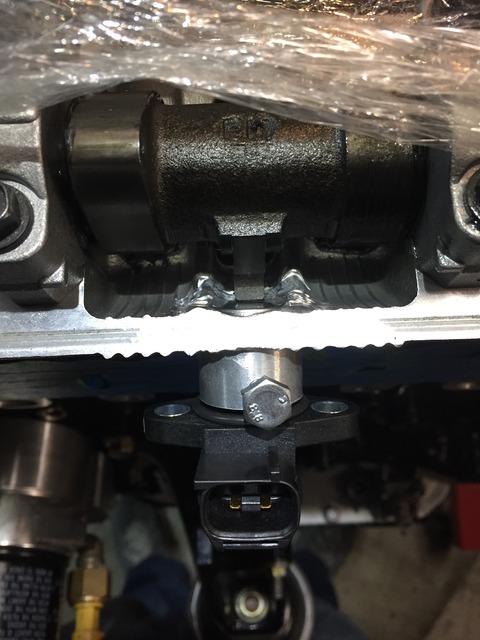
Crank is pretty simple. Replace oil pump with GTE pump, install trigger wheel and bolt on crank sensor.
Next is dealing with the shielded cam/crank wiring. With a GE both sets of wires are in one single round of shielding loom. 2 Input 2 ground. I used the existing wires from the loom and extended some with more shielding wire I had from another harness.
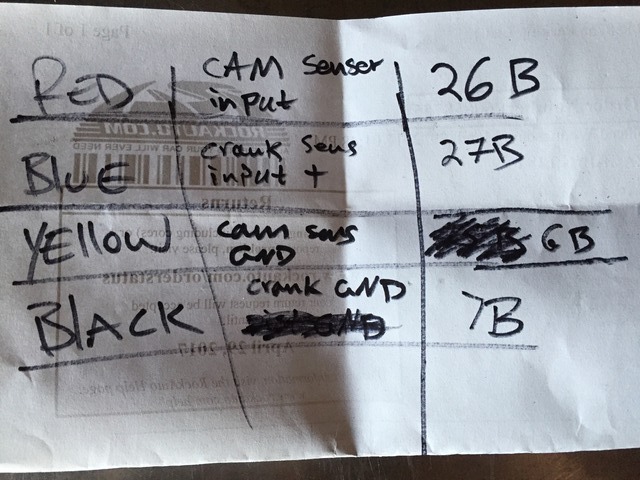
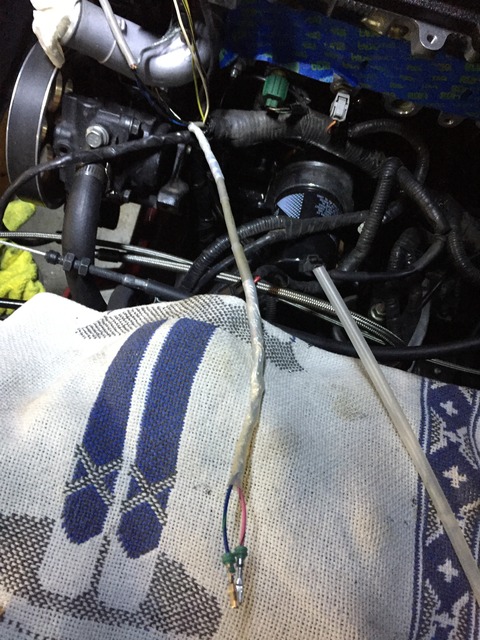
First I started with Identifying what wire will go where. The polarity of the sensors doesn't matter. So the two wires for the sensor can go in which ever way you want. Cam going to Cam and Crank going to Crank. After checking each wire this is what I got and what pins each sensor/wire will be going to.
I started with the cam sensor. First thing I did was cut the wire down to the harness where I can make it the cleanest but leaving enough shielding in place. Then added the new shielded wire for cam and crank. When you extend shielding wire I used a method I found online that seems to be the most logical way to make sure the extended wire stays shielded.
Leave about 2" of shielding in place on both ends because you will need to connect them to the new extended wiring. Then solder your wires together making sure you put heat shrink on. Shrink it and use a very small amount of electrical tape as another precautionary measure so the soldered joints do not touch. Then solder the two ends of shielding together to get a proper ground.
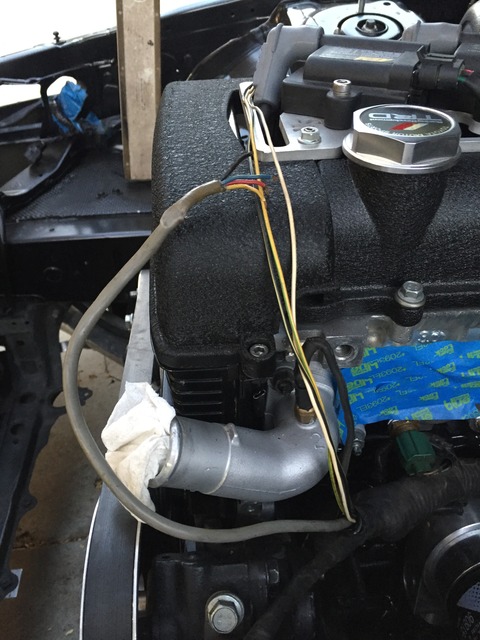
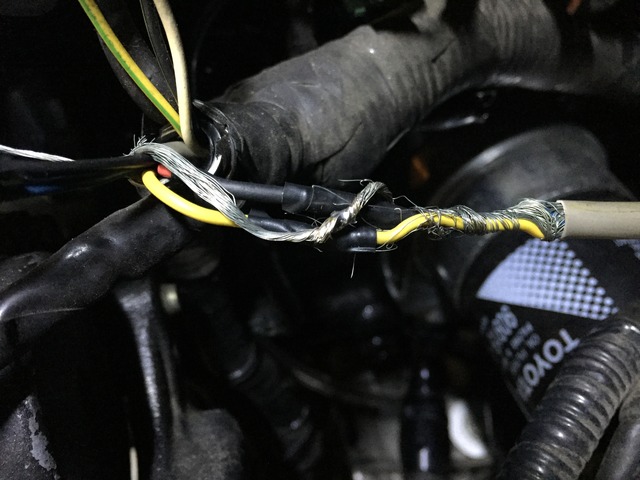
Now take some aluminium foil and wrap the exposed wire all around really tight. The foil will get grounded by touching the shielded wire. Then heat shrink. I used a clear heat shrink so the foil stays in place and doesn't get ripped in the process of sliding the heat shrink on.
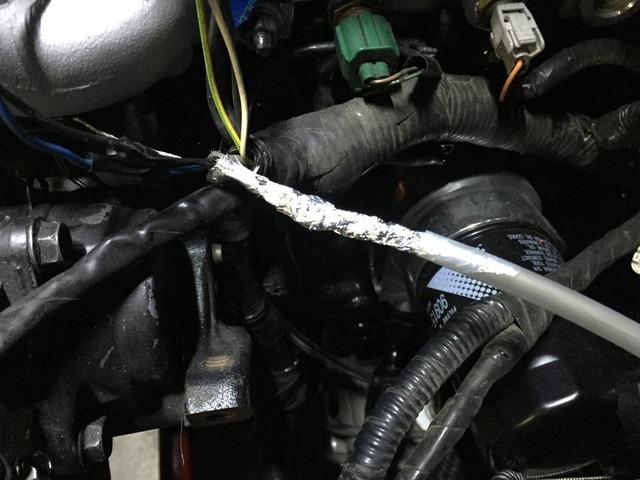
Then wrap the finished shielded wire in some type of loom for added protection.
Follow the same steps for the crank sensor. While your at it with the cranks sensor, you can clean up the alternator wiring as well.
More updates to follow. Intake side is pretty much done. Intake manifold, injectors, vacuum lines, IC piping, rad fan, radiator, over flow tank are all on. Now its time to move onto the hot side of the motor. Pics to follow in the next couple days.
For those that are NA-T and want to use GTE cams. Here's how I did it. Wiring might not be the same for all year SC's but you'll get the idea.
First you need to get a cam and crank sensor, GTE oil pump and trigger wheel to make this all work.
Cut a hole, weld or bolt on a GTE cam sensor bung. You can now buy the bung or adapter from a few places or you can just make one like I did. I used fpig to seal off the sensor to make sure it doesn't leak oil.
Make sure you have the gte cam in place because you need to have the proper gap for the sensor to cam trigger lobe. That's about it for the cam sensor.
Crank is pretty simple. Replace oil pump with GTE pump, install trigger wheel and bolt on crank sensor.

Next is dealing with the shielded cam/crank wiring. With a GE both sets of wires are in one single round of shielding loom. 2 Input 2 ground. I used the existing wires from the loom and extended some with more shielding wire I had from another harness.
First I started with Identifying what wire will go where. The polarity of the sensors doesn't matter. So the two wires for the sensor can go in which ever way you want. Cam going to Cam and Crank going to Crank. After checking each wire this is what I got and what pins each sensor/wire will be going to.

I started with the cam sensor. First thing I did was cut the wire down to the harness where I can make it the cleanest but leaving enough shielding in place. Then added the new shielded wire for cam and crank. When you extend shielding wire I used a method I found online that seems to be the most logical way to make sure the extended wire stays shielded.
Leave about 2" of shielding in place on both ends because you will need to connect them to the new extended wiring. Then solder your wires together making sure you put heat shrink on. Shrink it and use a very small amount of electrical tape as another precautionary measure so the soldered joints do not touch. Then solder the two ends of shielding together to get a proper ground.


Now take some aluminium foil and wrap the exposed wire all around really tight. The foil will get grounded by touching the shielded wire. Then heat shrink. I used a clear heat shrink so the foil stays in place and doesn't get ripped in the process of sliding the heat shrink on.


Then wrap the finished shielded wire in some type of loom for added protection.

Follow the same steps for the crank sensor. While your at it with the cranks sensor, you can clean up the alternator wiring as well.

More updates to follow. Intake side is pretty much done. Intake manifold, injectors, vacuum lines, IC piping, rad fan, radiator, over flow tank are all on. Now its time to move onto the hot side of the motor. Pics to follow in the next couple days.
Last edited by 8052JZ; 05-04-17 at 09:42 AM.
 05-04-17, 07:47 AM
#1136
I made the bung. Its welded from the inside and yes its a set screw. I could have gone above and beyond and make it so that the cam sensor bolts on like factory but that wont allow me to adjust the gap. I also used fpig to seal it off and it also helps to hold it in place. So win win.
Here's a couple more pics.

Here's a couple more pics.


Last edited by 8052JZ; 05-04-17 at 09:43 AM.

 05-12-17, 08:55 AM
#1138
Man I feel like I'm talking to my self lol
Got a few more things done while I'm waiting for the down pipe to be fixed.
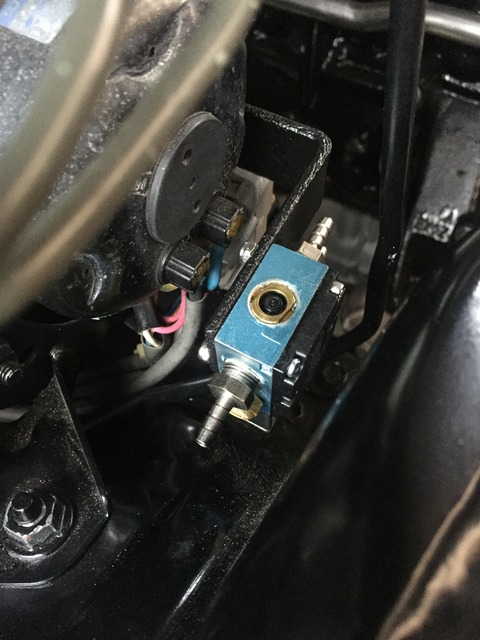
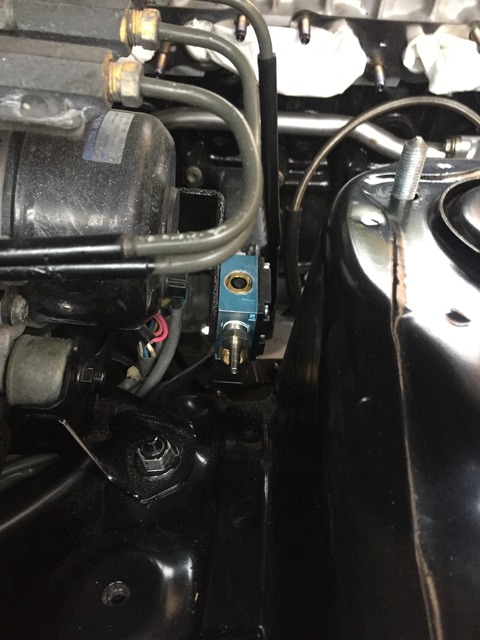
4port boost solenoid mounted next to the ABS motor. Its mounted upside down so the two ports going to the gate are facing the gate making it easier to route the lines.
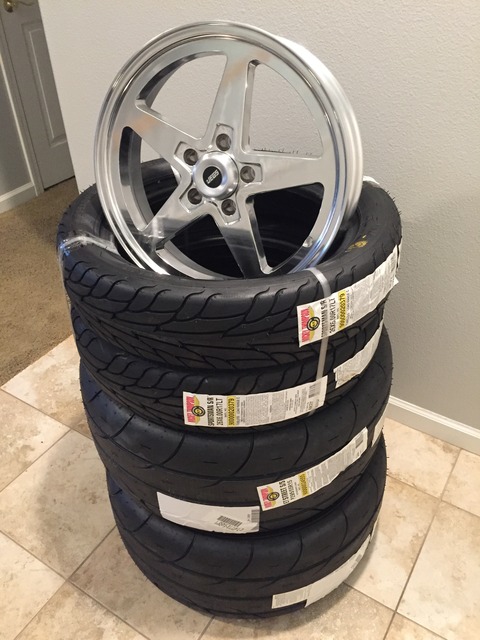
Finally sold my CCW wheels so I can get my drag wheel setup going. So I ordered some Mickey Thompson ET radials for the Weld 15" rears I got from gerry, Sportman front runner tires and a pair of Jegs 17"x4.5 shinnies which all showed up yesterday. A friend of mine sent me a link to the these Jeg wheels that look similar to the Welds but are 99$ a piece. At that price, I couldn't get around paying over 350 a wheel from Weld. I can put the extra funds else where on performance. Yes, your getting a name brand quality wheel but if Jegs or Summit are putting their names on these, then I would assume they stand behind there product making it a name brand part of quality. They are a bit heavier because they are cast and not billet like weld wheels but I'm sure the car does care . I decided to go with skinny wheel up front because my car wont be daily driven anymore so why not.
Got a few more things done while I'm waiting for the down pipe to be fixed.
4port boost solenoid mounted next to the ABS motor. Its mounted upside down so the two ports going to the gate are facing the gate making it easier to route the lines.


Finally sold my CCW wheels so I can get my drag wheel setup going. So I ordered some Mickey Thompson ET radials for the Weld 15" rears I got from gerry, Sportman front runner tires and a pair of Jegs 17"x4.5 shinnies which all showed up yesterday. A friend of mine sent me a link to the these Jeg wheels that look similar to the Welds but are 99$ a piece. At that price, I couldn't get around paying over 350 a wheel from Weld. I can put the extra funds else where on performance. Yes, your getting a name brand quality wheel but if Jegs or Summit are putting their names on these, then I would assume they stand behind there product making it a name brand part of quality. They are a bit heavier because they are cast and not billet like weld wheels but I'm sure the car does care
. I decided to go with skinny wheel up front because my car wont be daily driven anymore so why not. 

