8052JZ's NA-T Build
 12-09-16, 08:57 AM
#1096

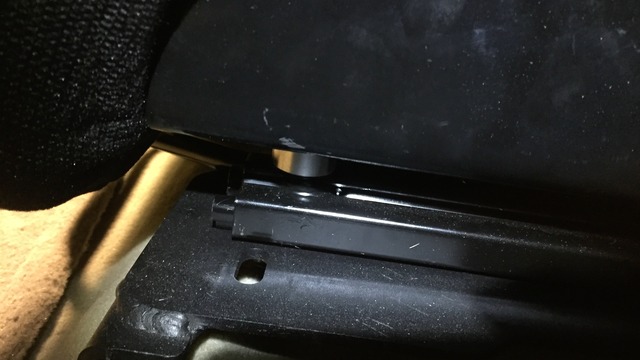
On a second note, tried to search for a 200amp fuse that I can replace the current 120amp fuse with and couldnt find anything?
 12-09-16, 09:34 AM
#1097

I have used Mechman 240amps alternators on any car making 500rwhp and above. And knock on wood , never had any problems on any of them so far.
A bigger amp alternator can carry all the necessary load without depleting your battery charge meaning it recharges your battery as fast as it is discharged or even better.
As long as your power loads of all equipments on each circuitry were same , you don't need to change any fuse. You only change fuses when you have more equipments using power thus the total amperage on such circuitry had increased.
Remember while your car is running , it is your alternator that is actually powering any electrical system. Only when an alternator dies does the battery kicks in thus depleting it when the alternator doesn't return that power to the battery. And any charging done by the alternator to the battery is regulated. It doesn't mean that 240 amp (in my case) is going back to the battery thus I need to increase the 120amp fuse to 250 amp... NOPE !
Last edited by gerrb; 12-09-16 at 09:49 AM.
12-09-16, 12:54 PM
#1098
I have used Mechman 240amps alternators on any car making 500rwhp and above. And knock on wood , never had any problems on any of them so far.
A bigger amp alternator can carry all the necessary load without depleting your battery charge meaning it recharges your battery as fast as it is discharged or even better.
As long as your power loads of all equipments on each circuitry were same , you don't need to change any fuse. You only change fuses when you have more equipments using power thus the total amperage on such circuitry had increased.
Remember while your car is running , it is your alternator that is actually powering any electrical system. Only when an alternator dies does the battery kicks in thus depleting it when the alternator doesn't return that power to the battery. And any charging done by the alternator to the battery is regulated. It doesn't mean that 240 amp (in my case) is going back to the battery thus I need to increase the 120amp fuse to 250 amp... NOPE !
A bigger amp alternator can carry all the necessary load without depleting your battery charge meaning it recharges your battery as fast as it is discharged or even better.
As long as your power loads of all equipments on each circuitry were same , you don't need to change any fuse. You only change fuses when you have more equipments using power thus the total amperage on such circuitry had increased.
Remember while your car is running , it is your alternator that is actually powering any electrical system. Only when an alternator dies does the battery kicks in thus depleting it when the alternator doesn't return that power to the battery. And any charging done by the alternator to the battery is regulated. It doesn't mean that 240 amp (in my case) is going back to the battery thus I need to increase the 120amp fuse to 250 amp... NOPE !
12-15-16, 08:51 AM
#1099
So got around to finishing another project I've been meaning to do while.
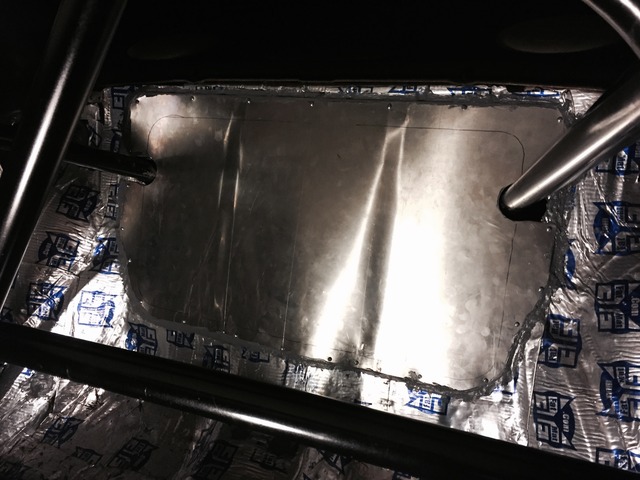
I made a new fuel tank cover that is flat compared to the fiberglass box that the cage guy made. Also sealed it off with seam sealer. Sense I'll be using an external Weldon pump, I plan to add a sump to the facotry tank that will feed the pump from underneath the car. If for what ever reason I need to get inside the tank, I will pull it out from the rear.
When I bought the carpet in this specific material, I thought it would match the oem tan carpet but it turned out to be darker. But, it did match the floor mats so I stuck with it.
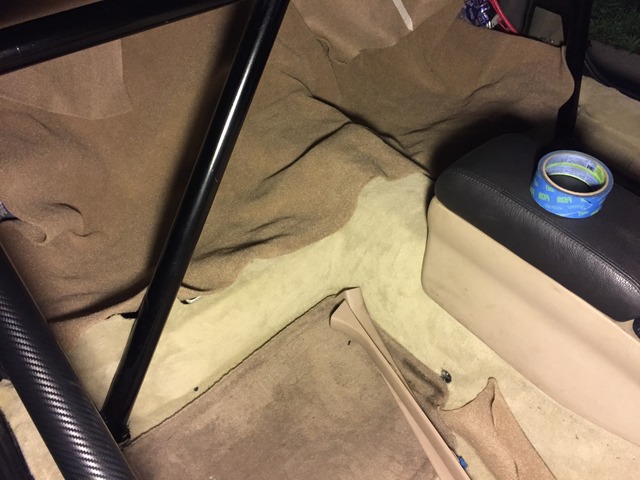
Then sprayed 3m adhesive glue and started to lay it down from the middle out, stretching the carpet to fit nicley.
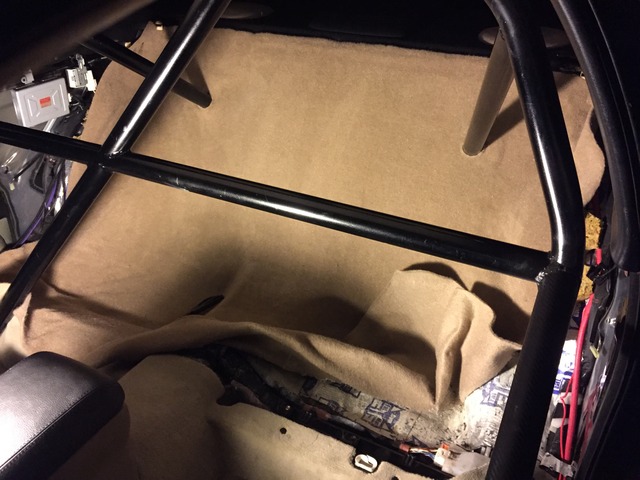
All thats left to do is trim the carpet and add the rear panels. Came out pretty good I think.

I made a new fuel tank cover that is flat compared to the fiberglass box that the cage guy made. Also sealed it off with seam sealer. Sense I'll be using an external Weldon pump, I plan to add a sump to the facotry tank that will feed the pump from underneath the car. If for what ever reason I need to get inside the tank, I will pull it out from the rear.

When I bought the carpet in this specific material, I thought it would match the oem tan carpet but it turned out to be darker. But, it did match the floor mats so I stuck with it.

Then sprayed 3m adhesive glue and started to lay it down from the middle out, stretching the carpet to fit nicley.

All thats left to do is trim the carpet and add the rear panels. Came out pretty good I think.

Last edited by 8052JZ; 12-15-16 at 08:54 AM.
12-16-16, 08:41 AM
#1101
To be honest, if you plan to get a cage and "add" onto it later, I would do the full cage you want from the begining. I wish I would have done that and now I am wanting to add the front main halo and down bars. I may even have to cut out the door bars then add them back on after the halo and down bars get put in. So my advice to you is, if you plan to get a cage knowing you need a full cage later, just do the full cage. Much easier. Saves time and money in the long rong.
01-04-17, 09:22 AM
#1102
Happy New Year! Time to get this ***** finished.
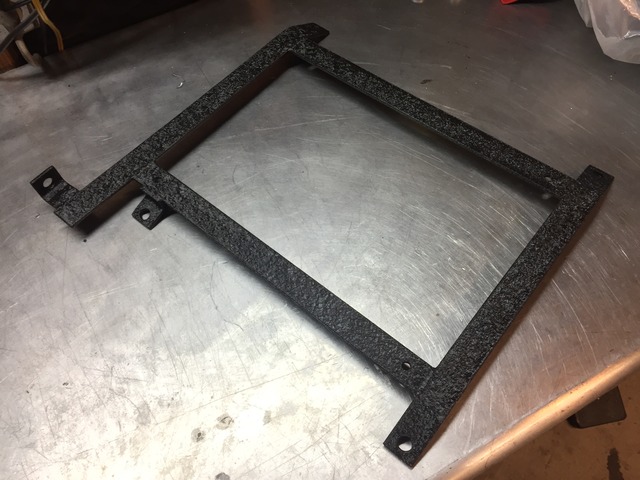
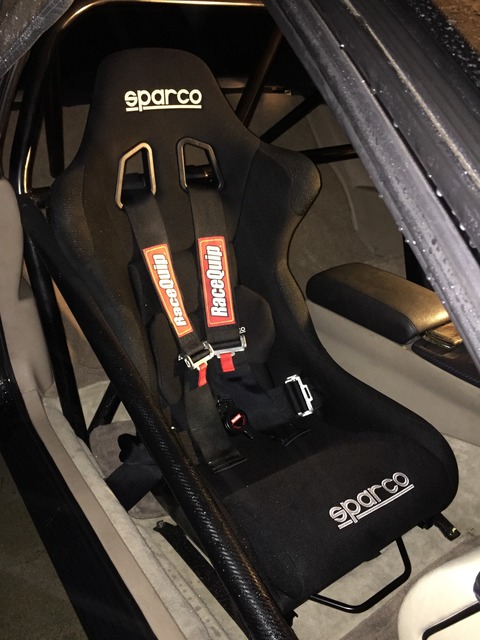
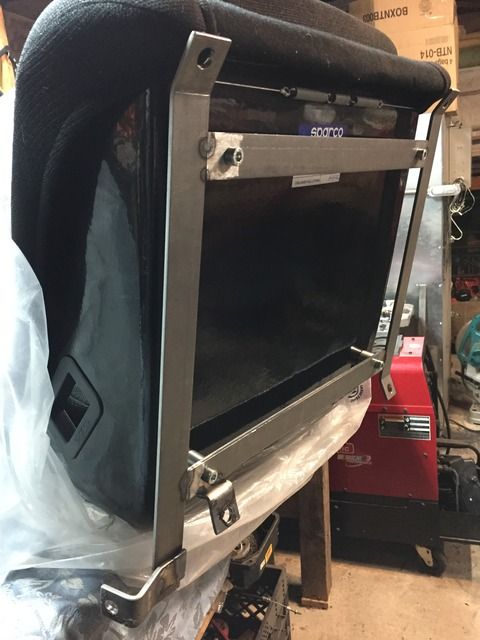
Now that the back seat is all done, I finally got a chance to install the sparco fighter seats I bought awhile back. Well just the catmandw said, the sparco brackets are junk and sit waaayy to high for these seats. After sitting in the seat, my head will rub against the roof lining which is a big no no. So instead of buying differnat brackets (wedge) that will also not fit perfectly, I decided to make some. Took a little more effort to do but they fit properly with no issue or squezzing one corner to another to get it lined up.
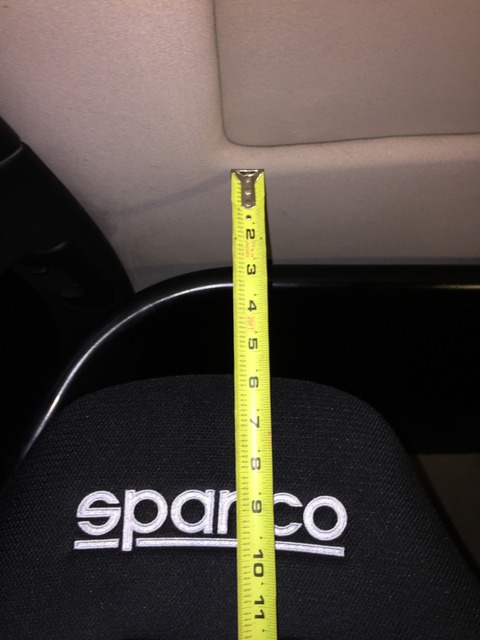
Seat with Sparco brackets. Top of the seat is about 3" from the head liner.

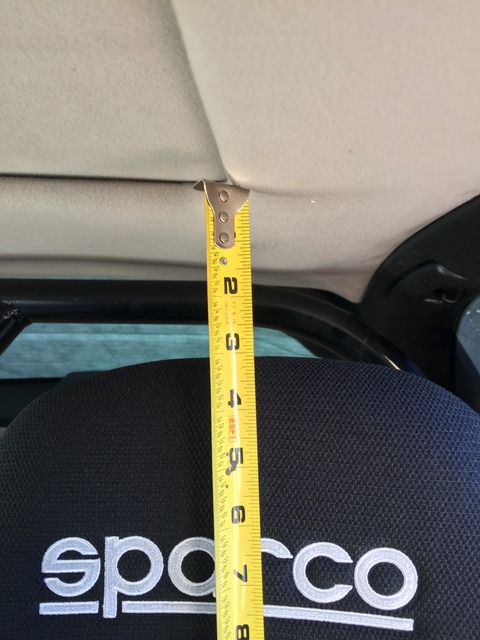
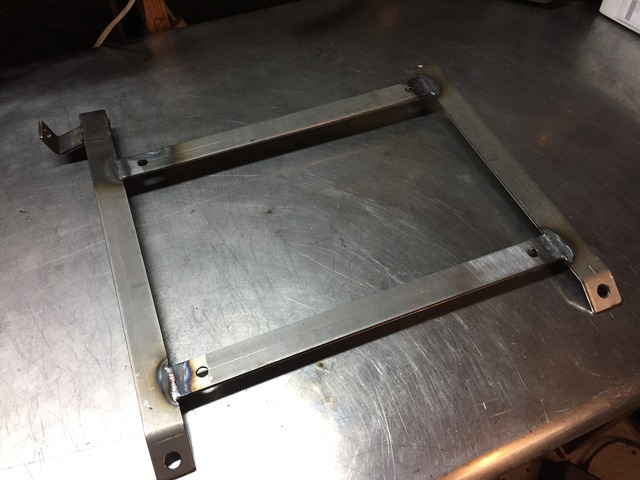
Thebracket alone sits about 2inch from the floor plus the sliders and the spacers that are required to mount the seats.
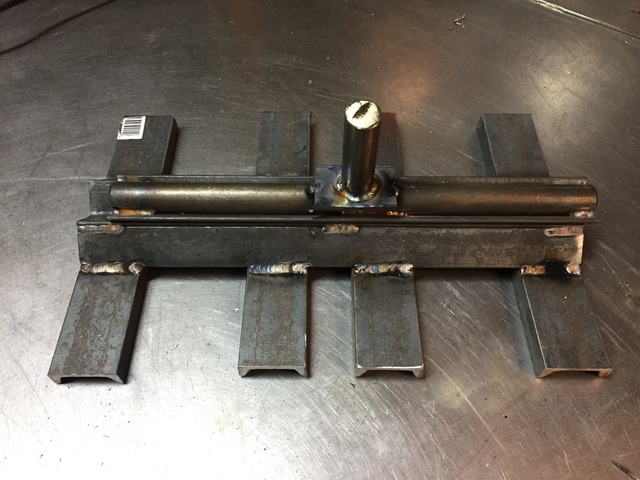
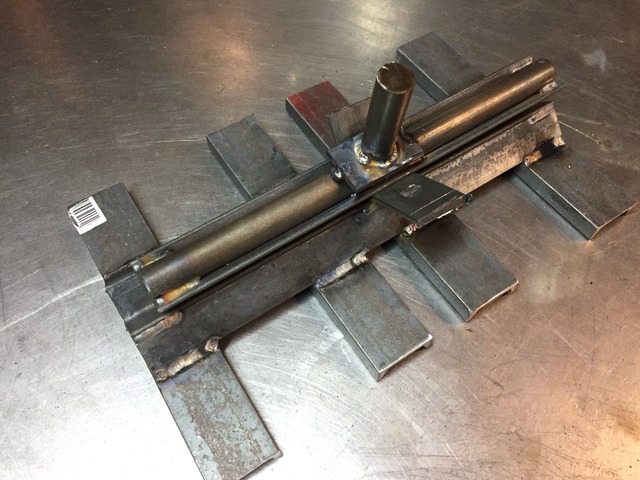
Bracket's are made out of 1 1/4" x 3/16 flat bar. I will have to get a few more pics but that passenger side is all done and painted wrinkle black. With this setup it will drop the seat about 2.5" plus what ever I cut off of the spacers.
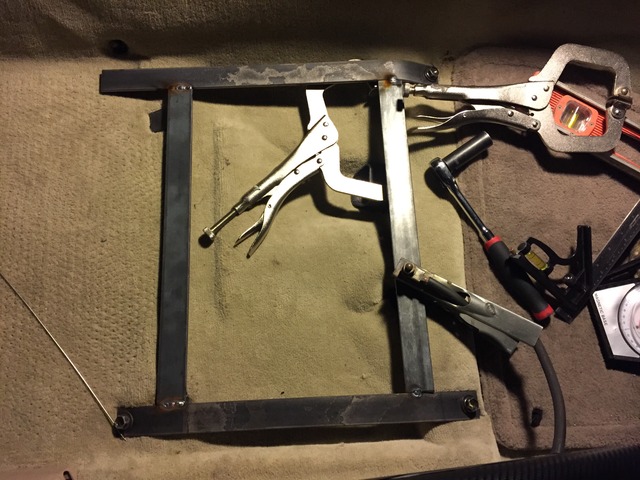
Instead of using the vice and brute strangth to bend the flat bar, I made a simple bending brake for the press. I've always used the vice and a hammer to make brackets which come out sloppy and hammered out. This brake makes this much quicker and cleaner.
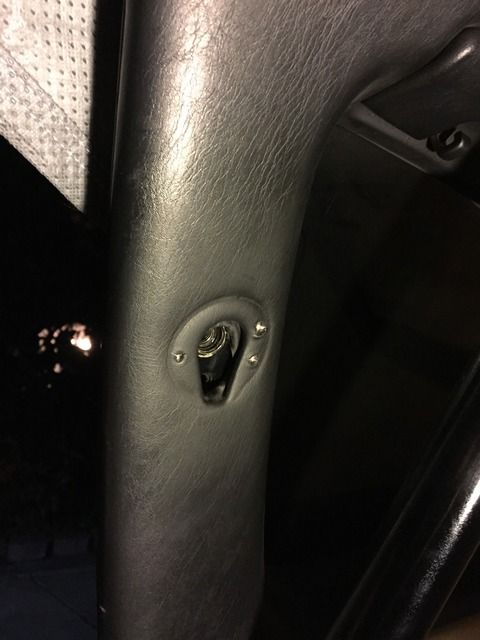
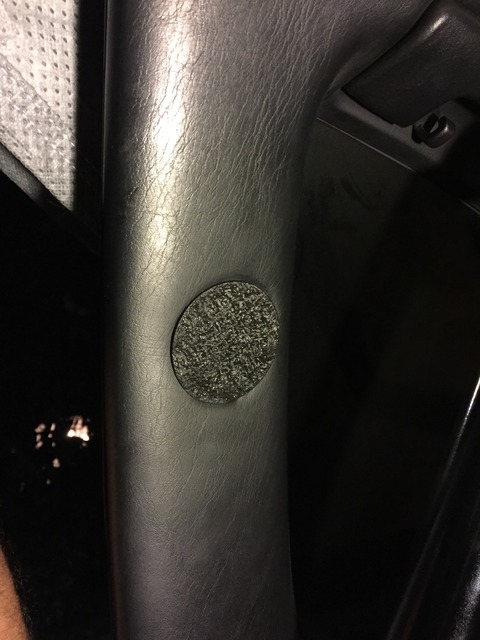
Sence I wont be using the factory seat belts, I made a plug for the seat belt mounts to cover up the whole. Got a bolt and cut a circle out of stainless and welded it together and painted it wrinkle. turned out pretty nice.
Now that the back seat is all done, I finally got a chance to install the sparco fighter seats I bought awhile back. Well just the catmandw said, the sparco brackets are junk and sit waaayy to high for these seats. After sitting in the seat, my head will rub against the roof lining which is a big no no. So instead of buying differnat brackets (wedge) that will also not fit perfectly, I decided to make some. Took a little more effort to do but they fit properly with no issue or squezzing one corner to another to get it lined up.
Seat with Sparco brackets. Top of the seat is about 3" from the head liner.


Thebracket alone sits about 2inch from the floor plus the sliders and the spacers that are required to mount the seats.

Bracket's are made out of 1 1/4" x 3/16 flat bar. I will have to get a few more pics but that passenger side is all done and painted wrinkle black. With this setup it will drop the seat about 2.5" plus what ever I cut off of the spacers.

Instead of using the vice and brute strangth to bend the flat bar, I made a simple bending brake for the press. I've always used the vice and a hammer to make brackets which come out sloppy and hammered out. This brake makes this much quicker and cleaner.


Sence I wont be using the factory seat belts, I made a plug for the seat belt mounts to cover up the whole. Got a bolt and cut a circle out of stainless and welded it together and painted it wrinkle. turned out pretty nice.


 so I can hone my skills .
01-04-17, 03:53 PM
so I can hone my skills .
01-04-17, 03:53 PM
#1105
Welding is a must in this type of work.. You'll be waiting more then anything for something to be welded rather then work it out your self real quick  Start practicing Gery! I'm sure you have scrap metal laying around somewhere lol
The harness deal is pretty simple. The only thing I need to make is the mounting point for the croch harness that goes under the seat. Other then that, the lap belts will be mounted to the trans tunnel and the other where the factory seat belt bolts on the floor. The shoulder harness goes to the cage. Ill updated with pics when I get to that.
Start practicing Gery! I'm sure you have scrap metal laying around somewhere lolThe harness deal is pretty simple. The only thing I need to make is the mounting point for the croch harness that goes under the seat. Other then that, the lap belts will be mounted to the trans tunnel and the other where the factory seat belt bolts on the floor. The shoulder harness goes to the cage. Ill updated with pics when I get to that.
01-05-17, 09:44 AM
#1106
Passenger seat is in and mounted along with the harness to see how things are. Since the seat doesnt have a cut out for the subharness (5th point) I will have to cut the seat so the 5th point can pass through the seat and be mounted to the chasis. I hate to cut up the new seat but saftey first.. I'm also thinking to remove the sliders and static mount the seat. Doing this it will lower the seat another inch or so.
Few pics of the brackets all done.
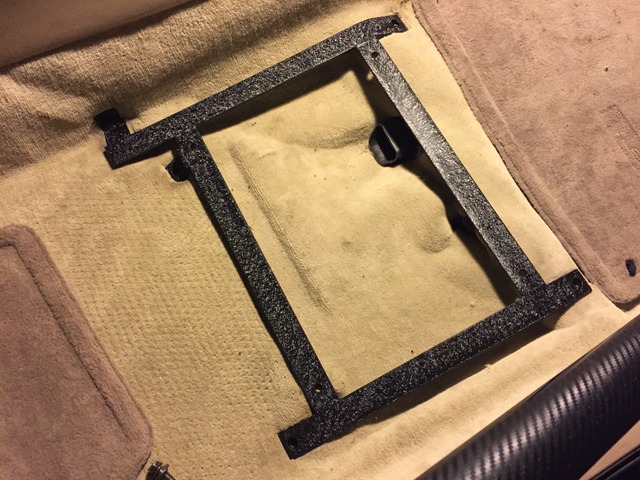
And here you can see I was able to get just about 3 more inchs lower with my bracket. With the sliders removed, I should be able to get another inch.
Few pics of the brackets all done.


And here you can see I was able to get just about 3 more inchs lower with my bracket. With the sliders removed, I should be able to get another inch.
 01-05-17, 11:43 AM
#1108
Thanks. I'm still on the fence about it but the purpose of that 5th point is to keep the latch mechanism from going up to your chest. It's also suppose to you keep you pushed down into the seat.
Well see. I've seen in a few other forums that people just cut a slip in the seat to add the sub harness and it worked out fine. The front part of the cousion is removable so the harness can go between that cushion keeping everything nice and clean.
Well see. I've seen in a few other forums that people just cut a slip in the seat to add the sub harness and it worked out fine. The front part of the cousion is removable so the harness can go between that cushion keeping everything nice and clean.
01-12-17, 10:01 AM
#1110
Stayed up fairly late last night to get the drivers bracket done. Now I just need to make the sub harness mount and make it work with seats.
After the seats are done and squared away, ill be getting the Weldon external pump installed. I plan to cut out the spare tire well and weld in a some sheet metal and mount the pump underneath. The factory gas tank will also be modified with a sump to feed the pump from the bottom. Pump, filters and regulator are all here along with a bunch of fittings to make it work.
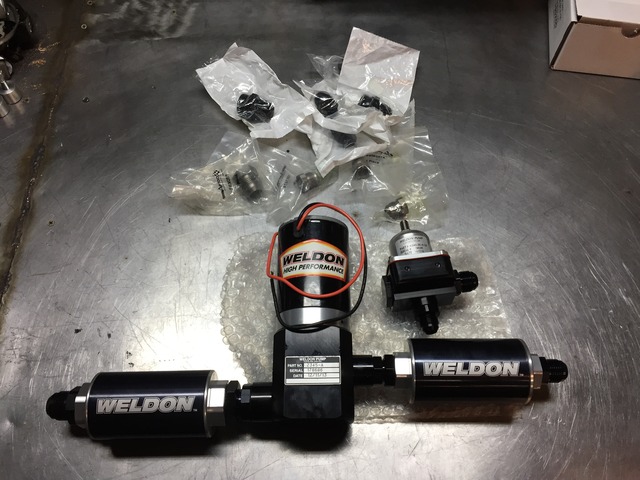


After the seats are done and squared away, ill be getting the Weldon external pump installed. I plan to cut out the spare tire well and weld in a some sheet metal and mount the pump underneath. The factory gas tank will also be modified with a sump to feed the pump from the bottom. Pump, filters and regulator are all here along with a bunch of fittings to make it work.
