8052JZ's NA-T Build


 09-15-16, 10:01 AM
#1070
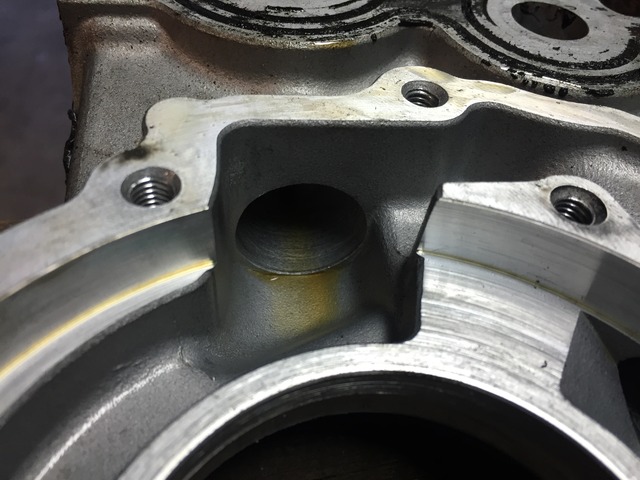
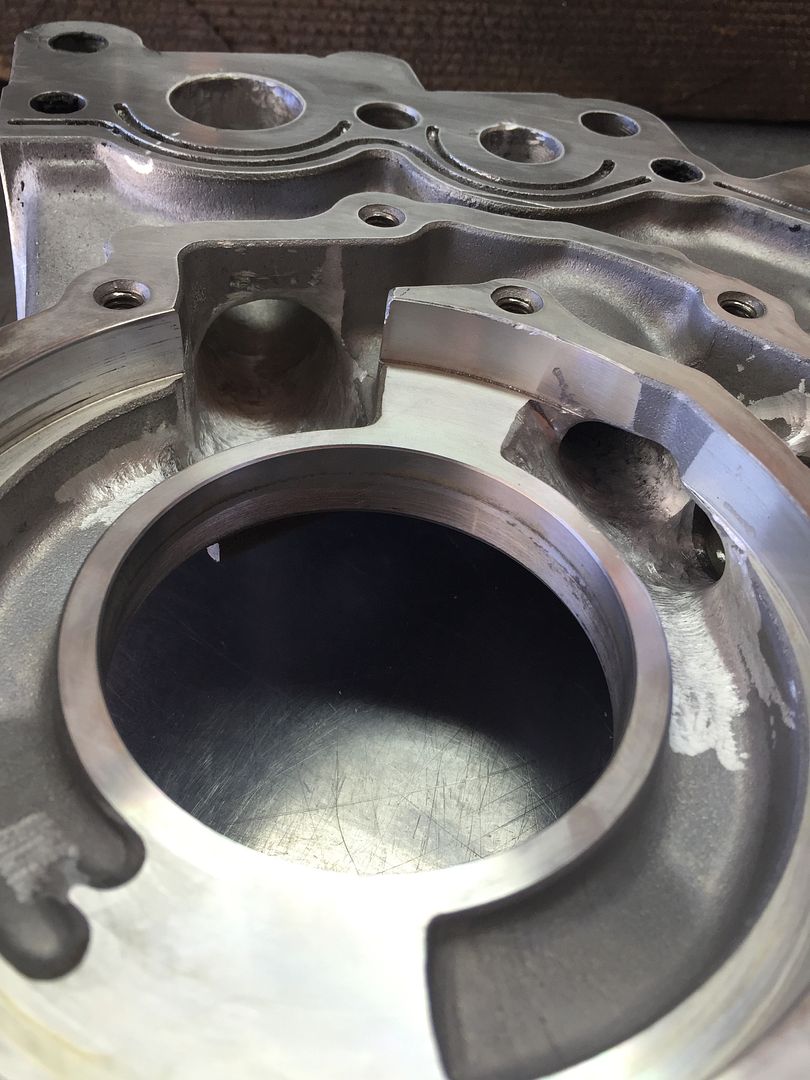
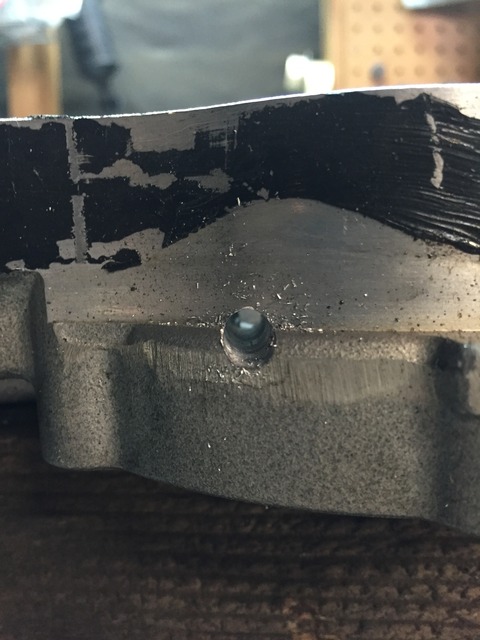
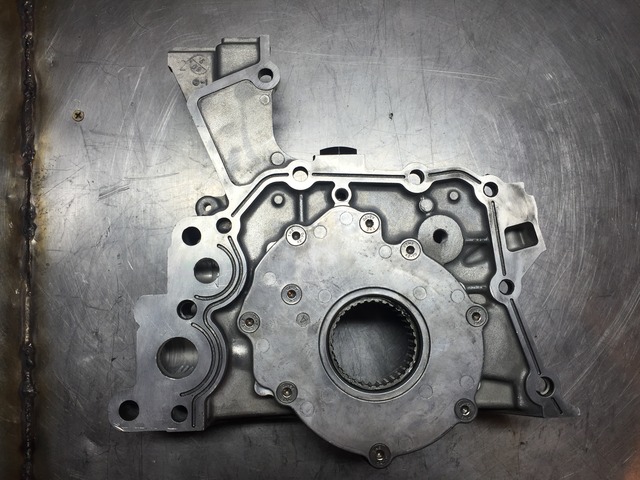
So Here a little DIY. GTE oil pump. I did some reading and found alot of information on what the "modified" oil pumps are about. And to be honest its a really simple mod if you have the right tools. To do one pump is takes about 2 hours from start to finish. The goal here is too open up all the galleys and smooth out all the rough edges to get maximum oil flow through the pump and achieve a higher oil pressure. Anyone can do this instead of buying a modified pump for $250+.
I started looking a spare pump I had before I touched the brand new unit I pulled from the new motor.
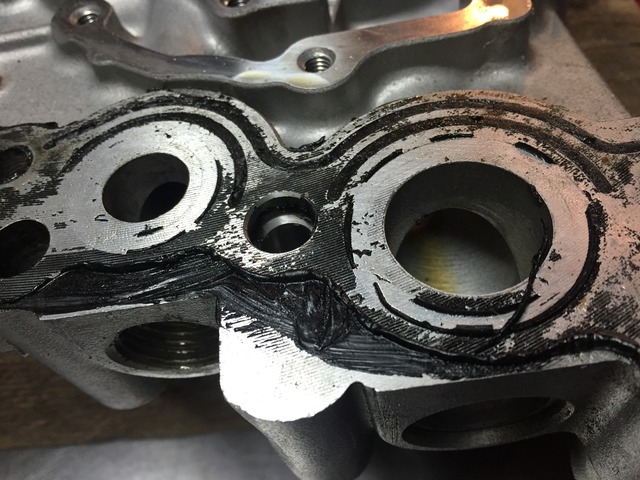
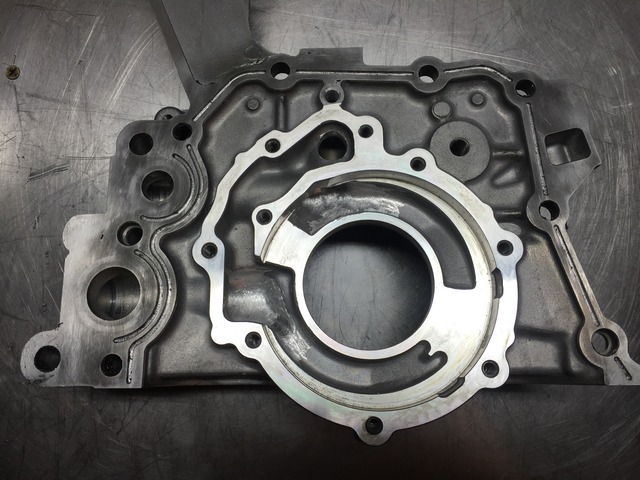
Pump taken apart.

There will be 7 area's you will want to open up. Relieve valve, bypass hole, main oil seal drain, 4 area's of feed and return galleys.
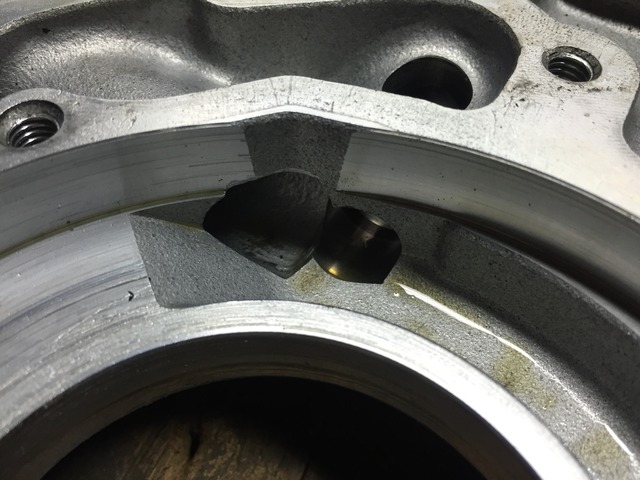
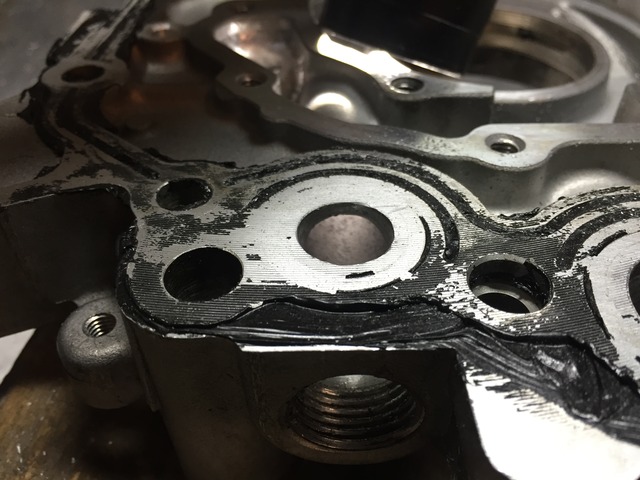
Didn't get a pic of the drain hole before porting but you get the idea.
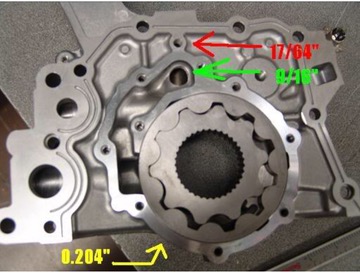
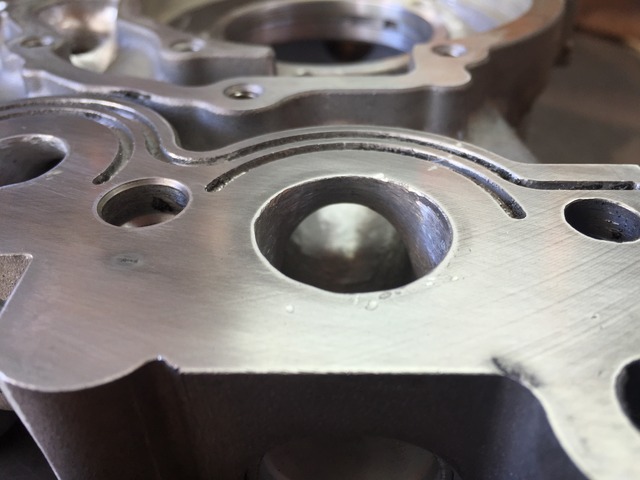
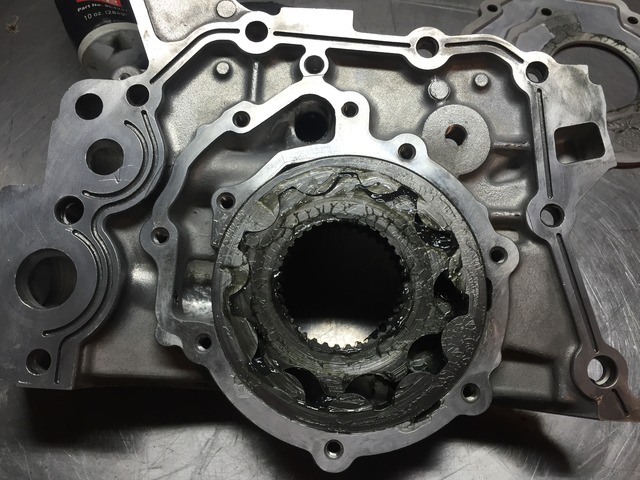
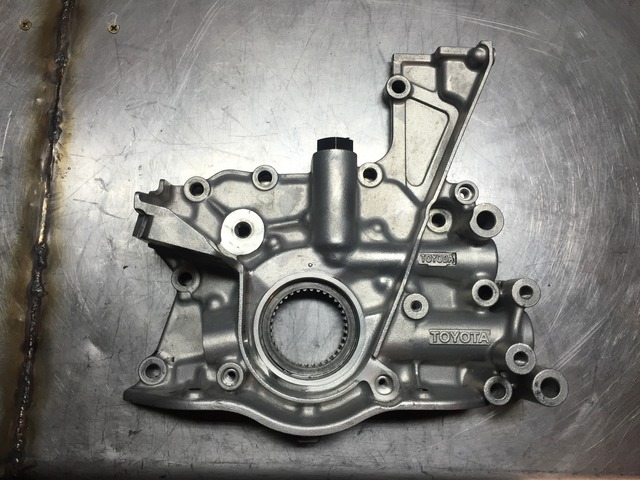
After port. Drill the holes out to the specs in the pic. After they are drilled, smooth out the sharp edges.
Then reassemble the pump. Be sure to clean out the pump so there are no metal shaving inside the pump what so ever. I think I washed out the pump several times to make sure its was clean. Blew it out with air at 150psi to get absolutely everything out. After it was cleaned, add some assembly lube to the drive gear to get quicker oil pressure at first start up.
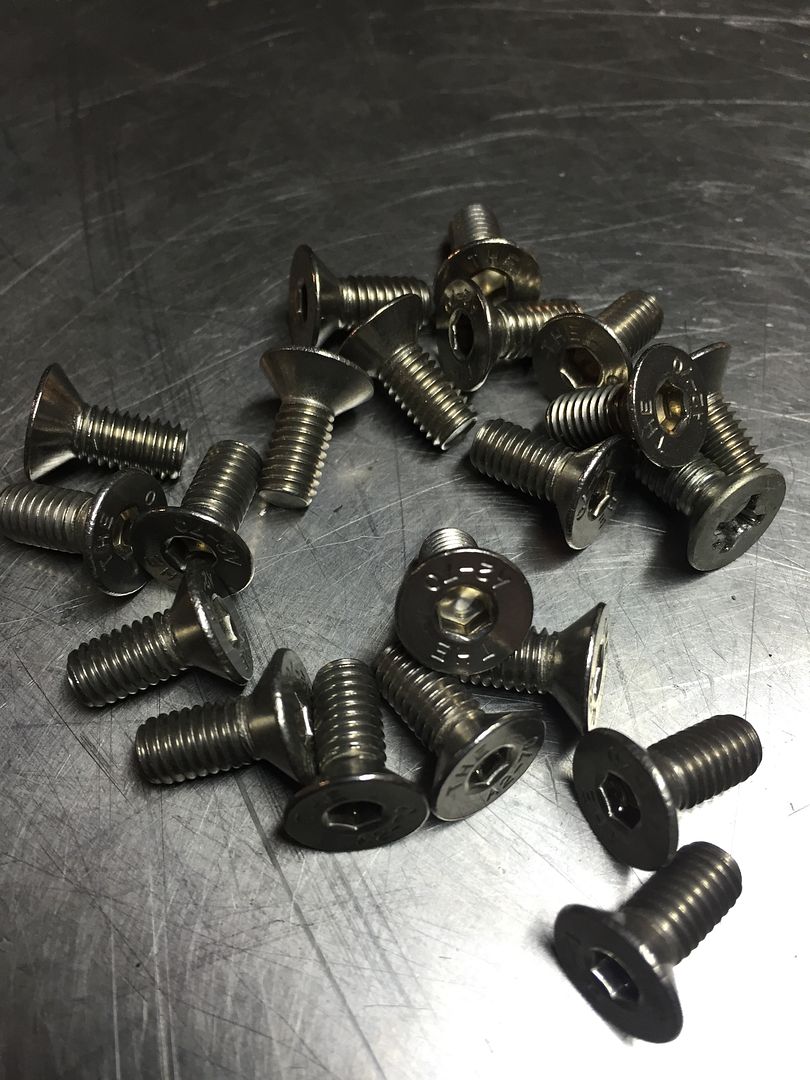
I used stainless allen head bolts for the gear cover because the original bolts are to hard to torque down with a Philips driver. Torqued to 8ftlbs. You can also add a very small amount of blue lock tight making sure you don't get the lock tight inside the pump.
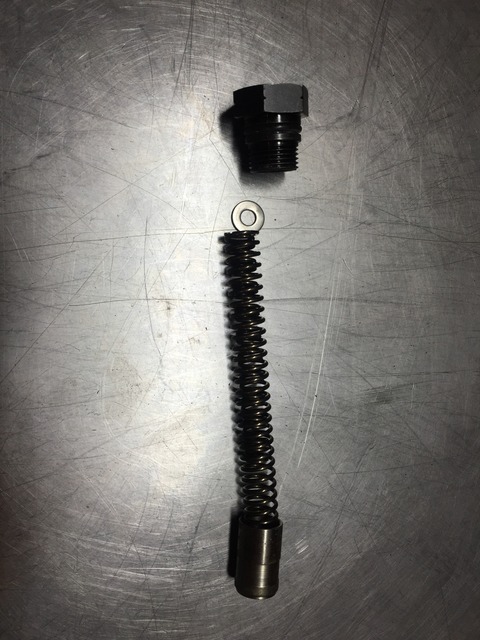
To raise the oil pressure, you add a stainless .035" washer to the bypass valve. I believe this raises oil pressure to about 1Bar over stock. Put the valve back in torquing it down to 36ftlbs
And there you have it. Your modified GTE oil pump.
I started looking a spare pump I had before I touched the brand new unit I pulled from the new motor.
Pump taken apart.

There will be 7 area's you will want to open up. Relieve valve, bypass hole, main oil seal drain, 4 area's of feed and return galleys.


Didn't get a pic of the drain hole before porting but you get the idea.
After port. Drill the holes out to the specs in the pic. After they are drilled, smooth out the sharp edges.


Then reassemble the pump. Be sure to clean out the pump so there are no metal shaving inside the pump what so ever. I think I washed out the pump several times to make sure its was clean. Blew it out with air at 150psi to get absolutely everything out. After it was cleaned, add some assembly lube to the drive gear to get quicker oil pressure at first start up.


I used stainless allen head bolts for the gear cover because the original bolts are to hard to torque down with a Philips driver. Torqued to 8ftlbs. You can also add a very small amount of blue lock tight making sure you don't get the lock tight inside the pump.


To raise the oil pressure, you add a stainless .035" washer to the bypass valve. I believe this raises oil pressure to about 1Bar over stock. Put the valve back in torquing it down to 36ftlbs

And there you have it. Your modified GTE oil pump.

Last edited by 8052JZ; 09-15-16 at 10:18 AM.

 09-27-16, 02:38 PM
#1075
Still in the car.. Hope to get things moving soon here. The new torque converter is what will set me back the most as this point. With new power goals, my current converter will not hold. Same converter ID and Real Street are using in there 1200HP drag supra's. Pro-torque.
09-29-16, 10:29 AM
#1076
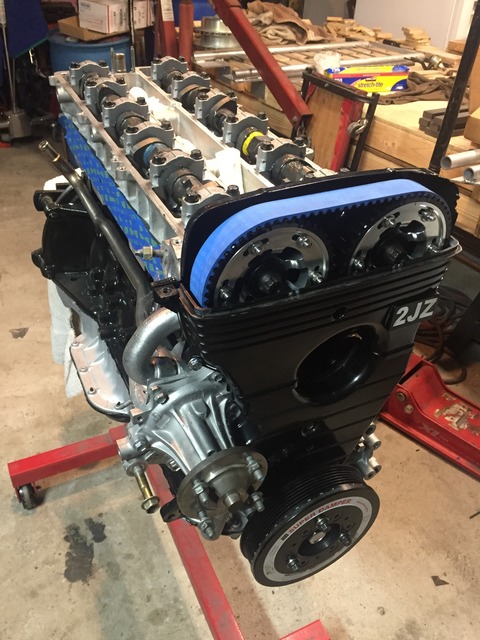
New motor is finally button up minus all the accessory's. In the next week or so I need to pull the motor out of the car and swap things over. Sensors, oil filter sandwich plate, water neck, alternator, power steering, flex plate etc..
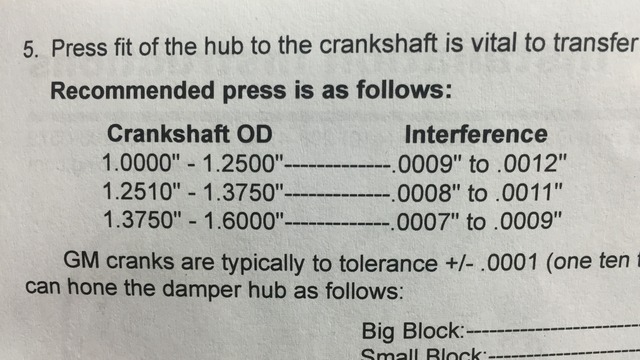
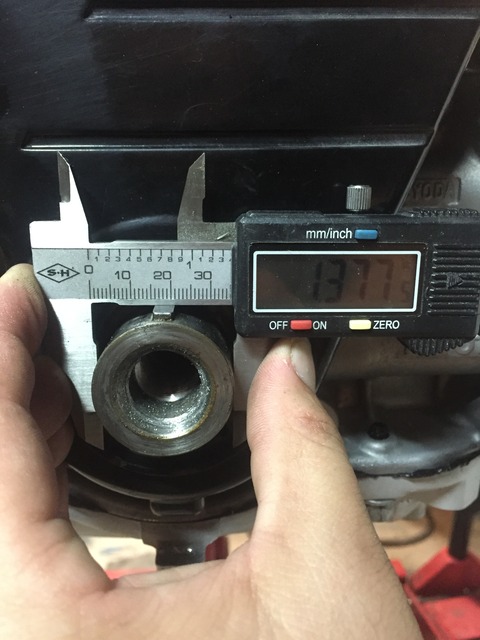
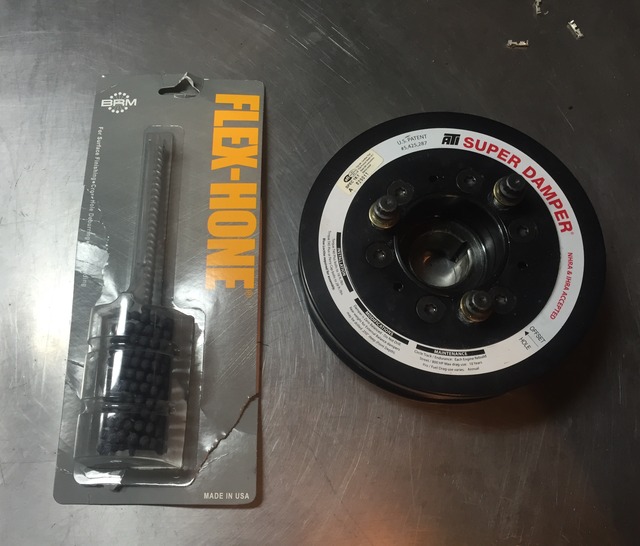
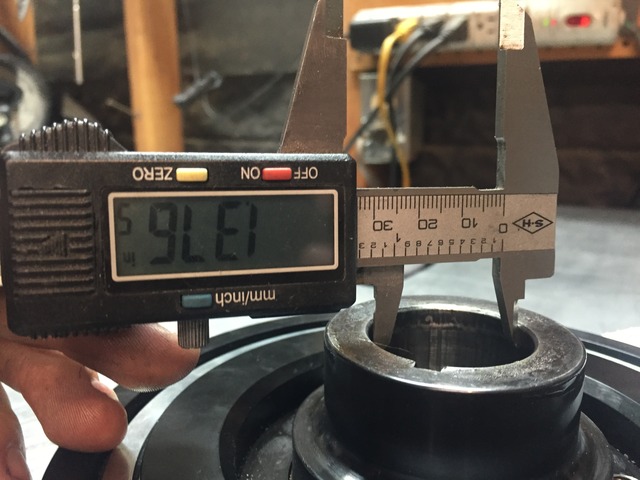
The ATi pulley I got needed to be speced out to my crank. Bought a $15 1.375" hone to clean out and open up the ati hub.
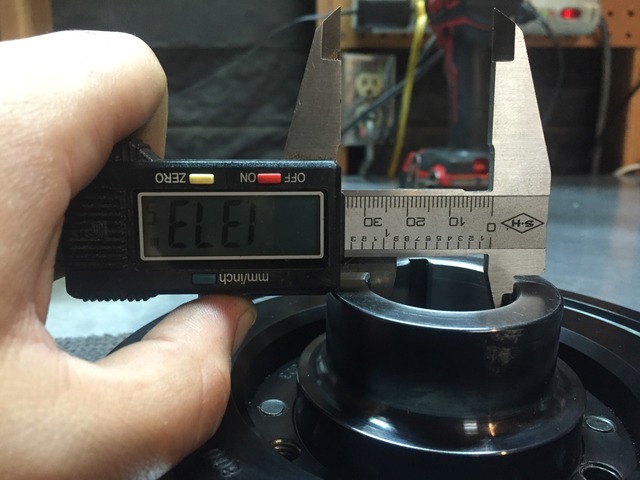
As you can see, the crank neck is 1.3775" which is standard on most JZ cranks, and the ati hub out of the box was 1.3735". So it needed about .004 taken off. The ATi tolerance is .0007 to .0009. After honing it out some it's, perfecting in spec. I used a friends telescoping gauge to confirm instead of the calipers.
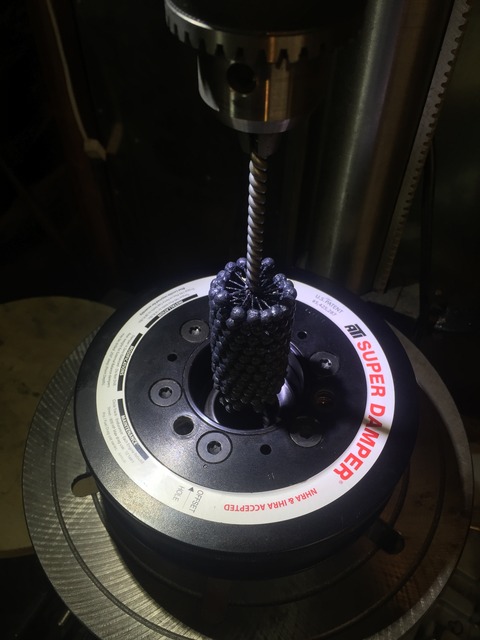
Used the drill press to hone it.
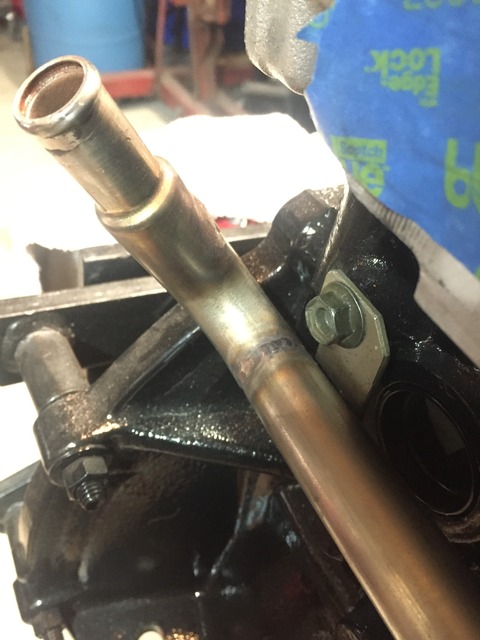
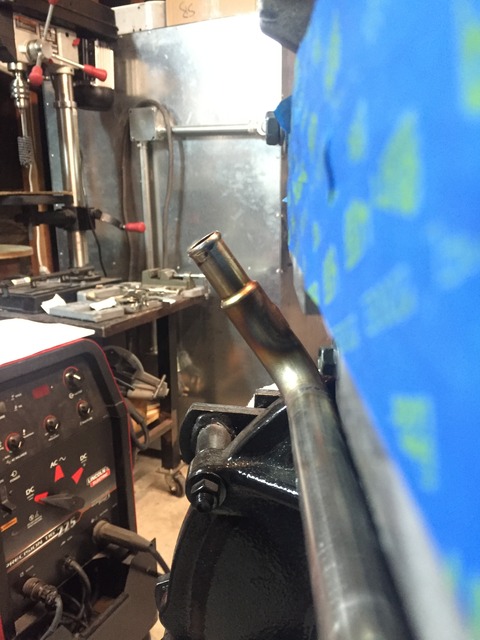
I also cut and clocked the rear water neck to move it away from the down pipe. In my current setup, the heater hose is nearly touching the down pipe and has always caused me to check on it from time to time. By doing this, I should a lot more room away from the down pipe.
The ATi pulley I got needed to be speced out to my crank. Bought a $15 1.375" hone to clean out and open up the ati hub.
As you can see, the crank neck is 1.3775" which is standard on most JZ cranks, and the ati hub out of the box was 1.3735". So it needed about .004 taken off. The ATi tolerance is .0007 to .0009. After honing it out some it's, perfecting in spec. I used a friends telescoping gauge to confirm instead of the calipers.


Used the drill press to hone it.


I also cut and clocked the rear water neck to move it away from the down pipe. In my current setup, the heater hose is nearly touching the down pipe and has always caused me to check on it from time to time. By doing this, I should a lot more room away from the down pipe.


 .
10-06-16, 12:30 PM
.
10-06-16, 12:30 PM
#1080

Looking good! Make sure you put the balancer in the oven for a bit to expand it before putting it on the crank.
Steve K.
Steve K.