Dranom's LS400 Build
 10-24-12, 11:03 PM
#31

yeah not bad i guess since i have a new radiator with it.
Old one leaked when they finished flushing it so I asked nima to just get me a new radiator (KOYO)
Didn't get to change the spark plugs so ill do that around 120k and replace valve cover seals
Just a TIP if your doing yours mark. Order online from carson toyota then just pick it up. Because i was gonna order over the phone but the parts guy said I need to do it online since the discount only applies for online orders which is stupid. But you can still pick up at carson
 10-24-12, 11:23 PM
#33
10-24-12, 11:36 PM
#34
Also removed my driverside door panel to lubricate the hinge and window motor. Its a bit noisy when going down but it didnt worked out like I wanted on the windows but worked great on the squeaks in the door
Used PYROIL multi purpose Silicone lubricant
Here's the how to for a 90-94 but pretty much the same for a 98-00
http://www.lexls.com/tutorials/body/fdoorpanel.html
When removing the controls you need to pry it in the back rather than the side like the one on the DIY

then unscrew the bolt
Once everything is off just carefuly lift up the panel and make sure the windows are down so you don't scratch the glass
Used PYROIL multi purpose Silicone lubricant
Here's the how to for a 90-94 but pretty much the same for a 98-00
http://www.lexls.com/tutorials/body/fdoorpanel.html
When removing the controls you need to pry it in the back rather than the side like the one on the DIY
then unscrew the bolt
Once everything is off just carefuly lift up the panel and make sure the windows are down so you don't scratch the glass
Last edited by Dranom; 10-25-12 at 12:27 AM.
 10-27-12, 05:57 AM
#38
Pole Position
iTrader: (2)

Join Date: Jul 2008
Location: Texas/Pennsylvania
Posts: 236
Likes: 0
Received 0 Likes
on
0 Posts
Also removed my driverside door panel to lubricate the hinge and window motor. Its a bit noisy when going down but it didnt worked out like I wanted on the windows but worked great on the squeaks in the door
Used PYROIL multi purpose Silicone lubricant
Here's the how to for a 90-94 but pretty much the same for a 98-00
http://www.lexls.com/tutorials/body/fdoorpanel.html
When removing the controls you need to pry it in the back rather than the side like the one on the DIY
then unscrew the bolt
Once everything is off just carefuly lift up the panel and make sure the windows are down so you don't scratch the glass
10-27-12, 08:13 PM
#44
]Also removed my driverside door panel to lubricate the hinge and window motor. Its a bit noisy when going down but it didnt worked out like I wanted on the windows but worked great on the squeaks in the door
Used PYROIL multi purpose Silicone lubricant
Used PYROIL multi purpose Silicone lubricant
10-28-12, 01:02 AM
#45
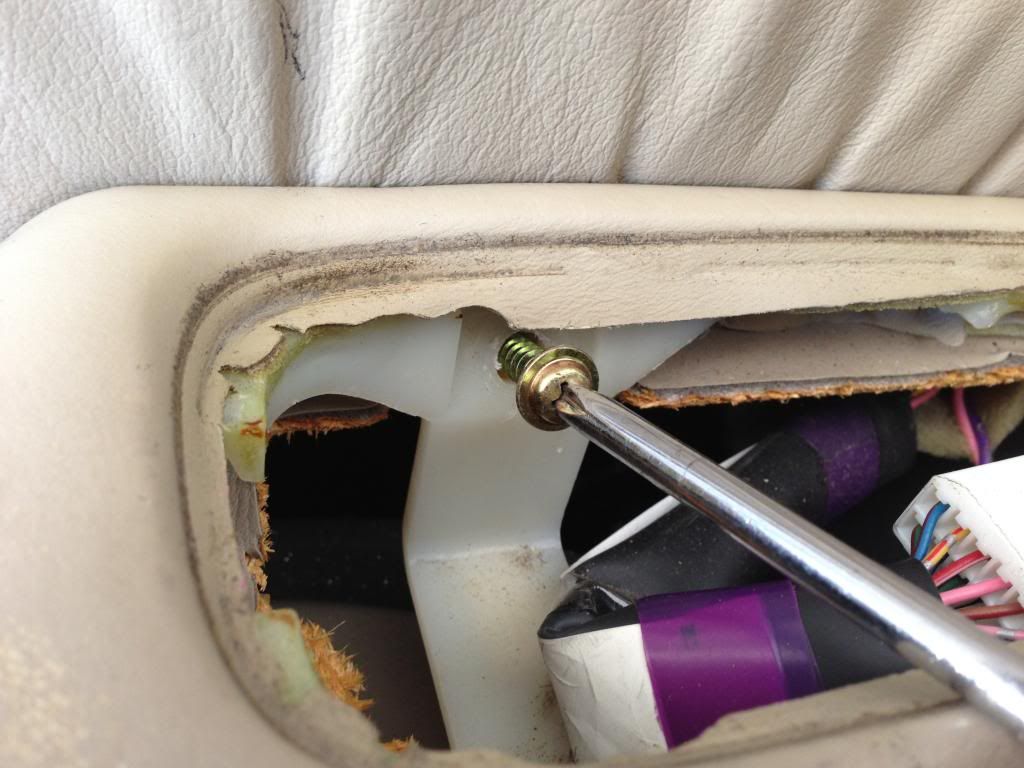
Yeah very simple. The rear seat took a bit more time since we don't know where the bolts are at.
5 bolts total for the back seat
3 up top
2 bottom
lol!
Yeah im sick of the height. Its too high for me and one of my front shocks is almost blown i think?
Only bad part about the megans is the rears doesnt go that low unless you play with the preload
my rears are max with good amout of preload fronts can go really low
It made it go up and down a bit faster but not much and the sound it makes didnt go away.
Im guessing its the motor??? Oh well...
5 bolts total for the back seat
3 up top
2 bottom
lol!
Yeah im sick of the height. Its too high for me and one of my front shocks is almost blown i think?
Only bad part about the megans is the rears doesnt go that low unless you play with the preload
my rears are max with good amout of preload fronts can go really low
Im guessing its the motor??? Oh well...