ScoobySC3's SC300 build thread
 07-15-12, 10:21 AM
#1
Driver
Thread Starter
iTrader: (1)
Join Date: Feb 2012
Location: Utah
Posts: 178
Likes: 0
Received 0 Likes
on
0 Posts
Okay I figure I have enough progress on my car to warrant a proper build thread. It will be a bit unorganized right now, but will look better in due time. I should have documented the build better of course, but here is where I am at.
I do not want to give too much info in regards to my future plans, but here are my goals as of right now. Note* goals subject to change...
First is to finish up the body work, lay down primer, paint and clear. I was thinking I want to make it White in color, but just dont know the exact shade of white I want. Please let me know if you have any suggestions. I am liking the new Nissan white as well as the White on the EVOX. I would love to do pearl white, but I dunno if it will turn out well, as this will be my first time painting a car...ever...
Still need to purchase/do body/interior related:
-Purchase primer/paint/clear - Does anyone have any recommendations??
-Buy rear window pad/trim thing.
-Buy a few clips I broke during teardown
-Buy front Windshield(broke mine taking it out)
-SEM black paint for painting the interior pieces I want back in the car
-Mod or buy gauge cluster needles
-Clean carpet and dye/paint it black
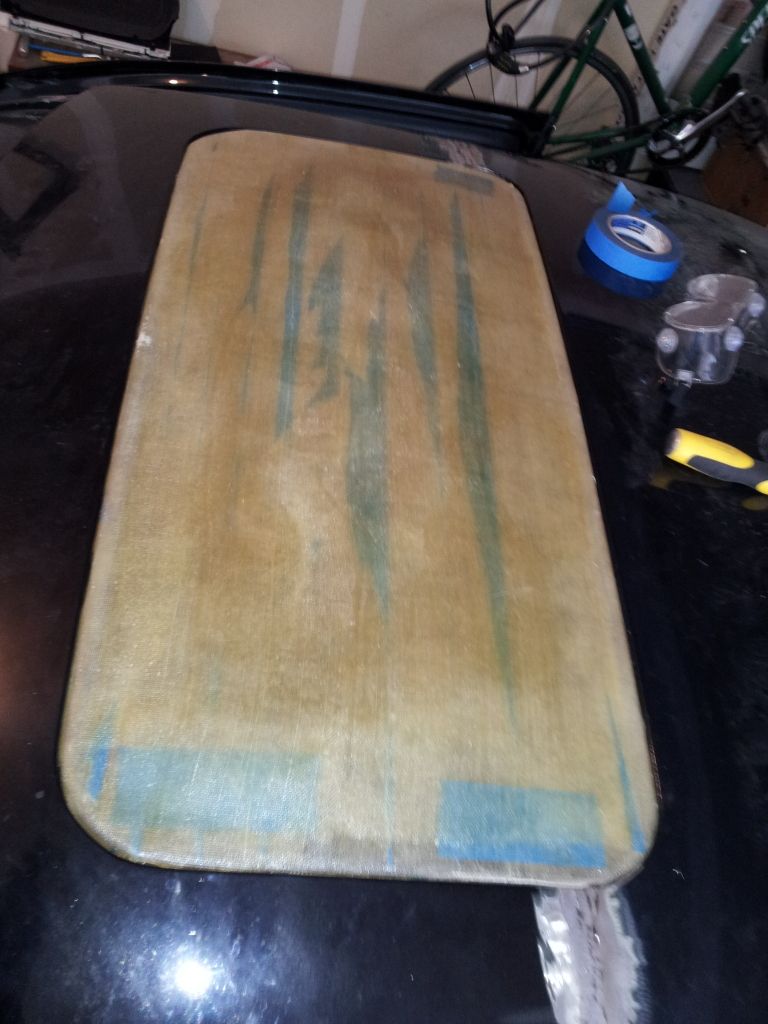
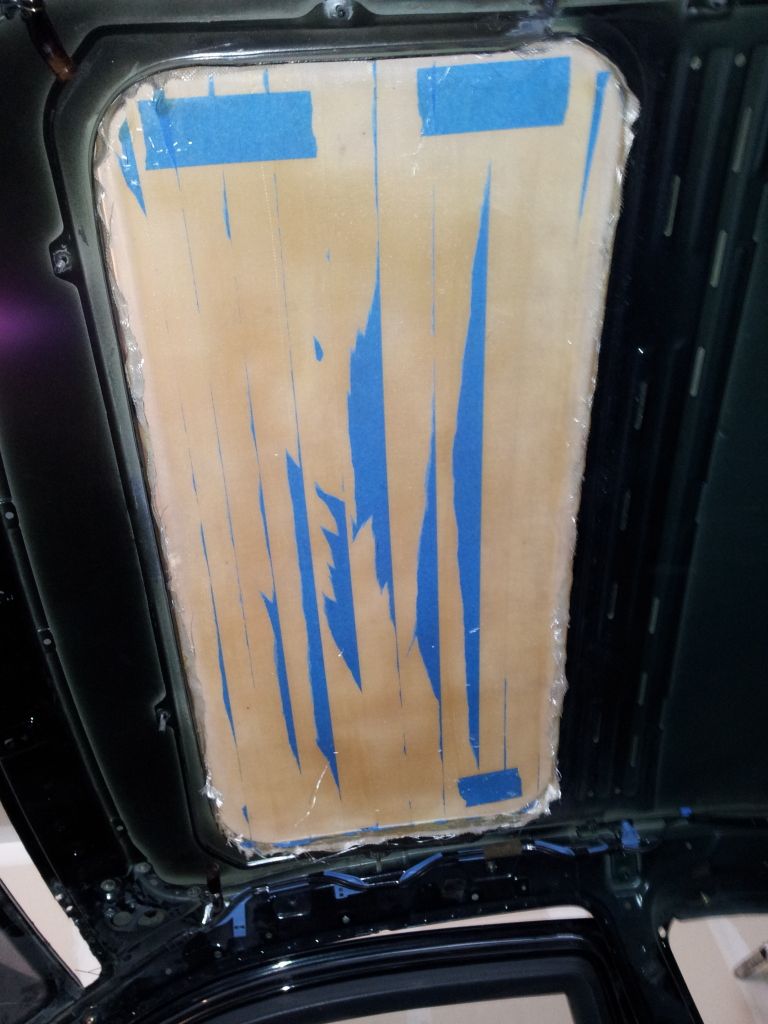
-Fisnish smoothing out sunroof(one of the more difficult things on this car, I know it does not have to be perfect, but it is tough getting it perfectly smooth with no waves)
-Clean and paint trunk white(same as interior)
-Clean and paint interior door panels
I'm sure there are a bunch more things, but that is what I can think of off the top of my head.
Suspension:
-I'm on the fence on coilovers, either I go cheap and get some Powered by Max coilovers, or I nut up and get some Tein Monoflex. I am leaning towards the monoflex, but the price stings just a bit. I feel like it will be worth the extra cost to get something I know and trust, but still need to make the decision.
-Bushings: I have polyurethane bushings for all of the suspension arms, but still need to purchase rear diff/subframe bushings. Trying to decide if I want solid mounts, or go with poly bushings.
-Hubs: Planning on sending them out to PBM to be modified. Hoping these will help with steering ratio, geometry, and steering angle.
LSD: Pretty set on the Tomei 2way LSD
Wheels Tires:
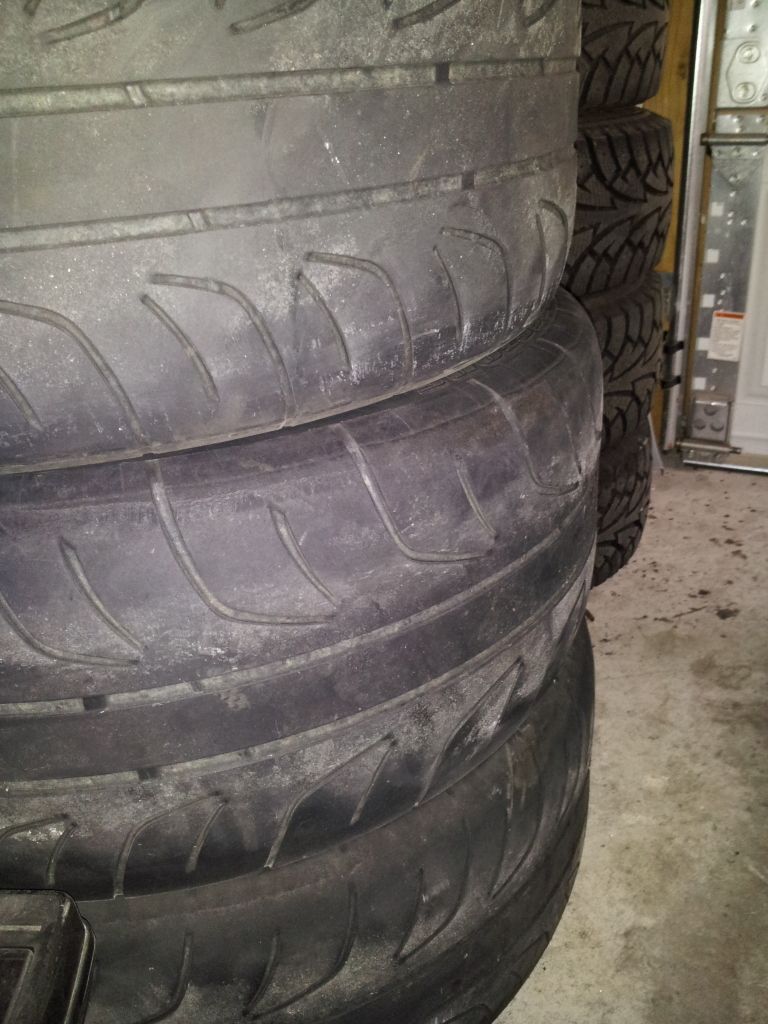
Right now I have some Stock EVO Enkei wheels wrapped in 245 RE01-R's which I may use on the front for drifting, and some ****ty tires on the rear to burn up.
I am thinking I will pick up some 18x10.5 Rear and 18x9.5 Front Enkei Nt03+M's and no idea on the tires yet.
I will either sell the ugly 15's on it, or use them in the rear for drifting practice.
Brakes:
Have not decided. LS400 4-pots are cheap and work well, but for not much more I can get Z06 6-pots and adapt them to my hub.
Power:
This will be the last thing I work on, but I have been doing research, and I am thinking about going with a 1JZ mated to a R154 trans.
ICE YO!
I would like to get rid of all of the stock stereo and go with a normal headunit and new speakers.(I know very little about audio, I just want a nice clean sound I can listen to super loud, don't need uber bass or anything, just quality speakers with good sound. Any input would be greatly appreciated.
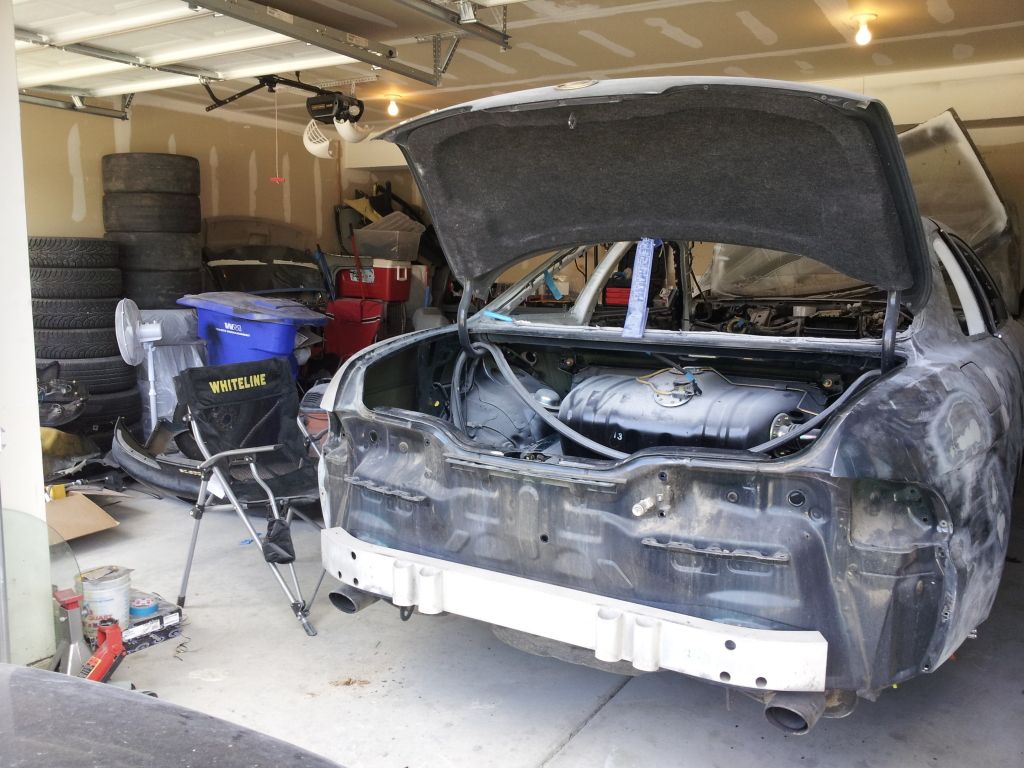
When I picked her up
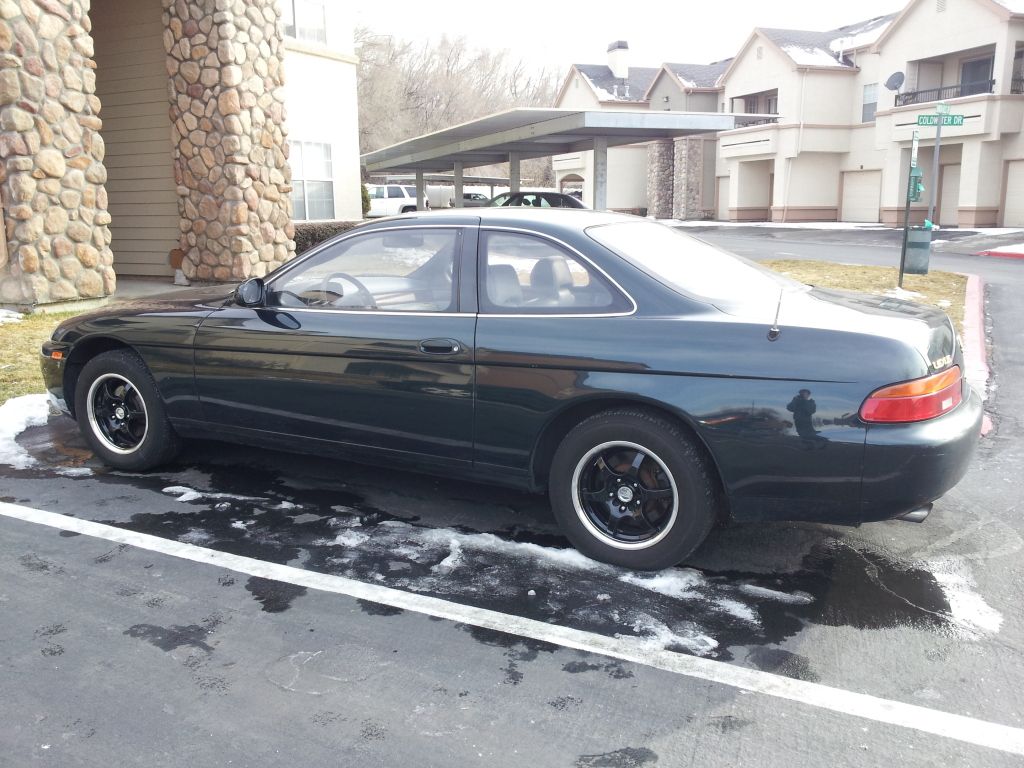
And the reason I am at where I am at with it...
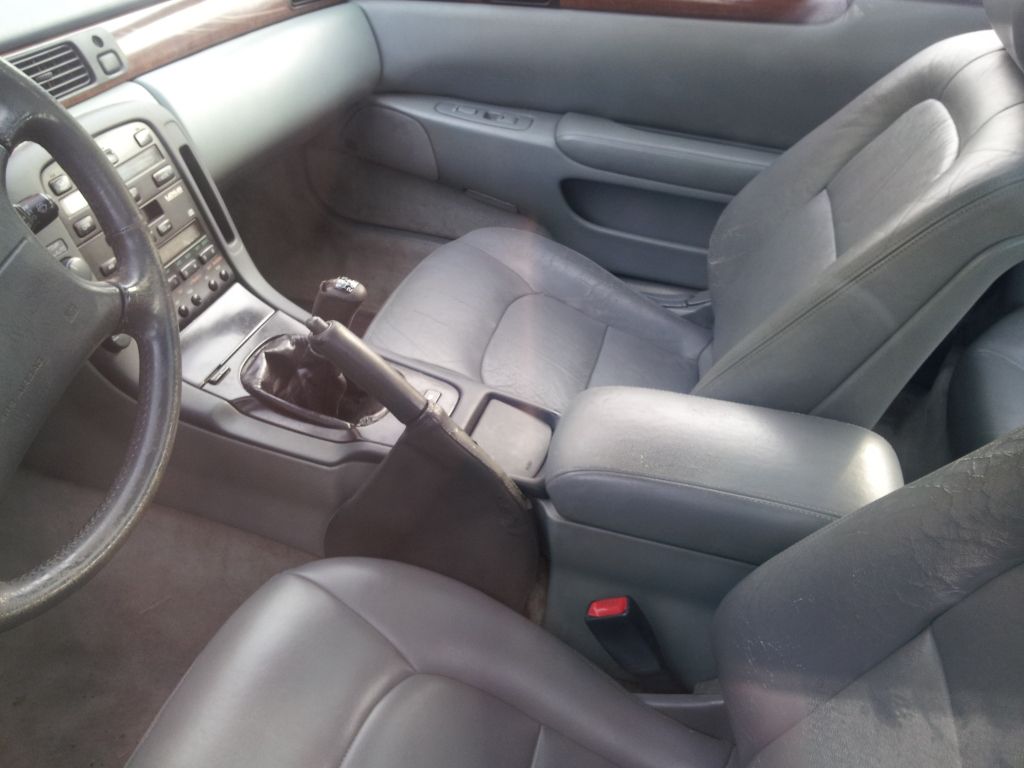
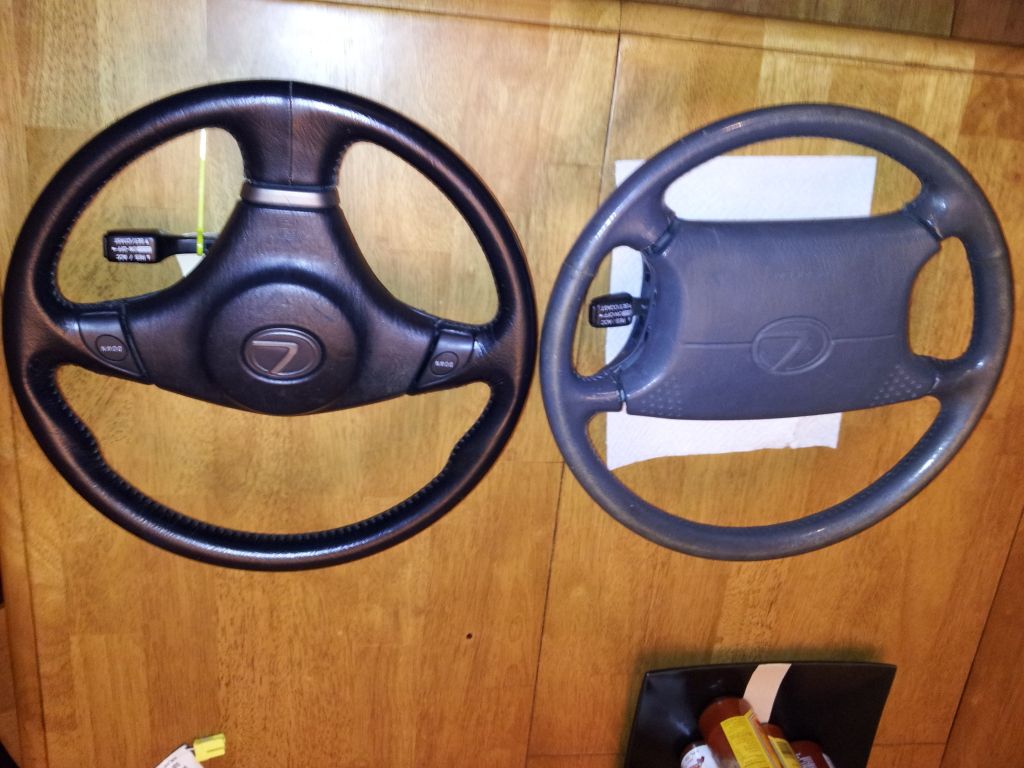
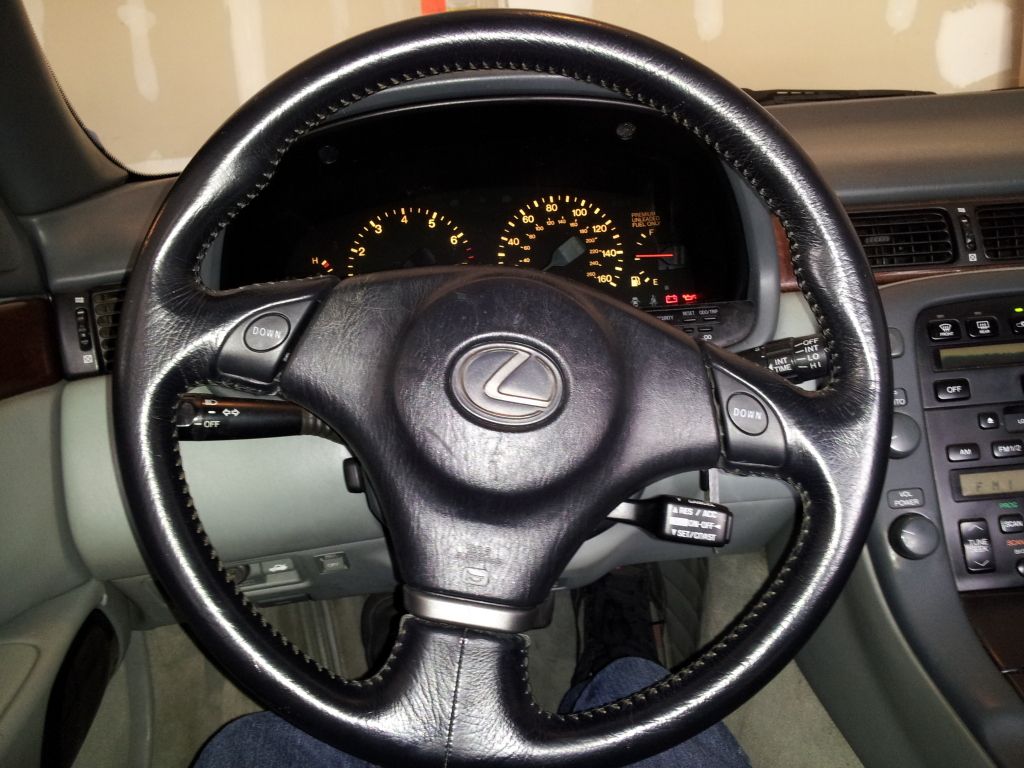
But before we get into that, the first thing I did was get rid of that awful stock bus style steering wheel and replaced it with an IS300 wheel.
ahhh much better
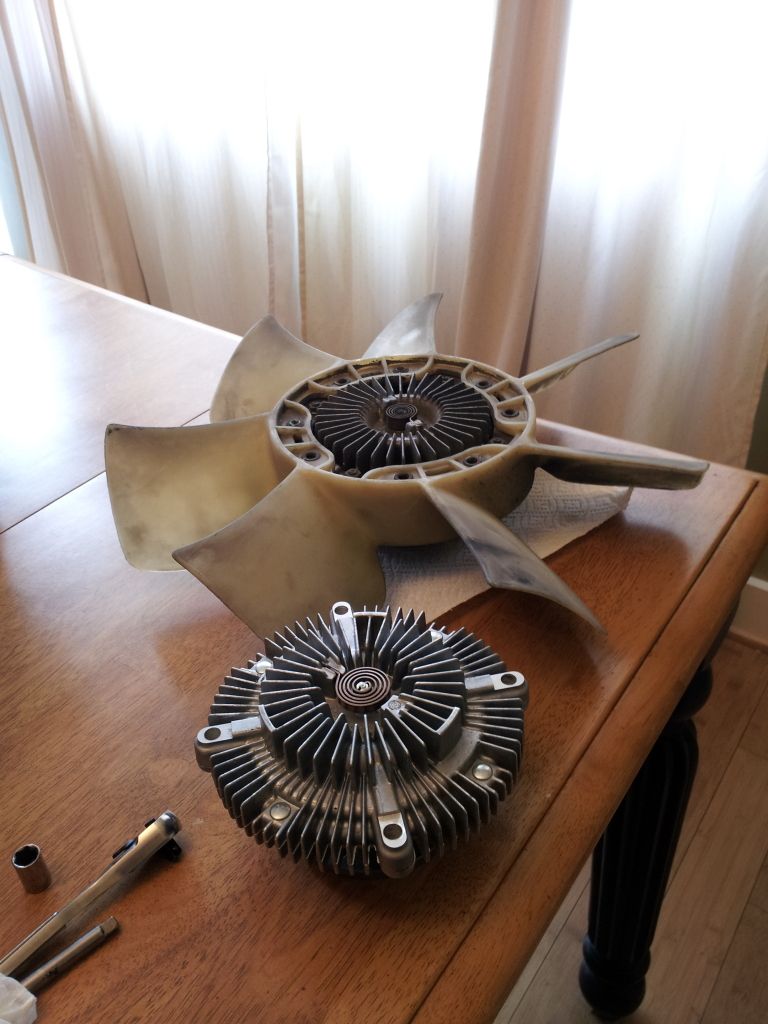
Next up was the fan clutch and steering rack bushings
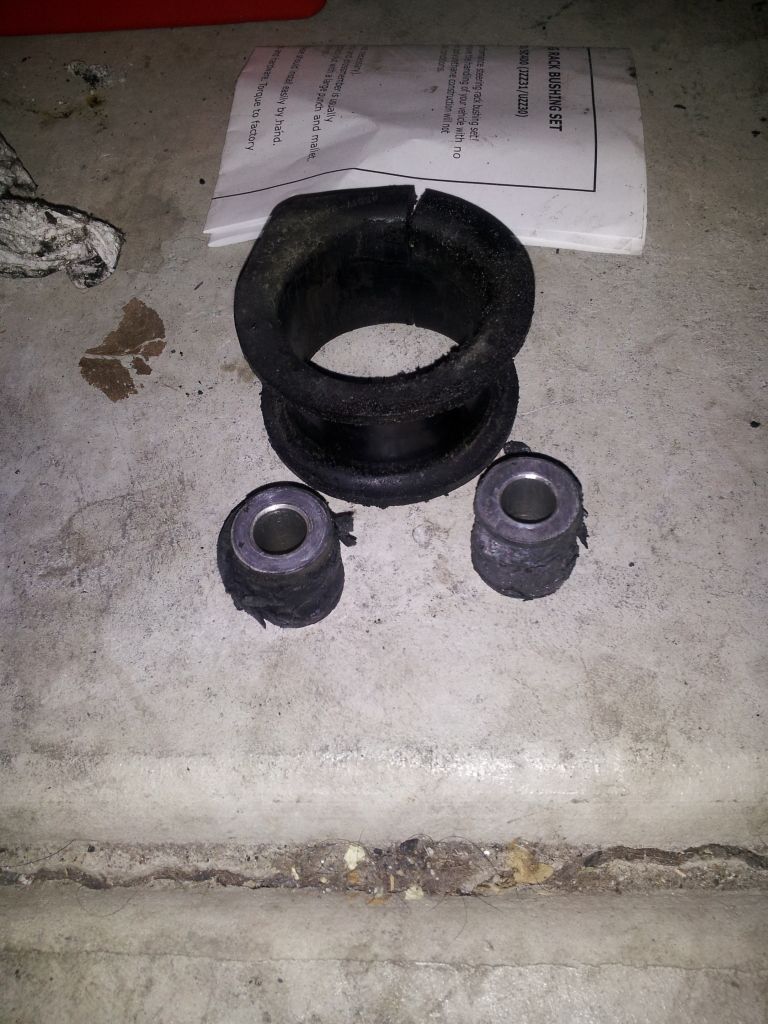
Old rack bushings, or at least what is left of them.
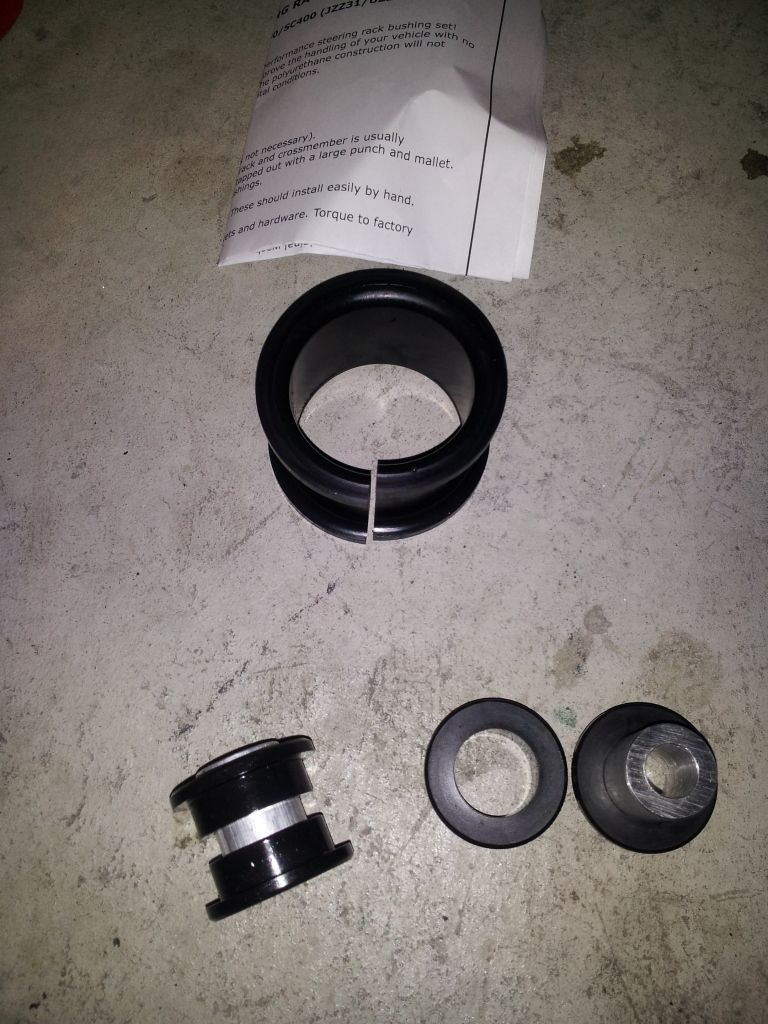
NEW!!!!
Also picked up some random goodies along the way..
RE01R's on stock EVO Enkeis
I do not want to give too much info in regards to my future plans, but here are my goals as of right now. Note* goals subject to change...
First is to finish up the body work, lay down primer, paint and clear. I was thinking I want to make it White in color, but just dont know the exact shade of white I want. Please let me know if you have any suggestions. I am liking the new Nissan white as well as the White on the EVOX. I would love to do pearl white, but I dunno if it will turn out well, as this will be my first time painting a car...ever...
Still need to purchase/do body/interior related:
-Purchase primer/paint/clear - Does anyone have any recommendations??
-Buy rear window pad/trim thing.
-Buy a few clips I broke during teardown
-Buy front Windshield(broke mine taking it out)
-SEM black paint for painting the interior pieces I want back in the car
-Mod or buy gauge cluster needles
-Clean carpet and dye/paint it black
-Fisnish smoothing out sunroof(one of the more difficult things on this car, I know it does not have to be perfect, but it is tough getting it perfectly smooth with no waves)
-Clean and paint trunk white(same as interior)
-Clean and paint interior door panels
I'm sure there are a bunch more things, but that is what I can think of off the top of my head.
Suspension:
-I'm on the fence on coilovers, either I go cheap and get some Powered by Max coilovers, or I nut up and get some Tein Monoflex. I am leaning towards the monoflex, but the price stings just a bit. I feel like it will be worth the extra cost to get something I know and trust, but still need to make the decision.
-Bushings: I have polyurethane bushings for all of the suspension arms, but still need to purchase rear diff/subframe bushings. Trying to decide if I want solid mounts, or go with poly bushings.
-Hubs: Planning on sending them out to PBM to be modified. Hoping these will help with steering ratio, geometry, and steering angle.
LSD: Pretty set on the Tomei 2way LSD
Wheels Tires:
Right now I have some Stock EVO Enkei wheels wrapped in 245 RE01-R's which I may use on the front for drifting, and some ****ty tires on the rear to burn up.
I am thinking I will pick up some 18x10.5 Rear and 18x9.5 Front Enkei Nt03+M's and no idea on the tires yet.
I will either sell the ugly 15's on it, or use them in the rear for drifting practice.
Brakes:
Have not decided. LS400 4-pots are cheap and work well, but for not much more I can get Z06 6-pots and adapt them to my hub.
Power:
This will be the last thing I work on, but I have been doing research, and I am thinking about going with a 1JZ mated to a R154 trans.
ICE YO!
I would like to get rid of all of the stock stereo and go with a normal headunit and new speakers.(I know very little about audio, I just want a nice clean sound I can listen to super loud, don't need uber bass or anything, just quality speakers with good sound. Any input would be greatly appreciated.
When I picked her up
And the reason I am at where I am at with it...
But before we get into that, the first thing I did was get rid of that awful stock bus style steering wheel and replaced it with an IS300 wheel.
ahhh much better
Next up was the fan clutch and steering rack bushings
Old rack bushings, or at least what is left of them.
NEW!!!!
Also picked up some random goodies along the way..
RE01R's on stock EVO Enkeis
Last edited by scoobySC3; 07-15-12 at 09:52 PM.
 07-15-12, 10:22 AM
#2
Driver
Thread Starter
iTrader: (1)
Join Date: Feb 2012
Location: Utah
Posts: 178
Likes: 0
Received 0 Likes
on
0 Posts
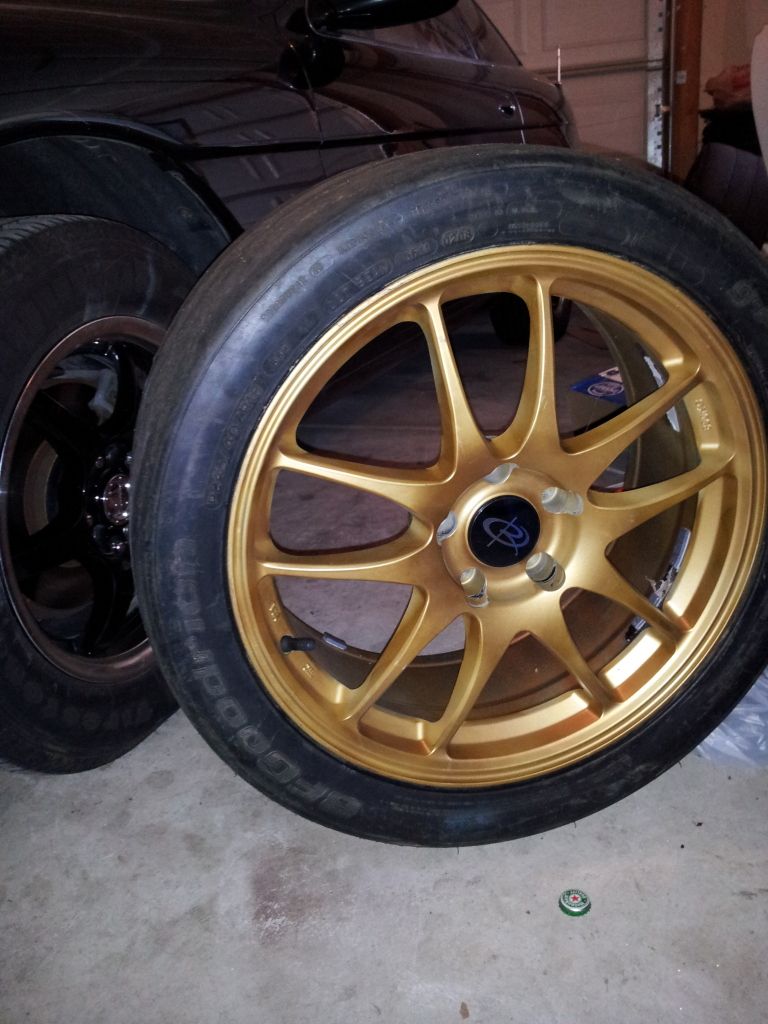
BFG R1's on Rotas(rotas have been sold)
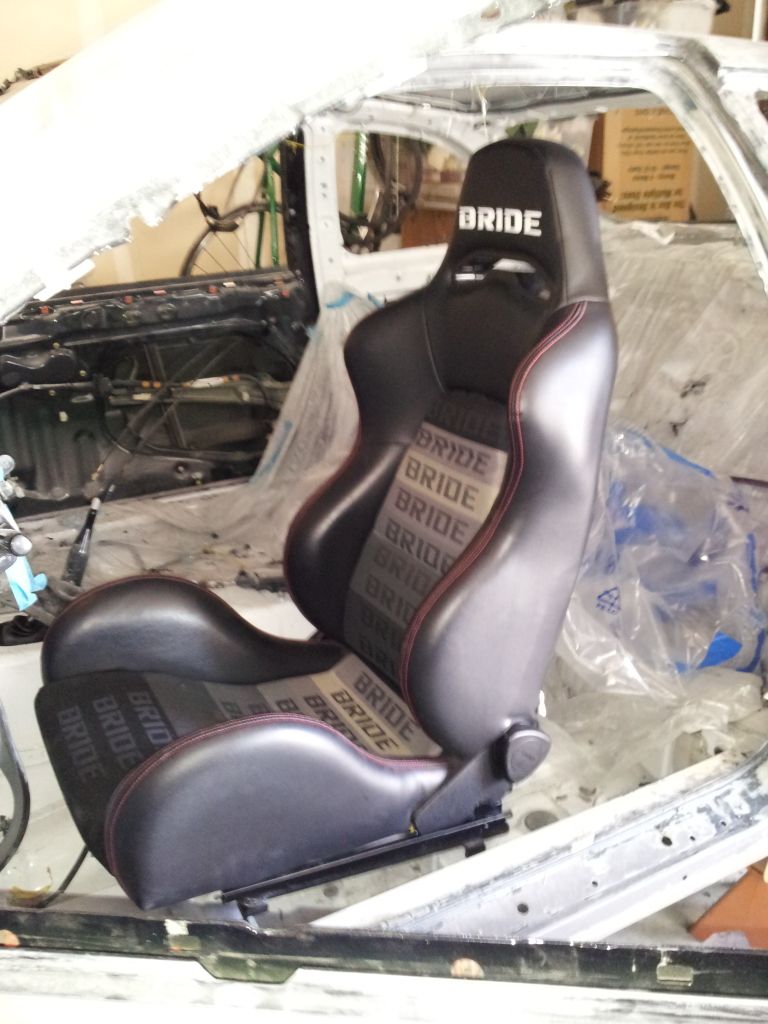
And of course my Bride seat which I just recently mounted using modified Sparco Sliders and Planted Base.

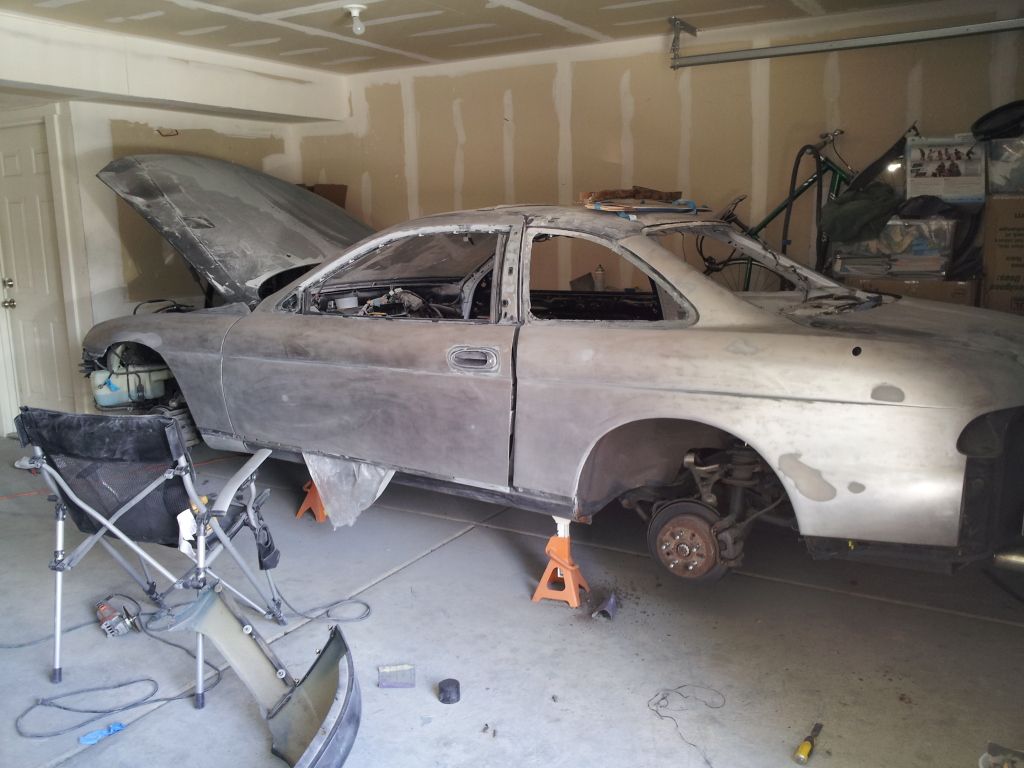
Okay now onto the fun, or not so fun part LOL.
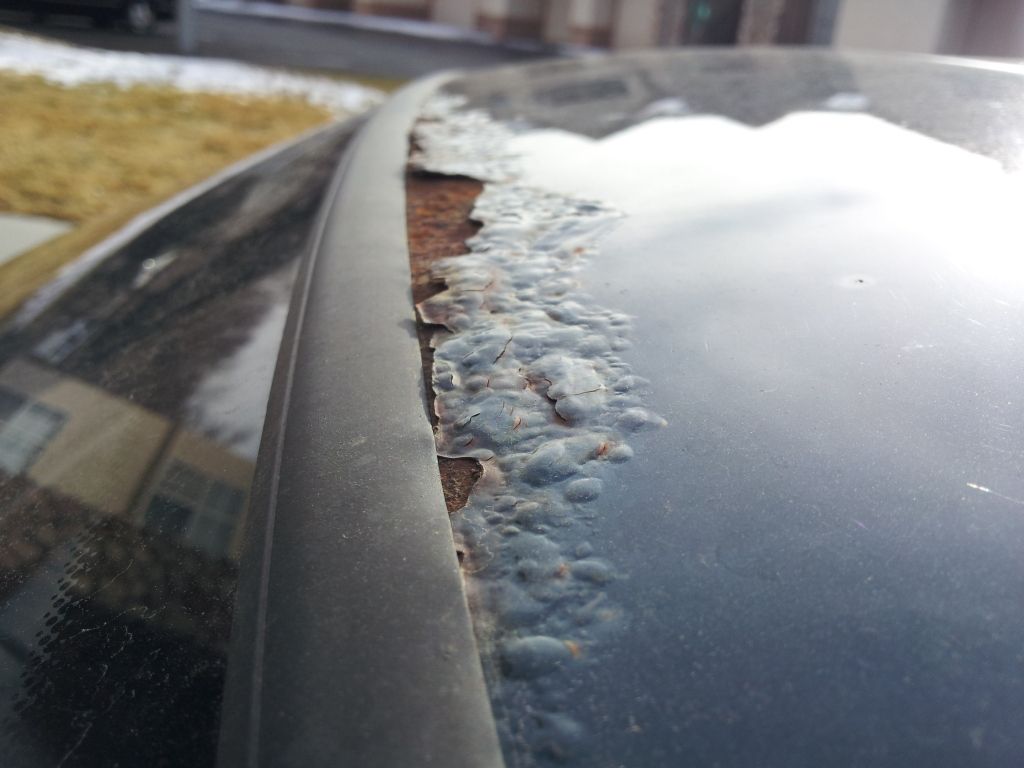
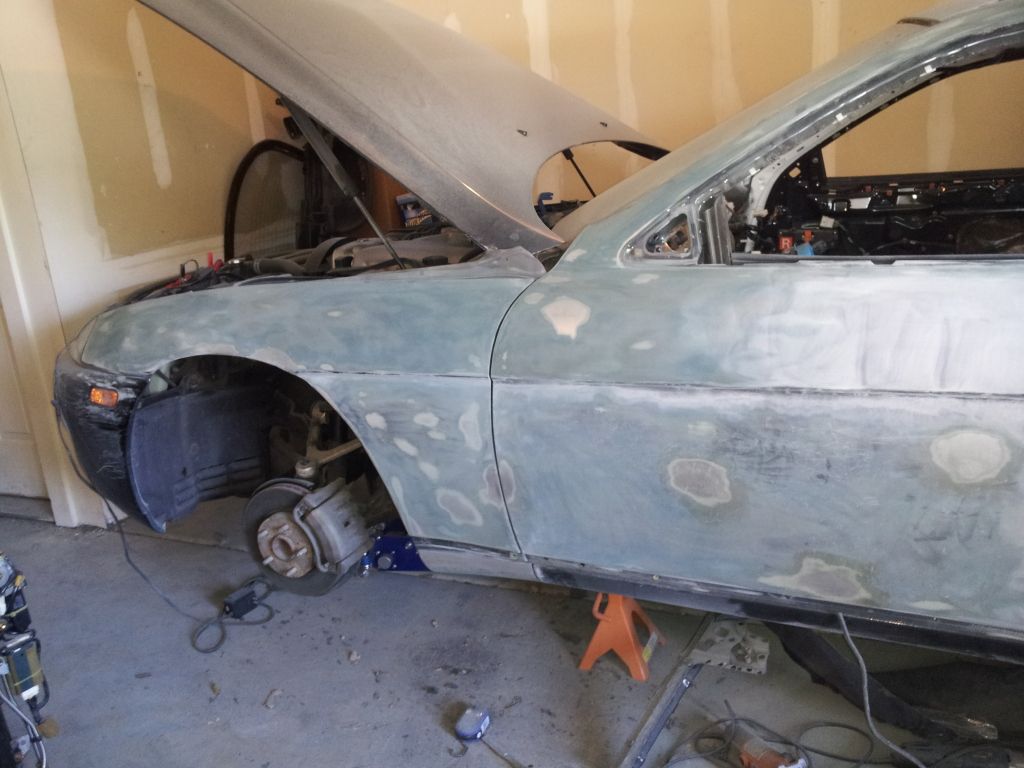
I thought the rust was not near as bad as it was...boy was I wrong. It had been "repaired" previously and hid the extent of the issue.
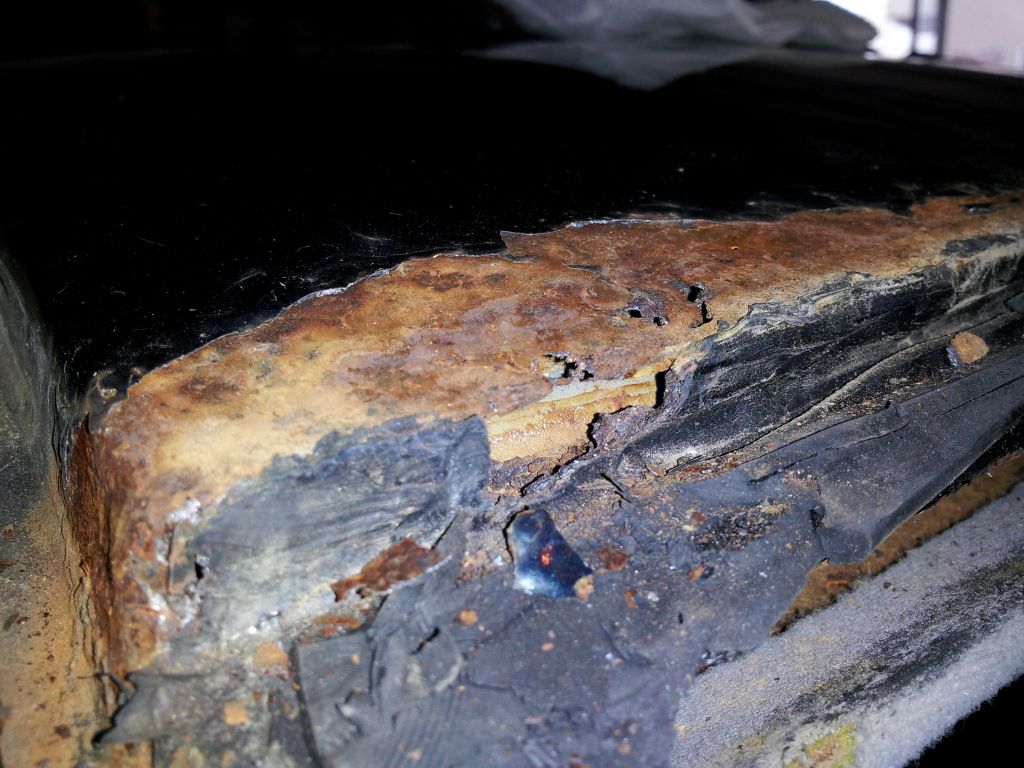
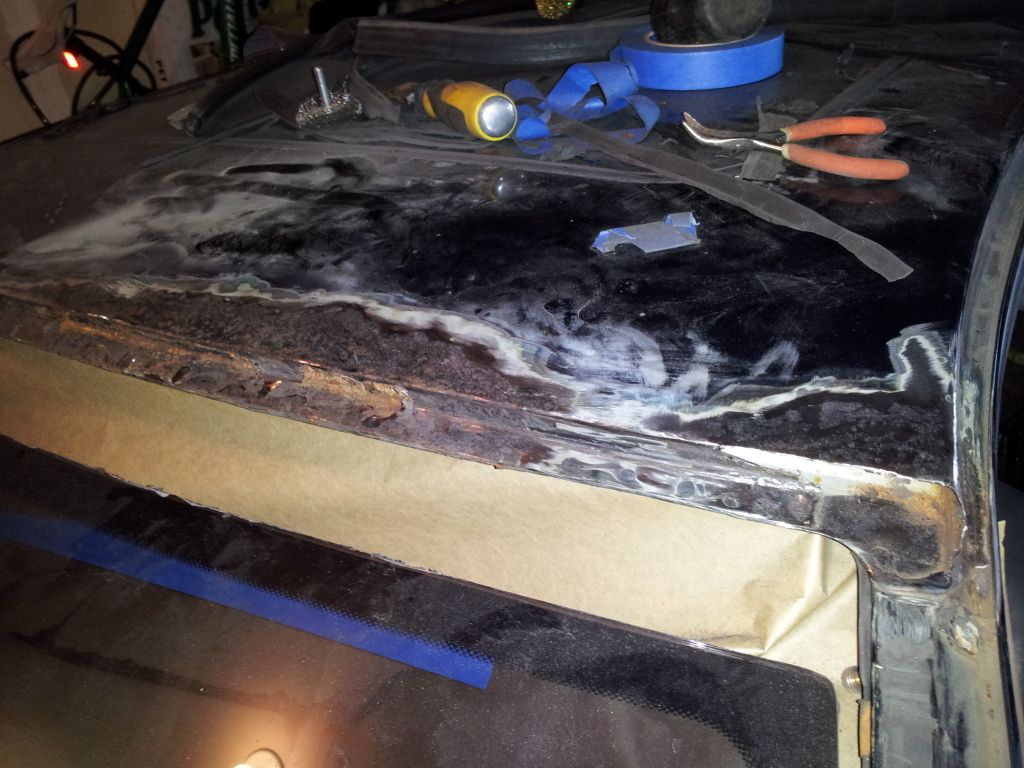
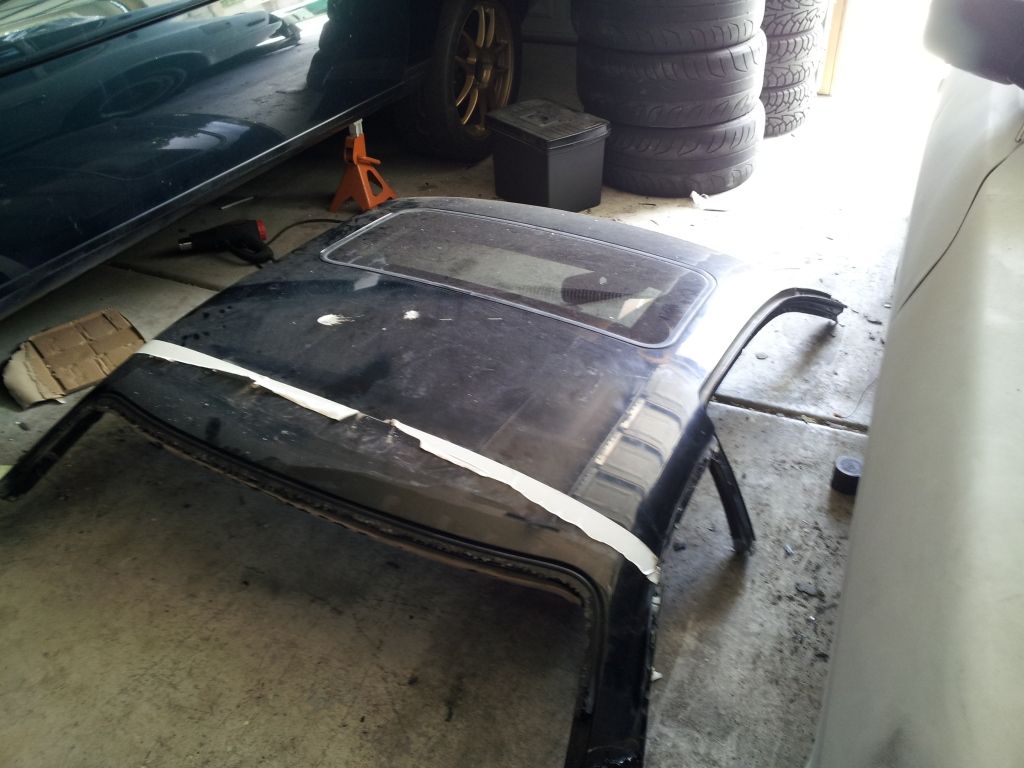
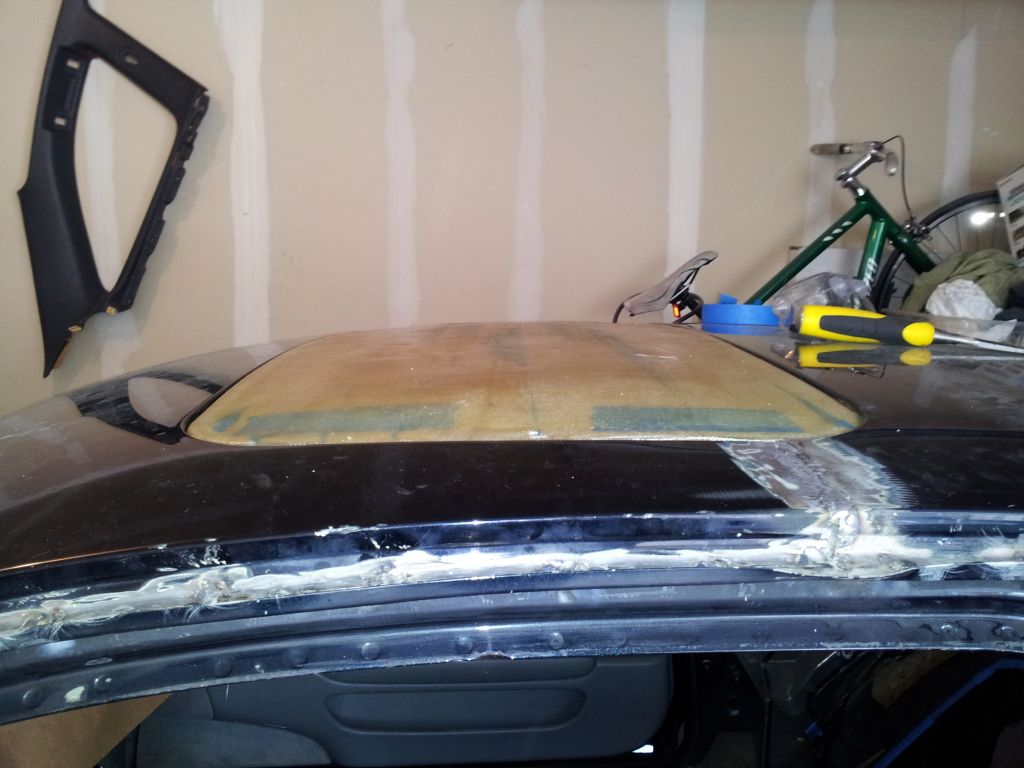
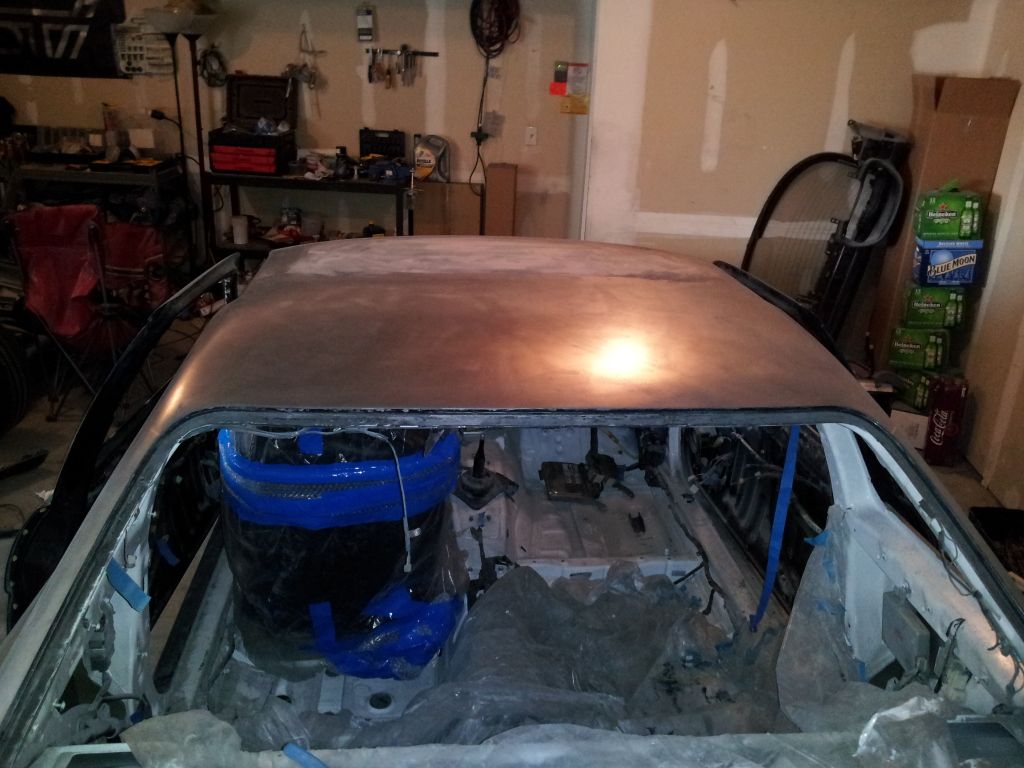
Needless to say that could not be patched up, so I made the decision to get a new roof and cut the old one out.
New Roof.
And of course my Bride seat which I just recently mounted using modified Sparco Sliders and Planted Base.
Okay now onto the fun, or not so fun part LOL.
I thought the rust was not near as bad as it was...boy was I wrong. It had been "repaired" previously and hid the extent of the issue.
Needless to say that could not be patched up, so I made the decision to get a new roof and cut the old one out.
New Roof.
07-15-12, 10:22 AM
#3
Driver
Thread Starter
iTrader: (1)
Join Date: Feb 2012
Location: Utah
Posts: 178
Likes: 0
Received 0 Likes
on
0 Posts
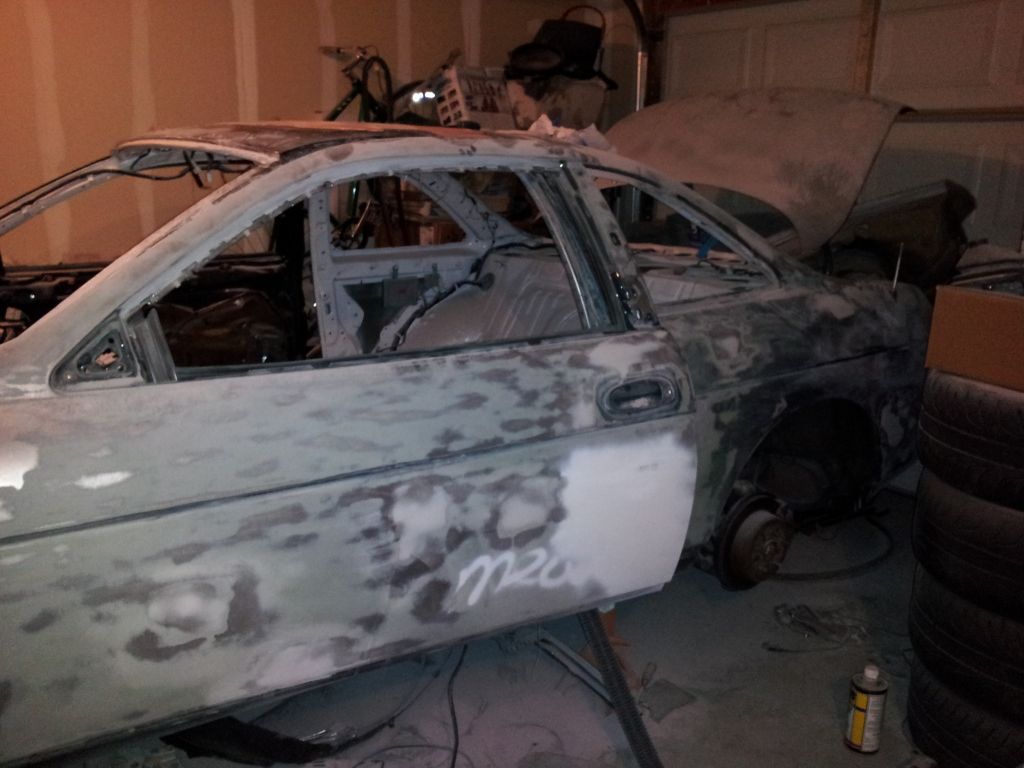
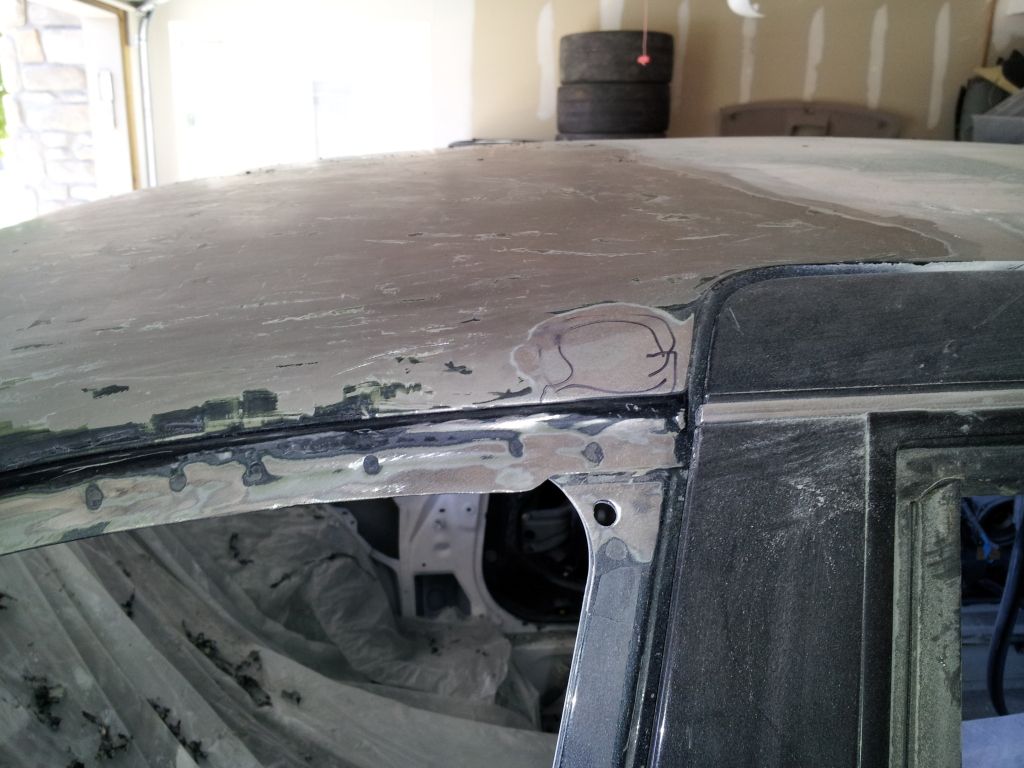
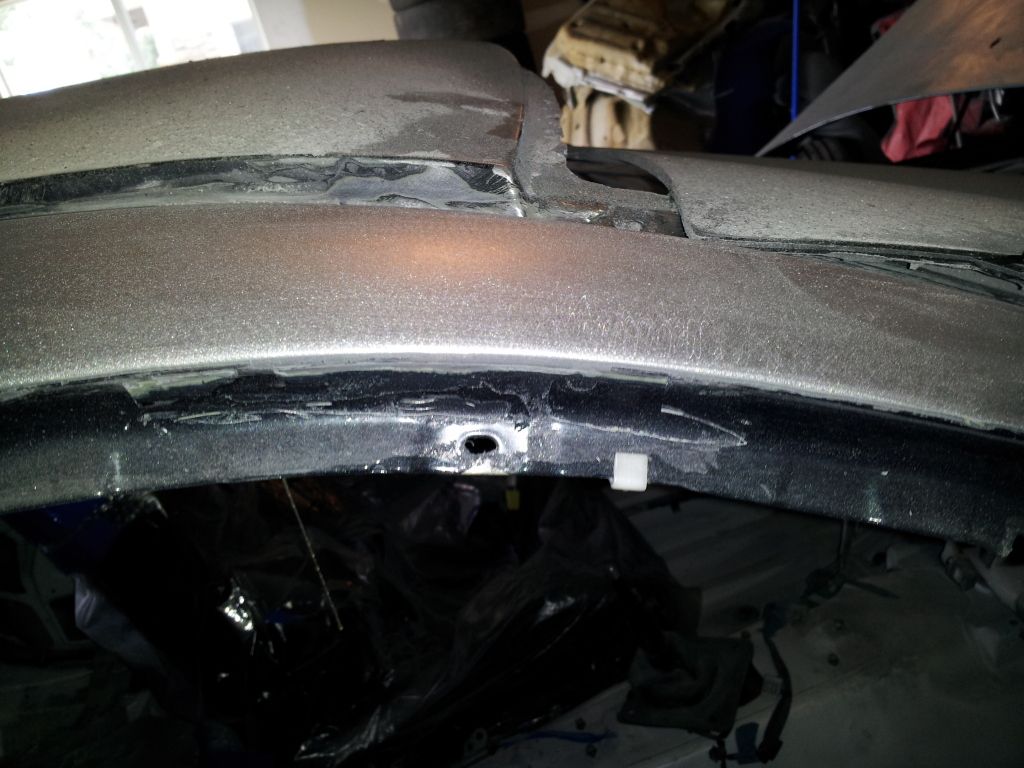
So the old roof had to be cut out..
Should have made it a sweet T-top
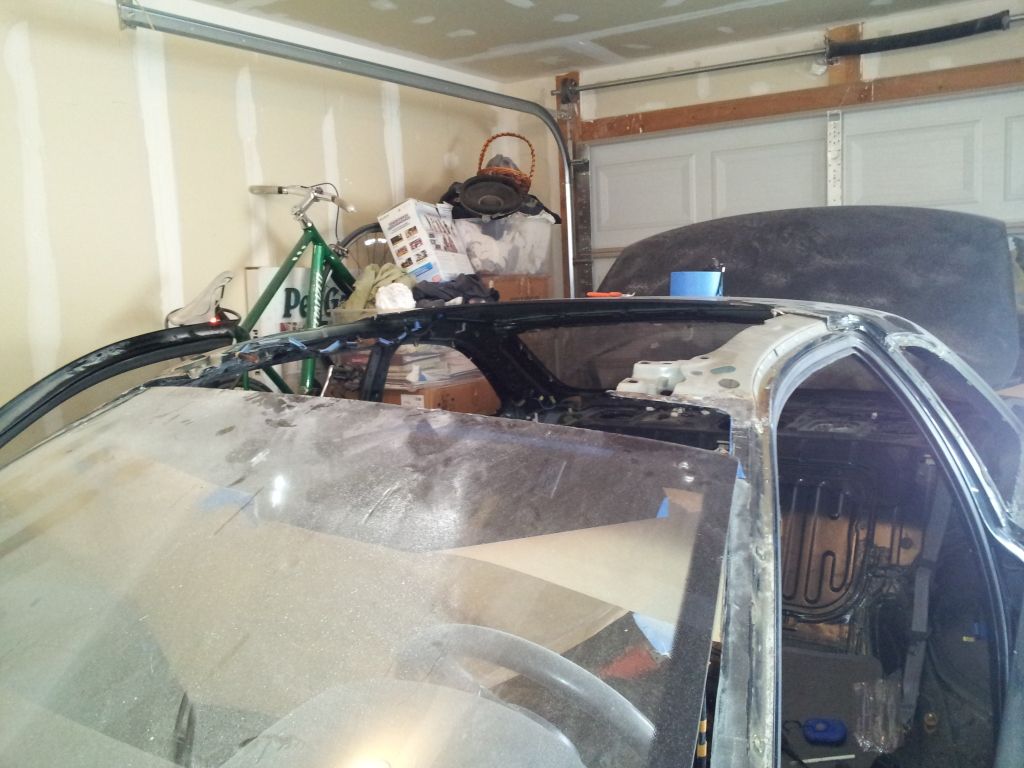
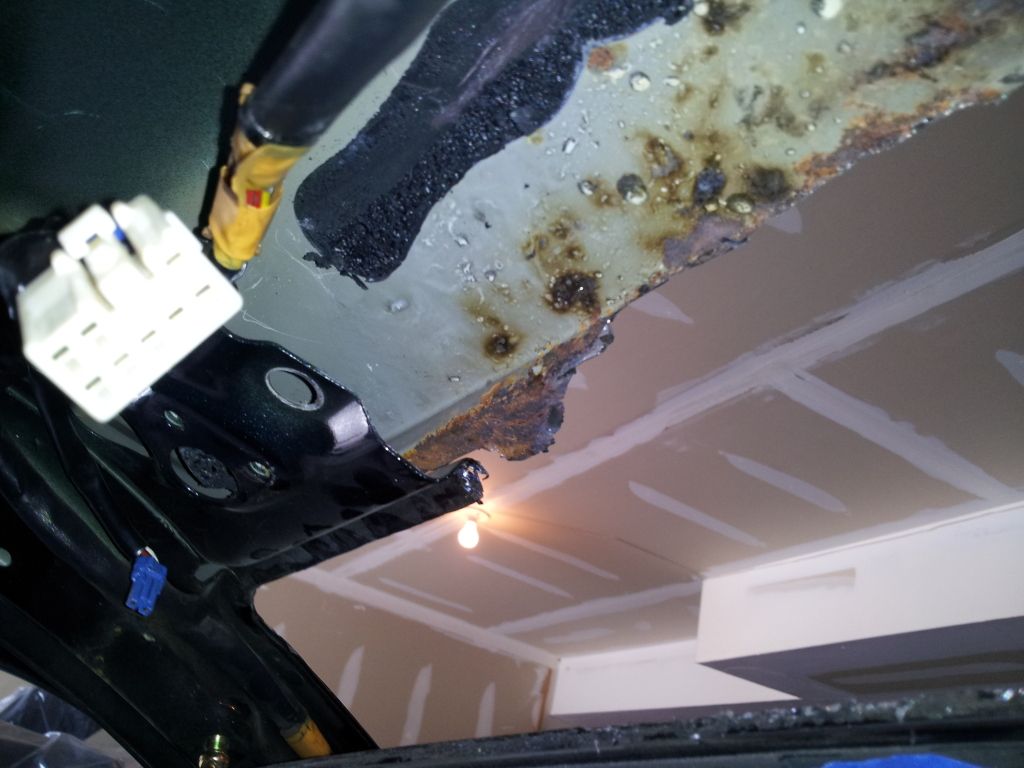
Discovered some surface rust underneath, so I drilled out the spot welds, ground down the rust, primered and welded back on.

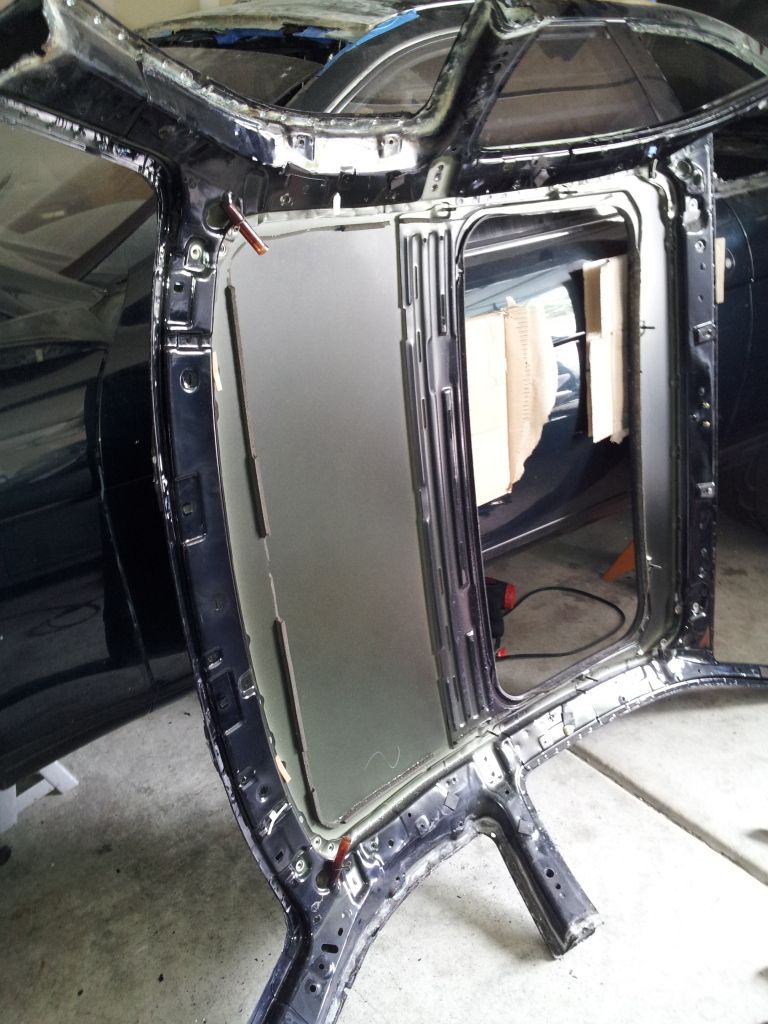
**** a sunroof..why? Because racecar. You can also see my new roof that I welded back on.
Should have made it a sweet T-top
Discovered some surface rust underneath, so I drilled out the spot welds, ground down the rust, primered and welded back on.
**** a sunroof..why? Because racecar. You can also see my new roof that I welded back on.

 07-15-12, 10:24 AM
#6
Driver
Thread Starter
iTrader: (1)
Join Date: Feb 2012
Location: Utah
Posts: 178
Likes: 0
Received 0 Likes
on
0 Posts
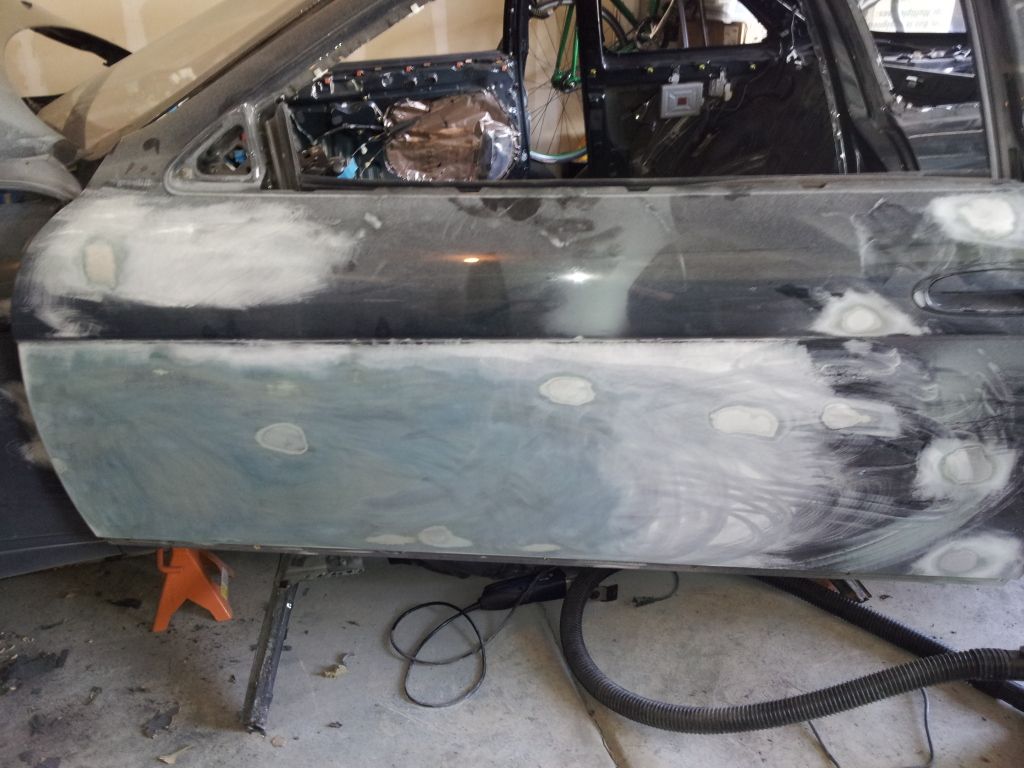
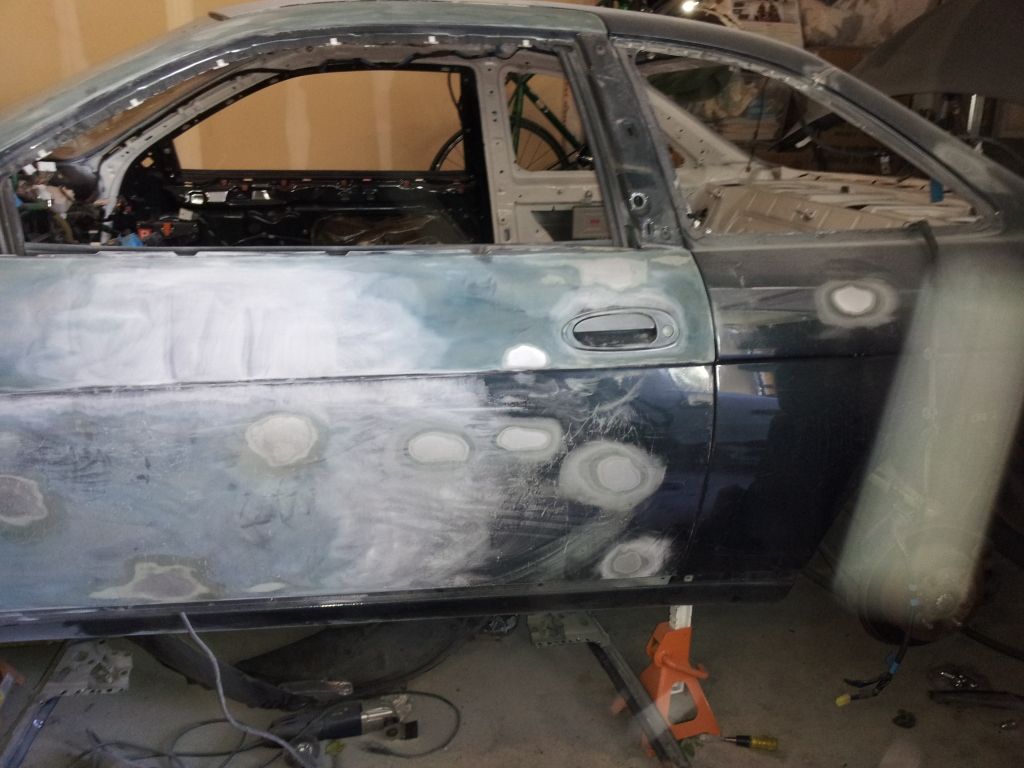
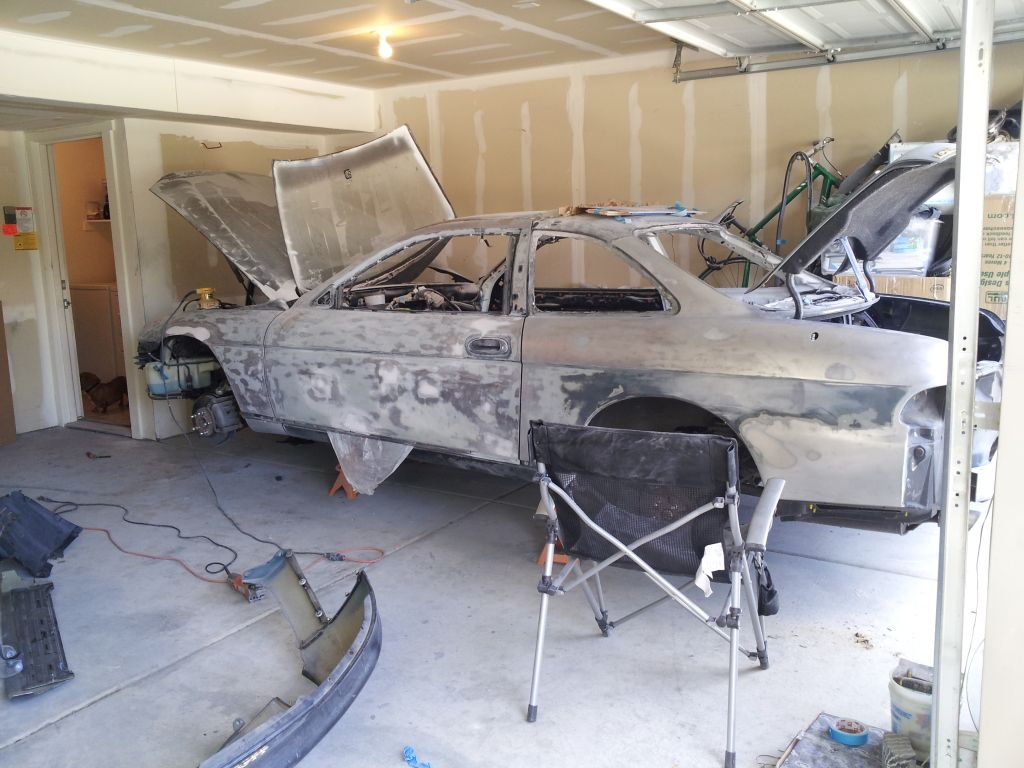
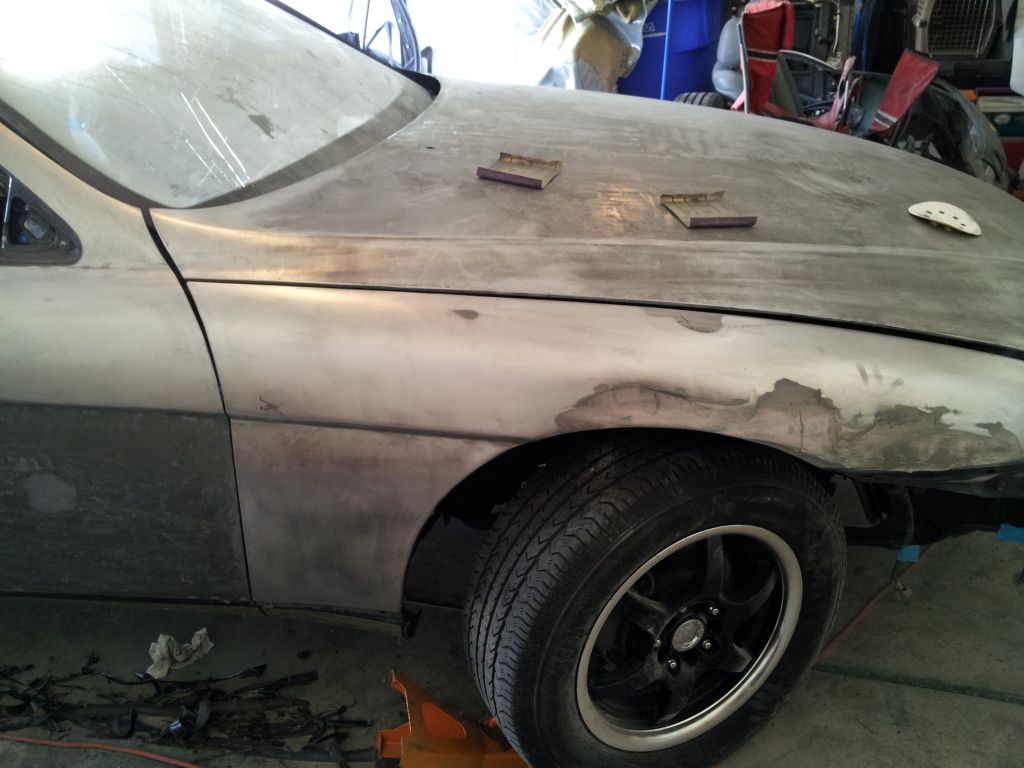
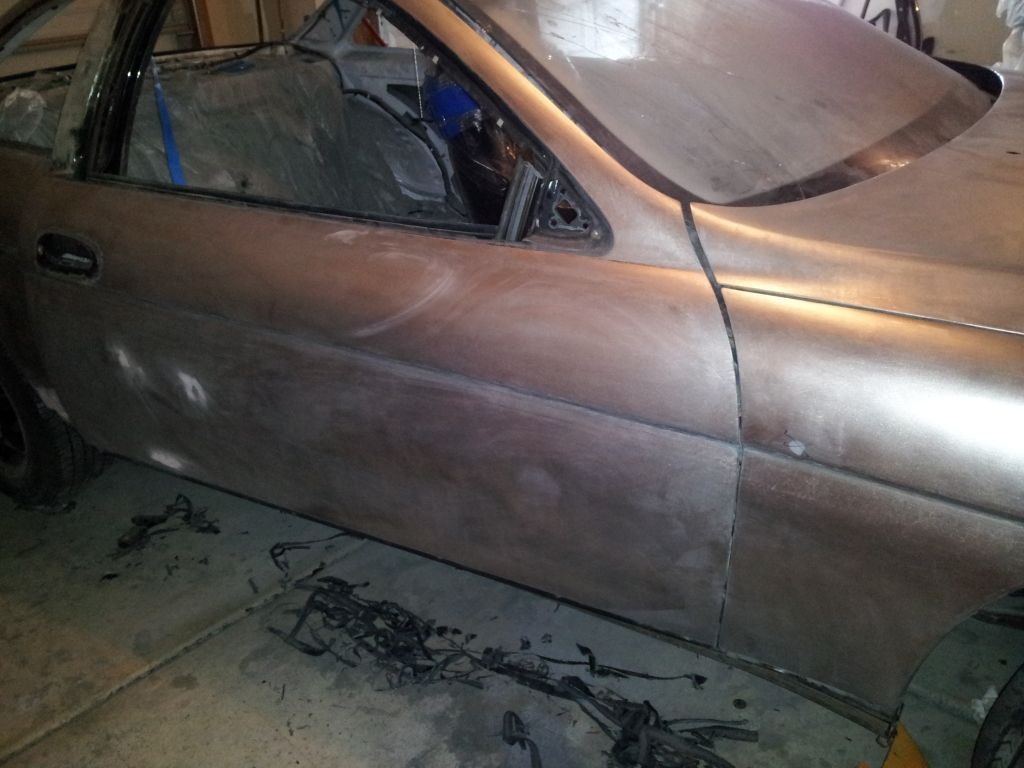
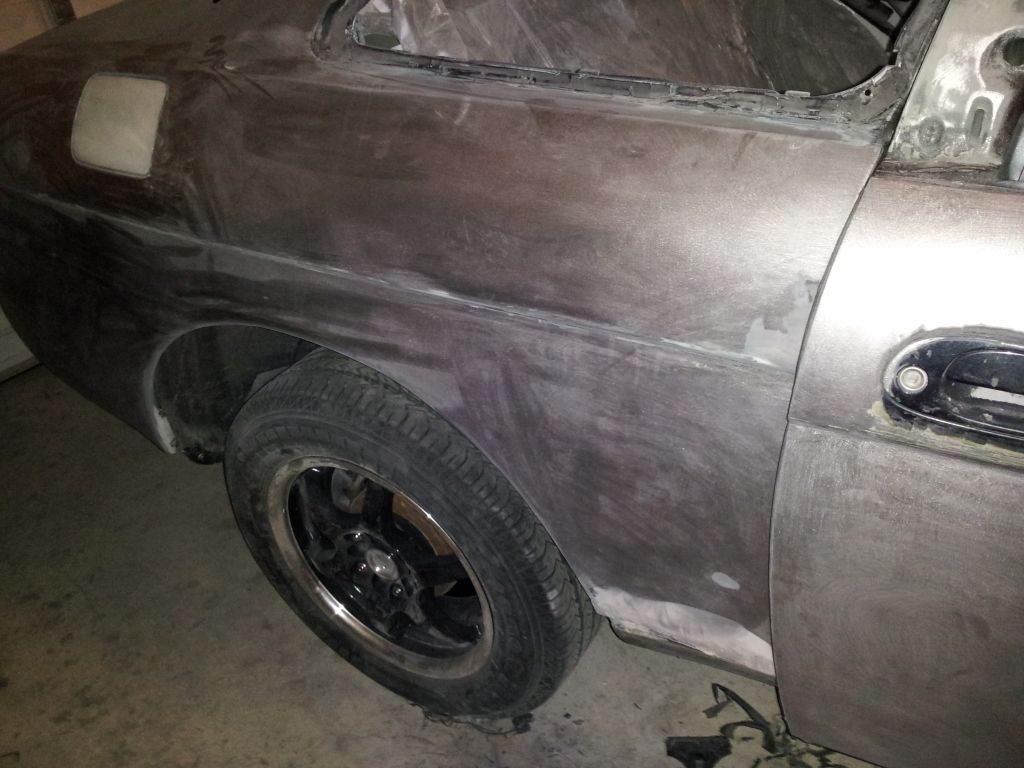
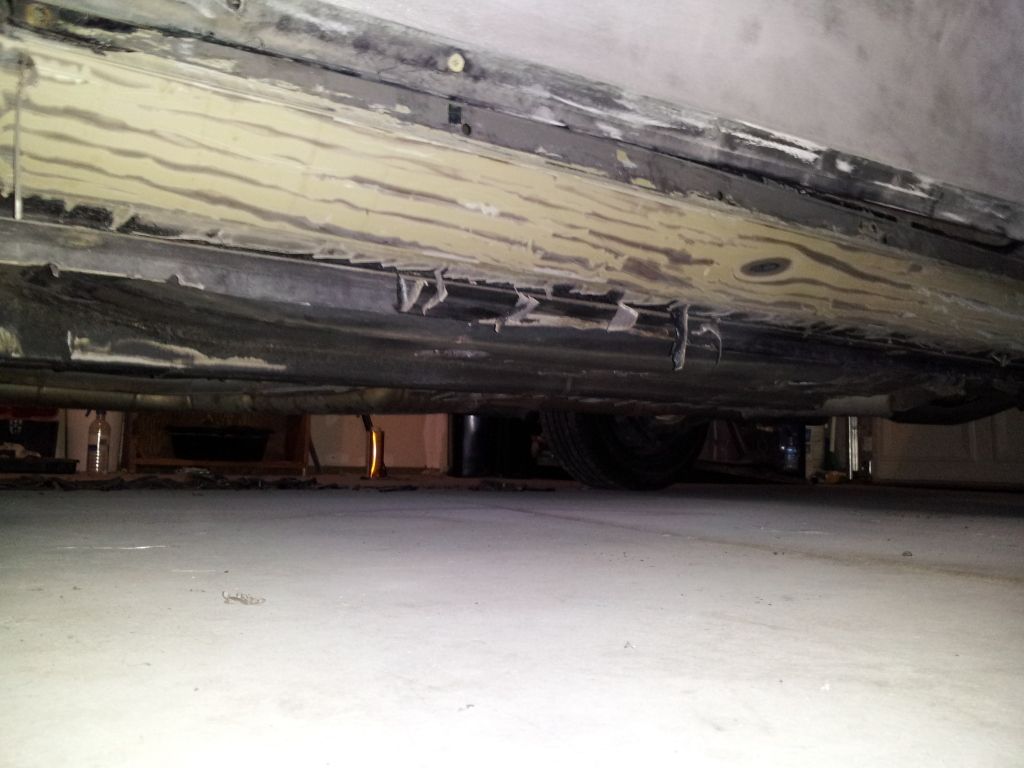
Then I discovered wonderful chemical strip. I had tried Aircraft remover in a spray can, but it was just not strong enough, so I tried KleenStrip in a jug, and this **** is extra gnarly, and can easily remove multiple layers quickly.

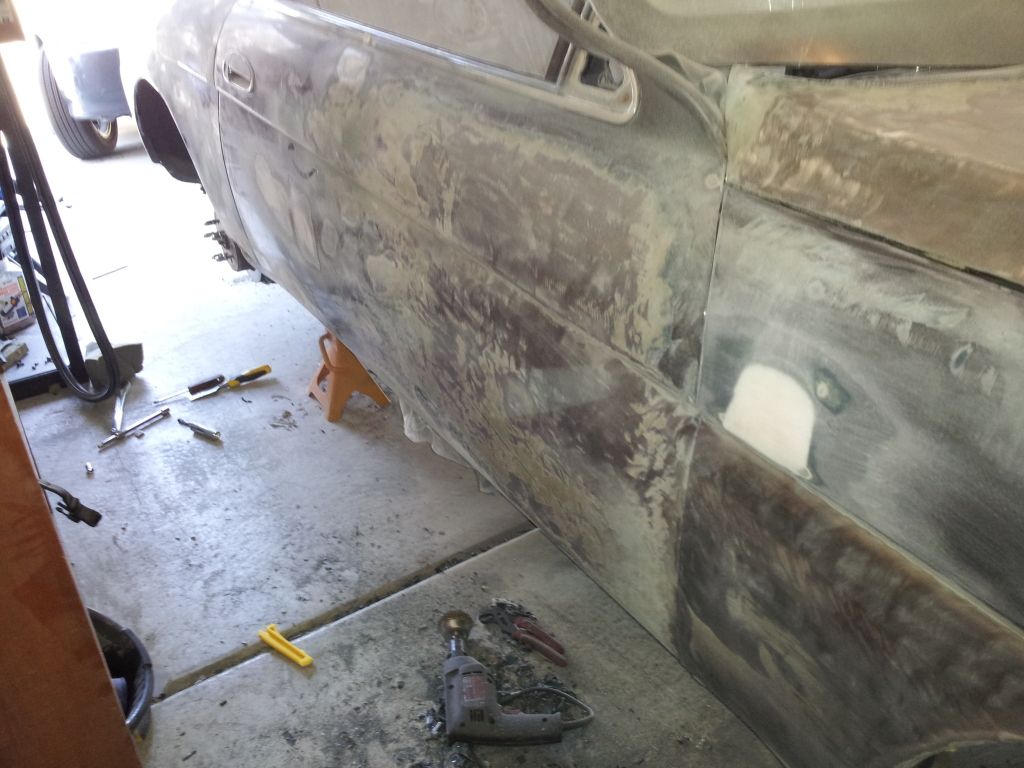
Before the KleenStrip, I had sanded the driver side down manually, which took almost a month. With the KleenStrip, I finished the passenger side in about a week, so we are moving quickly now...
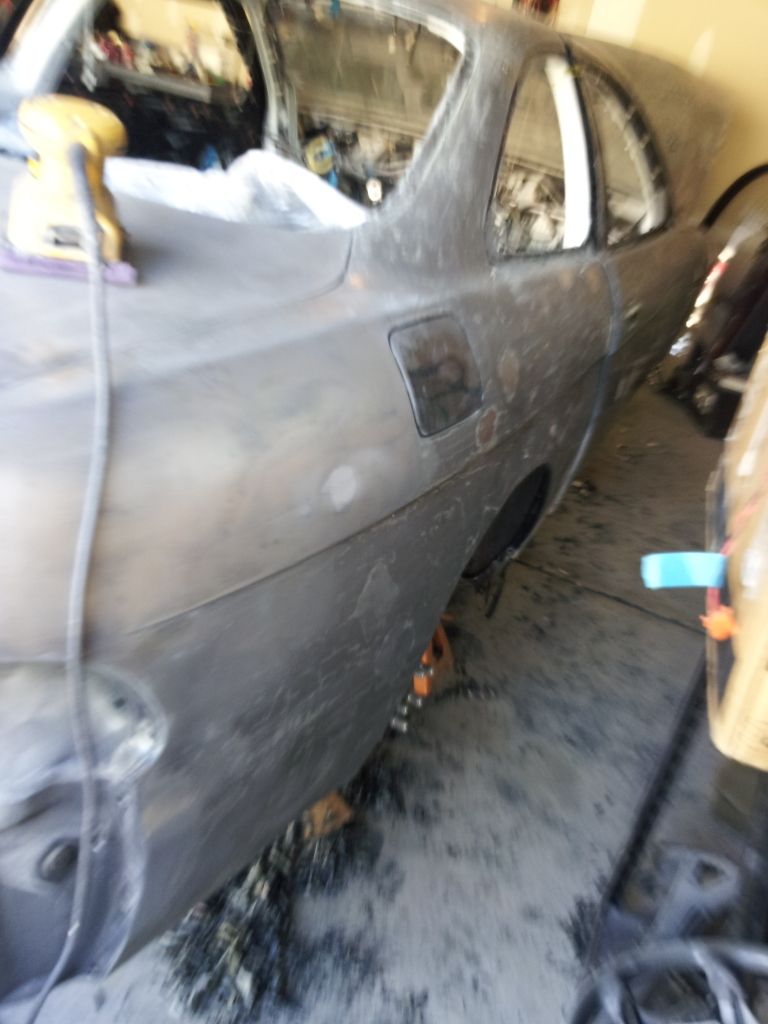
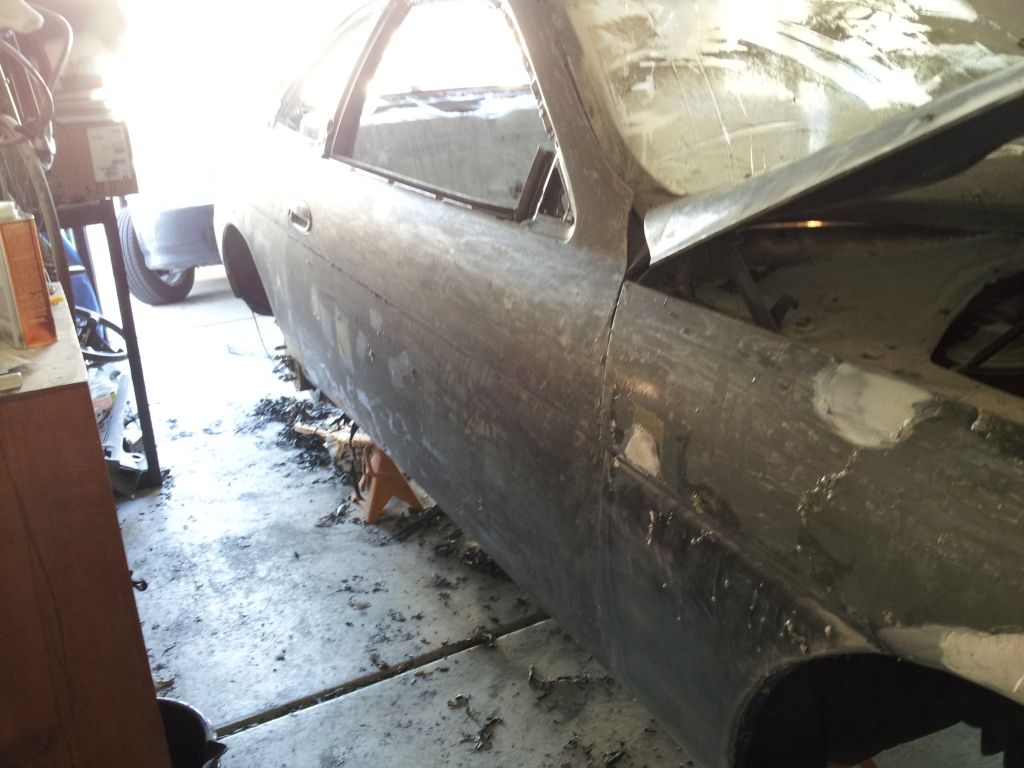
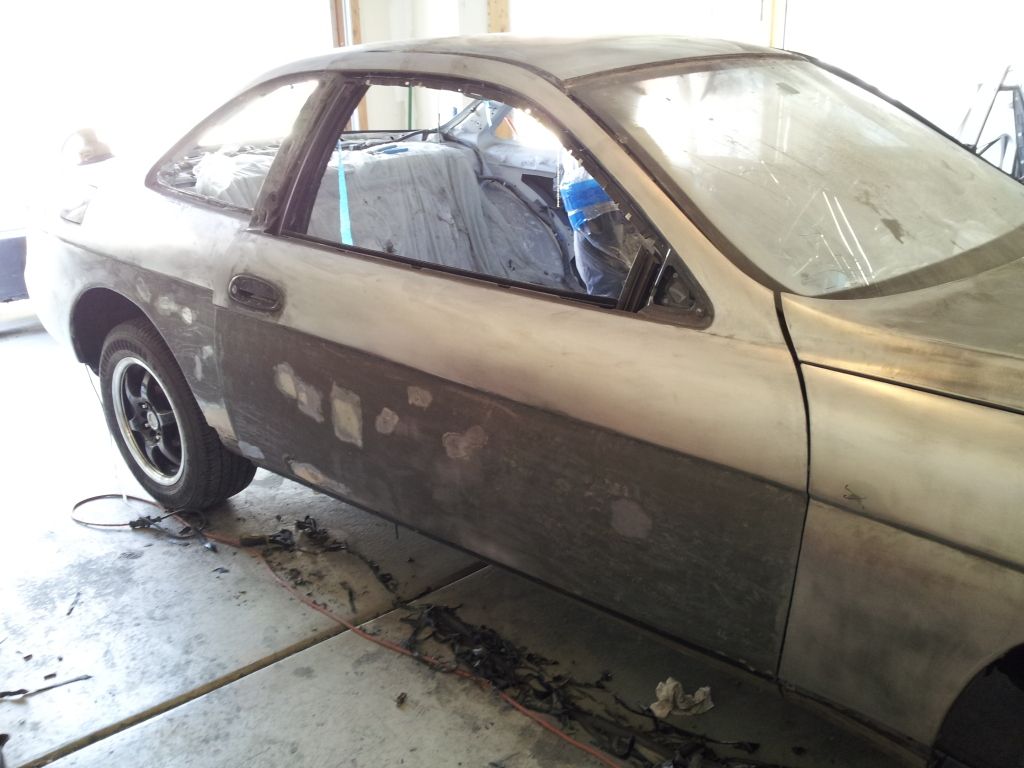
Before the KleenStrip, I had sanded the driver side down manually, which took almost a month. With the KleenStrip, I finished the passenger side in about a week, so we are moving quickly now...


Trending Topics
07-15-12, 10:25 AM
#8
Driver
Thread Starter
iTrader: (1)
Join Date: Feb 2012
Location: Utah
Posts: 178
Likes: 0
Received 0 Likes
on
0 Posts
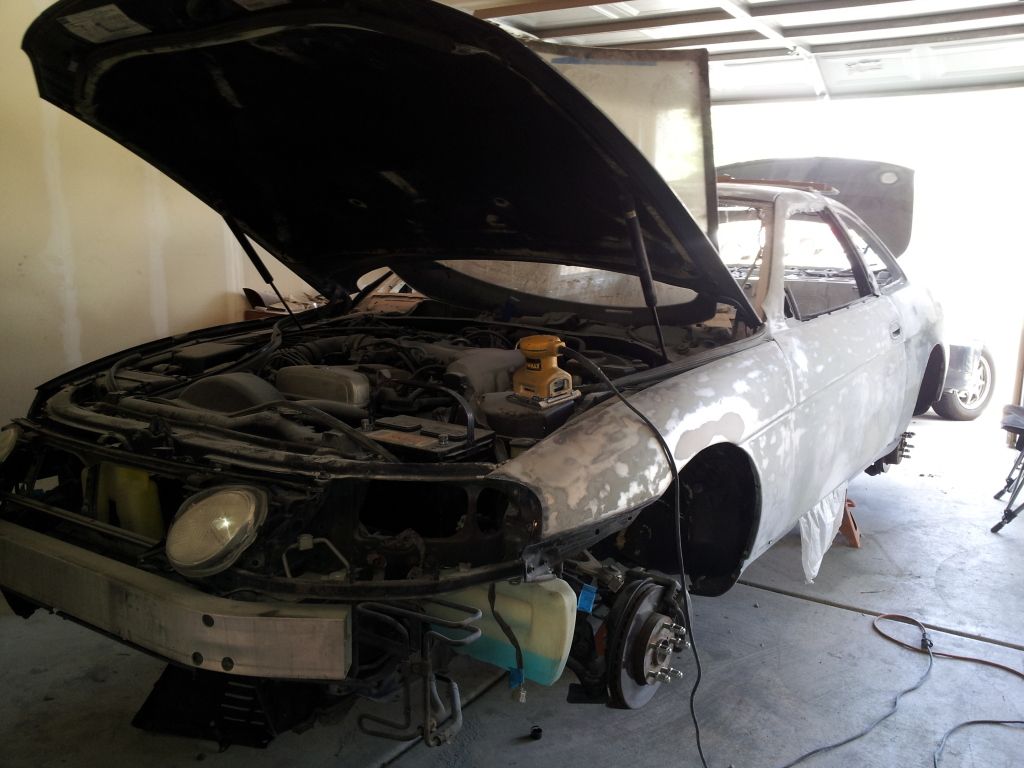
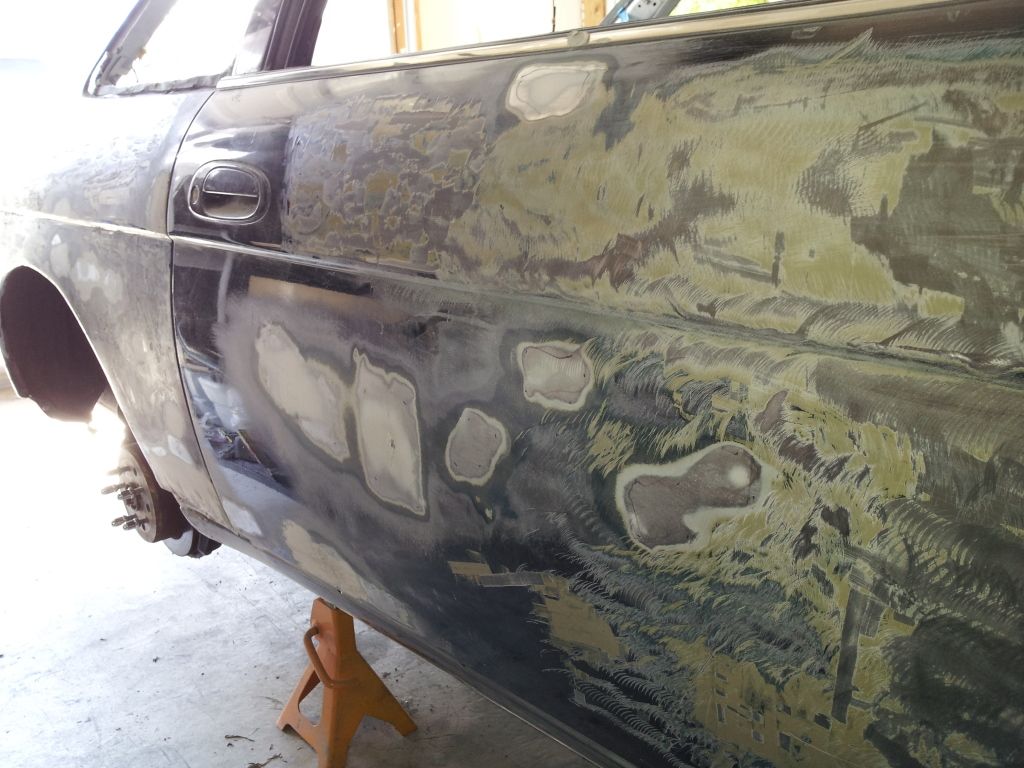
And now for a current update. Snapped a few pics today - and have a few questions. 
First is what do you do with the VIN tags? All body panels were original and would like to keep the tags on there. So would you tape them off and work around them, or would you try to remove them and then put them back on after paint?

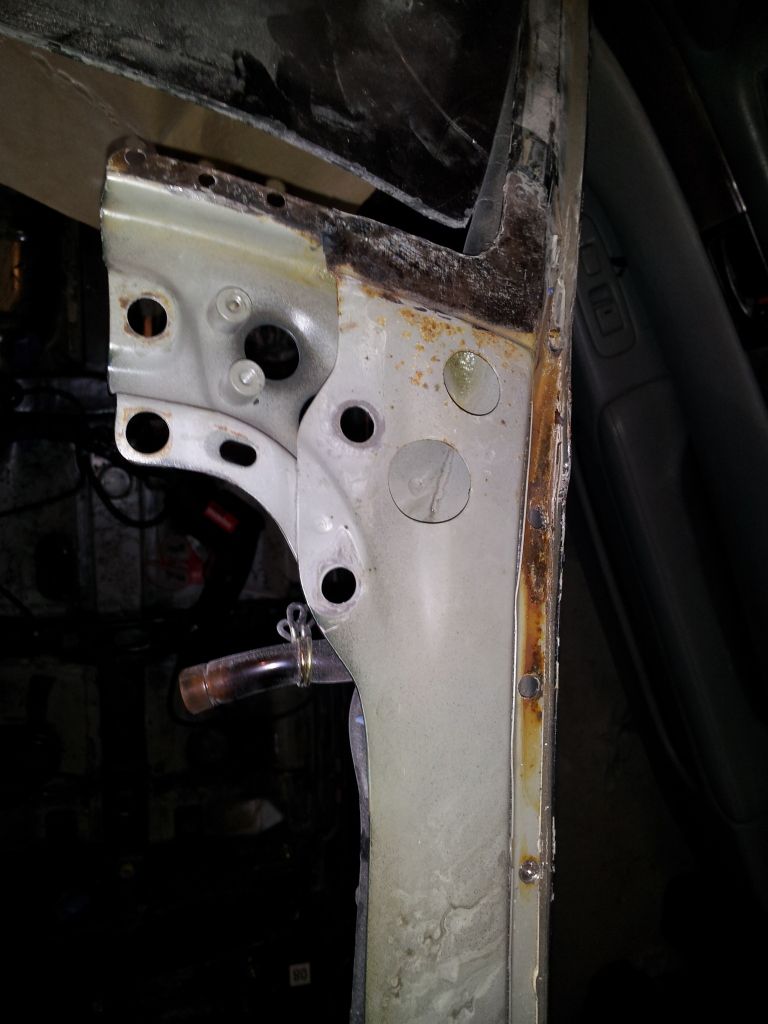
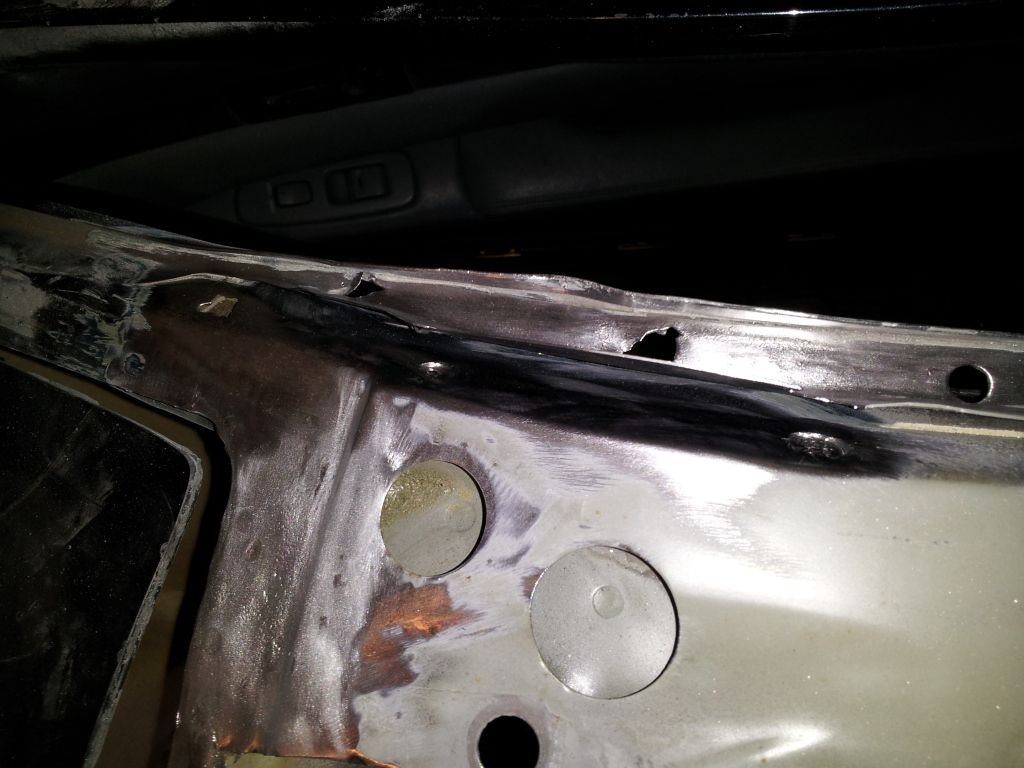
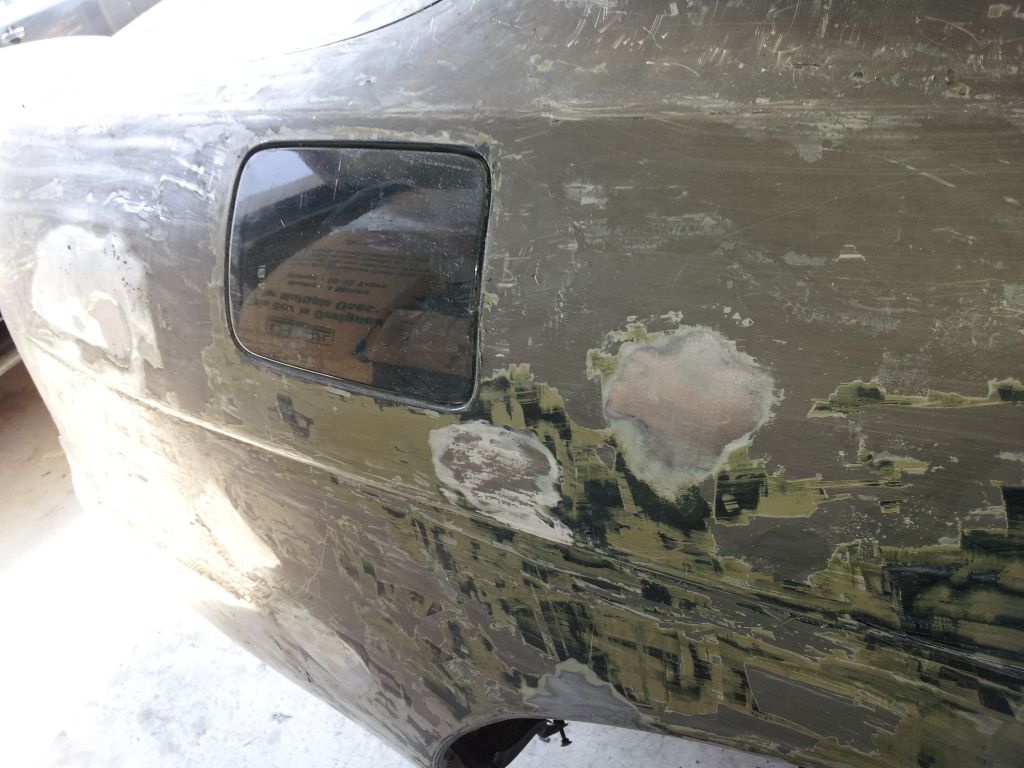
Next, on parts of the car that will not be seen once assembled, how aggressive do you get with the paint removal? Like, can I get away with just a surface scuff, or do I have to get down to raw paint or primer. Like around the window seal, which will be covered with a rubber seal.
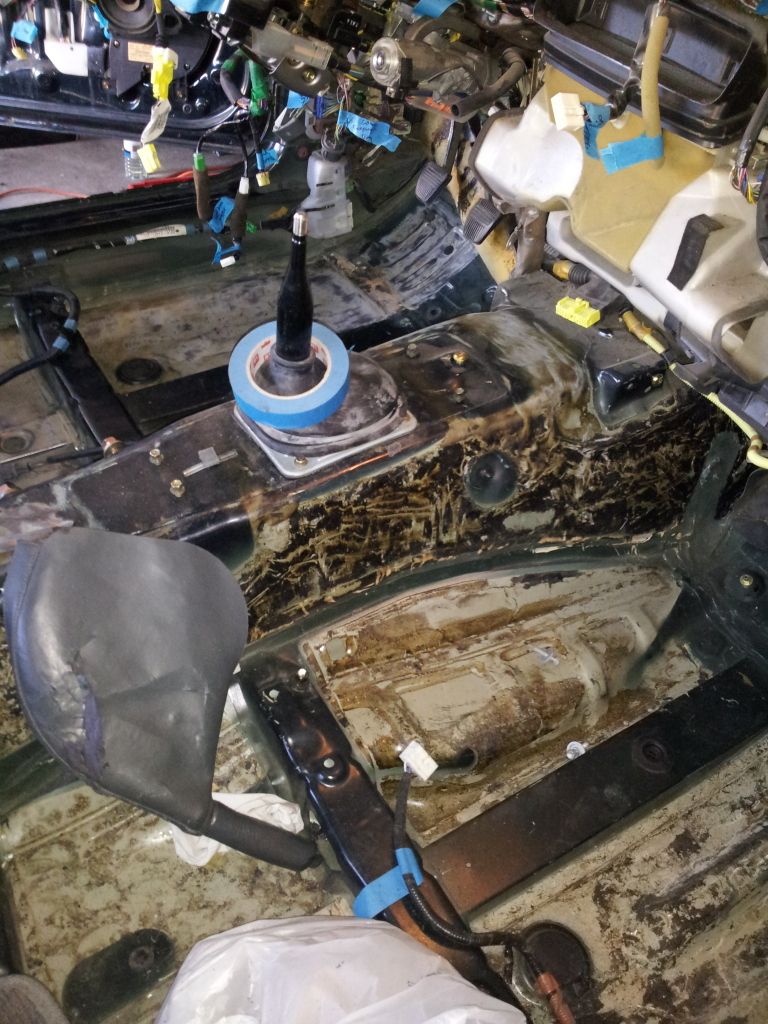
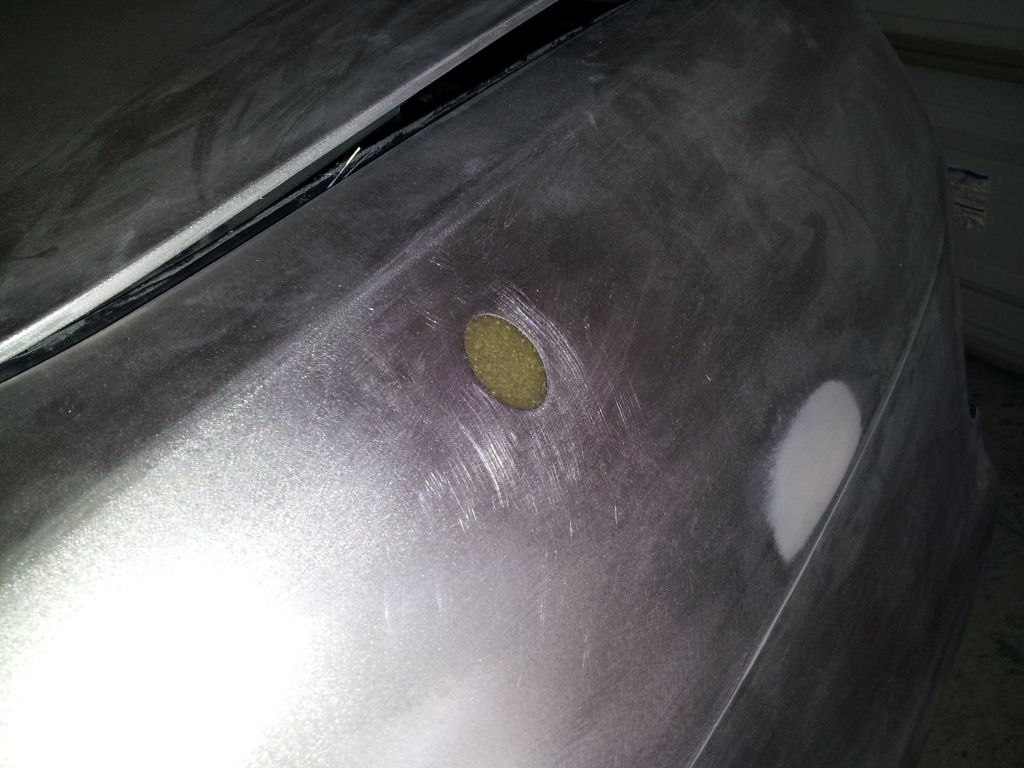
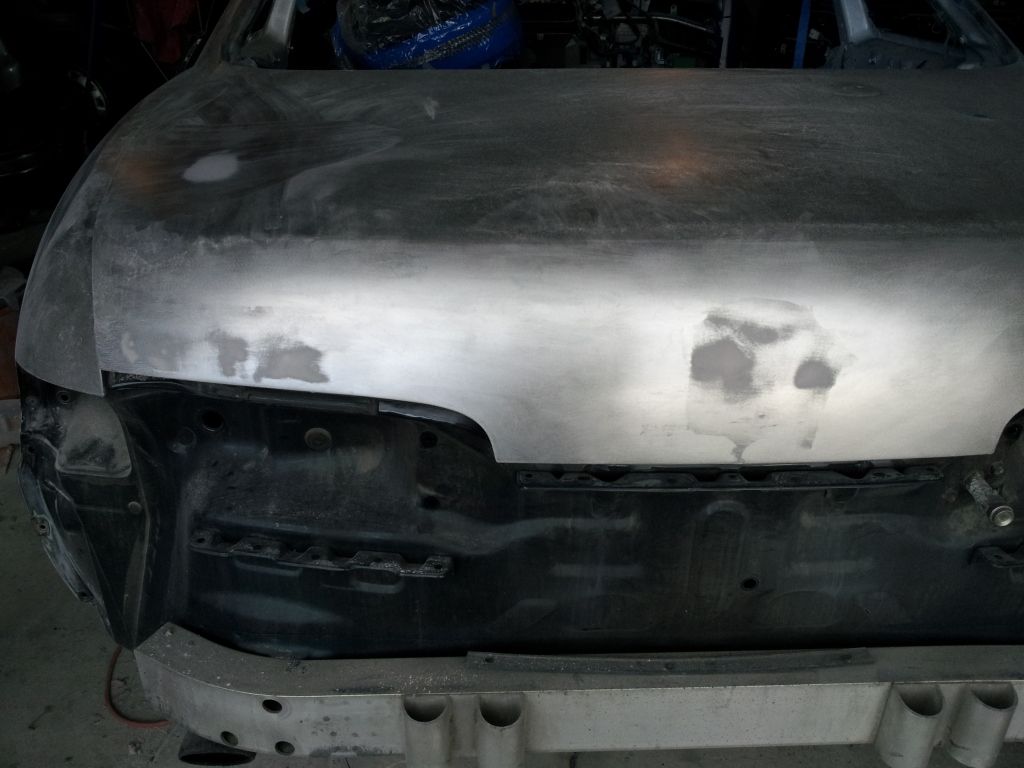
And now for a bit of progress. I hate the stock antenna so it's gone.
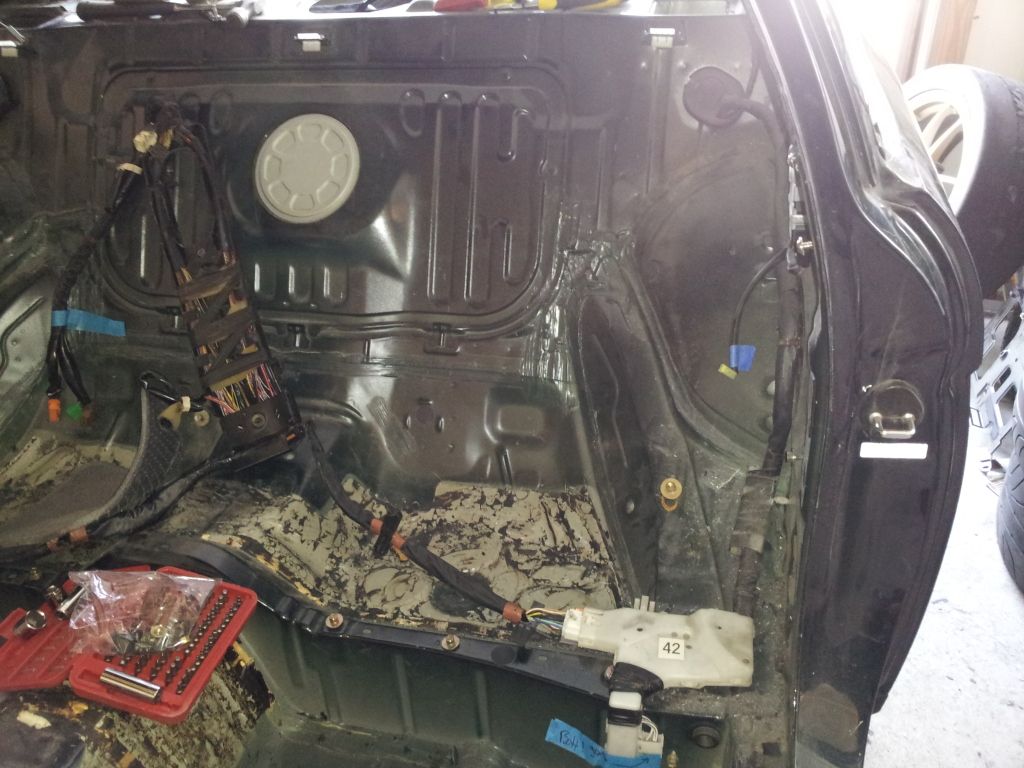
Laid a few layers of fiberglass behind it for strength. Still need to smooth it out with body filler. I will do the same on the holes in the trunk for the emblems. This will give me the option to run with or without the emblems.
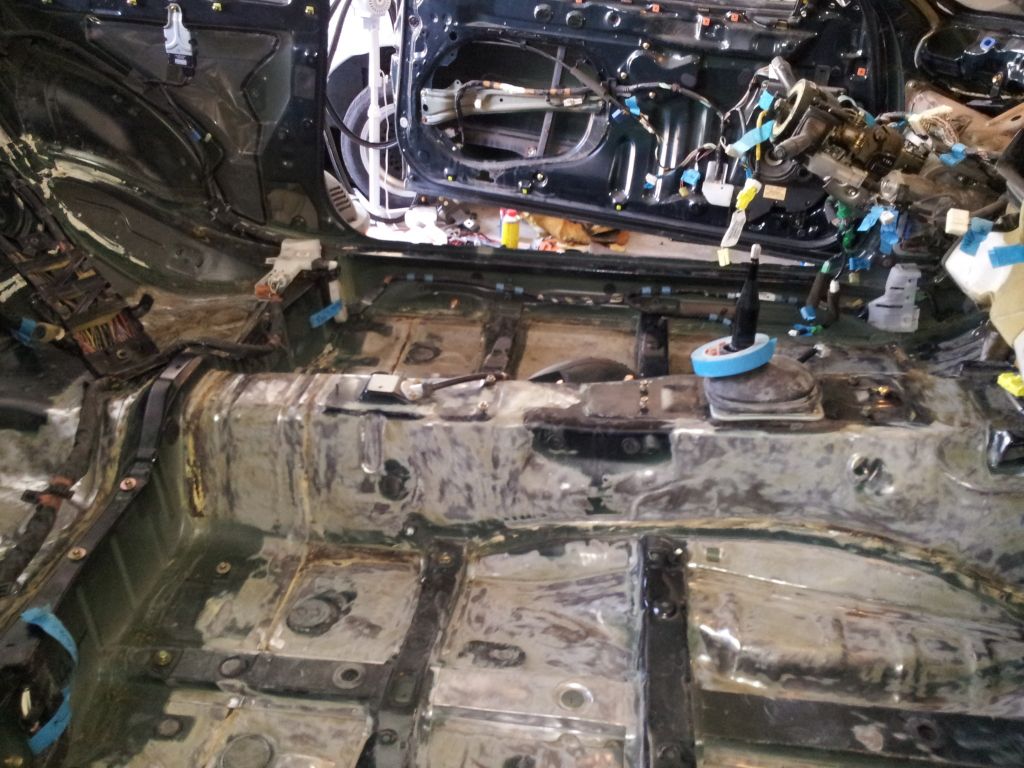
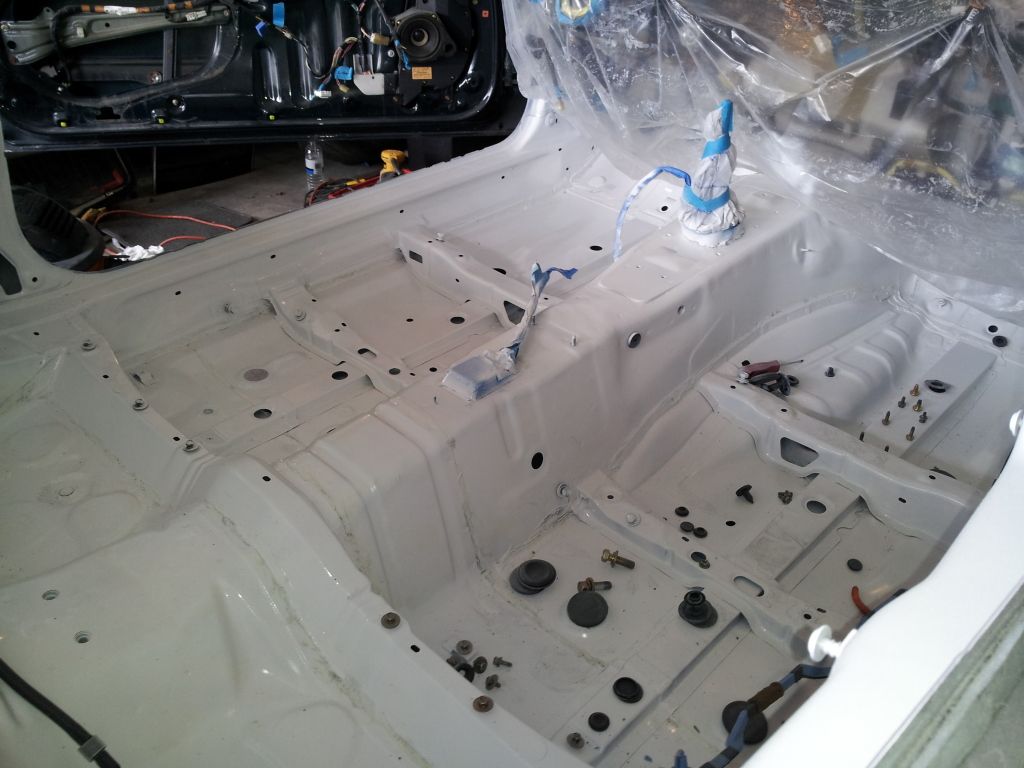
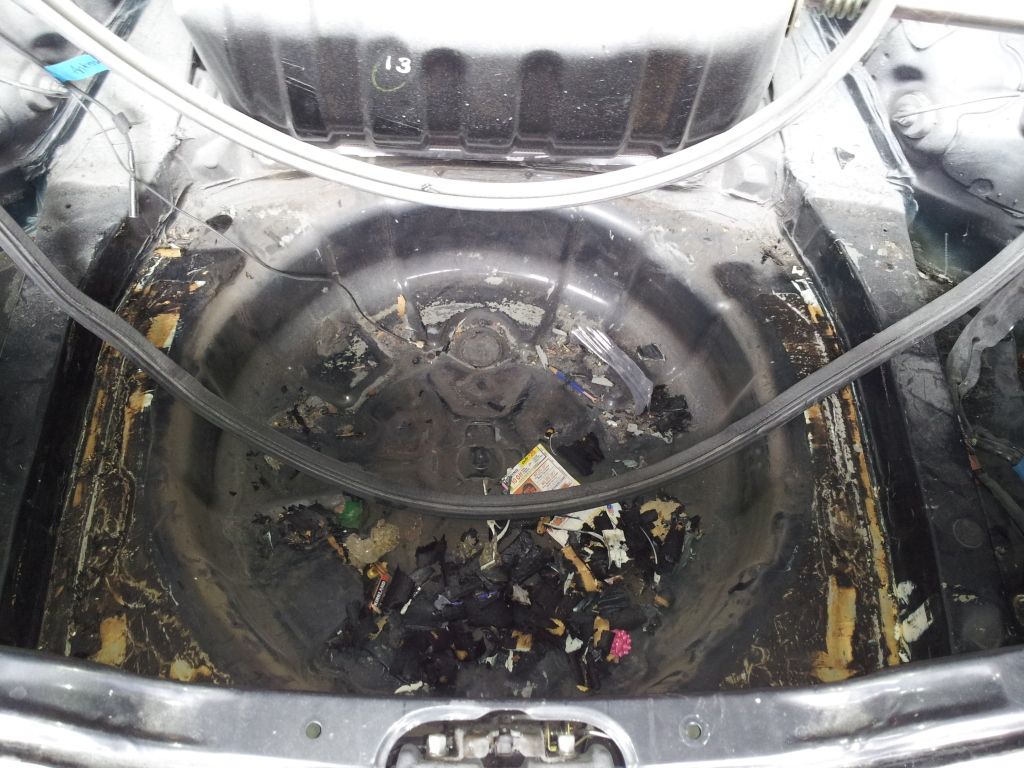
Made a bit more progress on my trunk yesterday.
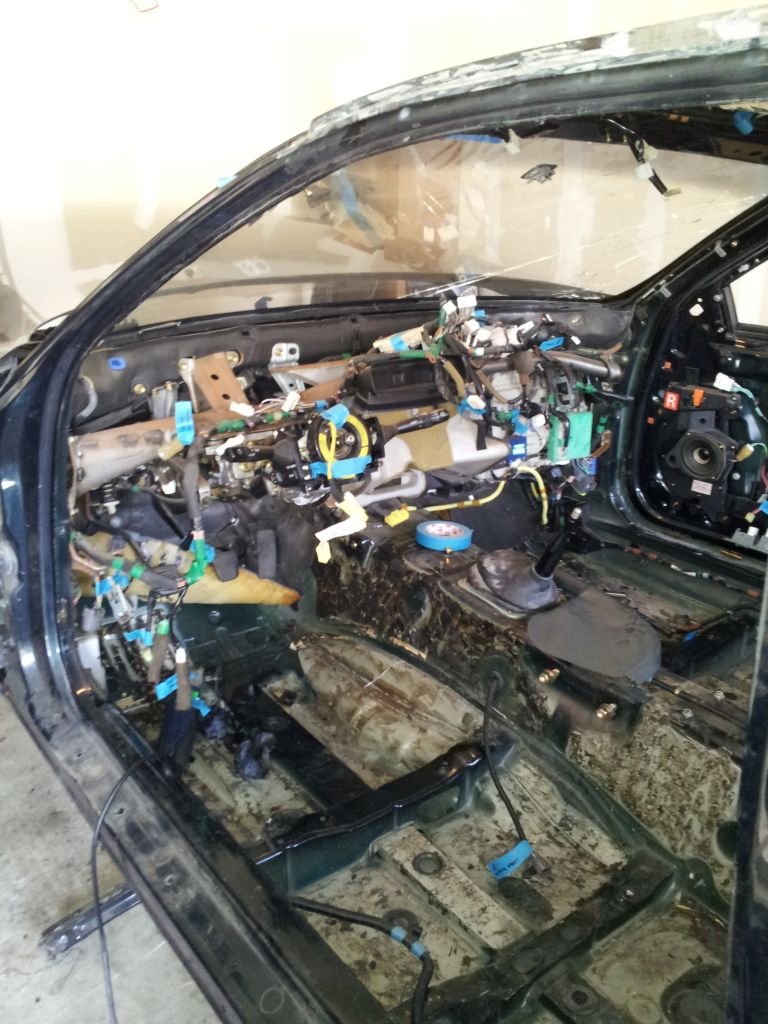
Got the sound deadening removed. BTW if you don't have dry ice, or don't want to pound the deadening out, a oscillating tool with a scraper attachment makes short work of the sound deadening. The oscillating tool works wonders for cutting the window seals to remove the windows too. I tried using a normal window remover tool, knives, long sharp blades, thin wire etc.. for removing the windows, but ended up cracking the front window, and shattering the rear passenger quarter window. Bought the oscillating tool and the rest came out with ease.
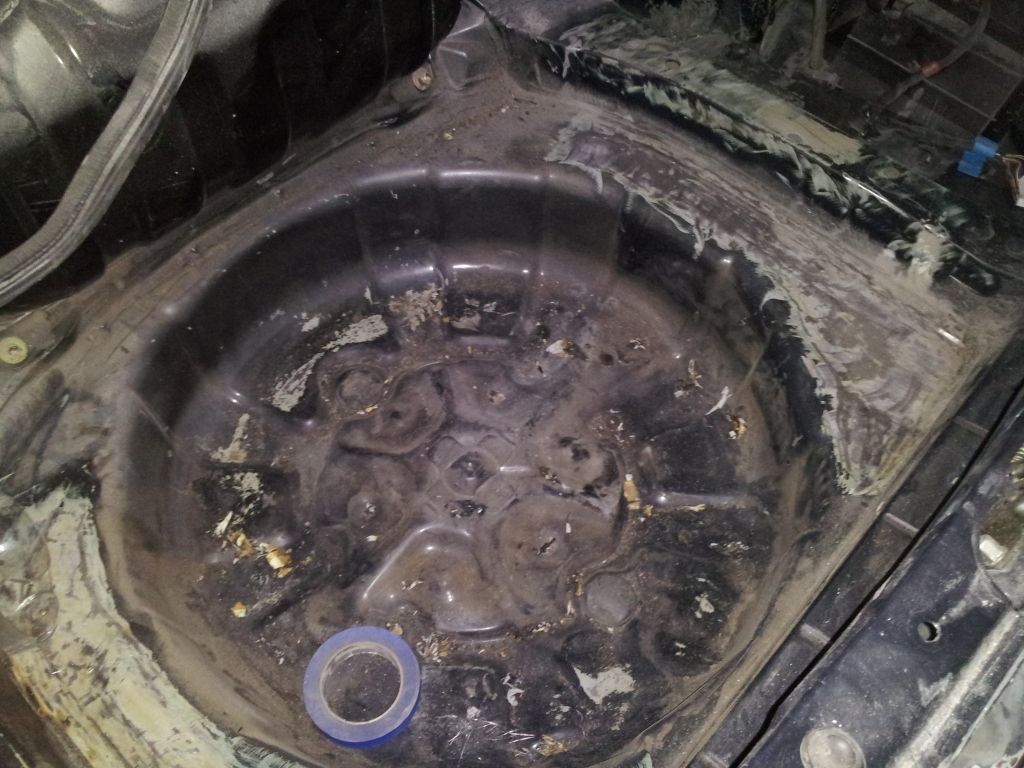
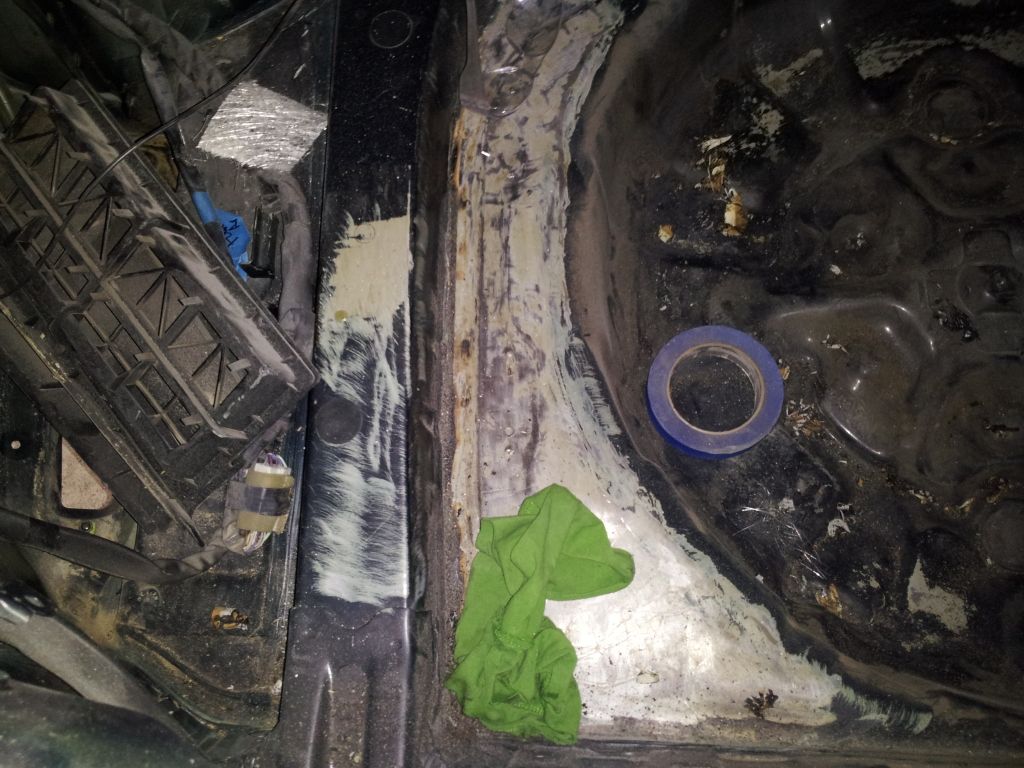
Cleaned up a bit more.
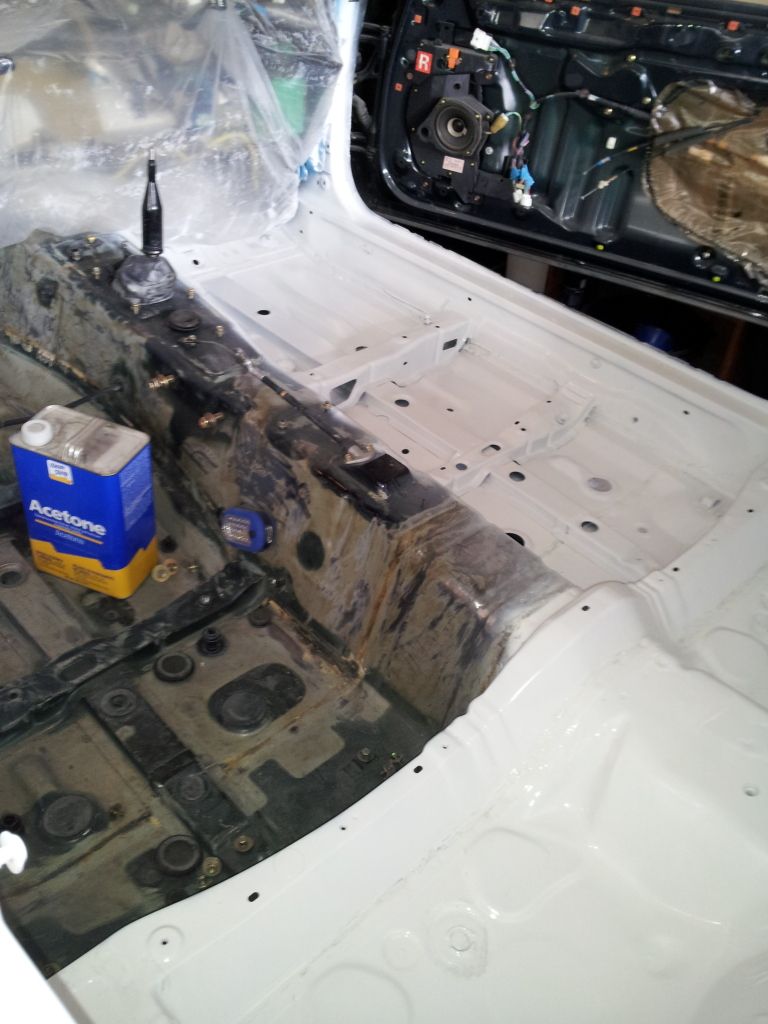
And if you are ever stripping a car to metal, this stuff is worth its weight in gold.
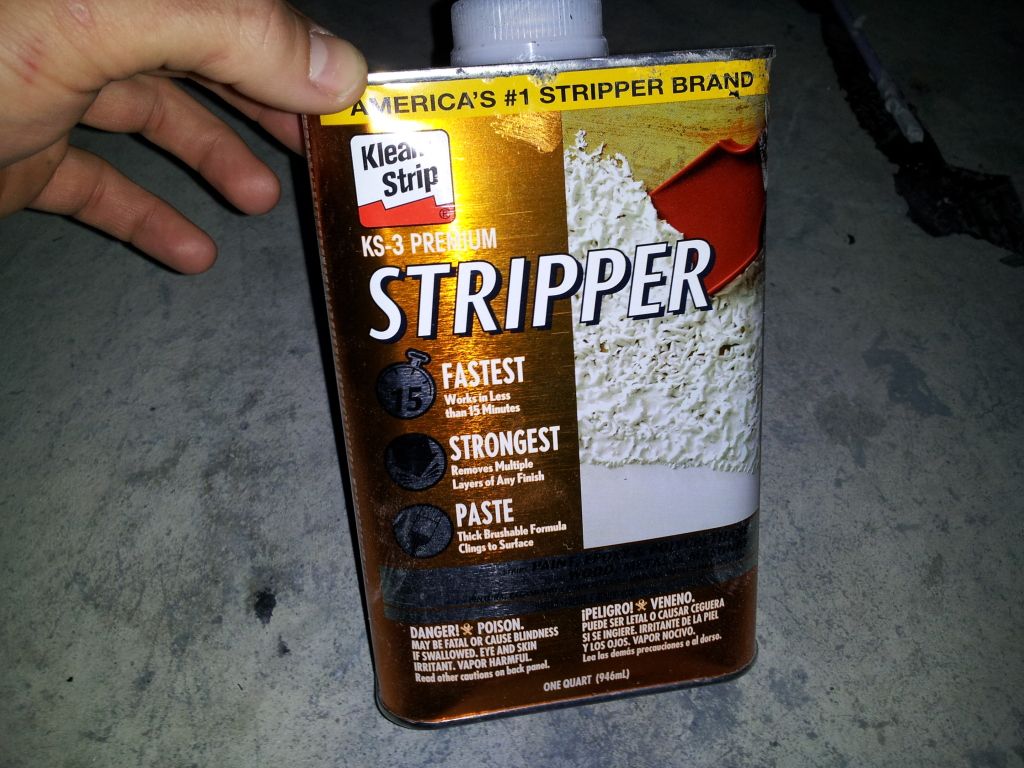
You literally lay it on with a brush, wait about 15minutes, use a 4inch scraper blade and it just peels up with minimal effort.
I was hoping to make more progress yesterday, but I had to work in the morning, and just flat out ran out of energy after a few hours yesterday. And of course I have family stuff and work today, so I won't get back at it until Monday.
Thanks,
Rick
First is what do you do with the VIN tags? All body panels were original and would like to keep the tags on there. So would you tape them off and work around them, or would you try to remove them and then put them back on after paint?
Next, on parts of the car that will not be seen once assembled, how aggressive do you get with the paint removal? Like, can I get away with just a surface scuff, or do I have to get down to raw paint or primer. Like around the window seal, which will be covered with a rubber seal.
And now for a bit of progress. I hate the stock antenna so it's gone.
Laid a few layers of fiberglass behind it for strength. Still need to smooth it out with body filler. I will do the same on the holes in the trunk for the emblems. This will give me the option to run with or without the emblems.
Made a bit more progress on my trunk yesterday.
Got the sound deadening removed. BTW if you don't have dry ice, or don't want to pound the deadening out, a oscillating tool with a scraper attachment makes short work of the sound deadening. The oscillating tool works wonders for cutting the window seals to remove the windows too. I tried using a normal window remover tool, knives, long sharp blades, thin wire etc.. for removing the windows, but ended up cracking the front window, and shattering the rear passenger quarter window. Bought the oscillating tool and the rest came out with ease.
Cleaned up a bit more.
And if you are ever stripping a car to metal, this stuff is worth its weight in gold.
You literally lay it on with a brush, wait about 15minutes, use a 4inch scraper blade and it just peels up with minimal effort.
I was hoping to make more progress yesterday, but I had to work in the morning, and just flat out ran out of energy after a few hours yesterday. And of course I have family stuff and work today, so I won't get back at it until Monday.
Thanks,
Rick

 07-17-12, 09:54 AM
#14
Driver
Thread Starter
iTrader: (1)
Join Date: Feb 2012
Location: Utah
Posts: 178
Likes: 0
Received 0 Likes
on
0 Posts

I sold the only bike that can take some serious abuse..
 07-17-12, 10:01 AM
#15
Driver
Thread Starter
iTrader: (1)
Join Date: Feb 2012
Location: Utah
Posts: 178
Likes: 0
Received 0 Likes
on
0 Posts
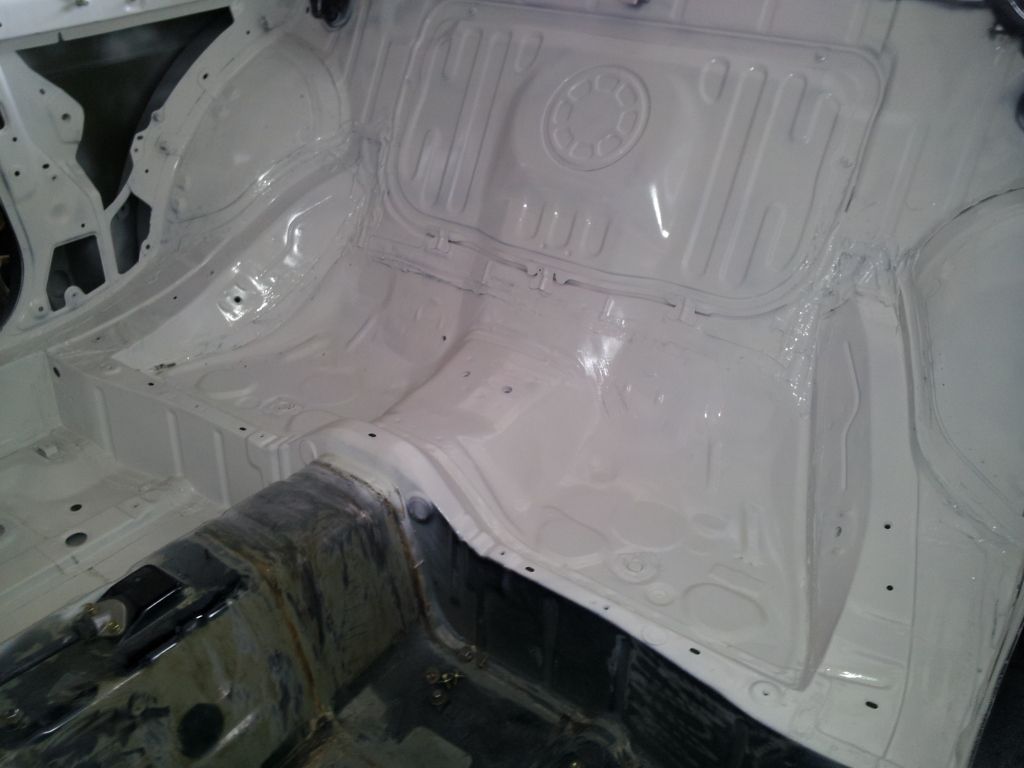
Made a bit more progress yesterday.
Filled in the antenna hole.

And got started on the rear driver side quarter and fender. The fender lips were wavy due to the pretty aggressive roll I did on them. But starting to look much better.
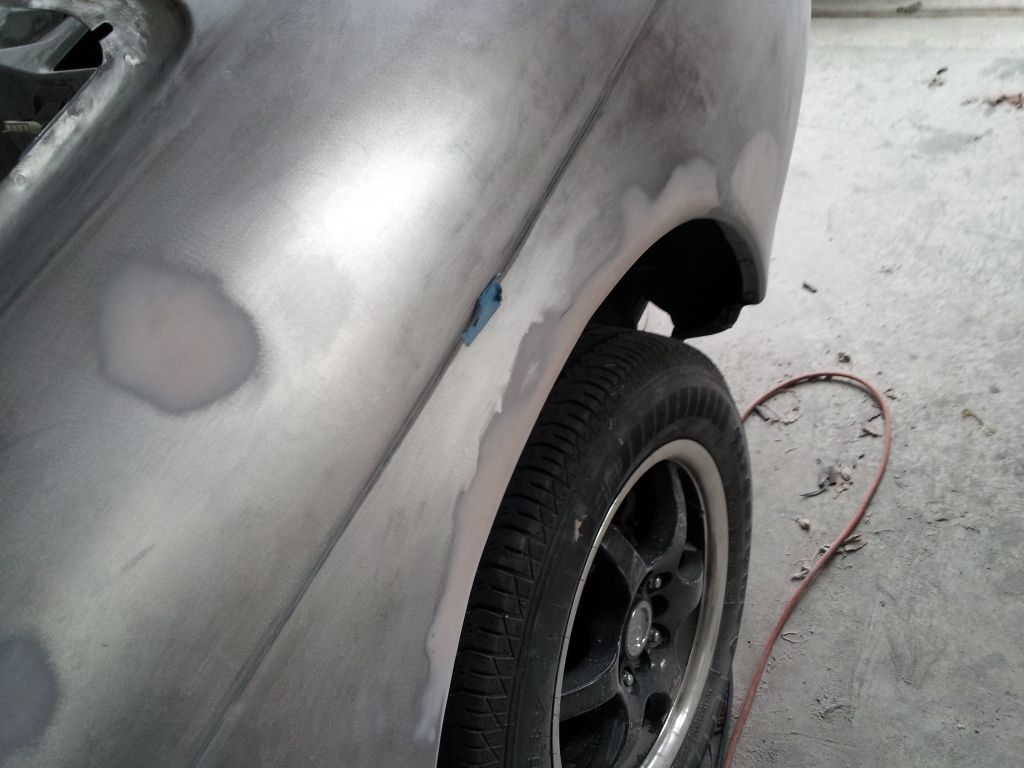
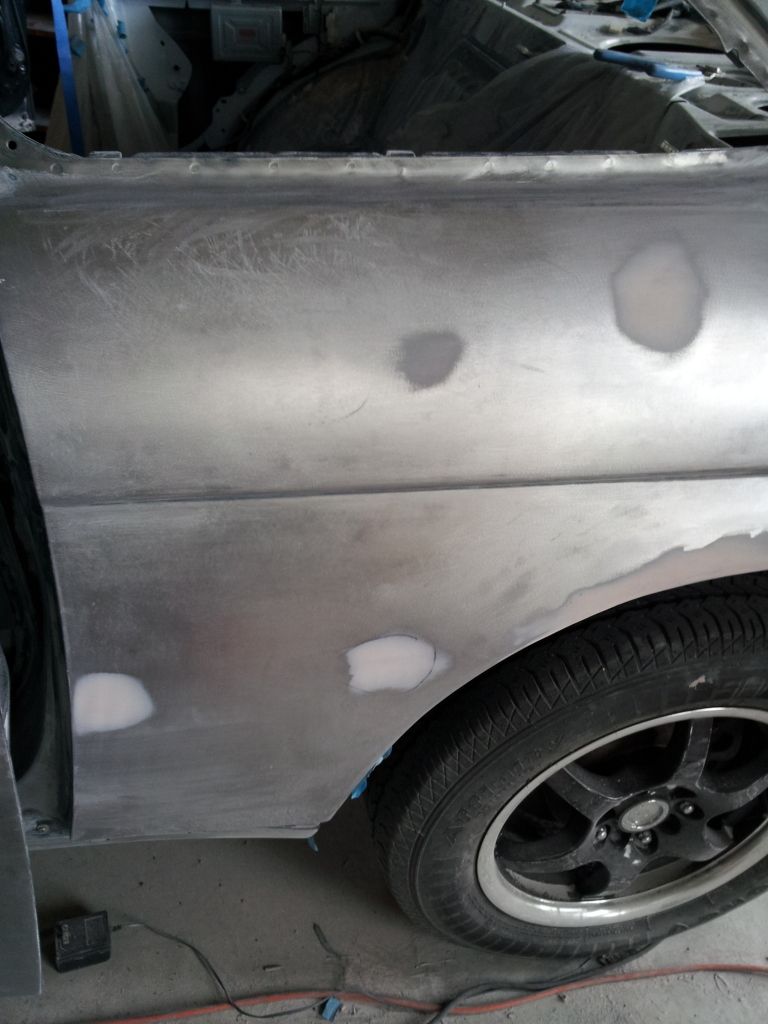
Also got my rear emblem holes filled in as well.
I wont be able to work on it today, but should be able to work on it a few hours everyday this week and hopefully all day saturday.
Thanks!
Rick
Last edited by scoobySC3; 07-17-12 at 10:06 AM.