
1993 sc300 build
 09-20-13, 06:36 PM
#91
Pole Position
Thread Starter

Join Date: Feb 2012
Location: nor cal
Posts: 272
Likes: 0
Received 0 Likes
on
0 Posts
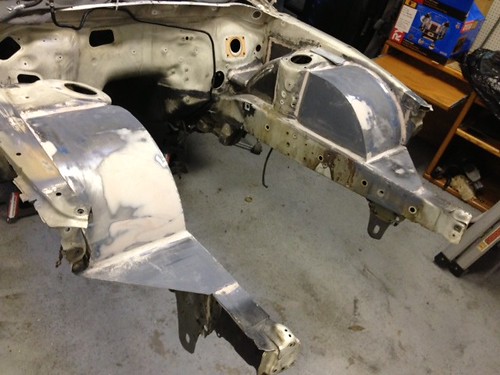
heres a picture with the side of the tub welded in, the drivers side tub is basically done, stil need to grind down some of the welds a bit and put seam sealer.
starting school tomorrow, so i wont have updates untill im back on break
starting school tomorrow, so i wont have updates untill im back on break
 01-03-14, 12:57 AM
#92
Pole Position
Thread Starter
Join Date: Feb 2012
Location: nor cal
Posts: 272
Likes: 0
Received 0 Likes
on
0 Posts
been doing a little work over break. tubbed the front and back of the towers, still need to add some metal to upper frame rails and then make my rad supports. almost done with front end
also cut out those frozen lca bolts. bushings were totally apart, they came right out

also cut out those frozen lca bolts. bushings were totally apart, they came right out
01-07-14, 07:32 PM
#94
Pole Position
Thread Starter
Join Date: Feb 2012
Location: nor cal
Posts: 272
Likes: 0
Received 0 Likes
on
0 Posts
some more pictures for the engine bay. finished most all the metal work/tubbing


I also started working on mounts for the s13 column. These are two pieces that I will weld into the dash bar to bolt into the column upper mounts, and then I will make a custom lower mount on the s13 column for the other 2 bolts (4 total).


other thoughts:
I will be using adjustable tie rod ends and modified knuckles.
im contemplating running an ls400 rack, it seems like they get more angle than the oem unit, but im not sure wether or not it will be worth it with modified knuckles and tie rod ends anyways. I would like to get lots of angle, comparable to the s13 big angle setups
Last edited by scott101; 01-08-14 at 03:06 PM.
02-06-14, 02:27 PM
#95
Pole Position
Thread Starter
Join Date: Feb 2012
Location: nor cal
Posts: 272
Likes: 0
Received 0 Likes
on
0 Posts
I have been looking at some other builds, and I was wondering if it would work well to run the radiator in front of the intercooler (radiator is the one closer to the front of car). would setting up the radiator and intercooler this was still cool effectively? Usually the intercooler is in front. I would like to do this to be able to run a specific radiator support setup but im not going to if it will cause overheating issues.
03-22-14, 05:44 AM
#96
Rookie

Join Date: Feb 2009
Location: NH
Posts: 54
Likes: 0
Received 0 Likes
on
0 Posts
I'm really excited for this build. I'm doing the exact thing to my 92 sc400 that I manually swapped. An earlier post you mentioned a clunk when tapping the brakes in reverse. I recently diagnosed that because mine was doing the exact thing and it was the front control arm bushing. The rear point of the lower arm in the front had so much slop that the clamping of the brakes would momentarily take the weight off the bushing and it would make the worn bushings "top out". I bought some prothane ones. I hope I like them. What did you use?
03-28-14, 04:23 PM
#97
Pole Position
Thread Starter
Join Date: Feb 2012
Location: nor cal
Posts: 272
Likes: 0
Received 0 Likes
on
0 Posts
I'm really excited for this build. I'm doing the exact thing to my 92 sc400 that I manually swapped. An earlier post you mentioned a clunk when tapping the brakes in reverse. I recently diagnosed that because mine was doing the exact thing and it was the front control arm bushing. The rear point of the lower arm in the front had so much slop that the clamping of the brakes would momentarily take the weight off the bushing and it would make the worn bushings "top out". I bought some prothane ones. I hope I like them. What did you use?
Ive been home for a week and Ive been working on the car
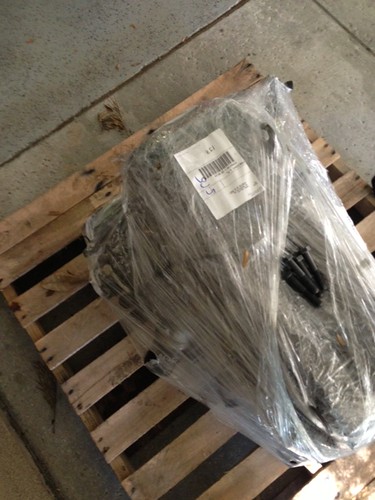
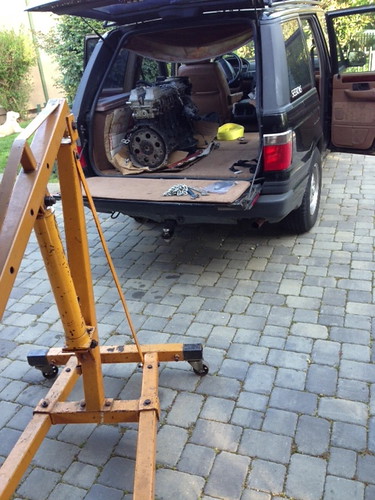
got the 1jz delivered
[IMG]
securedownload-10 by itsrainingrightnow, on Flickr[/IMG]
[IMG]
securedownload-1 by itsrainingrightnow, on Flickr[/IMG]
bottom end is for sale
[IMG]
securedownload-6 by itsrainingrightnow, on Flickr[/IMG]
got a is300 vvti 2jz
[IMG]
securedownload-2 by itsrainingrightnow, on Flickr[/IMG]
took the head off, which is for sale
[IMG]
securedownload-1 by itsrainingrightnow, on Flickr[/IMG]
[IMG]
securedownload-1 by itsrainingrightnow, on Flickr[/IMG]
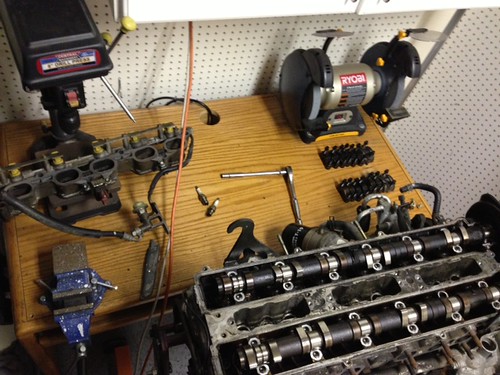
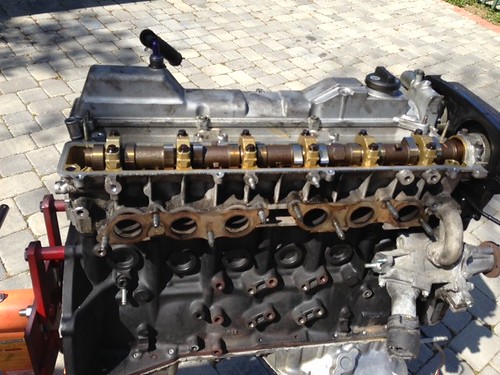
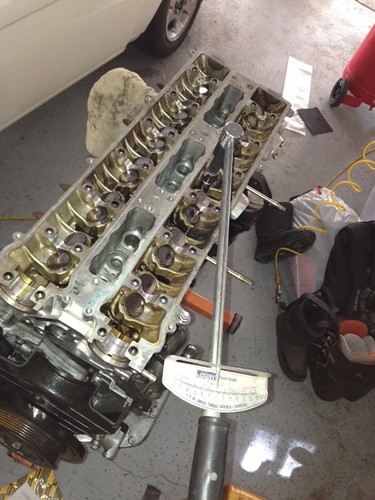
disassembled and cleaned the 1jz head
[IMG]
securedownload-5 by itsrainingrightnow, on Flickr[/IMG]
[IMG]
securedownload-3 by itsrainingrightnow, on Flickr[/IMG]
(I should have taken before pictures, it was pretty bad)
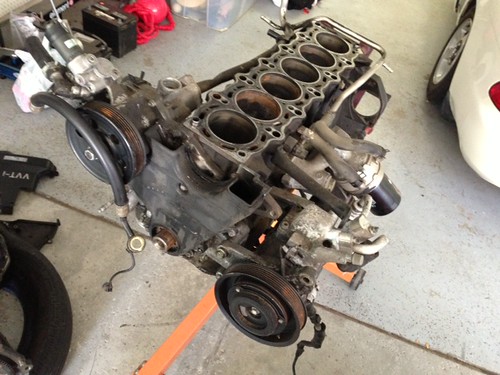
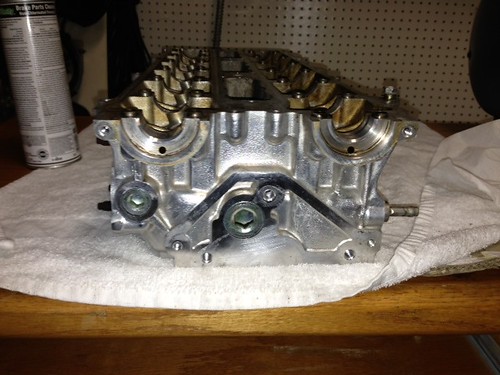
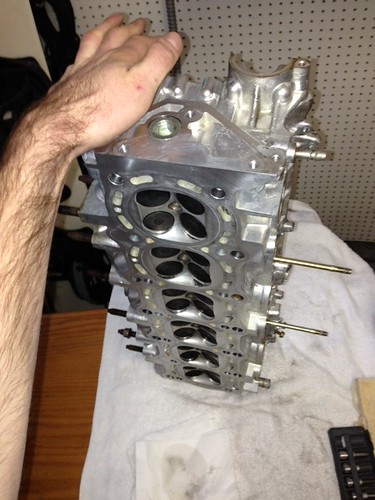
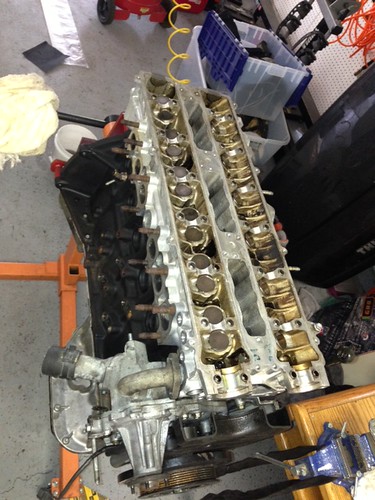
and just built my motor
[IMG]
securedownload-2 by itsrainingrightnow, on Flickr[/IMG]
[IMG]
securedownload-1 by itsrainingrightnow, on Flickr[/IMG]
[IMG]
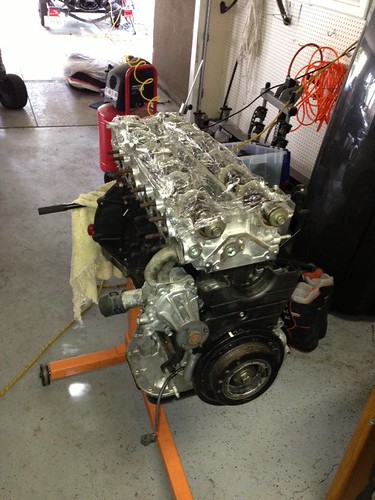
securedownload by itsrainingrightnow, on Flickr[/IMG]
then I cleaned and welded in my tow hooks (going to weld a bar between them for lower rad support and for chassis support)
[IMG]
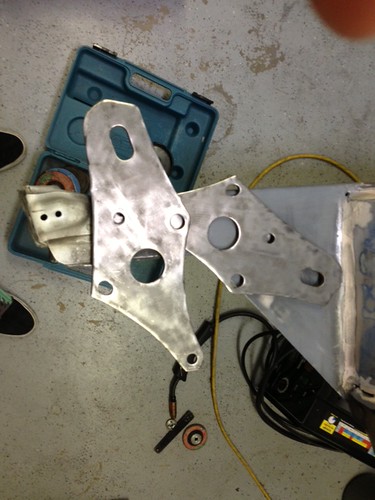
securedownload-8 by itsrainingrightnow, on Flickr[/IMG]
[IMG]
securedownload-6 by itsrainingrightnow, on Flickr[/IMG]
after that bar, only thing I have left on the front is a little more sanding, then the engine bay is ready for paint
Last edited by scott101; 03-29-14 at 03:06 AM.
03-28-14, 04:27 PM
#98
Pole Position
Thread Starter
Join Date: Feb 2012
Location: nor cal
Posts: 272
Likes: 0
Received 0 Likes
on
0 Posts
ive got a couple tech questions for people
Im using an is300 vvti bottom end for my 1.5jz build with a non-vvti 1jz head and will be putting this motor in my sc300.
1) will an sc300 rear sump oil pan swap right onto the block and work fine with dipstick, etc. (I know ill have to tap the pan for turbo oil return). I have to do this because the pan on it is front sump
2) what is the best place on the block to get oil feed for the turbo from. Ive heard of a sandwich plate from oil filter, a t fitting from the oil pressure switch. After looking at the block, I realized it might work well to use the existing oil line that feeds the vvti solenoid? Its already there and will no longer be serving any purpose. would this provide sufficient oil flow?
I just put the motor together and after torquing everything to spec, the exhaust cams spins fairly easily (the way I would expect it to) but the intake cam seems like its stuck or something. It turns, but takes nearly twice the pressure (with a wrench) to move it. Ive tried unbolting it and bolting it back in again using the correct sequence but it didn't make an improvement. Is there some trick to the intake cam? Could it be that my head or cam is out of spec?
thanks
scott
04-01-14, 09:13 PM
#100
Pole Position
Thread Starter
Join Date: Feb 2012
Location: nor cal
Posts: 272
Likes: 0
Received 0 Likes
on
0 Posts
going to pick up another 2jz to use the rods, oil pan, and some accessories from. hating myself for selling my original motor
how the car sits when i left it
how the car sits when i left it
 05-27-14, 10:53 PM
#102
Pole Position
Thread Starter
Join Date: Feb 2012
Location: nor cal
Posts: 272
Likes: 0
Received 0 Likes
on
0 Posts
painted up the front end. going to do one more coat. then im going to try to get my buddys father to machine down the front subframe mounts for me. should be going back together nicely once im home for the summer
08-01-14, 12:44 AM
#103
Pole Position
Thread Starter
Join Date: Feb 2012
Location: nor cal
Posts: 272
Likes: 0
Received 0 Likes
on
0 Posts
been working on the car here and there. put some things back in the front end and did the knuckles. I put the end under the knuckle and welded it the way my buddy whose a fabricator suggested: did a deep bevel and at least 4 passes on each side, and one pass in the front and 3 in the back. should be crazy strong
still need a bunch of parts
still need a bunch of parts

Thread
Thread Starter
Forum
Replies
Last Post