
Moosejaw's 98' SC300 Build


 04-20-12, 06:39 PM
#62
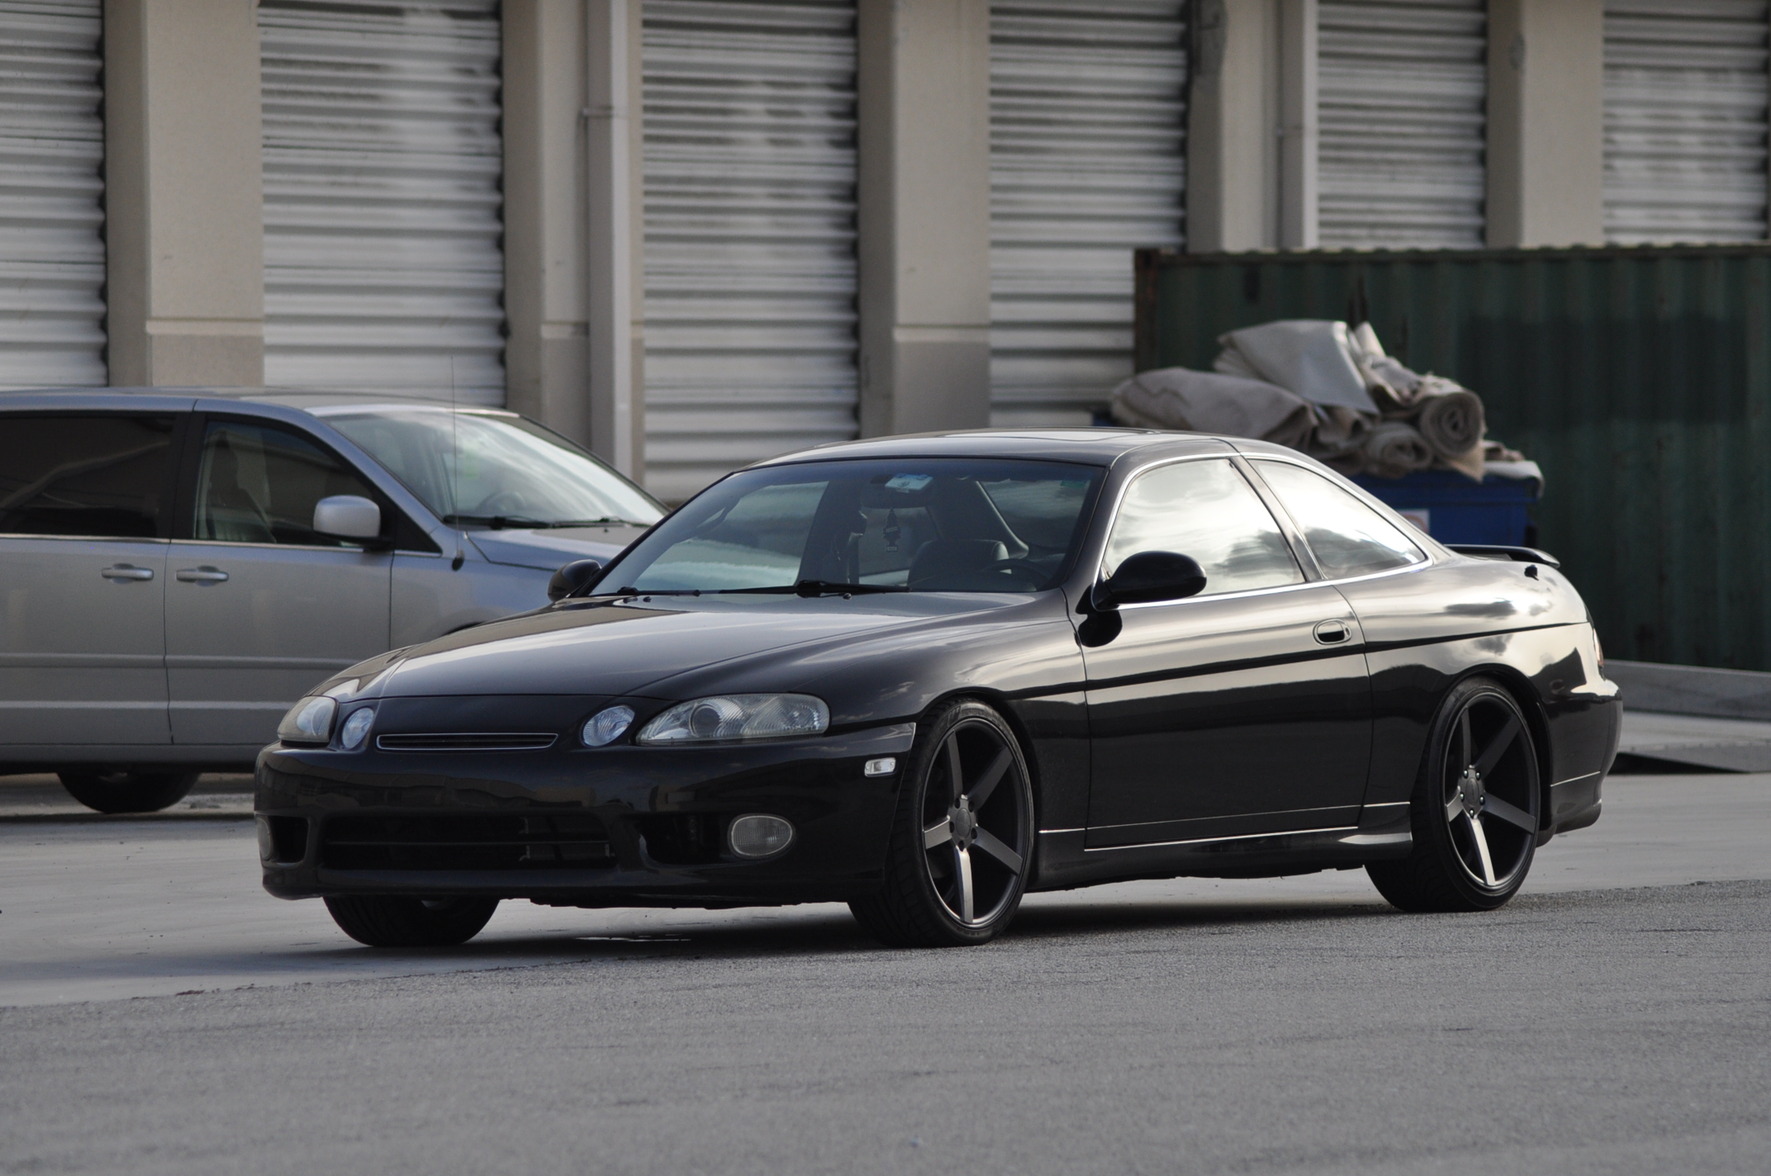
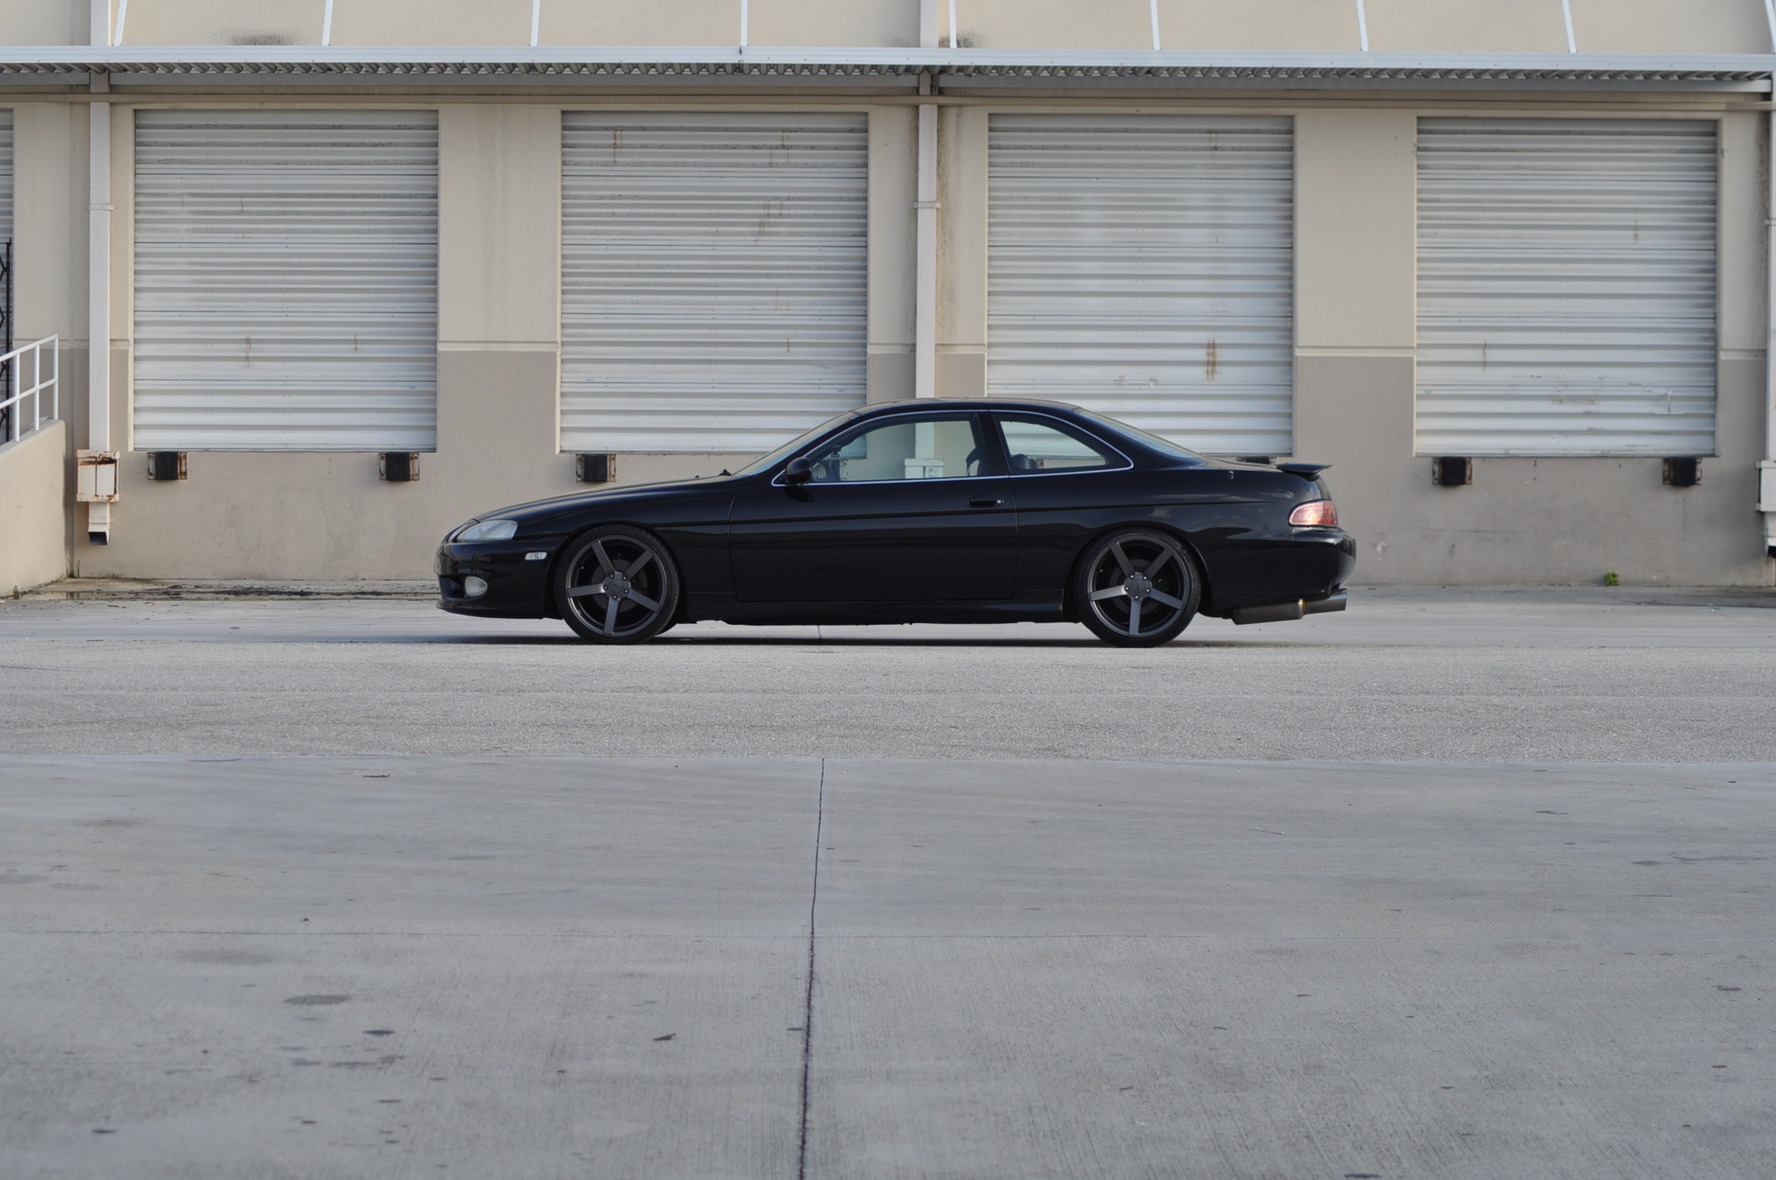
Honestly i cant make up my mind what i want when it comes to rims.....
Varstoens (but im not comfortable with the stretch tire look)
TSW Nurburgrings (a tad boring.....)
But im leaning towards Vossen CV3s when they come out in a 19" version (a dream that one day they will be in 19s)
04-26-12, 06:55 AM
#63
Well i just swapped the o2 sensors up front and what a mission.
I went to the website oxegensensor.com and got the part #s for my car, where i put those into amazon and bought them. Since my car is OBDII i got the Denso OEM style instead of Universal.
This was a pain in the ***!
1. The intake pipes were hard as hell to get off. Real rigid and stubborn. But once done, it's easy to get on and off with a 10mm socket.
2. Okay i see the first o2 sensor, i check the length of wire on new versus old and they are the same.
So i take a cheap adj. open end wrench and got it off. Put the anti-seize paste on the new one. Screw it in by hand and then finally tighten it with the target open end wrench. The part number was 234-4626 which was correct.
3. Time for the back one, it's stuck. PB Blaster didnt help. It got dark, i left it for the morning in my garage with the hood up and a rag placed in the intake manifold.
4. Next morning, with the PB Blaster, still stuck. So i called my buddy to use his o2 sensor socket. Still wouldnt come off.
5. I used a breaker pipe on the ratchet wtih a small hammer, no luck. Not going anywhere.
6. Called my mechanic buddy who looked at it and said. You need a gooseneck ratchet. We have a winner. Came off!
7. I get the new one and run the wire up to the connector. Amazon sent me the wrong connector which was part no 234 - 4622. I checked the amazon box versus the amazon invoice and again versus the oxygensensors.com website. Everything checked out.
I also called my buddy above and looked at his 1997 SC. The VVTI motors have a different header design than the non-VVTI. The manifold goes further back into the firewall on the VVTI, which is when i noticed the 02 sensor R&R looks easier on the non-VVTI looks easier than my car.
8. So i summarized rather than return the 02 sensor to Amazon, just take the old connector, strip it and put it on the new one. So out it came. and I swapped one wire at a time into my new hybrid O2 sensor. Well, new problem the wire was slightly shorter, so i removed the male connection from it's mount and zip-tied it to a vacuum line. Kind of ghetto but i haven't driven my car for four days because of this and i was tired of dealing with it.
9. Finally done, started up the car, let it idle for ten minutes and check engine light is gone. I didn't have to rescan it. New problem the car starts smoking, so I shut the car down, pop open the hood and look for the source at 10pm at night with my Iphone.
Neighbor comes over with his fancy flashlight, cant find the source, jack up the car to look for a plastic bag stuck to the exhaust, nope. Nothing fell into engine compartment while working on the car. So after 30 minutes of retracing my steps. My neighbor asks...."Did you use any WD-40 on the bung hole?
Ah-ha! The PB Blaster from two days before was the culprit ! Smoke went away after 10 minutes.
So far so good after 25 miles....No check engine light, i saw 30 mpg on the highway on the way to work. Before i was getting 22mpg. BTW I drive 65.
Summary: One of two things the 02 sensor connections are different on the 98+up VVTI models than what is called for OR the website oxygensensors.com has the wrong part number for the rear upstream header.
Amazon and Oxygensensors.com has the part number listed as 234-4622, I believe the correct part number is 234-4630.
04-28-12, 08:01 PM
#64
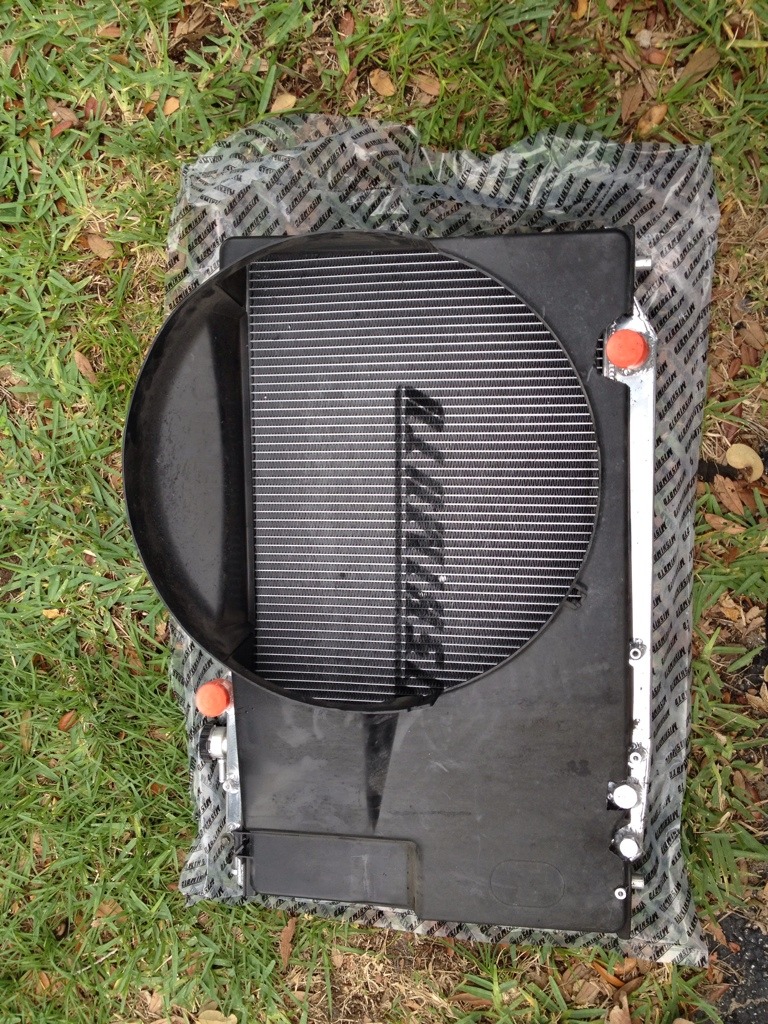
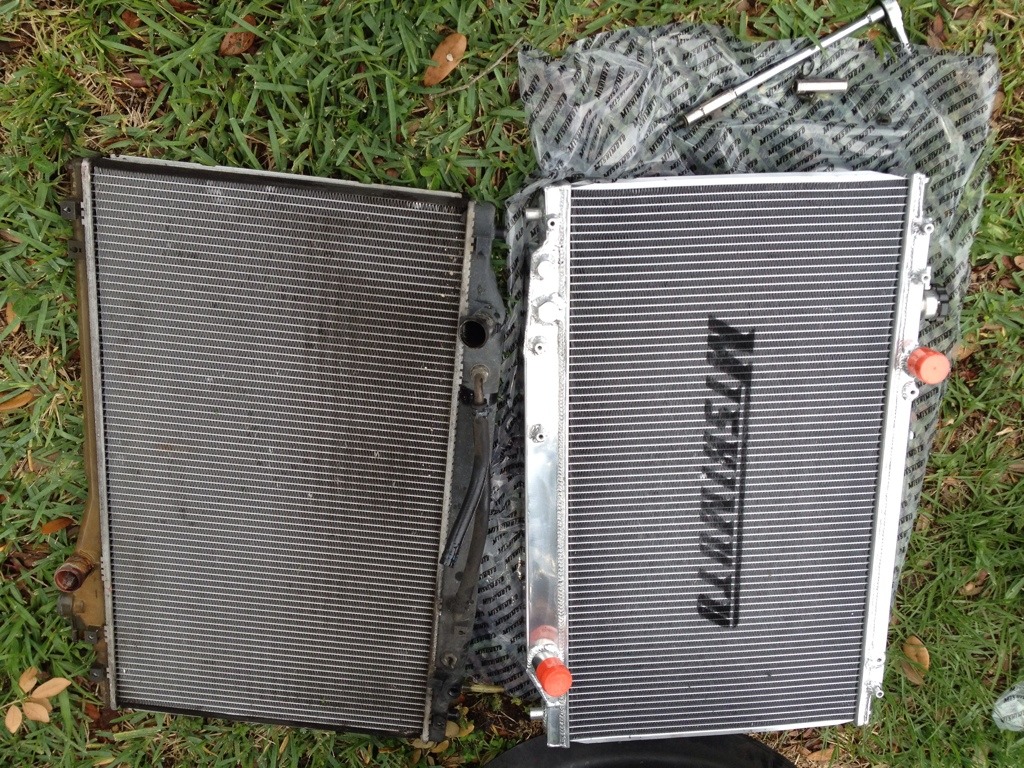
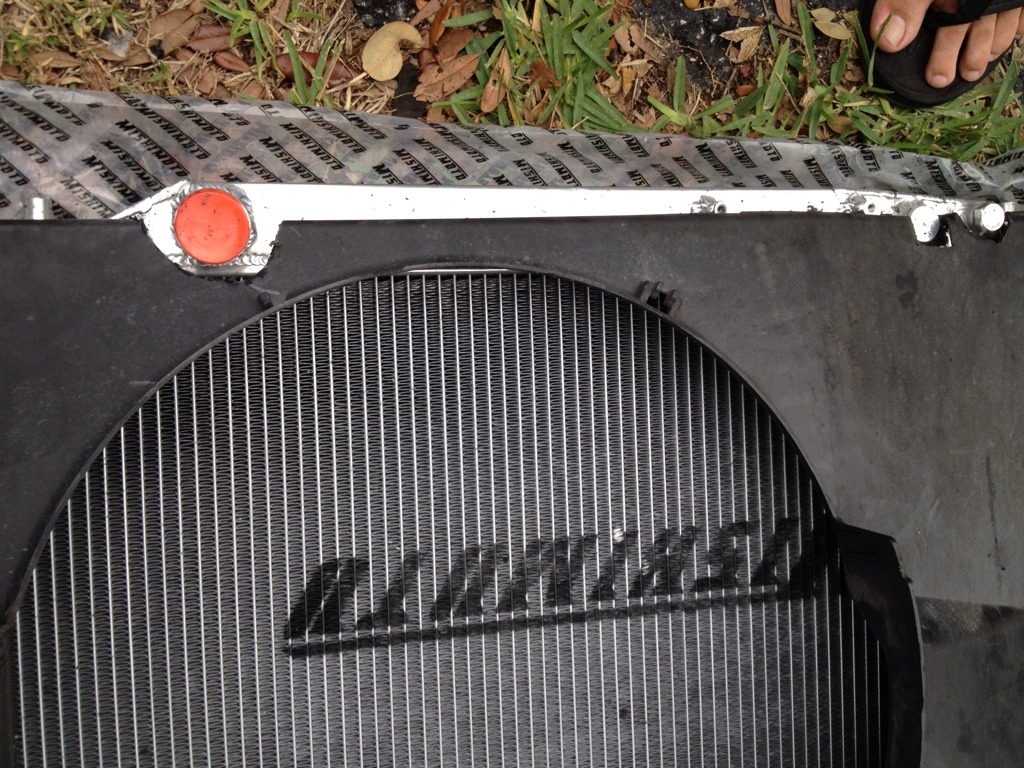
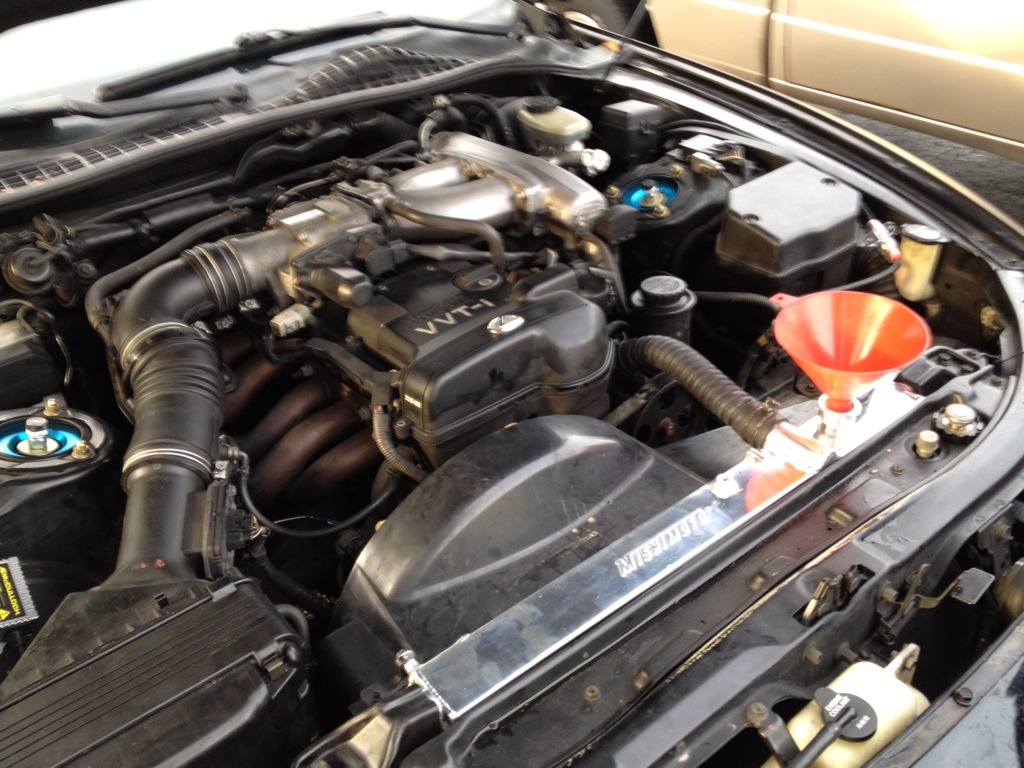
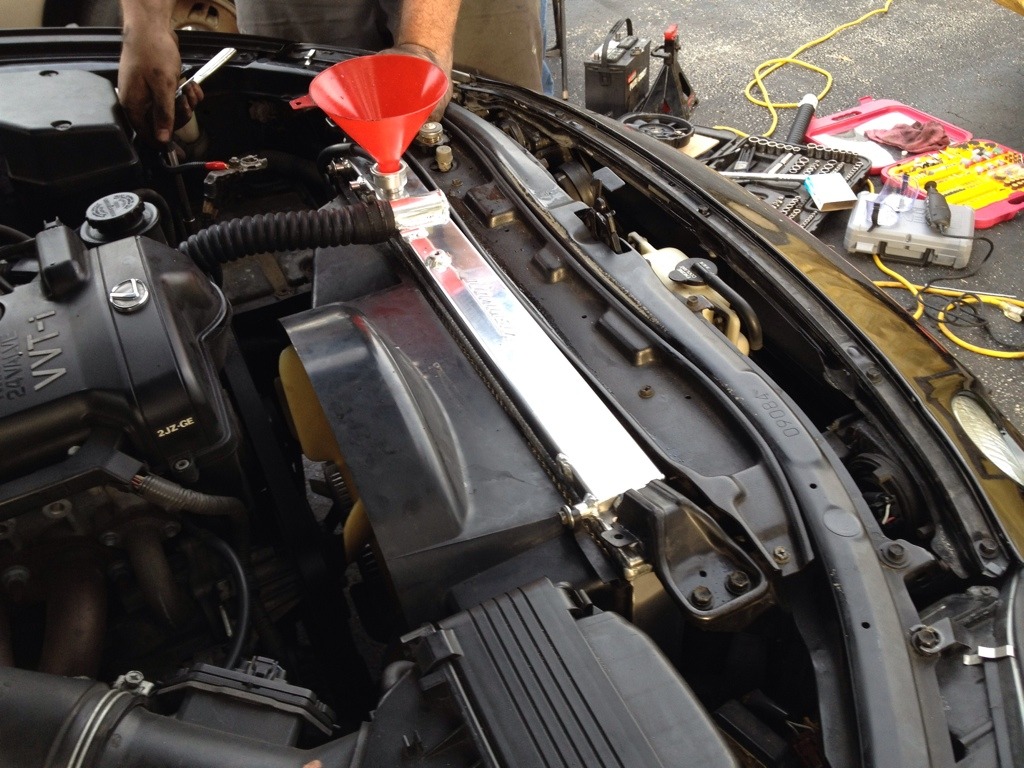
This was a nice upgrade.....
Radiator was on it last's leg
I bought a OEM Radiator from Amazon and then i started reading the threads about the mishimoto install with a separate tranny cooler which is what i did. Turned out nice.....
So i sent the Amazon Radiator back
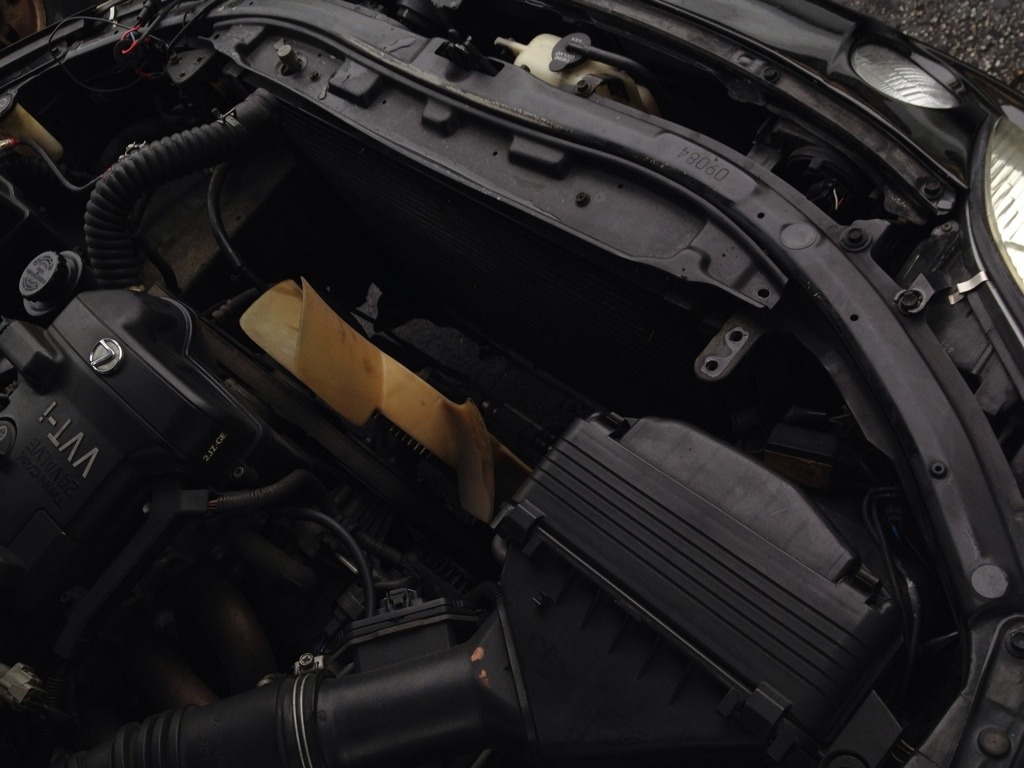
Install was okay. I used the existing rubber mounts at the bottom which fit perfect with mishimoto rad.
The two top brackets needed some work to get them flatter to fit on the new radiator.
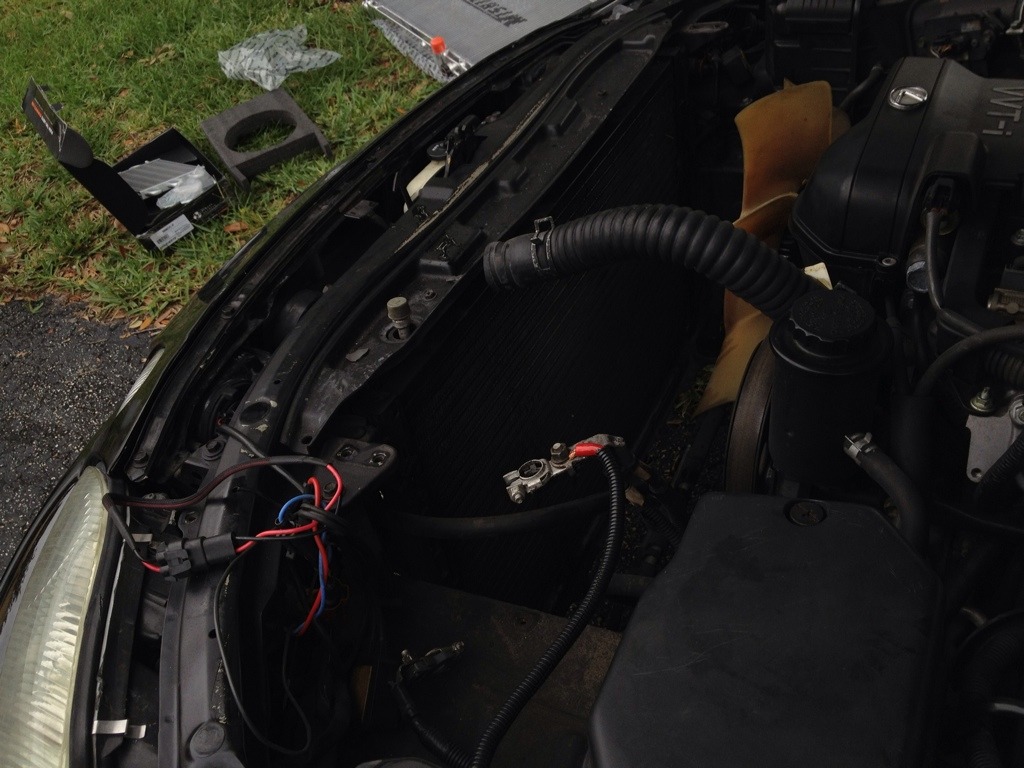
The most time consuming part was trimming the shroud with a dremel bit to fit the battery tray. It looked like stevie wonder did it.
I had to ziptie the radiator to the shroud in two places as it was hitting the fan.
Transmission cooler I mounted to the condensor to get the most air.
Filled it up with 1.5 gallons of Toyota Premixed Coolant and was good to go.
Radiator was on it last's leg
I bought a OEM Radiator from Amazon and then i started reading the threads about the mishimoto install with a separate tranny cooler which is what i did. Turned out nice.....
So i sent the Amazon Radiator back
Install was okay. I used the existing rubber mounts at the bottom which fit perfect with mishimoto rad.
The two top brackets needed some work to get them flatter to fit on the new radiator.
The most time consuming part was trimming the shroud with a dremel bit to fit the battery tray. It looked like stevie wonder did it.
I had to ziptie the radiator to the shroud in two places as it was hitting the fan.
Transmission cooler I mounted to the condensor to get the most air.
Filled it up with 1.5 gallons of Toyota Premixed Coolant and was good to go.
05-28-12, 05:37 PM
#65
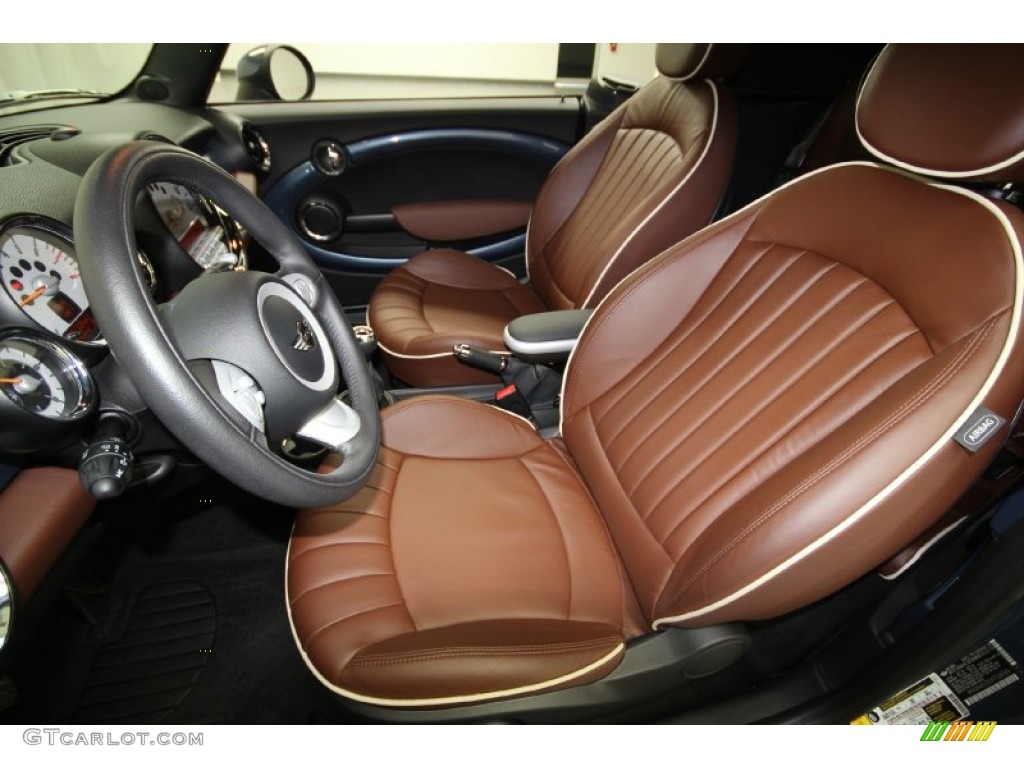
So im looking at redoing the leather on my car and i ordered these samples from leatherseats.com
What do you guys think?
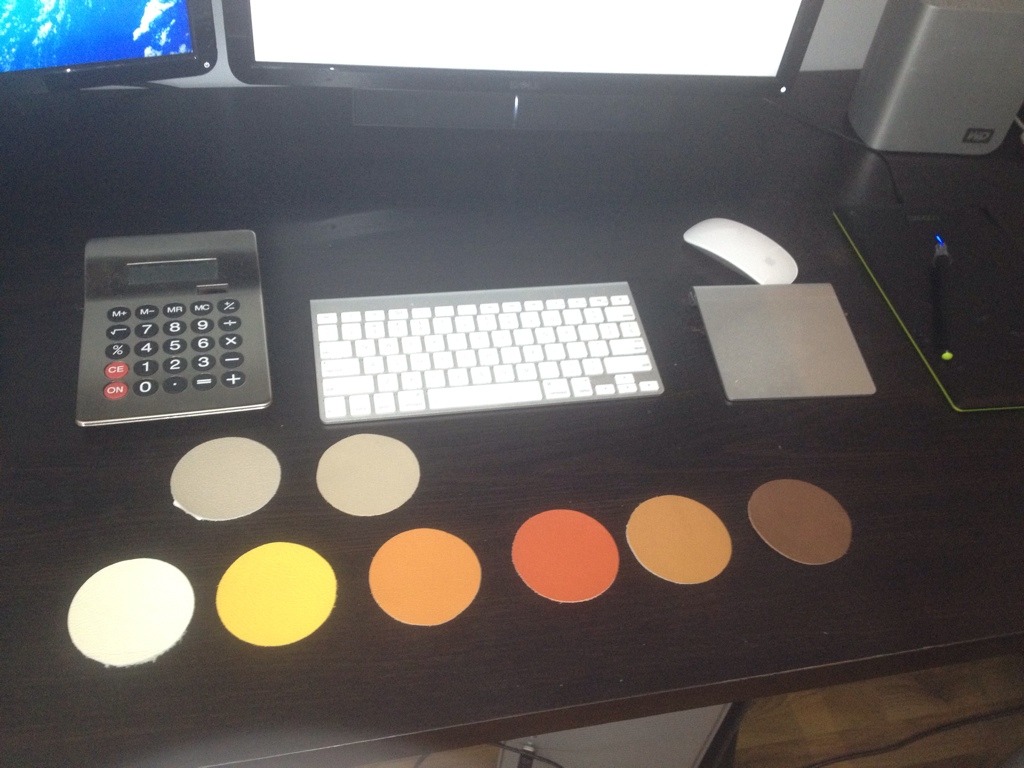
1. White.....will get dirty very fast for a daily.
2. Maize (Yellow) I like
3. Orange
4. Tangerine
5. Burnt Orange
6. Chocolate
Before you all jump on the hate yellow bandwagon. I was inspired by the NSX and the first generation M6
Obviously I would just do only the seats in yellow (or any other color).
Take a look at his NSX
Yellow

Orange is my second choice

Chocolate w/ white piping might be interesting.......(insert mini joke here)
Tangerine (whole body tho')

What do you guys think?
1. White.....will get dirty very fast for a daily.
2. Maize (Yellow) I like
3. Orange
4. Tangerine
5. Burnt Orange
6. Chocolate
Before you all jump on the hate yellow bandwagon. I was inspired by the NSX and the first generation M6
Obviously I would just do only the seats in yellow (or any other color).
Take a look at his NSX
Yellow
Orange is my second choice
Chocolate w/ white piping might be interesting.......(insert mini joke here)
Tangerine (whole body tho')
Last edited by moosejaw2; 05-28-12 at 06:41 PM.
06-05-12, 07:21 AM
#67
Rookie
Join Date: Aug 2011
Location: Florida
Posts: 67
Likes: 0
Received 0 Likes
on
0 Posts
 06-05-12, 07:40 AM
#68
Not my cup of tea. Those exotic colors in my opinion belong in select cars with a select line, NSX, and BMW M alike. I'm not feeling the change in color primarily due to the plumpness of the seats and their overall shape. I'd try to get something closer to black Nappa Leather, something smooth but textured / perforation.
I have the opportunity to make it unique, may as well take advantage of it.

 07-20-12, 11:58 AM
#72
Lexus Test Driver
Join Date: May 2011
Location: Miami, FL.
Posts: 1,393
Likes: 0
Received 0 Likes
on
0 Posts
i like the orange or brown seeing as those are my 2 color choices too lol. except the brown i like is from the 911 i think 2001 ill get u a pic. i dnt mind sharing my ideas lol.
