Fidel Cashflo's 1996 LS400 drift car build

 12-23-11, 02:17 PM
#138
Driver
Thread Starter
iTrader: (1)
Join Date: Apr 2011
Location: FL
Posts: 152
Likes: 0
Received 0 Likes
on
0 Posts
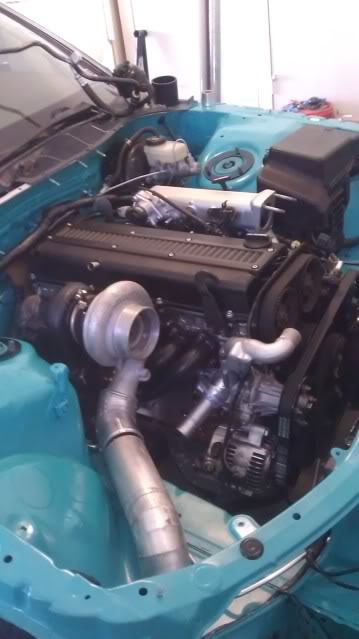
Well it’s the day before Christmas eve. The car is really close to running, just need to run a few more wires, and plumb some dumb stuff up.
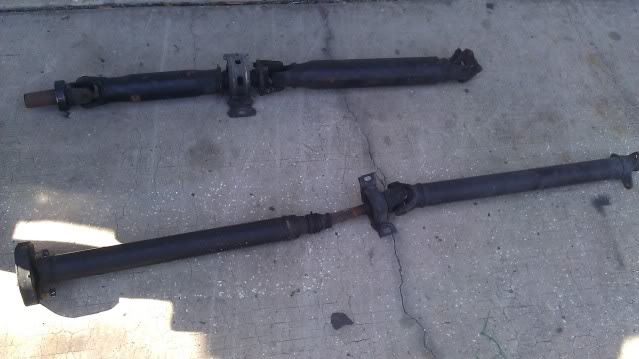
I have these dumb driveshafts here, not using either of them, just doing upgraded U-Joints 3” steel driveshaft with new yokes. I need to get rid of this R154 driveshaft y0.
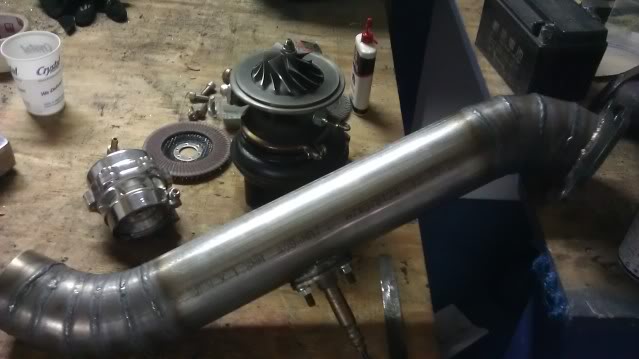
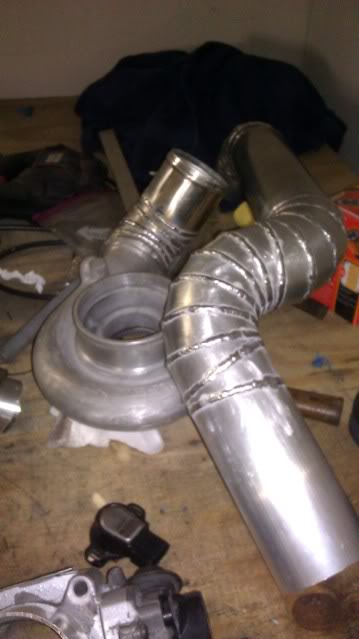
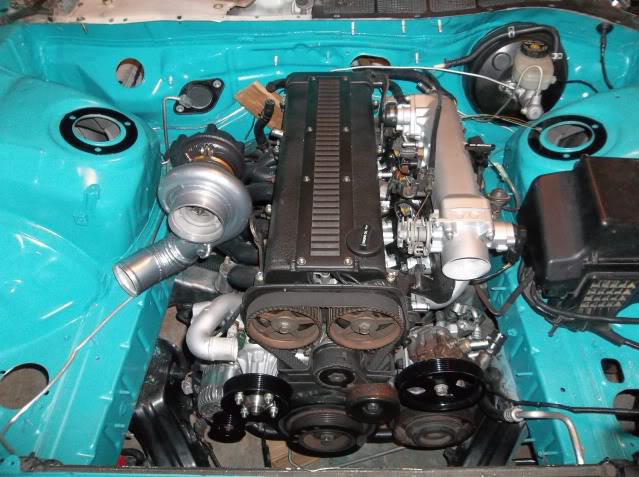
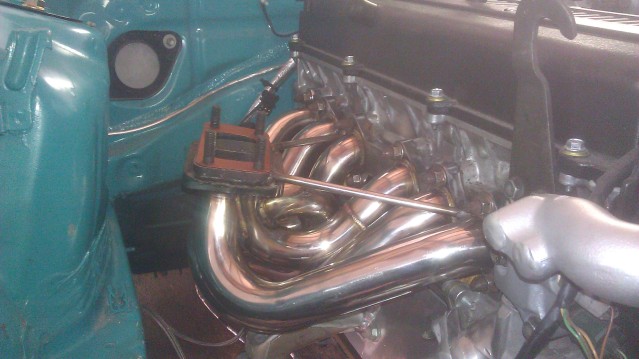
Downpipe is finally done.
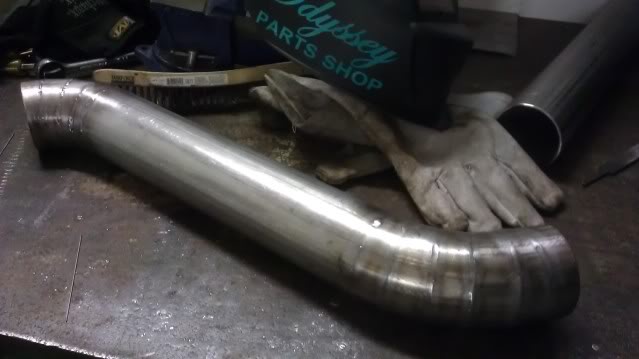
Just awaiting a V-Band for the bottom to attach to the exhaust were making.
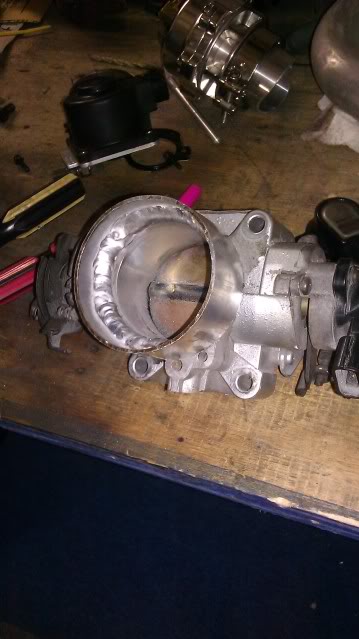
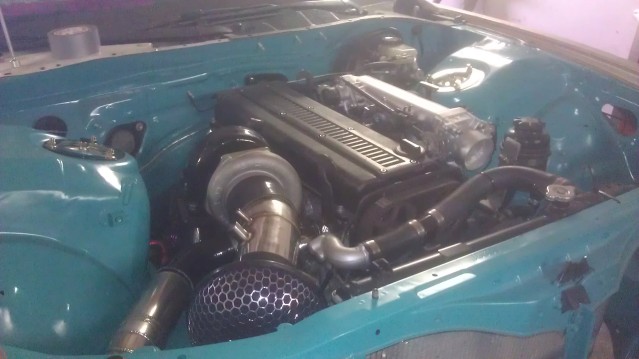
I didn’t like the look of a 90 degree coupler off of the throttle body, it looks like garbage, screw that. I cut the throttle body off, got rid of that traction control nonsense. Ranlet welded a 3” ring to my throttle body. I’m starting to get the hang of welding aluminum now.
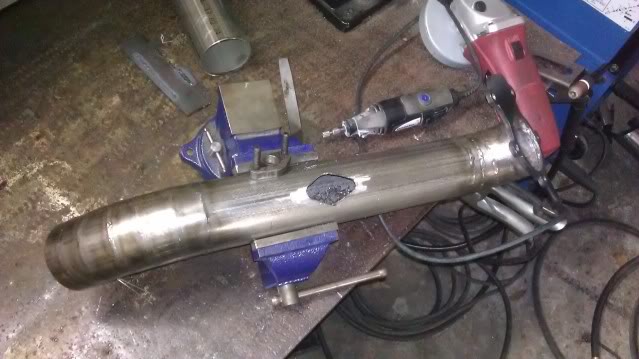
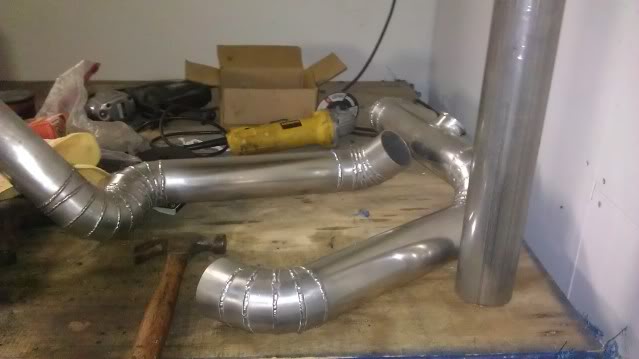
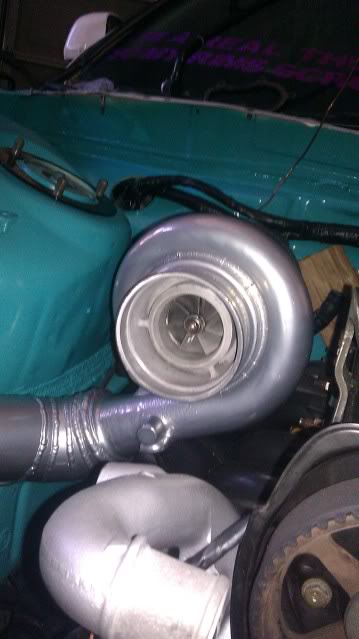
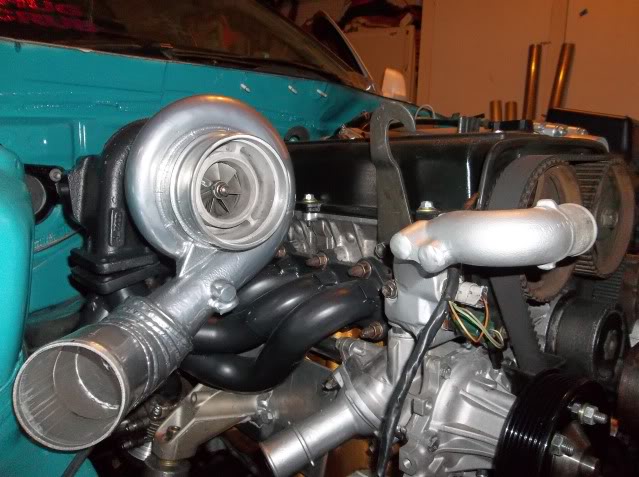
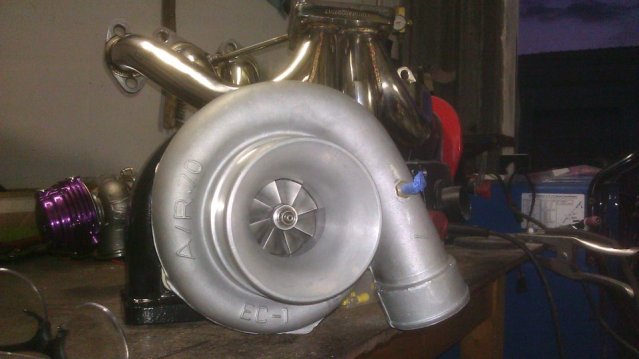
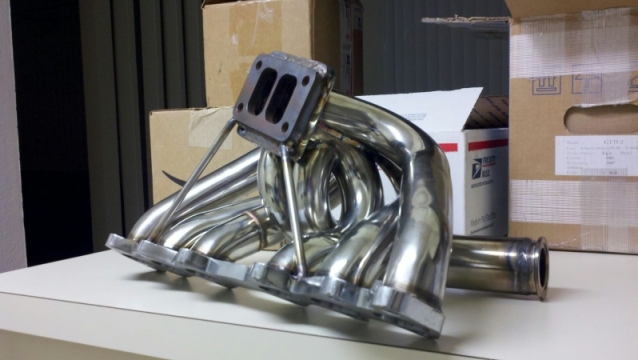
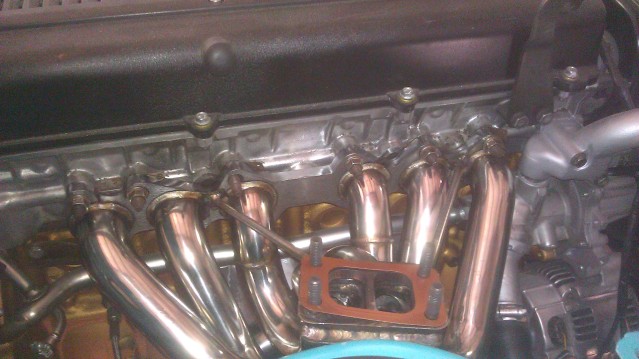
Turbo housing and hotside lower piping almost done.
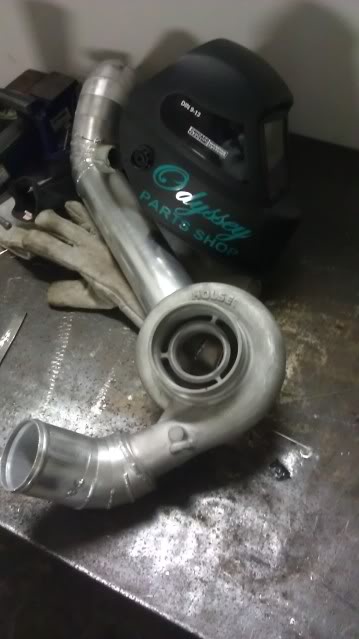
After they were welded, we test fit yet again. Win.
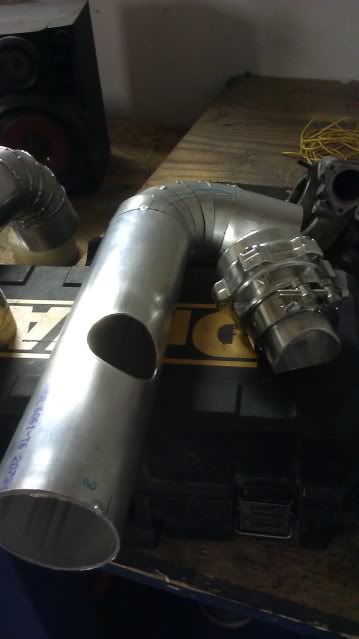
Blew a hole out for the blow off valve.
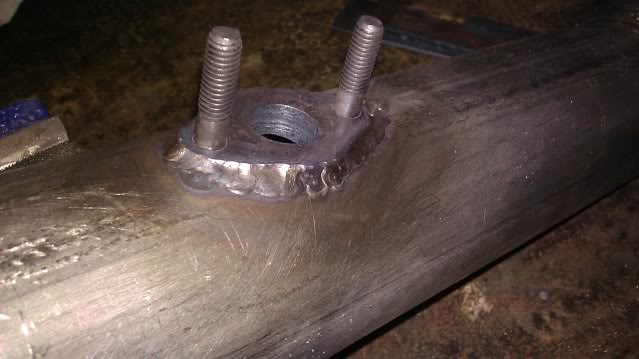
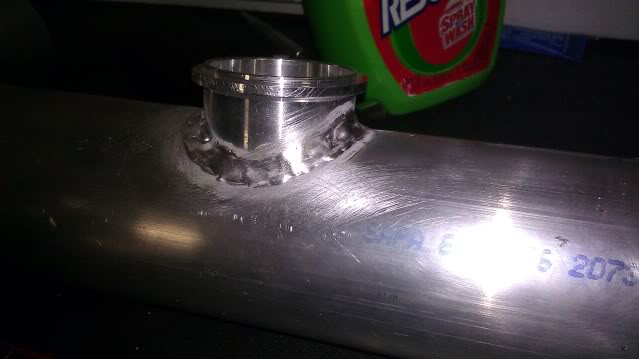
I welded the flange to the piping (first time actually welding something aluminum {of importance}). Came out pretty ok.
Random
Chrome Polish Snakes.
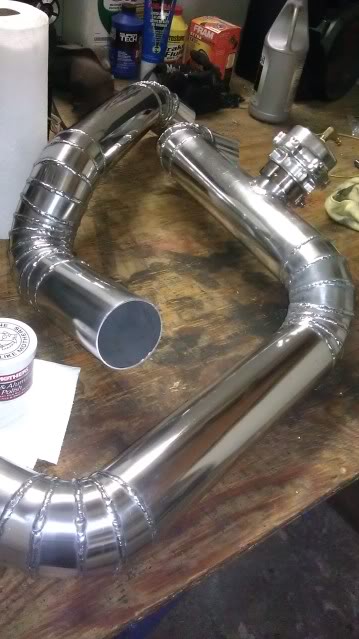

Got my turbo housing powdercoated since Holset uses some poor quality casts. Super porous. Definitely wasn’t going to spend the rest of my life trying to polish it. This new color is hot though.
I’m actually thinking of getting my valve covers/coolant neck/intake manifold coated this week. Still haven’t decided.
So my chassis harness wiring was altered before me purchasing my car. Some shotty *** place wired in this alarm system, bypassed the factory battery wiring and all kinds of drama. So I’ve been spending A LOT of time going through the FSM trying to figure everything out.
Should be two wires at the alternator fusible link. But….. Someone decided to make their own wiring for the battery. Yeah.
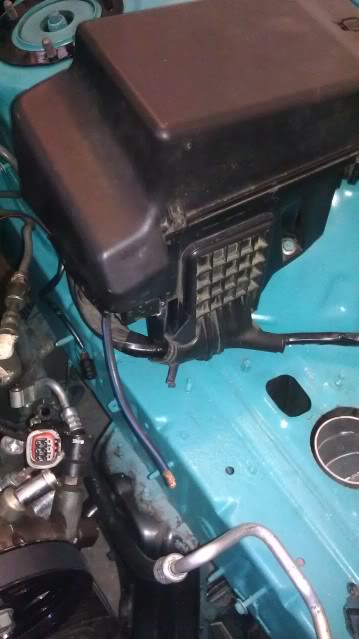
I decided to wire Fans, Fuel Pump, and Starter to switches. It’s easier that way. They’re going to be wired up properly 30Amp Relays, the switches themselves are 50Amp. Everything gets power from a separate fusebox I installed. It’s pretty nifty.

PS. I’m keeping the woodgrain!
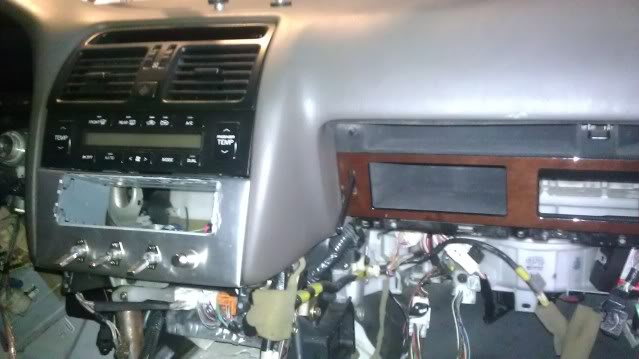
I had a huge sheet of aluminum so I’ve been trying to put it to good use.
It’s all boxed in so its sturdy, I’m going to and add some more material around the switches behind it to strengthen it a little more, maybe some rivets too. We’ll see.
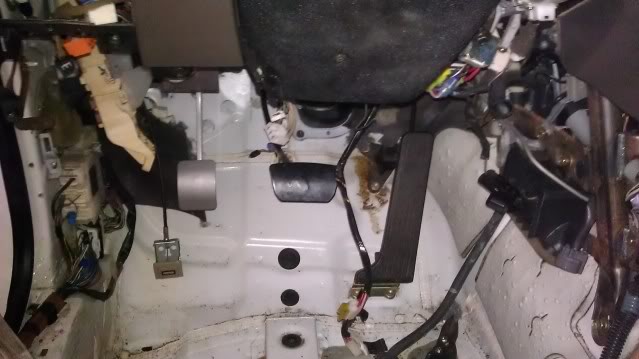
Oh yeah, it’s 5 speed.
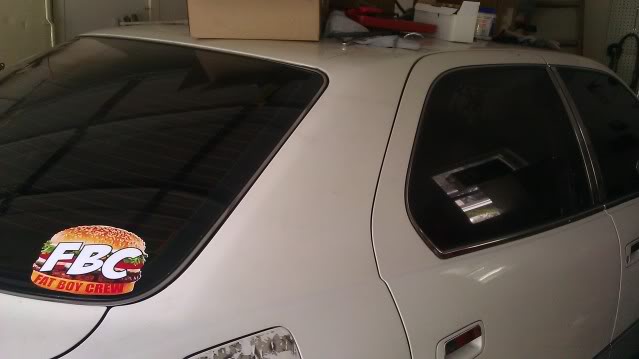
More cool stickers…
I have these dumb driveshafts here, not using either of them, just doing upgraded U-Joints 3” steel driveshaft with new yokes. I need to get rid of this R154 driveshaft y0.
Downpipe is finally done.
Just awaiting a V-Band for the bottom to attach to the exhaust were making.
I didn’t like the look of a 90 degree coupler off of the throttle body, it looks like garbage, screw that. I cut the throttle body off, got rid of that traction control nonsense. Ranlet welded a 3” ring to my throttle body. I’m starting to get the hang of welding aluminum now.
Turbo housing and hotside lower piping almost done.
After they were welded, we test fit yet again. Win.
Blew a hole out for the blow off valve.
I welded the flange to the piping (first time actually welding something aluminum {of importance}). Came out pretty ok.
Random
Chrome Polish Snakes.
Got my turbo housing powdercoated since Holset uses some poor quality casts. Super porous. Definitely wasn’t going to spend the rest of my life trying to polish it. This new color is hot though.
I’m actually thinking of getting my valve covers/coolant neck/intake manifold coated this week. Still haven’t decided.
So my chassis harness wiring was altered before me purchasing my car. Some shotty *** place wired in this alarm system, bypassed the factory battery wiring and all kinds of drama. So I’ve been spending A LOT of time going through the FSM trying to figure everything out.
Should be two wires at the alternator fusible link. But….. Someone decided to make their own wiring for the battery. Yeah.
I decided to wire Fans, Fuel Pump, and Starter to switches. It’s easier that way. They’re going to be wired up properly 30Amp Relays, the switches themselves are 50Amp. Everything gets power from a separate fusebox I installed. It’s pretty nifty.
PS. I’m keeping the woodgrain!
I had a huge sheet of aluminum so I’ve been trying to put it to good use.
It’s all boxed in so its sturdy, I’m going to and add some more material around the switches behind it to strengthen it a little more, maybe some rivets too. We’ll see.
Oh yeah, it’s 5 speed.
More cool stickers…
Last edited by Cashflo; 12-28-11 at 11:54 AM.


 05-23-12, 09:16 PM
#142
Driver
Thread Starter
iTrader: (1)
Join Date: Apr 2011
Location: FL
Posts: 152
Likes: 0
Received 0 Likes
on
0 Posts
Well it’s been a while since I updated this thread.
I have gotten cracking on some stuff, but mostly I’ve been backtracking. It sucks but I want to do everything the way I want it to be. No corners will be cut, just want to finish the car the way I’ve always wanted to.
Harness is all wired up, so the motor could technically start aside from the fuel pump. Map ECU is all wired up, still need to wire up my gauges and wideband. I also need to find a GReddy boost gauge.
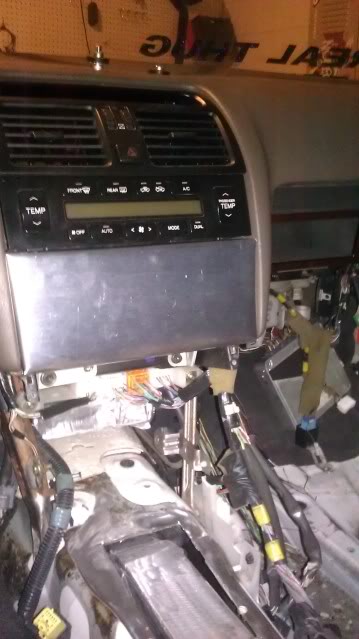
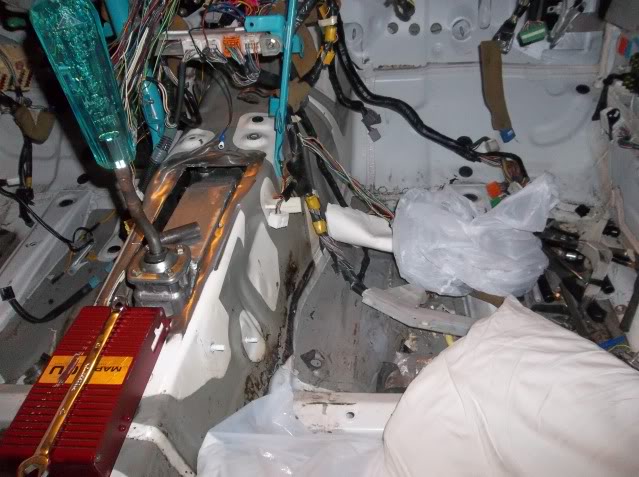
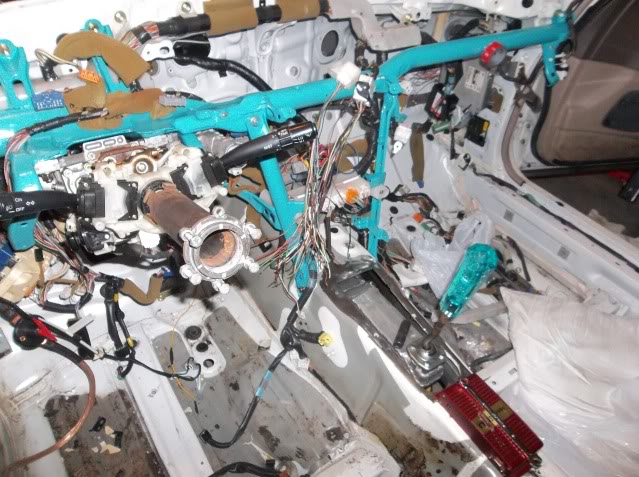
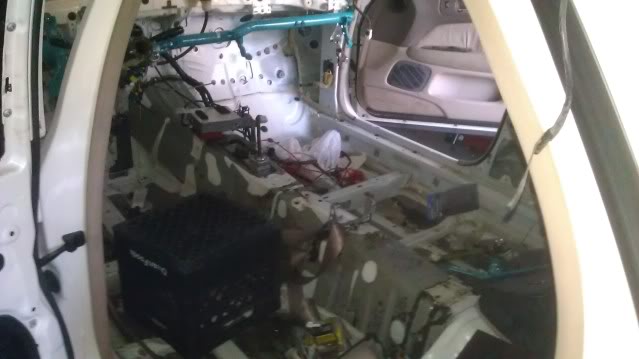
I gutted the whole car of every single wire inside of it, pulled the dash out…

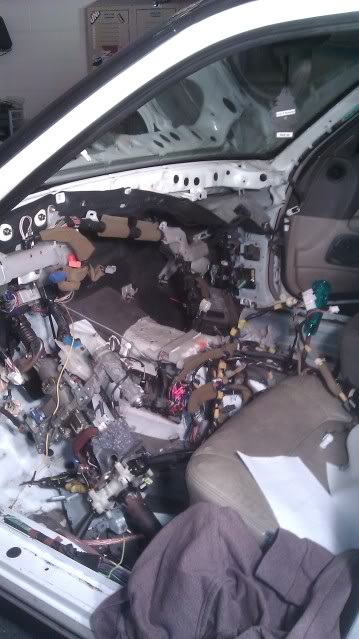
I have gotten cracking on some stuff, but mostly I’ve been backtracking. It sucks but I want to do everything the way I want it to be. No corners will be cut, just want to finish the car the way I’ve always wanted to.
Harness is all wired up, so the motor could technically start aside from the fuel pump. Map ECU is all wired up, still need to wire up my gauges and wideband. I also need to find a GReddy boost gauge.
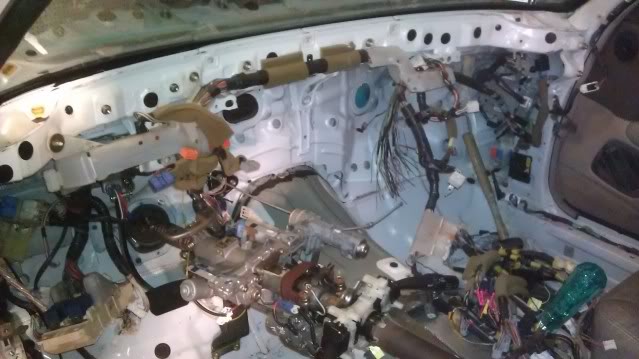
I gutted the whole car of every single wire inside of it, pulled the dash out…
05-23-12, 09:18 PM
#143
Driver
Thread Starter
iTrader: (1)
Join Date: Apr 2011
Location: FL
Posts: 152
Likes: 0
Received 0 Likes
on
0 Posts
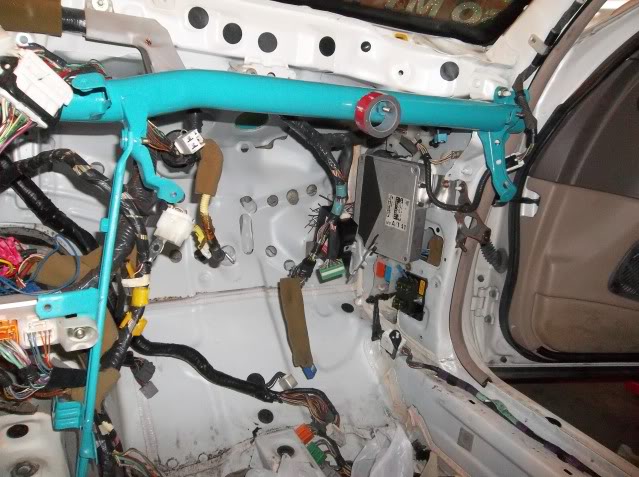
Dash bar was all kinds of nasty, covered in surface rust, nothing a wire wheel couldn’t fix. Had some left over teal paint, ehh what the hell. I have to make a new one when I cage it in a few weeks so why not.
I got the dash all cleaned up, and ready for some SEM colorcoat. This **** is amazing. I love it, one of the best products on the market for vinyl.
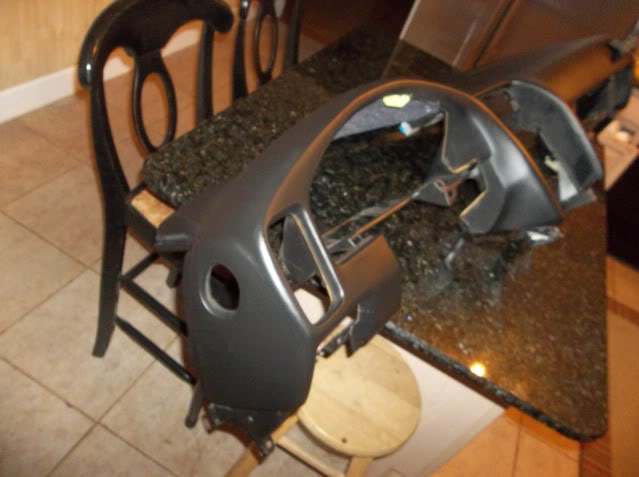
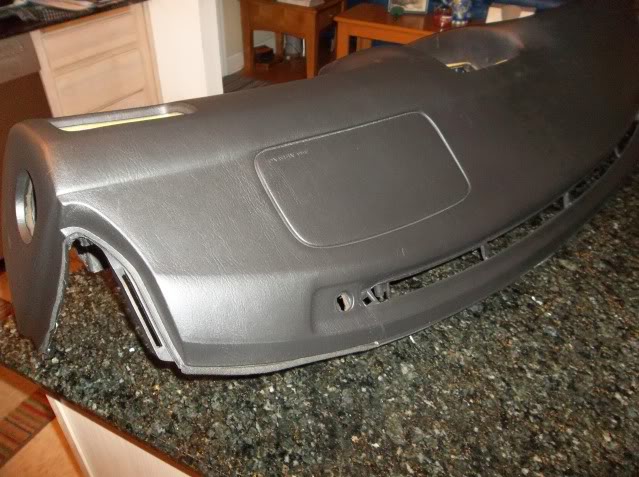
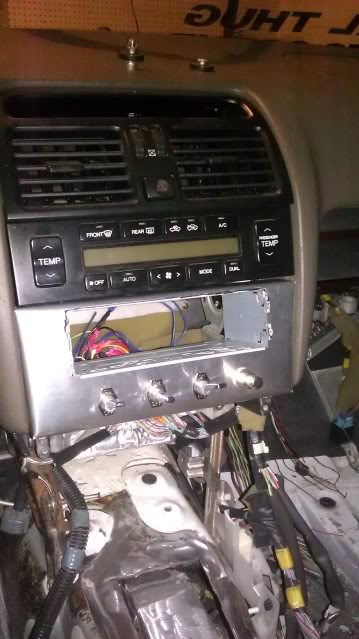
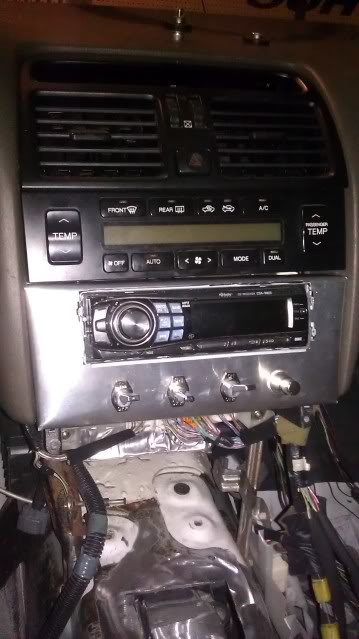
The dash came out great, looks OEM. Had a buddy of mine with Solidworks and a computerized plasma cutter get some stuff for me.
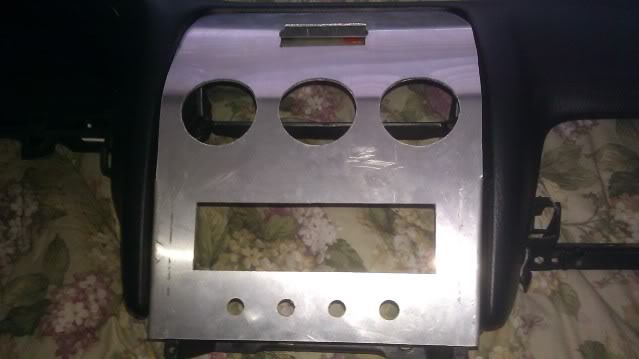
That is to hold my radio, 3 GReddy 60mm gauges, my sweet digital voltmeter and my switches.
Ordered some sweet BC racing coilovers, 18kg/16kg. They go super low, really stiff feeling (I’ve yet to drive on them obviously).

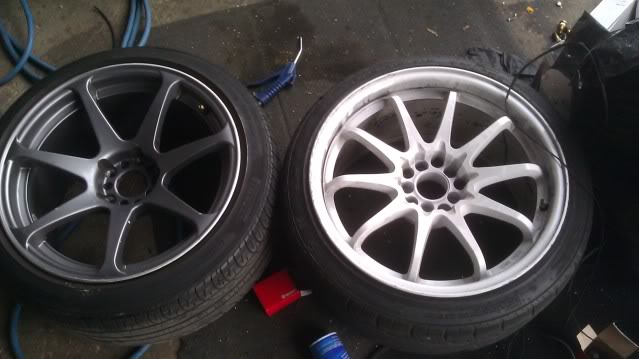
Bought some Work Equip M1’s from a buddy, owned em for about 24hrs before trading them for a set of battles with almost the same amount of cash on top I paid for the Works.

I got the dash all cleaned up, and ready for some SEM colorcoat. This **** is amazing. I love it, one of the best products on the market for vinyl.
The dash came out great, looks OEM. Had a buddy of mine with Solidworks and a computerized plasma cutter get some stuff for me.
That is to hold my radio, 3 GReddy 60mm gauges, my sweet digital voltmeter and my switches.
Ordered some sweet BC racing coilovers, 18kg/16kg. They go super low, really stiff feeling (I’ve yet to drive on them obviously).
Bought some Work Equip M1’s from a buddy, owned em for about 24hrs before trading them for a set of battles with almost the same amount of cash on top I paid for the Works.
Last edited by PureDrifter; 05-24-12 at 04:40 AM.
05-23-12, 09:19 PM
#144
Driver
Thread Starter
iTrader: (1)
Join Date: Apr 2011
Location: FL
Posts: 152
Likes: 0
Received 0 Likes
on
0 Posts
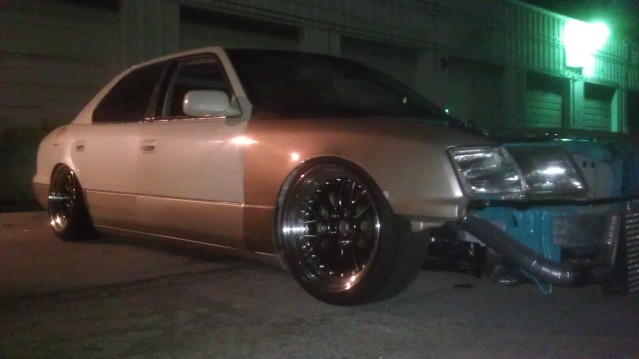
I got my battles but was faced with a decision in whether to keep them or trade them… I kept em
Had a buddy of mine make these sweet OPS (Odyssey Parts Shop) decals for my center caps, they look pretty nifty.

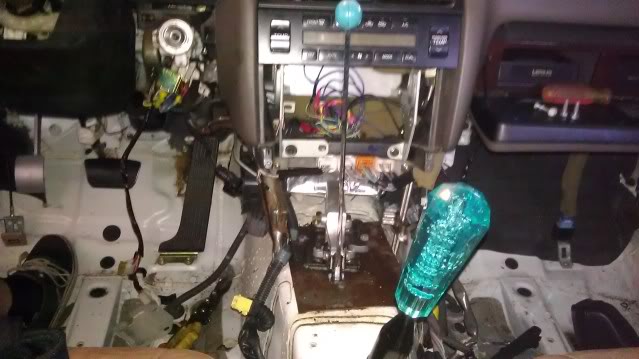
Playing with the camera.
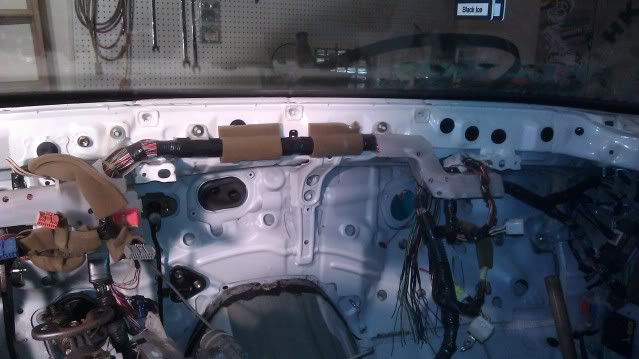
There is currently no wiring in the car what so ever, going to be making my own fuse panel and relay panel, then wiring up the necessities to drive the car. Gonna have my driveshaft made this week. Gotta fab up a harness bar, also I need to make a transmission tunnel (where I cut mine out).

Had a buddy of mine make these sweet OPS (Odyssey Parts Shop) decals for my center caps, they look pretty nifty.
Playing with the camera.
There is currently no wiring in the car what so ever, going to be making my own fuse panel and relay panel, then wiring up the necessities to drive the car. Gonna have my driveshaft made this week. Gotta fab up a harness bar, also I need to make a transmission tunnel (where I cut mine out).

 05-28-12, 10:45 AM
#147
Driver
Thread Starter
iTrader: (1)
Join Date: Apr 2011
Location: FL
Posts: 152
Likes: 0
Received 0 Likes
on
0 Posts
I'm getting pretty close to finishing the car. I just need to tidy up the rest of the chassis harness.
Wiring done:
Fans
Fuel Pump
Headlights
Wipers
Sunroof
Still need to wire:
Taillights
Turn signals
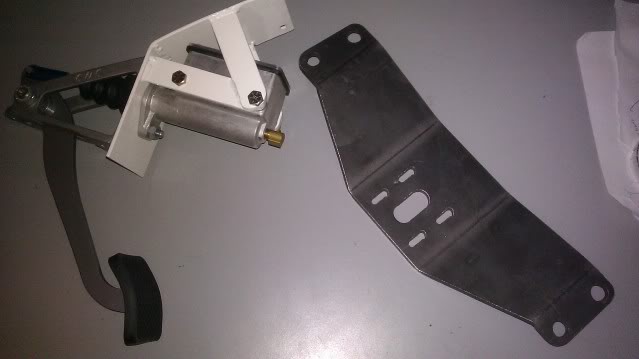
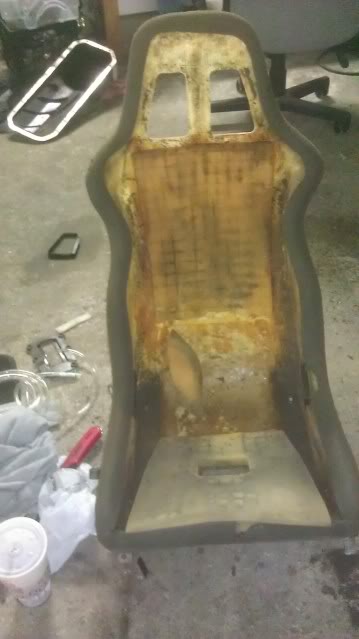
I got this sweet old Sparco Ultra from Ranlet.
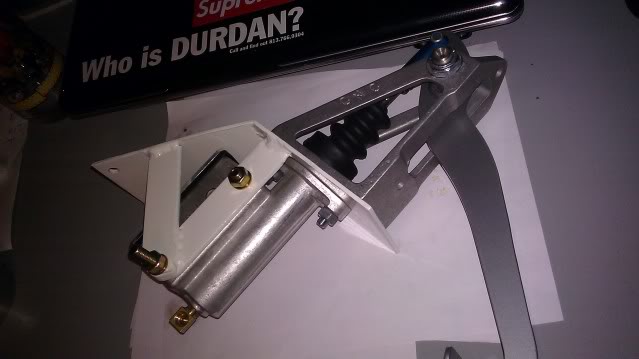
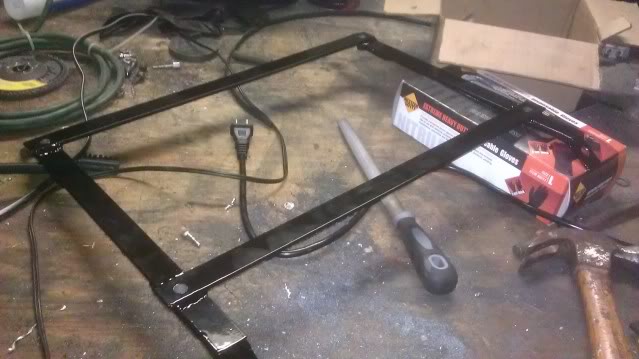
I made my own nifty seat rail.
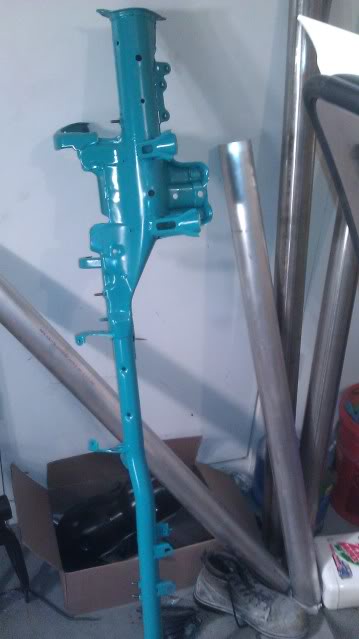
Fixed the hub I had, powdercoated it. It looks pretty sweet now.
Got this HKS filter from a buddy, ordered the reload kit.
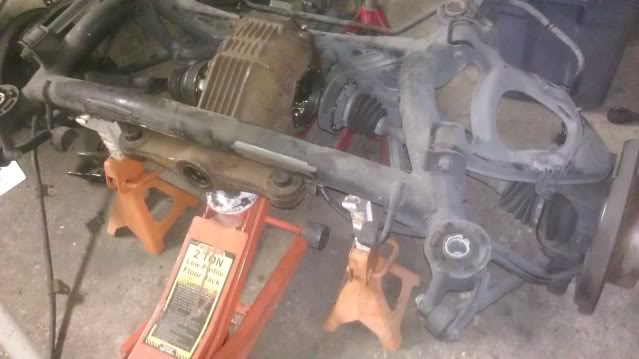
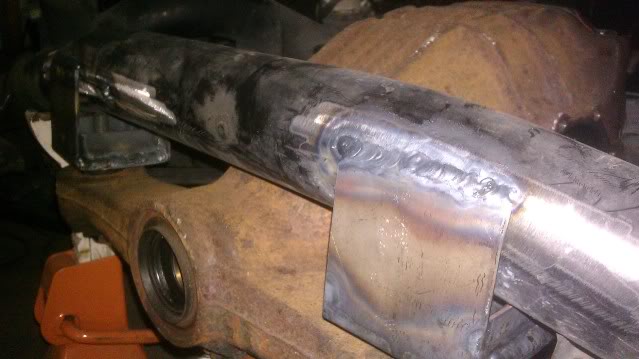
Dropped the subframe, I was over that LS diff. So I welded the SC diff, and made some mount brackets on the subframe. They should hold up well.
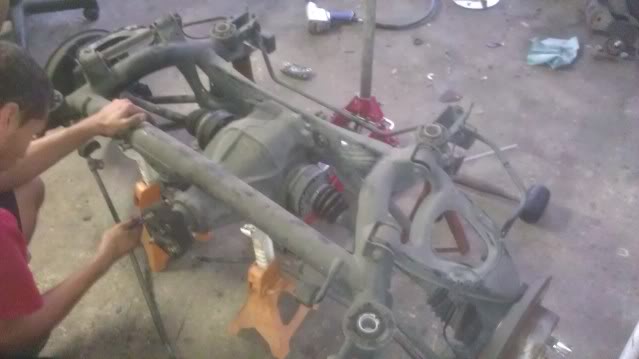
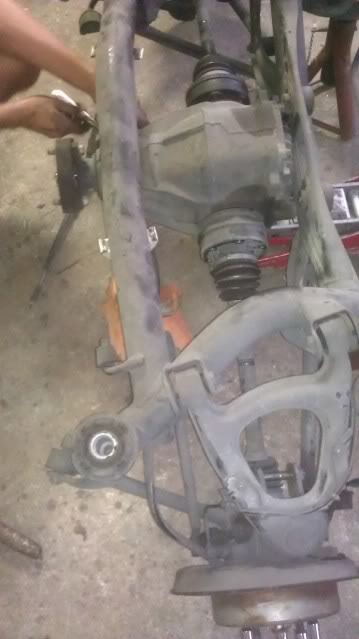
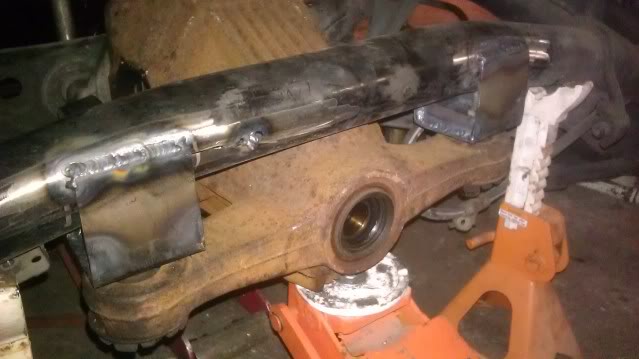
Disassembled the differential.
I'm basically just waiting on my driveshaft now, the shop I'm using is really behind and its taking forever.
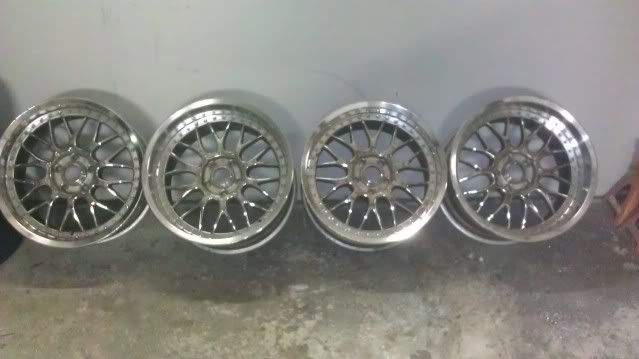
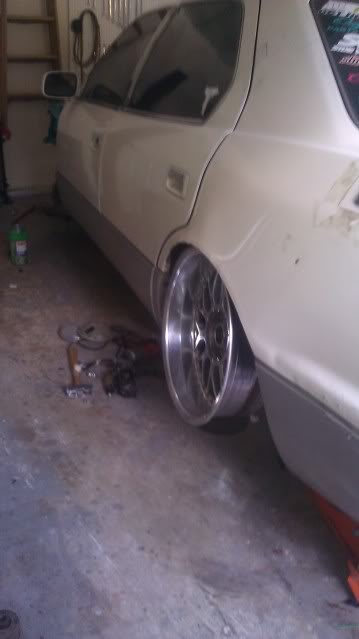
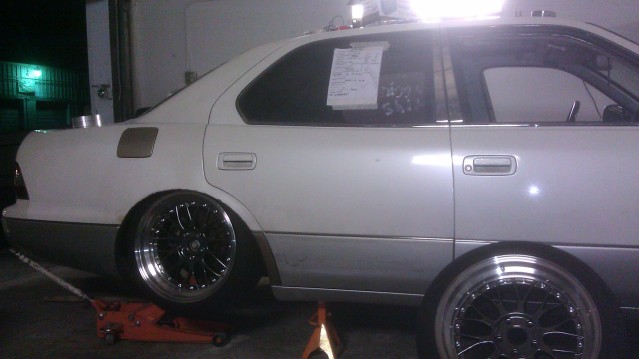
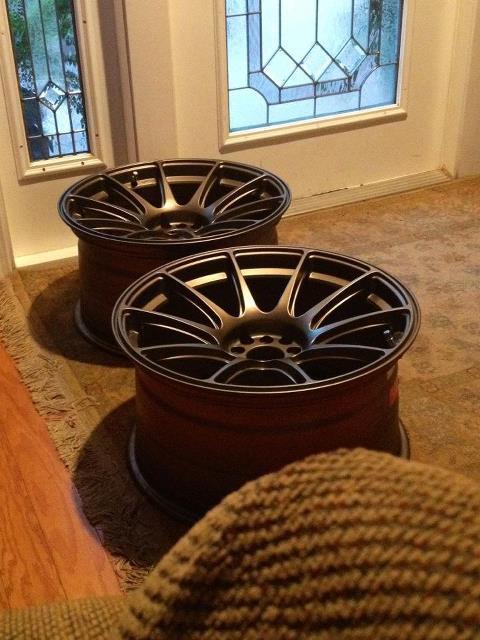
Sold the battles I had, Got some 18x10 all around XXR mesh wheels. 18x10 0 offset front, 18x10 -12 rear.
They're special order 5 lug only, not dual 5 lug. Custom center-caps, and I'm powdercoating the faces white.
Wiring done:
Fans
Fuel Pump
Headlights
Wipers
Sunroof
Still need to wire:
Taillights
Turn signals
I got this sweet old Sparco Ultra from Ranlet.
I made my own nifty seat rail.
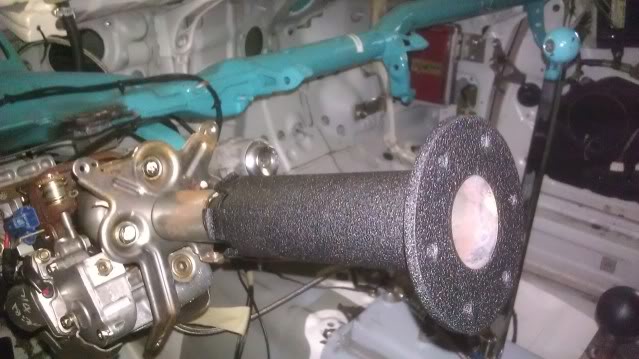
Fixed the hub I had, powdercoated it. It looks pretty sweet now.
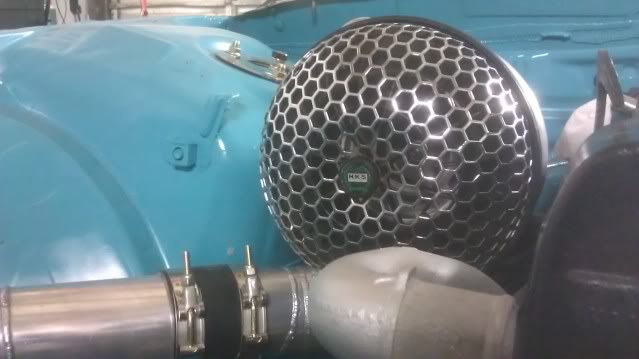
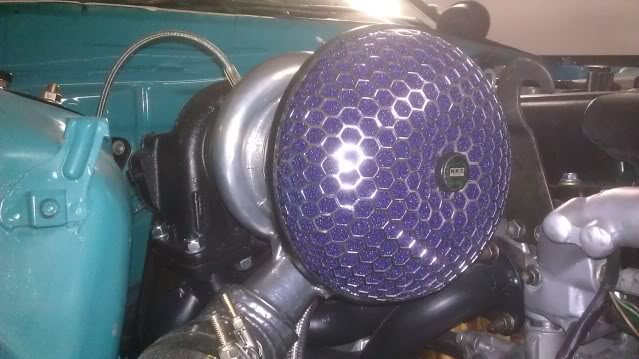
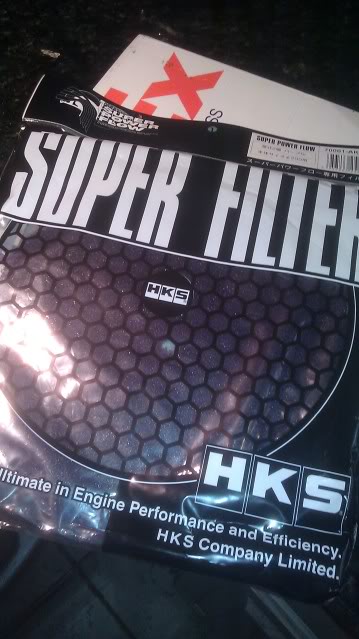
Got this HKS filter from a buddy, ordered the reload kit.
Dropped the subframe, I was over that LS diff. So I welded the SC diff, and made some mount brackets on the subframe. They should hold up well.
Disassembled the differential.
I'm basically just waiting on my driveshaft now, the shop I'm using is really behind and its taking forever.
Sold the battles I had, Got some 18x10 all around XXR mesh wheels. 18x10 0 offset front, 18x10 -12 rear.
They're special order 5 lug only, not dual 5 lug. Custom center-caps, and I'm powdercoating the faces white.
05-28-12, 11:41 AM
#148
Driver
Thread Starter
iTrader: (1)
Join Date: Apr 2011
Location: FL
Posts: 152
Likes: 0
Received 0 Likes
on
0 Posts
It’s been a minute since I updated the thread, and I have pretty much sold off a bunch of parts in the sense that “I’m upgrading”. Sold my seat, sold my wheels, sold my whole turbo setup, sold my transmission/clutch/flywheel, and copped some other parts.
I never posted about it, but I did get the car running and driving, drove it a couple of times, couldn’t get the brakes to bleed worth a ****. Transmission felt HORRIBLE. So I sold my trans/clutch/flywheel. I was kicking around the idea of a Z33 HR 6 speed for a while before, so I took the plunge and bought one. Didn’t really think it through all the way, ended up selling it.
I picked up a MC built R154, JZ Bellhousing, Exedy Hypersingle (got a sick deal-courtesy of Ryan Tuerck). Just a little more work to go before I get the car on the road again. I’m pretty stoked.
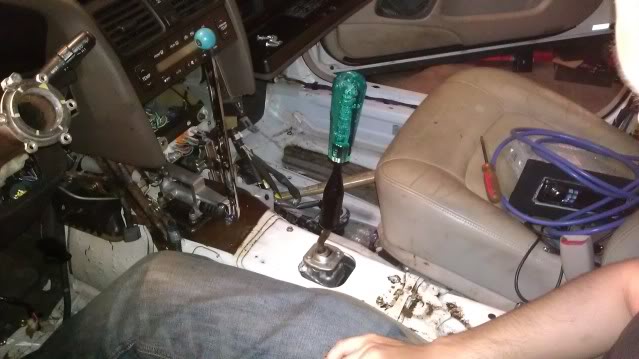
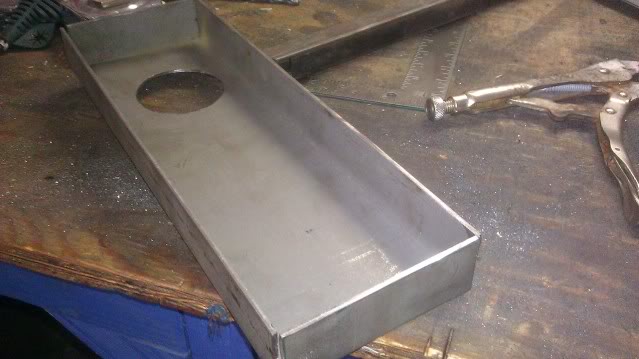
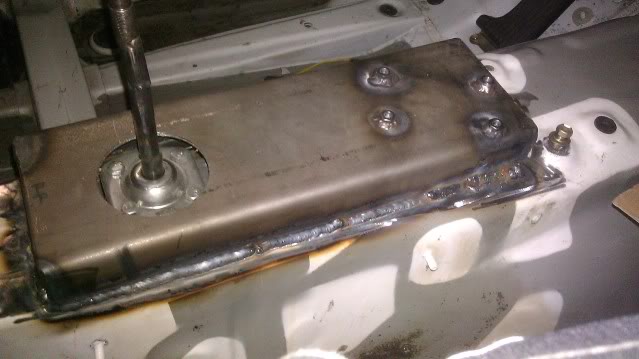
Don’t know if I ever posted a pic of the sweet “shifter box” trans tunnel thing. It came out kinda rad.
Copped these bad boys.
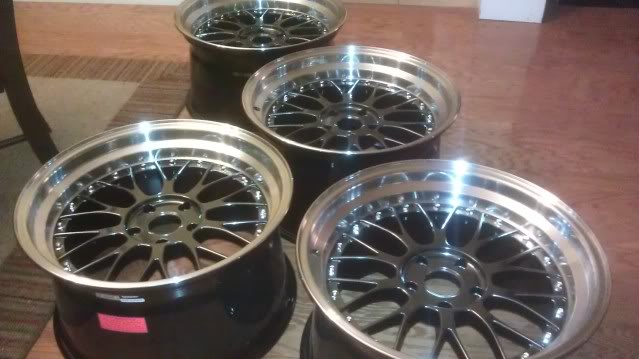
Don’t worry, I already got another set of wheels since I bought these lol, I have a problem.
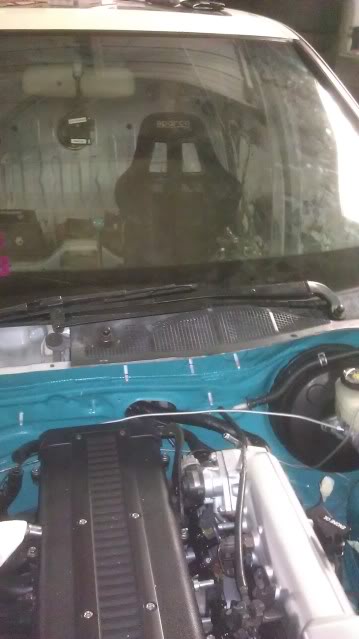
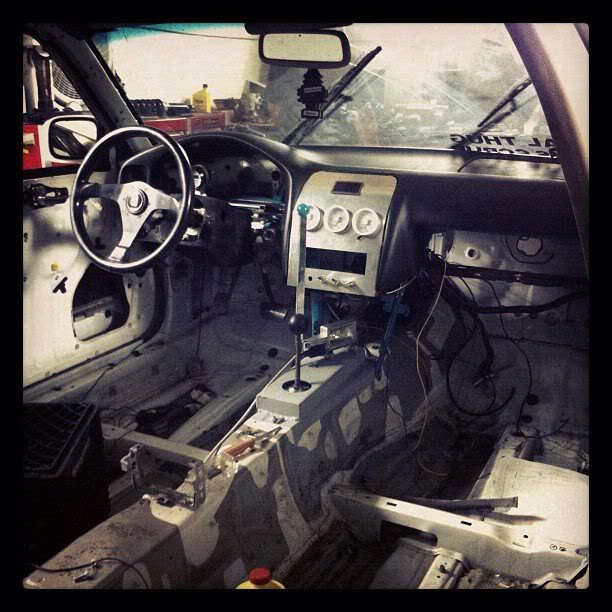
A friend took this rad pic of my interior. Dash in/all gauges wired and working. GReddy Gauges are rad!
A buddy of mine’s got a pretty rad 1JZ SC300, he was acquiring some single turbo parts. He ended up selling me his setup, as he purchased a GReddy T78 and T4 setup! Got this stuff for a steal!
I did a little research and ended up selling the turbo, a little too big of an exhaust housing for my current setup, and I’m only really wanting 400-450whp, picked up another HY35 LOL.
Made this little photo montage, don’t know if any of you listen to ASAP Rocky…
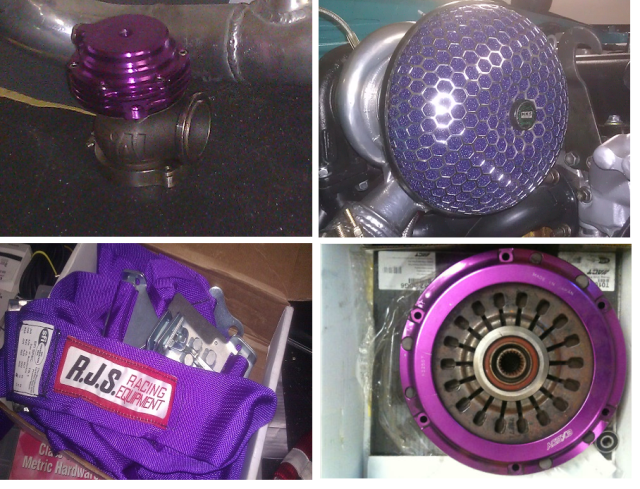
EVERYTHING’S PURPLE.
SO, I’m sure some you remember the picture of the two tone S13 on white TE’s? The color scheme I was planning on doing on this car. Well…. I got some new ideas.
I got to meet Nakai-San of Rauh Welt. He’s a really rad dude. Talked to him a couple times, showed him some pics of my car… His response “Toyota Celsior, nice car. Good car”. Then I showed him the bay “That’s a wild car!”. He was loving it!
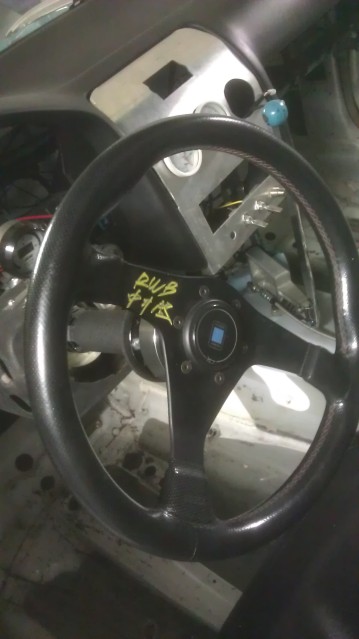
He autographed my Nardi and my Wangan Midnight Anime collection.
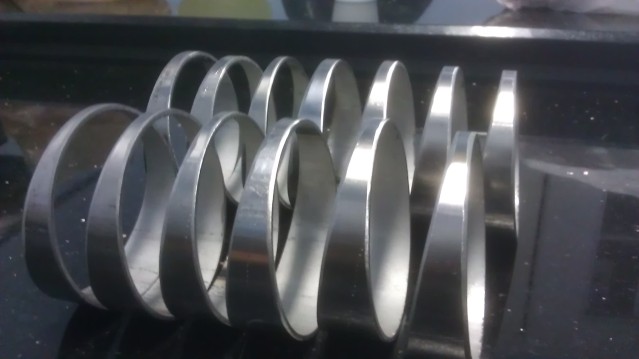
Stainless pies for the new downpipe, got a new saw, cuts these bad boys in 45 secs!
I never posted about it, but I did get the car running and driving, drove it a couple of times, couldn’t get the brakes to bleed worth a ****. Transmission felt HORRIBLE. So I sold my trans/clutch/flywheel. I was kicking around the idea of a Z33 HR 6 speed for a while before, so I took the plunge and bought one. Didn’t really think it through all the way, ended up selling it.
I picked up a MC built R154, JZ Bellhousing, Exedy Hypersingle (got a sick deal-courtesy of Ryan Tuerck). Just a little more work to go before I get the car on the road again. I’m pretty stoked.
Don’t know if I ever posted a pic of the sweet “shifter box” trans tunnel thing. It came out kinda rad.
Copped these bad boys.
Don’t worry, I already got another set of wheels since I bought these lol, I have a problem.
A friend took this rad pic of my interior. Dash in/all gauges wired and working. GReddy Gauges are rad!
A buddy of mine’s got a pretty rad 1JZ SC300, he was acquiring some single turbo parts. He ended up selling me his setup, as he purchased a GReddy T78 and T4 setup! Got this stuff for a steal!
I did a little research and ended up selling the turbo, a little too big of an exhaust housing for my current setup, and I’m only really wanting 400-450whp, picked up another HY35 LOL.
Made this little photo montage, don’t know if any of you listen to ASAP Rocky…
EVERYTHING’S PURPLE.
SO, I’m sure some you remember the picture of the two tone S13 on white TE’s? The color scheme I was planning on doing on this car. Well…. I got some new ideas.
I got to meet Nakai-San of Rauh Welt. He’s a really rad dude. Talked to him a couple times, showed him some pics of my car… His response “Toyota Celsior, nice car. Good car”. Then I showed him the bay “That’s a wild car!”. He was loving it!
He autographed my Nardi and my Wangan Midnight Anime collection.
Stainless pies for the new downpipe, got a new saw, cuts these bad boys in 45 secs!
05-28-12, 09:44 PM
#149

all the work looks good and glad you got it running again. How'd you meet nakai?
My only point of major concern is the new brackets for the diff. If you really wanna run it like that you should consider fully boxing the mounting brackets as they look ready to snap once you start shocking the driveline while drifting.
My only point of major concern is the new brackets for the diff. If you really wanna run it like that you should consider fully boxing the mounting brackets as they look ready to snap once you start shocking the driveline while drifting.