SC400TT Project Car Stage II


 10-13-09, 09:35 AM
#814
- Repair faulty wiring for the External MAP for Tranny
- Re-wire the Fuel pumps to the Autronic
- remove, clean and re-install the plugs as they are pretty fouled up due to such a rich fuel mixture right now
- Install the rest of the interior
- Attach the hood
- Attach the bumper
- Final buff on the new paint
- Attach the emblems
- Bleed the Big Brake set up
- Order the 20" tires for the i-Forged rims
- Take to tuner for dyno tune and road tune
- Drive car and enjoy


Ryan
10-28-09, 08:06 PM
#816
Driver

Join Date: Aug 2001
Posts: 100
Likes: 0
Received 0 Likes
on
0 Posts
Roger that. I heard it and it sounds delicious! Can't wait to ride in this monster. I am very excited to check out how the tranny setup is going to work. WTG Ryan. I know it feels good to be able to see the light.
 I still have to work out the stepper motor settings so I can get it to idle on it's own, but it is awesome. I made a video, and I called Shane so he can testify that he heard it.
11-02-09, 10:09 PM
I still have to work out the stepper motor settings so I can get it to idle on it's own, but it is awesome. I made a video, and I called Shane so he can testify that he heard it.
11-02-09, 10:09 PM
#820
Gang, I finally figured out how to save this video to file on my computer. I downloaded HandBrake and that program allowed it. I have now uploaded this video to YouTube.
Keep in mind this is the first ever start of this newly built motor, and that the base MAP is barely sufficient to run the motor. It was also suffering from some vacuum leaks, plus I initially ran a T between the Autronic SM4 internal MAP vacuum line with the vacuum line on the Aeromotive Fuel Pressure Regulator....A big no no for the Autronic. So it is idling quite rough in this video. I have since adjusted the MAP, and have corrected most of the vacuum leaks, especially being sure to dedicate the SM4 MAP to its own vacuum line. The car then idled significantly better and allowed me to run three heat cycles to seat up the internals a bit. I did not get a recording of that because I accidentally had the cam corder on standby.... . Anyway, the mix was still way too rich, and fouled the plugs a bit. I will be making a few more adjustments this week, and installing a colder plug with a heat range of 8, which should be just right for my set up.
Here is the video....
http://www.youtube.com/watch?v=_EPBMJO1TGo
Ryan
Keep in mind this is the first ever start of this newly built motor, and that the base MAP is barely sufficient to run the motor. It was also suffering from some vacuum leaks, plus I initially ran a T between the Autronic SM4 internal MAP vacuum line with the vacuum line on the Aeromotive Fuel Pressure Regulator....A big no no for the Autronic. So it is idling quite rough in this video. I have since adjusted the MAP, and have corrected most of the vacuum leaks, especially being sure to dedicate the SM4 MAP to its own vacuum line. The car then idled significantly better and allowed me to run three heat cycles to seat up the internals a bit. I did not get a recording of that because I accidentally had the cam corder on standby....
. Anyway, the mix was still way too rich, and fouled the plugs a bit. I will be making a few more adjustments this week, and installing a colder plug with a heat range of 8, which should be just right for my set up.Here is the video....
http://www.youtube.com/watch?v=_EPBMJO1TGo
Ryan
Last edited by SC400TT; 11-03-09 at 06:45 AM.
11-03-09, 08:59 PM
#822
Having to have someone else finish off the headlights as the original guy became less and less reliable. He got to the point that I had to threaten him with a lawsuit just to get him to respond, plus send a very nice CL Member over there 4 times to finally get my unfinished parts back. He did a portion of the headlights correctly. If he had paid attention to detail, and finished them up with quality work, they would have looked fantastic. They still will look fantastic, but I had the Carbon Fiber he laid on the inner housing removed, it just was not laid properly. The LED's were a mess, the wiring was horrendous as well. That is all removed and cleaned up. Going a different way with the LED's now, much cleaner, and should be more reliable. Also much less wiring.
Anyway, I have posted up a pic of the inner housings so you can see how the lights will look like. They are in primer grey right now, but will be in a matching automotive grade high gloss black paint when completed.
As you can see, the massive blinker has been done away with, a small amber strip has been installed for the blinker (but you cannot see that strip in the pic) with individual LED's installed behind the amber strip.
The dividing section that separated the blinker from the inside of the headlight has also been removed so that the light will only have one complete compartment filling the whole chamber of the light, instead of creating 2 separate chambers as the OEM light was designed.
A secondary projector has been custom fabricated to house the city light. It will consist of 1 PIAA Super White LED bulb to fit the stock housing mount. The front of the projector will have a projector lens to match and compliment the primary HID lens.
Everything will be closed up with a clear lens cover to completely modernize the look of the light. Should turn out pretty good when completed.
Driver side with the HID retrofit in place:

Passenger side:
Keep in mind these are cell phone pics, so they are not the best quality or lighting, but you get the idea....
Ryan
Anyway, I have posted up a pic of the inner housings so you can see how the lights will look like. They are in primer grey right now, but will be in a matching automotive grade high gloss black paint when completed.
As you can see, the massive blinker has been done away with, a small amber strip has been installed for the blinker (but you cannot see that strip in the pic) with individual LED's installed behind the amber strip.
The dividing section that separated the blinker from the inside of the headlight has also been removed so that the light will only have one complete compartment filling the whole chamber of the light, instead of creating 2 separate chambers as the OEM light was designed.
A secondary projector has been custom fabricated to house the city light. It will consist of 1 PIAA Super White LED bulb to fit the stock housing mount. The front of the projector will have a projector lens to match and compliment the primary HID lens.
Everything will be closed up with a clear lens cover to completely modernize the look of the light. Should turn out pretty good when completed.
Driver side with the HID retrofit in place:
Passenger side:
Keep in mind these are cell phone pics, so they are not the best quality or lighting, but you get the idea....
Ryan
Last edited by SC400TT; 11-03-09 at 09:08 PM.
 -Rob
01-08-10, 09:14 PM
-Rob
01-08-10, 09:14 PM
#824
OK, making progress.
Ryan
- The brakes are now bled and there are no leaks.
- The Iridium plugs are gapped and installed.
- The Base fule setting has been adjusted to lean it out a bit as the car idled at 8 on the gauge.
- I have the 20" iForged wheels test fit on the car and they clear the big brakes and look fantastic. Lips come right to the edges of the wheel wells.
- Tires are being ordered (Falkens), fantastic tires.
- The fuel pumps have been rewired to the Autronic SM4 so it will control them. Each one is on a separate pin, so I have set 1 up as a primary, and the second to come on at 10 lbs of boost.
- I will finish up rewiring the Innovate Lambda unit into the Autronic SM4 for accurate tuning this weekend.
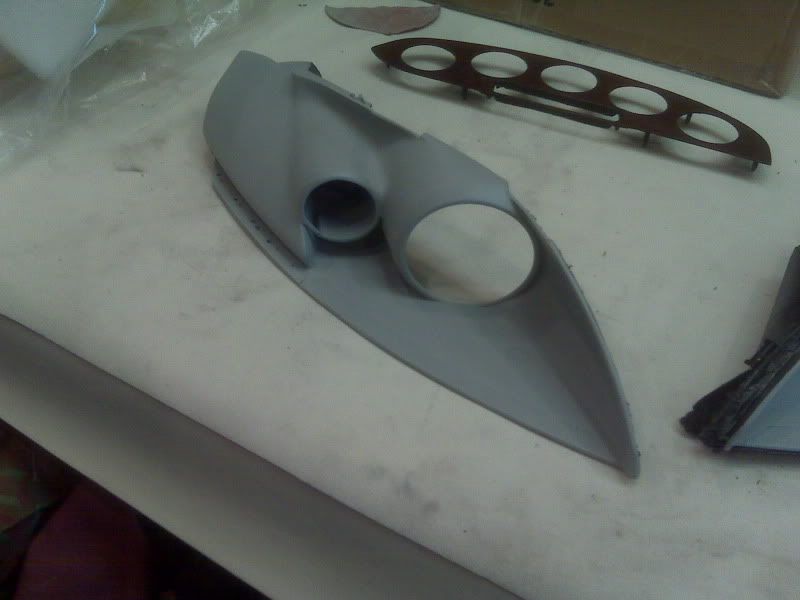
- The faceplate for the gauge pod was redone in matching burlwood, and is being reinstalled this weekend back into the car.
- Just about ready to put the interior back in the car.
Ryan