
20 Hours Full Detailing on A 13 Year Old Camry That has NEVER been detailed!
 03-16-15, 12:44 PM
#1

As a NON-professional detailer (I'm a professional analyst/engineer though  ), this is my 1st detailing project and using machine polisher for the very 1st time. Guess what? I'm going to tackle on my sister's Camry that has NEVER been washed nor detailed in 13 years. This car is only washed by mother nature--rain!
I made NO money on this project. I spent hundreds of dollars on parts and 20 hours of labor on the weekends just to help my family out. All this is VOLUNTEER work for the DETAILING PASSION
This thread is to motivate the non-pro Do-It-Yourself-Er out there to give machine polishing a try! If you are thinking about it, don't worry, it is easier than you thought. If I can do it, you can do it too!
Have you ever wonder how it looks like?
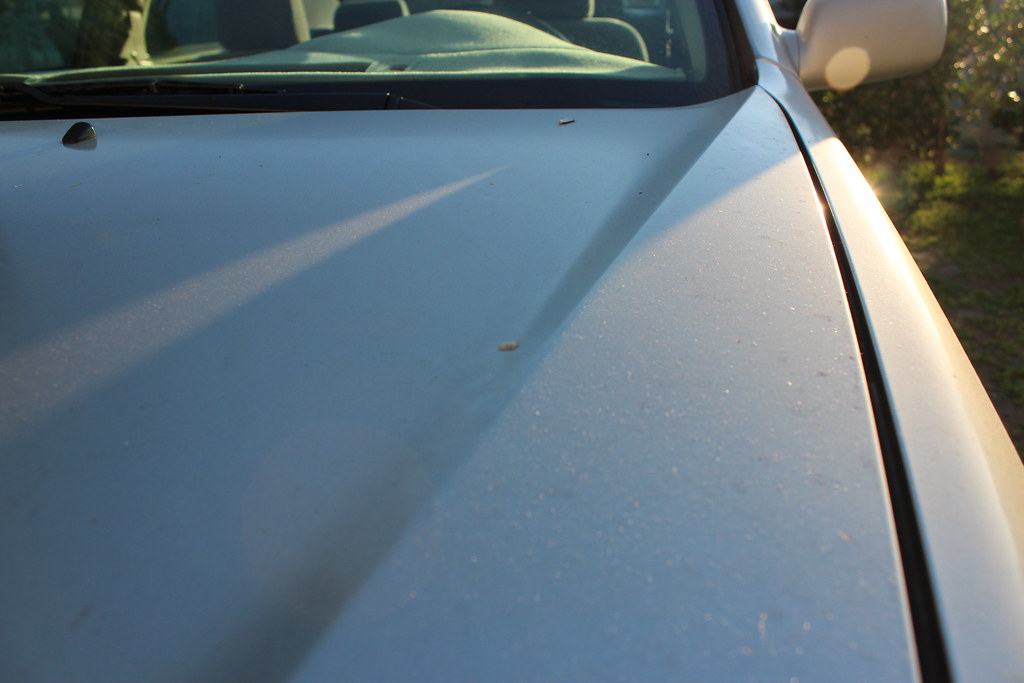
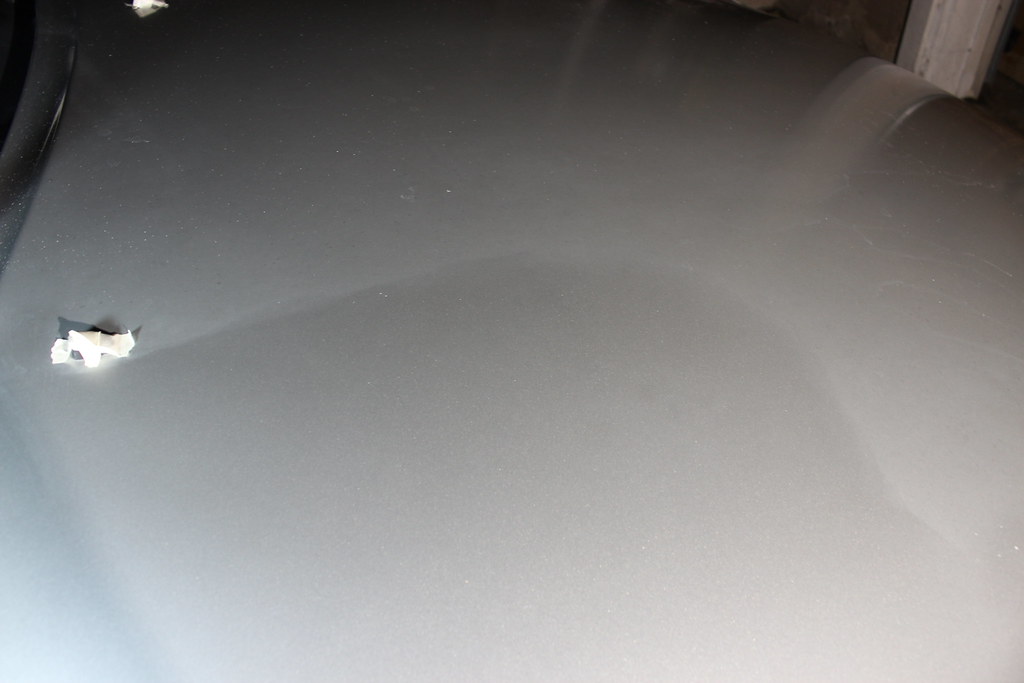
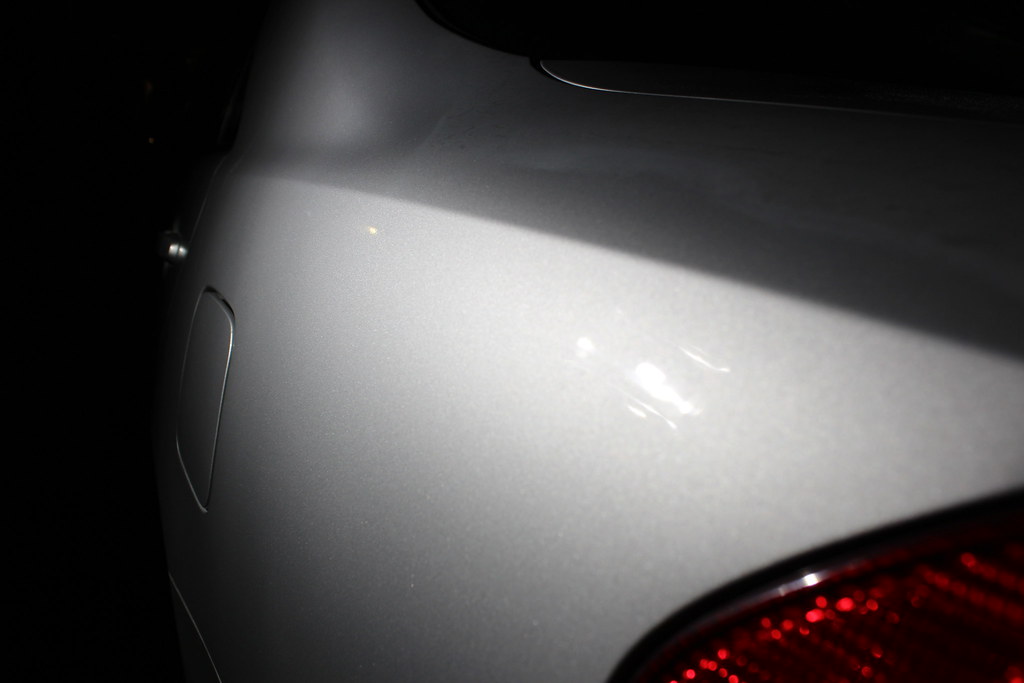
1. Clear Coat Failure
 IMG_6035 by FSportIS, on Flickr
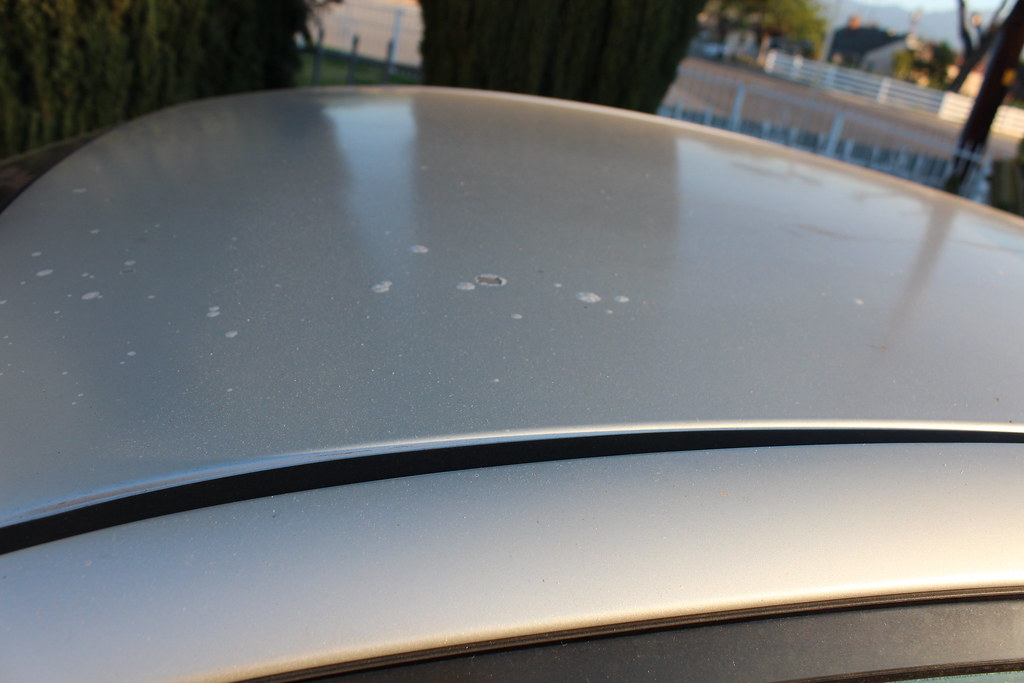
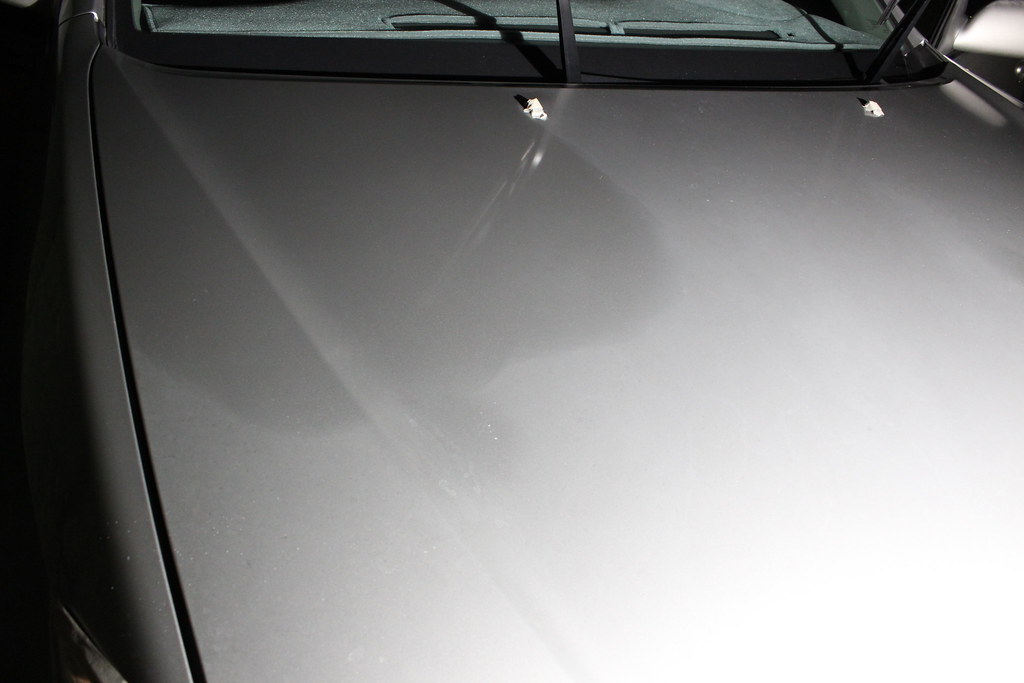
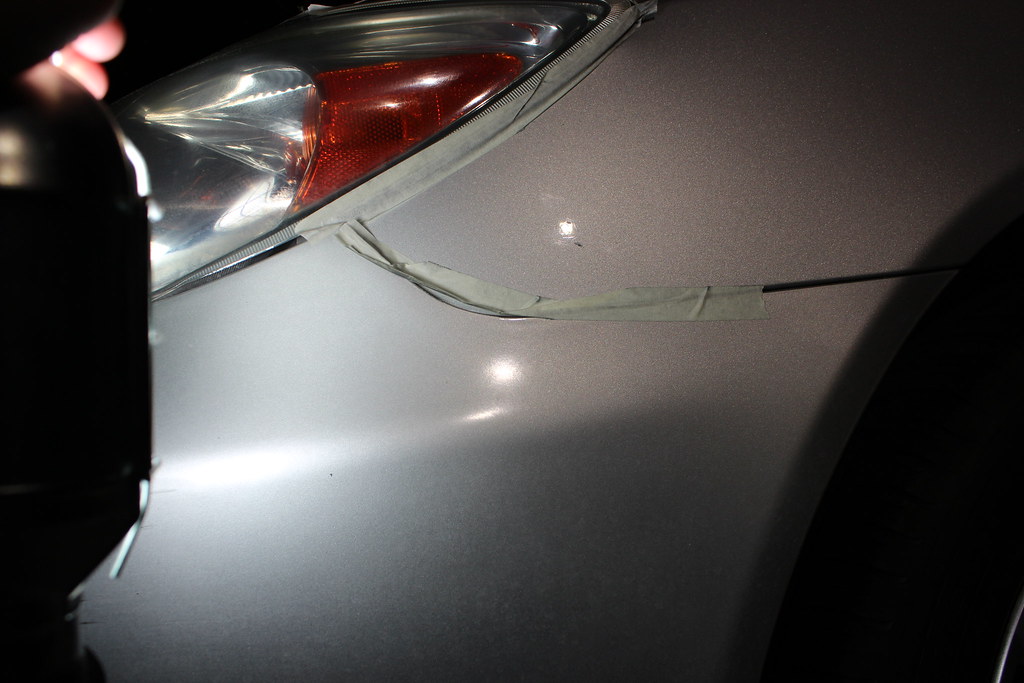
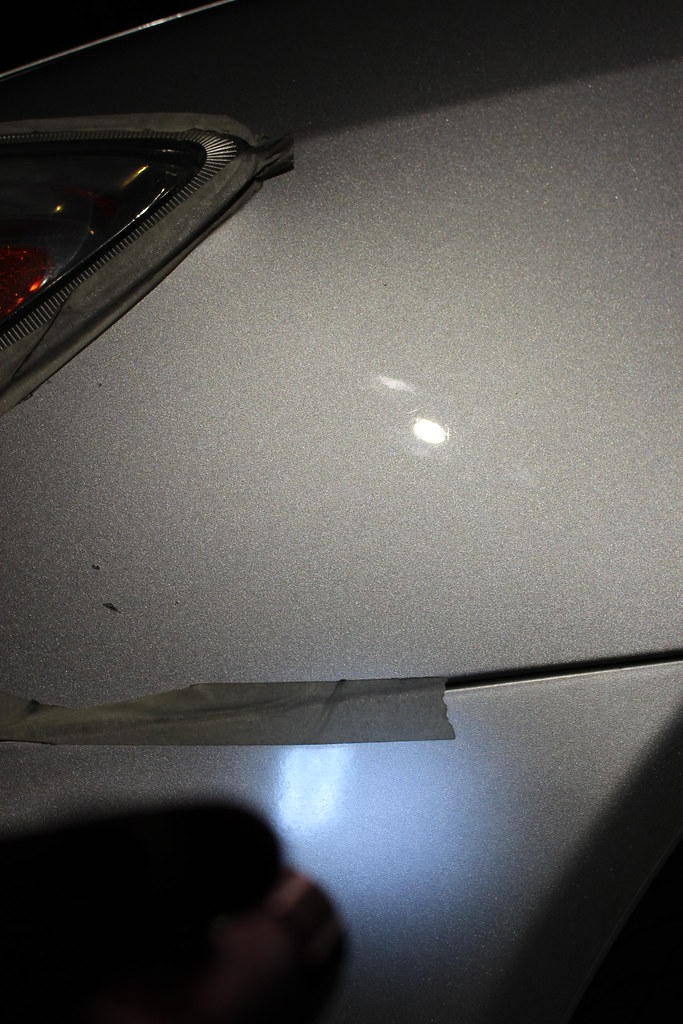
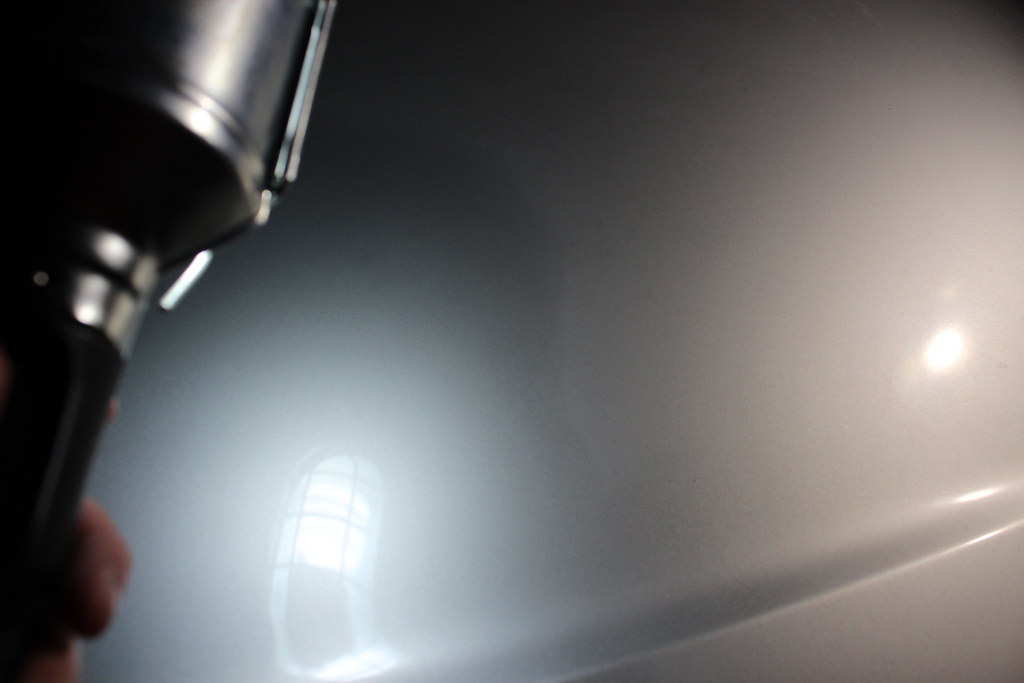
2. Super Water Spot Edging on the entire car!
 IMG_6036 by FSportIS, on Flickr
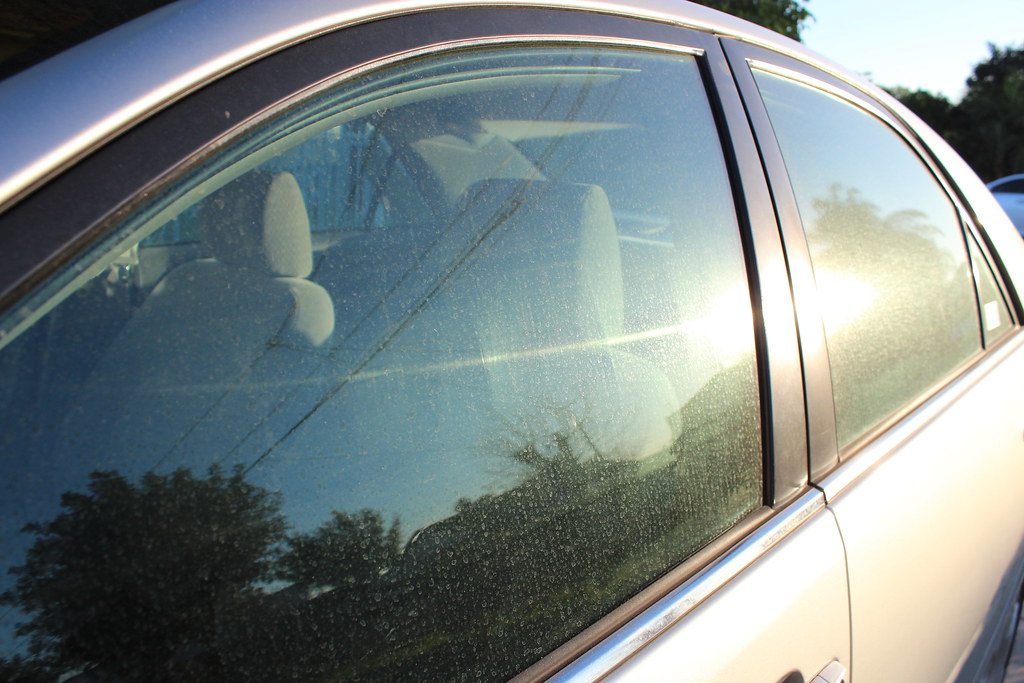
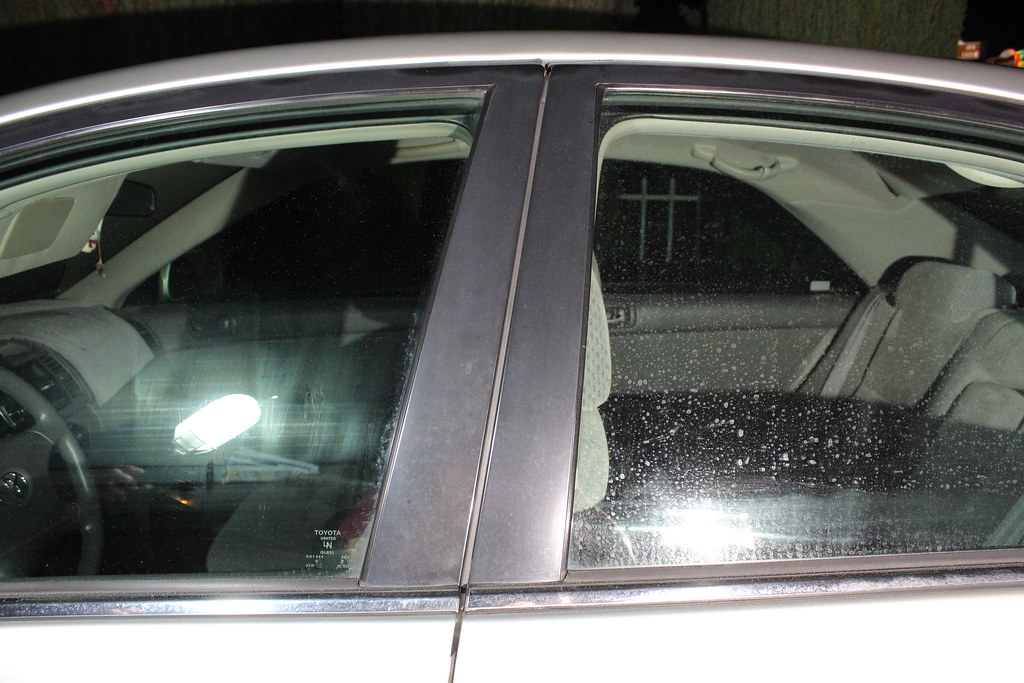
3. Super tar, dirt, dust, road grime, junks, acids, pollutions.. whatever mother nature throws at, you name it, it has it here.
 IMG_6037 by FSportIS, on Flickr
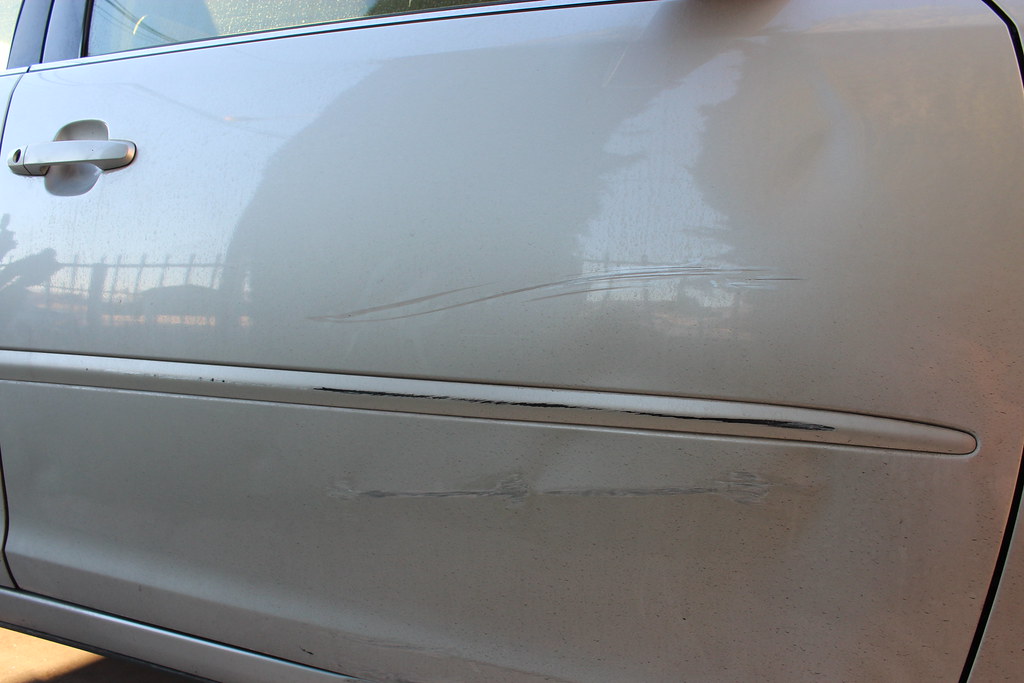
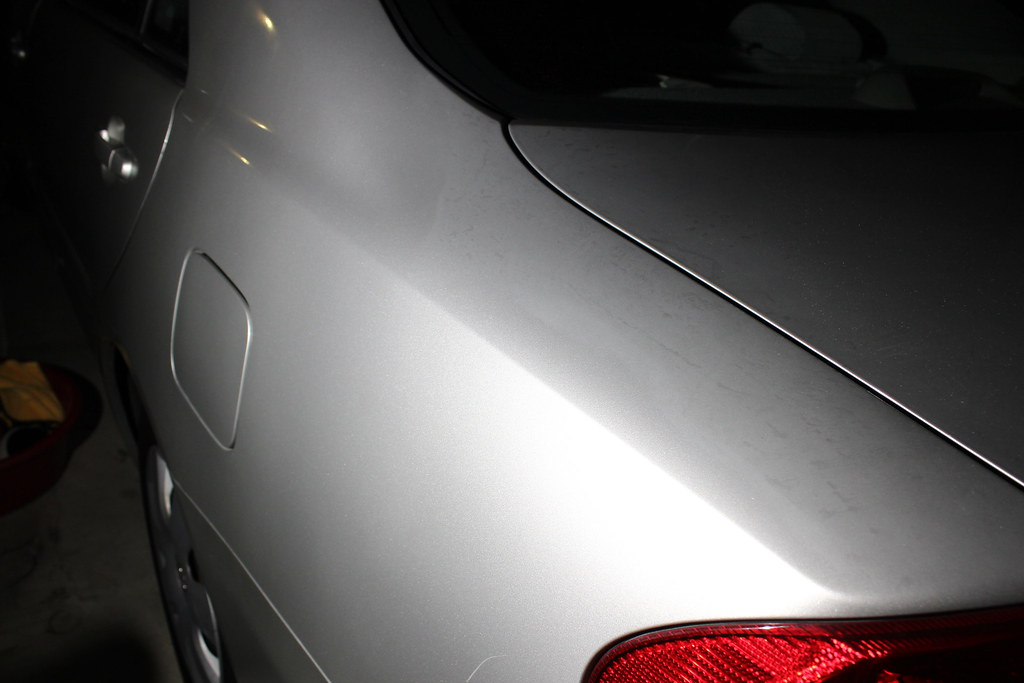
4. Random Super Deep Scratch
 IMG_6034 by FSportIS, on Flickr
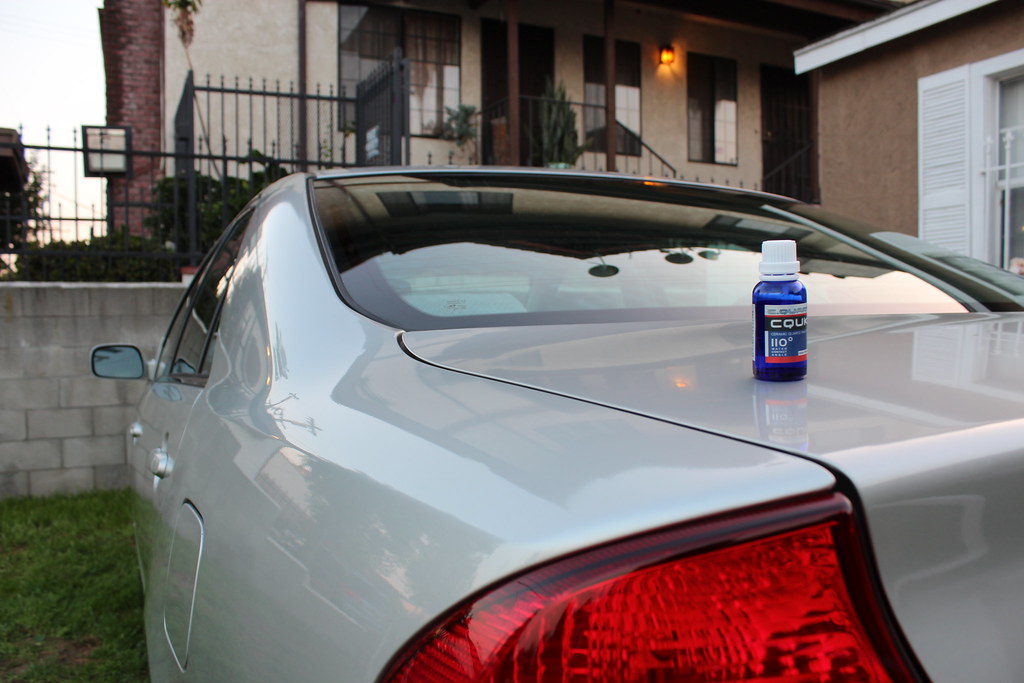
5. Absolutely no protection for 13 years. Water runs flat on it with no beading nor sheeting.
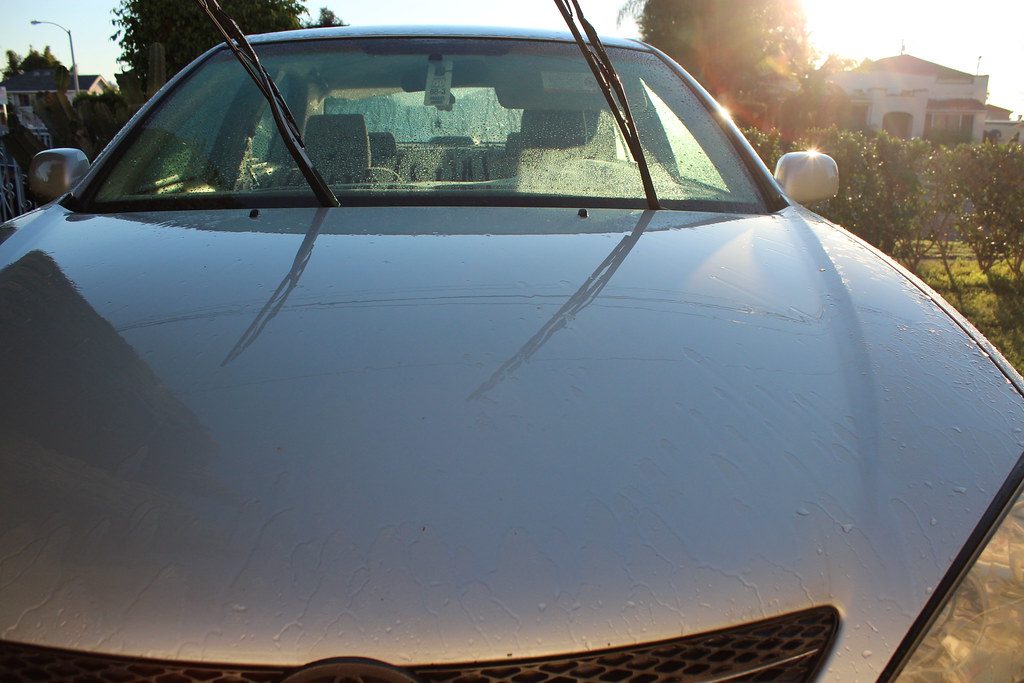 IMG_6039 by FSportIS, on Flickr
Already, time to attack? How?
1. Foam Canon + 2 water bucket wash with Carpro Reset shampoo
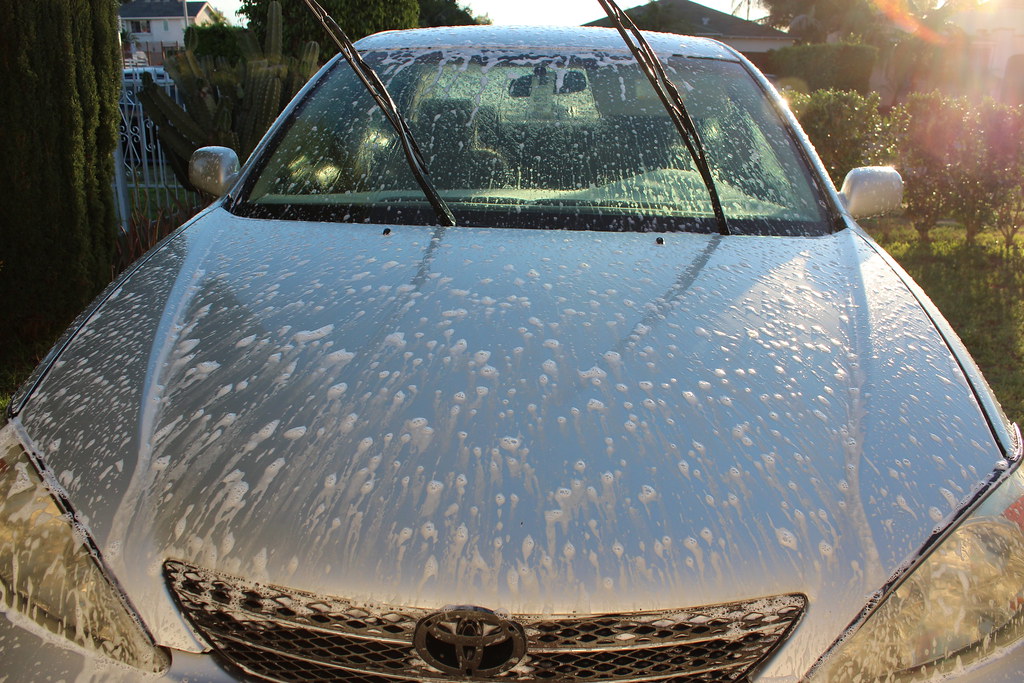 IMG_6043 by FSportIS, on Flickr
2. Removing as much water spot as I can with Carpro Spotless
 IMG_6044 by FSportIS, on Flickr
3. After drying with Absorber,Carpro Spotless are able to improve the look but there are still heavy water spot edging on the entire car that require polishing.
 IMG_6045 by FSportIS, on Flickr
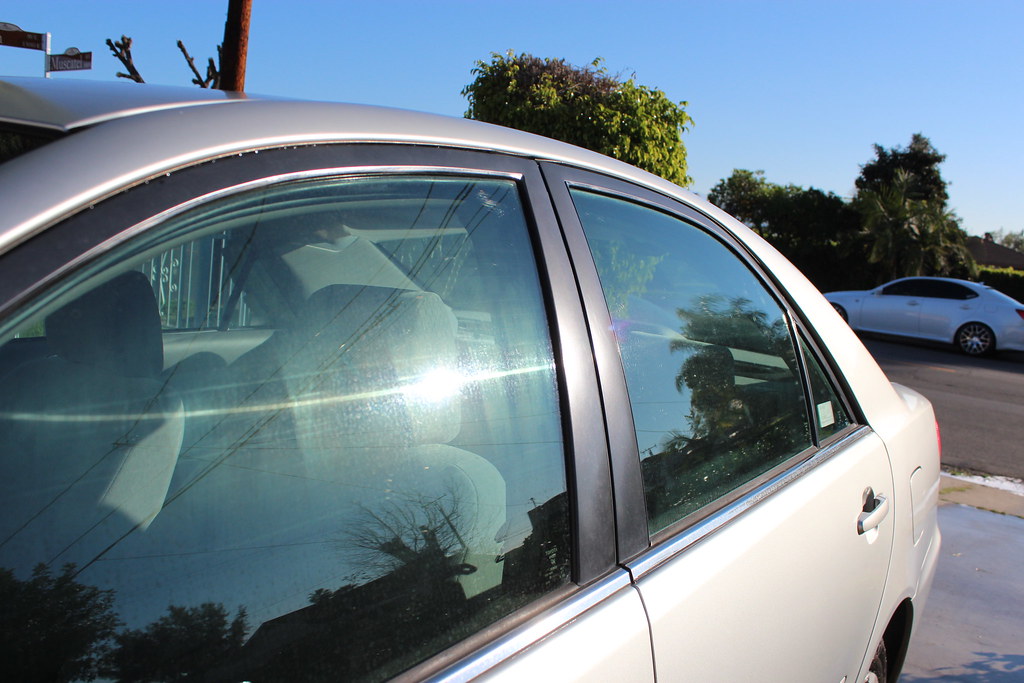
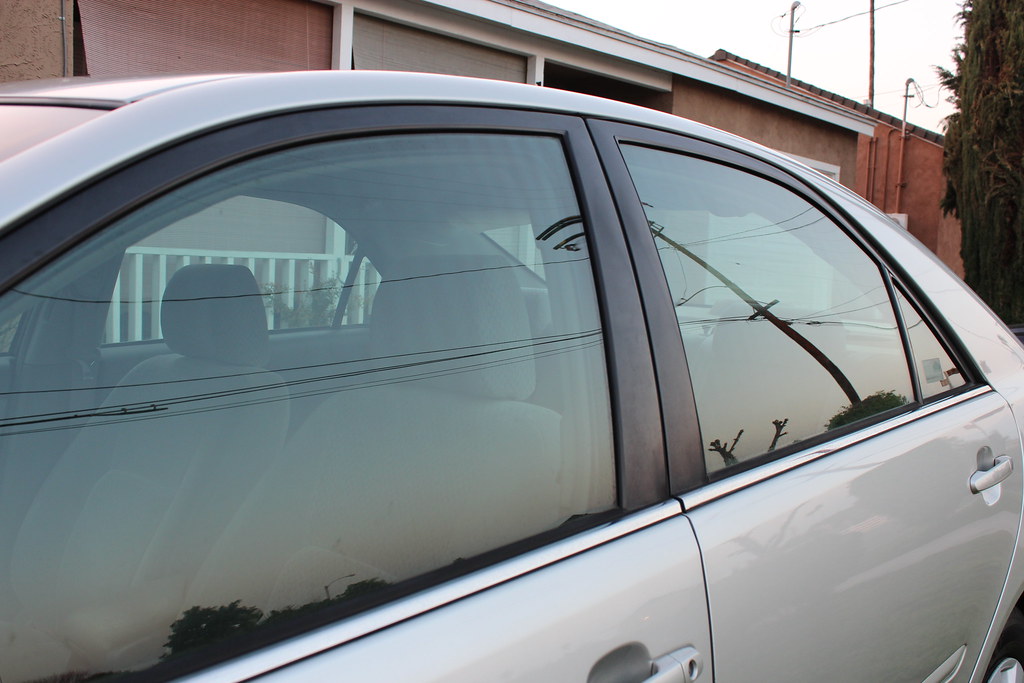
The rear glass comes out pretty good, I would say 90% improvement.
 IMG_6047 by FSportIS, on Flickr
4. Full Headlight Restoration with Meguiars Headlight Restoration Kit. I wet sand the headlights 3 times with 3 different sanding pads provided with the kit followed by a final polish with PlastX.
Before:
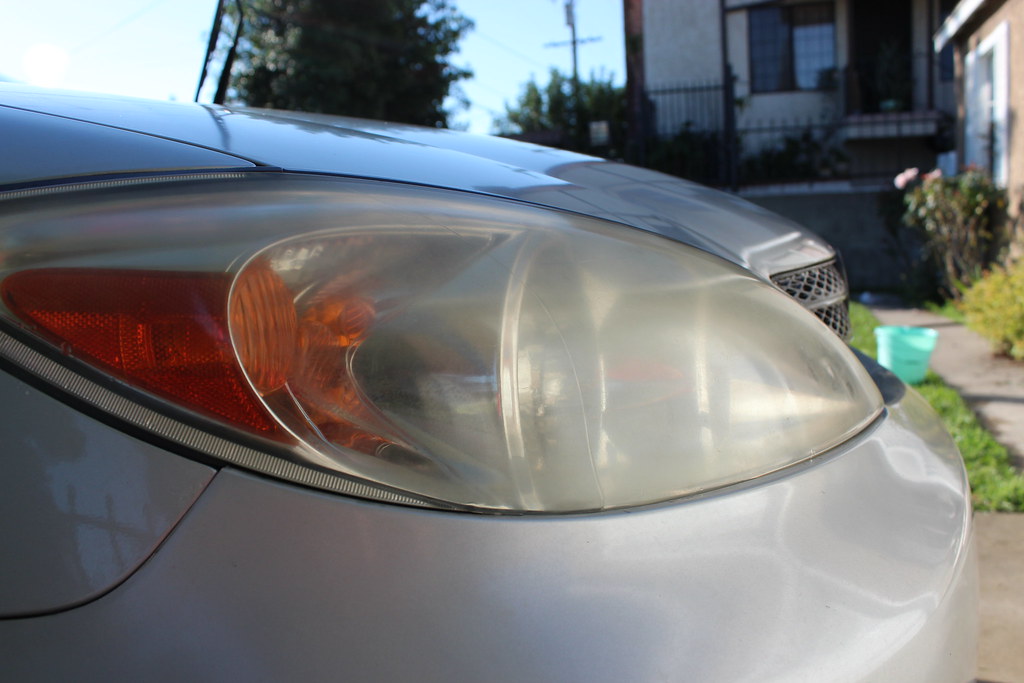 IMG_6050 by FSportIS, on Flickr
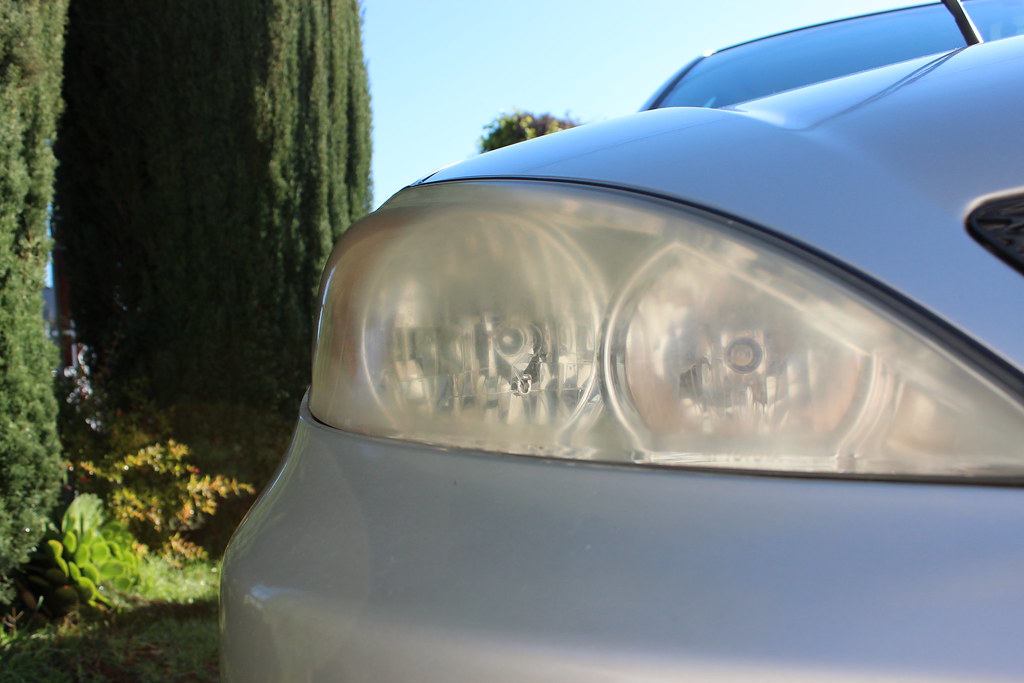 IMG_6052 by FSportIS, on Flickr
After with 50/50 shot. You know which one is finished.
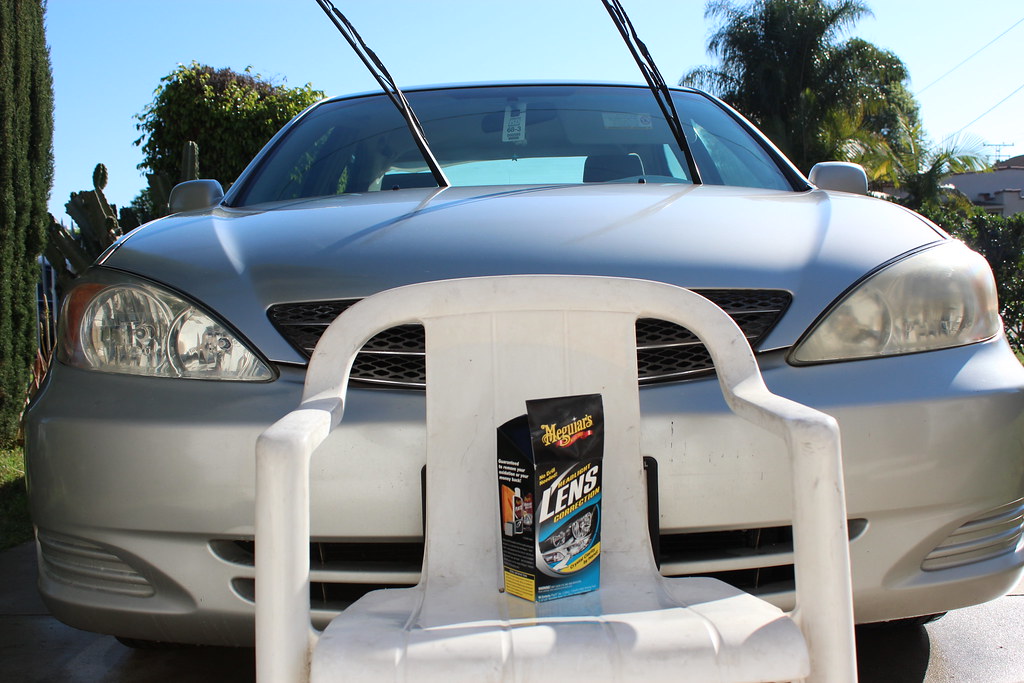 IMG_6053 by FSportIS, on Flickr
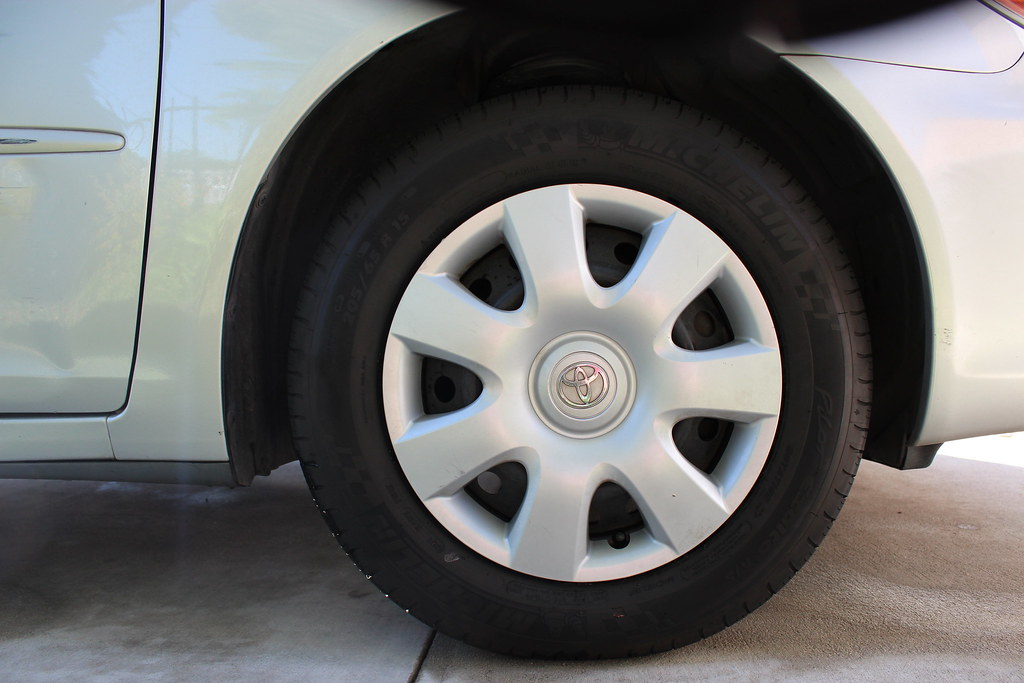
5. Wheels/Tires Crazy Cleaning with Both Meguairs All Purpose Cleaner, and followed up with Tuf Tire Cleaner all with Tuf Tire Brush.
Before, pay close attention at the color of the tire, it is brown, and caked with tons of junks.
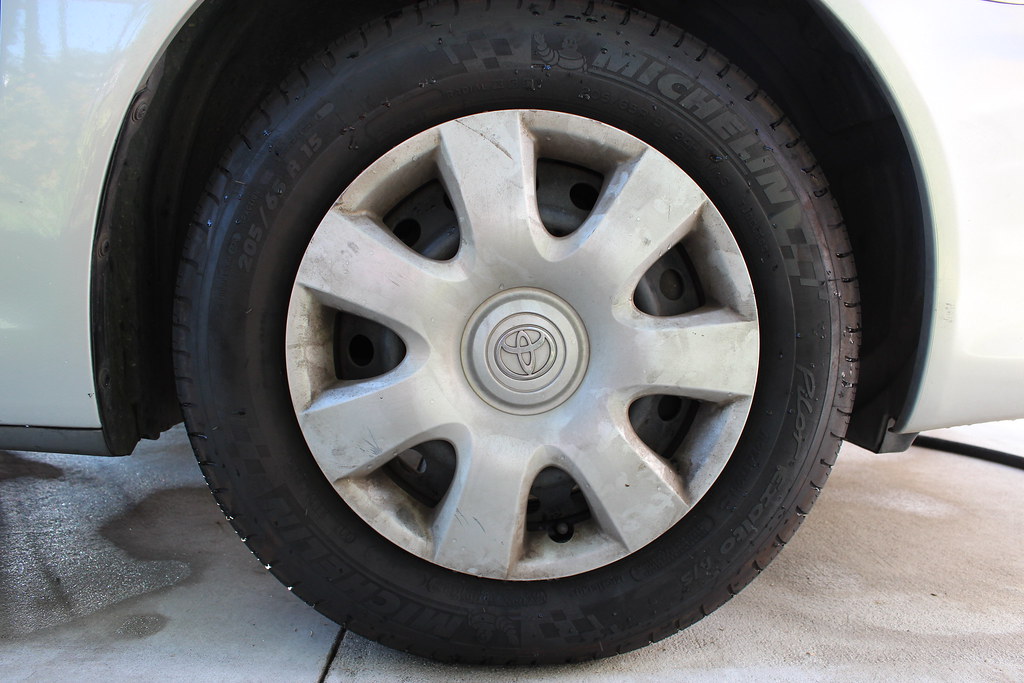 IMG_6064 by FSportIS, on Flickr
 IMG_6065 by FSportIS, on Flickr
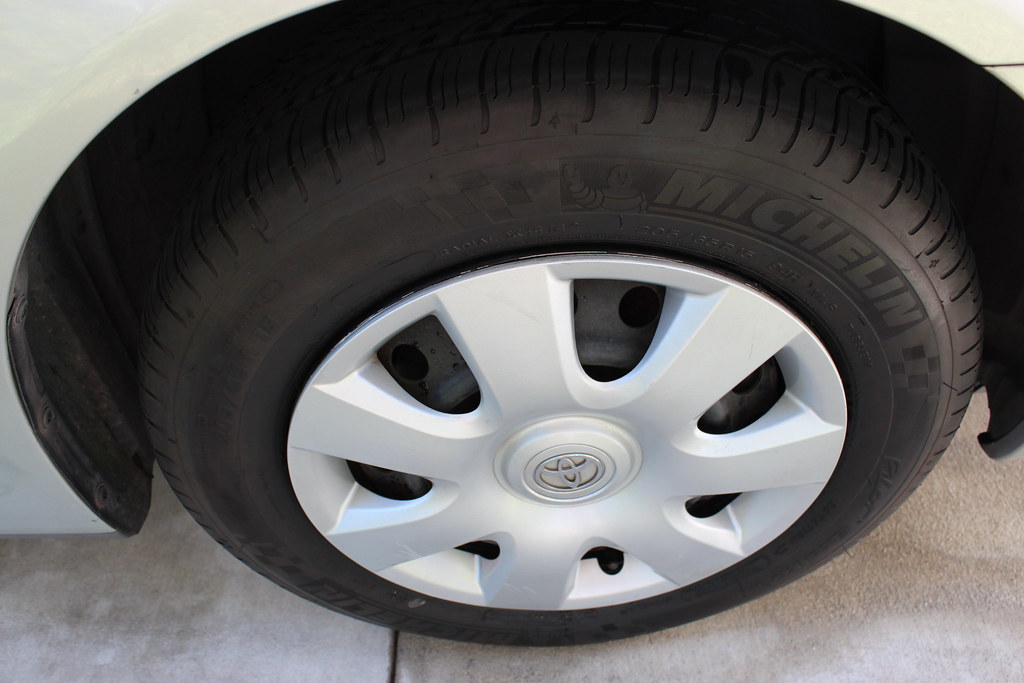
During the cleaning process, looks at that bad boy!!!!
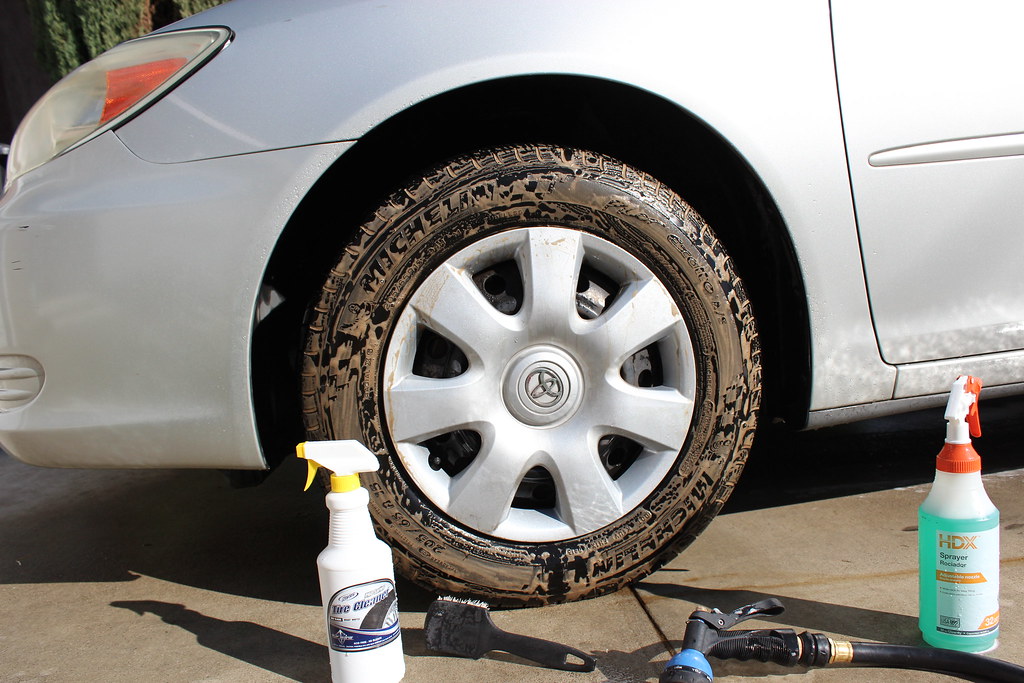 IMG_6062 by FSportIS, on Flickr
After:
 IMG_6070 by FSportIS, on Flickr
 IMG_6069 by FSportIS, on Flickr
6. Back to the paint, I decontaminate the paint with Carpro Iron X
All the horizontal surfaces are heavily contaminated. Look at all that bleeding, it hurts!!!!!!
Roof:
 IMG_6073 by FSportIS, on Flickr
Hood:
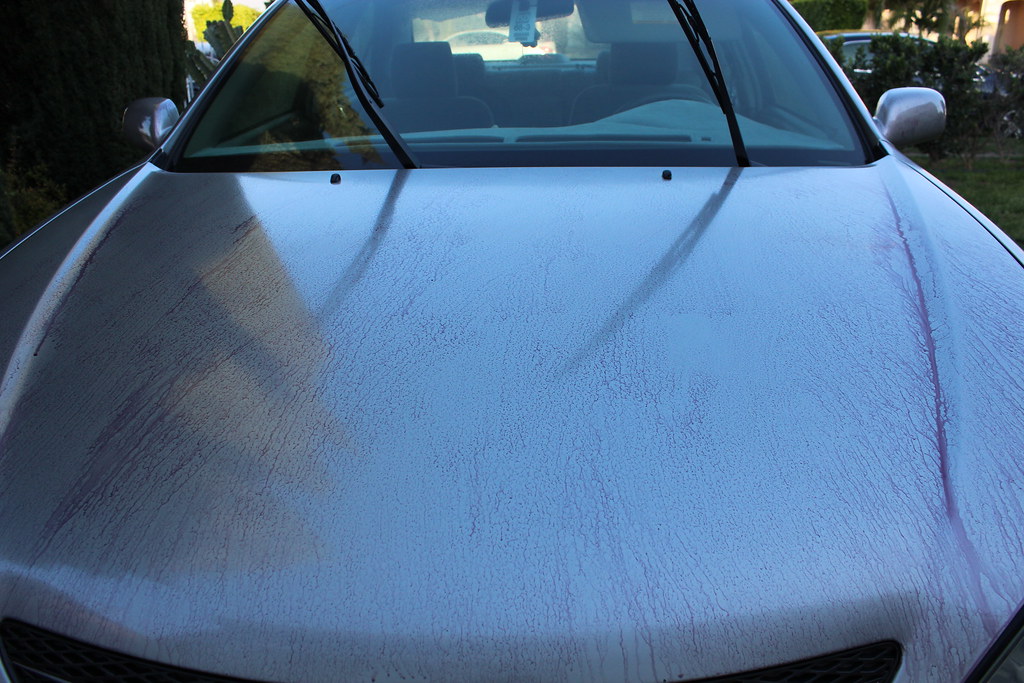 IMG_6075 by FSportIS, on Flickr
All the vertical panels are a lot better but the crevices are all bleeding still
 IMG_6077 by FSportIS, on Flickr
7. I decontaminate the paint again with Pinnacle Ultra Fine Clay Bar
Again, the horizontal surfaces are a mess! Look at this clay bar after finishing the hood
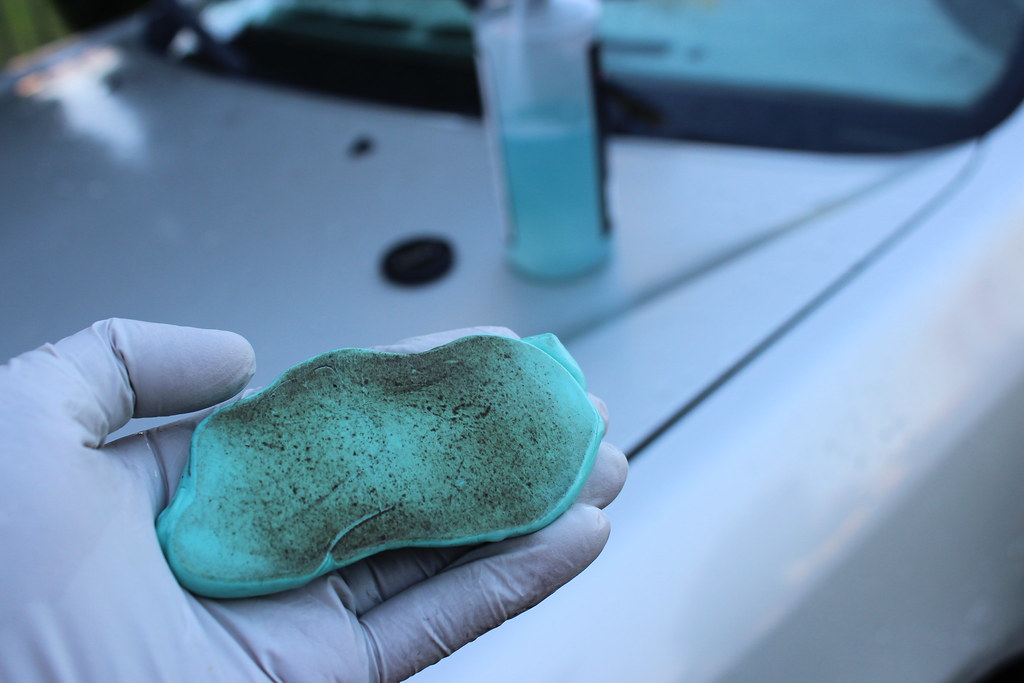 IMG_6080 by FSportIS, on Flickr
The vertical panels are a lot better. This clay bar is after finishing one door.
 IMG_6081 by FSportIS, on Flickr
), this is my 1st detailing project and using machine polisher for the very 1st time. Guess what? I'm going to tackle on my sister's Camry that has NEVER been washed nor detailed in 13 years. This car is only washed by mother nature--rain! I made NO money on this project. I spent hundreds of dollars on parts and 20 hours of labor on the weekends just to help my family out. All this is VOLUNTEER work for the DETAILING PASSION
This thread is to motivate the non-pro Do-It-Yourself-Er out there to give machine polishing a try! If you are thinking about it, don't worry, it is easier than you thought. If I can do it, you can do it too!
Have you ever wonder how it looks like?
1. Clear Coat Failure
IMG_6035 by FSportIS, on Flickr2. Super Water Spot Edging on the entire car!
IMG_6036 by FSportIS, on Flickr3. Super tar, dirt, dust, road grime, junks, acids, pollutions.. whatever mother nature throws at, you name it, it has it here.
IMG_6037 by FSportIS, on Flickr4. Random Super Deep Scratch
IMG_6034 by FSportIS, on Flickr5. Absolutely no protection for 13 years. Water runs flat on it with no beading nor sheeting.
IMG_6039 by FSportIS, on FlickrAlready, time to attack? How?
1. Foam Canon + 2 water bucket wash with Carpro Reset shampoo
IMG_6043 by FSportIS, on Flickr2. Removing as much water spot as I can with Carpro Spotless
IMG_6044 by FSportIS, on Flickr3. After drying with Absorber,Carpro Spotless are able to improve the look but there are still heavy water spot edging on the entire car that require polishing.
IMG_6045 by FSportIS, on FlickrThe rear glass comes out pretty good, I would say 90% improvement.
IMG_6047 by FSportIS, on Flickr4. Full Headlight Restoration with Meguiars Headlight Restoration Kit. I wet sand the headlights 3 times with 3 different sanding pads provided with the kit followed by a final polish with PlastX.
Before:
IMG_6050 by FSportIS, on FlickrIMG_6052 by FSportIS, on FlickrAfter with 50/50 shot. You know which one is finished.
IMG_6053 by FSportIS, on Flickr 5. Wheels/Tires Crazy Cleaning with Both Meguairs All Purpose Cleaner, and followed up with Tuf Tire Cleaner all with Tuf Tire Brush.
Before, pay close attention at the color of the tire, it is brown, and caked with tons of junks.
IMG_6064 by FSportIS, on FlickrIMG_6065 by FSportIS, on FlickrDuring the cleaning process, looks at that bad boy!!!!
IMG_6062 by FSportIS, on FlickrAfter:
IMG_6070 by FSportIS, on FlickrIMG_6069 by FSportIS, on Flickr6. Back to the paint, I decontaminate the paint with Carpro Iron X
All the horizontal surfaces are heavily contaminated. Look at all that bleeding, it hurts!!!!!!
Roof:
IMG_6073 by FSportIS, on FlickrHood:
IMG_6075 by FSportIS, on FlickrAll the vertical panels are a lot better but the crevices are all bleeding still
IMG_6077 by FSportIS, on Flickr7. I decontaminate the paint again with Pinnacle Ultra Fine Clay Bar
Again, the horizontal surfaces are a mess! Look at this clay bar after finishing the hood
IMG_6080 by FSportIS, on FlickrThe vertical panels are a lot better. This clay bar is after finishing one door.
IMG_6081 by FSportIS, on Flickr
Last edited by FSportIS; 03-16-15 at 01:05 PM.
 03-16-15, 12:45 PM
#2
8. Now, the paint has been cleaned and de-contaminated, it is ready for compounding and polishing. My combo is 2 steps process: Meguairs M100 compound on Lake Country Foam Orange Pads followed with Meguairs M205 Polish on Lake Country Foam White Pads. I do this on a 2 by 2 section at a time and I use light to medium pressure with a 4 section passes. I immediately wipe off the compounding or polish residue with Chemical Guys Professional Grade Microfiber Towels.
Test spot 50/50 shot, look at the heavy 13 year old oxidation being removed with just M100 on Orange pad.
 IMG_6090 by FSportIS, on Flickr
 IMG_6093 by FSportIS, on Flickr
 IMG_6100 by FSportIS, on Flickr
I'm very surprised that the M100 on orange pads cut super good while also finish very, very well.
M100 cutting ability here All water spots are removed, yep 100%
 IMG_6112 by FSportIS, on Flickr
M100 finish ability here Yes, this is a compound but finish like a polish
 IMG_6101 by FSportIS, on Flickr
 IMG_6109 by FSportIS, on Flickr
 IMG_6111 by FSportIS, on Flickr
Look at the clarity of the reflection of the light bulbs after 2nd step with M205 on White pad on a test spot
 IMG_6084 by FSportIS, on Flickr
9. To prepare for paint coating, I wipe off entire car surface with Carpro Eraser to make sure there is no oil, silicon or anything on it that prevent Cquartz UK coating bond to the paint. I also use Carpro BOA microfiber towels for steps.
10. Apply paint coating Cquartz UK to paint, glass, wheels for protection. I do this in a small section (about half size of a door) at a time, I drop 3 lines of solution to the small Carpro suede microfiber wrapped around an applicator and apply it horizontally first. Add more solution and do it vertically to the same area in a zik zak pattern to ensure complete coverage. I immediately buff off within 1 minute with the bigger Carpro suede microfibers and a final buff with Carpro BOA towels.
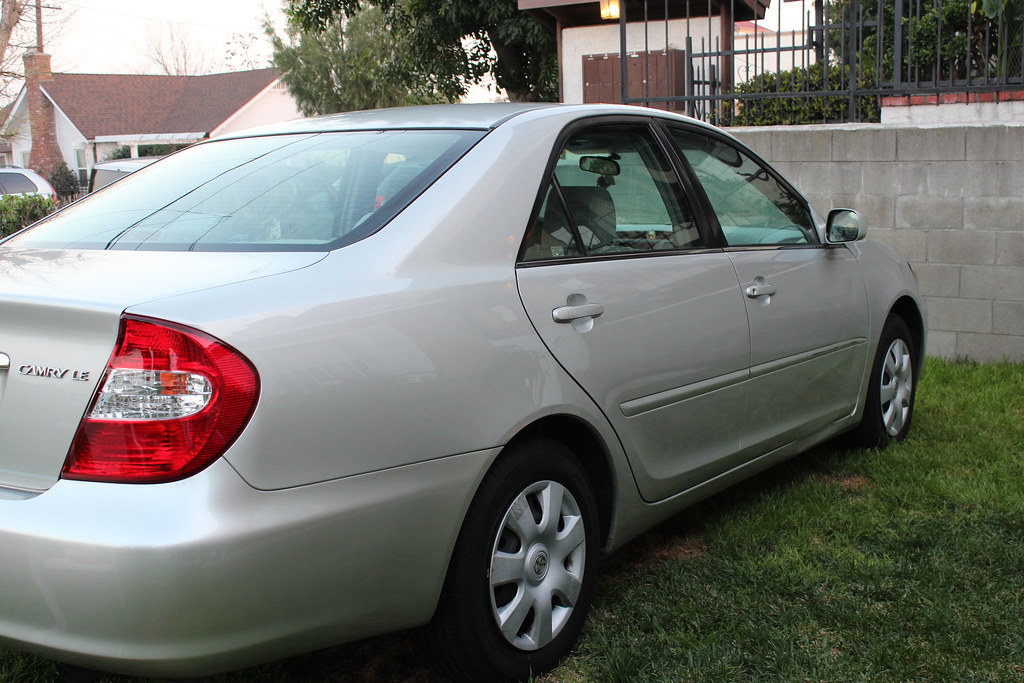
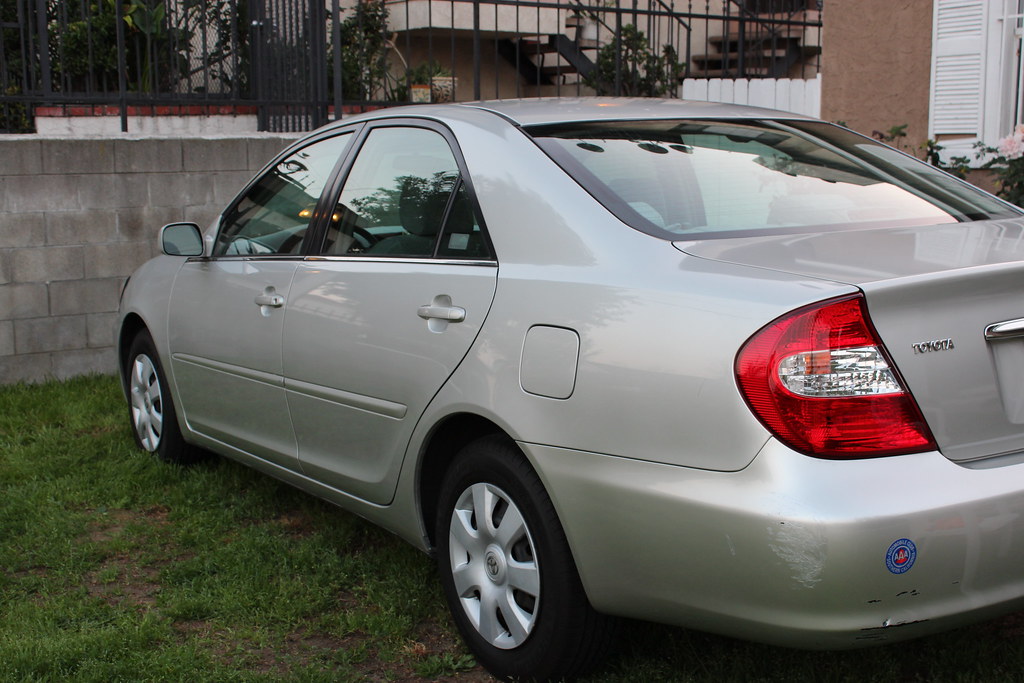
End results:
 IMG_6113 by FSportIS, on Flickr
Money shots here
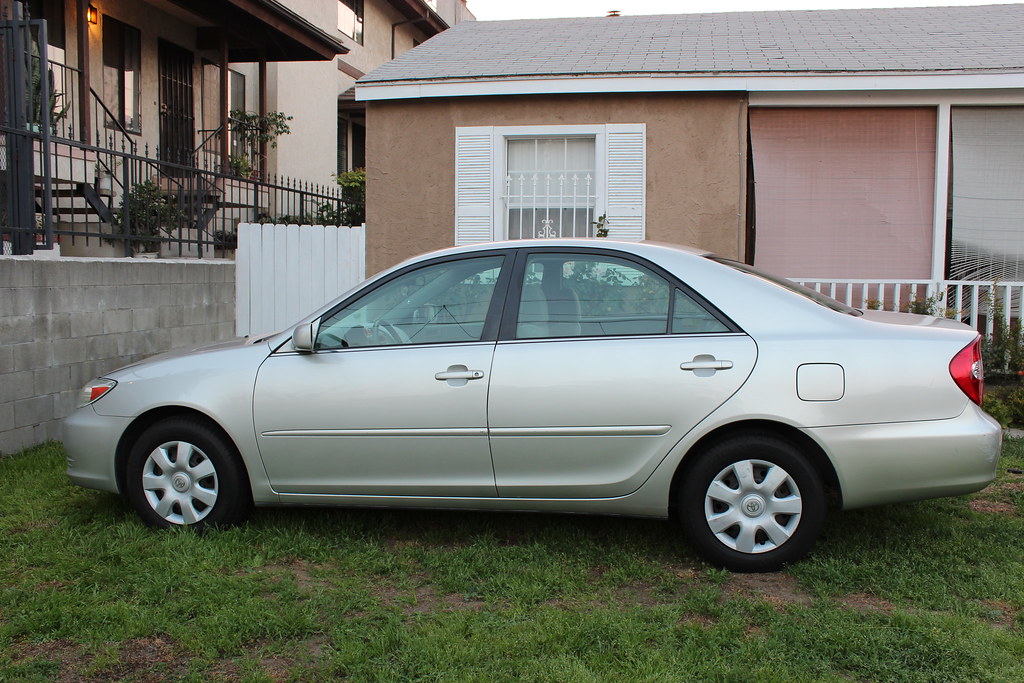 IMG_6114 by FSportIS, on Flickr
Look at the reflection:
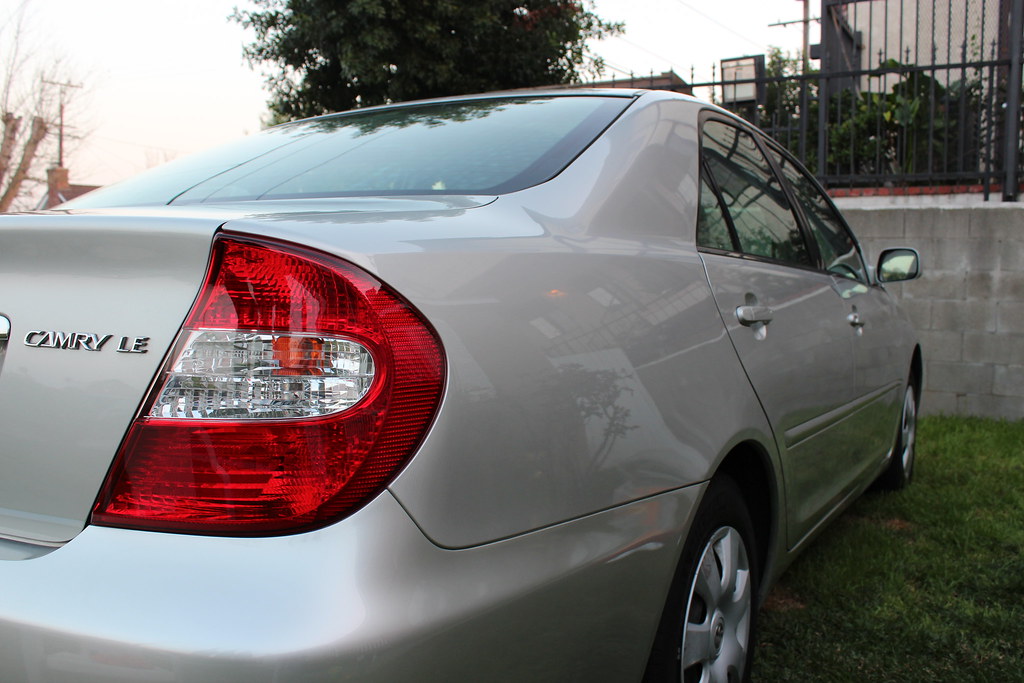 IMG_6116 by FSportIS, on Flickr
No more water spot and also protected
 IMG_6117 by FSportIS, on Flickr
Reflection, depth, gloss and wetness
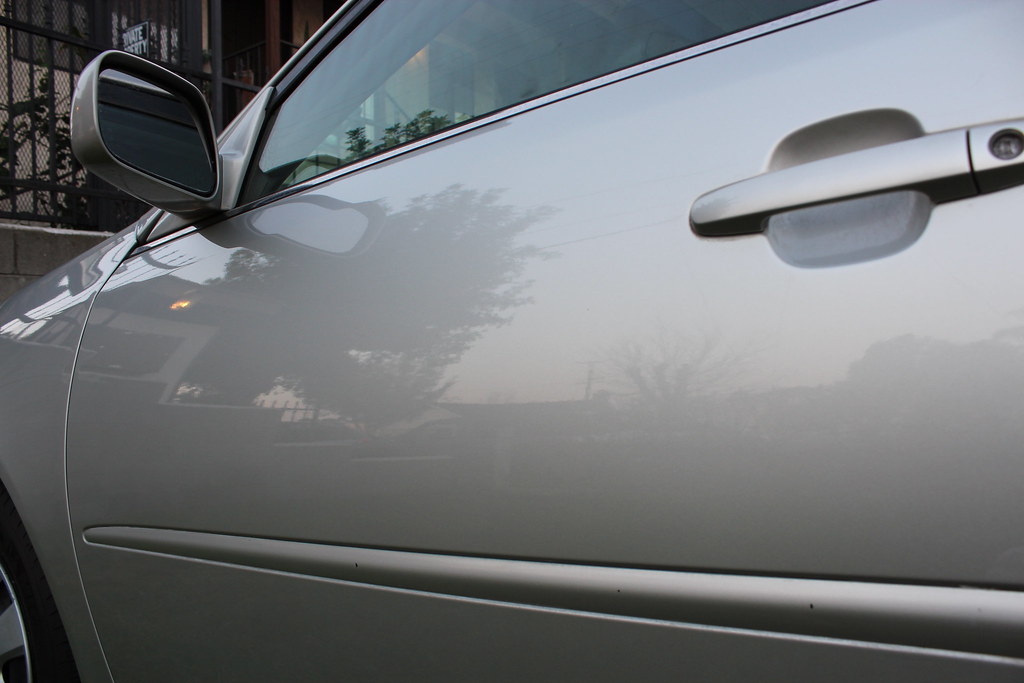 IMG_6118 by FSportIS, on Flickr
 IMG_6121 by FSportIS, on Flickr
 IMG_6122 by FSportIS, on Flickr
Test spot 50/50 shot, look at the heavy 13 year old oxidation being removed with just M100 on Orange pad.
IMG_6090 by FSportIS, on FlickrIMG_6093 by FSportIS, on FlickrIMG_6100 by FSportIS, on FlickrI'm very surprised that the M100 on orange pads cut super good while also finish very, very well.
M100 cutting ability here
All water spots are removed, yep 100%IMG_6112 by FSportIS, on FlickrM100 finish ability here
Yes, this is a compound but finish like a polishIMG_6101 by FSportIS, on FlickrIMG_6109 by FSportIS, on FlickrIMG_6111 by FSportIS, on FlickrLook at the clarity of the reflection of the light bulbs after 2nd step with M205 on White pad on a test spot
IMG_6084 by FSportIS, on Flickr9. To prepare for paint coating, I wipe off entire car surface with Carpro Eraser to make sure there is no oil, silicon or anything on it that prevent Cquartz UK coating bond to the paint. I also use Carpro BOA microfiber towels for steps.
10. Apply paint coating Cquartz UK to paint, glass, wheels for protection. I do this in a small section (about half size of a door) at a time, I drop 3 lines of solution to the small Carpro suede microfiber wrapped around an applicator and apply it horizontally first. Add more solution and do it vertically to the same area in a zik zak pattern to ensure complete coverage. I immediately buff off within 1 minute with the bigger Carpro suede microfibers and a final buff with Carpro BOA towels.
End results:
IMG_6113 by FSportIS, on FlickrMoney shots here
IMG_6114 by FSportIS, on FlickrLook at the reflection:
IMG_6116 by FSportIS, on FlickrNo more water spot and also protected
IMG_6117 by FSportIS, on FlickrReflection, depth, gloss and wetness
IMG_6118 by FSportIS, on FlickrIMG_6121 by FSportIS, on FlickrIMG_6122 by FSportIS, on Flickr

Trending Topics
03-18-15, 03:40 PM
#12
Thanks. I'm still noobie in training. I could work on some cars for fun 
Spotless work very well to remove light to medium water spots. If the water spots are less than 1 month old, Spotless can take care of them. If they are 13 year old water spots like the Camry above, Spotless can improve the look and polishing is required to completely remove it.
That is the motivation for me to work on this very car--to save it from dying. Clear coat failure is spreading everywhere. I was surprised at the end it turns out nice too despite my lack of experience.
Thanks
Thanks
03-18-15, 03:45 PM
#13
Clay bar step during decontamination will almost always create marring so I would highly recommend a light polish at minimum whenever you use clay bar.
03-19-15, 05:22 AM
#15

I did my sister's Taurus that was in a similar (though not quite as bad) condition, a few years ago. It was horrible. The whole time I was working on it, I was thinking about how I was wasting my time. After all, if she cared about the appearance, she would never have let it get so bad in the first place. Besides ... It's a Taurus. However after 2 FULL days on the interior and exterior, it actually came out pretty darn well, and I was pleased with the results. More importantly, so was she. In fact, she was inspired to actually start caring for it a little. The inside is now regularly cleaned up, and it gets regular washes! Now, I have no problem helping out by cleaning the paint once in a while, and keeping a good sealer on it. As much as I grumbled about it at the time, I feel really good about it, now.
Changing the world, one car at a time!
Changing the world, one car at a time!