Roadrover CL8018 8" Navigation IMPORTANT INFO
 07-06-14, 12:54 PM
#1
Lexus Test Driver
Thread Starter
I have been getting a number of PMs from users on this forum and decided that it may be beneficial to start a thread outlining some important information and files I have gathered since buying and installing my unit. This will not be a complete DIY or 'how to' but more of a supplemental guide to other DIYs on the forum. I wanted to highlight some of the tricky parts.
Completed product:
First of all I recommend to read through these threads, lots of good info:
https://www.clublexus.com/forums/is-...ufacturer.html
https://www.clublexus.com/forums/is-...6k-beware.html
https://www.clublexus.com/forums/is-...w-picture.html
https://www.clublexus.com/forums/is-...xus-menus.html
Before we start, here are some important files:
These are the factory firmware files. If you mess up your unit really bad, you can flash brand new firmware and this should fix most, if not all, issues:
http://www.mediafire.com/download/hc...RIMA-V1.55.rar
Extract these to an SD card, pop it in the device, power up and it should do its magic. It will then let you get into wince where you will have to paste a working D2280 folder.
Also note that the version number just means it is for a specific unit. I believe V1,28, 1.55 and 1.73 are all for this unit and I have not noticed any important differences. There is no reason to change to a different working version.
Next we have a WAY better looking skin. This is a skin I ported over form another roadrover unit on a non English site. I don't take credit for making the skin, I did however spend a decent amount of time making it work with out unit and creating missing pages. If you do not know how to change skins, start reading the 50 or so page thread that is linked above.
http://www.mediafire.com/download/a5...etter_skin.rar
Now we come to the boot logos:
http://www.mediafire.com/download/cb.../Boot_Logo.rar
Once you update the boot logo, the file must be deleted from the root of your SD card or reamed. Otherwise it will just keep updating every time you turn the unit on.
Here is the update.exe file that allows you to enter WinCE:
http://www.mediafire.com/download/gv...ju5/Update.exe
Here is my D2280 folder, this contains the updated skins (also renamed in the settings) and the radio fix. For most of you, this is what you want. If you are starting from scratch and don't have a D2280 folder on your unit, use the complete D2280 folder file:
http://www.mediafire.com/download/q1...0_Complete.rar
If you are replacing the existing D2280 folder, you want this folder that has the fonts deleted (over writing the font usually causes an error and halts the copying process):
http://www.mediafire.com/download/85...0_NO_FONTS.rar
INFO
To clear things up, there are 2 aftermarket navigation units available for the 2IS. The first being the 7" Flyaudio unit (which is most likely a rebranded Roadrover unit) and then there is the newer 8" Roadrover CL8018 unit, which is what I have installed. Roadrover is the company in China that is actually manufacturing these units. However they do not sell to the public. In order to get one, you will need to find a distributor off of Alibaba or Aliexpress.
The 7" unit is the older model meant for 2006-2008 Lexus 2IS. I do not have any experience with this unit but I have read that there were some issues with the CANbus protocol and there's a possibility of running into errors like the airbag light being on (or something like that).
The 8" newer unit is meant for a 2009-2012 but will work with a 2006-2008 unit, with minor modifications. I have a 2006 IS350, so everything in this thread will be based around that.
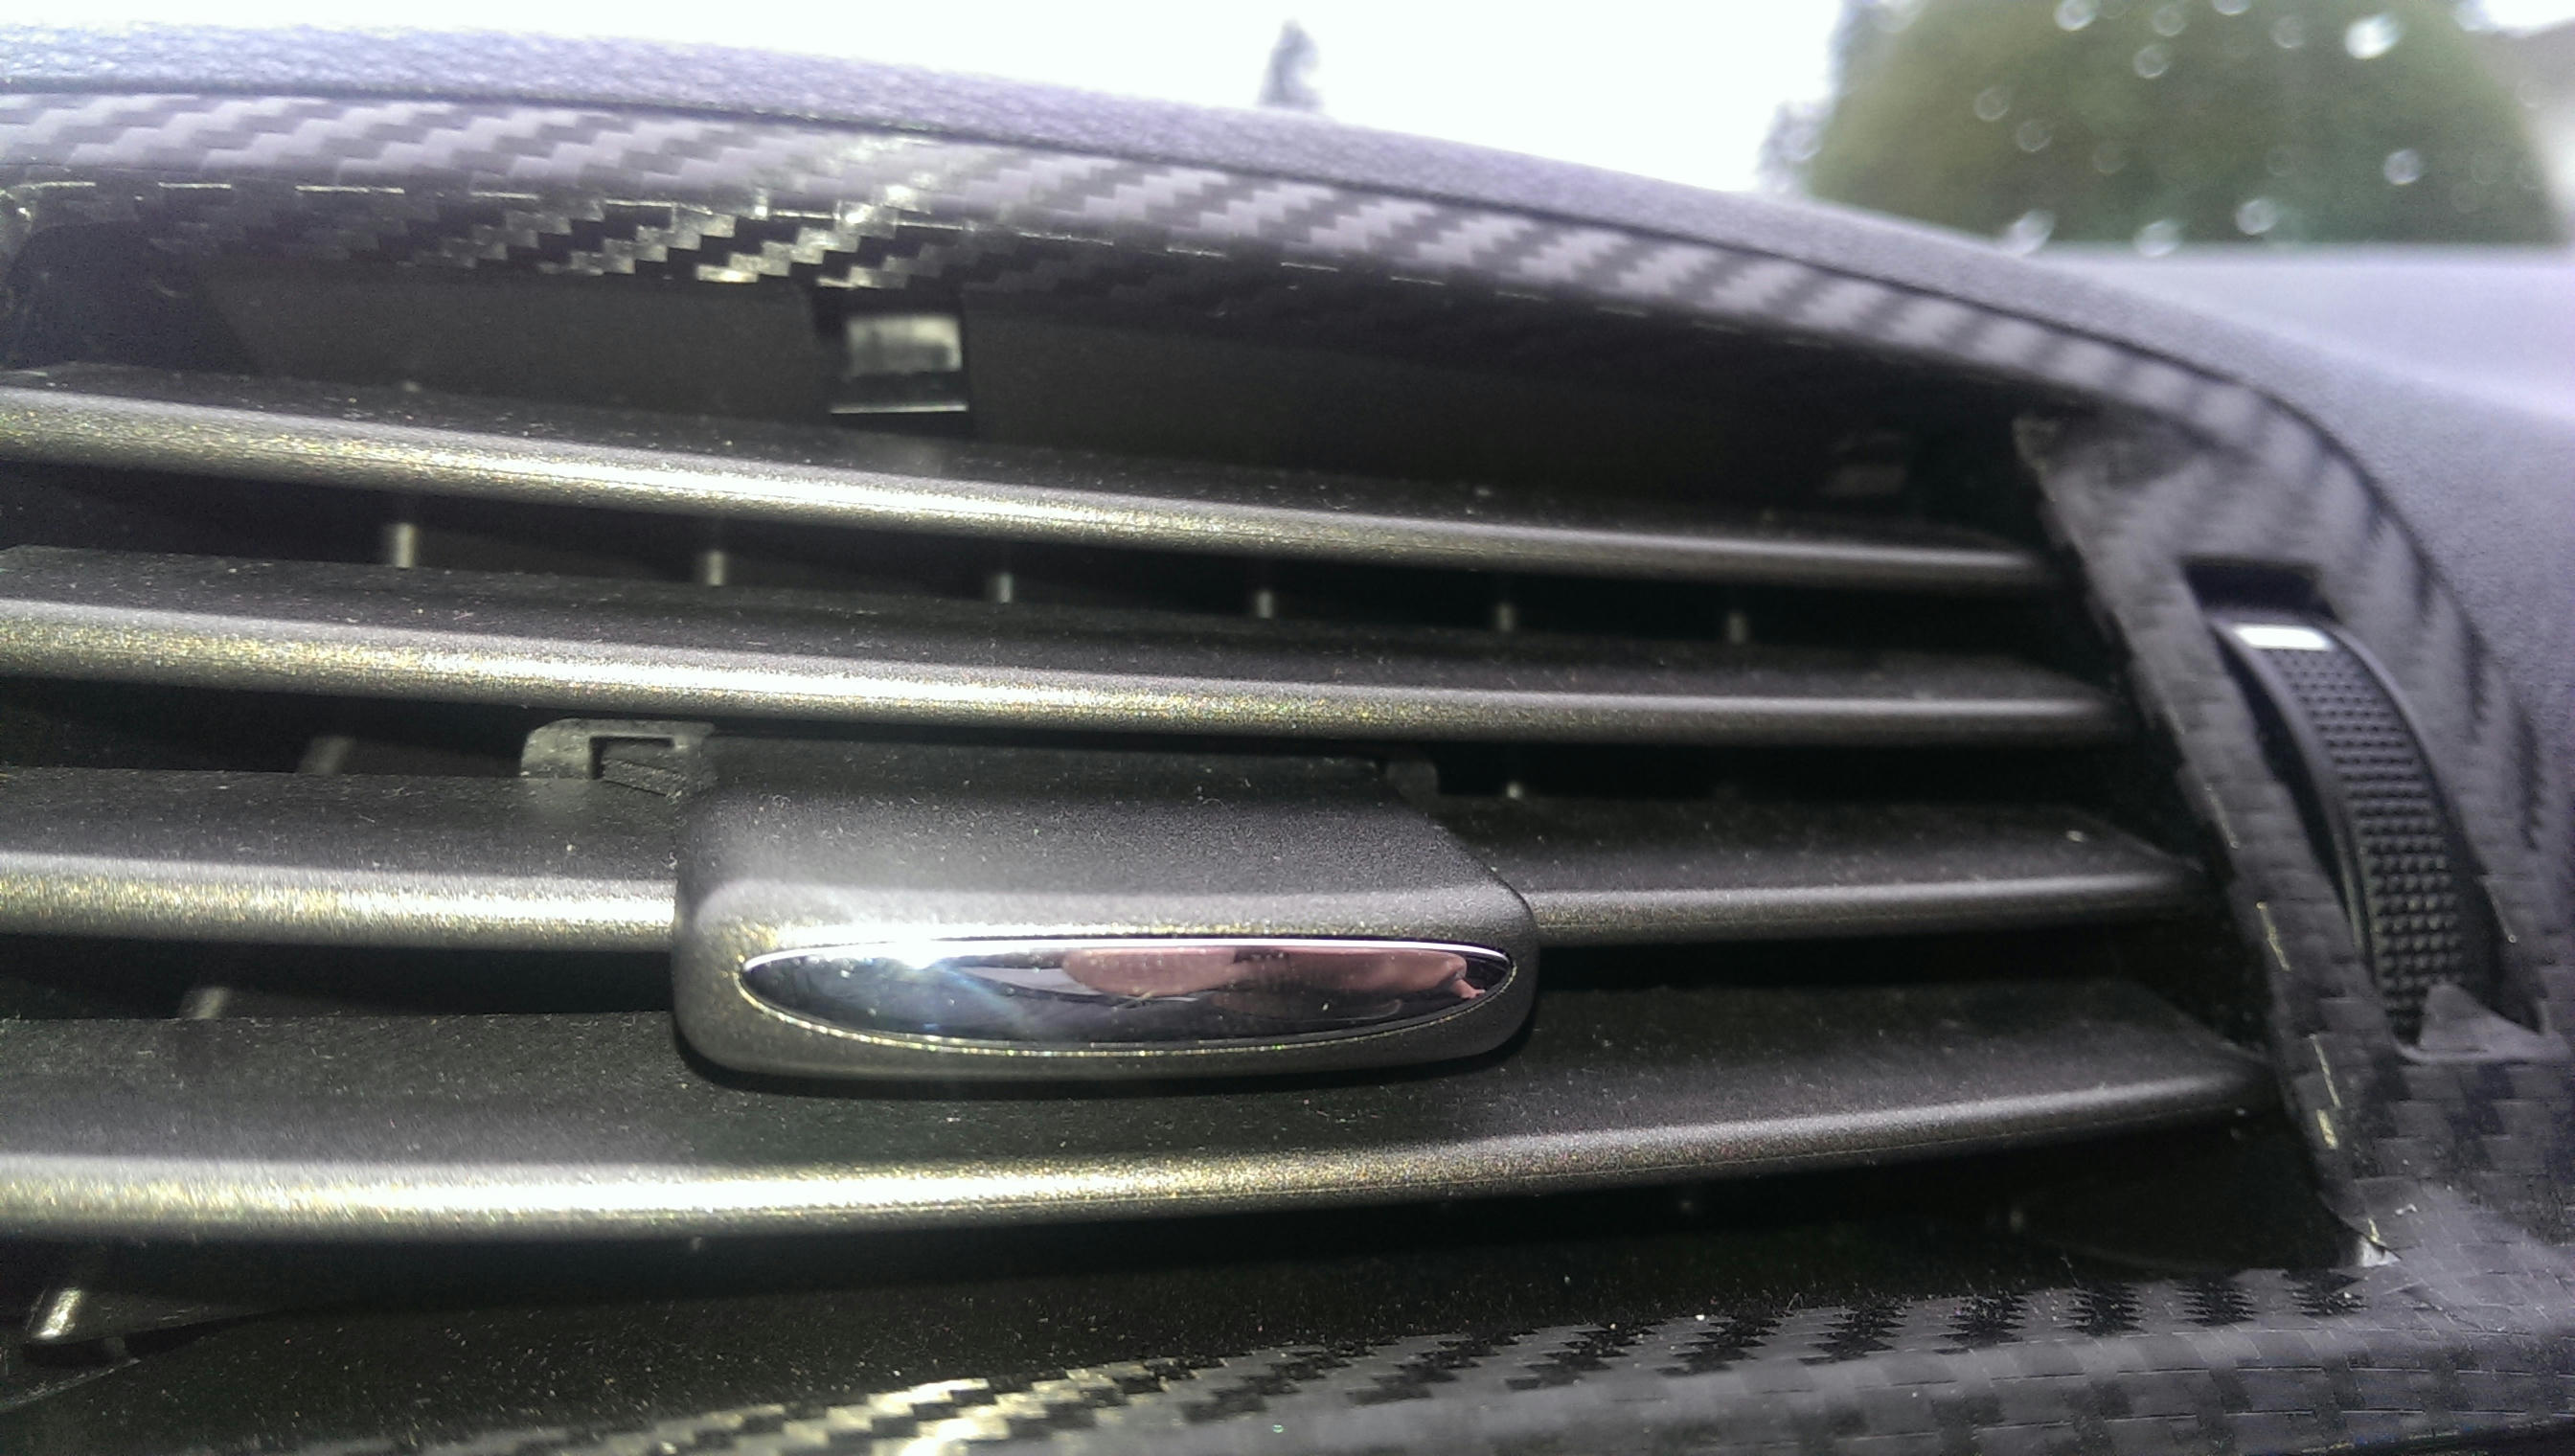
If you install the 8" unit into a 06-08 model 2IS, you will notice that there will be a gap between the unit and the AC vent. This is due to Lexus changing the design of the vent in 2009. You may either live with the gap, find a way to fill in the gap (like I did) or buy a newer 09+ vent. If you do buy the new vent, it will also need some cutting and modifying to work.
From here on I will only be discussing the Roadrover 8" unit.
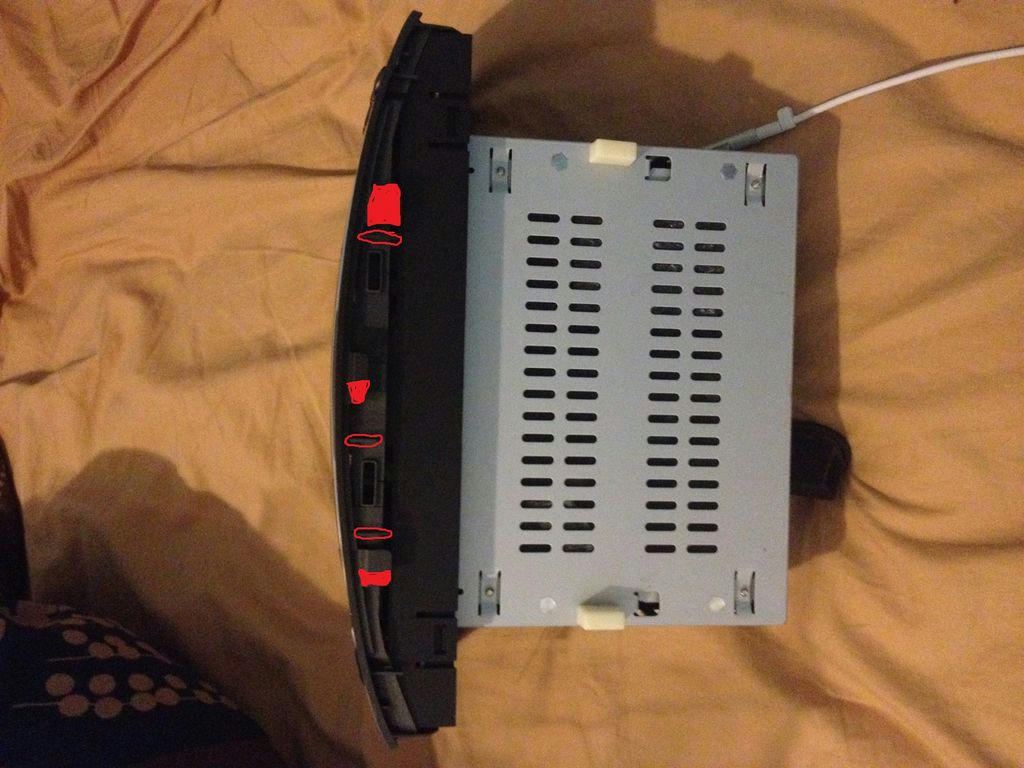
In order to install the unit, the following modifications will need to be made:
You will need to cut out the red marks in the picture below. (This pic was created by someone else on the forum)
The USB plug (shown below) is a male plug that is meant to plug into the back of the factory USB plug. Since the 2006 models do not have this, the best option is to cut it off and solder on a female connector. (Please note that the pins aren't the same layout as a standard USB Plug, which means a female to female USB gender bender will not work. But the wires inside are the standard colour code.
Before:

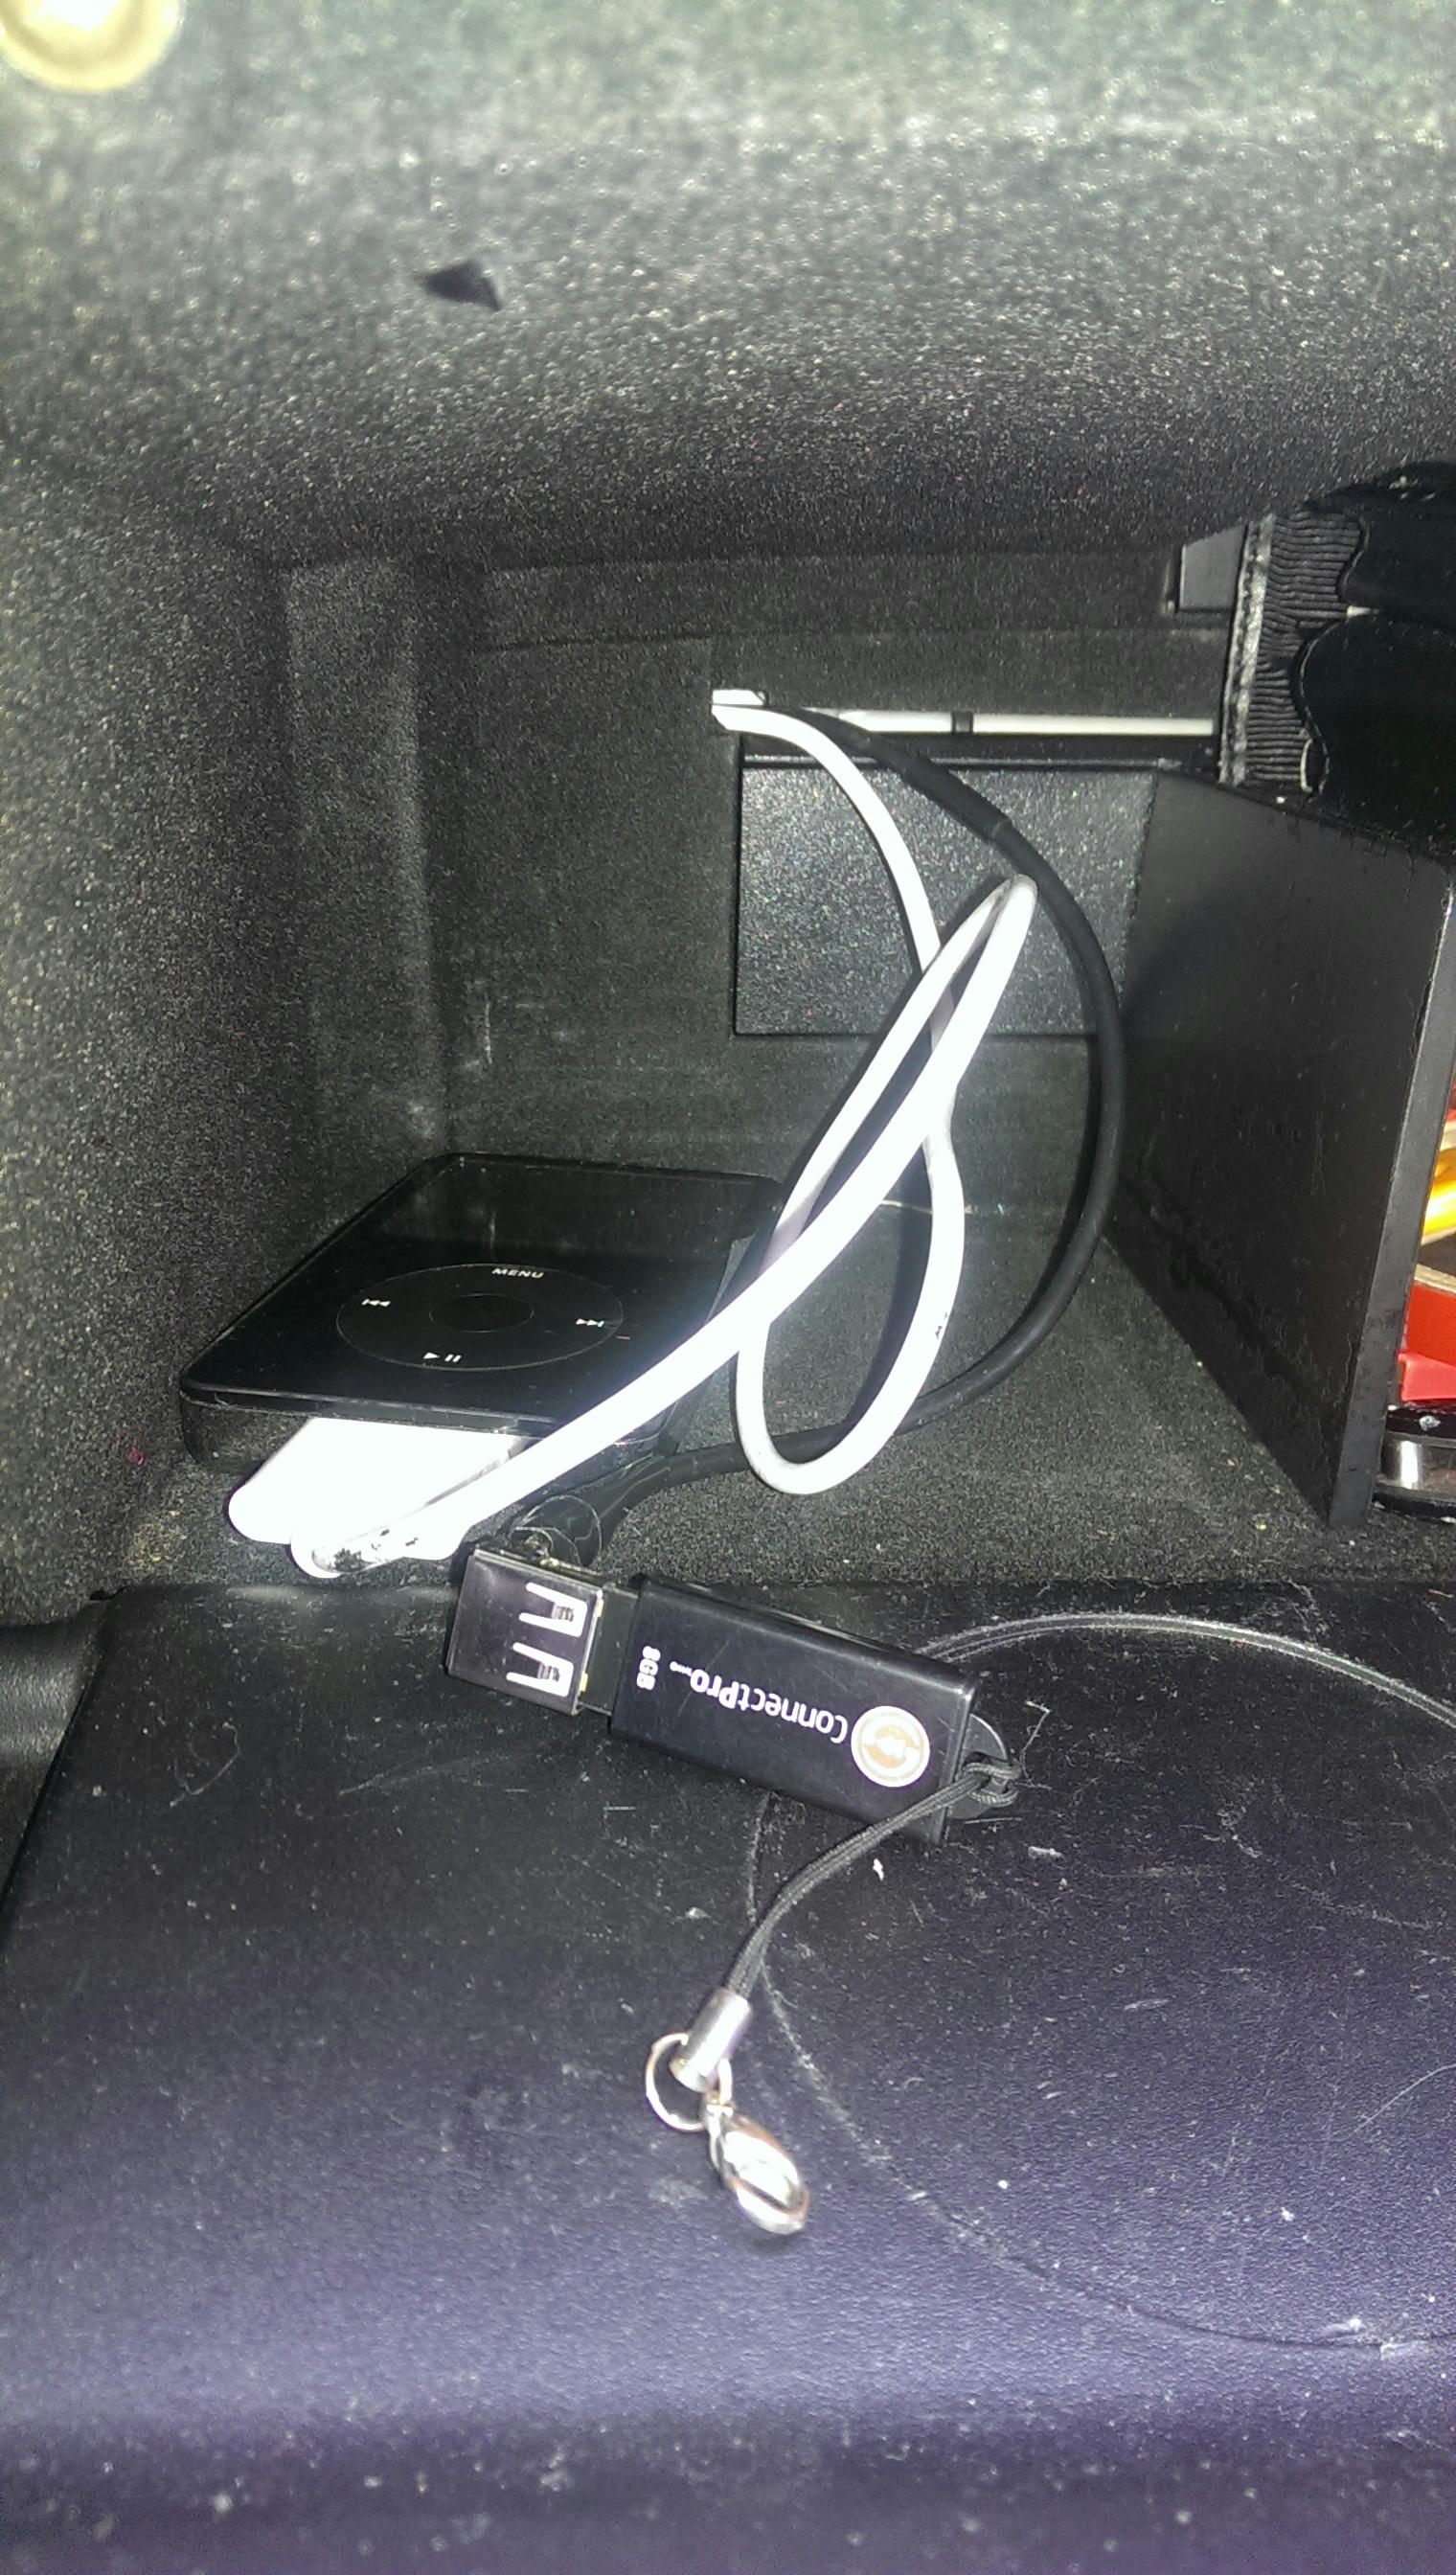
After (Also shows where I ran the USB and iPOD cable):
I would recommend doing the soldering before the install. It is a bit scary soldering inside the car.
The vent removal is probably the hardest part if you do not know where the tabs are located. Each one must be popped down with a flat head screw driver before the vent will come out nicely.
The GPS antenna can be mounted quite nicely behind the rear view mirror:

You may notice mine looks kind of funny, I have wrapped the bottom of the antenna and my dash cam in tin foil and black electrical tape because of interference.
I will also mention that if you are not detecting a GPS antenna connected, it is probably set up for the wrong port in your sys.txt file for iGO (or missing completely). You will have to add a line in the syst.txt file telling it which port your GPS antenna is on.
By removing the panel below the steering wheel and on the left of the dash, you can easily route the cable.
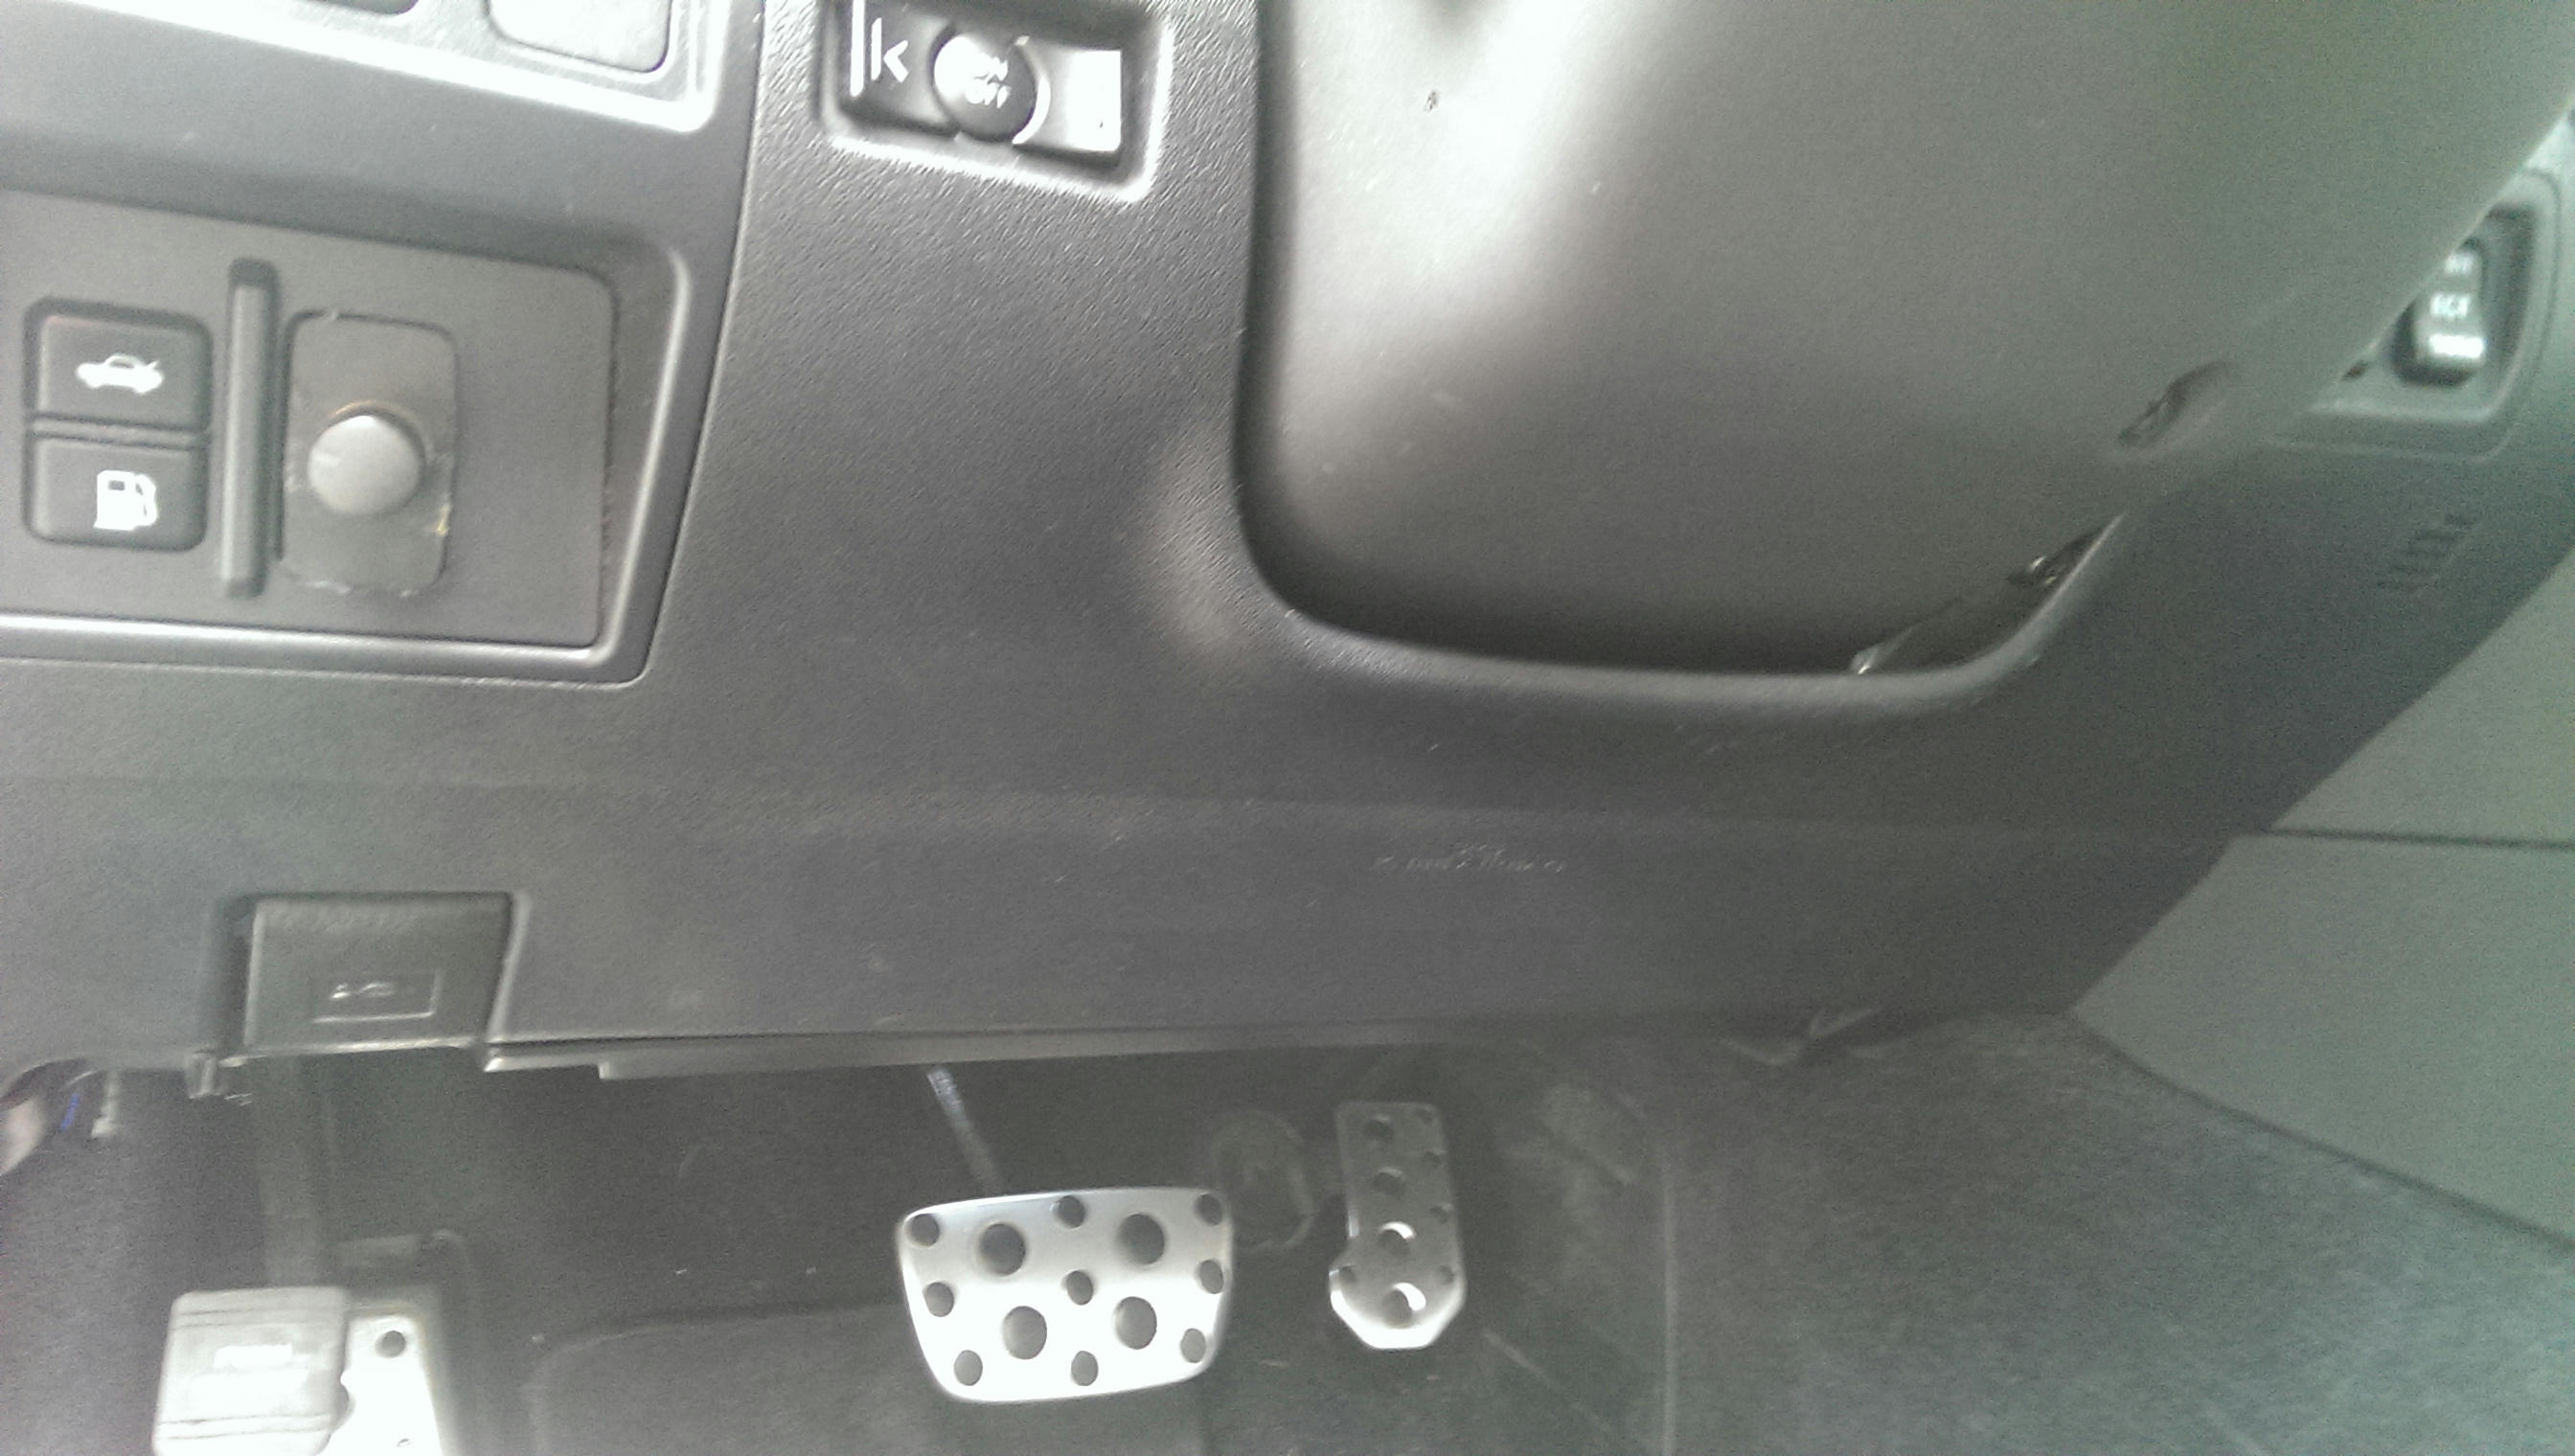

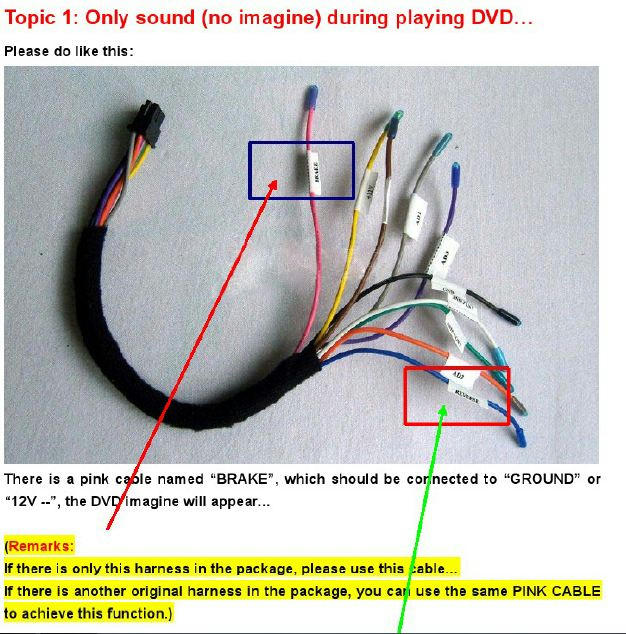
If you want to play movies while driving (or even if you don't) I recommend grounding the pink brake wire. This makes the unit think you have the parking brake on.
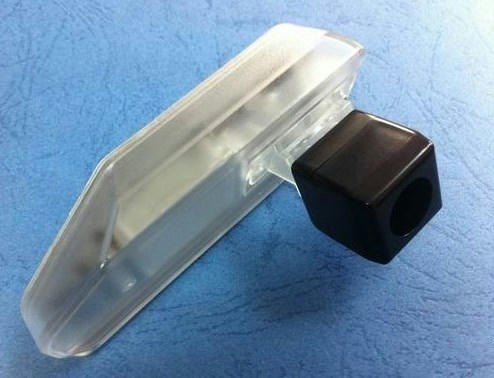
Now we come to the backup camera, I went with the OEM style. This is not like the OEM camera that would come with the car, but one that uses the license plate LED housing, meaning no drilling holes.
Here is a quick diagram of how to wire it up:
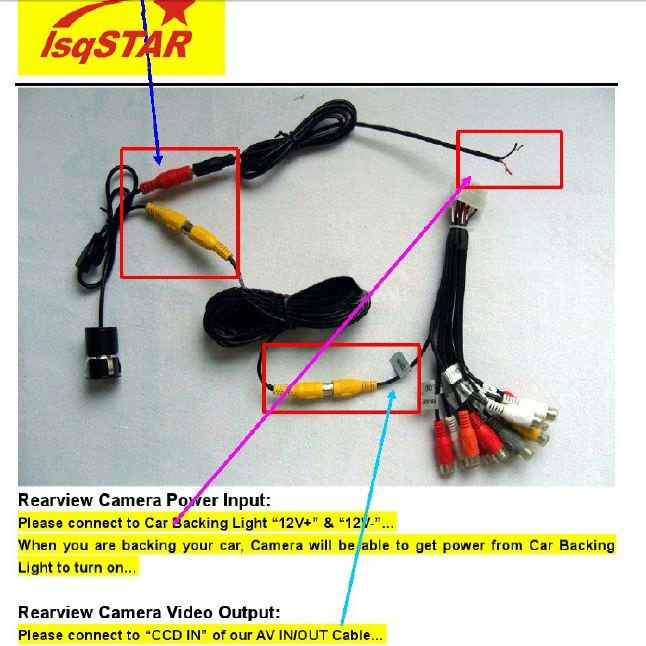
For the camera power and reverse signal, I tapped into the reverse bulb power, since it is right in the trunk lid by the camera. I am pretty sure the video cable that comes with the camera also has an additional wire, which is to be used as the reverse signal that goes back to the navigation unit.
Now to physically install the camera is a bit of a pain. Once you run the wires all the way to the trunk, to get out the LED housing, you have to remove the outside painted panel on the trunk. Start by removing the inside carpeted portion, remove the nuts holding the back outer piece in place then the outer piece should pop off. Be VERY careful that you don't bend or crack this piece!

Next you will need to remove the stock LED housing and install the new camera housing. As is, it will not fit. You must separate the black camera cube from the housing and feed them through separately then reconnect once inside.
I also noticed that the new LED is sort of blue, where as the older one is more of a white/yellow. To fix this, put on a couple layers of masking tape (seriously, works perfect).

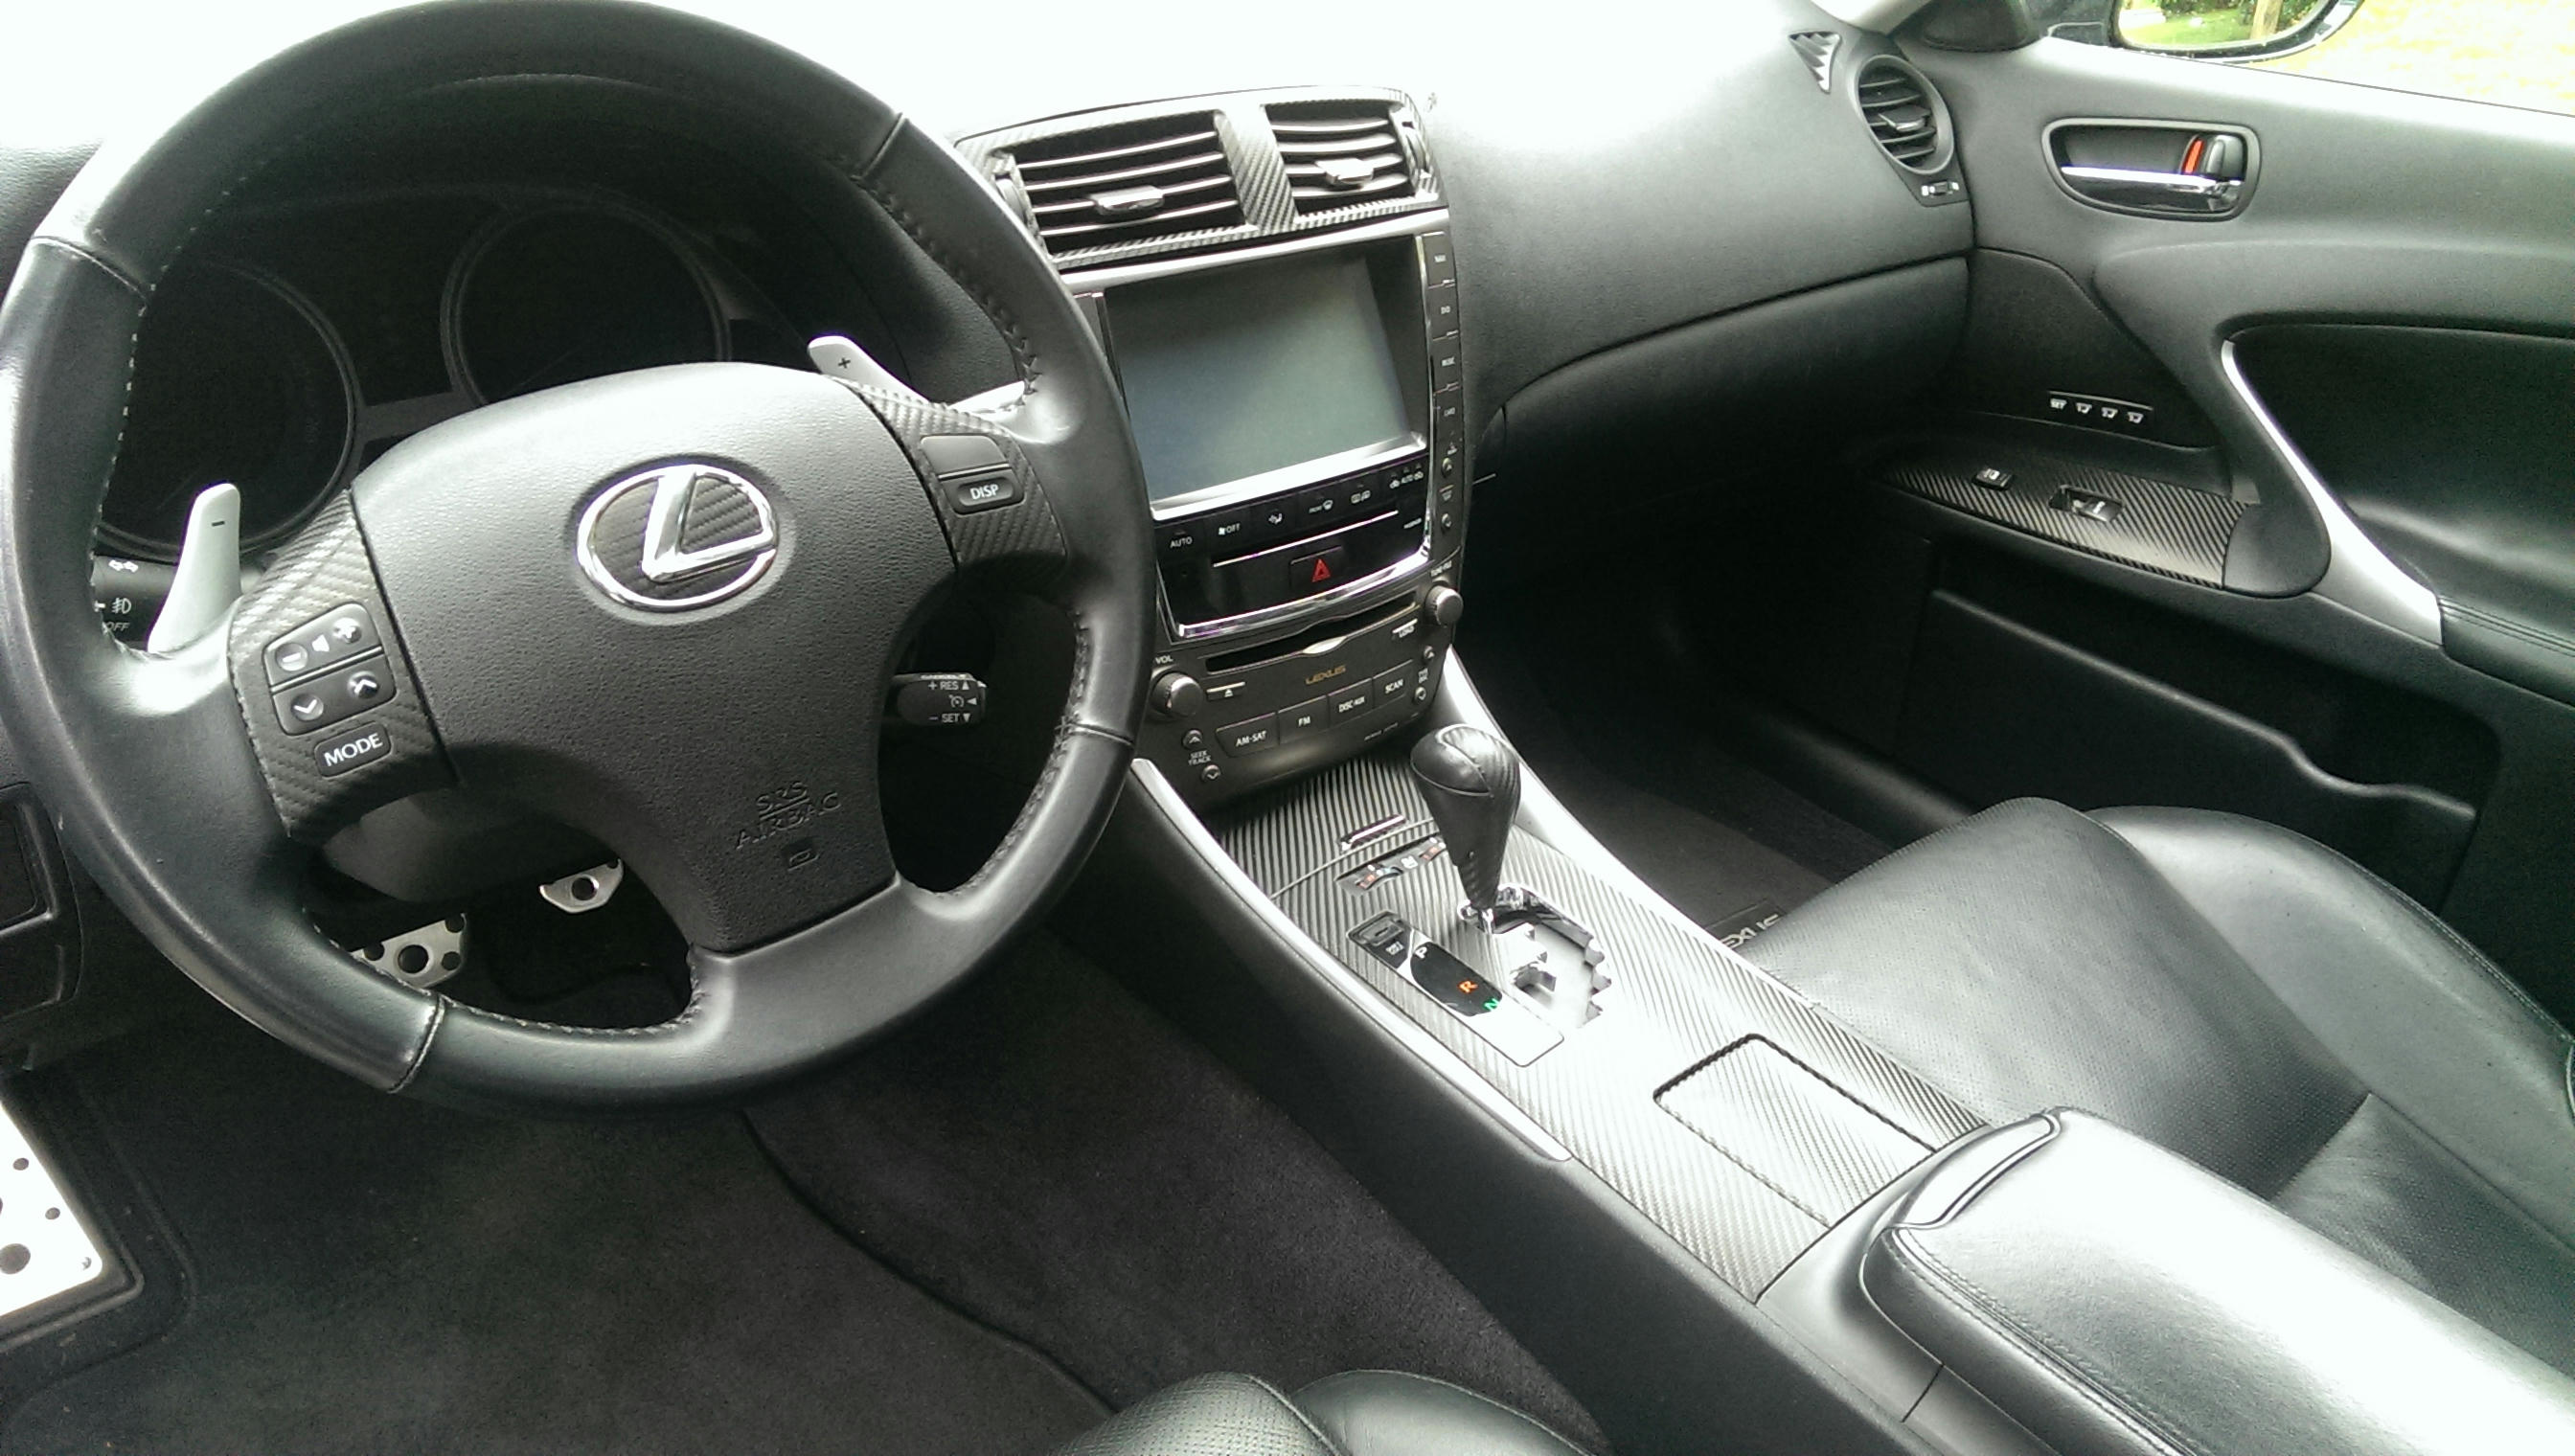
And finally, here are some pics of my completed install. You will notice that I have used 3M 1080 carbon fiber wrap on the AC vents, I also got some stick on foam weather proofing and cut it to fit nicely in the gap. This greatly improved the looks of the gap without having to spend $200 on a new 09+ vent.
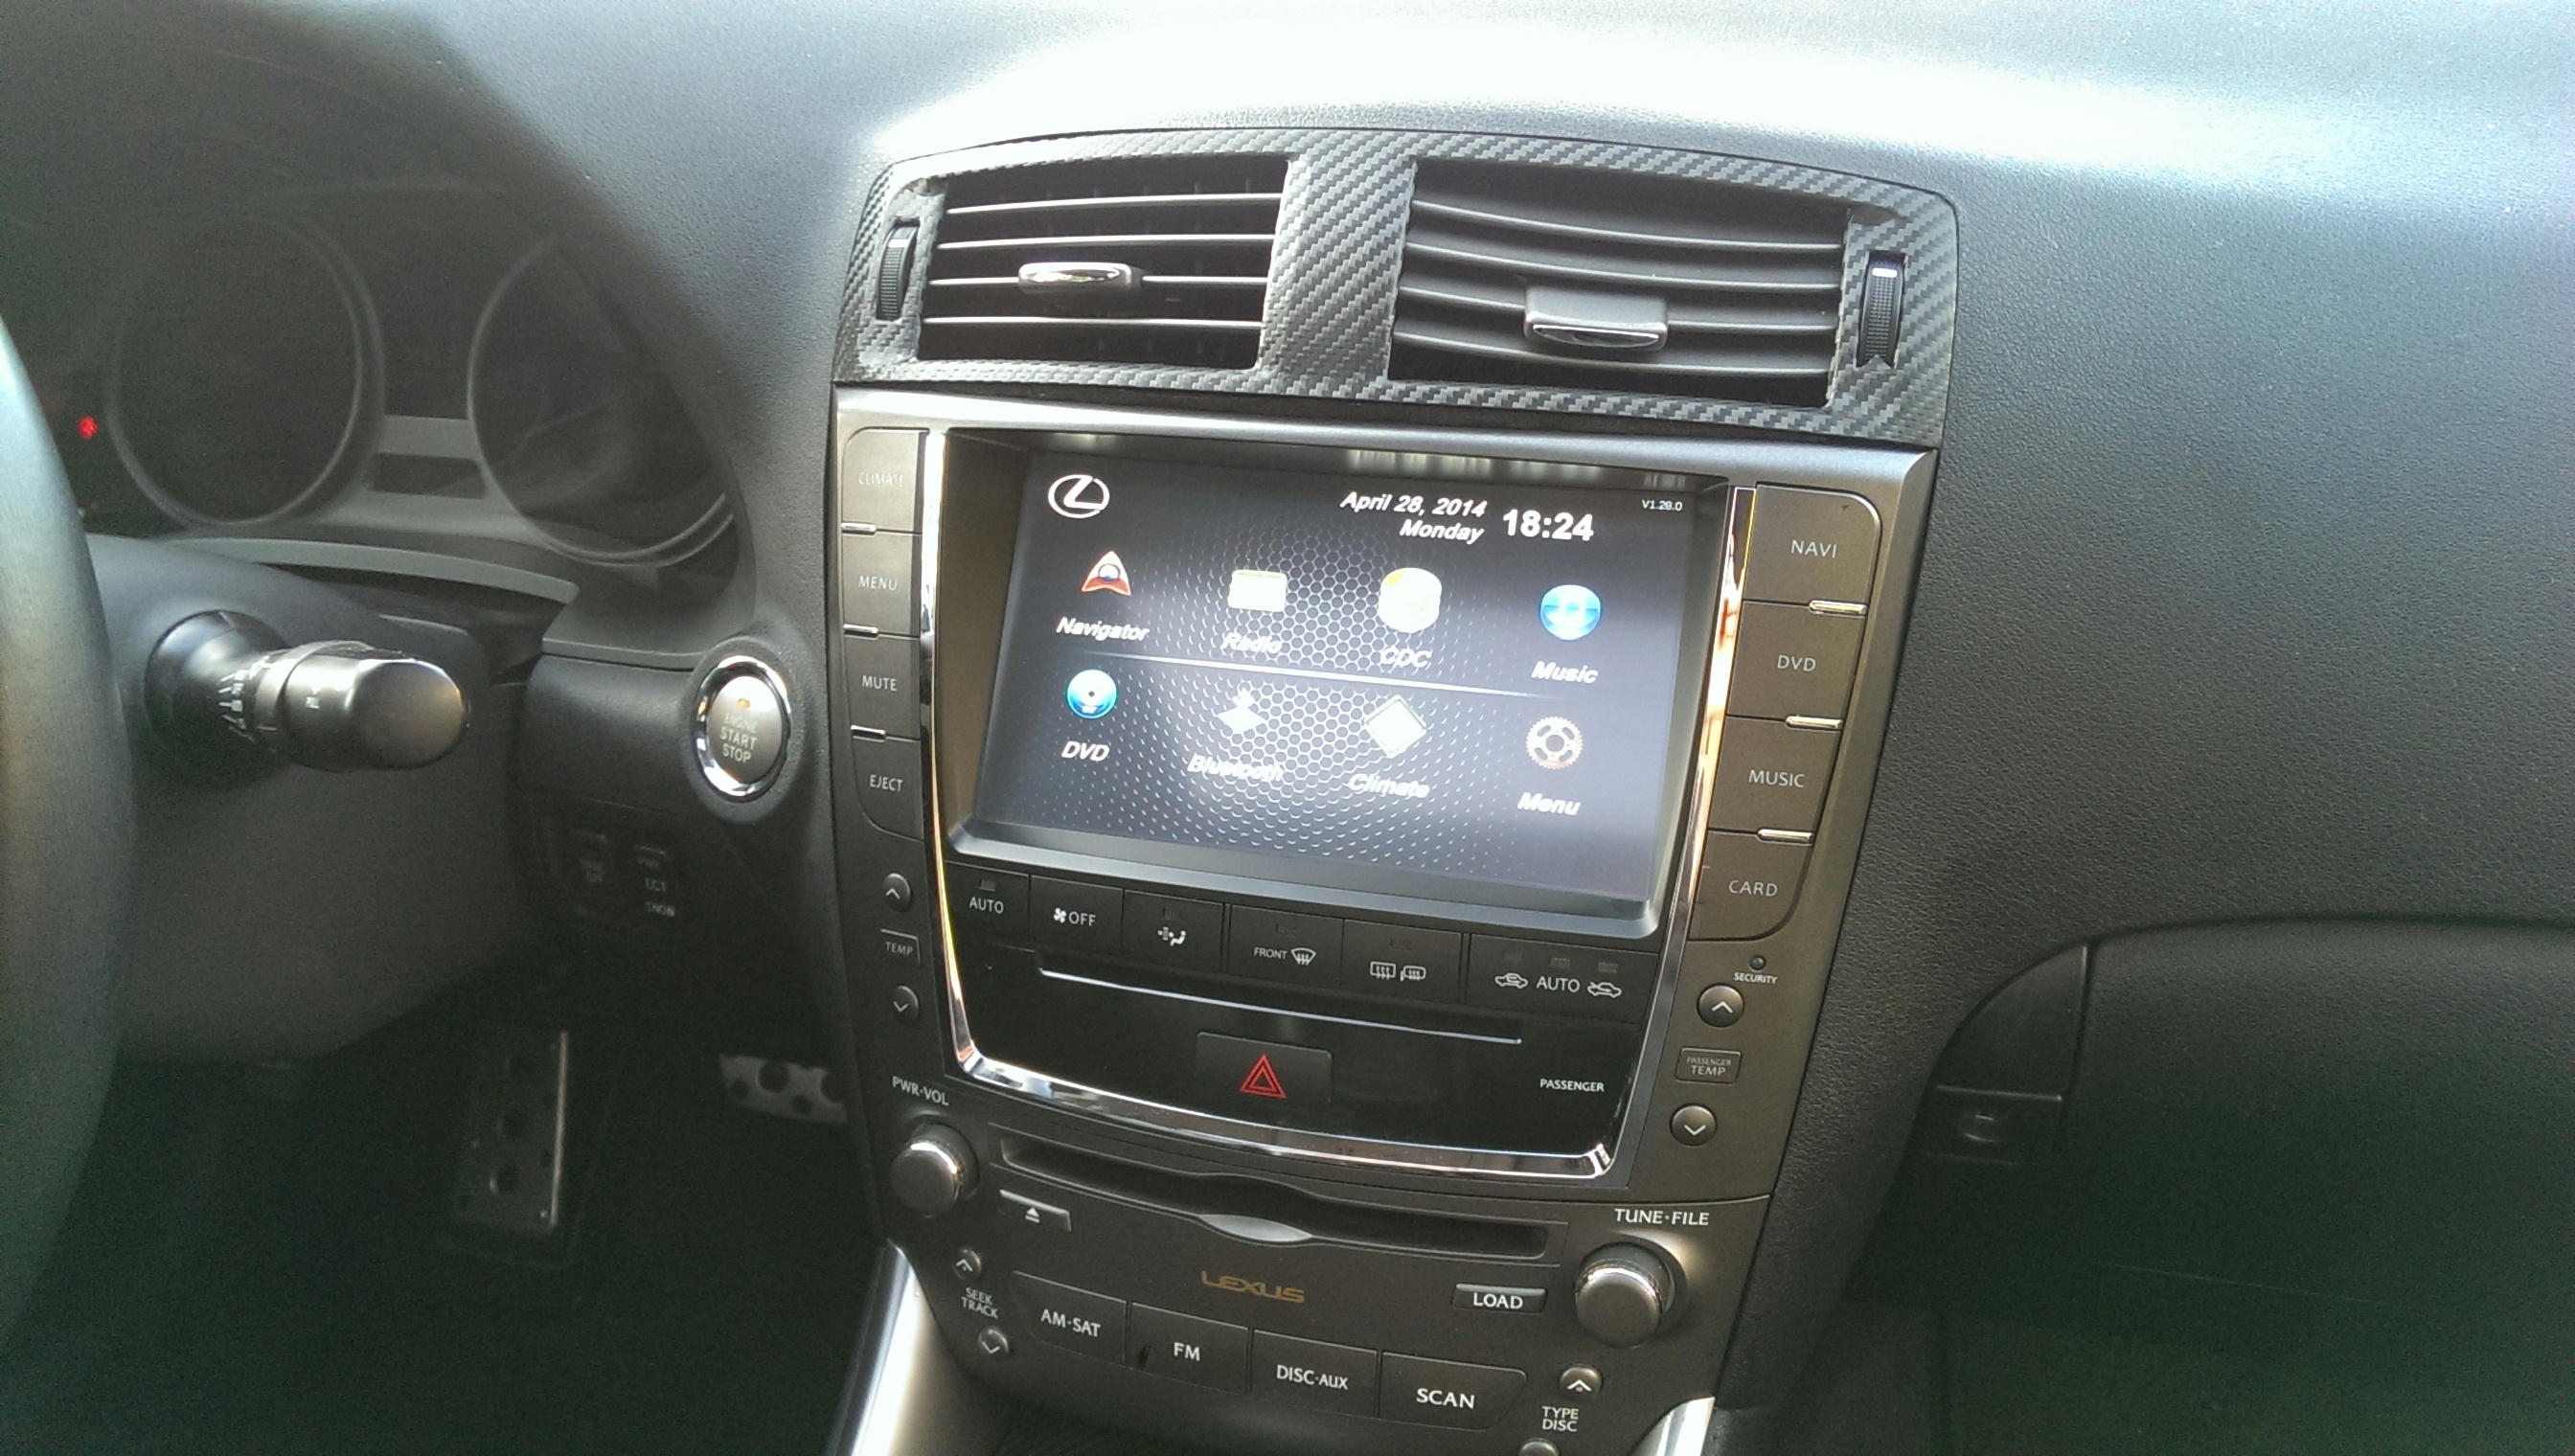
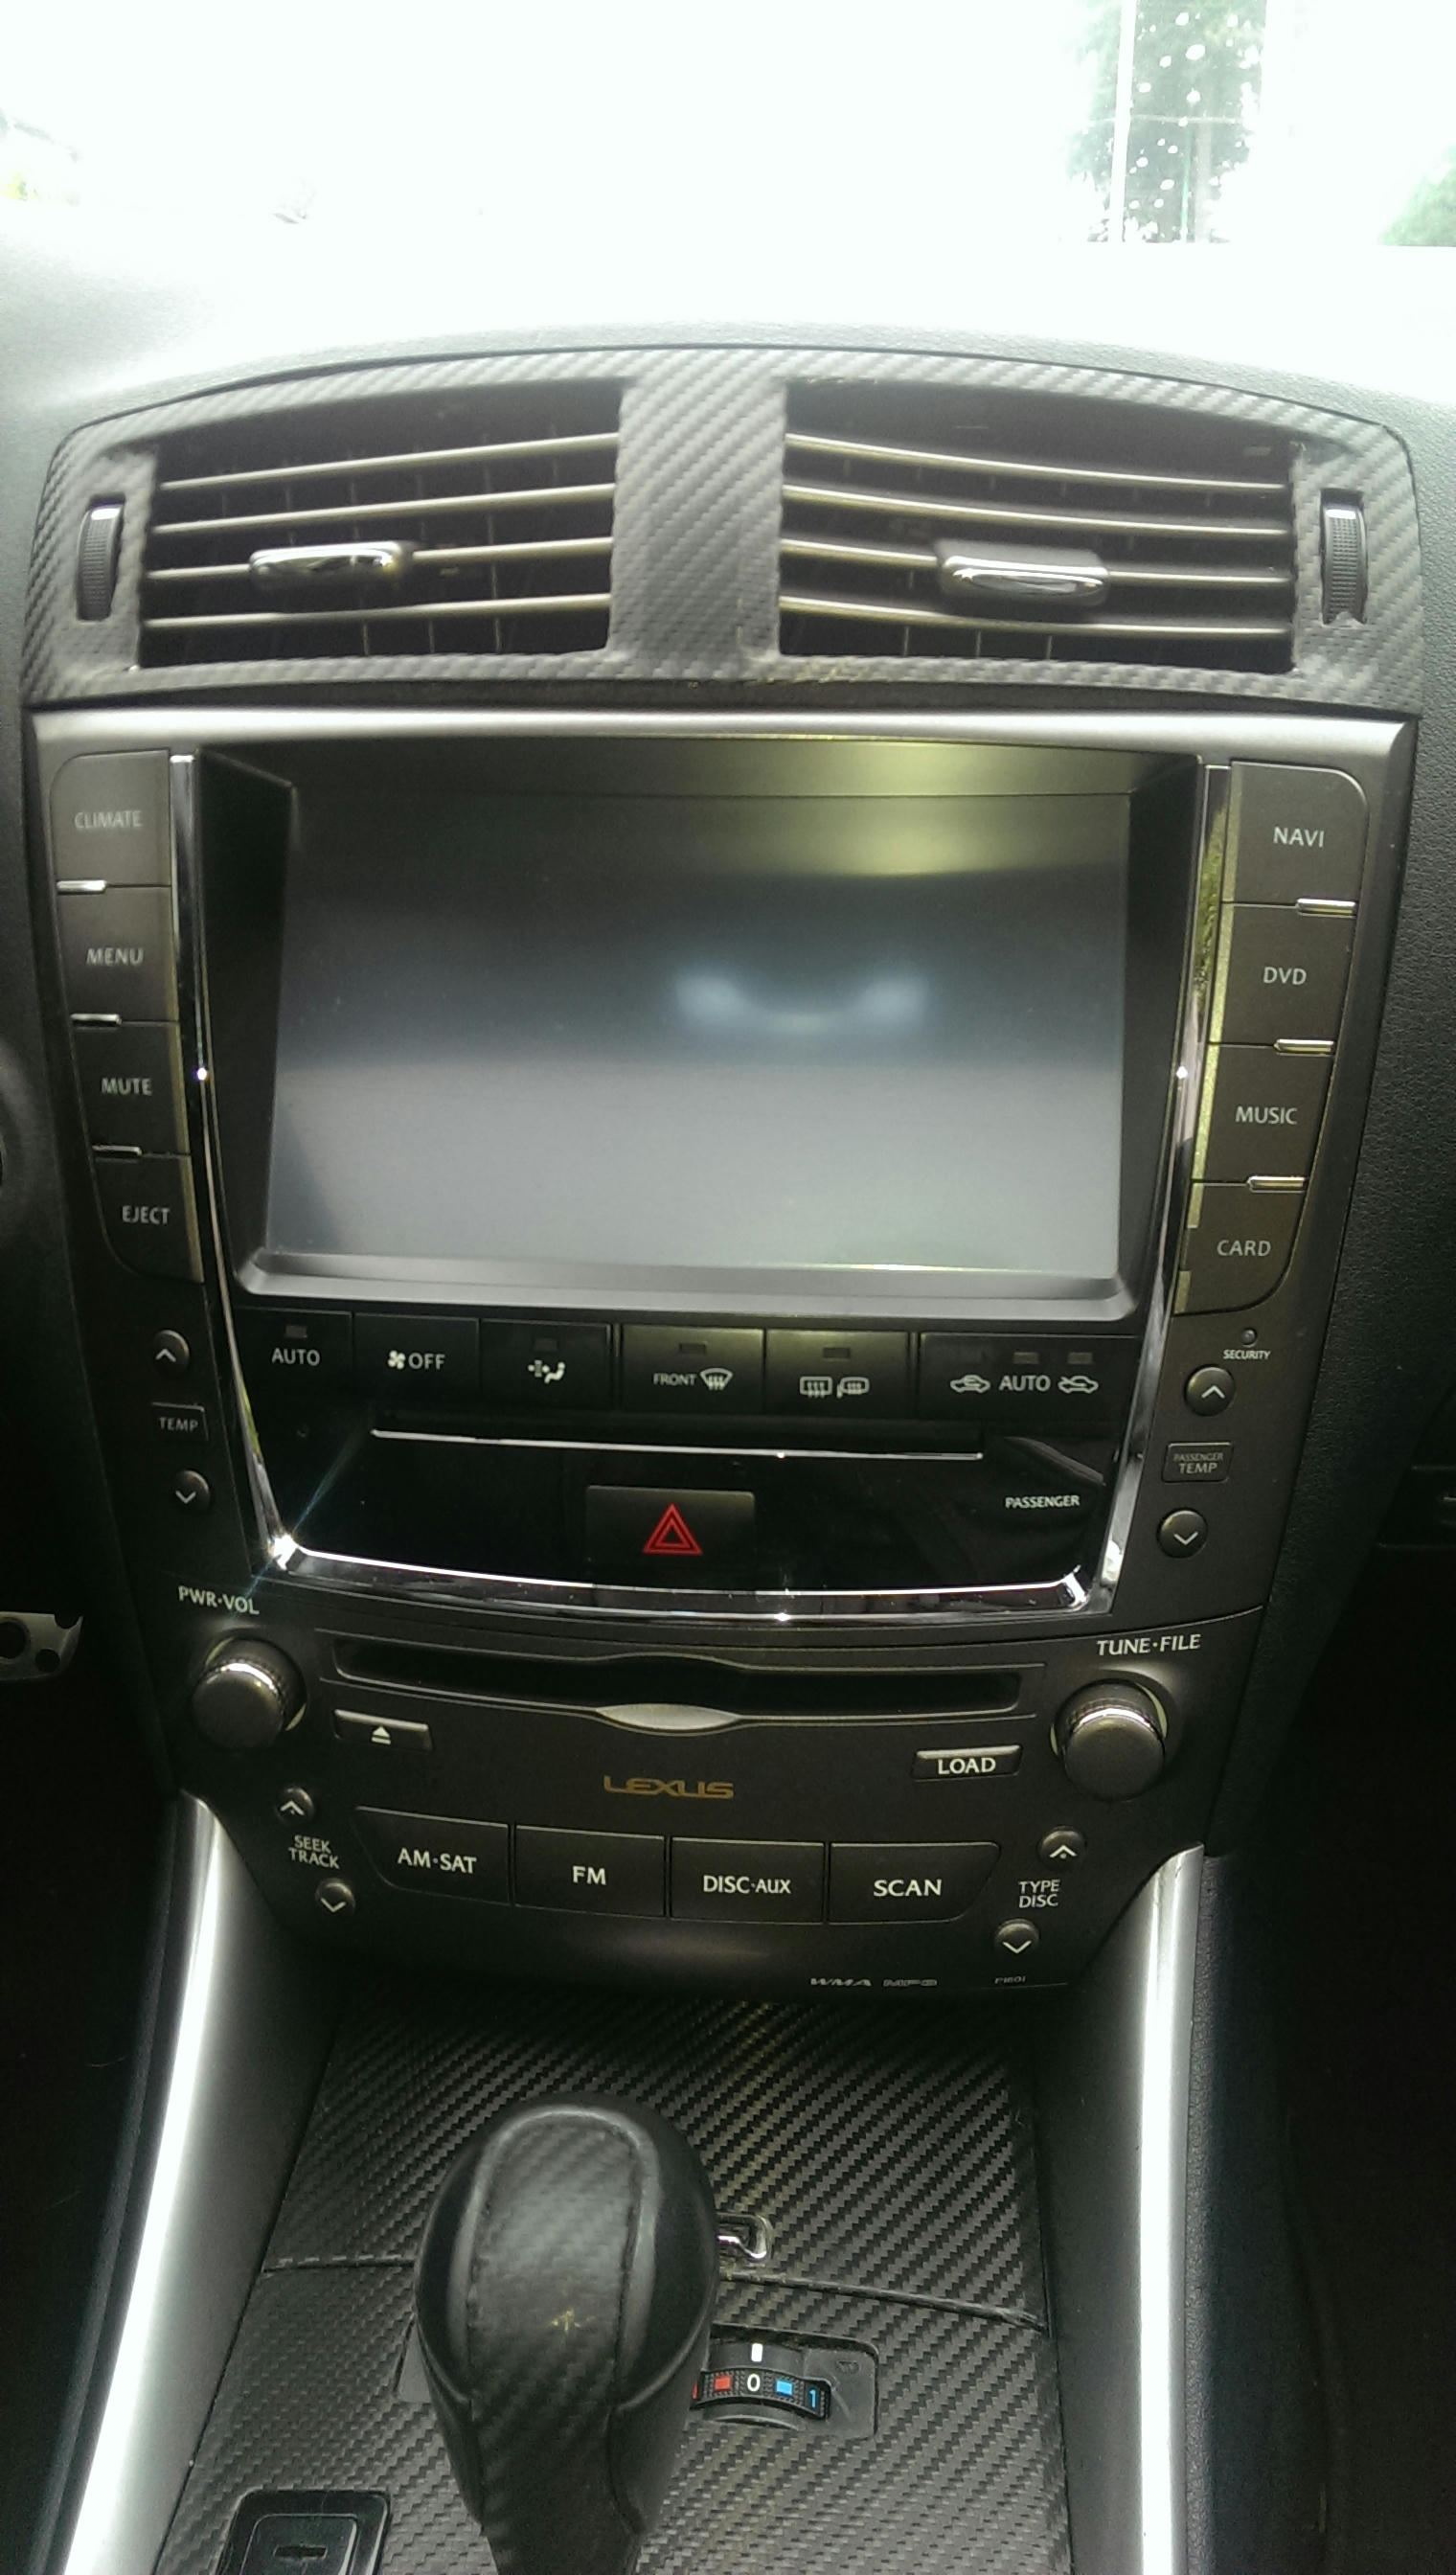
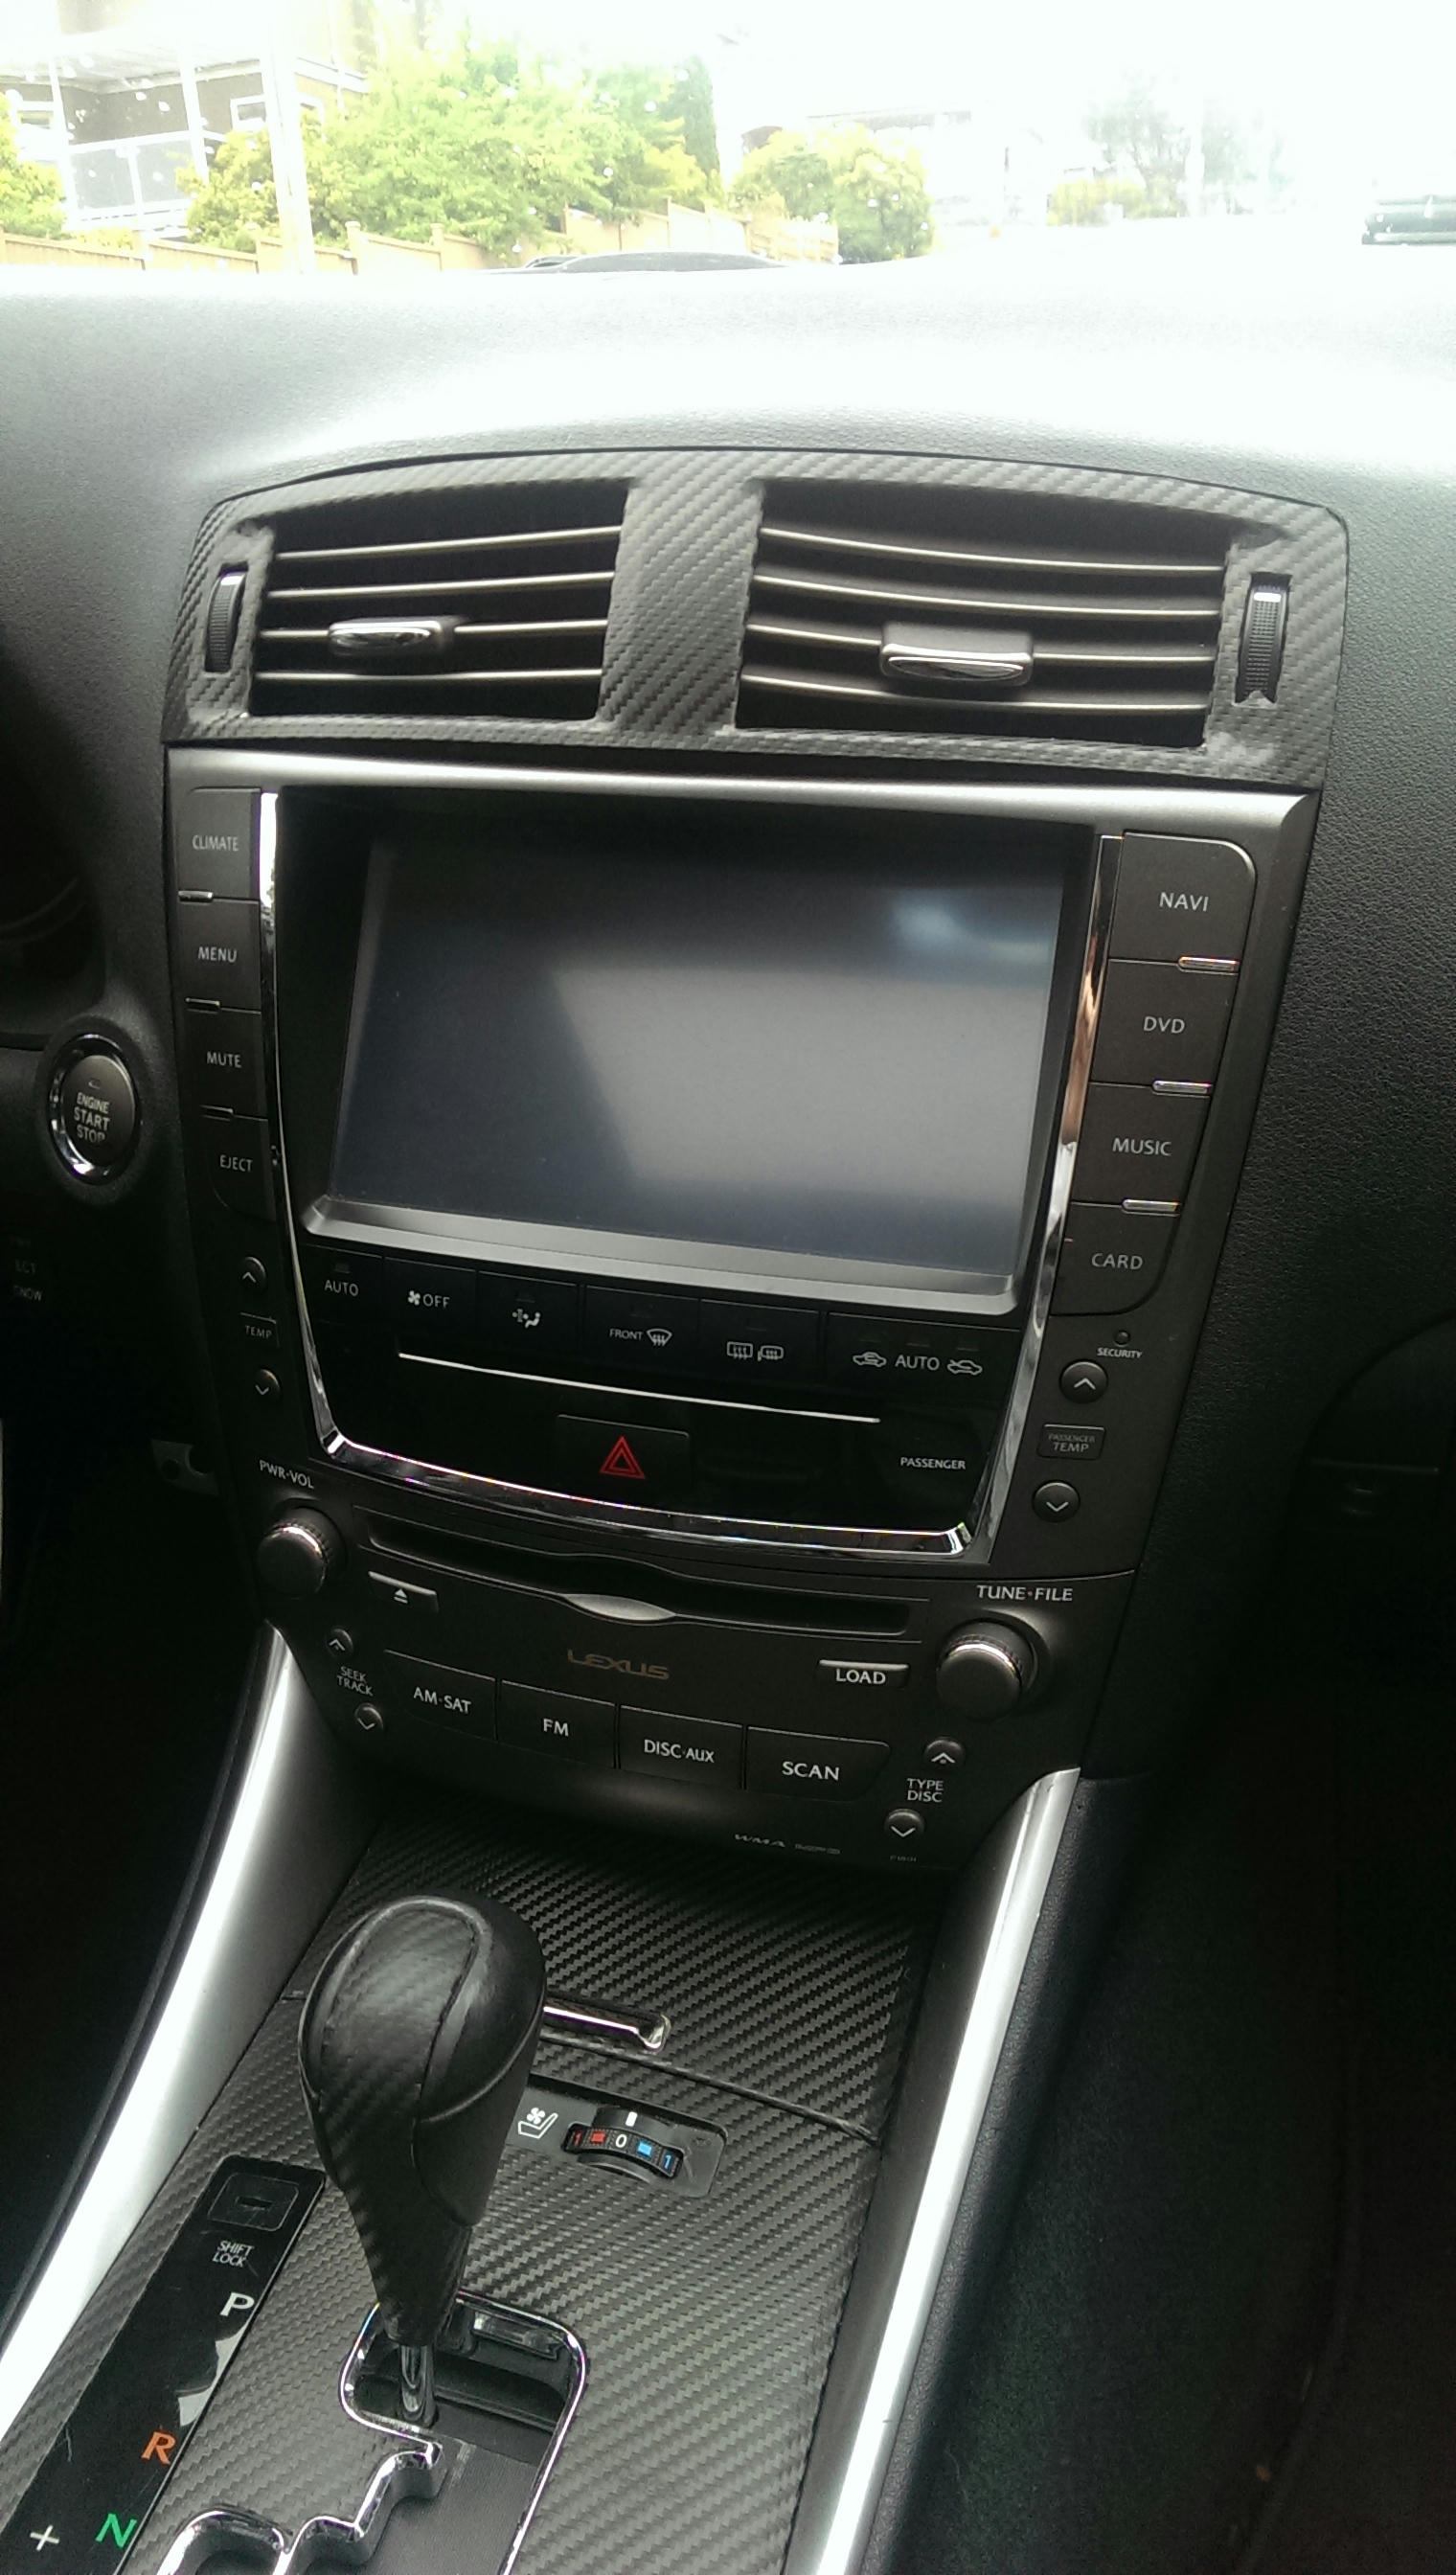
Completed product:
First of all I recommend to read through these threads, lots of good info:
https://www.clublexus.com/forums/is-...ufacturer.html
https://www.clublexus.com/forums/is-...6k-beware.html
https://www.clublexus.com/forums/is-...w-picture.html
https://www.clublexus.com/forums/is-...xus-menus.html
Before we start, here are some important files:
These are the factory firmware files. If you mess up your unit really bad, you can flash brand new firmware and this should fix most, if not all, issues:
http://www.mediafire.com/download/hc...RIMA-V1.55.rar
Extract these to an SD card, pop it in the device, power up and it should do its magic. It will then let you get into wince where you will have to paste a working D2280 folder.
Also note that the version number just means it is for a specific unit. I believe V1,28, 1.55 and 1.73 are all for this unit and I have not noticed any important differences. There is no reason to change to a different working version.
Next we have a WAY better looking skin. This is a skin I ported over form another roadrover unit on a non English site. I don't take credit for making the skin, I did however spend a decent amount of time making it work with out unit and creating missing pages. If you do not know how to change skins, start reading the 50 or so page thread that is linked above.
http://www.mediafire.com/download/a5...etter_skin.rar
Now we come to the boot logos:
http://www.mediafire.com/download/cb.../Boot_Logo.rar
Once you update the boot logo, the file must be deleted from the root of your SD card or reamed. Otherwise it will just keep updating every time you turn the unit on.
Here is the update.exe file that allows you to enter WinCE:
http://www.mediafire.com/download/gv...ju5/Update.exe
Here is my D2280 folder, this contains the updated skins (also renamed in the settings) and the radio fix. For most of you, this is what you want. If you are starting from scratch and don't have a D2280 folder on your unit, use the complete D2280 folder file:
http://www.mediafire.com/download/q1...0_Complete.rar
If you are replacing the existing D2280 folder, you want this folder that has the fonts deleted (over writing the font usually causes an error and halts the copying process):
http://www.mediafire.com/download/85...0_NO_FONTS.rar
INFO
To clear things up, there are 2 aftermarket navigation units available for the 2IS. The first being the 7" Flyaudio unit (which is most likely a rebranded Roadrover unit) and then there is the newer 8" Roadrover CL8018 unit, which is what I have installed. Roadrover is the company in China that is actually manufacturing these units. However they do not sell to the public. In order to get one, you will need to find a distributor off of Alibaba or Aliexpress.
The 7" unit is the older model meant for 2006-2008 Lexus 2IS. I do not have any experience with this unit but I have read that there were some issues with the CANbus protocol and there's a possibility of running into errors like the airbag light being on (or something like that).
The 8" newer unit is meant for a 2009-2012 but will work with a 2006-2008 unit, with minor modifications. I have a 2006 IS350, so everything in this thread will be based around that.
If you install the 8" unit into a 06-08 model 2IS, you will notice that there will be a gap between the unit and the AC vent. This is due to Lexus changing the design of the vent in 2009. You may either live with the gap, find a way to fill in the gap (like I did) or buy a newer 09+ vent. If you do buy the new vent, it will also need some cutting and modifying to work.
From here on I will only be discussing the Roadrover 8" unit.
In order to install the unit, the following modifications will need to be made:
You will need to cut out the red marks in the picture below. (This pic was created by someone else on the forum)
The USB plug (shown below) is a male plug that is meant to plug into the back of the factory USB plug. Since the 2006 models do not have this, the best option is to cut it off and solder on a female connector. (Please note that the pins aren't the same layout as a standard USB Plug, which means a female to female USB gender bender will not work. But the wires inside are the standard colour code.
Before:
After (Also shows where I ran the USB and iPOD cable):
I would recommend doing the soldering before the install. It is a bit scary soldering inside the car.
The vent removal is probably the hardest part if you do not know where the tabs are located. Each one must be popped down with a flat head screw driver before the vent will come out nicely.
The GPS antenna can be mounted quite nicely behind the rear view mirror:
You may notice mine looks kind of funny, I have wrapped the bottom of the antenna and my dash cam in tin foil and black electrical tape because of interference.
I will also mention that if you are not detecting a GPS antenna connected, it is probably set up for the wrong port in your sys.txt file for iGO (or missing completely). You will have to add a line in the syst.txt file telling it which port your GPS antenna is on.
By removing the panel below the steering wheel and on the left of the dash, you can easily route the cable.
If you want to play movies while driving (or even if you don't) I recommend grounding the pink brake wire. This makes the unit think you have the parking brake on.
Now we come to the backup camera, I went with the OEM style. This is not like the OEM camera that would come with the car, but one that uses the license plate LED housing, meaning no drilling holes.
Here is a quick diagram of how to wire it up:
For the camera power and reverse signal, I tapped into the reverse bulb power, since it is right in the trunk lid by the camera. I am pretty sure the video cable that comes with the camera also has an additional wire, which is to be used as the reverse signal that goes back to the navigation unit.
Now to physically install the camera is a bit of a pain. Once you run the wires all the way to the trunk, to get out the LED housing, you have to remove the outside painted panel on the trunk. Start by removing the inside carpeted portion, remove the nuts holding the back outer piece in place then the outer piece should pop off. Be VERY careful that you don't bend or crack this piece!
Next you will need to remove the stock LED housing and install the new camera housing. As is, it will not fit. You must separate the black camera cube from the housing and feed them through separately then reconnect once inside.
I also noticed that the new LED is sort of blue, where as the older one is more of a white/yellow. To fix this, put on a couple layers of masking tape (seriously, works perfect).
And finally, here are some pics of my completed install. You will notice that I have used 3M 1080 carbon fiber wrap on the AC vents, I also got some stick on foam weather proofing and cut it to fit nicely in the gap. This greatly improved the looks of the gap without having to spend $200 on a new 09+ vent.
Last edited by getafewliv; 07-09-14 at 08:57 AM.


Trending Topics
07-07-14, 01:30 PM
#8
Driver School Candidate
Hey man, thanks for the post. Good info, and solved all of my issues but one.
I've got an 06 IS250 as well and just got this 8" RR. When I press the brake pedal, the screen dims and the backlights for the buttons come on as if I've turned on the headlights. I've tried both power and ground to the "illum" wire and neither help. Are you experiencing this as well?
I've got an 06 IS250 as well and just got this 8" RR. When I press the brake pedal, the screen dims and the backlights for the buttons come on as if I've turned on the headlights. I've tried both power and ground to the "illum" wire and neither help. Are you experiencing this as well?
07-07-14, 02:49 PM
#9
Lexus Test Driver
Thread Starter
Hey man, thanks for the post. Good info, and solved all of my issues but one.
I've got an 06 IS250 as well and just got this 8" RR. When I press the brake pedal, the screen dims and the backlights for the buttons come on as if I've turned on the headlights. I've tried both power and ground to the "illum" wire and neither help. Are you experiencing this as well?
I've got an 06 IS250 as well and just got this 8" RR. When I press the brake pedal, the screen dims and the backlights for the buttons come on as if I've turned on the headlights. I've tried both power and ground to the "illum" wire and neither help. Are you experiencing this as well?
However, I have an issue where at night when my headlights are on, if I hit the climate button, the back-light on the screen brightens up and stays brightly lit unless I turn the lights off and back on. Not sure how to fix that one.
07-07-14, 06:11 PM
#10
Driver School Candidate
Don't do anything to the illum wire, it is unnecessary. The unit can detect when the lights are on through the CANbus protocol.
However, I have an issue where at night when my headlights are on, if I hit the climate button, the back-light on the screen brightens up and stays brightly lit unless I turn the lights off and back on. Not sure how to fix that one.
However, I have an issue where at night when my headlights are on, if I hit the climate button, the back-light on the screen brightens up and stays brightly lit unless I turn the lights off and back on. Not sure how to fix that one.
Do you by chance know how to change it from Celsius to Fahrenheit?
Your interior looks fantastic, by the way.
07-07-14, 10:49 PM
#11
Driver School Candidate
Just FY everyone's I, once you do the update to fix the radio tuner range, you will need to do the following on the RoadRover 8018 series running the iGO8 navigation.
Remove the SD card and take a look at it with a computer. Rename the iGO8 folder to NaviOne then open the NaviOne folder and find the iGO8.exe file and rename that to NaviOne.exe. Depending on your computer's settings you may not see the .exe extension so look for "application" as the file type. There should only be one file named iGO8, rename that.
Nav should load and work fine now.
07-08-14, 01:23 PM
#12
Lexus Test Driver
Thread Starter
So there is definitely something screwy with the way it handles illumination then. I double checked everything and I guess I just have to live with the damn screen dimming every time I hit the brakes. It does light up the buttons and dim the screen when I turn the lights on, but it's doing the same thing when the lights are off. =/
Do you by chance know how to change it from Celsius to Fahrenheit?
Your interior looks fantastic, by the way.
Do you by chance know how to change it from Celsius to Fahrenheit?
Your interior looks fantastic, by the way.
Do you have the illum wire grounded or tied to +12v? Or is it just left open circuit? I would double check the wires in the back and see if anything else is grounded when it shouldn't be.
As far as the deg C or F, I have no clue... but since I am in Canada, we use Celsius. You know, because the metric system makes sense.
07-08-14, 01:24 PM
#13
Lexus Test Driver
Thread Starter
Just FY everyone's I, once you do the update to fix the radio tuner range, you will need to do the following on the RoadRover 8018 series running the iGO8 navigation.
Remove the SD card and take a look at it with a computer. Rename the iGO8 folder to NaviOne then open the NaviOne folder and find the iGO8.exe file and rename that to NaviOne.exe. Depending on your computer's settings you may not see the .exe extension so look for "application" as the file type. There should only be one file named iGO8, rename that.
Nav should load and work fine now.
Remove the SD card and take a look at it with a computer. Rename the iGO8 folder to NaviOne then open the NaviOne folder and find the iGO8.exe file and rename that to NaviOne.exe. Depending on your computer's settings you may not see the .exe extension so look for "application" as the file type. There should only be one file named iGO8, rename that.
Nav should load and work fine now.
Later today, I will try and post up my D2280 folder, should have the radio fix and skins ready to go.
Last edited by getafewliv; 07-09-14 at 07:47 AM.
 07-09-14, 08:59 AM
#15
Lexus Test Driver
Thread Starter
I have updated the thread above. I was getting errors from chrome when I tried to download the radio fix.
Instead I have uploaded 2 versions of my D2280 folder. One with fonts and one without. This D2280 folder has the updated skins and North American radio fix.
I am talking with the supplier I got my unit from about getting a link set up for people who want to buy, hopefully that reduces confusion for people and gets everyone a decent price.