When you click on links to various merchants on this site and make a purchase, this can result in this site earning a commission. Affiliate programs and affiliations include, but are not limited to, the eBay Partner Network.
i found that there isn't a lot of coverage regarding air suspension setups for the LS400, though the install is pretty straightforward. i say if you can install suspension and wire up an aftermarket amplifier you can install an air suspension system. depending on how intricate you wanted to go (add accessories like pressure gauges, wiring routing, single or dual compressors, etc.), you can install a basic system in a weekend. the following will briefly describe my adventure installing a system in my 97 UCF20, which took longer...
my parts list:
- BC Racing BR-type coilovers
- Universal Air Suspension Aero Sport bags w/brackets
- 1/4" airline
- SMC 3/8" valves
- dual Firestone compressors
- 5gal chrome tank
- Norgren water traps
- Viair 165/200psi tank pressure switch
- Air Ride Technologies digital gauge (made by Dakota Digital)
- Dakota Digital pressure senders
- EAI switchbox
since i am running dual compressors, i utilized a 4 gauge power wire which needs to run from the battery to the trunk. i found a main harness that enters the cabin located behind the front fender. this was the perfect spot to get the wire through the firewall.
closeup
this is a view from the engine bay. i installed some loom to make it look like factory. that is the brake booster to the left.
power wire nice and tidy
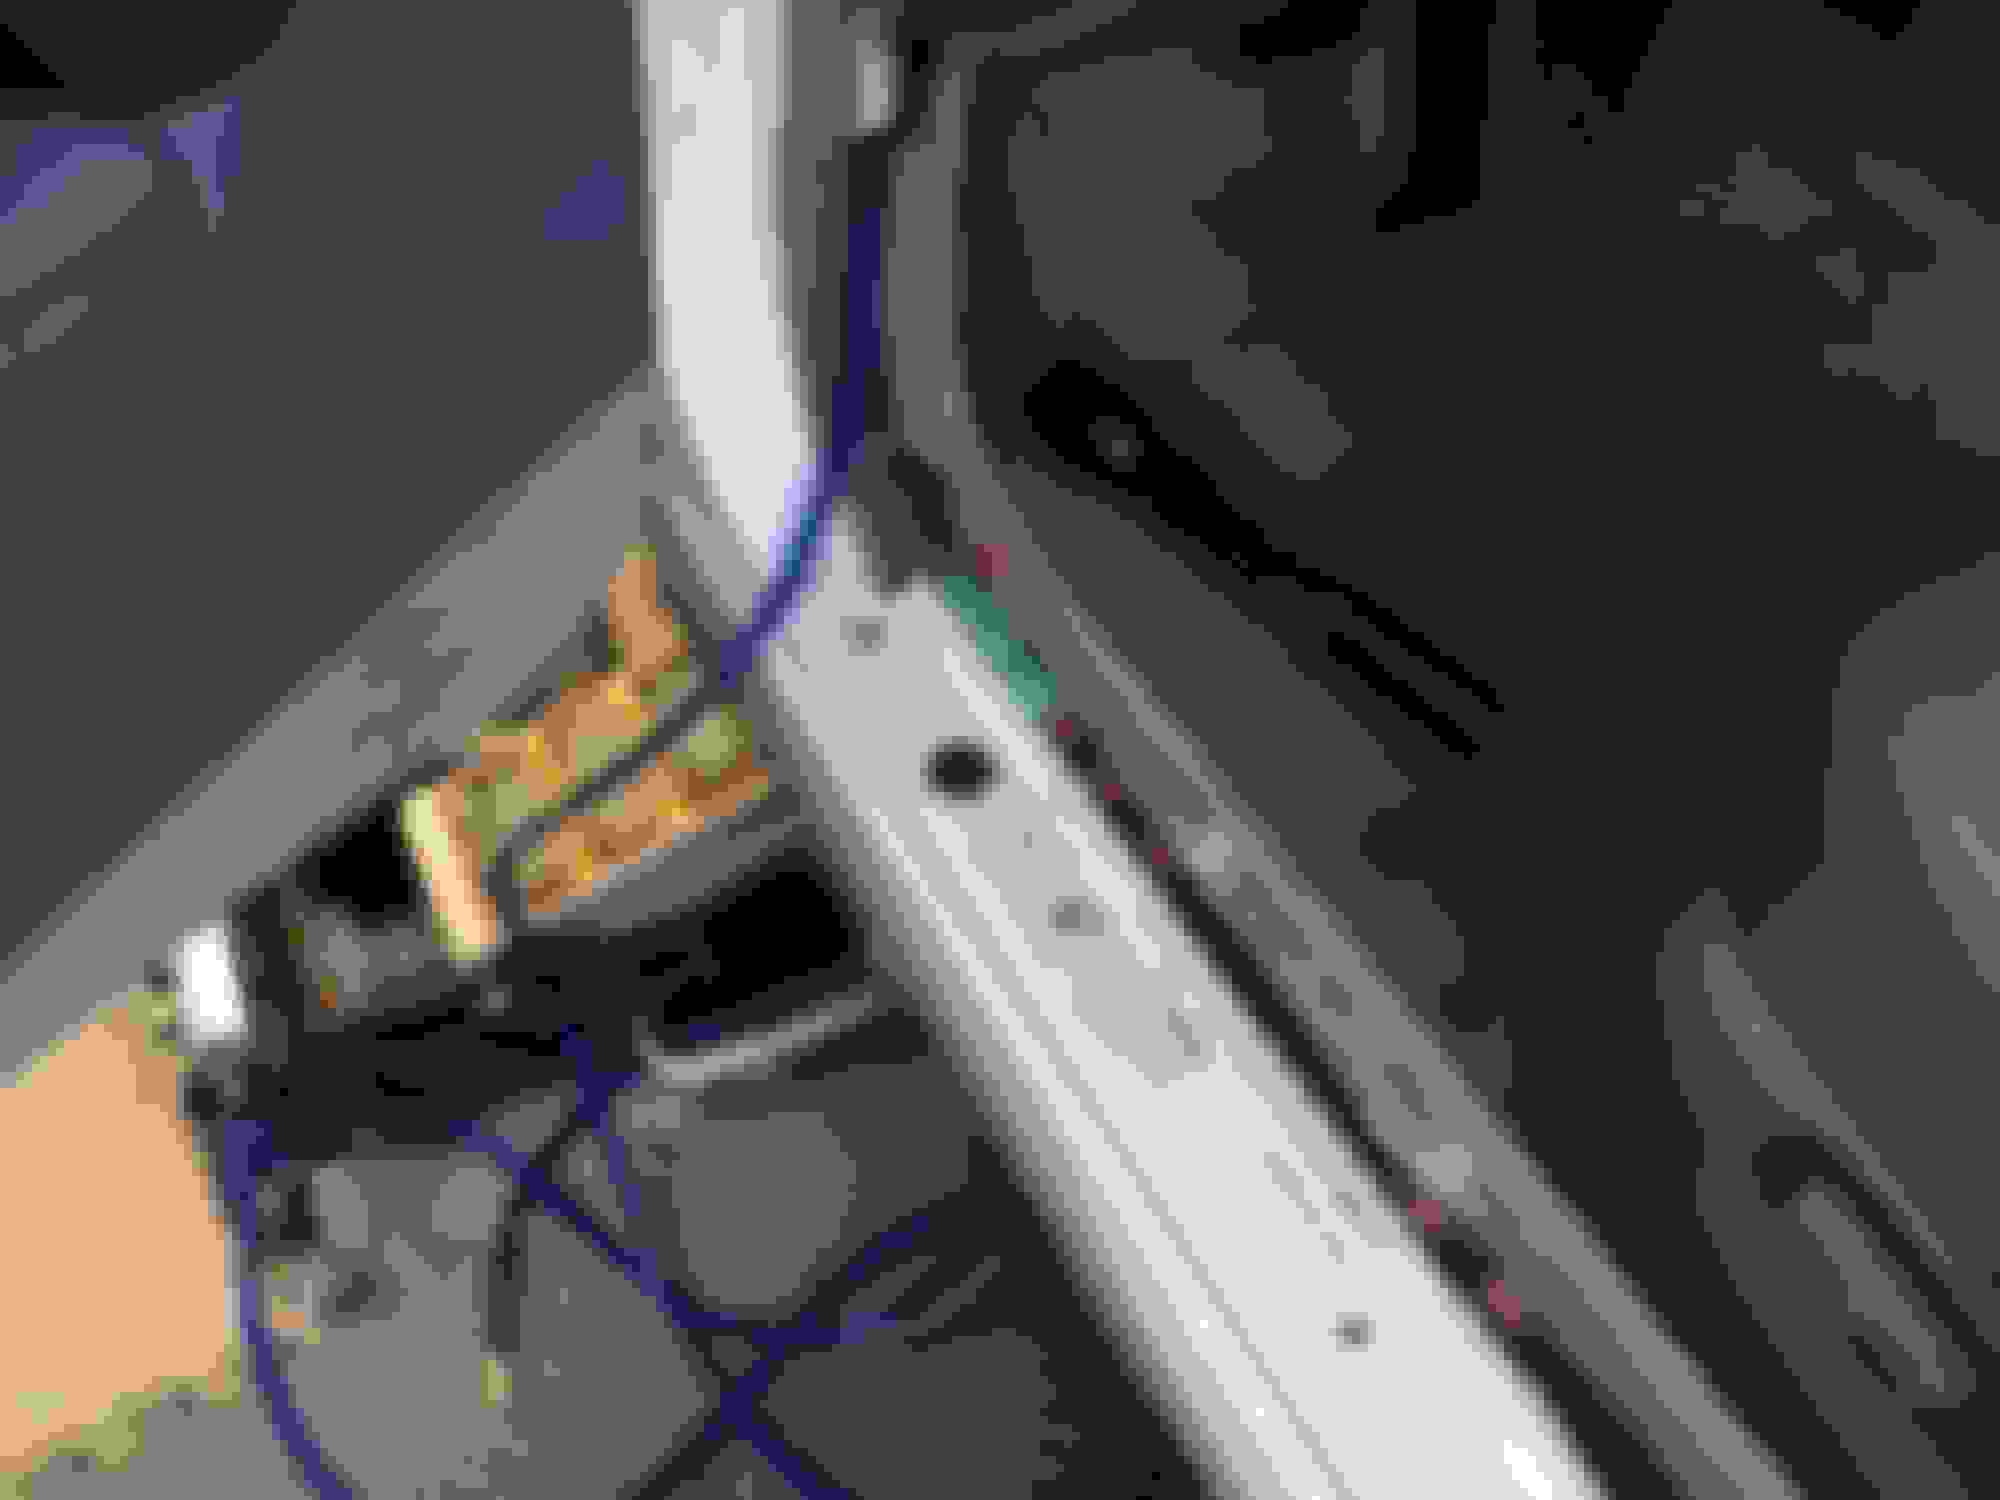
the wire enters the cabin directly above the e-brake pedal.
i ran it under the door sills. i took many pictures due to the fact that i hardly see anyone actually show how to do this.
the rear seats need to be removed to go through yet another firewall to the trunk. i opted to drill a hole in a plastic cover near the seatbelt.
i preran my wires for my digital gauge and switchbox which reside under the center console and under the passenger side seat respectively. i ran their wires on the passenger side of the car, again under the door sills and through the rear firewall.
speaking of digital gauge, i opted to place it in the ashtray which fit perfectly. i don't have any details on this part so i apologize. i had to make sure the wires don't bind when the door is pivoted. the center console is very tight so the wires were ran with caution, so much as to not hinder the cupholder hide movement.
i removed the rear trunk liner to gain better access. there is a sharp part of the frame on both sides that i covered with loom to prevent any chaffing on the wires. an exposed wire will cause a short, or worse the adjacent gas tank to catch on fire!
after some thought i chose to run a new floor to hold the tank, while the valves and compressors would reside where the spare tire used to be. i used some plywood scraps from home depot.
i wrapped the wood in black speaker cabinet carpet. i should have ordered dark gray instead for a better match.
i highly recommend V&S 1081 adhesive over 3M. this stuff works better, especially when tackling a headliner.
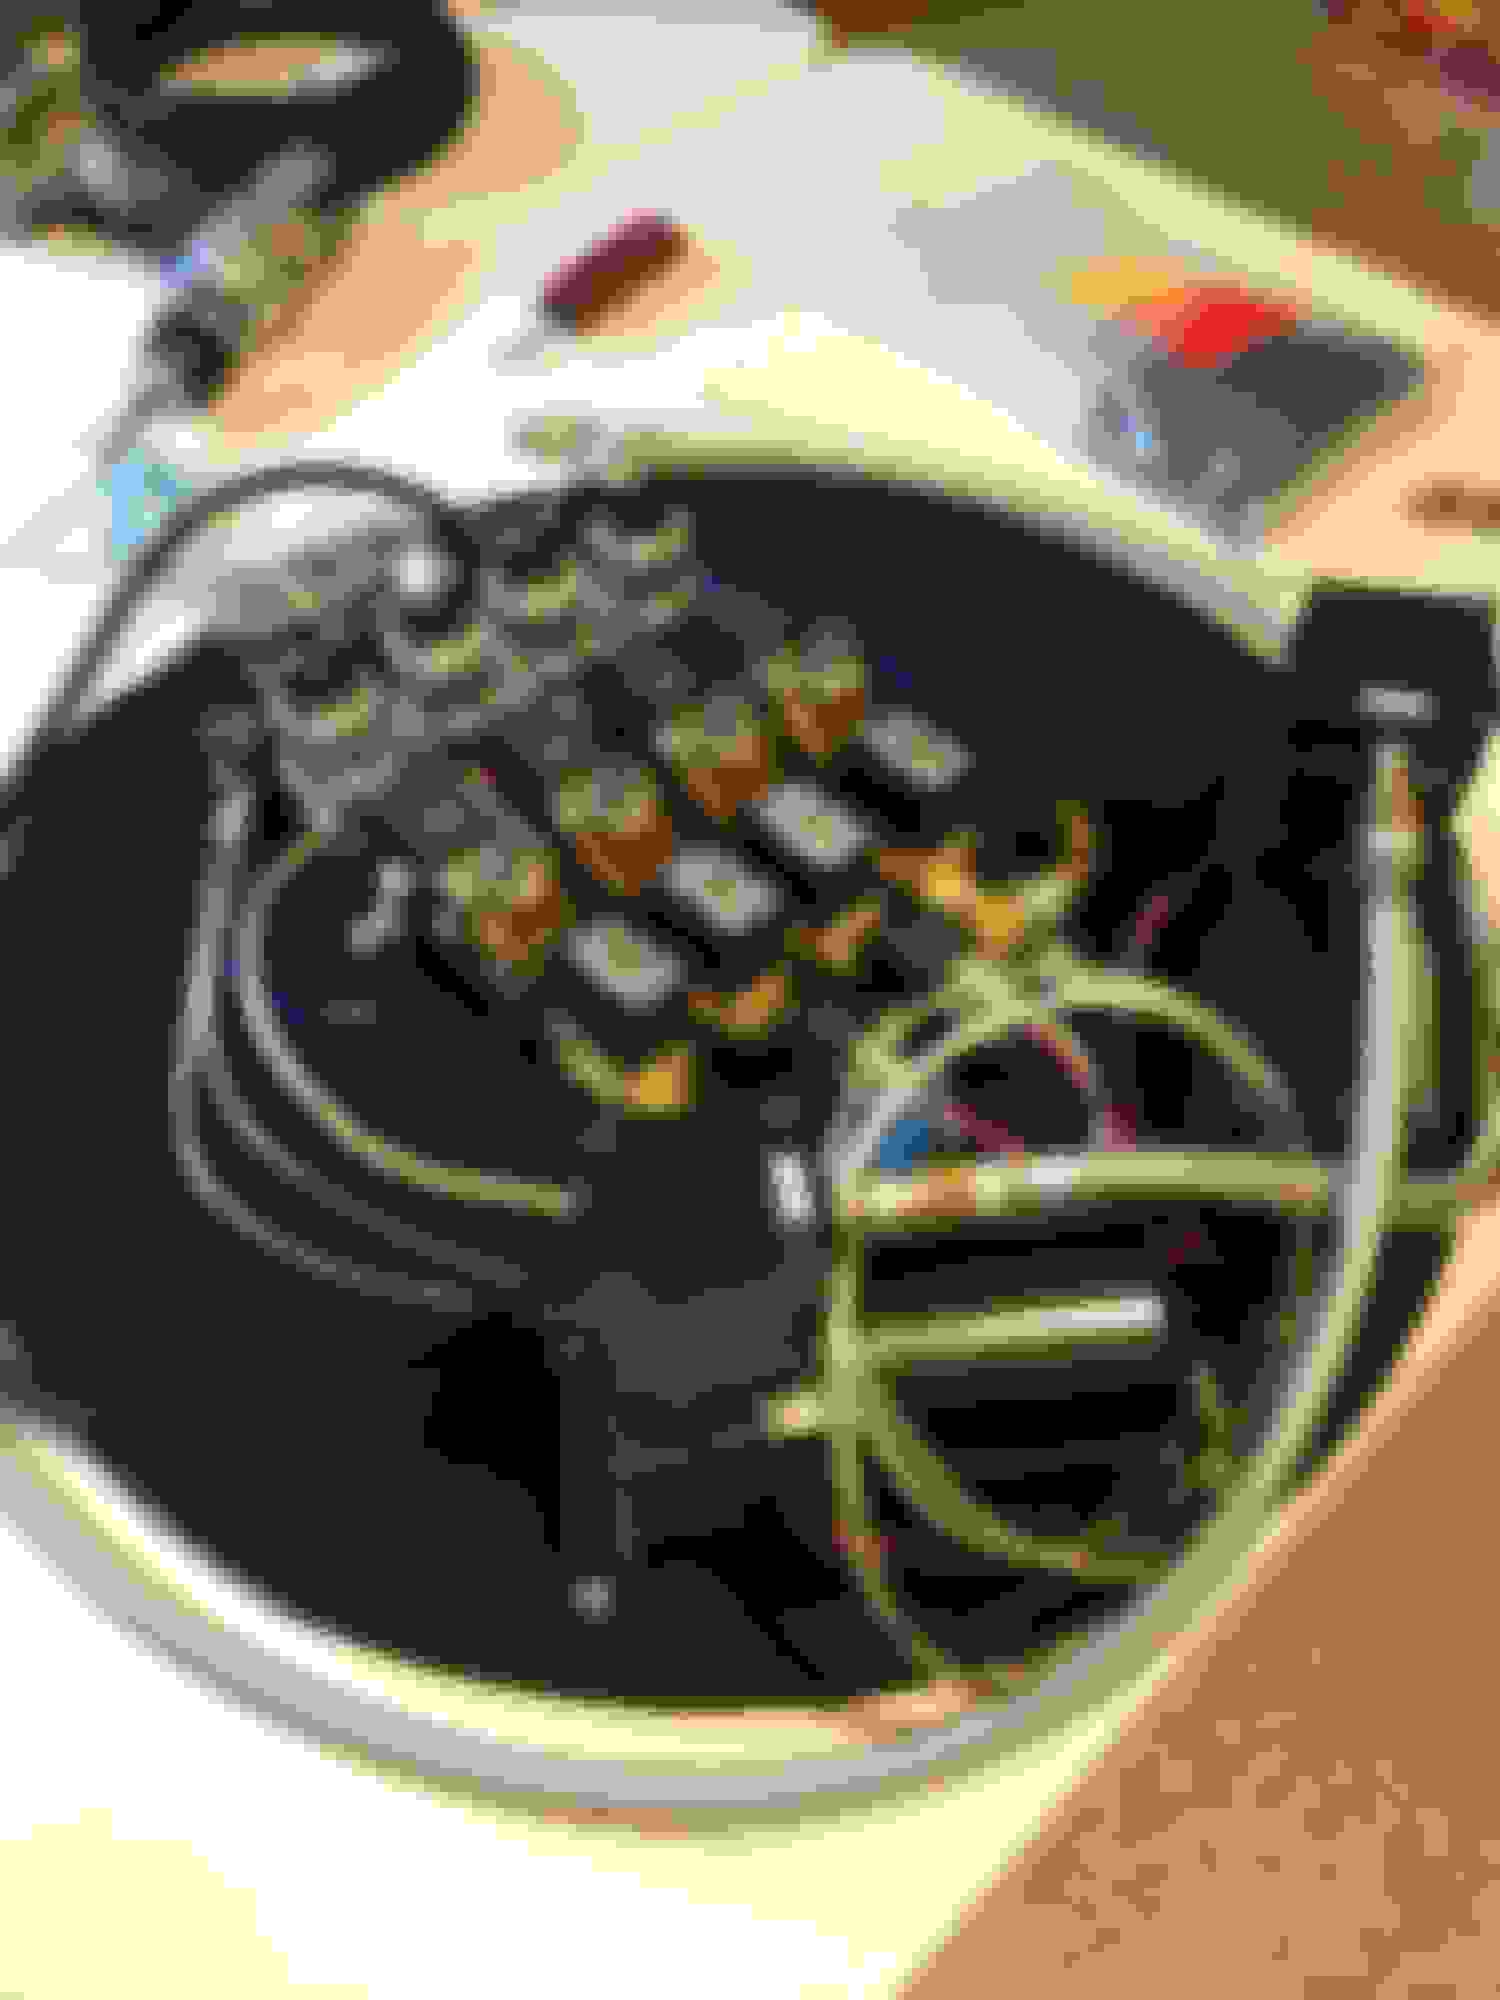
next was to build the valves. since i used these valves on my previous car they were already 90% assembled. i simply needed to add extra fittings for the pressure senders. these were sourced from home depot as well.
here is how the valves are plumbed where the vertical valves are for dump.
after the adhesive had dried, the valves, compressors, relays, etc were installed onto the wood.
now to the coilovers! it is as simple as replacing the springs with the bags, with some slight perch height changes. the bag brackets i received from UAS were bare metal. i could have used spray paint but wanted a more durable finish so i had them powdercoated matte black. i even redid the studio/battle version adjustable toe arms in the same finish.
when installing the brackets to the coilovers, i used some threadlock sealant though it may not be necessary. i added a flat washer to minimize marring the finish.
i removed the springs from the coilover assembly and lowered the perches 4" from the end of the shock body, per recommendation of UAS.
i then put together the whole bag w/bracket assembly onto the shock body. the parts removed were the spring, the two plastic spring isolators, and the dust boot as seen in the top of the picture.
here is the stock rear versus the new setup. i ended up lengthening the coilover 2" more when i installed it in the car since it was too short. the coilovers were originally intended for a 90-94 UCF10 so this may explain the difference.
i failed to take pictures of the coilovers on the car. next was to run the air lines. here is the front passenger side line running down and into the underside wiring tray. there are two trays, one on each side running from the front to the back. they make running the lines much easier and symmetrical.
i routed the air lines around the exhaust behind the heat shields, above the axles, and into the trunk area using existing holes plugged up by a rubber grommet. there is one on each side near the ABS sensors. it is ideal to run the air lines the same length between left and right so the same amount of volume can move in and out of the bags.
finished all the wiring to the valves and senders
finished wiring the compressors and relays, one per compressor and a third one for accessory power
i grouped all the grounds together to a single wire. you can see the type of compressor i'm running as well. this is the same compressor that Air Runner uses.
there is a nice ground point behind the trunk liner on the right side of the trunk latch.
last step was to plumb the tank.
tank feed side
tank pressure switch side (which was disconnected prior to testing)
here are the initial aired out pictures. the upper a-arms are hitting the frame up front. i am unsure what is stopping the rear.
i have yet to take a test drive and play with the dampening settings on the coils. from factory they were set to 25 front 25 rear (30 being the stiffest). i brought the rear to 20 for now. also i am uncertain as to what bag pressure feels and works the best. i may have to adjust the height settings on the coils to lessen the strain on the bags especially up front. i haven't even checked for leaks!
this project took me from the tail end of december through the first week of february, working only on the weekends. of course i accumulated and assembled the parts as much as i could before getting the car on jack stands. once the bags were on the car i needed to finish the rest of the system to get the car back on the ground. planning was key. i used my iPhone to capture all this, and i missed a few steps since i was busy doing the work. if there are any question just ask!
very nice install, the final trunk looks very clean.
A couple questions/comments:
1-Why did you use an old style valve setup instead of a manifold (ala accuair)?
2-Why not accuair management? Cost?
3-thread the rear coilovers in more, if the bag is airing out properly then you set it too high. (since you mentioned having to raise it before install)
4-What will you do in case of a flat?
5-Aren't the 1/4" lines a bit too slow?
I've been debating air for years now but just can't bring myself to do it quite yet.
Nice man! Drop the bottom end of the coil and lay frame... Ok well not lay frame cuz that needs some fab work but to get lower to the floor. If I had the money i would be on air right now!!! I love your trunk set up but I fear a flat tire. Ill rather do a fake wall let up. But other then that man you are set, just need wheels and BAM! this will be money!
PureDrifter go on air already man! Its a life saver trust me!
Last edited by RA40; 02-14-13 at 04:35 PM.
Reason: No sales
very nice install, the final trunk looks very clean.
A couple questions/comments:
1-Why did you use an old style valve setup instead of a manifold (ala accuair)?
2-Why not accuair management? Cost?
3-thread the rear coilovers in more, if the bag is airing out properly then you set it too high. (since you mentioned having to raise it before install)
4-What will you do in case of a flat?
5-Aren't the 1/4" lines a bit too slow?
I've been debating air for years now but just can't bring myself to do it quite yet.
thanks man, it's been a long time coming. here are my answers to your questions.
1) i already had these valves from my previous setup and they work great. why spend more? the SMC valves are made in japan and are rebuildable (at the cost of deplumbing everything).
2) cost is precisely why i stayed away from accuair, autopilot, etc. i love the manifold valve setups but i just couldn't spring the money to get one. they would have made the install much easier and cleaner for sure!
3) yeah i have yet to play with the settings. most air setups i see the rear is tucked more than the front. i prefer to be even when aired out. when i get the wheels on i will dial it all in.
4) in case of a flat i simply call AAA. even if i had a spare, i just have it towed. i'd rather not deal with that on the side of the road. risky i know.
5) i ran 3/8" lines before in my other car and it was too fast so i told myself i would run 1/4" this time around (my comparison is a boba straw vs a regular straw). i had to run speed controls to slow it all down, since it was hopping up (this was on a much lighter accord)! glad i went smaller since i feel the speed is very nice and controlled. i am running 200psi tank pressure where most folks run at 150-175psi. also running 1/4" lines through the car is much easier since it's smaller and more flexible.
air is very convenient especially around here where driveways and speed bumps abound. they do add more routine maintenance, and headaches when there are leaks. what inclined me to go air is to get that perfect stance, all while being able to drive home safely. now to work on that stance...
Nice man! Drop the bottom end of the coil and lay frame... Ok well not lay frame cuz that needs some fab work but to get lower to the floor. If I had the money i would be on air right now!!! I love your trunk set up but I fear a flat tire. Ill rather do a fake wall let up. But other then that man you are set, just need wheels and BAM! this will be money!
PureDrifter go on air already man! Its a life saver trust me!
i wish i could lay frame, throw some sparks! even as simple as my setup (did not even use a manifold valve) it still cost me a bit over $2k so yeah it's expensive. as for a flat, i just have my car towed. been doing that for all my cars, even the ones with a spare.
doing a fake wall will hinder trunk space. it's small enough as it is with the gas tank there. maybe a false floor with a peek-a-boo tank would work better. this is how the VW guys run to keep the spare. oh and the wheels are here, just need to get tires, which again cost $. it will be money alright, money out of my pocket ha!
did you have a template for the trunk board or something? i also want to cut a new board out for my trunk
yeah i used the trunk carpet as a template. your car should have one there already no? some cars have a trunk mat, on top of the trunk carpet. they are both the same size and perfect for a template. just don't make one HUGE piece, you will not be able to get it in the opening.
 02-12-13, 03:01 AM


 cool. Good use of old setup. why spend more to fit the trend. Selling your old setup would have taken time.. Time is money..

