3ES (97-01) Suspension Overhaul Guide
 01-06-13, 07:37 PM
#1
I thought I would create this thread to help any other 3ES owners who might be intimidated by a suspension job. There is quite a few things that I have learned by doing it myself, so I would like to pass that knowledge along and maybe even help someone in need. This will be updated in the future with any more info that I may gather. For now, my plan is to post the build process, the install, and the before/after shots.
Part 1: The Build
My 1998 ES300 has about 196,000 miles, as of today (1/6/13). It's still riding on its original suspension, which is in dire need of an update. I already upgraded the swaybars with the ones from Whiteline. The ride is still smooth, but the strut mounts make all sorts of noises if I hit a bumpy stretch of road. They sound like the bolts are loose or something.
After some thought and an extensive research, I decided to build a complete set of struts, so that I would have the highest quality components and minimize my "down time". I chose to go with Toyota mounting hardware, Tokico struts, and Tanabe springs (last minute decision). My original plan was to use H&R springs, but they were out of stock. There are some things that can normally be reused during a strut replacement, but as I said earlier, I didn't want to be stuck mixing the old with the new.
All Necessary Components and Current Prices

Helpful Diagrams
Front

Rear

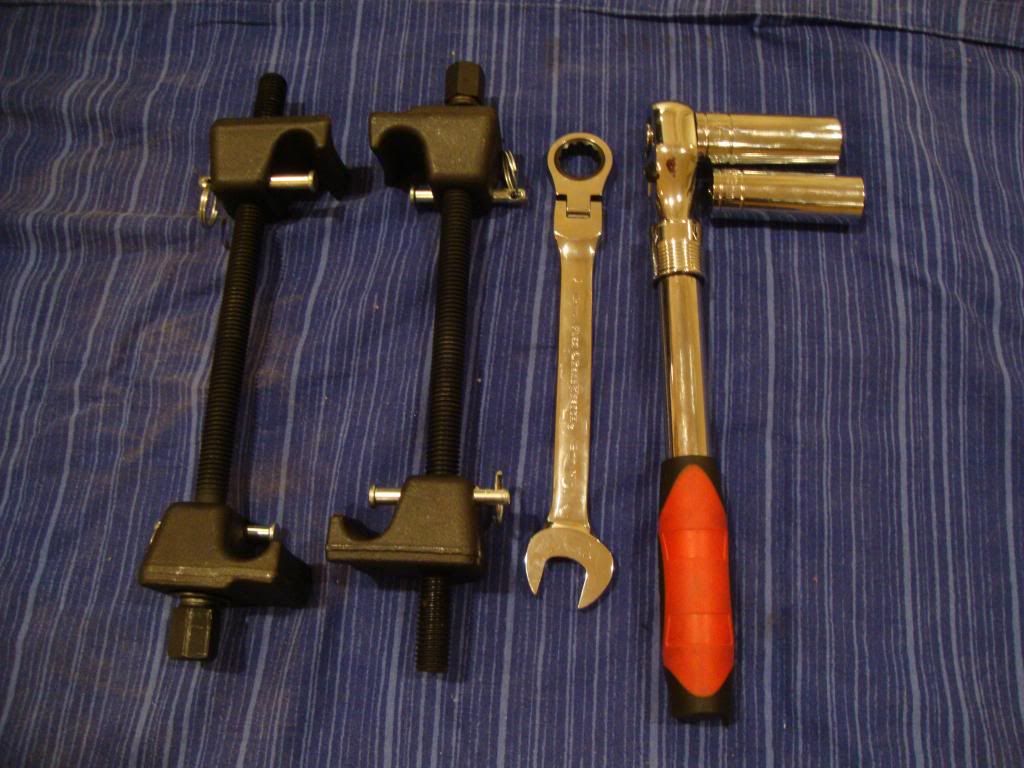
Tools Used
- Spring Compressors
- 19mm GearWrench
- 19(Spring Compressors) and 22mm(Top Nut and Bottom Bolts) Sockets
- Socket Wrench
I assembled the Rear Struts myself, but the front ones were a bit more difficult due to the higher spring rate of the stiffer coils. I did not feel safe compressing the springs, so I decided to have a local shop do them for me.

Some things to note:
The bearing goes the RED side UP / BLACK side DOWN, like so. This is the front mount sitting upside down.

The strut mounts have to face a certain direction. The ARROWS have to point to the OUTSIDE of the vehicle. For example, the left mount would point to the left tire/steering knuckle.

Every strut has little notches that line up with the strut mount indentations. As a result, it's very easy to keep the strut shaft from spinning. This is very useful when you want to tighten/loosen the top nut.
Strut Shaft Notches

Strut Mount Indents

As I said before, I built the rear struts myself. Here is the breakdown of parts.

Notice the little metal collar in front of the bump stop. It is not listed in the Service Manual, but you WILL need it to securely install the top mount. A closer look at the collar:

Compressing the Spring

Installing the Mount

The collar sits in between the mount and the top nut.

One done, one more to go

Make sure that the FARTHEST STUD points OUTSIDE the car (towards the tire).

Size comparison of the front and rear struts.

Awaiting the install...

Part 1: The Build
My 1998 ES300 has about 196,000 miles, as of today (1/6/13). It's still riding on its original suspension, which is in dire need of an update. I already upgraded the swaybars with the ones from Whiteline. The ride is still smooth, but the strut mounts make all sorts of noises if I hit a bumpy stretch of road. They sound like the bolts are loose or something.
After some thought and an extensive research, I decided to build a complete set of struts, so that I would have the highest quality components and minimize my "down time". I chose to go with Toyota mounting hardware, Tokico struts, and Tanabe springs (last minute decision). My original plan was to use H&R springs, but they were out of stock. There are some things that can normally be reused during a strut replacement, but as I said earlier, I didn't want to be stuck mixing the old with the new.
All Necessary Components and Current Prices
Helpful Diagrams
Front
Rear
Tools Used
- Spring Compressors
- 19mm GearWrench
- 19(Spring Compressors) and 22mm(Top Nut and Bottom Bolts) Sockets
- Socket Wrench
I assembled the Rear Struts myself, but the front ones were a bit more difficult due to the higher spring rate of the stiffer coils. I did not feel safe compressing the springs, so I decided to have a local shop do them for me.
Some things to note:
The bearing goes the RED side UP / BLACK side DOWN, like so. This is the front mount sitting upside down.
The strut mounts have to face a certain direction. The ARROWS have to point to the OUTSIDE of the vehicle. For example, the left mount would point to the left tire/steering knuckle.
Every strut has little notches that line up with the strut mount indentations. As a result, it's very easy to keep the strut shaft from spinning. This is very useful when you want to tighten/loosen the top nut.
Strut Shaft Notches
Strut Mount Indents
As I said before, I built the rear struts myself. Here is the breakdown of parts.
Notice the little metal collar in front of the bump stop. It is not listed in the Service Manual, but you WILL need it to securely install the top mount. A closer look at the collar:
Compressing the Spring
Installing the Mount
The collar sits in between the mount and the top nut.
One done, one more to go
Make sure that the FARTHEST STUD points OUTSIDE the car (towards the tire).
Size comparison of the front and rear struts.
Awaiting the install...
Last edited by Hayk; 02-10-13 at 11:35 AM.
 01-06-13, 07:38 PM
#2
Part 2: The Install
Took longer than expected, but I'm glad it's over... The rear struts were a major PITA!
Front
Tools Used:
12mm Socket for ABS/Brake Line
14mm Socket for Top 3 Nuts
22mm Socket for Bottom 2 Bolts
*Sway Bar - I have aftermarket links (a combination of 15/14mm)

Front Old vs New
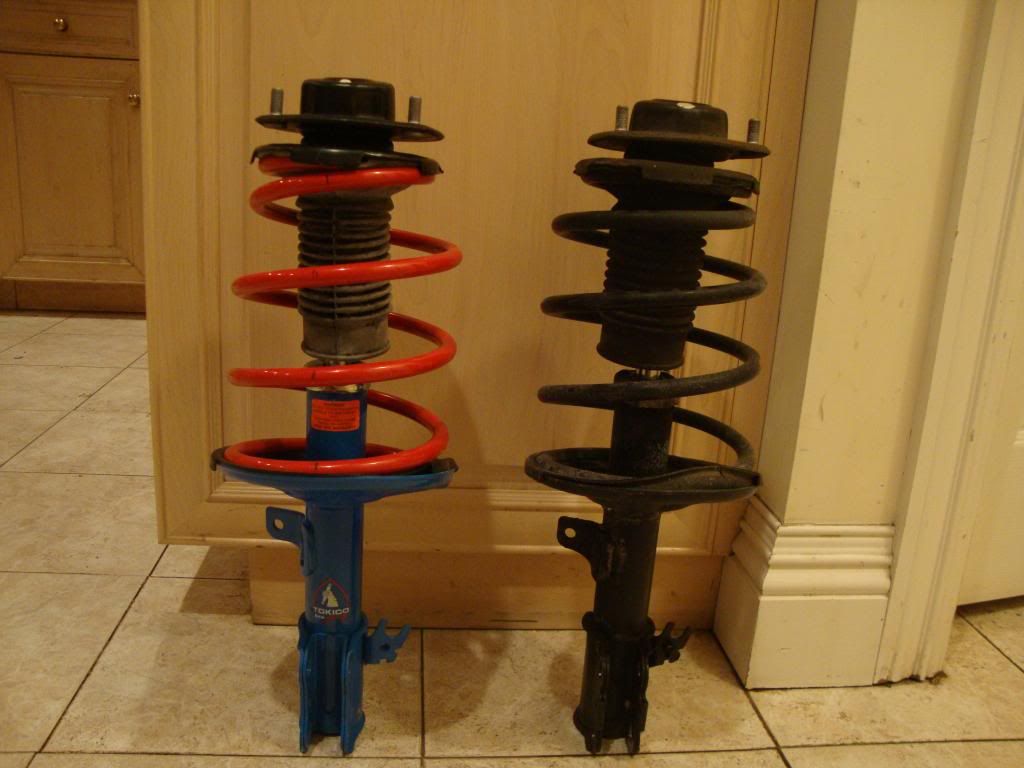
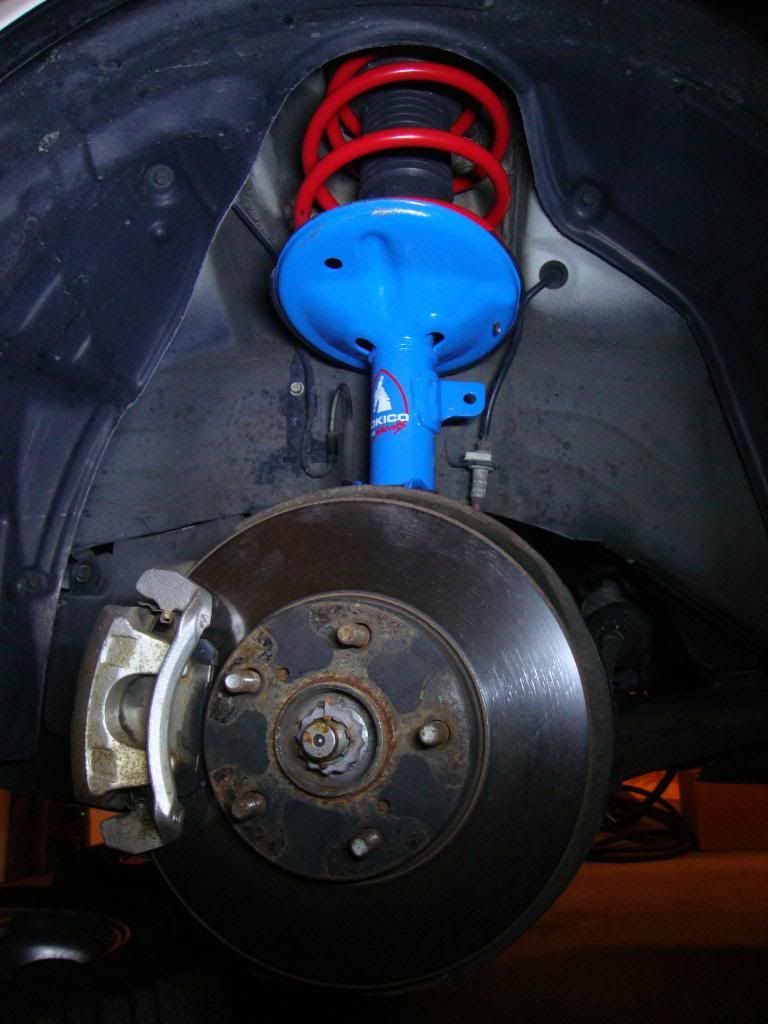
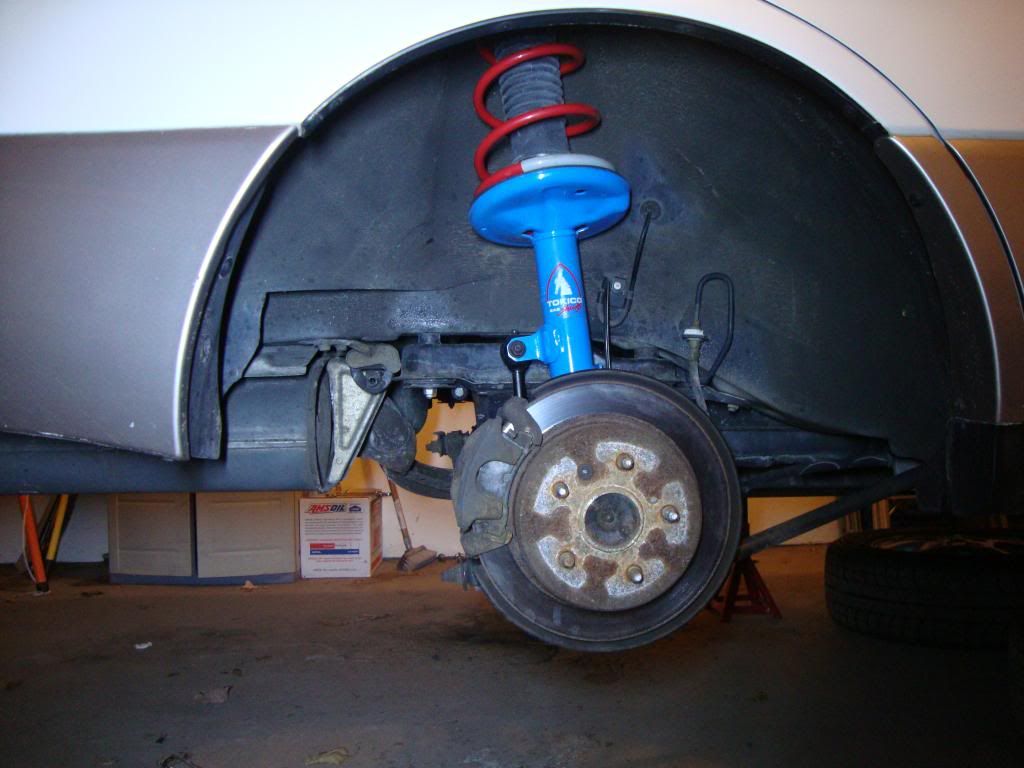
Both Fronts Replaced. There was some corrosion between the mount and the shock tower. Also, the bottom spring insulators have perished.

Very straight forward
Rear
Tools Used:
Phillips Head Screw Driver for Seat Belt Guides
10mm Socket for ABS
12mm Socket for the Brake Line and Rear Seat Back
12mm GearWrench for Top 3 Nuts (very tight space with long studs)
14mm Socket for Rear Seat Belts
19mm Bottom Bolts
*Sway Bar - depends on what you have

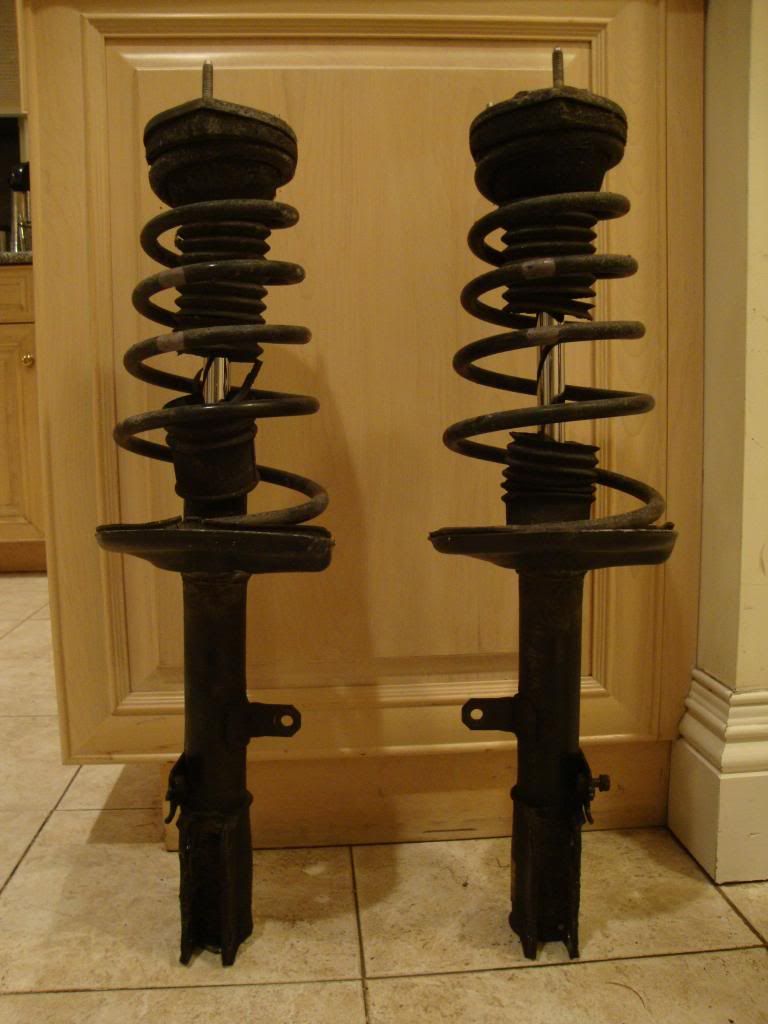
Rear Old vs New. Looks like there are less coils, but there really isn't, it's just the spacing.

Both Removed. The top mount bellows have ripped apart, and the bottom spring insulators were worn out.
One more difference about factory vs aftermarket springs. The Lexus spring is flattened at the top to make a better contact patch with the mount - much better design.

The Tanabe spring is simply cut and stops abruptly.

All Done!
Some thoughts about the rear struts: It helps to have an additional set of hands - I worked alone. The trickiest part of the replacement is positioning the new strut. You have to be able to raise the rear suspension links with the strut and stick the studs through the top holes. At the same time, you will need to reach inside the car and thread all the top nuts to hold the strut in place. Long arms and some upper body strength is required. I would recommend placing something sturdy under the rotor to help support the weight of the suspension.
Bonus: Rear Seat Removal
Pull Up on the Seat Bottom. It uses these hooks that snap into place.

Unbolt Three Seatbelts and Remove Four Seat Back Bolts.

Lift the seatback up to remove it. There are three hooks on the back.

This is what they go into.

Once you have it partially removed, unscrew the seat belt guides from the top of the seat (6 Phillips head screws).

Took longer than expected, but I'm glad it's over... The rear struts were a major PITA!
Front
Tools Used:
12mm Socket for ABS/Brake Line
14mm Socket for Top 3 Nuts
22mm Socket for Bottom 2 Bolts
*Sway Bar - I have aftermarket links (a combination of 15/14mm)
Front Old vs New
Both Fronts Replaced. There was some corrosion between the mount and the shock tower. Also, the bottom spring insulators have perished.
Very straight forward
Rear
Tools Used:
Phillips Head Screw Driver for Seat Belt Guides
10mm Socket for ABS
12mm Socket for the Brake Line and Rear Seat Back
12mm GearWrench for Top 3 Nuts (very tight space with long studs)
14mm Socket for Rear Seat Belts
19mm Bottom Bolts
*Sway Bar - depends on what you have
Rear Old vs New. Looks like there are less coils, but there really isn't, it's just the spacing.
Both Removed. The top mount bellows have ripped apart, and the bottom spring insulators were worn out.
One more difference about factory vs aftermarket springs. The Lexus spring is flattened at the top to make a better contact patch with the mount - much better design.
The Tanabe spring is simply cut and stops abruptly.
All Done!
Some thoughts about the rear struts: It helps to have an additional set of hands - I worked alone. The trickiest part of the replacement is positioning the new strut. You have to be able to raise the rear suspension links with the strut and stick the studs through the top holes. At the same time, you will need to reach inside the car and thread all the top nuts to hold the strut in place. Long arms and some upper body strength is required. I would recommend placing something sturdy under the rotor to help support the weight of the suspension.
Bonus: Rear Seat Removal
Pull Up on the Seat Bottom. It uses these hooks that snap into place.
Unbolt Three Seatbelts and Remove Four Seat Back Bolts.
Lift the seatback up to remove it. There are three hooks on the back.
This is what they go into.
Once you have it partially removed, unscrew the seat belt guides from the top of the seat (6 Phillips head screws).
Last edited by Hayk; 01-10-13 at 04:12 PM.

 01-06-13, 09:39 PM
#6
Lexus Champion
You did a great job, the correct way to do a suspension overhaul IMO.
Trending Topics
 01-07-13, 08:27 AM
#10
Lead Lap
Great to see this, a big help for others to know what exactly they need to buy. It took some time for me to work out the parts to build up new struts to replace the entire units. I went with Tokico blues too I like them so far a bit more sporty.
For those not going with aftermarket springs, I would recommend to use the OEM Lexus parts there if replacing, the aftermarket stock replacement springs don't appear to be high quality, coating flakes off while you install, different thickness and number of coils (might be different rate). When ordering the stock springs, you need to know the paint color on your stock springs, pink or green, there are two different parts for each place. If you have over 100k miles on the stock springs, they have likely sagged quite a bit.
For those not going with aftermarket springs, I would recommend to use the OEM Lexus parts there if replacing, the aftermarket stock replacement springs don't appear to be high quality, coating flakes off while you install, different thickness and number of coils (might be different rate). When ordering the stock springs, you need to know the paint color on your stock springs, pink or green, there are two different parts for each place. If you have over 100k miles on the stock springs, they have likely sagged quite a bit.
01-07-13, 08:17 PM
#11
Great to see this, a big help for others to know what exactly they need to buy. It took some time for me to work out the parts to build up new struts to replace the entire units. I went with Tokico blues too I like them so far a bit more sporty.
For those not going with aftermarket springs, I would recommend to use the OEM Lexus parts there if replacing, the aftermarket stock replacement springs don't appear to be high quality, coating flakes off while you install, different thickness and number of coils (might be different rate). When ordering the stock springs, you need to know the paint color on your stock springs, pink or green, there are two different parts for each place. If you have over 100k miles on the stock springs, they have likely sagged quite a bit.
For those not going with aftermarket springs, I would recommend to use the OEM Lexus parts there if replacing, the aftermarket stock replacement springs don't appear to be high quality, coating flakes off while you install, different thickness and number of coils (might be different rate). When ordering the stock springs, you need to know the paint color on your stock springs, pink or green, there are two different parts for each place. If you have over 100k miles on the stock springs, they have likely sagged quite a bit.
01-08-13, 03:23 PM
#12
Lead Lap
I didn't have any flaking, but the coating did get chewed up by the spring compressors. I will let you know how the Tanabe springs compare to the OEM, once I form an educated opinion. Keep in mind that buying factory springs will run you about $400, which I think is absurd for what you get.
It was hard to swallow the stock spring prices, but what can you do. Keep in mind that there are two unique part numbers for each of the springs for just a 2001 ES300 like mine. Nevermind that Camries have their own part numbers. But the Moog springs, the same part covers multiple generations of Camry, and ES. They are selling you the same spring for a 92 as they are for a 2002, because that is a cheap way to do it. So at least I got the actual correct spring, cuz the rear stock spring is likely a wildly different rate from the Moog part. Plus the stock springs are powder coated with some phenominal OEM quality stuff that the spring compressor didn't hurt.
01-08-13, 06:16 PM
#13
Rookie

Join Date: Dec 2011
Location: California
Posts: 50
Likes: 0
Received 0 Likes
on
0 Posts
WOW! JUST WOW... Lately I've been thinking about selling my lexus  but before I sell it she needs a few things to be fixed, and one of those is a total suspension refresh!!! thanks so much for posting because I really had no idea where to begin!
but before I sell it she needs a few things to be fixed, and one of those is a total suspension refresh!!! thanks so much for posting because I really had no idea where to begin!
01-10-13, 04:13 PM
#15
Updated with Rear Seat instructions.
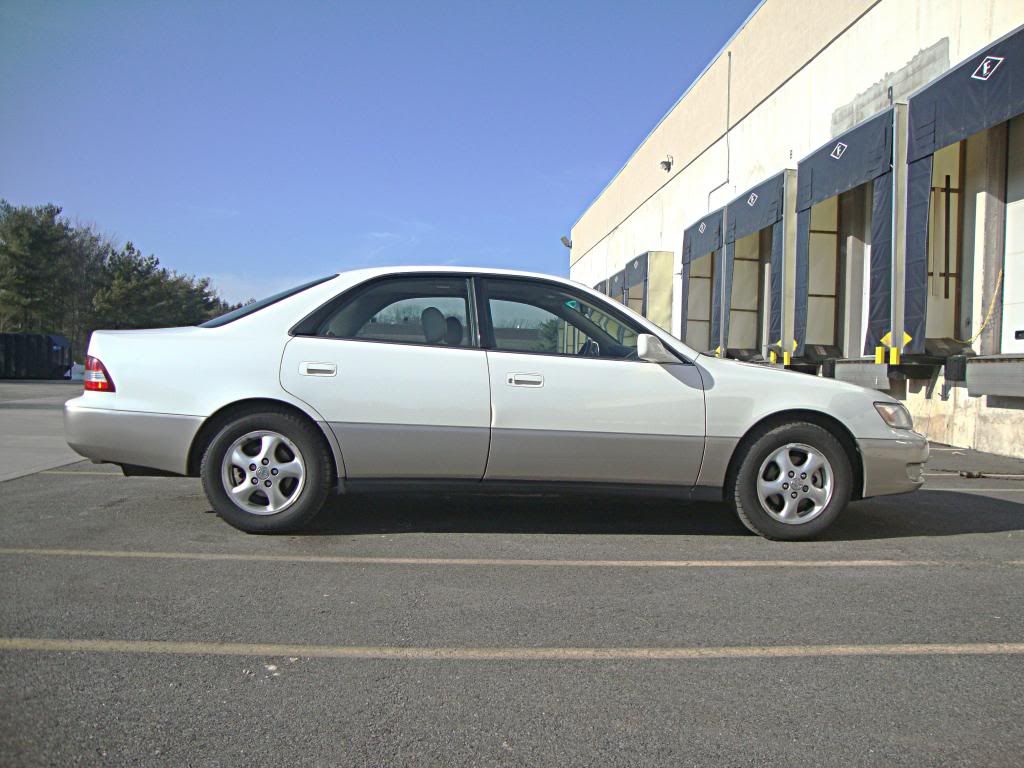
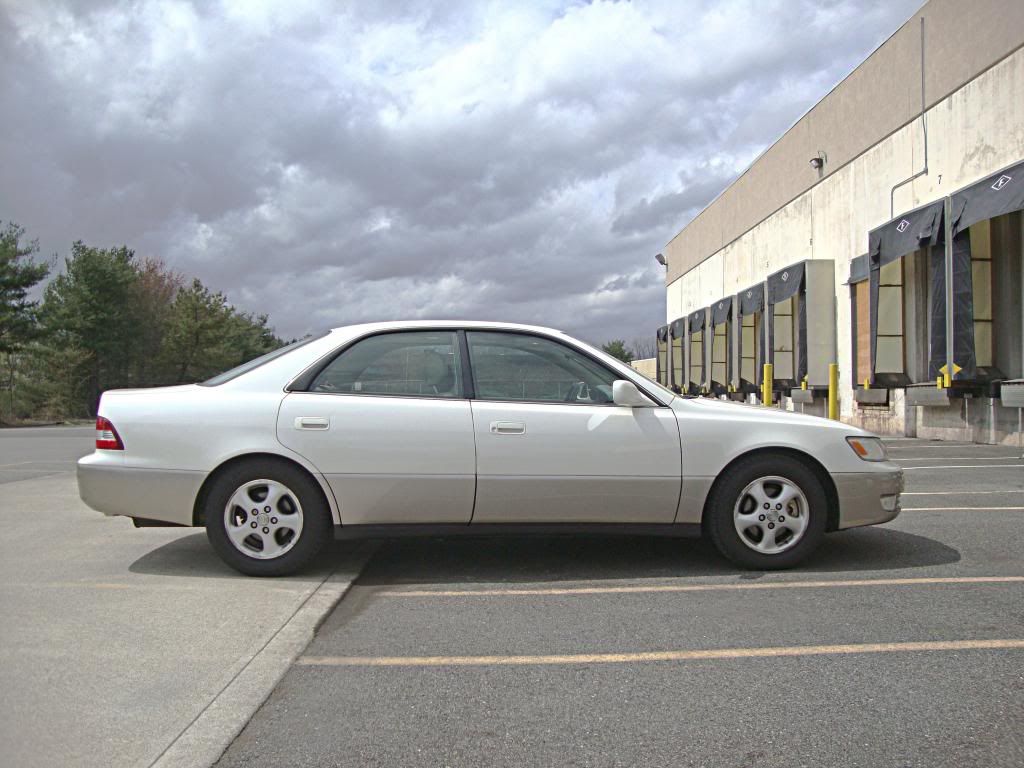
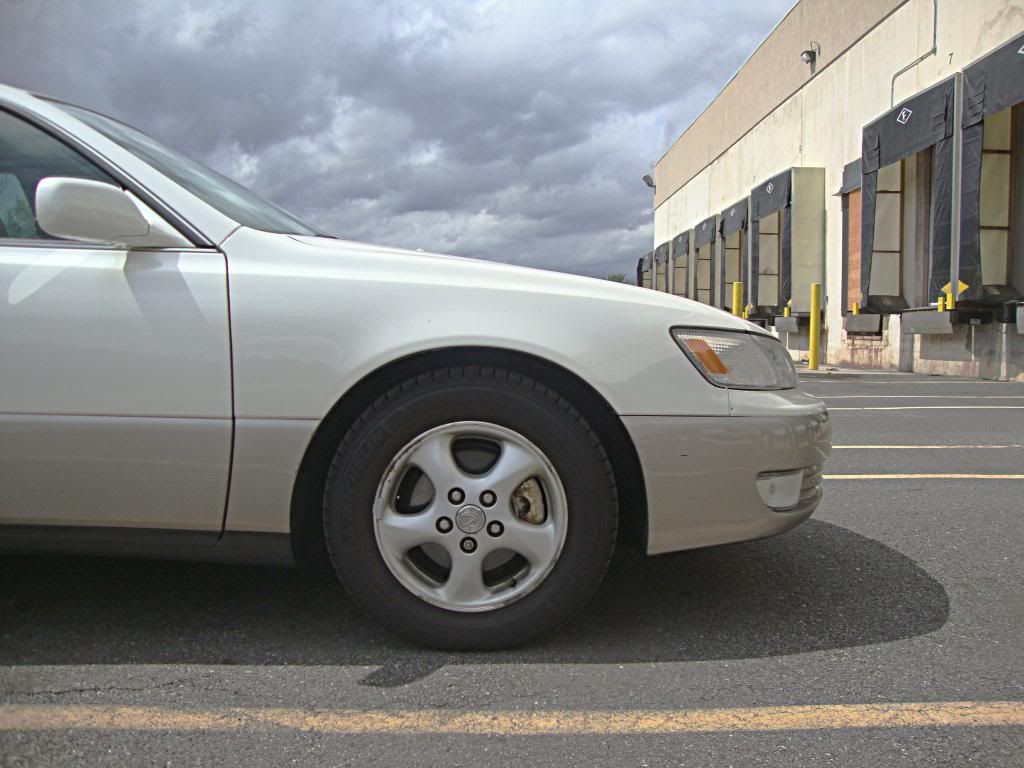
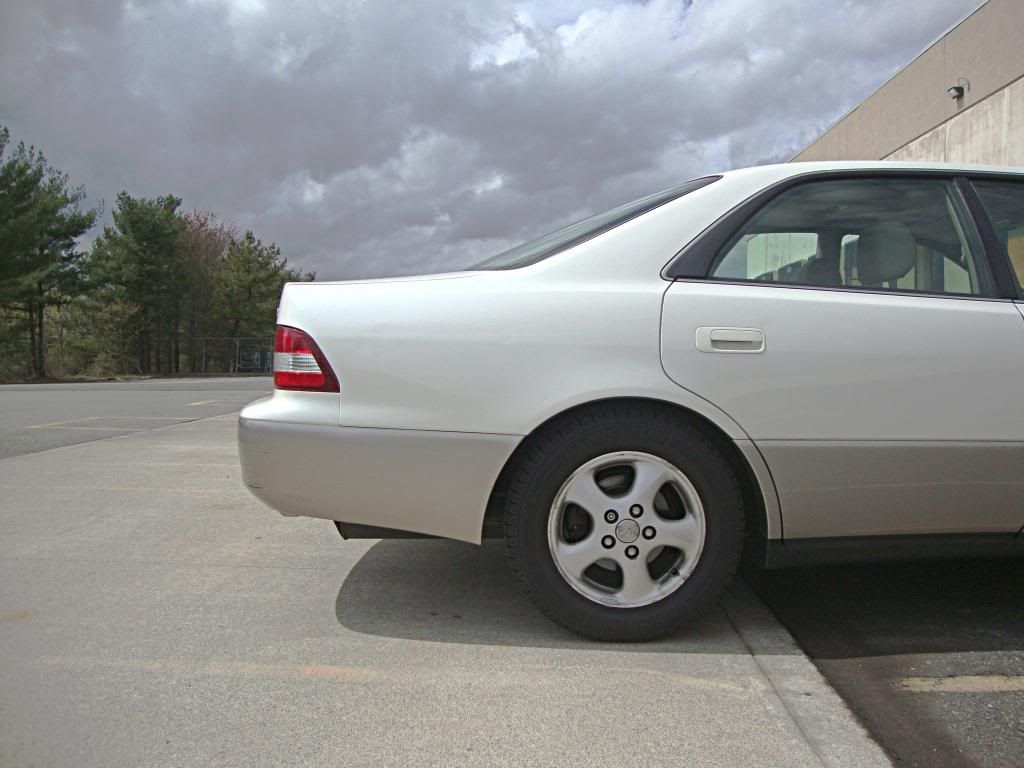
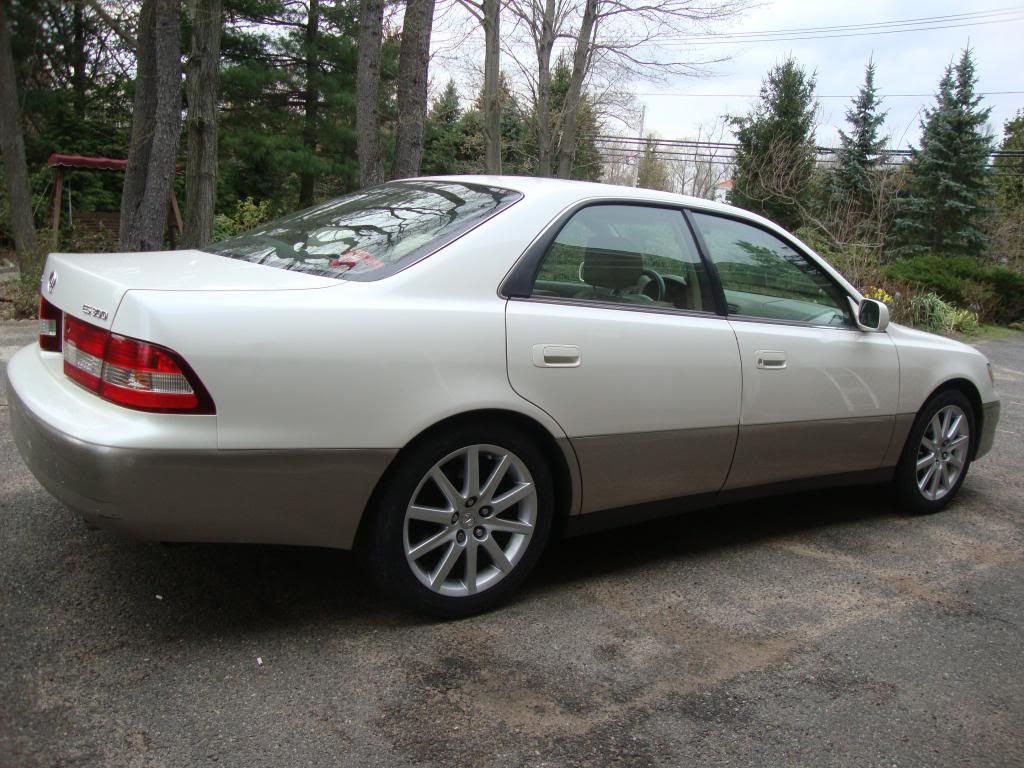
So far, I have only made about three trips with the new setup. What I have noticed is that the suspension is a lot more responsive to bumps, which unfortunately produces some squeaks from certain interior trim pieces. I'm not sure if it reduced any body roll, because it feels very similar to my old setup, but then again, I'm currently driving without a front sway bar. Most of my commute is on a flat highway, so it still feels almost as smooth as stock. There is however a small stretch of local road, which is fairly rough and lasts about 5 seconds - it's much more unpleasant with the current suspension. I did notice that there is no nose dive during braking and less of a tendency for the car to "squat" while accelerating from a stop. Also, I'm not 100% sure, but I believe all the "loose suspension" noises are gone. The two long trips that I made, I did not have my back seats in the car, so I was still hearing a lot of road noise, the fuel pump, and the seat belts moving around. As for the looks, the front gap is just a little bigger than the rear, maybe half an inch or so.
So far, I have only made about three trips with the new setup. What I have noticed is that the suspension is a lot more responsive to bumps, which unfortunately produces some squeaks from certain interior trim pieces. I'm not sure if it reduced any body roll, because it feels very similar to my old setup, but then again, I'm currently driving without a front sway bar. Most of my commute is on a flat highway, so it still feels almost as smooth as stock. There is however a small stretch of local road, which is fairly rough and lasts about 5 seconds - it's much more unpleasant with the current suspension. I did notice that there is no nose dive during braking and less of a tendency for the car to "squat" while accelerating from a stop. Also, I'm not 100% sure, but I believe all the "loose suspension" noises are gone. The two long trips that I made, I did not have my back seats in the car, so I was still hearing a lot of road noise, the fuel pump, and the seat belts moving around. As for the looks, the front gap is just a little bigger than the rear, maybe half an inch or so.
Last edited by Hayk; 01-10-13 at 04:26 PM.

