LS400 Starter Replacement - a story by BDR
 01-06-06, 06:55 AM
#1

Well let me tell you...
I think I had an easier time installing the Head Gasket on my IS300
I was somewhat prepared for the task ahead as I tried to search this forum for some useful tips.
For the most part all i found with the search tool was a lot of complaining about work and price and has anyone else done it.
I figured I'd give you a small window in to my world of Lexus V8 tech to help the folks that come after me.
My 1991 LS400 has about 158K on the motor. I know for a fact that everything on the motor is OEM factory (aka 15yrs old) except for the timing belt that my father-in-law had done at 125K. With that said, every vacuum hose and coolant larger than 1/8" seemed to crack when I sprayed them with PB Blaster and used a heat gun to soften them up to disconnect them. The Crankcase vent hose 5/8" thick from valve cover to Throttle body was a mess and will have to be replaced.
The intake was also very reluctant to come off as the rubber had baked and hardened to a tough plastic that was also impervious to movement. But after a little heat, everything was off.
The Throttle body was a little troublesome to remove (as compared to the 2JZ TB) once all the actuating cables are removed and the 4 12mm bolts/nuts are removed you can slide the TB forward a little but the clips on the coolant lines that attach in the lower rear of TB are quite a pain to get to. (I suggest using a bent-nose pliers for easy removal)
The Upper Intake manifold was pretty straight forward to remove , just remember to remove the connections in the rear of manifold. I just sprayed all those tiny vacuum lines with PB Blaster to loosen up the 15yr seal. Once I reassemble the motor and start the car, I will go back and replace each vacuum line one by one. (this was I wont mix up any lines if i tried to do this now)
The lower manifold was a pain in the **** to remove. With the help of a magnet wand I removes the 8-10 12mm nuts/bolts that hold the manifold to the heads. I also removed the Fuel Pressure Regulator, Front and rear fuel cross-over pipe and fuel feedpipe on passenger side fuel rail. Be sure to pay attention and not DROP the fuel crush washers as they will slip and fall into hell. then you either have to go fishing or buy new ones (which delays the process)
The engine harness is also bolted to the lower mani thru the center (remove those 2 10mm bolts)
The harness loom was brittle from age and heat so be careful as to twisting abd moving. I realized that this manifold was strangled under all sorts of things.
I have no idea how folks leave the fuel system in tact to remove this manifold, as it is very very tight and the extra work involved in wiggling it out is not justified if you can remove the fuel and make it an easier removal. Im pretty good around motors and it seems futile to leae it on the mani.
I had no choice but to remove both fuel rails. The 17mm fuel rail bolts were VERY VERY tough to remove - serious torque was needed!!! I did not unplug injectors as the connectors were very brittle and I didnt want to chance breaking a key connector. So I remove the fuel rail and rotated the injector harnesses 180* towards the outside of vehicle and let them rest on the valve covers.
Once the fuel system was removed the I pushed a big pry bar into the runners and pryed up to break the factory gasket seals . That was easy.. once broken, the lower manifold was free of constraint.
Although everything was now disconnected, There wasnt really much room as things are dangling everywhere!! The big IAC valve of whatever bolts to the front of upper intake (circular object held by two 12mm bolts) was constantly in the way and I had to further remove more coolant lines and vacuum lines from it to get it up and out of the way.
NOTE: I didnt have to drain the coolant from the engine. (as of right now)
Once I got that out of the way.... the only obstacle was balancing the lower mani and lifting it uniformly to clear mount studs. (I know it sound easy, but bending over the engine and balancing and moving things out of way is a bit tedious) If you have a helper it may be easier, but I always work alone on big jobs as I like to know what i removed from where, and where I put it.
You have to maneuver it under the wire harness that runs over the middle of lower mani to front of engine as its not that easy to undo the entire harness. and I wasnt looking forward to break brittle 15yo clips.
I lifted it and decided to move it towards the drivers side and slide it under the harness.
After pushing a few dangling things out of the way a few times .... the lower manifold popped right out.
(That was a happy moment) Now i was looking at the starter!!!
I will not remove the coolant bridge. i am going to buy the correct flexhead 14mm wrench to remove starter bolts. I will soak them with PB Blaster tonight and hope for an easy removal.
I will also hope that the clips are removed without breaking.
I will include pics later and more details about what will be replaced on the way back in.
Hopefully this will help someone in the future as to what to look for.

 01-06-06, 06:16 PM
#3
Rookie

Join Date: Oct 2005
Location: TX
Posts: 60
Likes: 0
Received 0 Likes
on
0 Posts
As you mentioned, all the help we can get is appreciated. My battery fluctuates between 11 and 12.5 amps, so if my starting problem gets worse and a battery doesn't fix it, I'll be digging with a wrench as you were.
01-06-06, 08:54 PM
#4
Driver School Candidate

Join Date: Jan 2006
Location: NY
Posts: 14
Likes: 0
Received 0 Likes
on
0 Posts
Diddy, what a coincident, I am doing the same thing, and up to the same stage as you are, I was wonder how you can access and loose the starter mounting bolt without removing the rear coolant bridge, what kind of special tool you're going to get, let me know, so it can save me some work.
You are absoluely correct, it is a pain to replace the starter for this car, you have to take out everything on the top of the engine just to see the starter, and still need more work to remove it.
You are absoluely correct, it is a pain to replace the starter for this car, you have to take out everything on the top of the engine just to see the starter, and still need more work to remove it.
01-09-06, 05:45 PM
#5
Molex,
After doing some more inspection... The rear coolant bridge will HAVE to come out. I mean it can be done with it in, but my hands are big and I have no idea how i am gonna thread the starter bolt back in when two of my fingers can barely fit under the coolant bridge. DOH!
Furthermore the 4 12mm Coolant bridge nuts are going to be a pain to get , especially the rear ones that reside under the damn wiring harness!
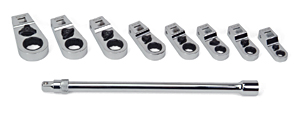
I plan on buying this tool -Snap On Ratcheting Crowfoot wrench Part number BFCRM14. Its only $16 (found the tip on Lextreme.com)
I been soaking the two bolts with PB Blaster while I wait since there is nothing else I can do at the moment until the replacement starter gets here from Carson Toyota.
My new task is to now figure out how to remove the rear coolant bridge. I also have to figure out how to remove or raise and support the wire loom. It is very very brittle after 15yrs of engine and tranny heat.
The rear coolant bridge bolts are hidden under it so once i figure that out I will know what path to take.
All this has been pretty easy, its just time consuming and frustrating trying to engineer the solution along the way. no big deal... car is apart so inevitably it will be put back together and driven out of my garage!
After doing some more inspection... The rear coolant bridge will HAVE to come out. I mean it can be done with it in, but my hands are big and I have no idea how i am gonna thread the starter bolt back in when two of my fingers can barely fit under the coolant bridge. DOH!
Furthermore the 4 12mm Coolant bridge nuts are going to be a pain to get , especially the rear ones that reside under the damn wiring harness!
I plan on buying this tool -Snap On Ratcheting Crowfoot wrench Part number BFCRM14. Its only $16 (found the tip on Lextreme.com)
I been soaking the two bolts with PB Blaster while I wait since there is nothing else I can do at the moment until the replacement starter gets here from Carson Toyota.
My new task is to now figure out how to remove the rear coolant bridge. I also have to figure out how to remove or raise and support the wire loom. It is very very brittle after 15yrs of engine and tranny heat.
The rear coolant bridge bolts are hidden under it so once i figure that out I will know what path to take.
All this has been pretty easy, its just time consuming and frustrating trying to engineer the solution along the way. no big deal... car is apart so inevitably it will be put back together and driven out of my garage!
01-09-06, 09:14 PM
#6
Driver School Candidate
Join Date: Jan 2006
Location: NY
Posts: 14
Likes: 0
Received 0 Likes
on
0 Posts
Diddy,
I have eventually removed the starter yesterday, it is a very, very painful and cumbersome job, I do not know how people can put up with Lexus. Removing the air chamber, intake manifold, fuel injectors, fuel injector rail, inlet fuel pipe, return fuel pipe and all those are the easy part.
As I said before, after all these have come out, The starter is visible, but you cannot take it out, I surveryed this situation quite a while, unless you have special custom-made wrench that snakes through along the firewall and reaches the 2 mounting bolts, you have no other choice, but have to remove the coolant bridge to gain acces to the 2 mounting bolts
Let me tell you how I did it. ( I was cursing the engineer who design the Lexus LS400, and I am still cursing , I think the Japanese are smart people, how can they design something like this, just the location of starter is stupid enough.)
In order to loosen the coolant bridge ( just loosen, not remove yet, to remove, it is another headache, I'll describe how to do this later, be patient.). There are 4 nuts holding the coolant bridge onto the 4 studs protruding from the engine block, 2 on each side, the front 2 nuts are easy to remove, the rear one on the driver side, needs a universal, not a big deal.
However, the rear one on the passenger side is a *****, it is hiding behind the wiring harness directly under one of the heater hose( the one close to the driver side), you need a mirror to see it, unless you have the right length of extension in combination with a universal, you may be able to access it , for me, I end up taking out the heater hose on one end (the engine end), push the hose away to gain acces to the nut, you have to be careful not to let the nut to fall down, if it falls to the ground, you are lucky, if it falls and trapped in the engine compartment, you will have a hard time to get it back if you can get it back at all, unless you are Hercules, pick up the 4000 lb LS400 and shake it. it will be great if you have a magnetic socket, I stuck a little masking tape with the sticking side out into the socket, it works out OK. With all 4 nuts are out, bang the coolant bridge with a hammer a little bit, now the cooland bridge is loose. If you did not drain the coolant, the engine and the floor will get wet, that is Ok, it will dry out.
With the Coolant bridge loose, you think you can remove it, NO! In order to remove the coolant bridge, you have to lift it up vertically about 1 inch or so to clear the studs ( another stupid design, why can't they use a bolt to screw in to the engine block instead, in this case it will be much easier , just to slide it out ). There are no room for you to lift the coolant bridge, because the wiring harness is on the top of the coolant bridge, the most you can lift may be 1/4 of an inch which is not enough.
A little survey find out most of the wiring harness is inside a plastic box enclosure and is bolted to the coolant bridge by two 10mm bolts located behind the harness near the firewall ( also you need a mirror to see this), thinking by removing these 2 bolts, you can lift up the wiring harness and have room for you to lift up the coolant bridge. NO! after removing the 2 bolts, though the wiring harness is separated from the coolant bridge, you still can not lift up the wiring harness because there are 2 branches from the harness, one on driver side and one on passenger side both go to the inside of the car and must be bolted inside somewhere (it is so tight, there are no service length at all, another stupid thing ).
At this moment, I got stomped, if you cannot remove the coolant bridge, you cannot take the starter out. After some thougt, the only way to do it, though I do not like it, is to break the plastic box holding the harness , the wiring harness become seperate wires, that will have room to lift up the coolant bridge. ( in fact, you do not need to break the plastic box, but I did not know, only after I break it I find out, after you take out the old tape, you will find the top are interlocked with the bottom part, take out the top and slide out the bottom)
So I take out the old tape, and nipping, sawing and cutting to take away the plastic box, I have to be careful not to damage the wire. With plastic cover gone, the wires loose, I took out the coolant bridge.
With the coolant bridge removed and the wiring harness loose, now I can use a regular ratchet and a 14mm socket to loose the 2 starter mounting bolts through the firewall, still needs a little manuevering
The bolt on the driver side is easy to take out once it is loose, the other one on the passenger side, because the EGR pipe is on the way (another stupid design), after it is loose, I use my 2nd and middle finger to turn back little at a time to take it out . What a pain in the xxx.
With the bad starter out, I am ready to put a a new one in, a re-build one, and put back everything. I'll keep you post.
Is there any body has a better way to do it? I'll like to know. I make one mistake, I broke the wiring harness plastic box which I believe you can avoid, I would have to get some black electrical tape to bundle the wires back and put some of those flexible conduit.
01-10-06, 06:48 AM
#7
Can we just take the top cover off the harness box and cut each ends and remove the center section. this way, we preserve the box and can reattach the two halves and use some "Cool Tape" to reattach the cut part of the box?
This is insane that we have to go thru this process.
but can you imagine the hack job that a private mechanic or dealer would do and you'd never know what they cut and mangled under your intake? LOL
Good Information posted, I ripped the gasket on the front of top intake mani where the IACV i think fits. "Big round thing held on by 2 12mm nuts" I hope I can just use RTV silicon on it.
Trending Topics
01-10-06, 07:21 AM
#8
Originally Posted by molex
I broke the wiring harness plastic box which I believe you can avoid, I would have to get some black electrical tape to bundle the wires back and put some of those flexible conduit.
01-10-06, 08:16 AM
#9
Driver School Candidate
Join Date: Jan 2006
Location: NY
Posts: 14
Likes: 0
Received 0 Likes
on
0 Posts
Diddy,
I guess you can do that as long as you have can lift up the the wire to have enough room to lift up the coolant bridge.
you can get the ISC gasket from the dealer, about $3.00, in fact, you need a lot of more gaskets if you do not want to use the old one, They are all available from the dealer, some from autozone
I also replace the fuel injector insulator, because when I took them out, I broke couple of them.
From autozone: approx $35.00
2 x Intake manifold gasket and 4x air chamber gasket set
From dealer: approx $55.00
throttle body gasket
ISC gasket
EGR pipe gasket
EGR valve gasket
rear coolant bridge gasket x2
fuel injector insulator x 8
I have my starter rebuilt by some local shop $99.00
labor cost - invaluable
I have all these ready, I am going to put them back together starting this evening after work.
Diddy, thank you for the advice for the tape.
I wonder how the dealer do this job, I quote one dealer in my area before, they told me the starter is about $400, and labor is about 4 hours ($110 per hour), with the gaskets, will be close to $1000.00. It is no samll change. But I am very curious they can do this in 4 hours, I wish I know how they do it. Anybody knows?
01-10-06, 09:13 AM
#10
I only ripped that one gasket. All of my other gaskets are reusable. I didnt warp or bend any of the intake gaskets. I just gotta shop vac the block and scrape all the years of crud from around the intake ports. Once I clean up this stuff, it should be easy.
I do have to replace some vacuum hose which I will do later. with some premium silicone hose I have left over from the turbo IS project.
I will have to purchase the cooling bridge and ISC gaskets I guess .
I do have to replace some vacuum hose which I will do later. with some premium silicone hose I have left over from the turbo IS project.
I will have to purchase the cooling bridge and ISC gaskets I guess .
01-10-06, 11:10 AM
#11
Driver School Candidate
Join Date: Jan 2006
Location: NY
Posts: 14
Likes: 0
Received 0 Likes
on
0 Posts
Diddy,
How are going to clean the intake port?
For the intake manifold, it is outside, I can clean with carburettor cleaner or somthing like that, but, if you clean the intake port by spraying those cleaner, both the dirt and cleaner fluid it will get into the combustion chamber, is that OK?
How are going to clean the intake port?
For the intake manifold, it is outside, I can clean with carburettor cleaner or somthing like that, but, if you clean the intake port by spraying those cleaner, both the dirt and cleaner fluid it will get into the combustion chamber, is that OK?
01-11-06, 08:44 AM
#12
IT shouldnt cause a problem as that fluid is meant to be burnt.
I have blasted my head with carb cleaner before to wash out all the grime. Even the piston tops have been blasted and sanded with 2000grit paper.
Those carb cleaners should get most of the grime out of the head as I see there is LOTS of carbon build up after 15yrs. (Which is afftecting the port diameter - which will inevitably slow the flow)
I am goin to get crackin on my coolant bridge tomorrow. get it off, get starter out and get it cleaned.
I have like a garden growing in the valley of the heads. leaves, dirty, grease, whatever you can think of is stuck in there LOL.
this car will look and run like new by the time I am done.
I also have to replace all the rubber hoses with silicone hoses to stop the hoses from dry rotting and becoming brittle.
01-12-06, 09:18 AM
#13
UPDATE:
Well I did it.... I broke down and removed the two 10mm bolts holding the plastic wire loom to the coolant bridge. At this point I took a screwdriver and gouged the crap out of the now taunting loom. LOL I broke that **** into itty bitty pieces and removed it from the engine bay. I easily moved the wring aside and removed the 4 12mm nuts to free and remove the coolant bridge.
Unfortuntely I couldnt find the drain plug on the rad due to tiredness and rain and just plain out not wanting to go under the car with a underbody cover intact. So as I pryed up the coolant bridge. A texas like flash flood of incredible hulk juice filled the valley where the starter sits between the heads and puddled down the tranny onto the floor. I pryed the coolant bridge out and removed it and gained some access to the starter bolts.
I used a simple 14mm wrench and a breaker bar over the end to loosen the two starter bolts. once loosened I removed the bolts by hand and the starter is now out.
NOW: Clean up and engine prep begins. which will be the fun part.
I have to soak up all the coolant in the block valley.
Scrape and clean all gasketted surfaces
get a wire brush and scrape all the crud and grease off motor and shopvac it out.
I have to order some various width silicon hoses
I also have to go get some regular "Screw Clamps" I have those spring clamps!!!!!!!!
Hopefully I will get my starter and Coolant Bridge gaskets from Carson tomorrow.
I was gonna reuse the coolant bridge gaskets, but I'd hate to have a leak after i assemble all this stuff LOL
Stay Tuned!!
01-12-06, 02:41 PM
#14
Driver School Candidate
Join Date: Jan 2006
Location: NY
Posts: 14
Likes: 0
Received 0 Likes
on
0 Posts
Good for you, Diddy, for me, I already put the new starter in as well as the coolant brigde
To make sure the starter is OK, at least it cranks, ( you donot want to find out the new starter is no good after you put everything back). The way to do this, is to connect the battery back, use a jumper wire (18 gauge or thicker), connect directly from the positive termianl of the battery to the starter solenoid for a few seconds. If it cranks, it should be OK, as it is cranking, because the intake manifold is not in yet, you can see the intake valves are also moving up and down, another sign it is cranking. One IMPORTANT note,
DO NOT attempt to use the key to crank, because once you turn the key, the fuel pump will be on. Since your fuel lines are open, not a good idea to shoot the gasoline out, in addition, with a lot of sensors are disconnected, god knows what the computer will think.
I also spliced this wire with the the original solenoid connector wire and route this wire outside and hide it somewhere when everything is finished. The purpose is to isolate the problem in the future if starting problem happens again. As you know, the 12 v supply goes through the ignition switch, the transmmision neutral sw, the anti-theft cut off before going to the solenoid. By doing this, you by-pass all three of the unknown. I do this on every car I have when I replace the starter.
To splice the wire, if you want to do this, burn off some insulation on the original wire, join the new wire, I advice to solder them together, if you just twist them together and tape them, I am afraid it may become loose in the future, that will defeat the purpose of troubleshooting.
FYI, the torque on the coolant bridge bolt and the intake manifold nut and bolt is 13 ft-lb according to the manual, also when you install the intake manifold, observe the orientation, the manifold can be fitted both ways. The arrow on the top of the intake manifold should point toward to the front of the car, that is the radiator.
I work pretty slow, probably you will catch me up.
01-12-06, 04:54 PM
#15
Driver School Candidate
Join Date: Jan 2006
Location: NY
Posts: 14
Likes: 0
Received 0 Likes
on
0 Posts
I would to correct what I say before about this
" the 12 v supply goes through the ignition switch, the transmmision neutral sw, the anti-theft cut off before going to the solenoid "
Actually, the 12v supply goes through a fuse and the starter relay contacts, then goes to the start solenoid.
The start relay is controlled by the ignition switch, the transmission neutral switch and the anti-theft system. All have to be OK before the relay can be energised, then the contact is close and supply juice to the starter solenoid.

