DIY - Daizen Caster Arm Bushing Installation - lots of pics!
 03-23-10, 07:59 AM
#1
Advanced
Thread Starter

3/3/12 Update - After two years, the Daizens started clunking, so I took them out and replaced them with OEM type bushings. This how-to is of course still applicable, but I now have my doubts about the Daizen bushings. See post #98 for details.
I posted this on the general forum, but thought it might be useful on this one as well, hope that's OK.
This weekend I installed the Daizen caster arm bushings, and took some pictures along the way. I did the whole job in 3.5 hours, counting from getting the car up onto the jackstands to when I test drove it. This was my first time doing this, I think I could do it in half the time if I did it again.
I got the bushing kit from TM Engineering. I guess I was lucky, because I got the parts within ten days of ordering, and Todd was great in his correspondence with me.
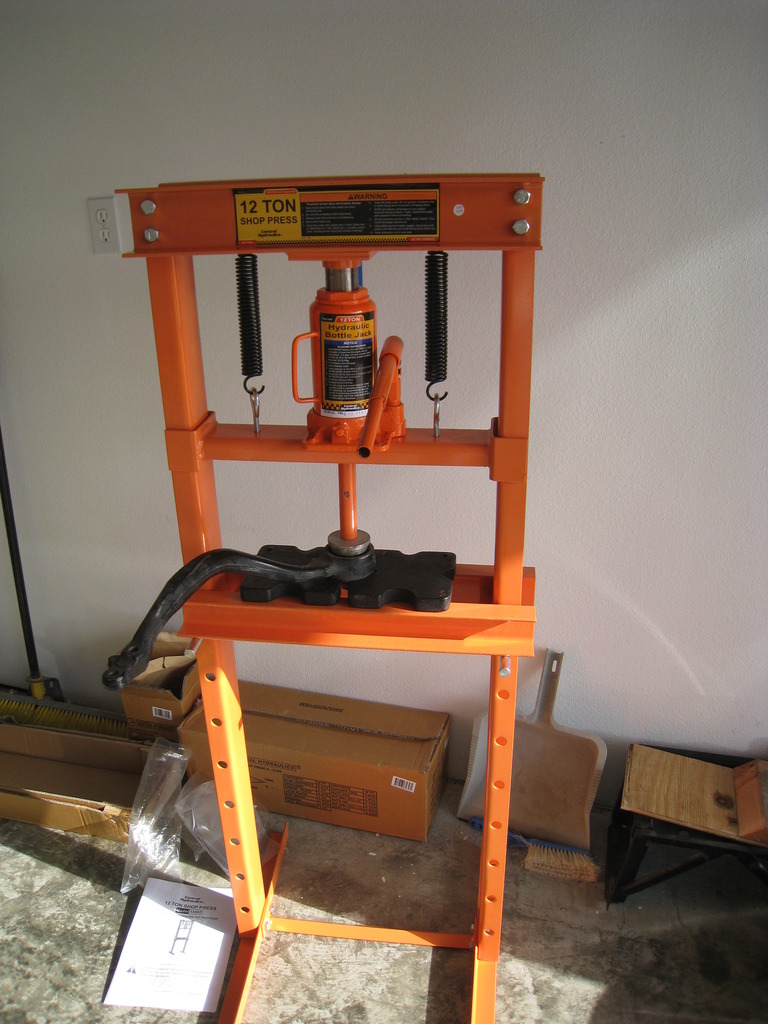
A tricky part of this job was getting the old bushings out. I did not use either the "torch it out" or "cut it out" approaches, instead I sprung for the $99 Harbor Freight 12 ton press, and pressed them out. I would recommend this approach - it is fairly easy, plus you get to keep the press as a reward .
.
So here is the step by step DIY. As a disclaimer, I am a fairly competent DIY-er. If you are not, or are not sure of what you are doing, this job may not be for you.
If, like me, you are only doing the caster arm bushing (#2 Lower Suspension Arm, in Lexus-speak), there is no need to separate or remove ball joints, springs, etc. Some writeups suggested to do that, but there is no need.
1. Jack up the car and put it safely onto jackstands. Remove wheels/tires.
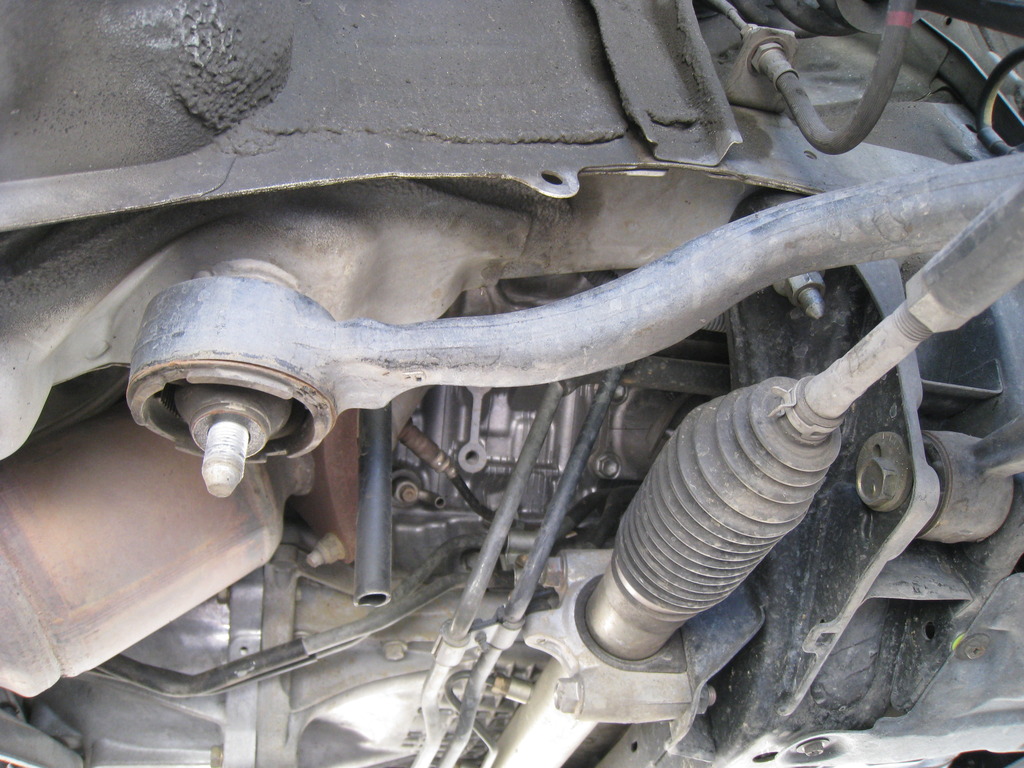
2. Remove the bolts and nuts holding the suspension member brace and the two strut bar brackets. 10 fasteners total - two bolts in the front of the brace, and then two bolts and two nuts at each strut bar bracket. Below is a photo of one strut bar bracket, and its four fasteners. (For those who noticed - yes, the arm already has new bushings installed, because I initially forgot to take this picture, and took it at the end of the job).
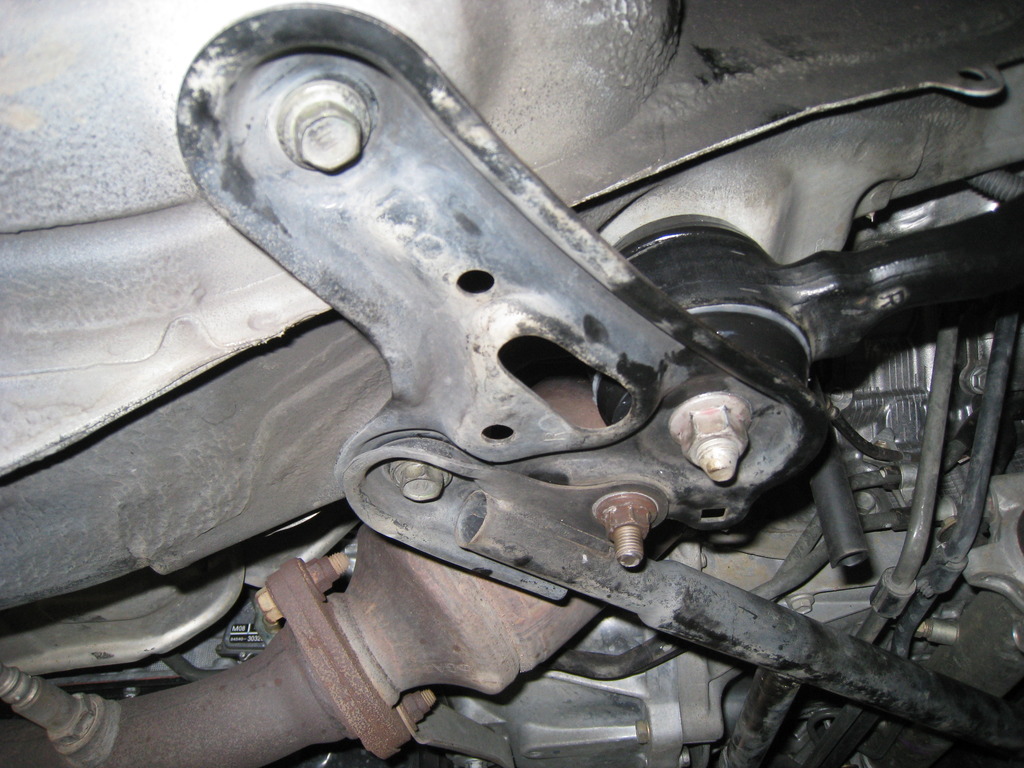
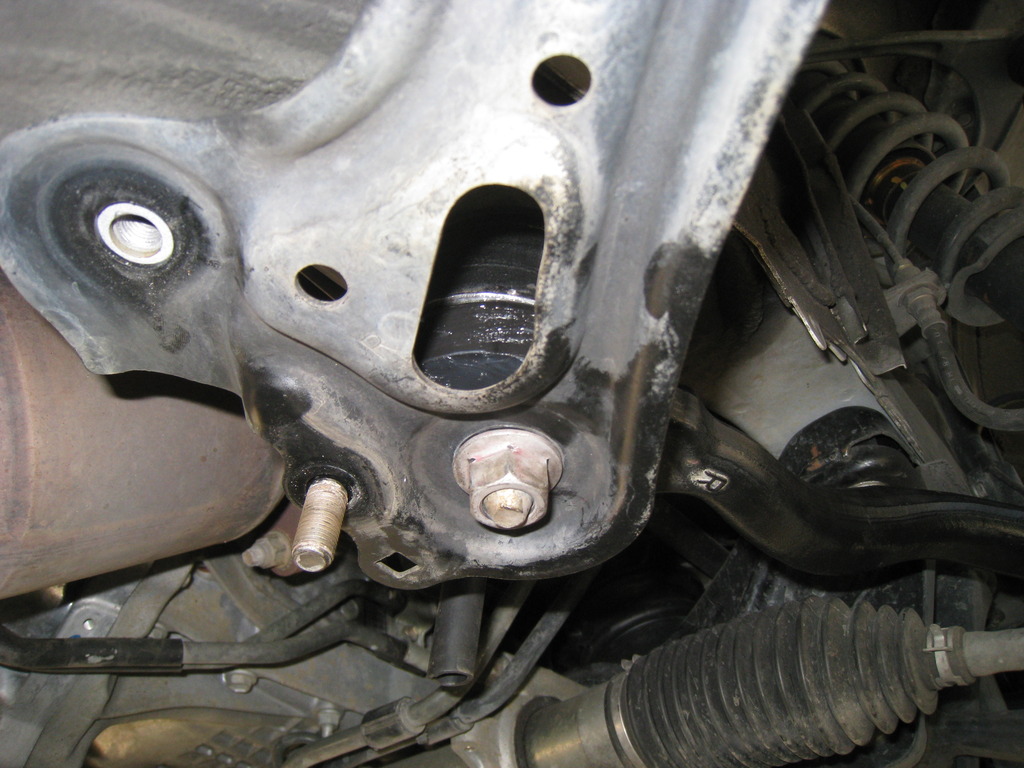
3. Here is a view of the bushing end of the arm, the bushing is now exposed.
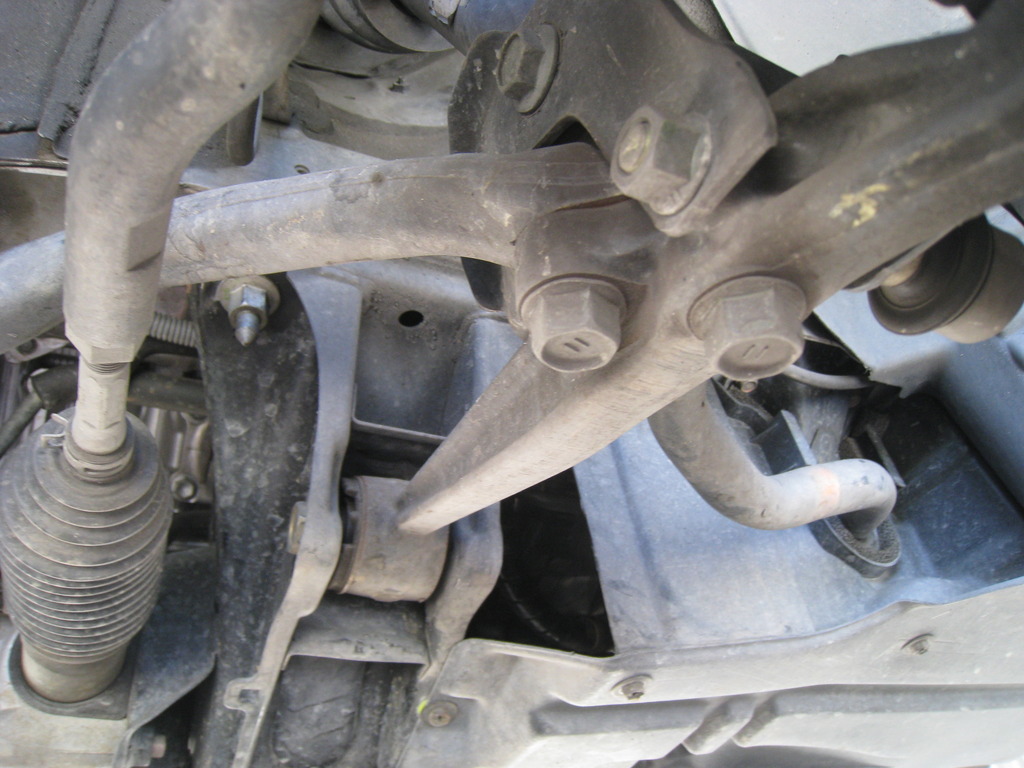
4. Here is a view of the two bolts holding the caster arm to the #1 Lower Suspension Arm (the ones with "11" on the head).
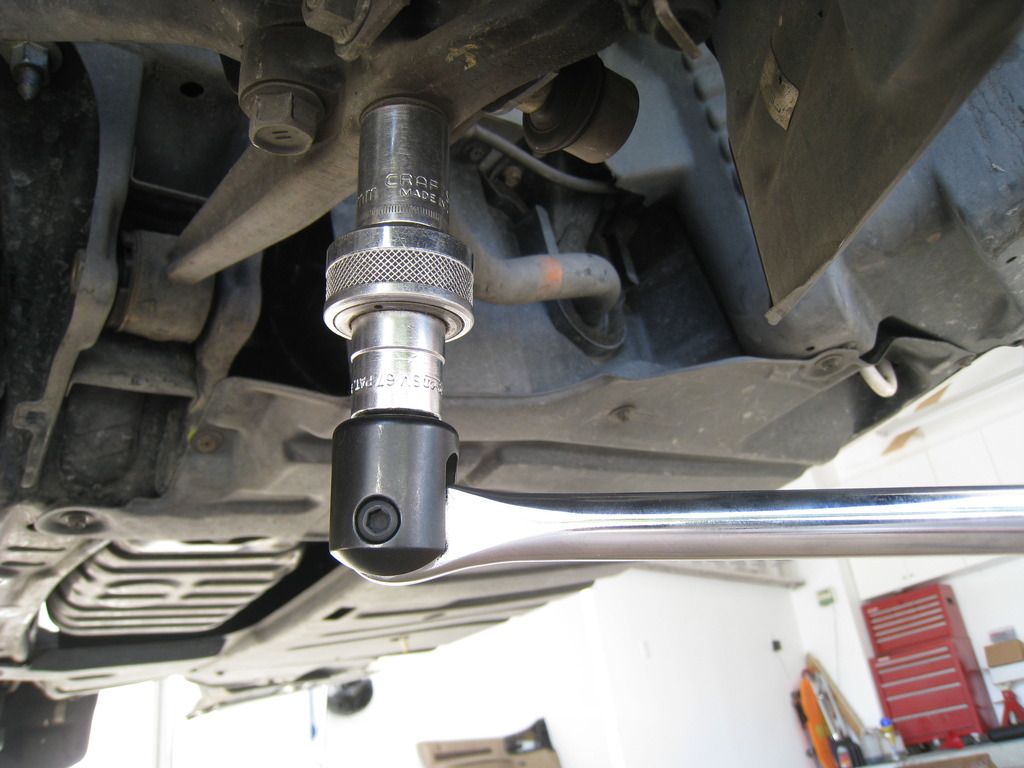
5. Here I am removing the two bolts holding the caster arm to the #1 Lower Suspension Arm. I used a 25" breaker bar, and still had to give it a heck of a heave-ho before the bolts loosened.
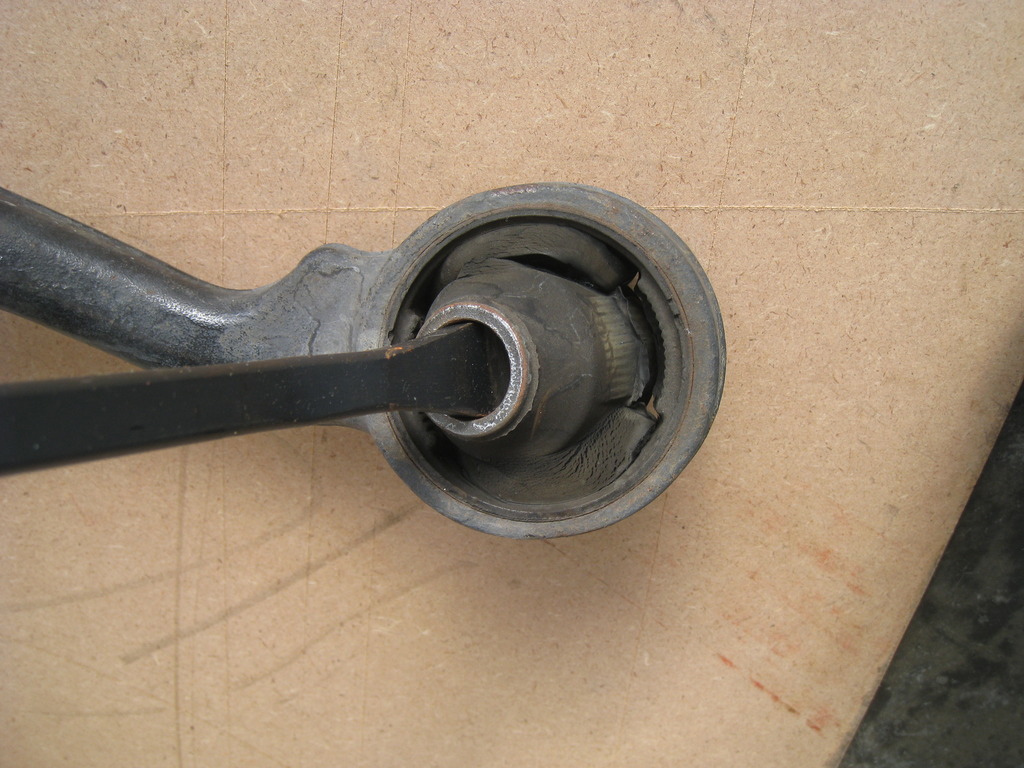
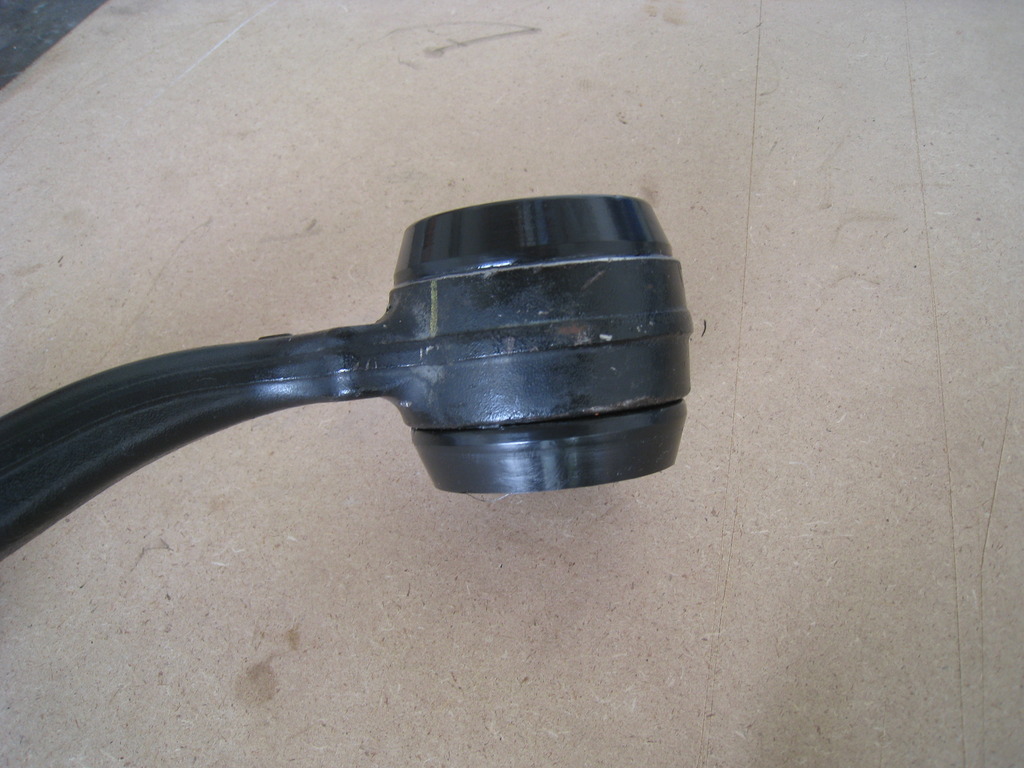
6. Now the arm comes right out, as promised.
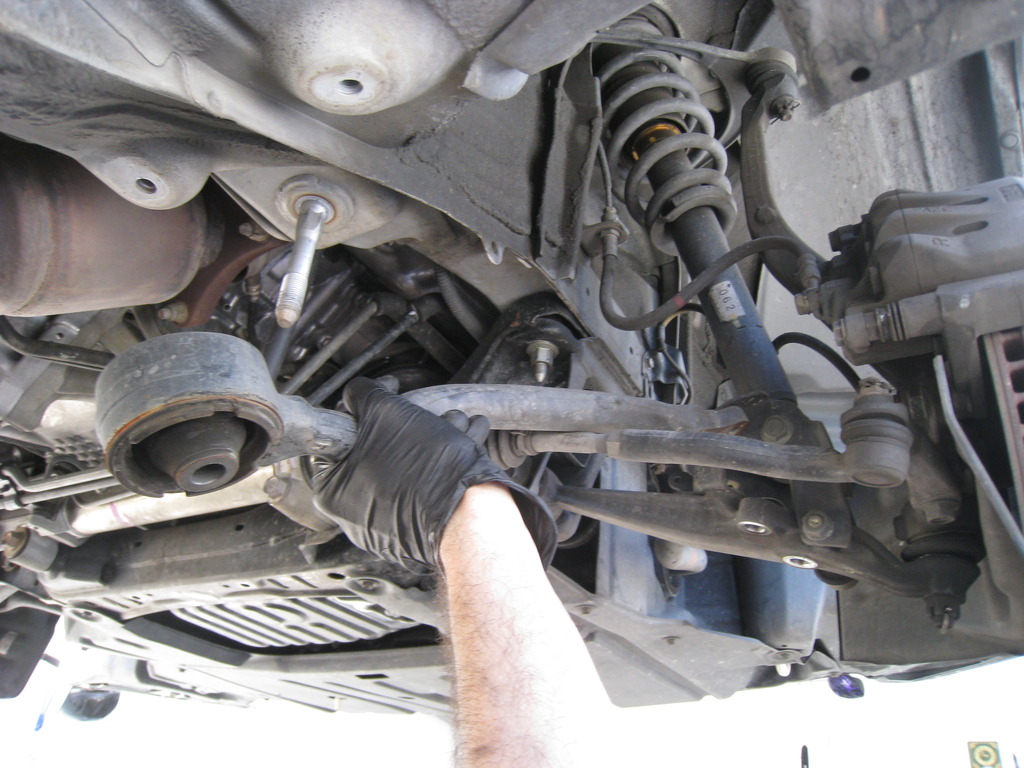
My bushings were pretty much shot, as you can see by the big crack that is visible when I pried on the bushing.
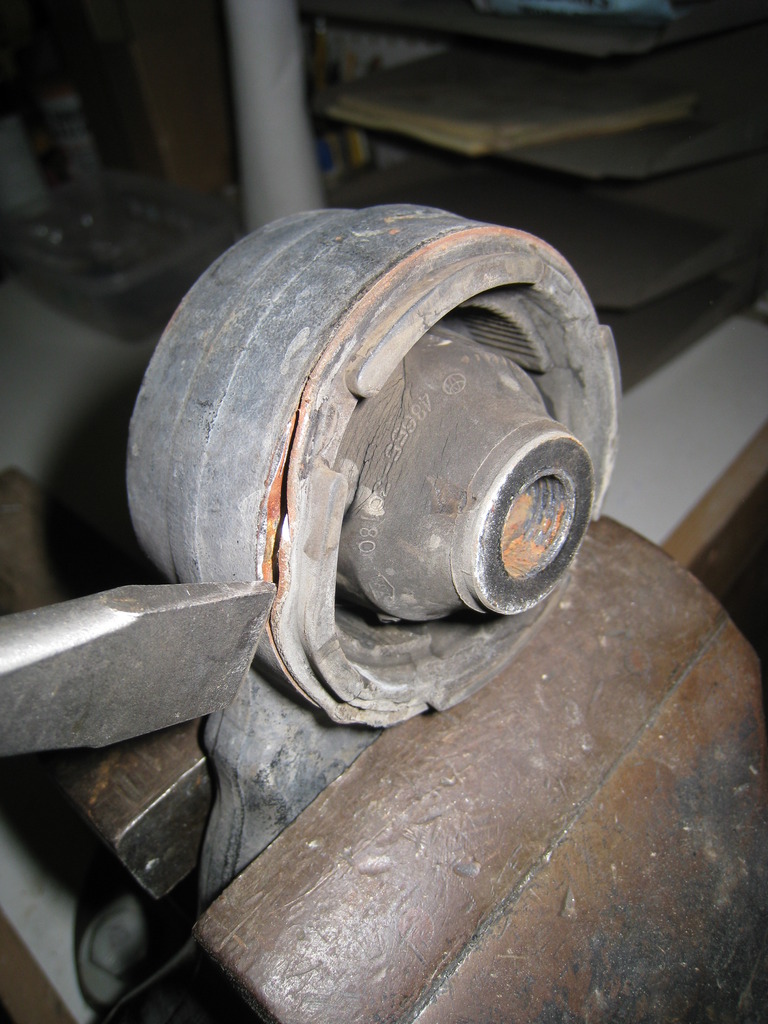
7. You cannot press the bushings out without lifting the lip of the bushing first. I clamped the arm in a vise, and used an air chisel to lift the lip. Here is a portion of the lip lifted.
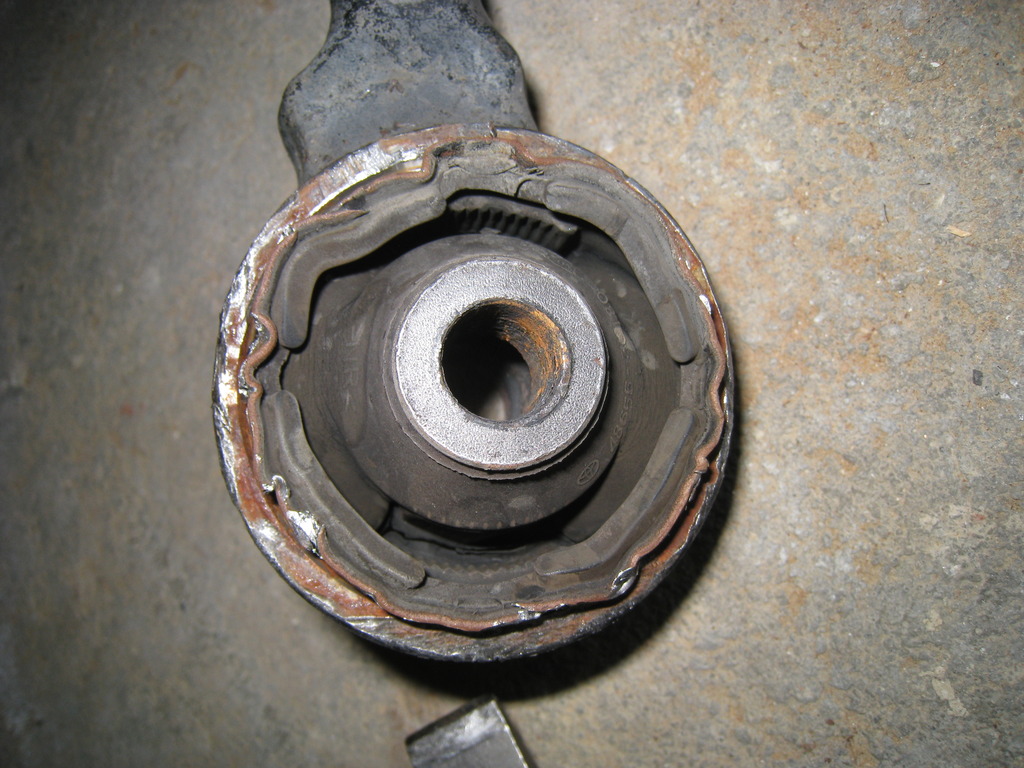
8. Here is what you want to end up with, with the lip lifted all the way around.
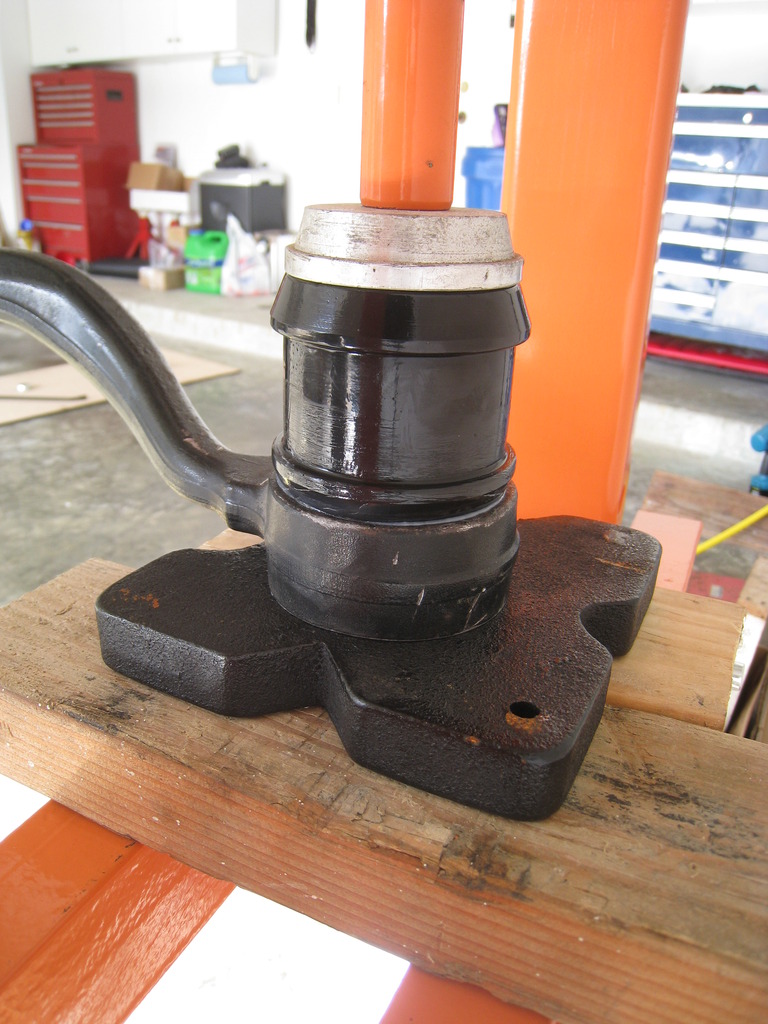
9. Now I placed the arm and the bushing into my 12 ton press.
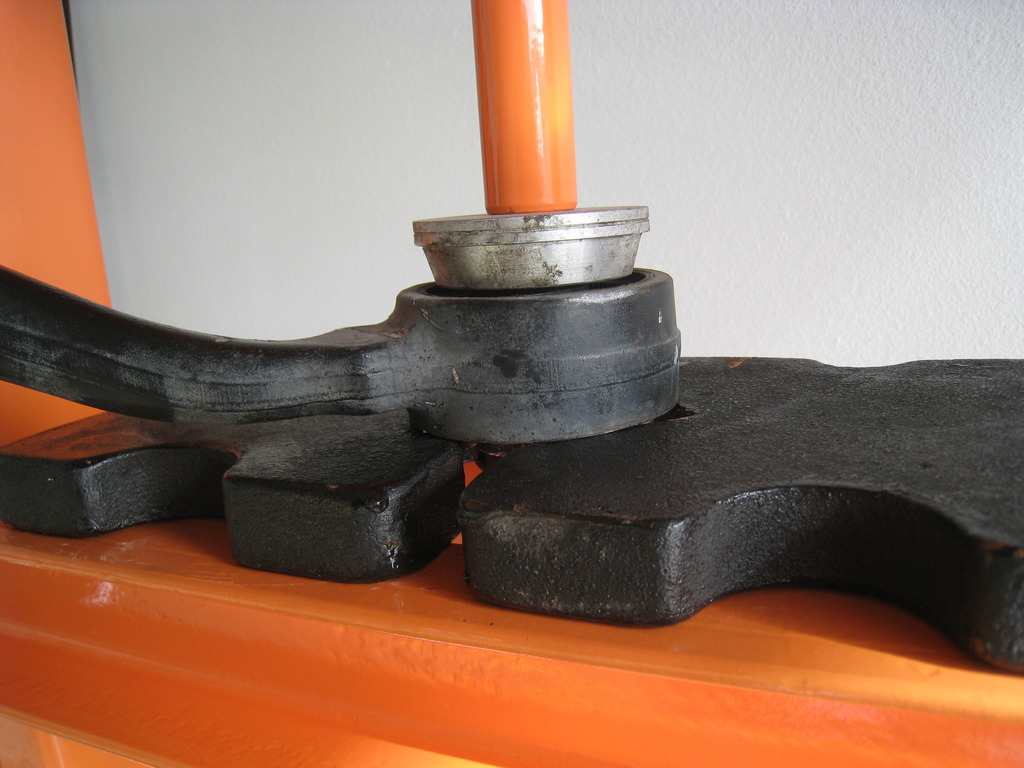
10. Here is a closeup, just after starting to press.
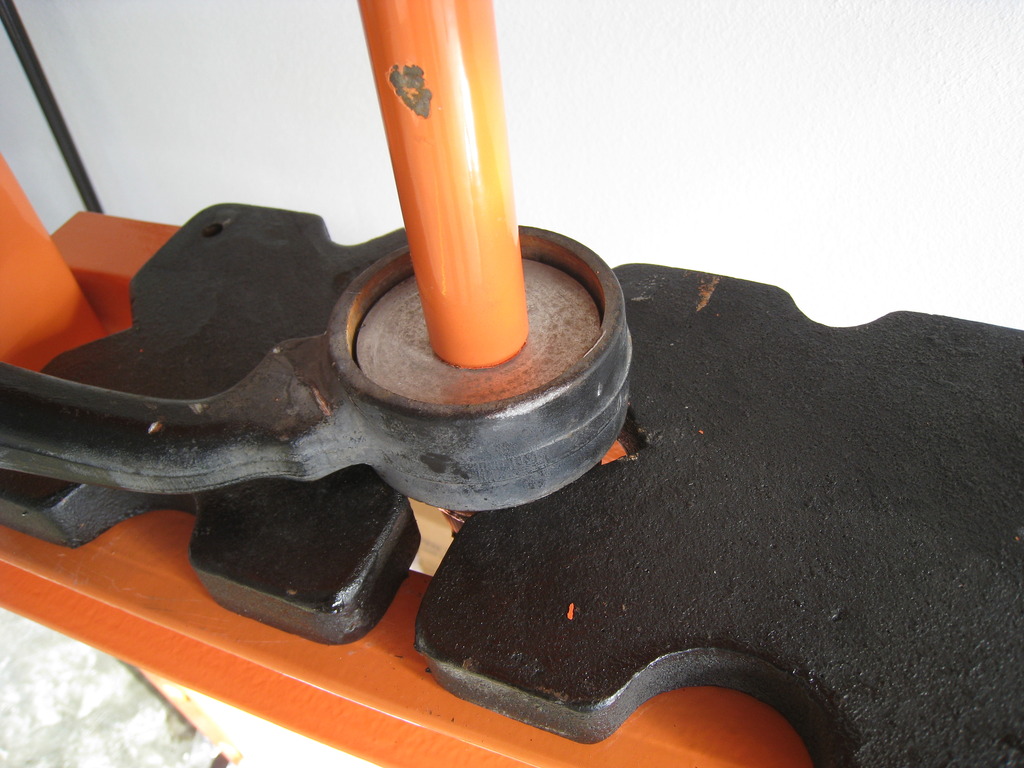
11. Here is the bushing after some movement. It made quite the "POP!" when it first moved.
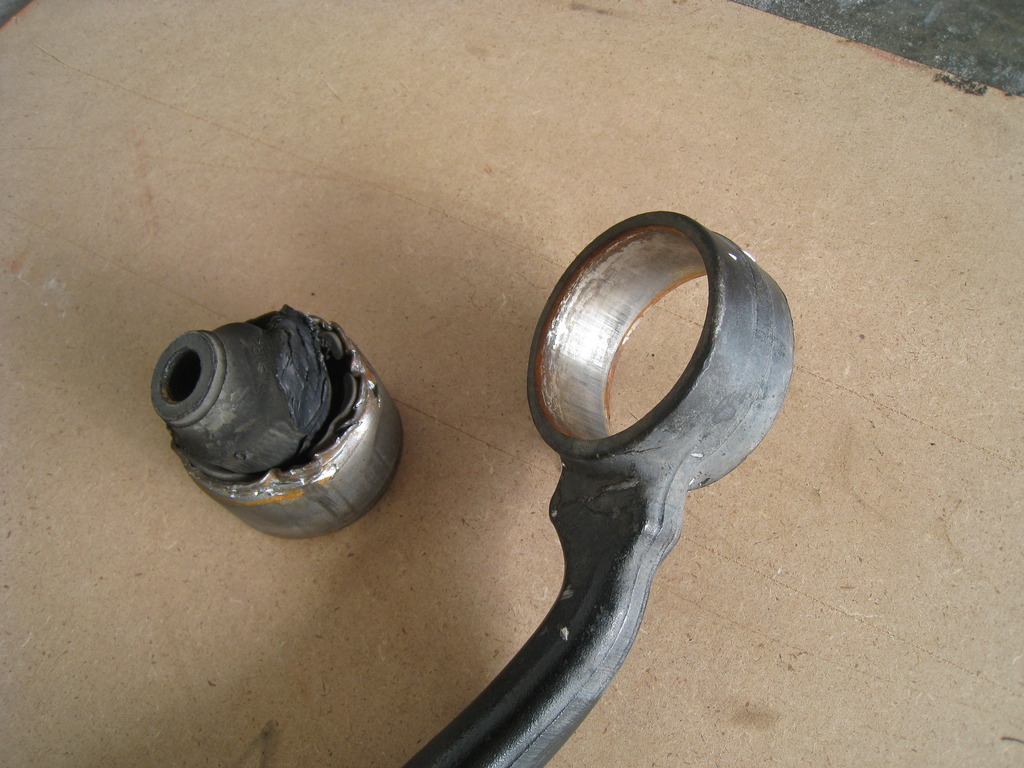
12. Here is the bushing out of the arm.
13. You'll want to debur the arm, remove any rust, and then apply some of the Daizen supplied lube to the arm and to the bushing.
14. Now it's time to install the Daizen bushing in the arm. Line up the bushing and the arm in the press, and proceed to press.
15. At first it looked like the lip was too big to slip through the arm hole, as the bushing was flexing and bulging quite a bit. I was worried that the bushing might collapse under pressure. But it did not, and with more pressure it popped right in.
The next step was getting the arm back into the car. It ended up being the most frustrating part for me. The problem is that the Daizen bushing is much less compliant than the original bushing, so it is difficult to simultaneously line up both the bushing with its stud, and the caster arm with the #1 control arm. I initially tried installing the control arm bolts first, but then I could not slip the bushing over the stud. I even tried to raise the control arm with a jack, but no matter how high I raised it (to the point of lifting the car off the jack stand), things still would not line up. So I ended up using the approach I show here.
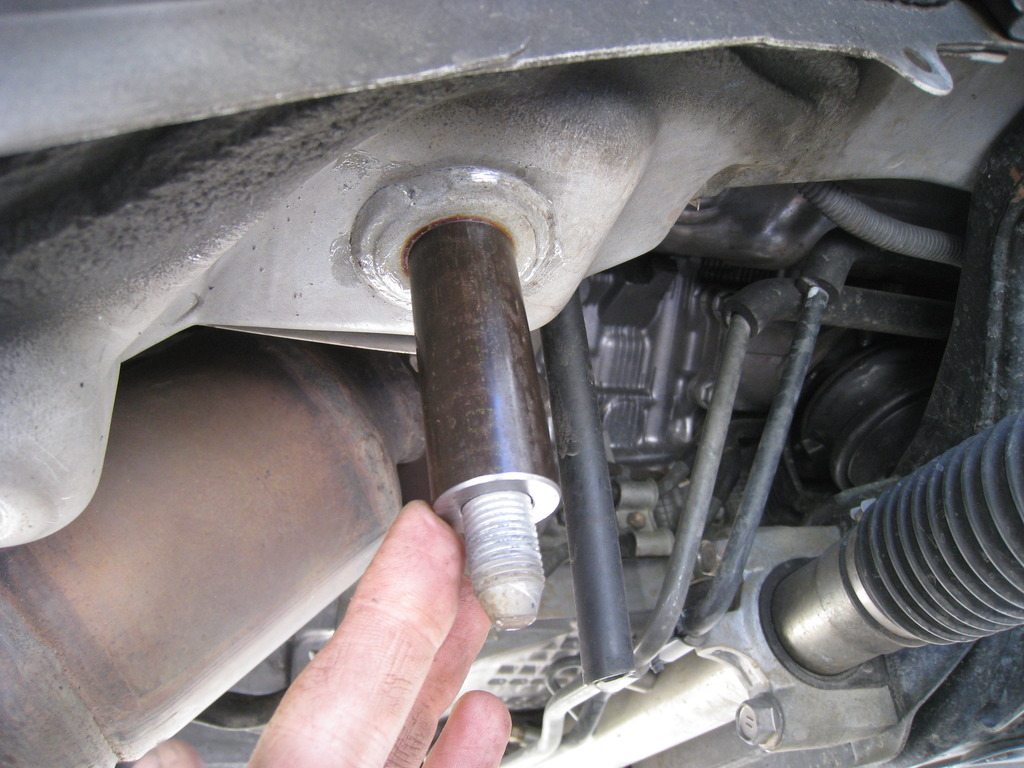
16. Slip the Daizen sleeve onto the stud. The larger hole goes up; it won't fit the other way.
17. Now position the caster arm in place, and slip the bushing over the Daizen sleeve.

18. Place the strut bar bracket over the stud, and loosely install the retaining nut, to keep the arm from falling off the stud.
19. Now it's time to install the bolts holding the caster arm to #1 control arm - but as you can see, the geometry is off. If you try to install the bolts like this, you'll strip the threads and will end up with a big mess on your hands.
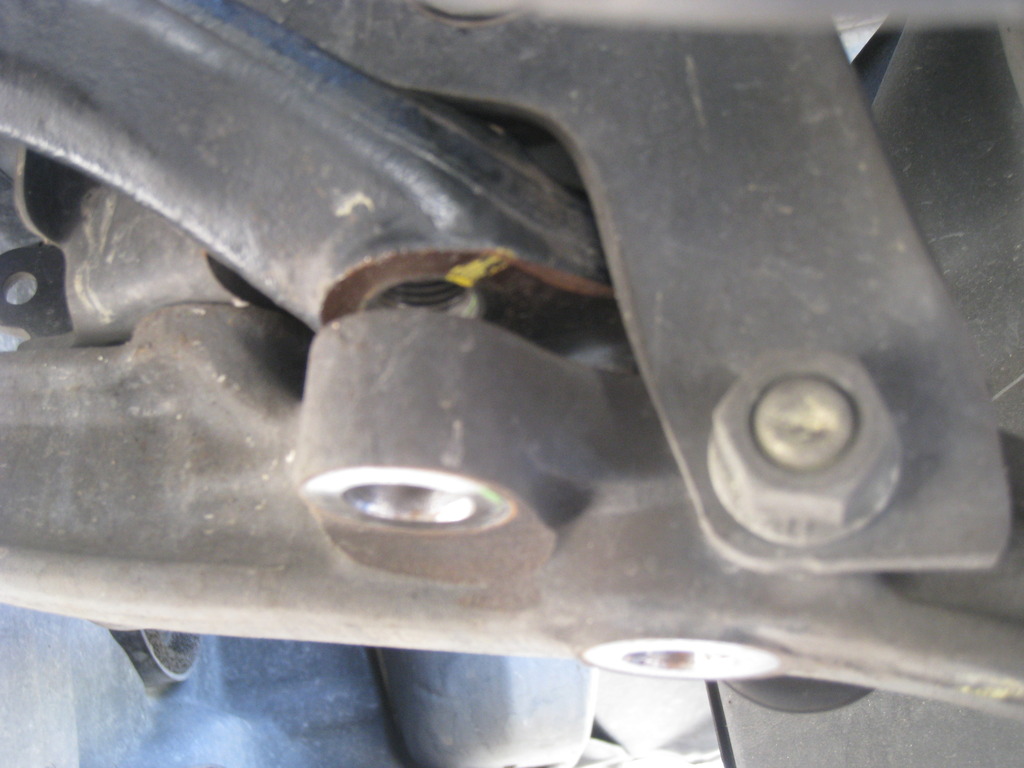
20. To line things up, I grabbed a large adjustable wrench, placed it over the caster arm near the bushing, and rotated the arm until the bolts up front lined up.
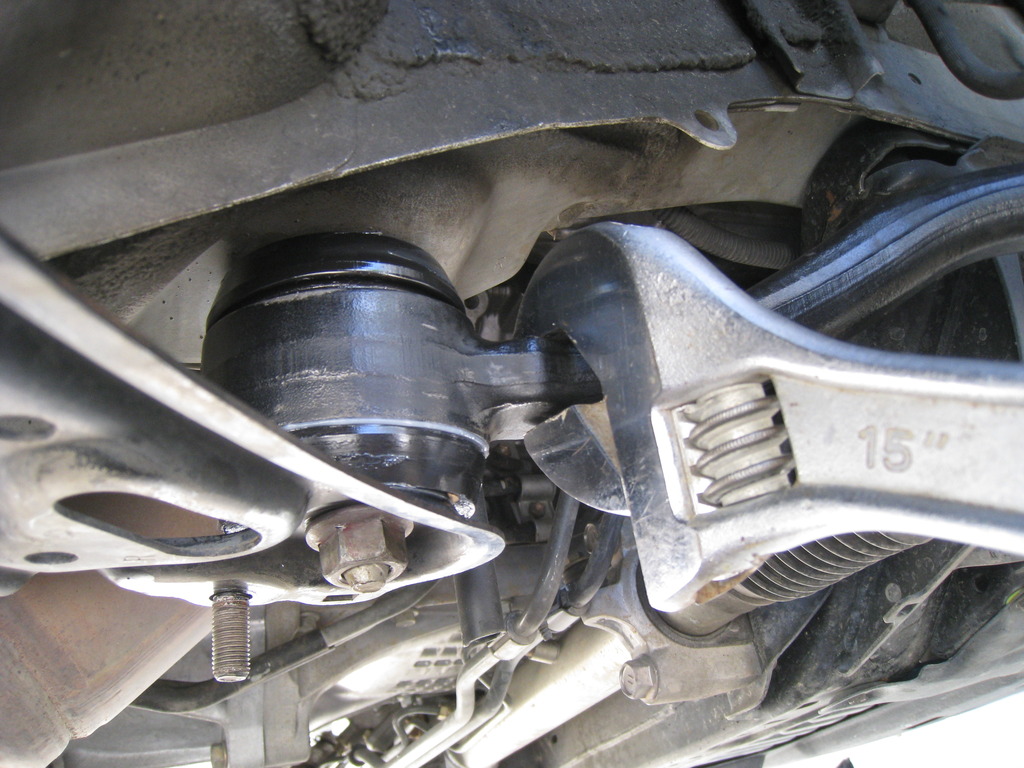
21. Reinstall the suspension member brace, torque all the bolts and nuts. Caster arm to #1 control arm bolts: 122 ft-lbf ; Caster arm bushing stud: 112 ft-lbf; strut bar bracket and suspension member brace bolts: 43 ft-lbf. Reinstall the wheels, and go for a test drive
I have not driven the car enough to see if it cured my clunking, or how it improved the drivability (if at all), but I wanted to post this thread before I forgot all the steps. I'll report on the driving impressions later on.
BTW, on further reflection, if I did this again, I might try another approach for getting the arm back in place: first loosely install the bolts holding the caster arm to the control arm, and then use some kind of a pry bar inside the bushing sleeve to force it to rotate and line up with the stud. But I haven't tried this, so I don't know if that would work better or worse than the approach I showed here.
Hope this helped. I would welcome any corrections or clarifications that I might have left out.
I posted this on the general forum, but thought it might be useful on this one as well, hope that's OK.
This weekend I installed the Daizen caster arm bushings, and took some pictures along the way. I did the whole job in 3.5 hours, counting from getting the car up onto the jackstands to when I test drove it. This was my first time doing this, I think I could do it in half the time if I did it again.
I got the bushing kit from TM Engineering. I guess I was lucky, because I got the parts within ten days of ordering, and Todd was great in his correspondence with me.
A tricky part of this job was getting the old bushings out. I did not use either the "torch it out" or "cut it out" approaches, instead I sprung for the $99 Harbor Freight 12 ton press, and pressed them out. I would recommend this approach - it is fairly easy, plus you get to keep the press as a reward
.So here is the step by step DIY. As a disclaimer, I am a fairly competent DIY-er. If you are not, or are not sure of what you are doing, this job may not be for you.
If, like me, you are only doing the caster arm bushing (#2 Lower Suspension Arm, in Lexus-speak), there is no need to separate or remove ball joints, springs, etc. Some writeups suggested to do that, but there is no need.
1. Jack up the car and put it safely onto jackstands. Remove wheels/tires.
2. Remove the bolts and nuts holding the suspension member brace and the two strut bar brackets. 10 fasteners total - two bolts in the front of the brace, and then two bolts and two nuts at each strut bar bracket. Below is a photo of one strut bar bracket, and its four fasteners. (For those who noticed - yes, the arm already has new bushings installed, because I initially forgot to take this picture, and took it at the end of the job).

3. Here is a view of the bushing end of the arm, the bushing is now exposed.

4. Here is a view of the two bolts holding the caster arm to the #1 Lower Suspension Arm (the ones with "11" on the head).

5. Here I am removing the two bolts holding the caster arm to the #1 Lower Suspension Arm. I used a 25" breaker bar, and still had to give it a heck of a heave-ho before the bolts loosened.

6. Now the arm comes right out, as promised.

My bushings were pretty much shot, as you can see by the big crack that is visible when I pried on the bushing.

7. You cannot press the bushings out without lifting the lip of the bushing first. I clamped the arm in a vise, and used an air chisel to lift the lip. Here is a portion of the lip lifted.

8. Here is what you want to end up with, with the lip lifted all the way around.

9. Now I placed the arm and the bushing into my 12 ton press.

10. Here is a closeup, just after starting to press.

11. Here is the bushing after some movement. It made quite the "POP!" when it first moved.

12. Here is the bushing out of the arm.

13. You'll want to debur the arm, remove any rust, and then apply some of the Daizen supplied lube to the arm and to the bushing.
14. Now it's time to install the Daizen bushing in the arm. Line up the bushing and the arm in the press, and proceed to press.

15. At first it looked like the lip was too big to slip through the arm hole, as the bushing was flexing and bulging quite a bit. I was worried that the bushing might collapse under pressure. But it did not, and with more pressure it popped right in.

The next step was getting the arm back into the car. It ended up being the most frustrating part for me. The problem is that the Daizen bushing is much less compliant than the original bushing, so it is difficult to simultaneously line up both the bushing with its stud, and the caster arm with the #1 control arm. I initially tried installing the control arm bolts first, but then I could not slip the bushing over the stud. I even tried to raise the control arm with a jack, but no matter how high I raised it (to the point of lifting the car off the jack stand), things still would not line up. So I ended up using the approach I show here.
16. Slip the Daizen sleeve onto the stud. The larger hole goes up; it won't fit the other way.

17. Now position the caster arm in place, and slip the bushing over the Daizen sleeve.

18. Place the strut bar bracket over the stud, and loosely install the retaining nut, to keep the arm from falling off the stud.

19. Now it's time to install the bolts holding the caster arm to #1 control arm - but as you can see, the geometry is off. If you try to install the bolts like this, you'll strip the threads and will end up with a big mess on your hands.

20. To line things up, I grabbed a large adjustable wrench, placed it over the caster arm near the bushing, and rotated the arm until the bolts up front lined up.

21. Reinstall the suspension member brace, torque all the bolts and nuts. Caster arm to #1 control arm bolts: 122 ft-lbf ; Caster arm bushing stud: 112 ft-lbf; strut bar bracket and suspension member brace bolts: 43 ft-lbf. Reinstall the wheels, and go for a test drive
I have not driven the car enough to see if it cured my clunking, or how it improved the drivability (if at all), but I wanted to post this thread before I forgot all the steps. I'll report on the driving impressions later on.
BTW, on further reflection, if I did this again, I might try another approach for getting the arm back in place: first loosely install the bolts holding the caster arm to the control arm, and then use some kind of a pry bar inside the bushing sleeve to force it to rotate and line up with the stud. But I haven't tried this, so I don't know if that would work better or worse than the approach I showed here.
Hope this helped. I would welcome any corrections or clarifications that I might have left out.
Last edited by lyonkster; 05-21-17 at 04:45 PM.

 03-23-10, 10:34 AM
#4
Advanced
Thread Starter
Trending Topics

 06-07-10, 01:43 PM
#12
Driver School Candidate

Join Date: Nov 2009
Location: FL
Posts: 6
Likes: 0
Received 0 Likes
on
0 Posts
Thanks for the thorough write-up Leon. I changed these out the weekend before last. I also had trouble lining up the front bolts. I managed to get the passenger side using the wrench method you described in Step 20. On the driver's side, I couldn't get it to line up using the wrench.
The instructions that come with the Daizen bushings call for putting the bushing over the stud without the sleeve, inserting the front bolts, and then putting the sleeve through the bushing. Without the sleeve, it is much easier to line up the front bolts. However, it is very difficult to push the sleeve through the bushing last. I was able to do so by using a jack with a piece of wood and a socket that was roughly the same diameter as the sleeve. Place the socket on the wood and line it up with the sleeve and slowly raise. Once you raise the sleeve enough to expose a few threads on the stud, you can put the bracket and nut on and use a wrench to tighten the nut and push the sleeve up the rest of the way.
The instructions that come with the Daizen bushings call for putting the bushing over the stud without the sleeve, inserting the front bolts, and then putting the sleeve through the bushing. Without the sleeve, it is much easier to line up the front bolts. However, it is very difficult to push the sleeve through the bushing last. I was able to do so by using a jack with a piece of wood and a socket that was roughly the same diameter as the sleeve. Place the socket on the wood and line it up with the sleeve and slowly raise. Once you raise the sleeve enough to expose a few threads on the stud, you can put the bracket and nut on and use a wrench to tighten the nut and push the sleeve up the rest of the way.
06-07-10, 08:20 PM
#14
Search for my posts about TM and bushings and you can get the details.
Will bushings make a diff about the clucking noises?
OMGosh - yes!
I replaced all my bushings (back sway, front sway, steering, ALL the front control arm bushings) and the car feels AMAZING.
Just do 'em all.
The following users liked this post:
tiguy99 (06-01-17)
06-07-10, 09:14 PM
#15
Advanced
Thread Starter
You're welcome, glad to be of help .
Yeah, I saw their recommended procedure, but I did not like the idea of forcing the sleeve into a misaligned bushing, I was afraid that the sleeve would chew up the bushing. But I'm glad it worked for you!
.
The instructions that come with the Daizen bushings call for putting the bushing over the stud without the sleeve, inserting the front bolts, and then putting the sleeve through the bushing. Without the sleeve, it is much easier to line up the front bolts. However, it is very difficult to push the sleeve through the bushing last.

