DIY Coolant Temperature Sensor change (PICS)
 09-02-08, 03:00 PM
#1
Pit Crew
Thread Starter

UPDATE 09/05/08 - 69 degrees in Indianapolis today with relative high humidity (it rained earlier).
I am still blown away by the vast difference this simple sensor has made to the driving characteristics of my car.
I've done a few simple 0-60 mph runs with a digital stopwatch and figured I'd have a go at it again today.
Nothing scientific, not perfect, not a dragstrip timing system, just my finger on the button hitting start when I release the brake and stop when I see 60mph on the speedo.
In the beginning, my LS always felt somewhat slower than it should be. Using the same test, same road it did like 8.2 - 8.1 seconds to 60mph.
At its worst, I saw a 10.2 second 0-60 about a month ago.
Today, same road, same non scientific approach: Brake torque to 1,500 rpm -- traction control off, ETC on, manually shifting the 1-2 at 6,200rpm, it registered a 7.53 0-60 run.
End Update:
_____________________________
After reading this thread:
https://www.clublexus.com/forums/sho...d.php?t=376713
I decided to give it a try myself. I have noticed a slight decrease in gas mileage as well as a significant sporadic decrease in performance. Right now in Indiana it is about 92 degrees and humid, so... the weather has some to do with it, but I found the thread interesting nevertheless.
The entire procedure was quite basic, but because of the different covers on the 1UZ it took some time to get to the sensor.
I spent about 2 hours from start to finish.
1. A generic 1995 1UZFE in my Lexus with 72k miles on the clock. New plugs and wires about two months ago.
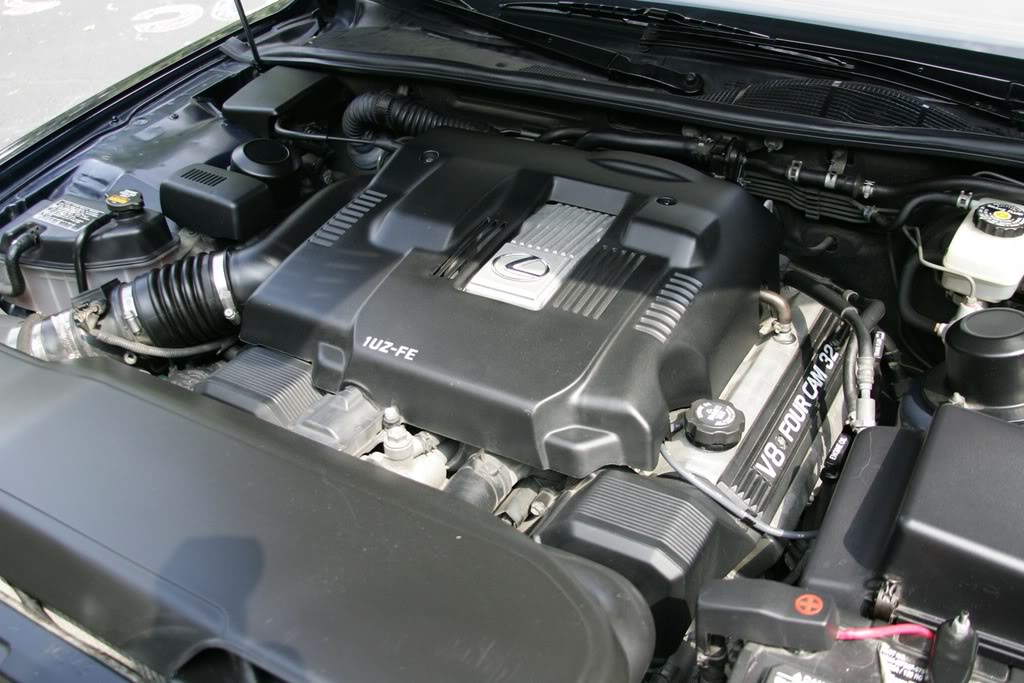
2. I started by just removing the upper manifold cover with the three 10mm bolts, but found that the coolant temperature sensor is hidden under the front spark plug wire channel.

3. It is located directly under the spark plug wire channel. This needs to come out and the spark plugs need to be carefully pulled out of the way.
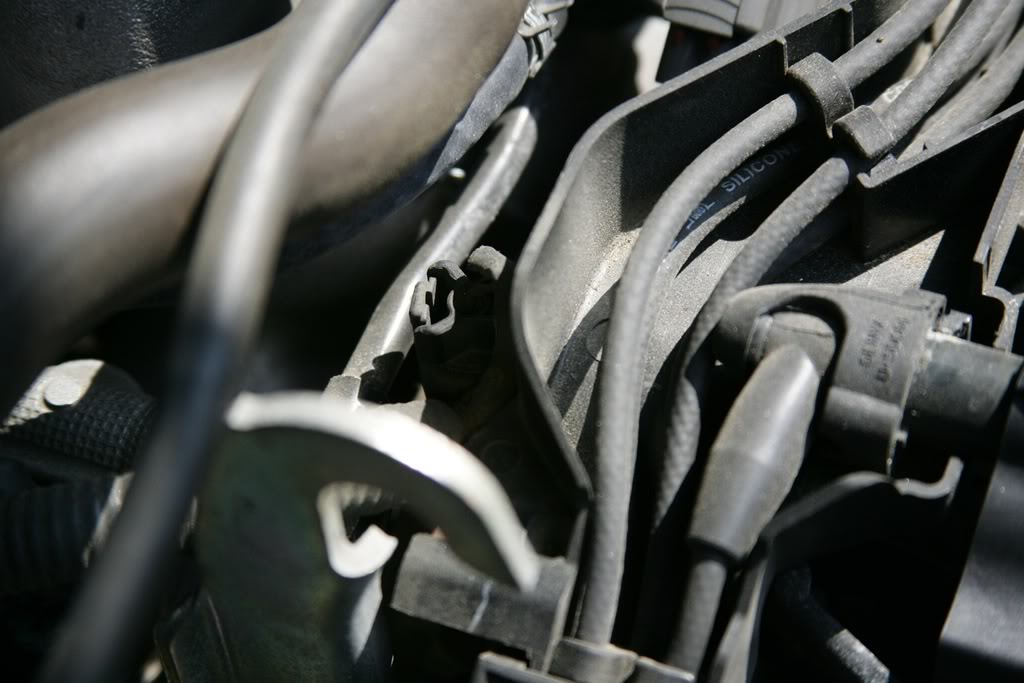
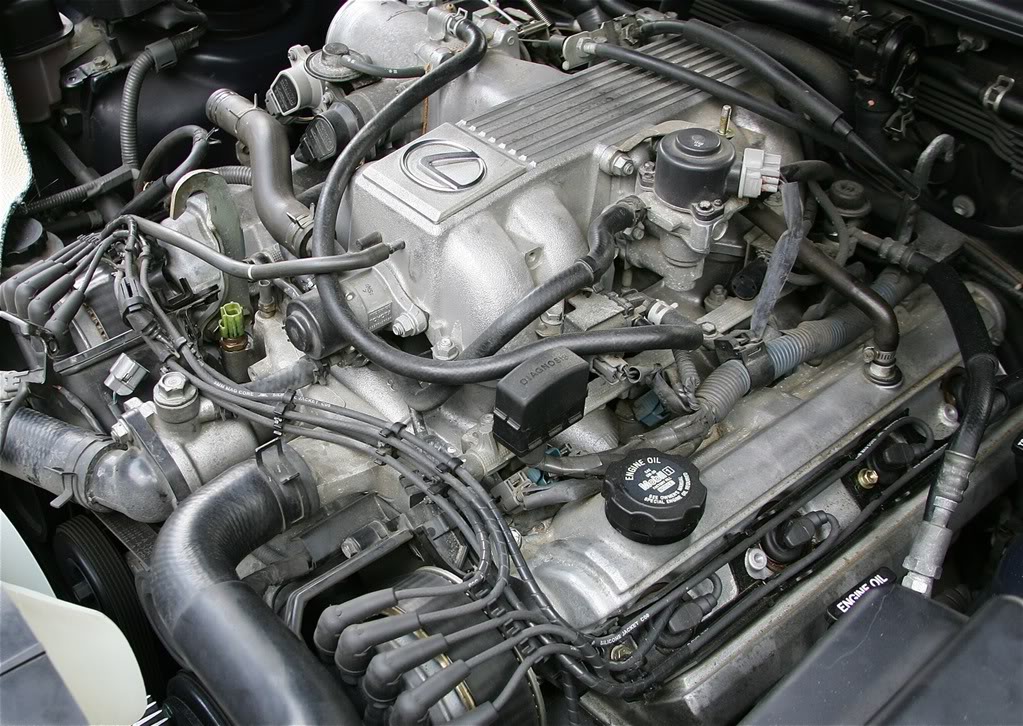
4. So... I decided to just pull all of the plastic parts off of the engine. This included the intake pipe, two spark plug covers and the front spark plug wire channel. These all come off with 10mm sockets. I also went ahead and removed the front coil pack with a screw driver and disconnected the weather fitting. It gave me more clearance.
The coil pack is connected to a metal bracket with 4 screws. The bracket is then connected to another bracket with 2 10mm screws. I removed the bracket for better clearance.
5. And here it is... One OEM Toyota Coolant Temperature sensor. It is the larger green colored sensor. It was removed with a 3/4" (I didn't have the metric equivalent) deep socket.
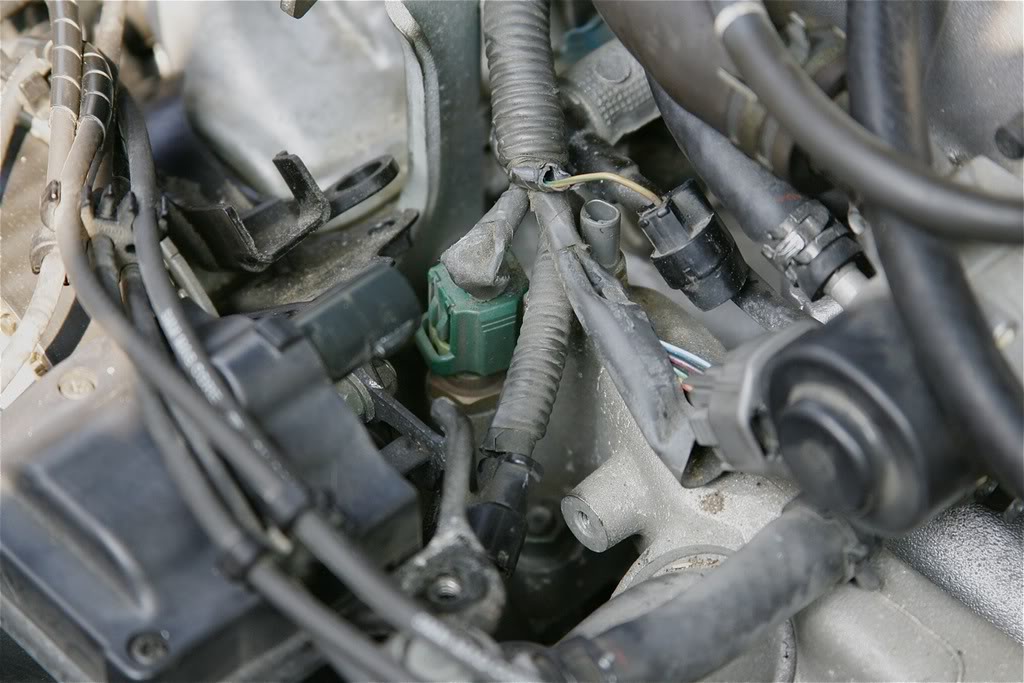
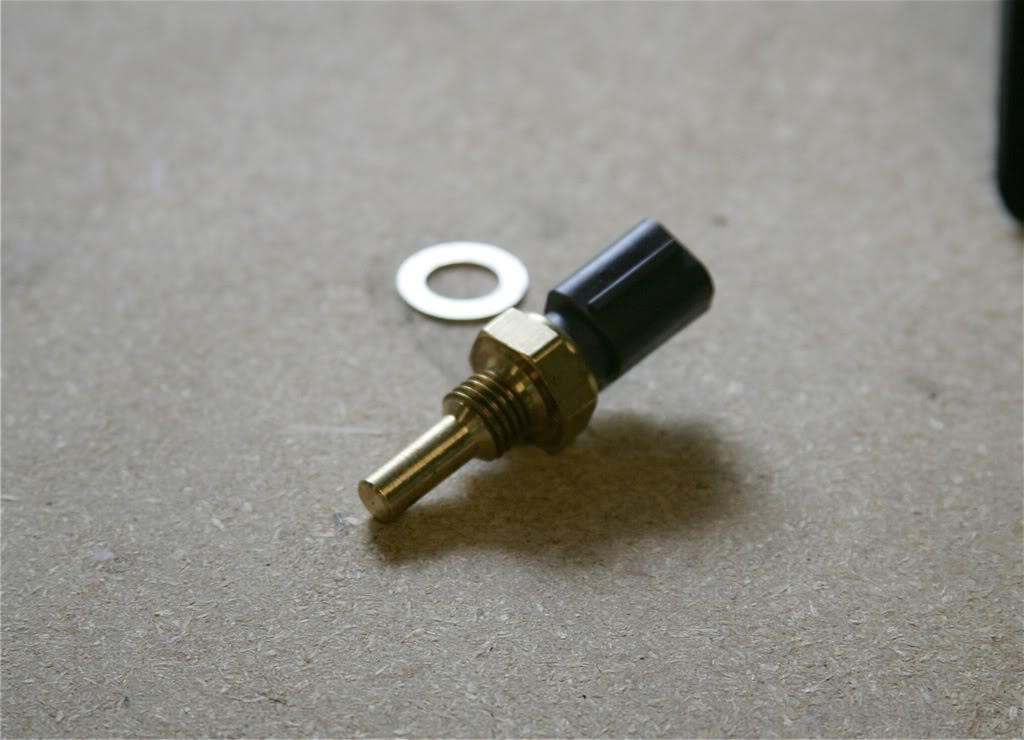
6. Here is the new aftermarket coolant temperature sensor that I bought from autozone for $29.00 plus tax. It comes with its own copper washer. I installed this sensor with the same 3/4" deep socket and torqued it down very slowly until it was snug. Remember this is aluminum so be careful.
7. After that, the parts all go back on in reverse order. I pulled the ECU fuse as well as the negative battery terminal and waited about 10 - 15 minutes while I put my tools away before taking her for a drive.
Note - I did this on a slightly warm engine and zero coolant leaked out or spewed out of the hole once I removed the sensor.
Conclusion:
This was very simple and not time consuming. I noticed right away a significant increase in throttle response as well as a smoother power delivery across the entire range.
I run BP or Shell 93 in the tank and while I know it was still 92 degrees outside, I am looking forward to seeing what some cooler temperatures do to the car both performance and gas mileage.
Best,
Dustin
I am still blown away by the vast difference this simple sensor has made to the driving characteristics of my car.
I've done a few simple 0-60 mph runs with a digital stopwatch and figured I'd have a go at it again today.
Nothing scientific, not perfect, not a dragstrip timing system, just my finger on the button hitting start when I release the brake and stop when I see 60mph on the speedo.
In the beginning, my LS always felt somewhat slower than it should be. Using the same test, same road it did like 8.2 - 8.1 seconds to 60mph.
At its worst, I saw a 10.2 second 0-60 about a month ago.
Today, same road, same non scientific approach: Brake torque to 1,500 rpm -- traction control off, ETC on, manually shifting the 1-2 at 6,200rpm, it registered a 7.53 0-60 run.
End Update:
_____________________________
After reading this thread:
https://www.clublexus.com/forums/sho...d.php?t=376713
I decided to give it a try myself. I have noticed a slight decrease in gas mileage as well as a significant sporadic decrease in performance. Right now in Indiana it is about 92 degrees and humid, so... the weather has some to do with it, but I found the thread interesting nevertheless.
The entire procedure was quite basic, but because of the different covers on the 1UZ it took some time to get to the sensor.
I spent about 2 hours from start to finish.
1. A generic 1995 1UZFE in my Lexus with 72k miles on the clock. New plugs and wires about two months ago.
2. I started by just removing the upper manifold cover with the three 10mm bolts, but found that the coolant temperature sensor is hidden under the front spark plug wire channel.
3. It is located directly under the spark plug wire channel. This needs to come out and the spark plugs need to be carefully pulled out of the way.
4. So... I decided to just pull all of the plastic parts off of the engine. This included the intake pipe, two spark plug covers and the front spark plug wire channel. These all come off with 10mm sockets. I also went ahead and removed the front coil pack with a screw driver and disconnected the weather fitting. It gave me more clearance.
The coil pack is connected to a metal bracket with 4 screws. The bracket is then connected to another bracket with 2 10mm screws. I removed the bracket for better clearance.
5. And here it is... One OEM Toyota Coolant Temperature sensor. It is the larger green colored sensor. It was removed with a 3/4" (I didn't have the metric equivalent) deep socket.
6. Here is the new aftermarket coolant temperature sensor that I bought from autozone for $29.00 plus tax. It comes with its own copper washer. I installed this sensor with the same 3/4" deep socket and torqued it down very slowly until it was snug. Remember this is aluminum so be careful.
7. After that, the parts all go back on in reverse order. I pulled the ECU fuse as well as the negative battery terminal and waited about 10 - 15 minutes while I put my tools away before taking her for a drive.
Note - I did this on a slightly warm engine and zero coolant leaked out or spewed out of the hole once I removed the sensor.
Conclusion:
This was very simple and not time consuming. I noticed right away a significant increase in throttle response as well as a smoother power delivery across the entire range.
I run BP or Shell 93 in the tank and while I know it was still 92 degrees outside, I am looking forward to seeing what some cooler temperatures do to the car both performance and gas mileage.
Best,
Dustin
Last edited by Zoraone; 09-05-08 at 12:05 PM.


 09-02-08, 05:46 PM
#4
Pit Crew
Thread Starter
Awesome.
Update -
Took the car out tonight to get some milk for the kiddo. About 80 degrees and still very humid (just stormed in Indy).
Wow, what a different car - especially froma 60mph punch. In PWR mode the 4 to 2 downshift and run up to 6,000 rpm was so much better. Smooth and continued to pull.
Before, it would pull, but always felt like it hit a flat spot somewhere between 3,500 and 5,000 rpm. Like the car would just fall on its face.
Hopefully it stays this way.
I've never thought of the LS400 of a performance vehicle, but it is nice to have all of the advertised horses.
09-02-08, 06:01 PM
#6
Pit Crew
Thread Starter
09-05-08, 06:12 AM
#7
Pit Crew
Thread Starter
New update:
I seem to be getting better mileage. I filled up two days ago with some BP 93. I'll wait until I fill up next. I've been doing 100% city driving.
Car still seems much more powerful.
I seem to be getting better mileage. I filled up two days ago with some BP 93. I'll wait until I fill up next. I've been doing 100% city driving.
Car still seems much more powerful.
Trending Topics


 09-05-08, 09:50 AM
#11

just changed mine, took me <20 mins and i def feel a difference. i have a lean malfunction on my LS right now and it used to fuel cut and buck like crazy at around 3k rpm or so. but now there is a tiny bit of bucking since i changed this. will be changing my o2 sensors soon to fully fix the lean malfunction. will be also reporting on gas mileage too. thanks Zoraone!
 09-05-08, 08:55 PM
#15
should be in the same place... i just took off the top spark plug piece and removed the driver side SP covers to replace it. also removed the bolt holding down the passenger distrib cover so i can wiggle out the middle plastic piece that clips onto the spark plugs.